Build this cute desk, easy DIY plans by ANA-WHITE.com
Happy Friday! We made it through another week, it's time to celebrate with a BRAND NEW Handbuilt Holiday plan!

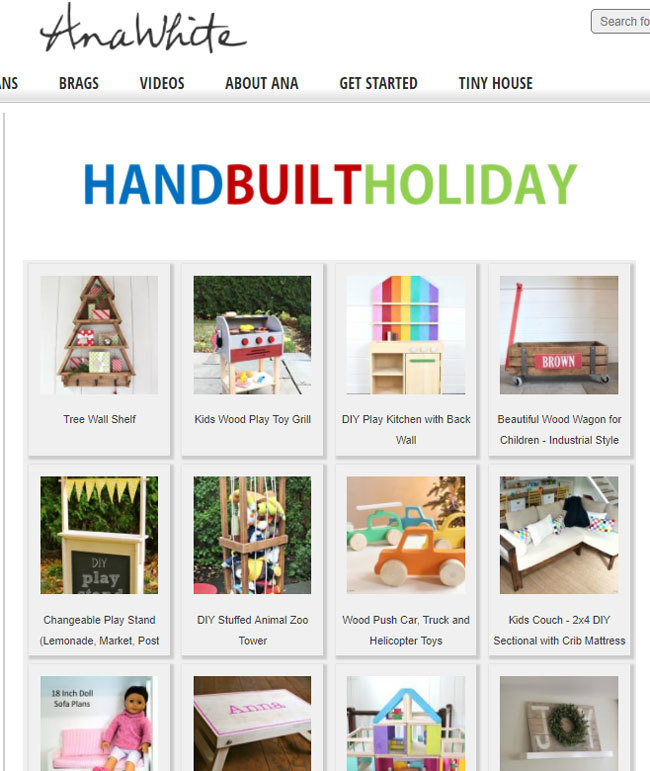
If you are new here or just popping back over for the first time in a while, for the fifth year in a row, Jaime Costiglio and I have been sharing a free series of Holiday gift plans every Friday in the weeks leading up to Christmas. You can see all the past plans here.
We are so excited to add a brand new plan to the Handbuilt Holiday series today!

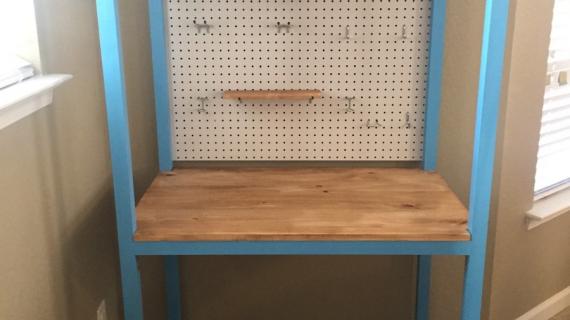
It's a house shaped desk! We love house shaped anything, but a desk with pegboard on the back???
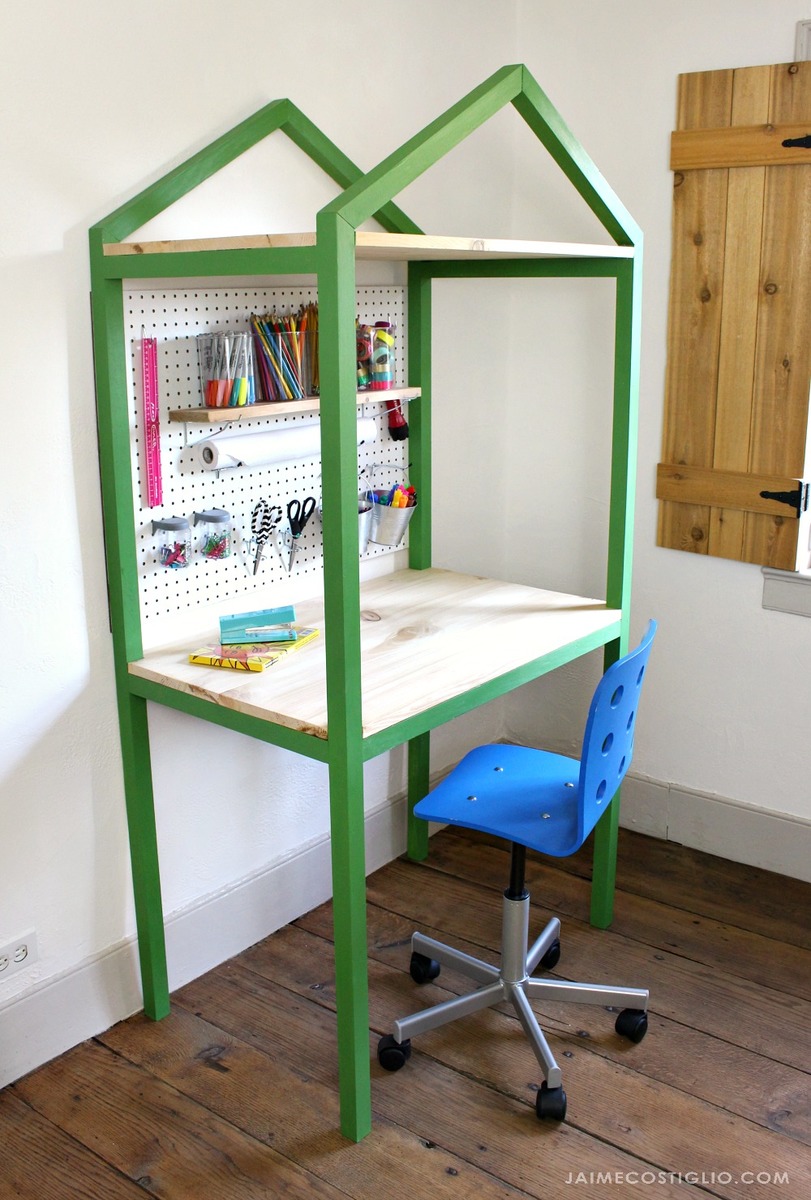
Too cute, too functional, too awesome!
Do check out Jaime Costiglio's post with lots more photos and details on how she used 1x12s for the desk and shelf (instead of the project panel) and added the pegboard back.
Plans follow, enjoy and share!
XO Ana
CLICK HERE FOR JAIME COSTIGLIO BUILD POST MORE DETAILS AND PHOTOS
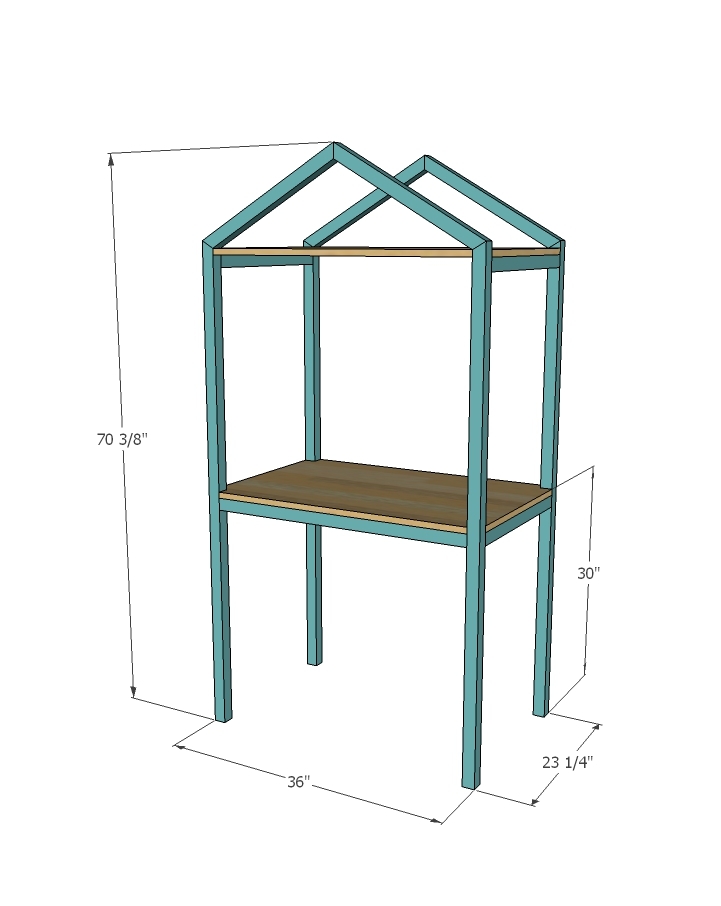
Preparation
1 - project panel 72" x 23-1/4" like this one http://www.homedepot.com/
5 - 2x2 @ 8 feet long
2-1/2" pocket hole screws
1-1/4" brad nails
NOTE: Jaime couldn't find a good project panel so ended up using 1x12s instead. You can see how she did that here.
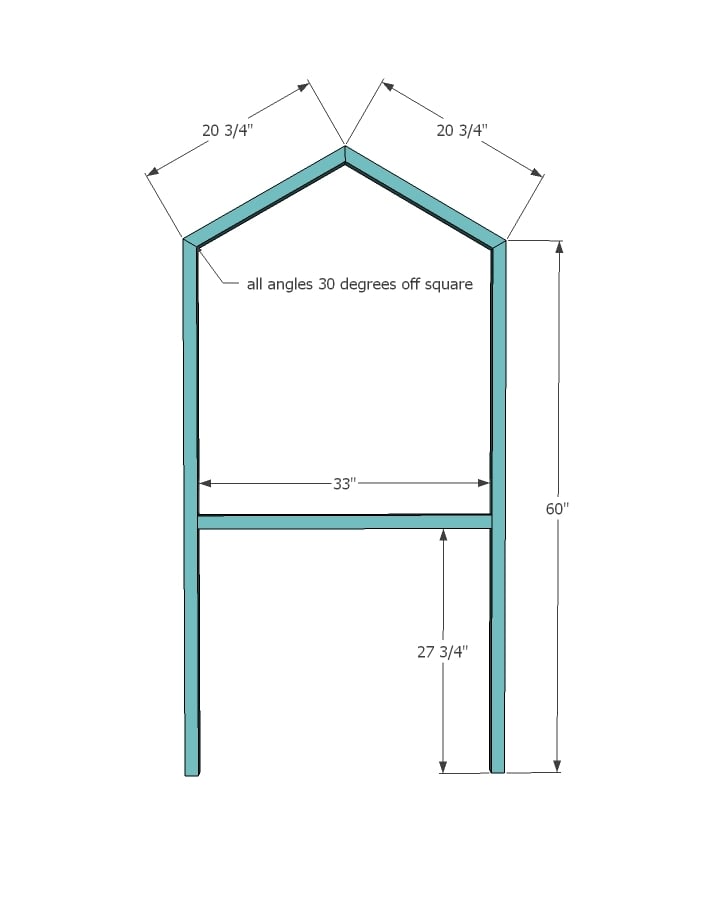
4 - 2x2 @ 20-3/4" long point to long point, ends not parallel, both ends cut at 30 degrees off square
4 - 2x2 @ 60" - longest point measurement, one end cut at 30 degrees off square
2 - 2x2 @ 33"
4 - 2x2 @ 20-1/4"
2 - Project panels @ 23-1/4" x 36"


Instructions
Step 1
Build two of the frames. I recommend a Kreg Jig here, the pocket holes will work really well for attaching the angles. Use the 1-1/2" setting and 2-1/2" pocket hole screws.
Step 2

Attach frames together with side pieces, hide pocket holes by placing facing upward - the shelving and desktop will cover in next step.
Step 3
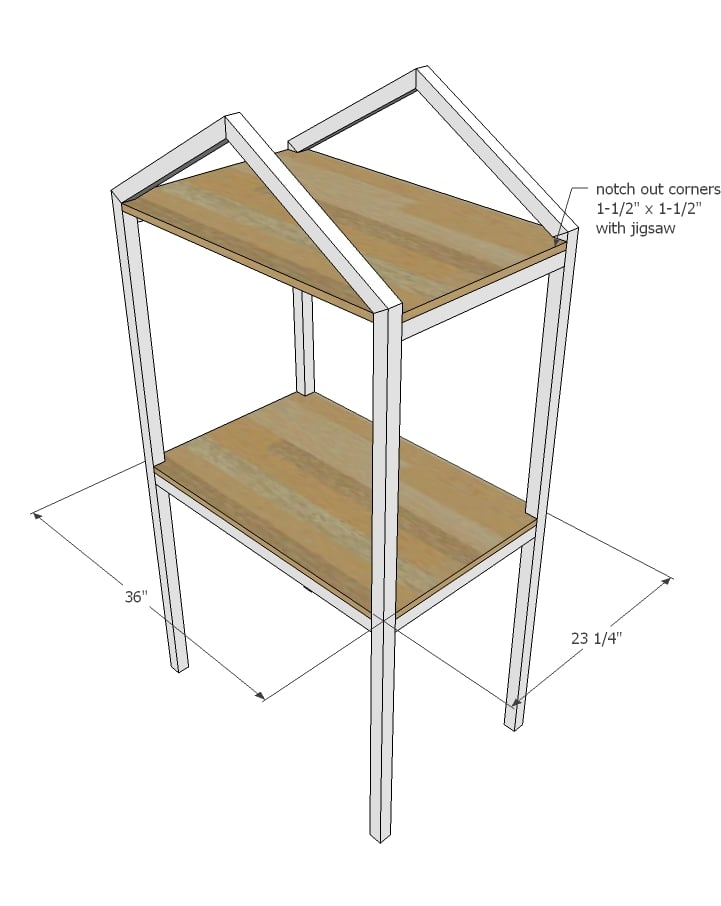
Notch out corners of project panels and attach to the frames with glue and 1-1/4" brad nails.