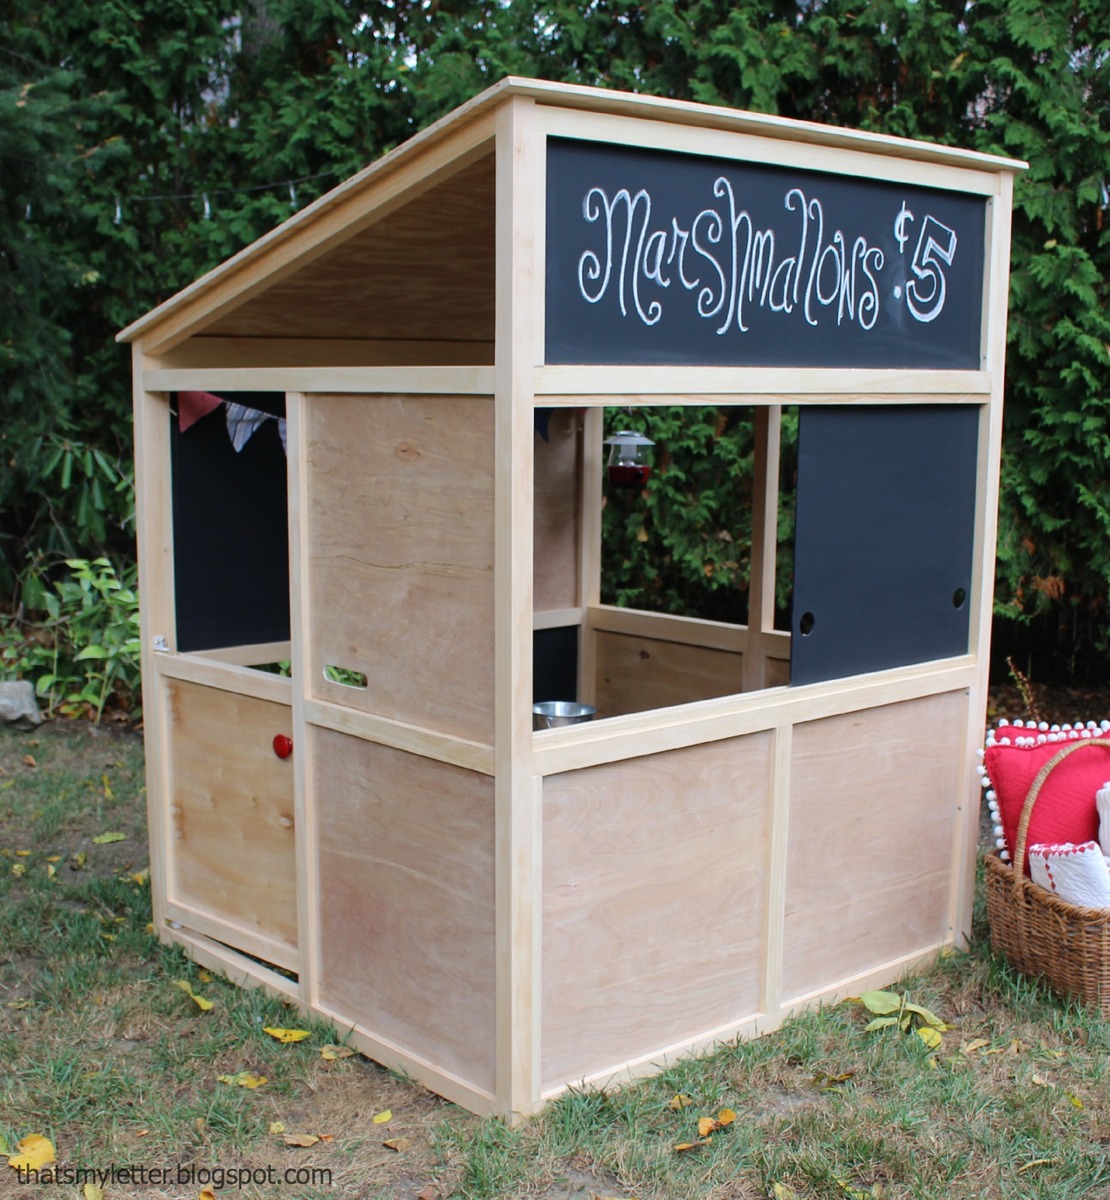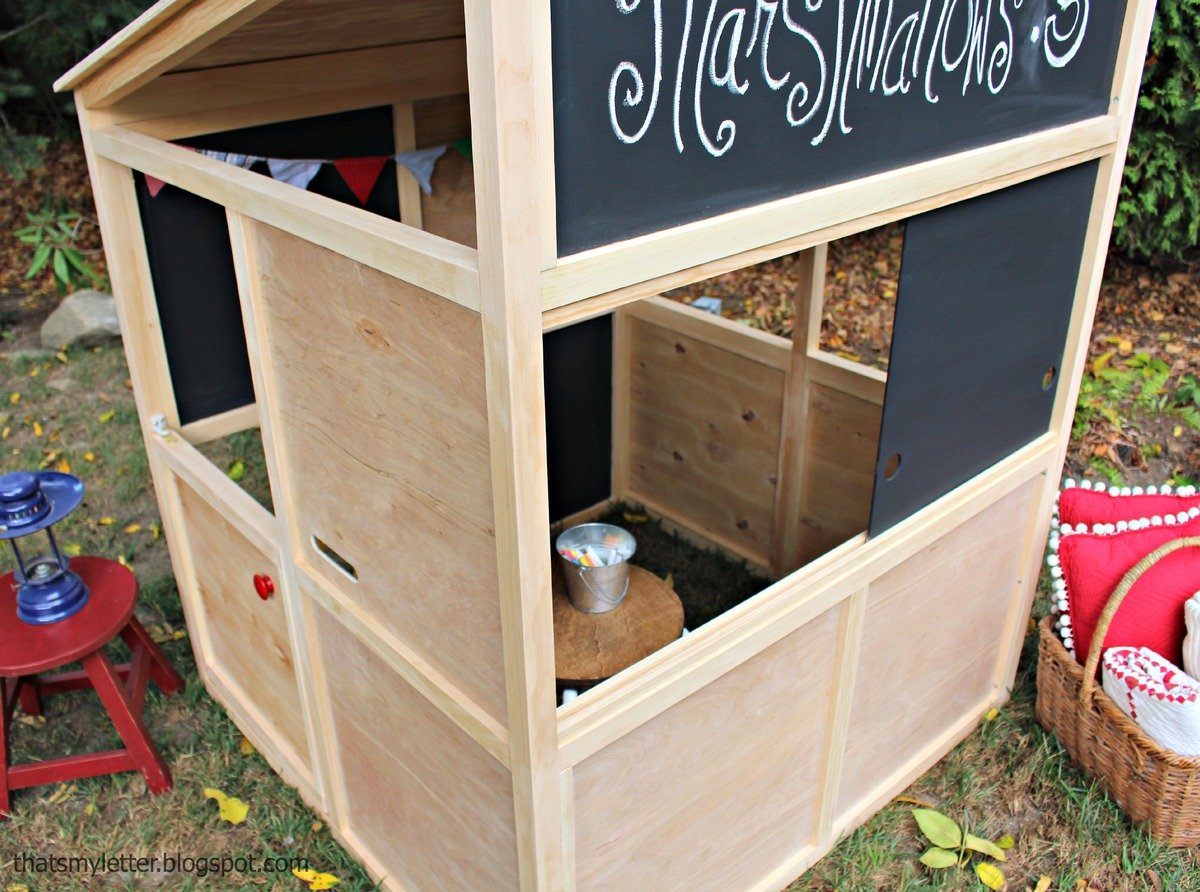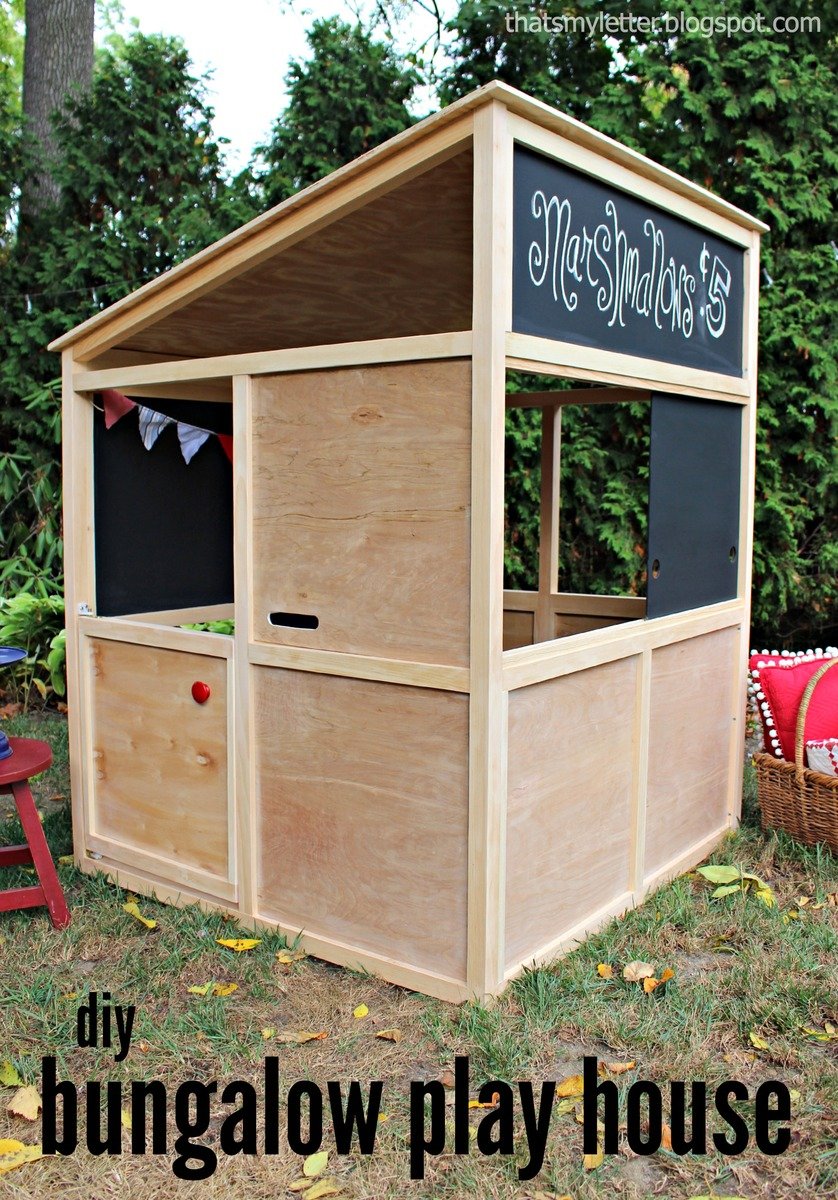
Indoor Playhouse Modern Bungalow

Difficulty
Intermediate
| Print this plan

DIY an indoor playhouse - free plans from Ana-White.com
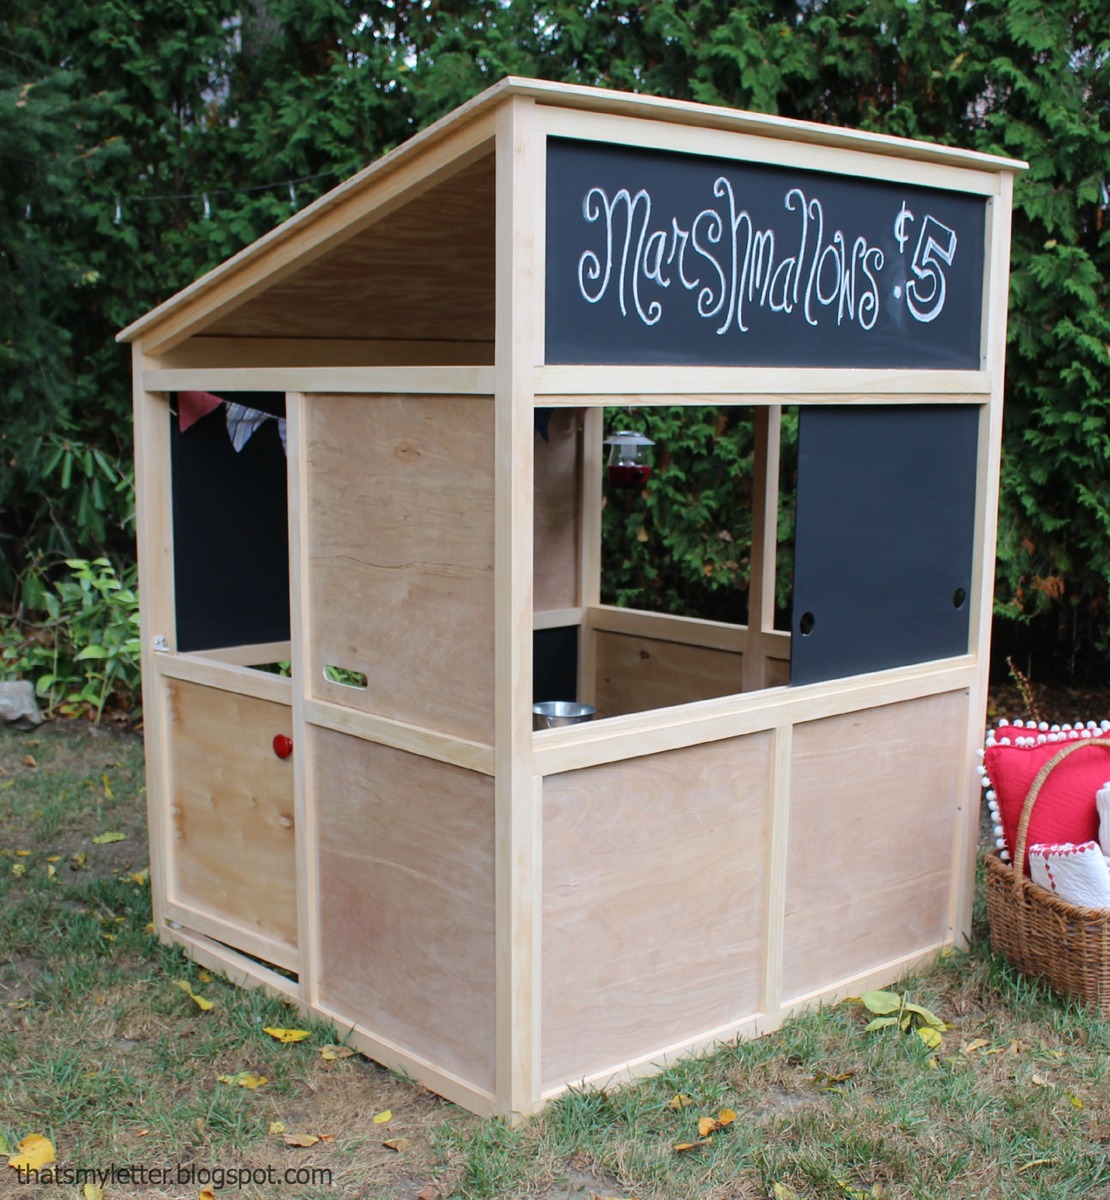
Happy Friday DIY Friends!!!

We have a big treat for you today!!!  

Jaime from That's My Letter and I are so excited to kick off this year's Handmade Holiday Series with a brand new project plan for you today!

It's an indoor (or outdoor) playhouse!!!!

I've got the plans following, but if you want to read from Jaime on how much she spent on this project, see tons more photos and building tips, please read Jaime's building post here.

Enjoy!

XO Ana


PS - We've got one more indoor playhouse plan on its way next week that's a little more scaled back, so check that out next week too.

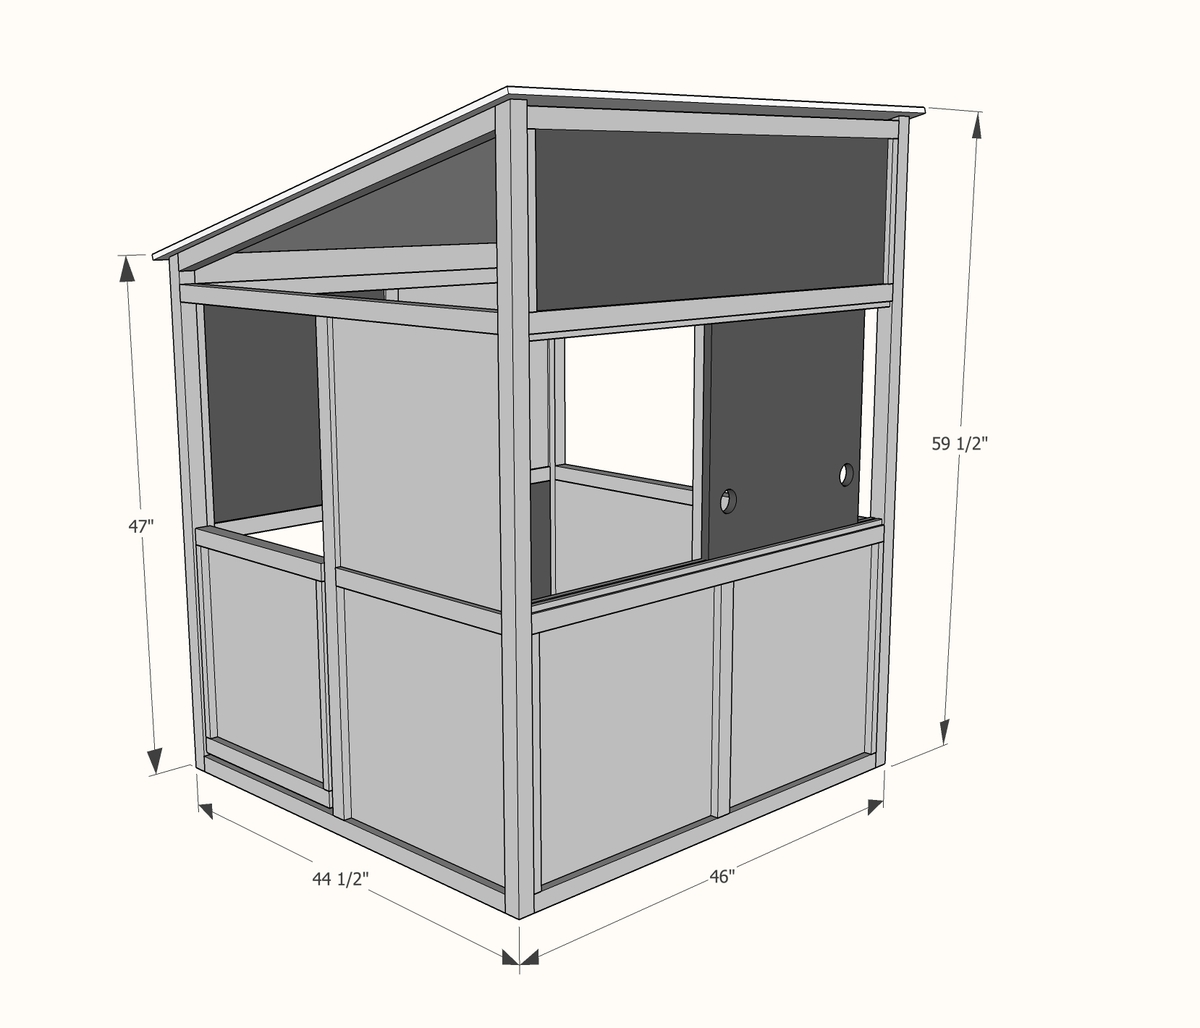
Dimensions
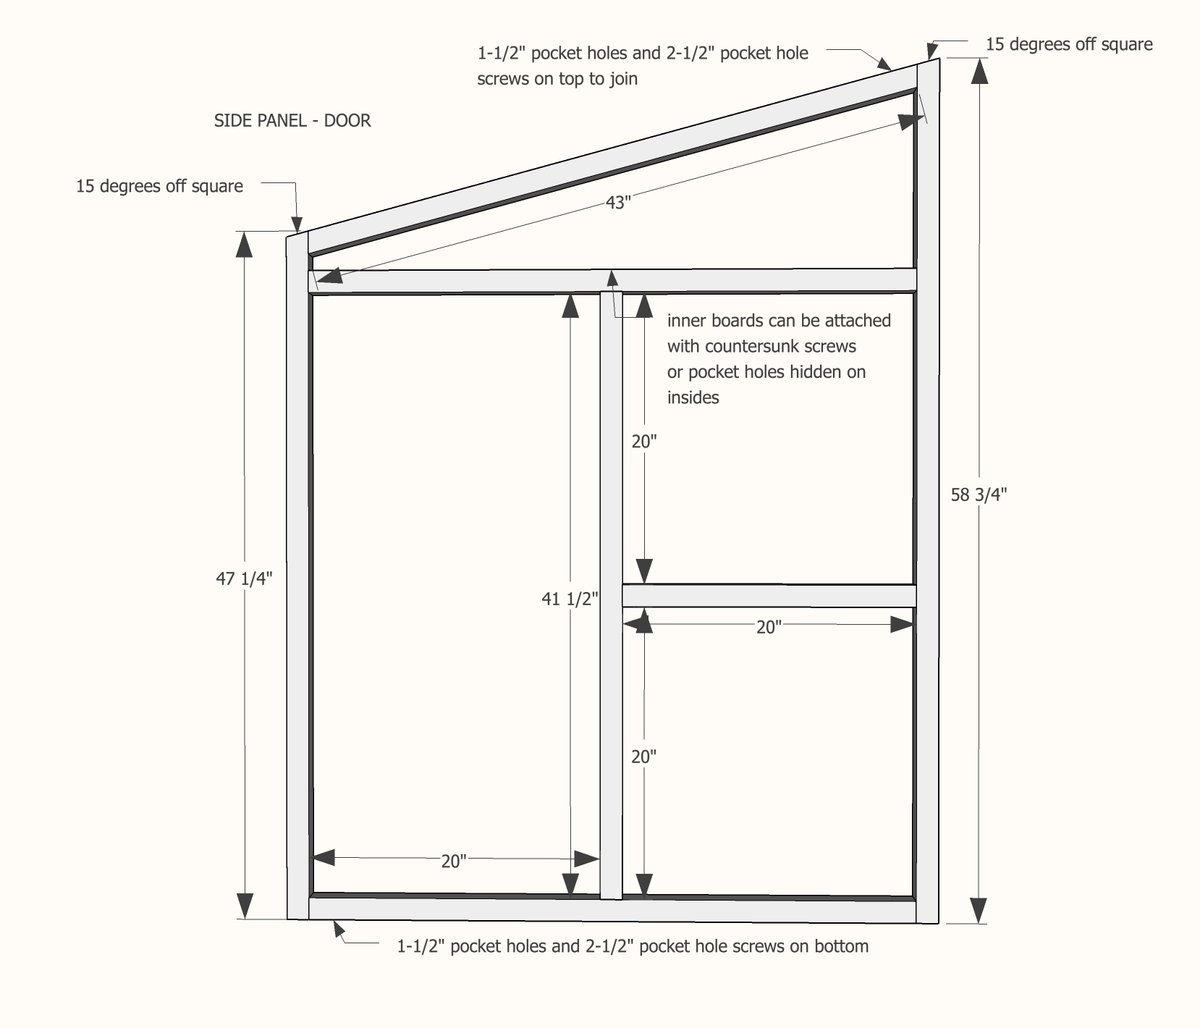
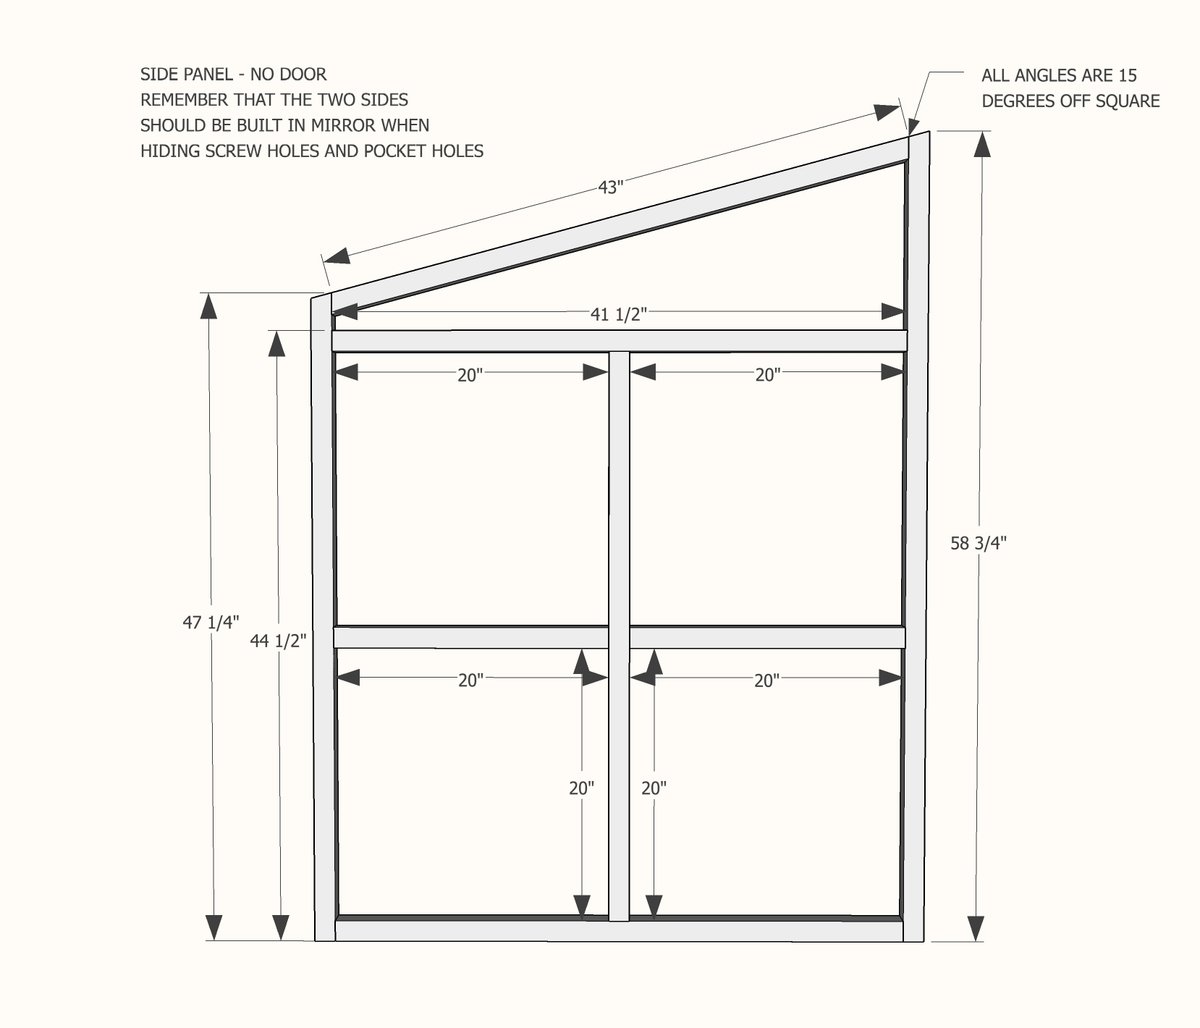
Dimensions shown above

Preparation

Shopping List

12 - 2x2 @ 8 feet long

2 - 1x2 @ 8 feet long

1 - 1x3 @ 4 feet long

1-1/2 sheet of 1/4" thick plywood

1/2 sheet of 1/2" thick plywood

93 feet of 1/2" x 1/2" moulding

2 Cafe Hinges for Door Swing

Common Materials
2 inch screws
2 1/2 inch screws
1 1/4 inch finish nails
Cut List

SIDE PANELS

2 - 2x2 @47-1/4" (long point measurment, one end cut at 15 degrees off square)

2 - 2x2 @ 58-3/4" (long point measurement, one end cut at 15 degrees off square)

2 - 2x2 @ 43" (long point to long point measurement, both ends cut at 15 degrees off square, ends ARE parallel)

6 - 2x2 @ 41-1/2"

3 - 2x2 @ 20"


BACK PANEL

2 - 2x2 @ 43"

2 - 1x2 @ 41-1/2"

1 - 2x2 @ 41-1/2"

2 - 2x2 @ 20"


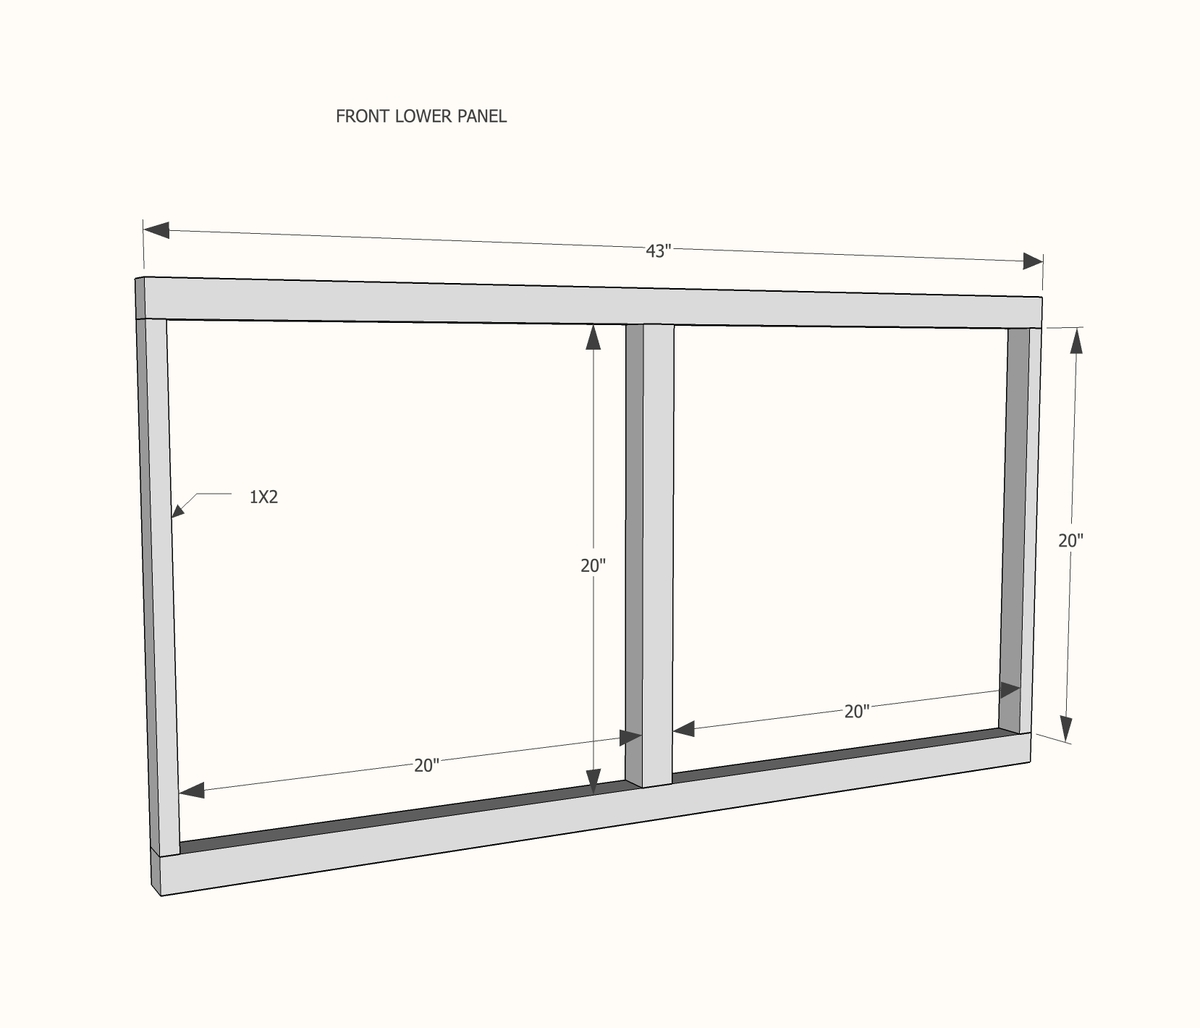
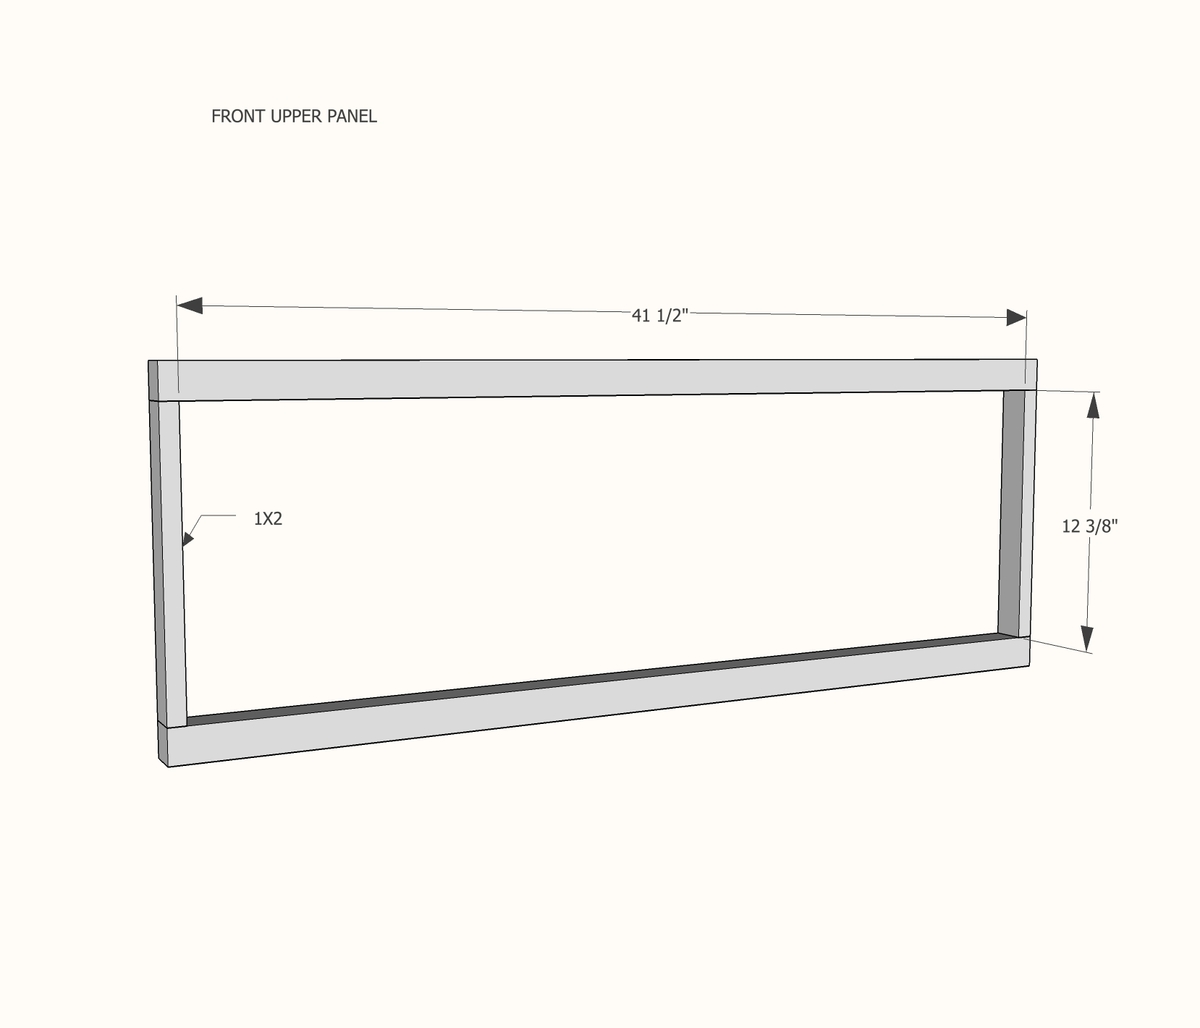
FRONT PANELS

4- 2x2 @ 43"

2 - 1x2 @ 20"

1 - 2x2 @ 20"

2 - 1x2 @ 12-3/8"


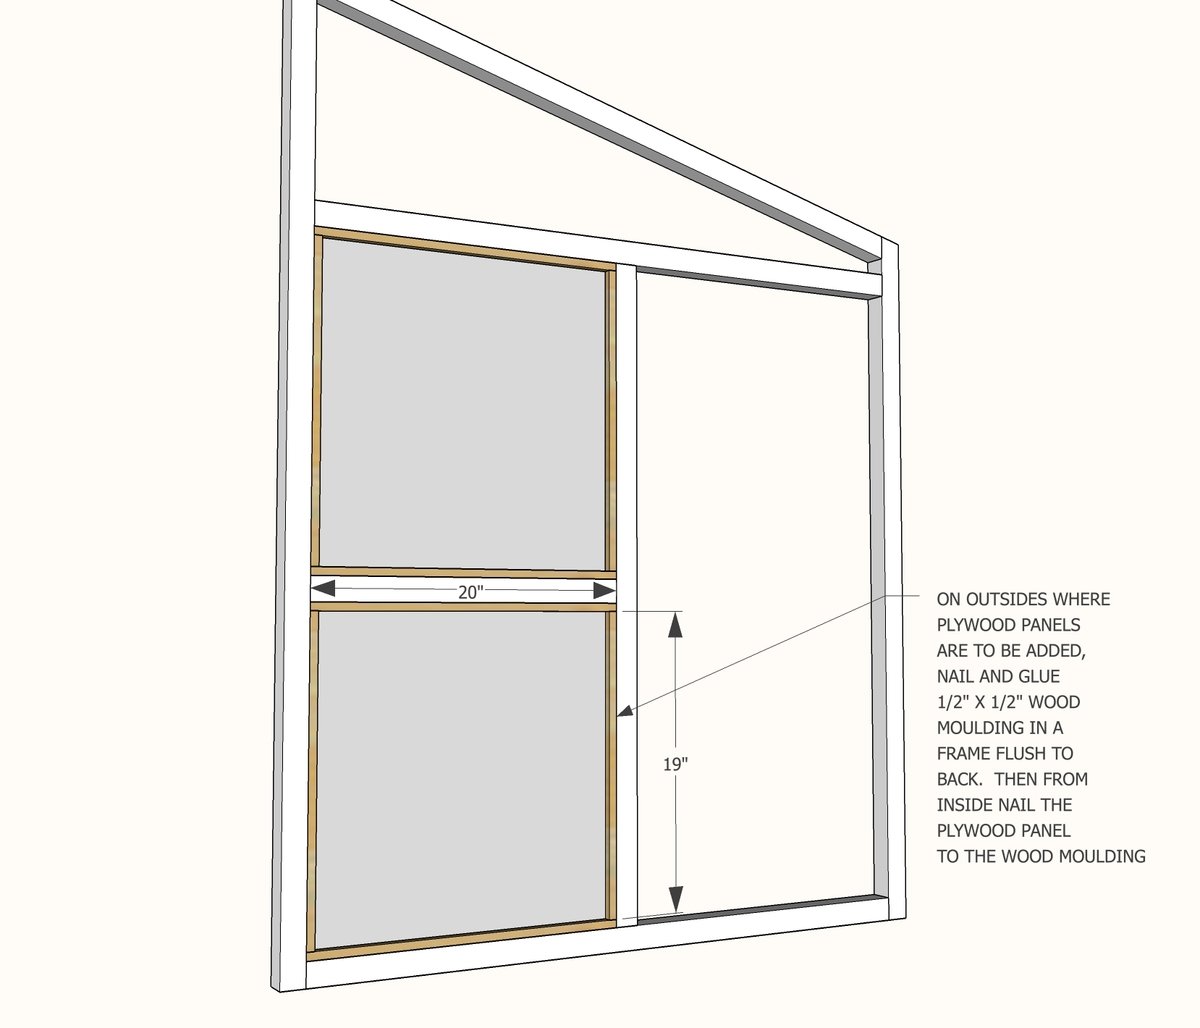
PANELS

18 - 1/2" x1/2" moulding @ 20"

18 - 1/2" x 1/2" moulding @ 19"

10 - 1/4" thick plywood or hardboard @ 20" x 20"

1 - 1/4" thick plywood or hardboard @ 12-3/8" x 41-1/2"

4 - 1/2" x 1/2" moulding @ 41-1/2"


TOP

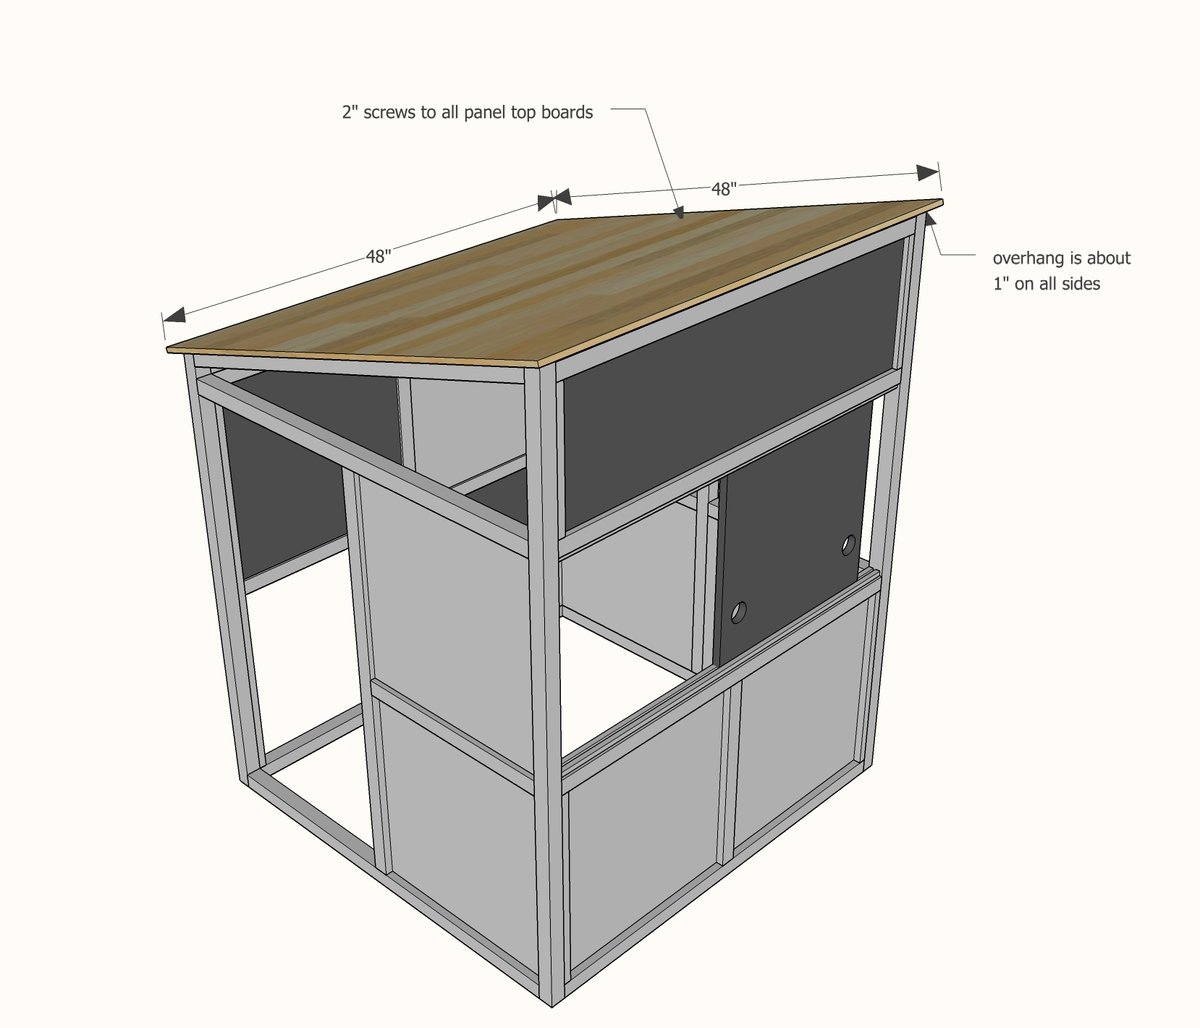
1 - 1/2" thick plywood @ 48" x 48"

1 - 1x3 @ 43"


DOOR

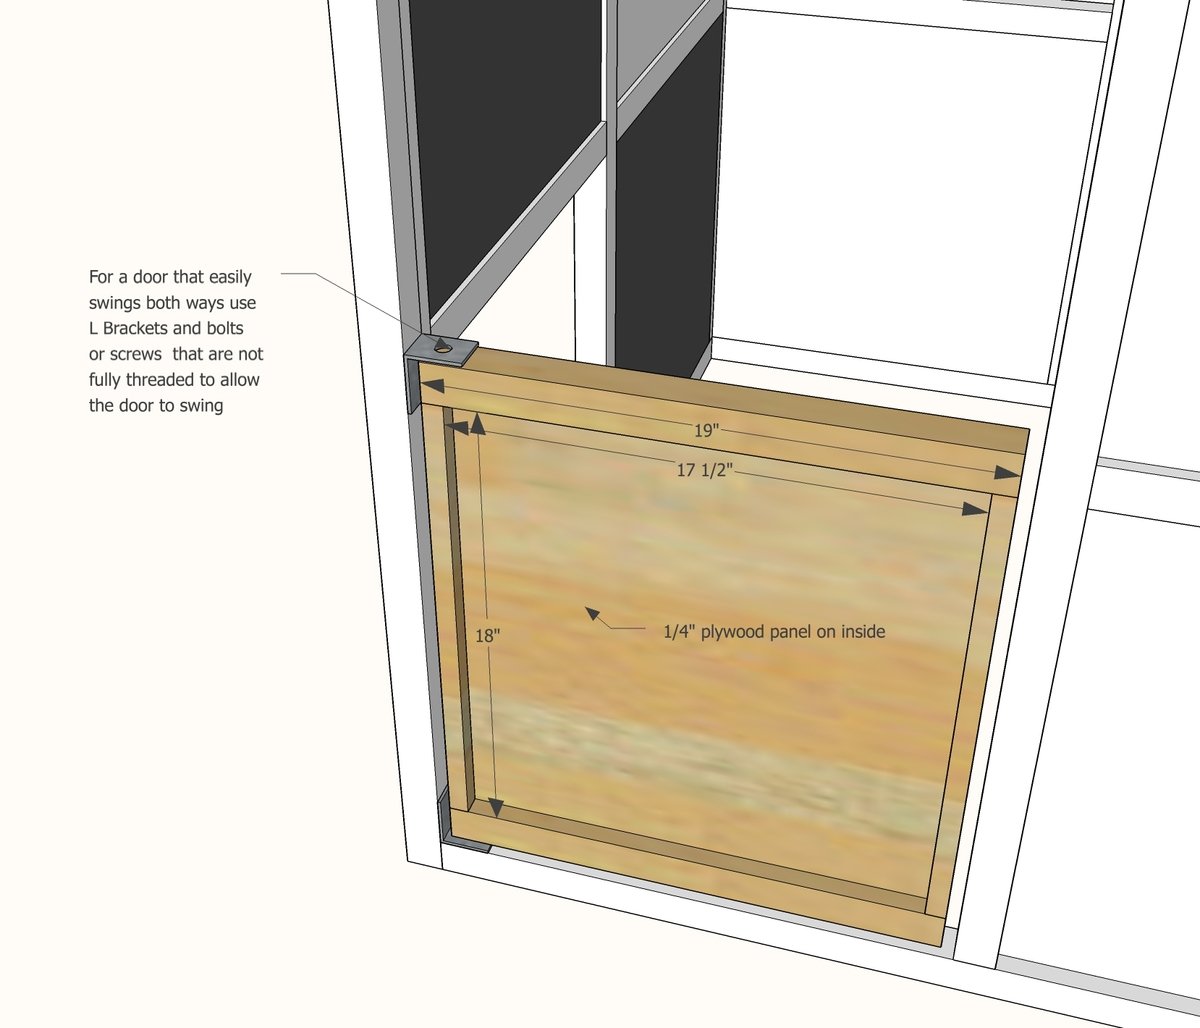
2 - 2x2 @ 19"

2 - 1x2 @ 18"

1/4" plywood 18" x 17-1/2"

moulding to hold plywood in place


Tools
Tape Measure
Speed Square
Pencil
Safety Glasses
Hearing Protection
Kreg Jig
Drill
Circular Saw
Miter Saw
Brad Nailer
General Instructions

Please read through the entire plan and all comments before beginning this project. It is also advisable to review the Getting Started Section. Take all necessary precautions to build safely and smartly. Work on a clean level surface, free of imperfections or debris. Always use straight boards. Check for square after each step. Always predrill holes before attaching with screws. Use glue with finish nails for a stronger hold. Wipe excess glue off bare wood for stained projects, as dried glue will not take stain. Be safe, have fun, and ask for help if you need it. Good luck!

Instructions

Step 1

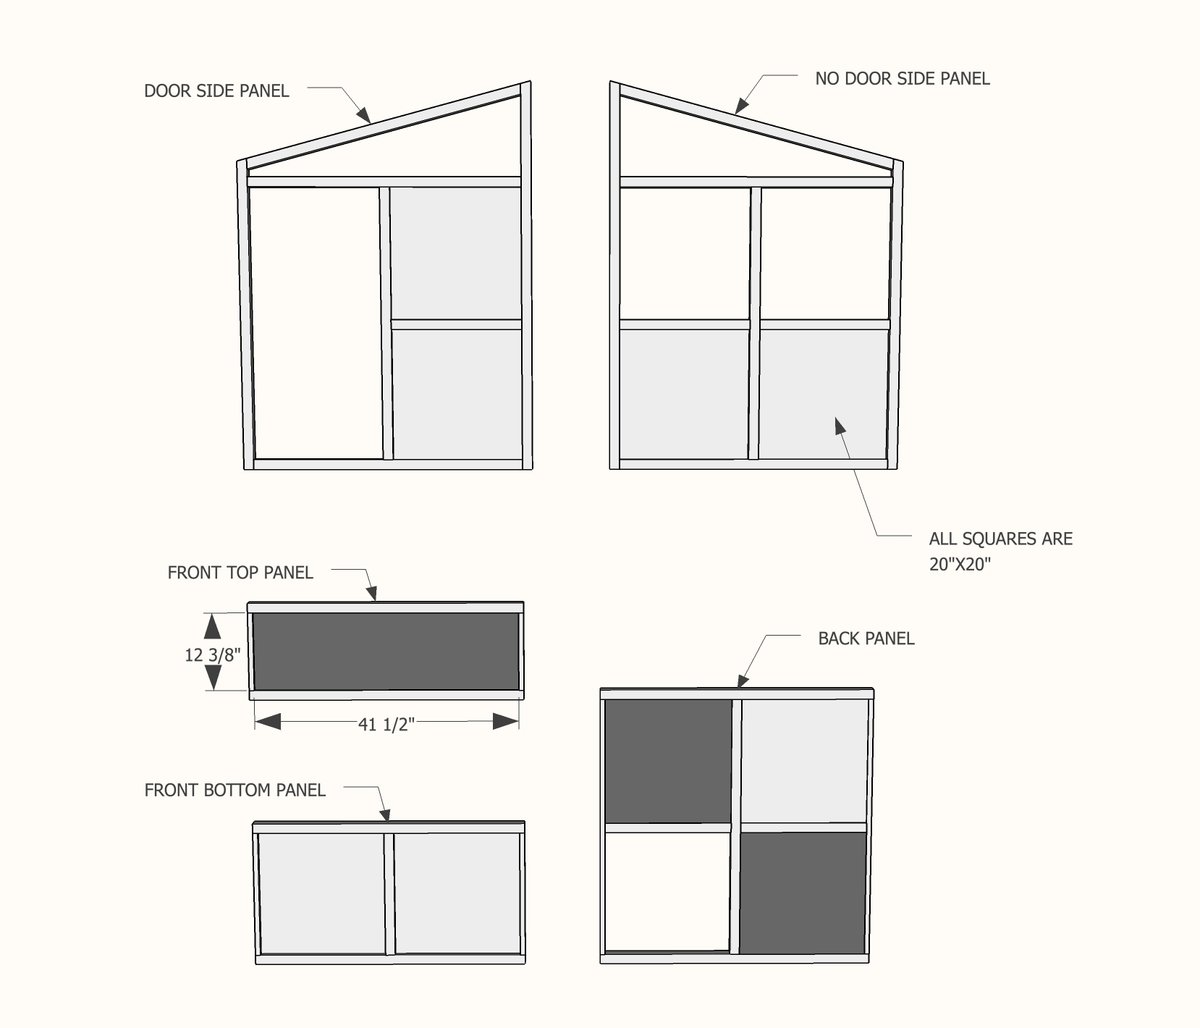
Construct side frame as shown in diagram.

Step 2

Construct other side frame as shown in diagram.

Remembe that the two sides will be in mirror as you place your screws.

Step 3

Construct back panel.

Step 4

Construct front bottom panel.

Step 5

Step 6

Add plywood panels inside openings as desired.

There are many ways to do this, we choose to add the moulding to give the inside a finished look. 

Step 7

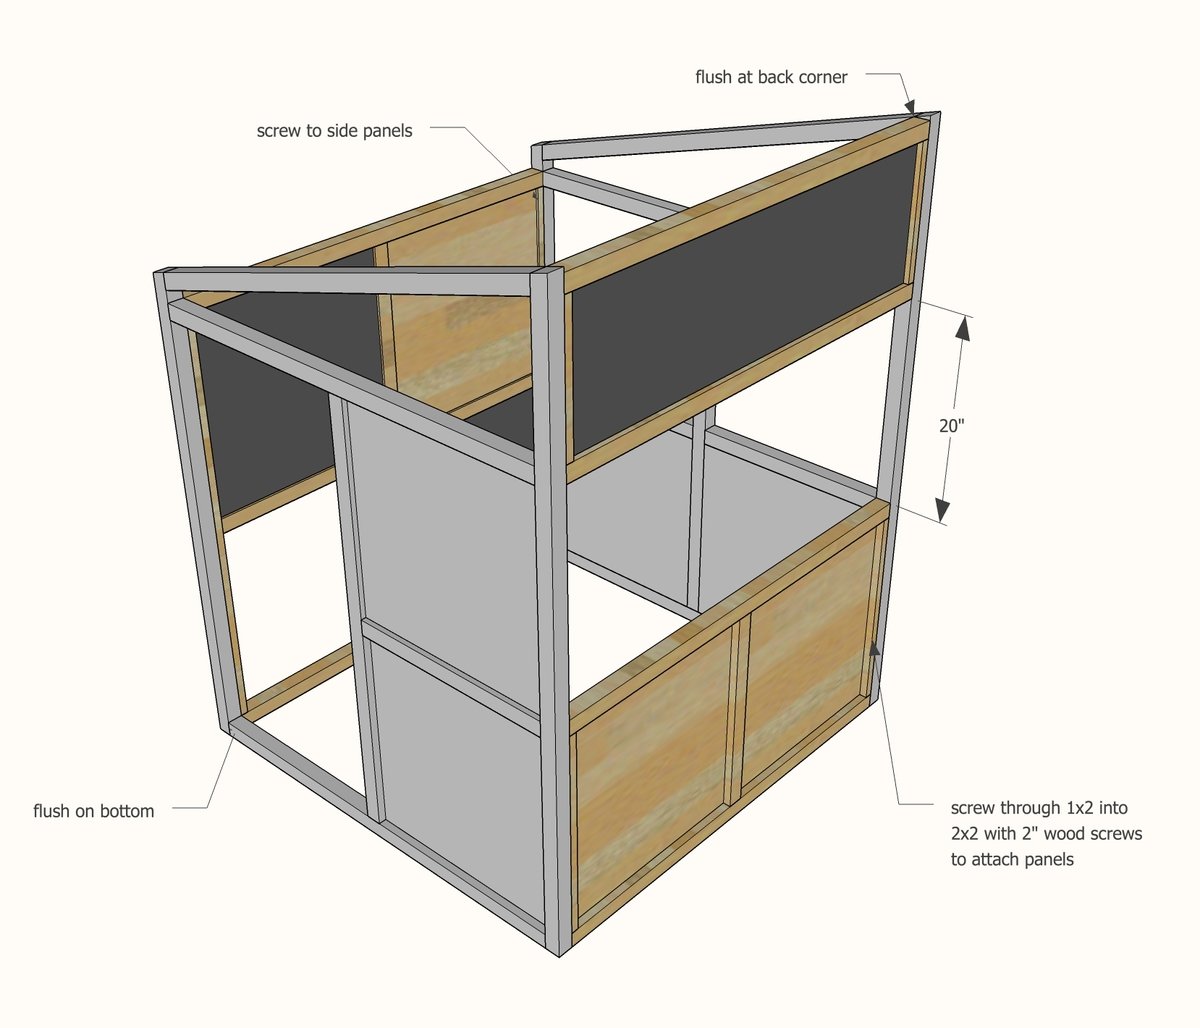
Here are all the panels as shown made in photographs.

Step 8

Once panels are built, they can be attached to each other with screws.  

Step 9

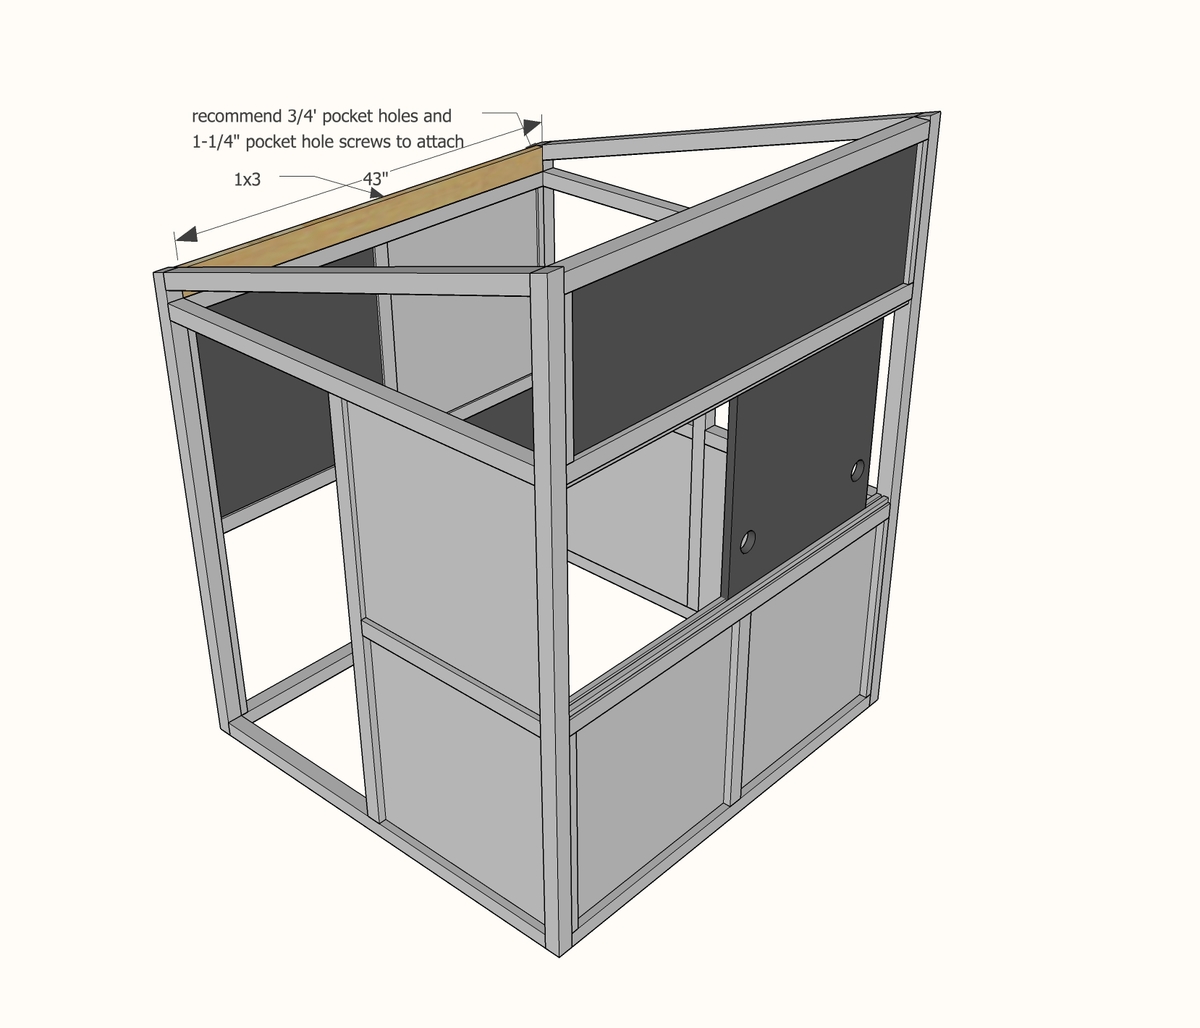
Fill in the back top with a 1x3 board.  Pocket holes on inside are the easiest way to attach.

Step 10

The top is designed to fit a half sheet of plywood.  The plywood will overhang 1" on all sides.  Screw to all top panels.

Step 11

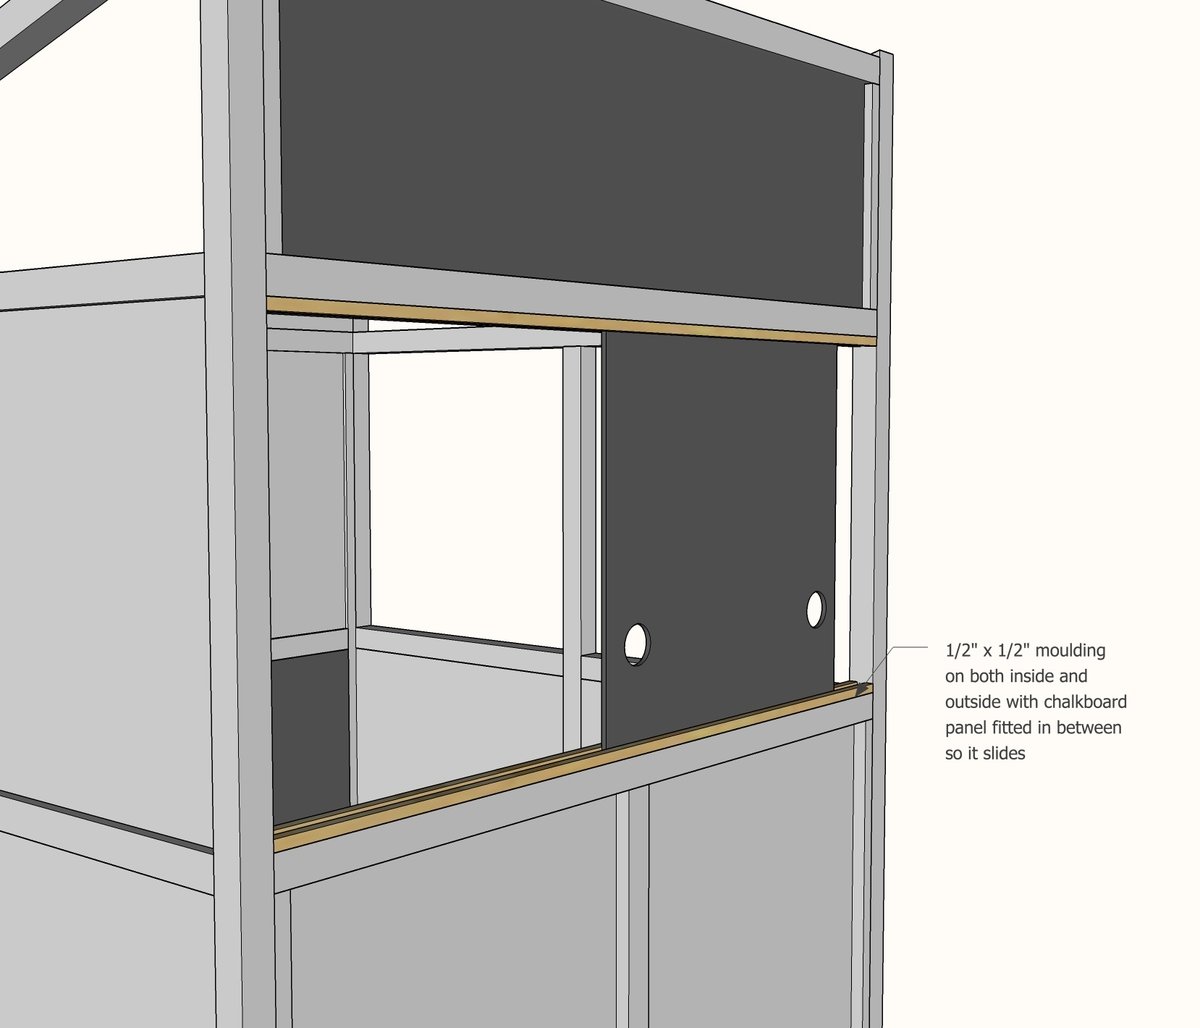
For the sliding chalkboard front, sandwich plywood in between moulding.

Step 12

Build door and attach with pivot hinges.

Finishing Instructions
Preparation Instructions
Fill all holes with wood filler and let dry. Apply additional coats of wood filler as needed. When wood filler is completely dry, sand the project in the direction of the wood grain with 120 grit sandpaper. Vacuum sanded project to remove sanding residue. Remove all sanding residue on work surfaces as well. Wipe project clean with damp cloth.
It is always recommended to apply a test coat on a hidden area or scrap piece to ensure color evenness and adhesion. Use primer or wood conditioner as needed.