
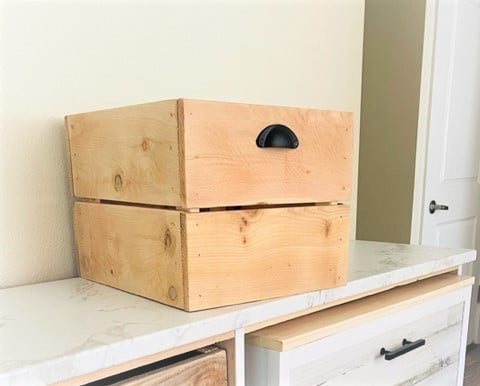

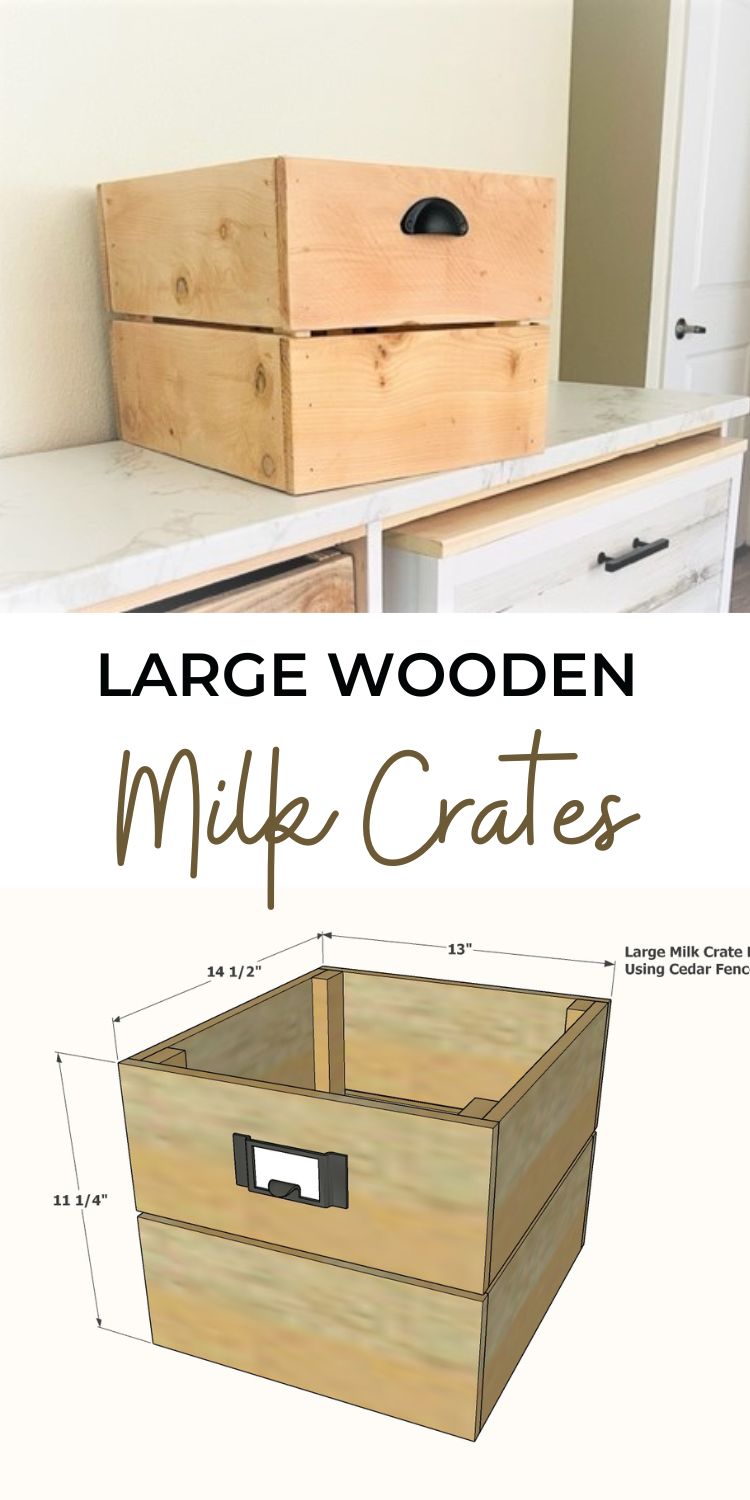
Build your own wooden milk crates using cedar fence pickets for about $10. This super easy tutorial is easy to customize in size. Free plans by Ana-White.com
Designed and built by Family DIYnamic
Why Build Your Own Wooden Milk Crates?
- About $10 a crate, instead of $20-$60 a crate
- Cedar, naturally rot resistant and good for closets
- Customize the size for a perfect fit
- Raw wood can be painted or stained any color
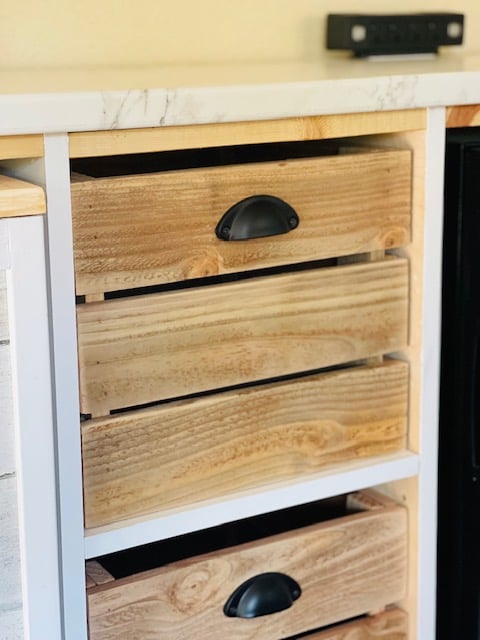
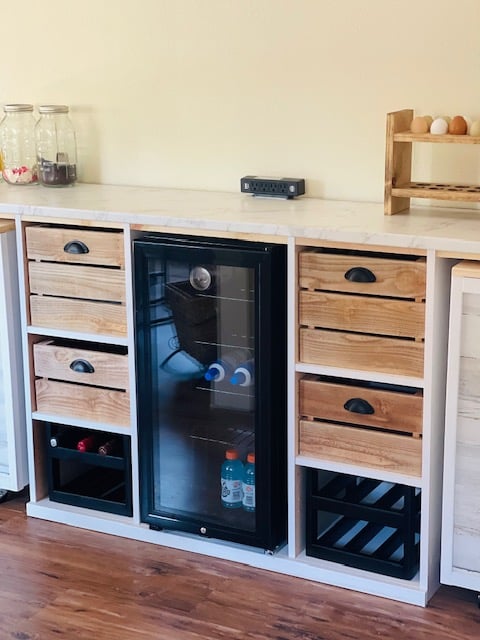
Easy to Customize the Size to Fit Your Cabinets
Cedar is Good for Closets, Rot Resistant
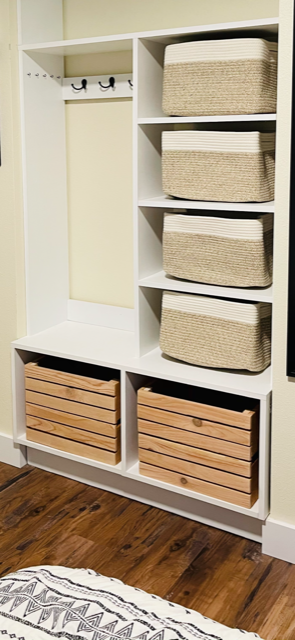
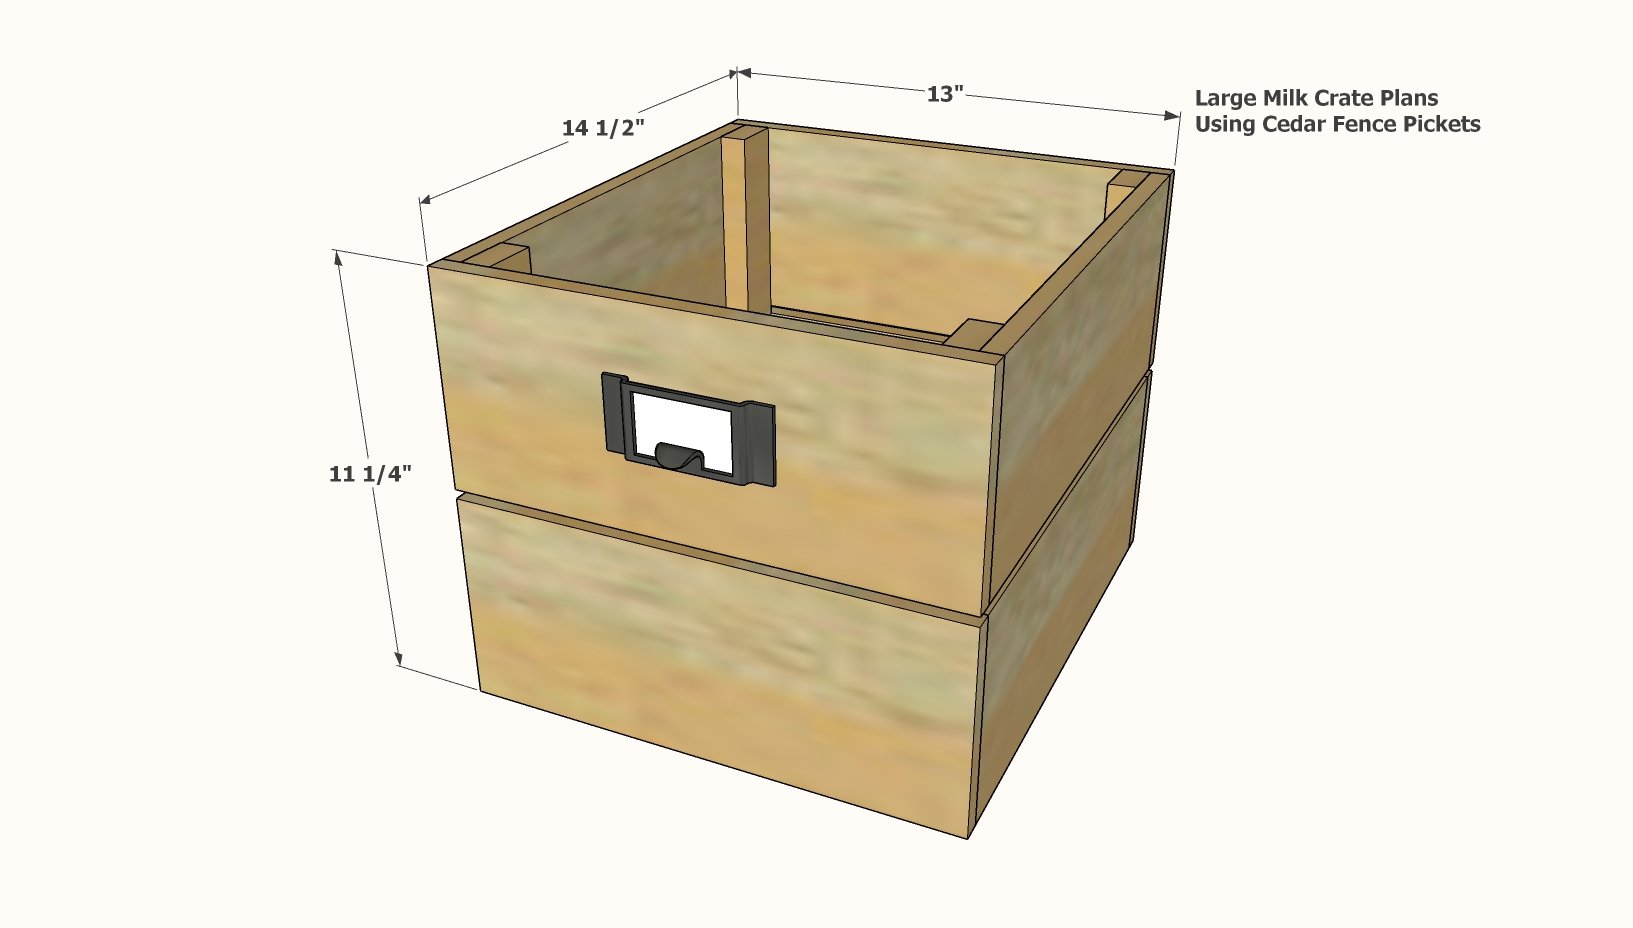
Free Plans to Build Your Own Large Wooden Milk Crates
BUILD VIDEO
Pin For Later!
Preparation
- 2 - cedar fence pickets, 5-1/2" wide x 6 feet long
- 1 - 1x2 furring strip, 8 feet long
- 1-1/4" and 1" brad nails
- wood glue
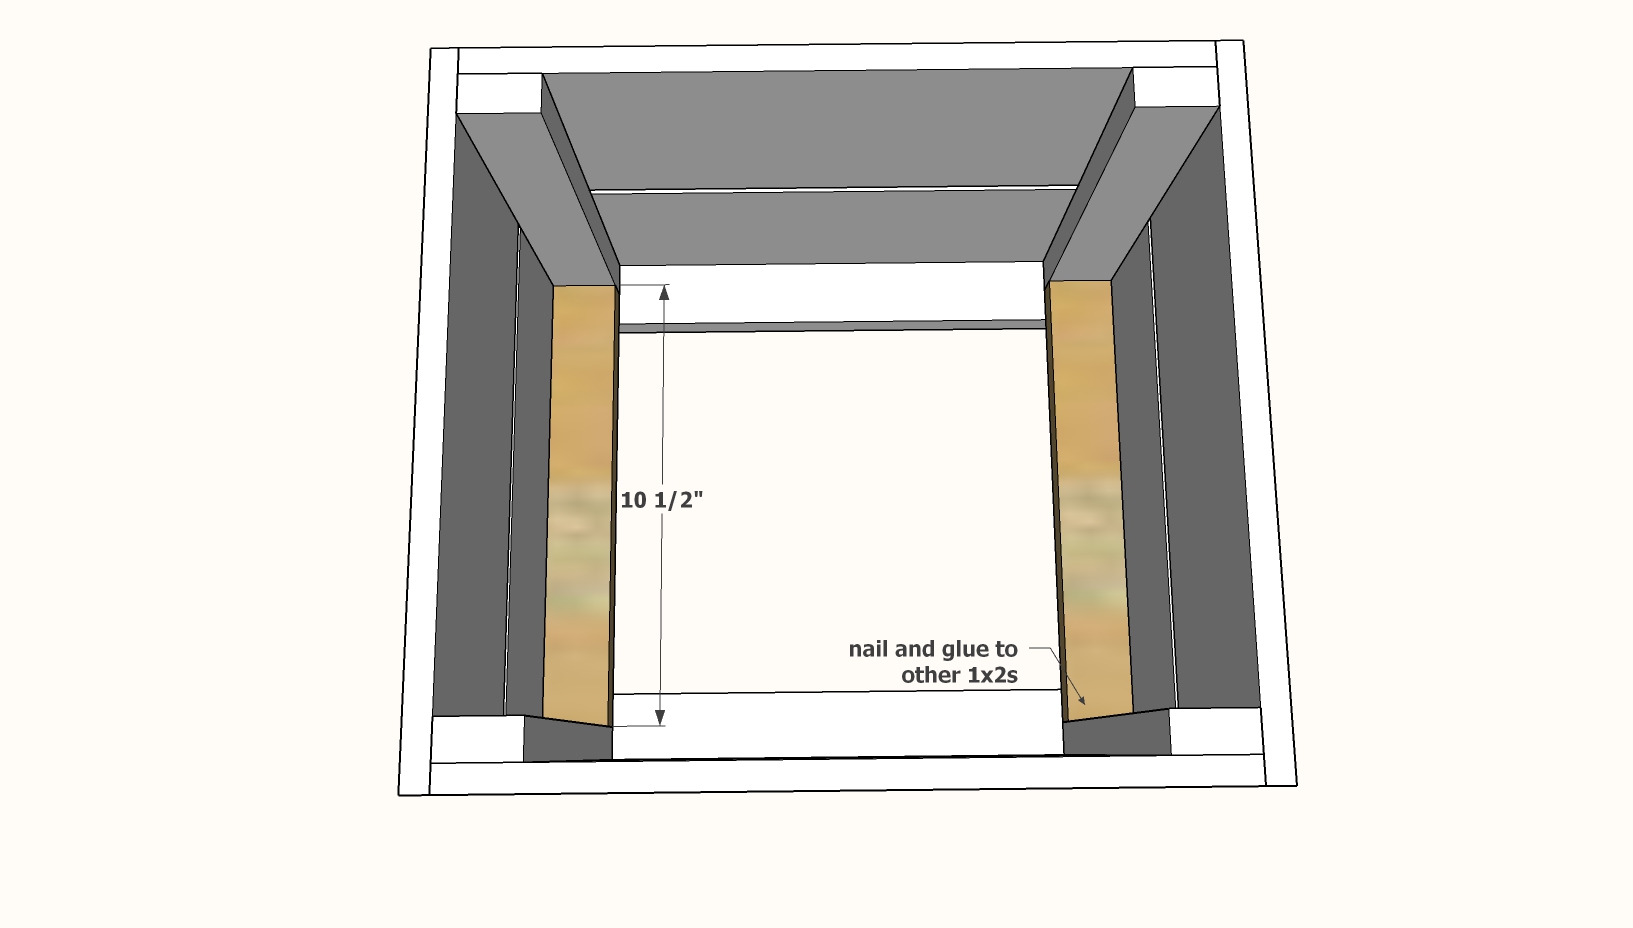
- 2 - 1x2 @ 13-1/2" - bottom frame
- 6 - 1x2 @ 10-1/2" - legs and bottom fill in pieces
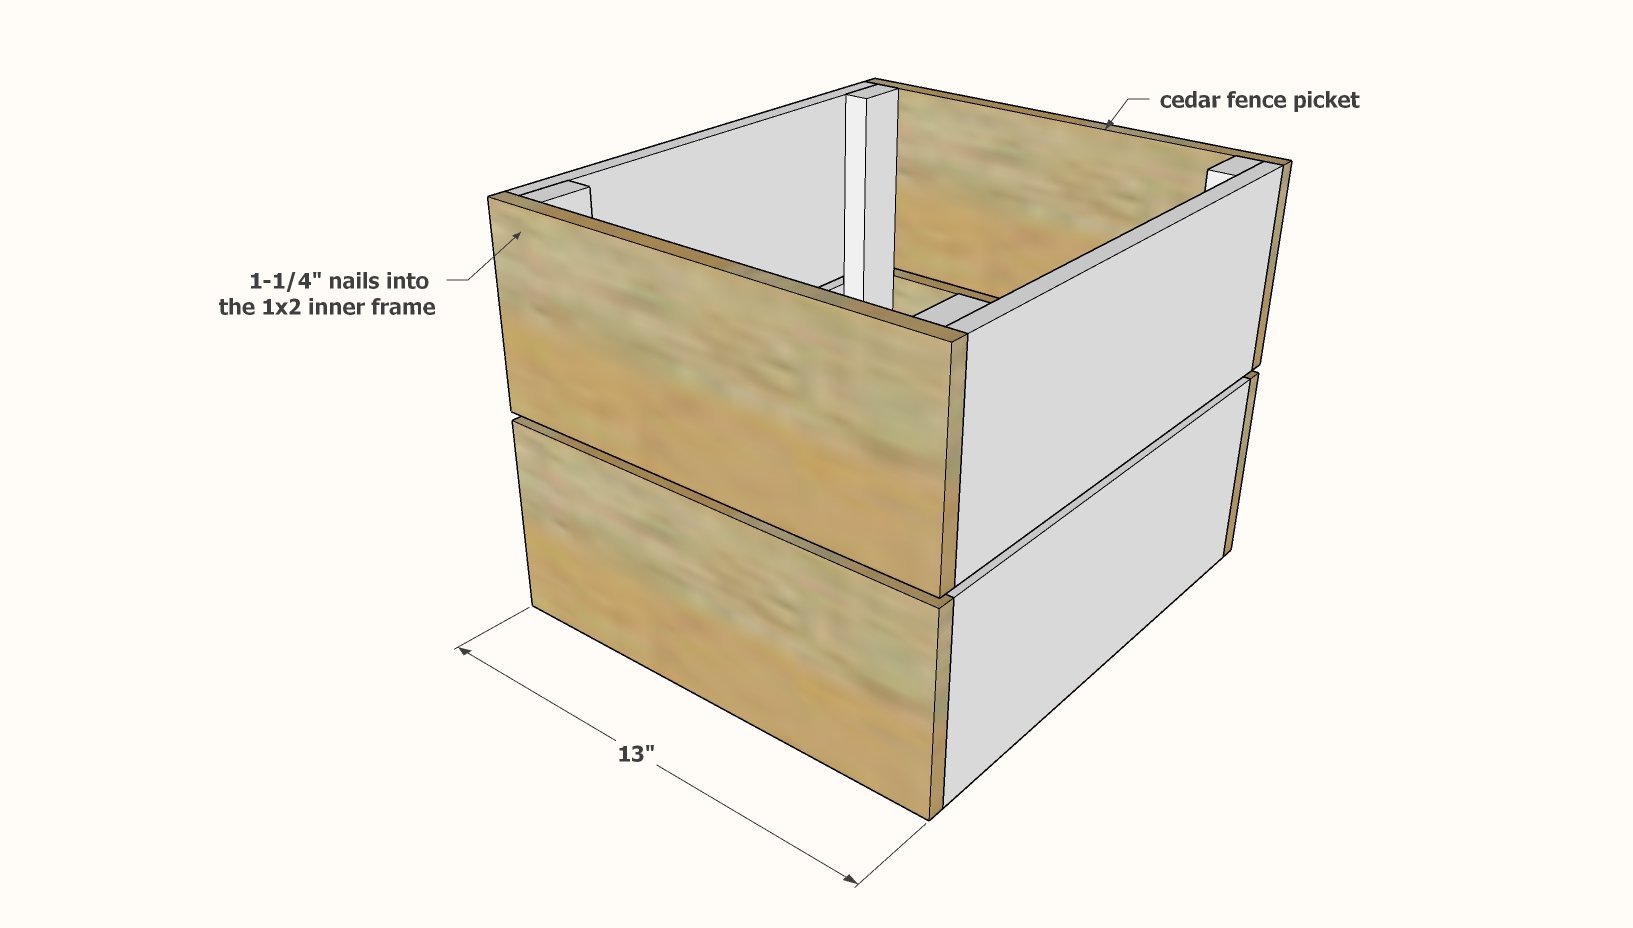
- 4 - cedar fence pickets @ 13-1/2" - sides
- 4 - cedar fence pickets @ 13" - front and back
- 2 - cedar fence pickets @ 12" - bottom


Instructions
Step 1
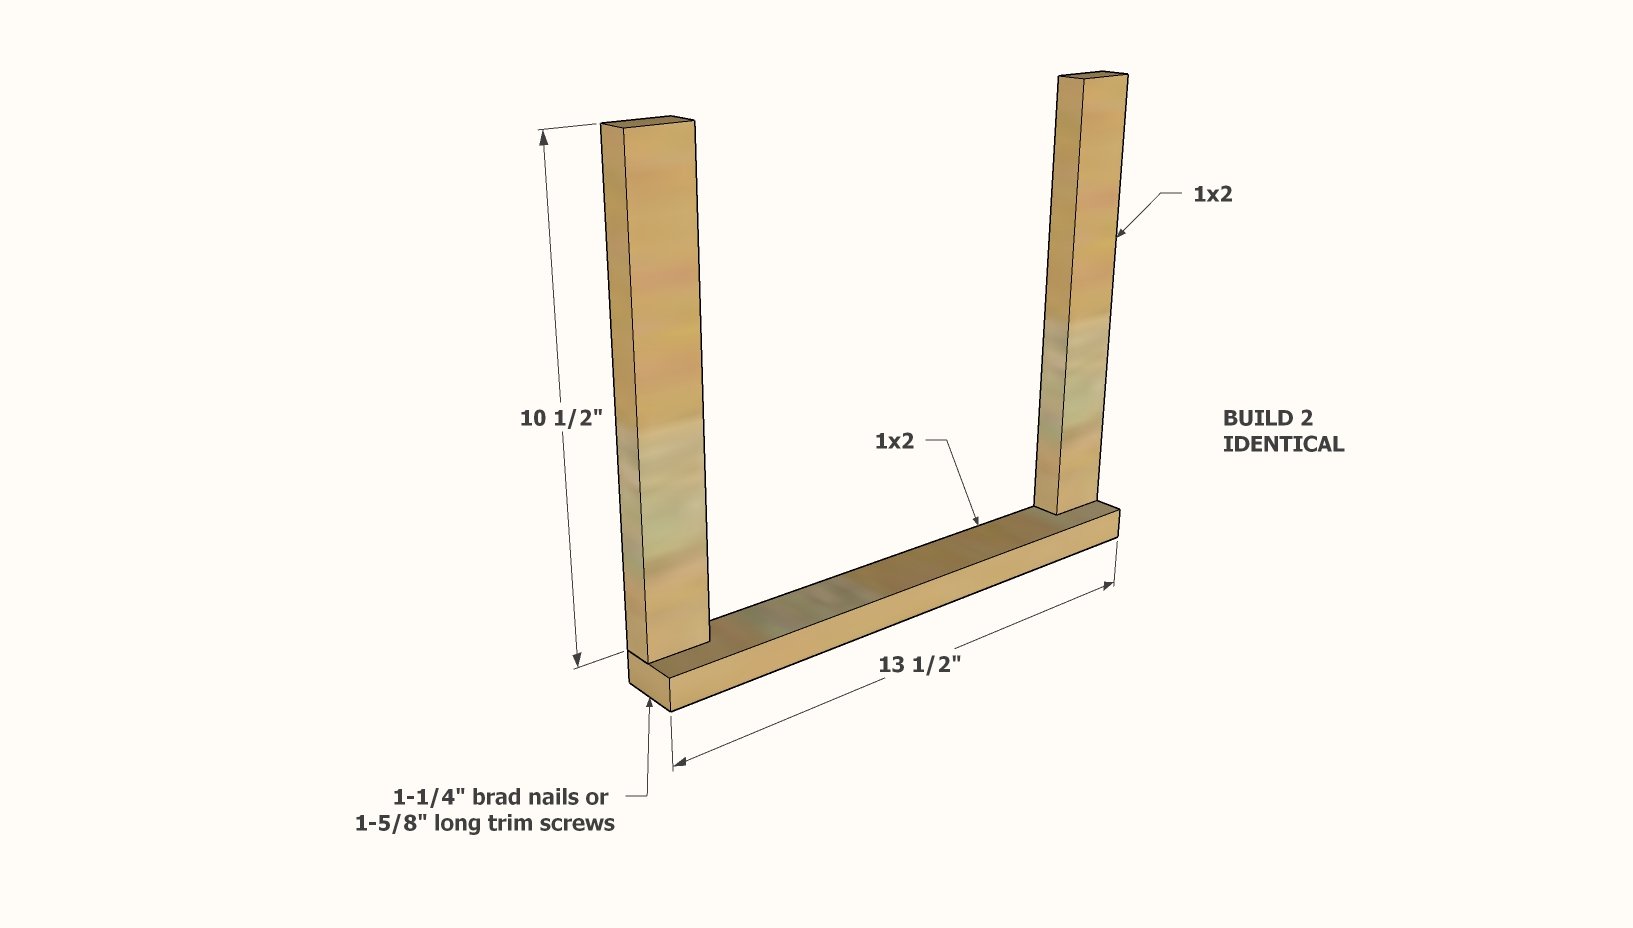
Cut the 1x2s with a circular saw or compound miter saw.
Nail the vertical 1x4s to the bottom 1x4 with 1-1/4" brad nails and glue.
Build two identical.
Crate depth adjustment: The bottom 1x2 sets the depth for the crate. For custom size, cut 1" less than the overall desired depth of your crate.
Crate height adjustment: The vertical 1x2s set the depth of the crate. Cut 3/4" less than the overall desired height. As shown, height is designed to work with 2 cedar fence pickets.
Step 2
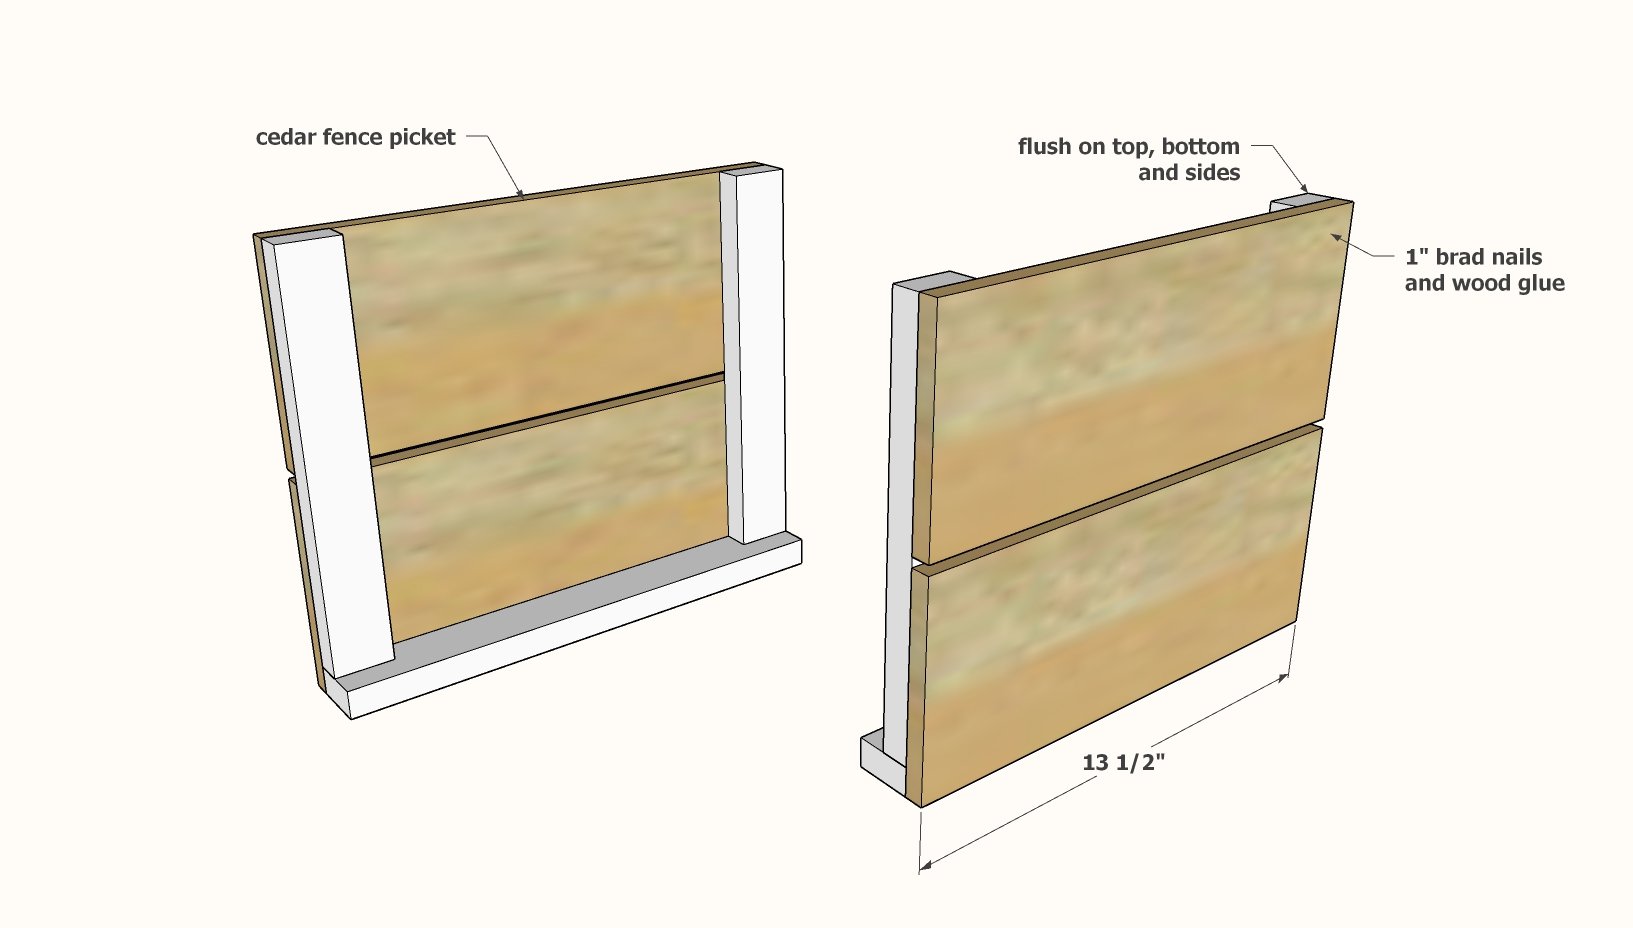
Cut the cedar fence pickets for the sides and nail to the 1x2 inner frame.
Step 3
Width Adjustment: The front and back cedar fence pickets set the width of the crate. Cut to the desired width of the crate.
Attach the cedar fence pickets to the front and back with the 1" brad nails.
Step 4
Inside - fill in the insides between the 1x2s with 1x2 pieces.
Step 5
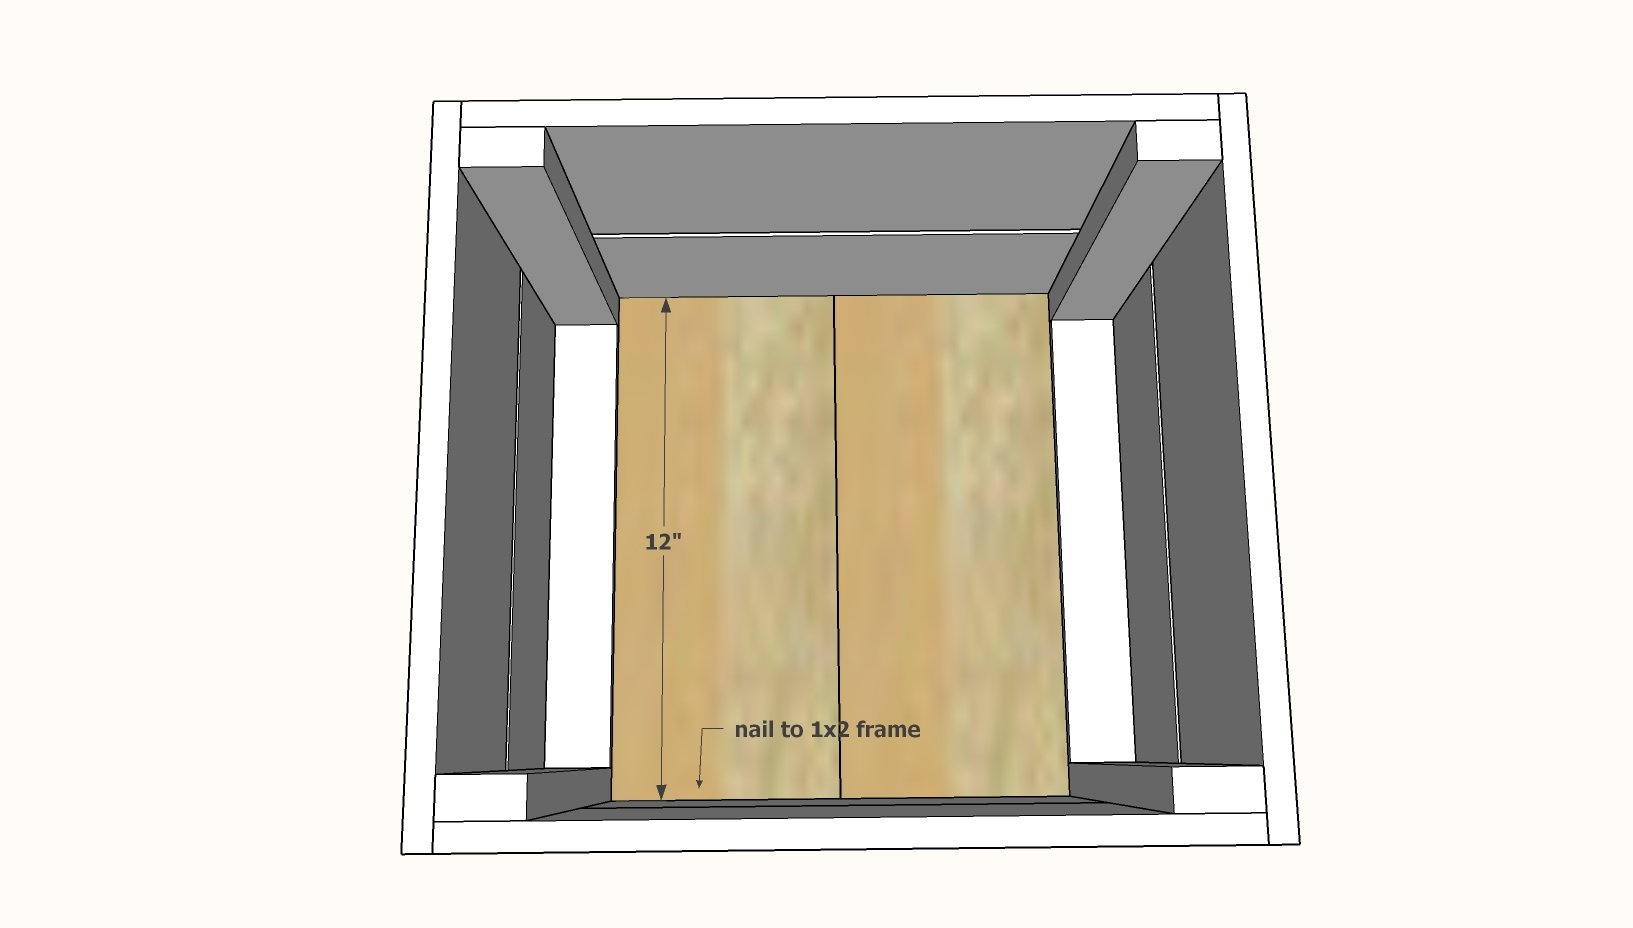
Inside - fill in the remaining inside with cedar fence pickets.
