


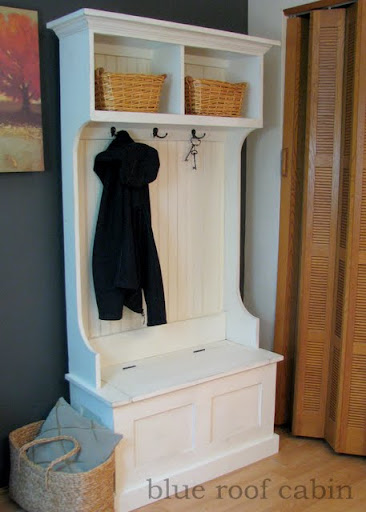
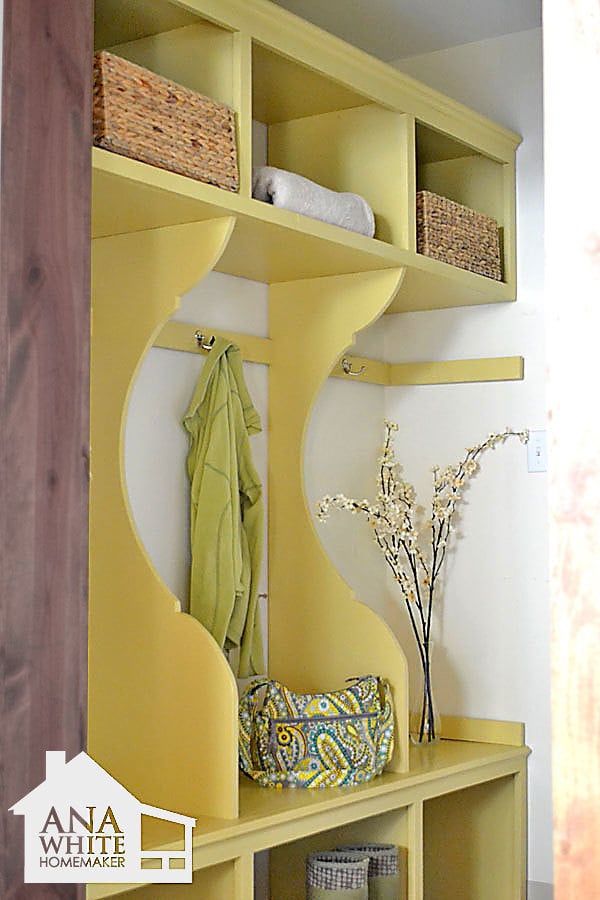
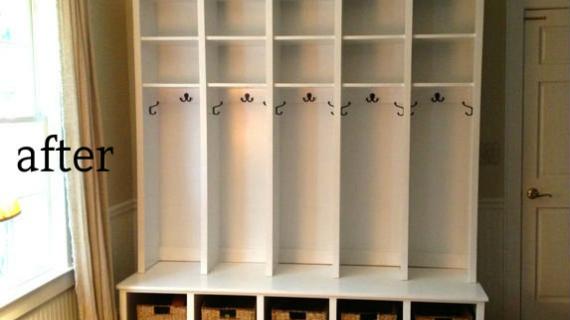
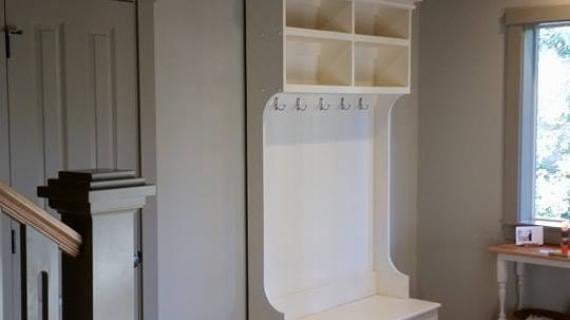
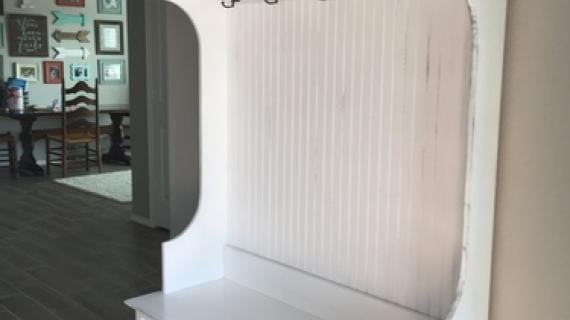
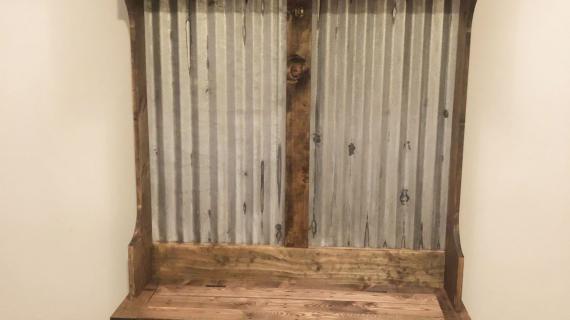
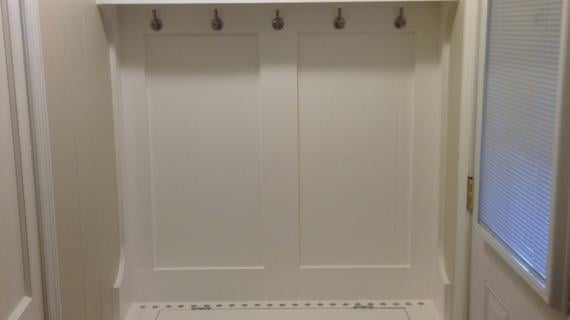
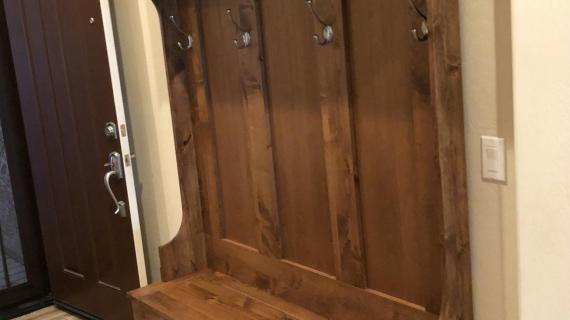
This hall tree is perfect for smaller spaces with it's narrow width. Free plans to build a narrow hall tree. Simple step by step plans include detailed diagrams, cut list and shopping list, and photos.
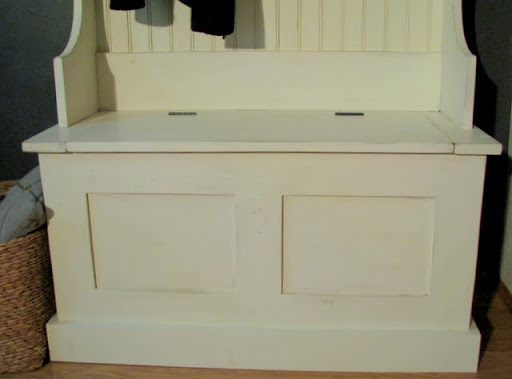
I am so glad you all liked Mimi's Hall Tree. On Friday, I put together plans for the bench shown at the base of this hall tree.
Preparation
- 1 - 1x10 @ 8 feet long
- 1 - 1x10 @ 6 feet long
- 1 - 1x12 @ 4 feet long
- 1 - 1x6 @ 4 feet long
- 1 - 1x2 @ 8 feet long
- 1 - 1x3 @ 8 feet long
- 1 - sheet 1/4" plywood or beadboard
- 1 - stick 6 feet small crown moulding
- Use either 2" screws or 1 1/4" pocket hole screws to build
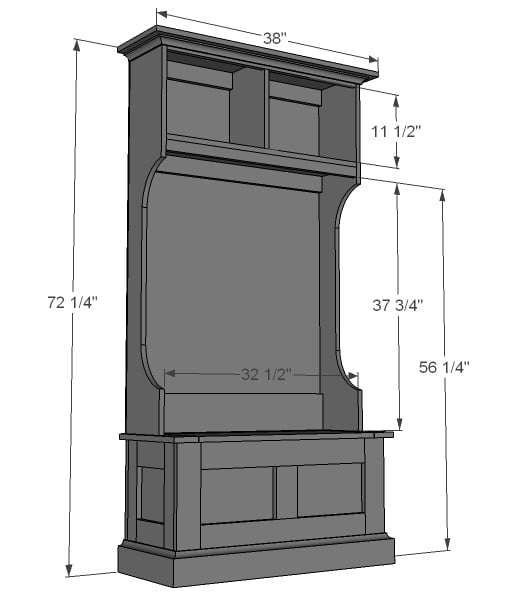
- 2 - 1x10 @ 53" (Sides)
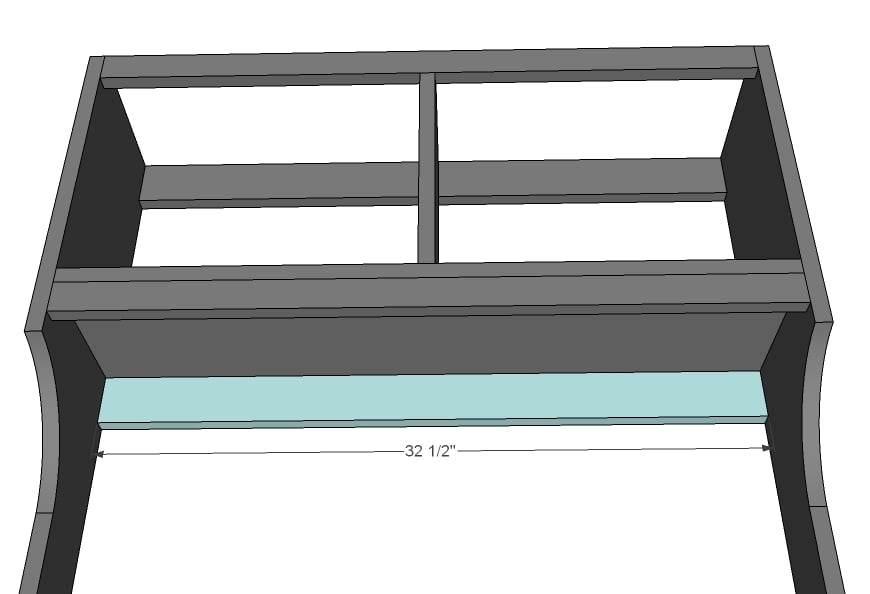
- 1 - 1x10 @ 32 1/2" (Shelf)
- 1 - 1x10 @ 13" (Divider)
- 2 - 1x2 @ 32 1/2" (Front Trim)
- 2 - 1x3 @ 32 1/2" (Back Trim)
- 1 - 1x6 @ 32 1/2" (Base)
- 1 - 1x12 @ 38" (Top)
- 1 - beadboard or 1/4" plywood @ 34" x 53" (Back)


Please read through the entire plan and all comments before beginning this project. It is also advisable to review the Getting Started Section. Take all necessary precautions to build safely and smartly. Work on a clean level surface, free of imperfections or debris. Always use straight boards. Check for square after each step. Always predrill holes before attaching with screws. Use glue with finish nails for a stronger hold. Wipe excess glue off bare wood for stained projects, as dried glue will not take stain. Be safe, have fun, and ask for help if you need it. Good luck!
Instructions
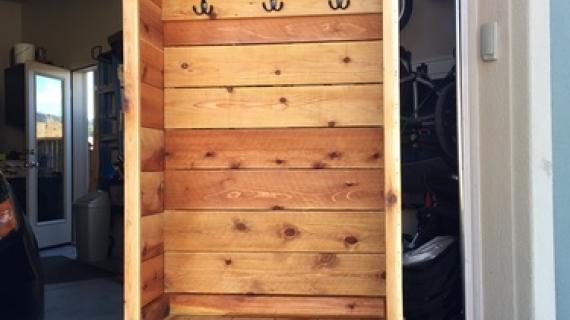
Step 1
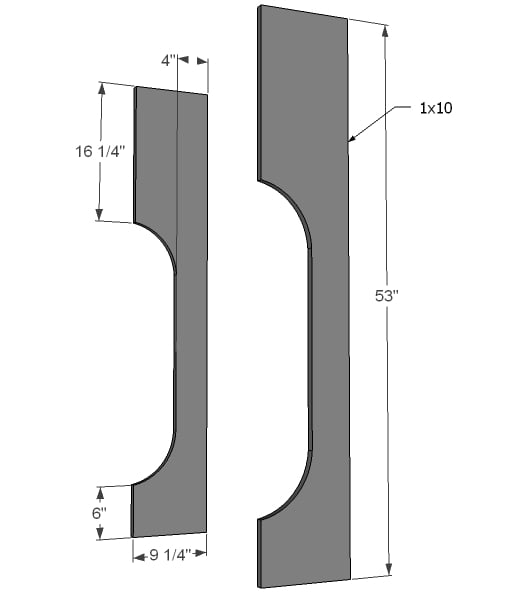
Notch out hutch sides as desired.
Step 2
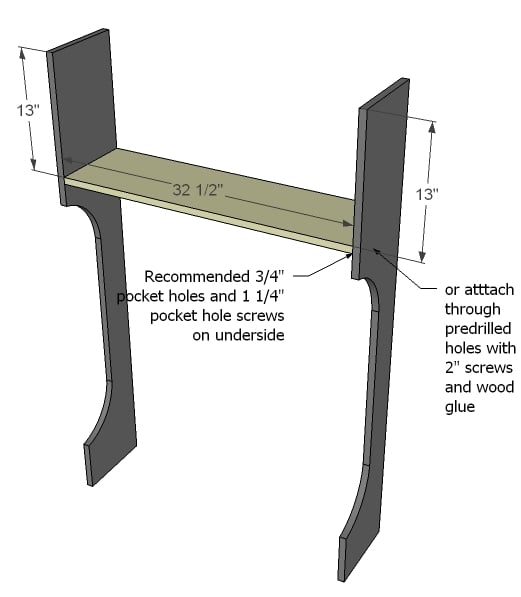
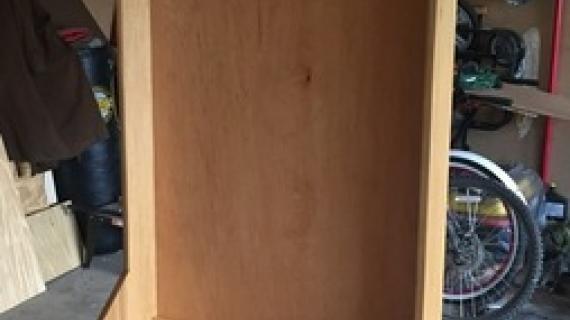
Next, add the shelf.
Step 3
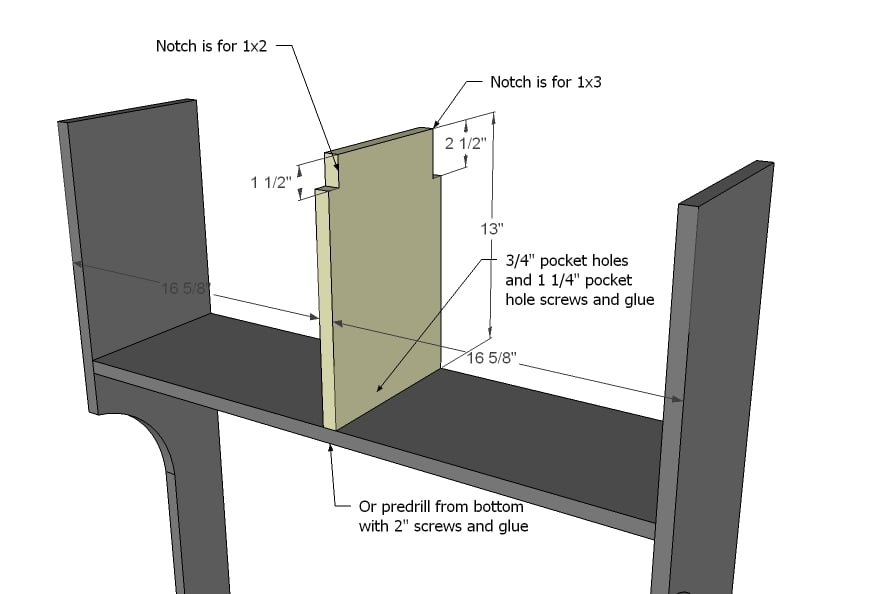
Notch out the tops of divider to fit a 1x2 on front and 1x3 on back. Use a jigsaw to make square cuts. Attach divider to shelf.
Step 4

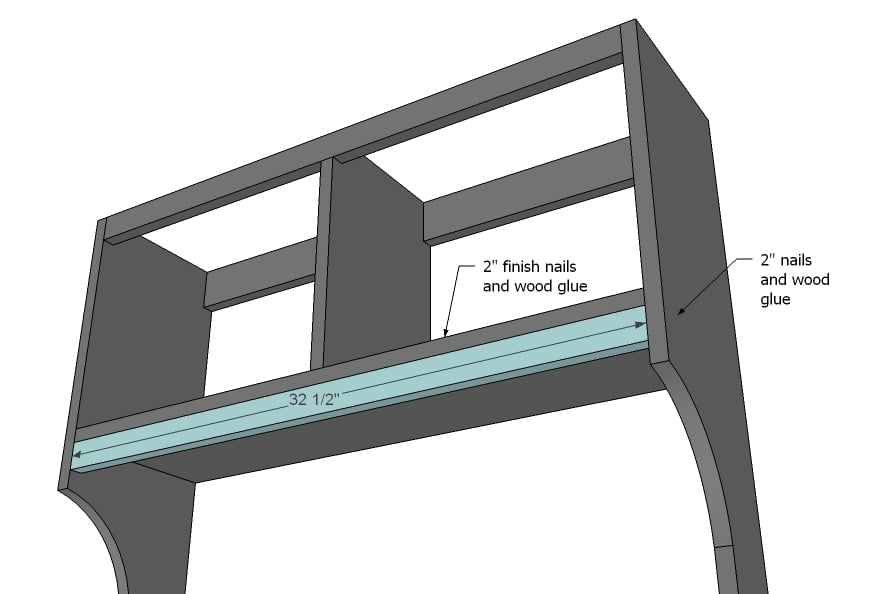
Next, add the front and back trim, making sure the divider is centered on the 1x2 and 1x3.
Step 5
Step 6
And the back trim.
Also, not pictured, add the base trim flush to bottom back of hutch
with 3/4" pocket holes and 1 1/4" pocket hole screws on back side, or 2" countersunk screws and wood glue.
Step 7
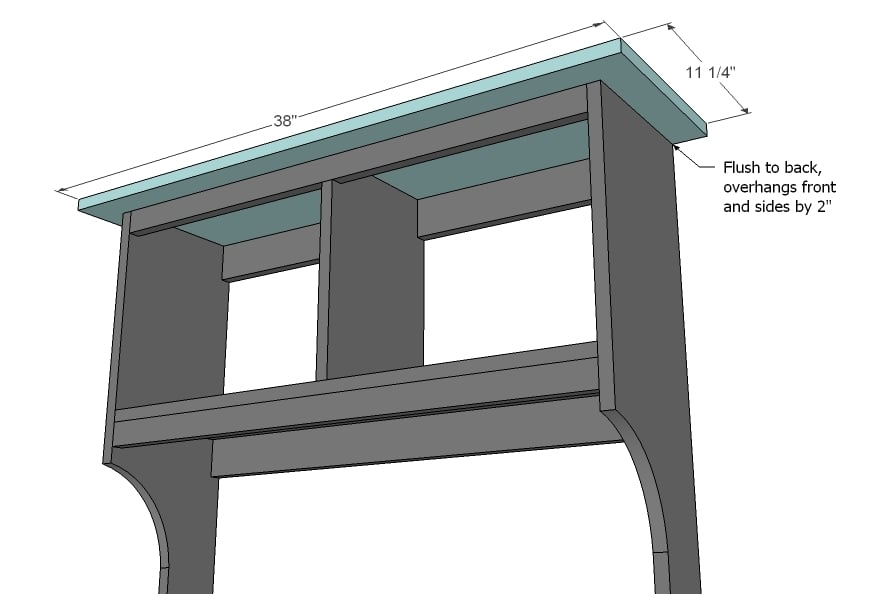
Next, add the top. Notice the 2" overhang on sides and front.
Step 8
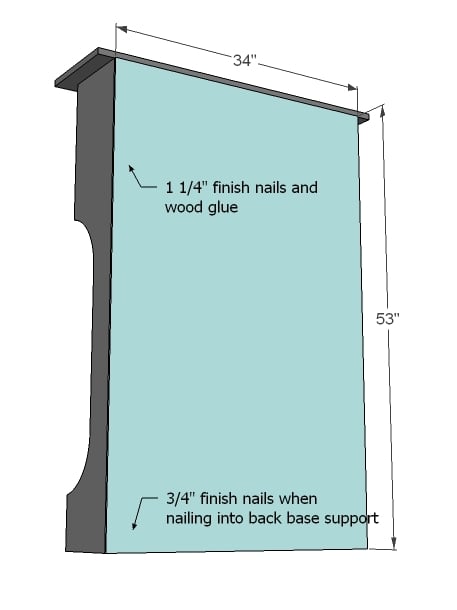
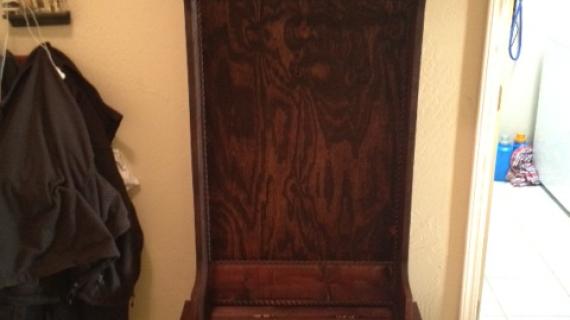
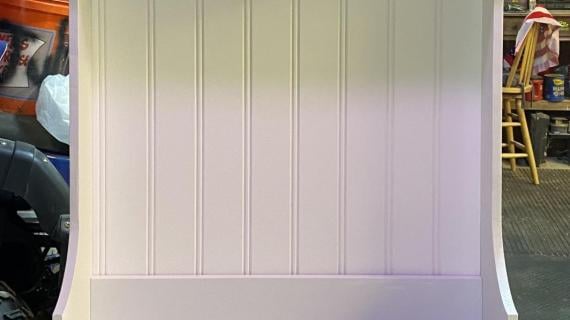
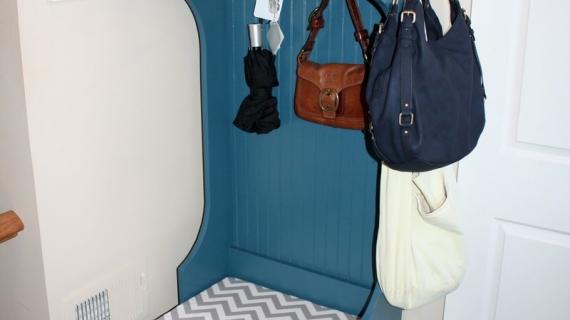
Attach beadboard or plywood to back.
Step 9
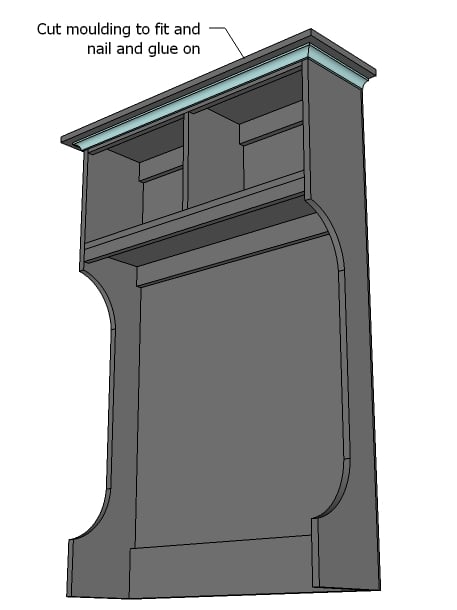
Apply moulding as desired, mitering corners to fit.
Step 10
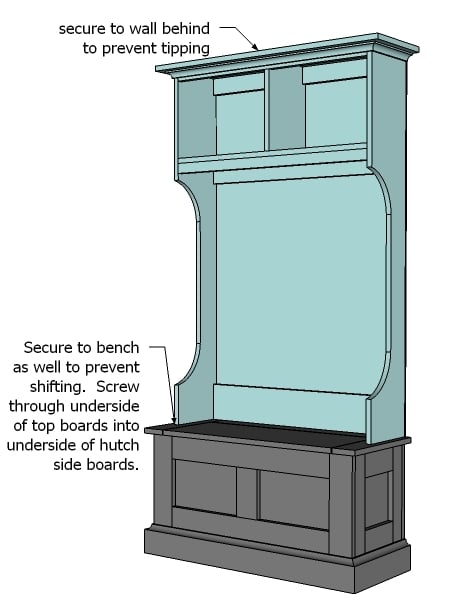
Finally, secure to bench and wall to prevent forward tipping.
It is always recommended to apply a test coat on a hidden area or scrap piece to ensure color evenness and adhesion. Use primer or wood conditioner as needed.

Comments
townsean
Wed, 02/08/2012 - 02:22
Great!
This looks great. It's just want I need :D
patrickhosey
Wed, 02/08/2012 - 22:10
Awesome!
I come home and my military uniform gets spread out everywhere. This would make the perfect uniform organizer!
shannonstaggs (not verified)
Thu, 02/16/2012 - 11:36
LOVE THIS!!
Hi Ana! I love your site and all of your projects! I recently completed the Farm House King Head/Foot board and absolutely LOVE IT! Working on one for my son's room now as well.
I am trying to find plans for something very similar to this hall tree, although I would like it to slide into a corner. Have you done anything similar or do you have any recommendations for altering the above plans to make a corner hall tree? I am thinking about using the Corner Unit for the twin storage bed and add the top piece to it - what are your thoughts on that? Thanks in advance!
jwbrett
Sat, 06/02/2012 - 08:20
Love It, but...
Pictures can be deceiving. :) It looks so tall! But actually I'm taller (6'1")
BTP (By the Plan) the piece will only come out to be just a 1/4" over 6 foot high from bottom of base to top of hutch.
So I'm adding a foot to its height (6" to the bench, 6" to the hutch) to push it up a bit and make it feel less like a dwarf on a standard 8' ceiling.
Such a gorgeous design and beadboard all the way!
Melodie (not verified)
Wed, 12/12/2012 - 17:35
Easy plan to alter
I made this and the accompanying bench this weekend. The instructions are clear and easy to follow. Assembly is a snap!
I agree that the piece is deceptively short. I added 13 1/4" to the height of the sides and created 2 shelves instead of one. Now it looks much more substantial on my entry wall.
My hubby loves it...no more mess in our entryway.
davidschmidt4715
Sun, 01/05/2020 - 15:56
SketchUp File
I love this hutch. great job guys.
Is it possible to receive a copy of the SketchUp file for customization?
GogreenWoodworking
Sun, 05/17/2020 - 09:41
I was wondering if it was…
I was wondering if it was possible for this project to be shortened up width wise to 32" wide because in my home we have base board heat so those are in the way, so to make it fit our space it would have to be 32" wide, any suggestions?