
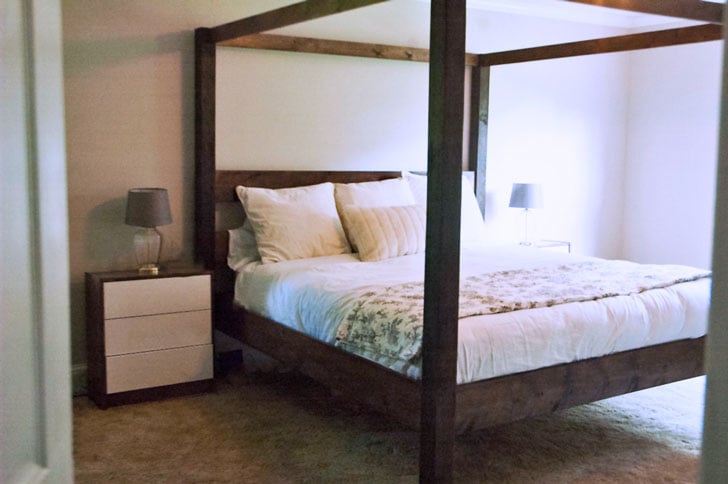

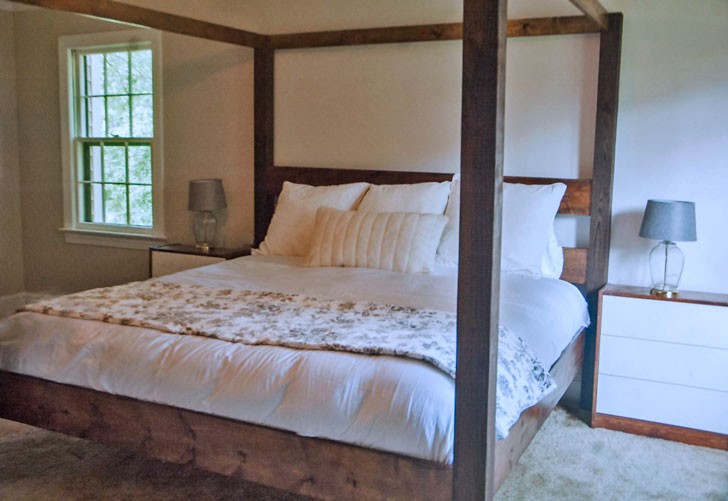
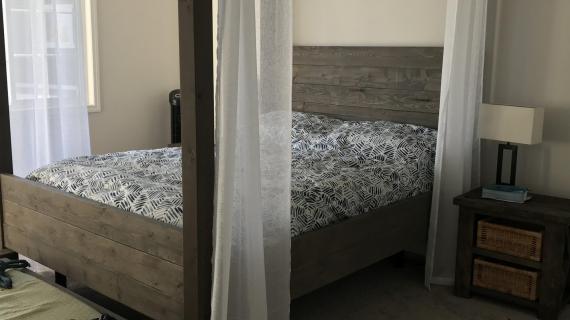
A beautiful, minimalist king canopy bed that's easier than it looks! Build with step by step woodworking plans using basic tools and off the shelf lumber.
Preparation
- (4) 4x4 eight-foot posts. We couldn't find untreated pine anywhere, so we ended up buying treated wood, which I was worried about. It actually looks good and it stains almost identical to the other untreated boards.
- (6) 2x8 eight-foot boards
- (6) 2x8 or 1x8 boards, 8 feet long (whatever is cheaper, will be used for the bed slats)
- (4) 2x4 eight-foot boards (for the canopy)
- (6) 2x4 eight-foot boards (for bottom supports)
- 2-1/2" pocket hole screws
- Kreg Jig pocket hole tool (this is a must have and SO worth the $20)
- Stain (I used Minwax Special Walnut, my personal favorite)
- Polyurethane
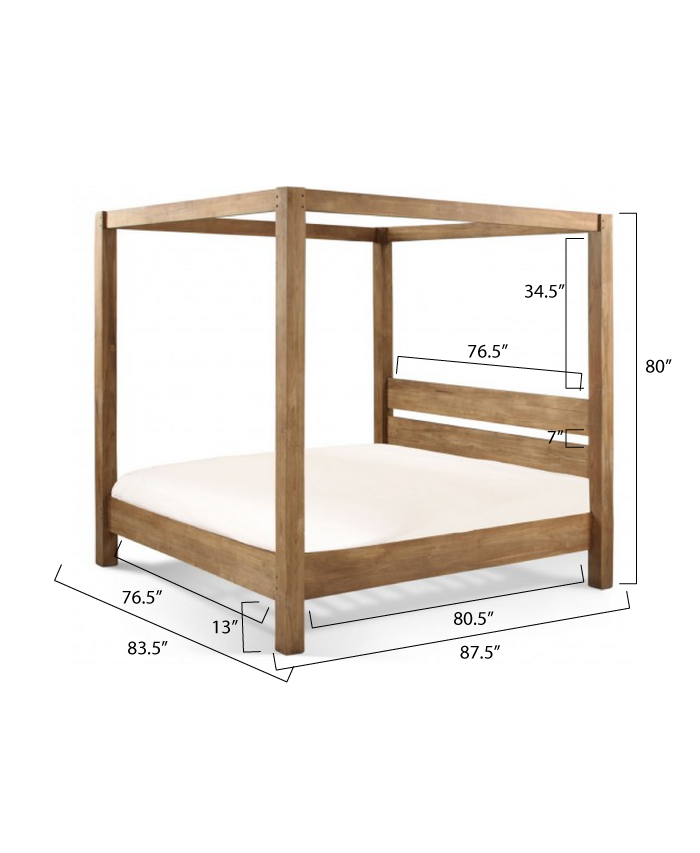
- (4) 4x4 @ 80" | posts
- (4) 2x8 @ 76-1/2" | headboard and footboard
- (2) 2x8 @ 80" | siderails
- (2) 2x4 @ 76-1/2" | headboard and footboard high canopy boards
- (2) 2x4 @ 80" | siderail high canopy boards
- (2) 2x4 @ 82" | siderails supports
- (4) 2x4 @ 73-1/2" | bottom supports that run width-wise under the bed
- (2) 2x4 @ 16-1/2" | supports that run from the ground to the 2x4 width-wise supports underneath the bed
- 6) 2x8 or 1x8 @ 82" | to set on top of the 2x4s for support if not using box spring (I suggest not using a boxspring for this bed)


Instructions
Step 1
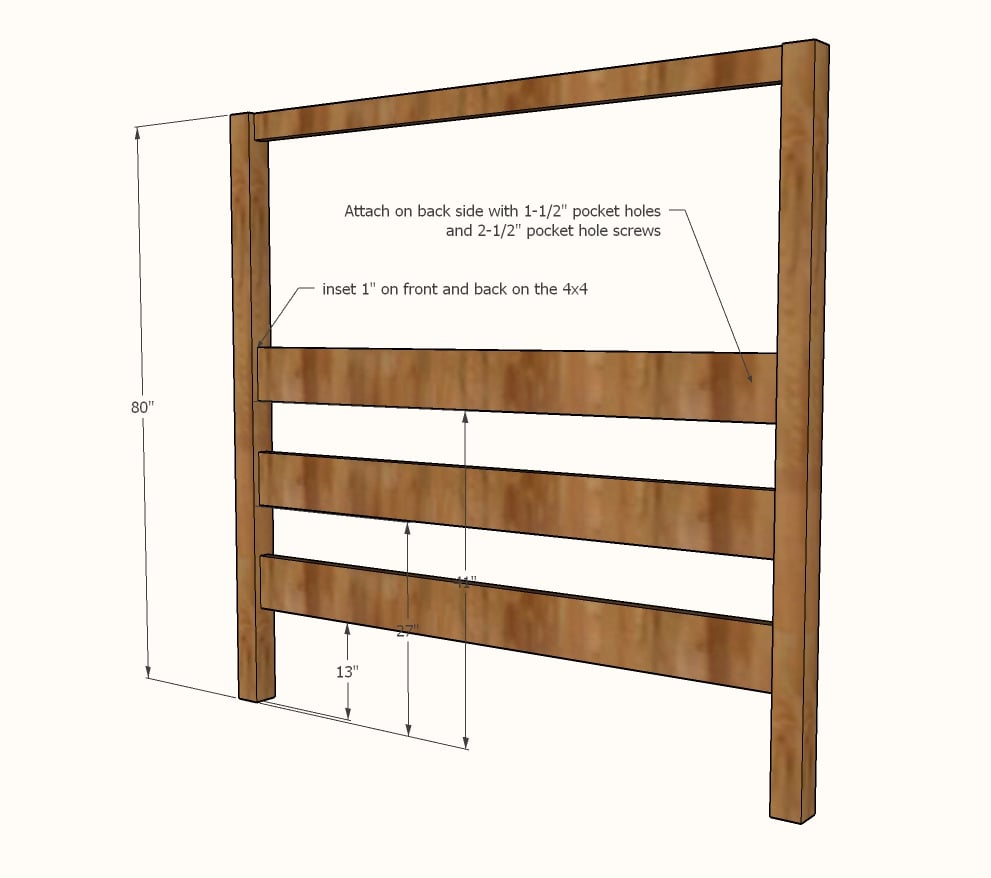
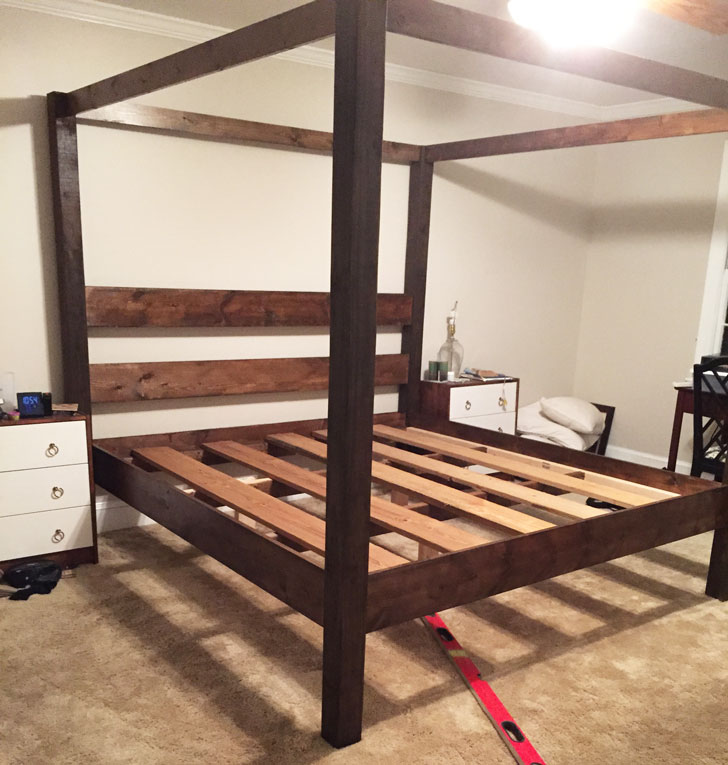
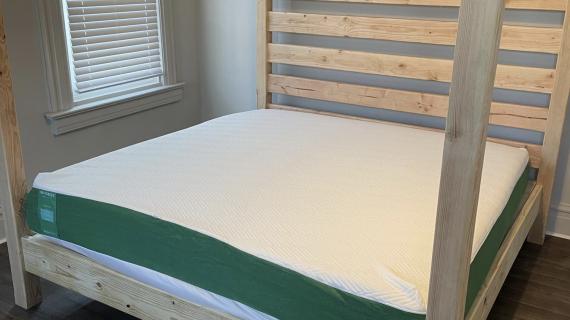
Assemble the headboard.
Pre-drill holes on 2x8 boards using kreg pocket hole tool, 2 to each side.
Attach the first 2x8 to the two posts at 13" high. Attach the next at 27" high and finally the third board at 41" high.
Step 2
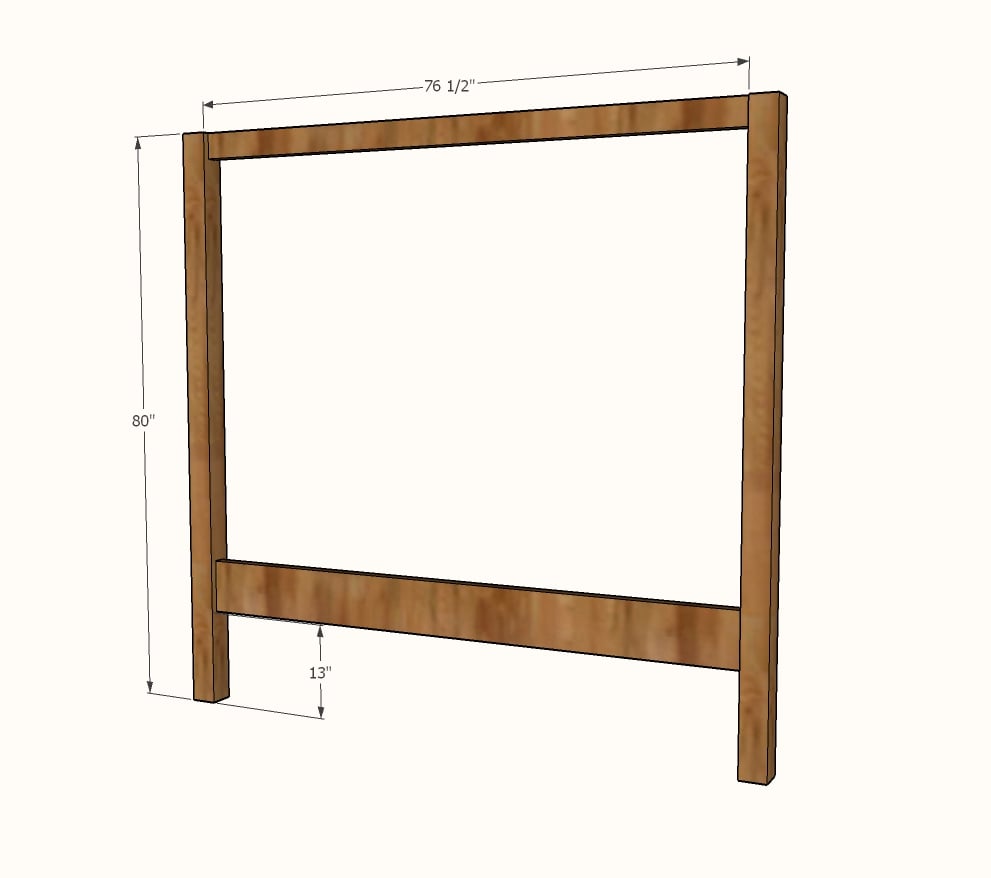
2. Assemble the footboard, using the same method as the headboard, but using only one 2x8 board, placed at 13" high on the 4x4 posts.
Step 3

Build the bed frame out of the 2x4s.
You can use pocket holes to assemble.
Sand and finish the headboard, footboard, and the 2x8 siderails.
You do not need to finish the 2x4 supports and 2x8 slats (if using).
Step 4
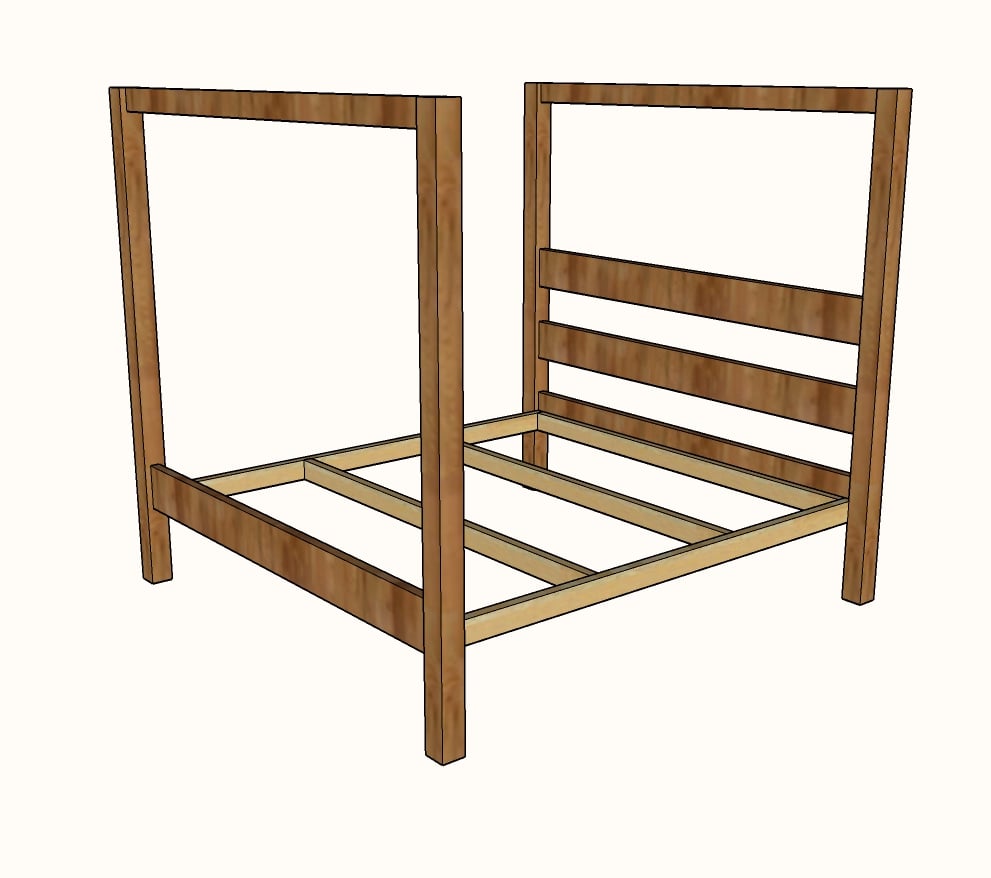
Bring the pieces in the room.
Screw the bed frame to the headboard and footboards with 2-1/2" screws (you can use pocket hole screws, or buy other wood screws)
The bottom of the 2x4s should be flush with the bottom of the 2x8s.
Also screw at an angle into the 4x4 posts.
Step 5
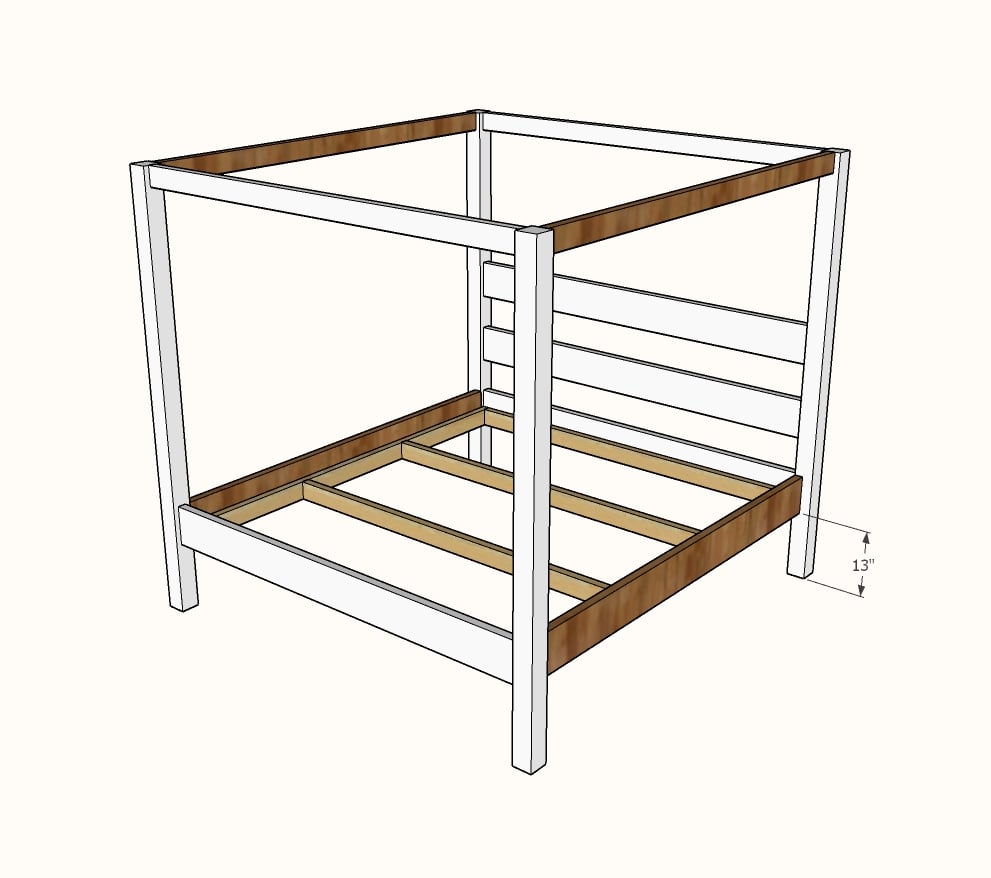
Use pocket holes to attach the top 2x4.
Attach 2x8 siderail to the 4x4 leg at the top with a pocket hole.
Also screw from inside the 2x4 into the back of the 2x8 siderail with 2-1/2" screws.
Step 6
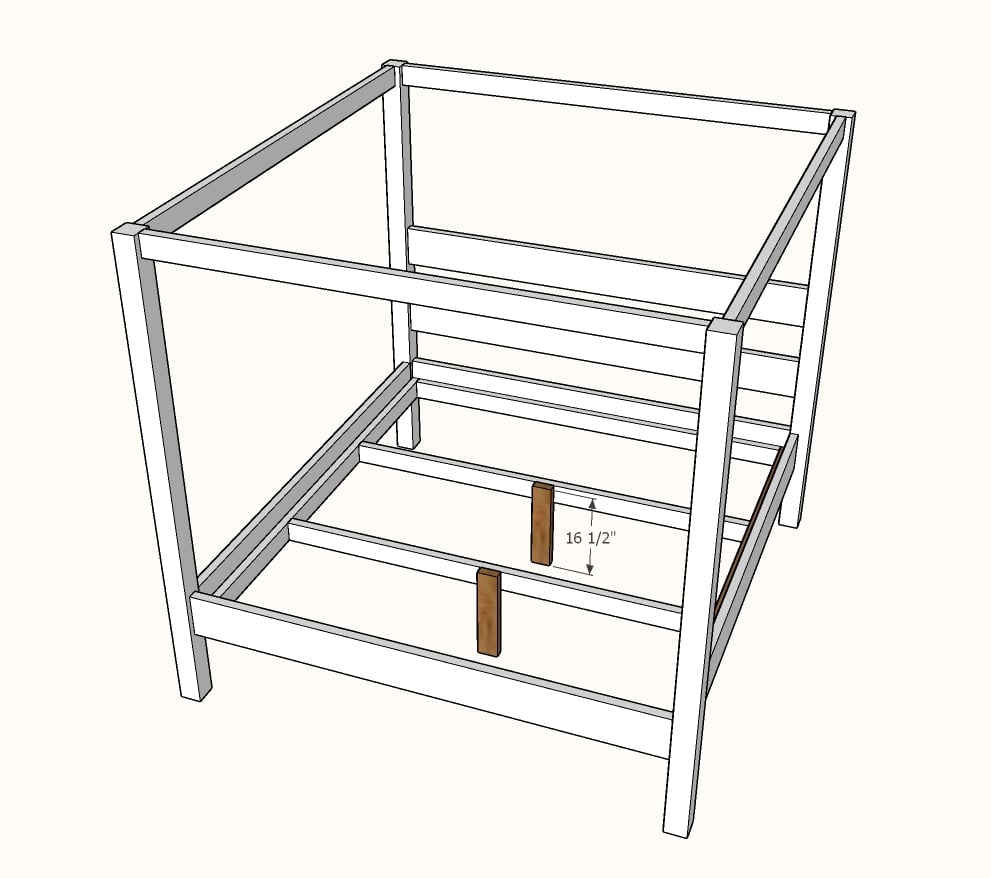
Attach center legs to the 2x4 supports to support the center of the bed.
Step 7

Lay the 1x8 or 2x8 slats inside the bed and screw down.
It is always recommended to apply a test coat on a hidden area or scrap piece to ensure color evenness and adhesion. Use primer or wood conditioner as needed.


Comments
serhatakiska
Sun, 08/16/2015 - 11:06
detailed plans?
this is a simple yet an elegant design and I would like to build it for my daughter and son-in-law. As I am an entusiastic beginner, I was wondering if you have detailed plans. I would like to see how the side rails, head and foot rails connected to the posts. What kind of wood did you use?
Thank you in advance,
Serhat
Gesette
Tue, 10/27/2015 - 08:37
Detailed Plans II
Can we please see how you build this bed just like all your plans? I only use your plans when i build. I love your projects and the ease of building them.
Ana White Admin
Tue, 10/27/2015 - 11:56
Existing plan
Here is an existing plan that may help!
http://ana-white.com/2014/07/plans/saving-alaska-farmhouse-canopy-bed
mablemouse
Mon, 01/02/2017 - 16:30
I love this plan! But was
I love this plan! But was wondering, we will be moving a lot due to my husband's job and wondered if there is a way to help make this "movable"? Easier to be taken apart and put back together, I mean.
jheriwhit
Sun, 01/24/2021 - 10:39
I was wondering the same…
I was wondering the same thing...
Butderf1ies
Sat, 07/23/2022 - 19:35
Queen plans
What size would I cut the headboard, footboard and side rails to fit a queen size mattress?