


Easy to make modern floating shelf out of 1x3s and 1/4" plywood. Customize to any length!


Happy Weekend!!!
Are you tackling any projects this weekend? Here's a project that I made last weekend -
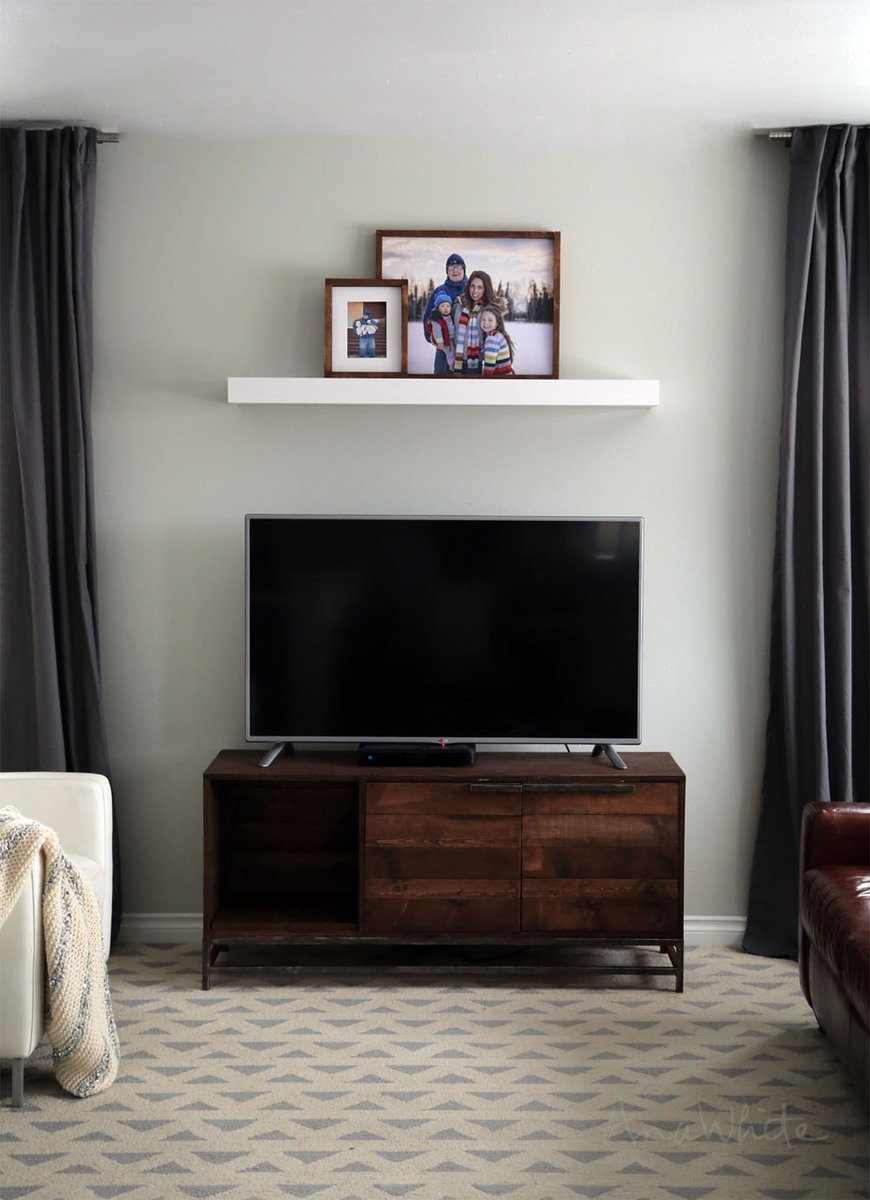
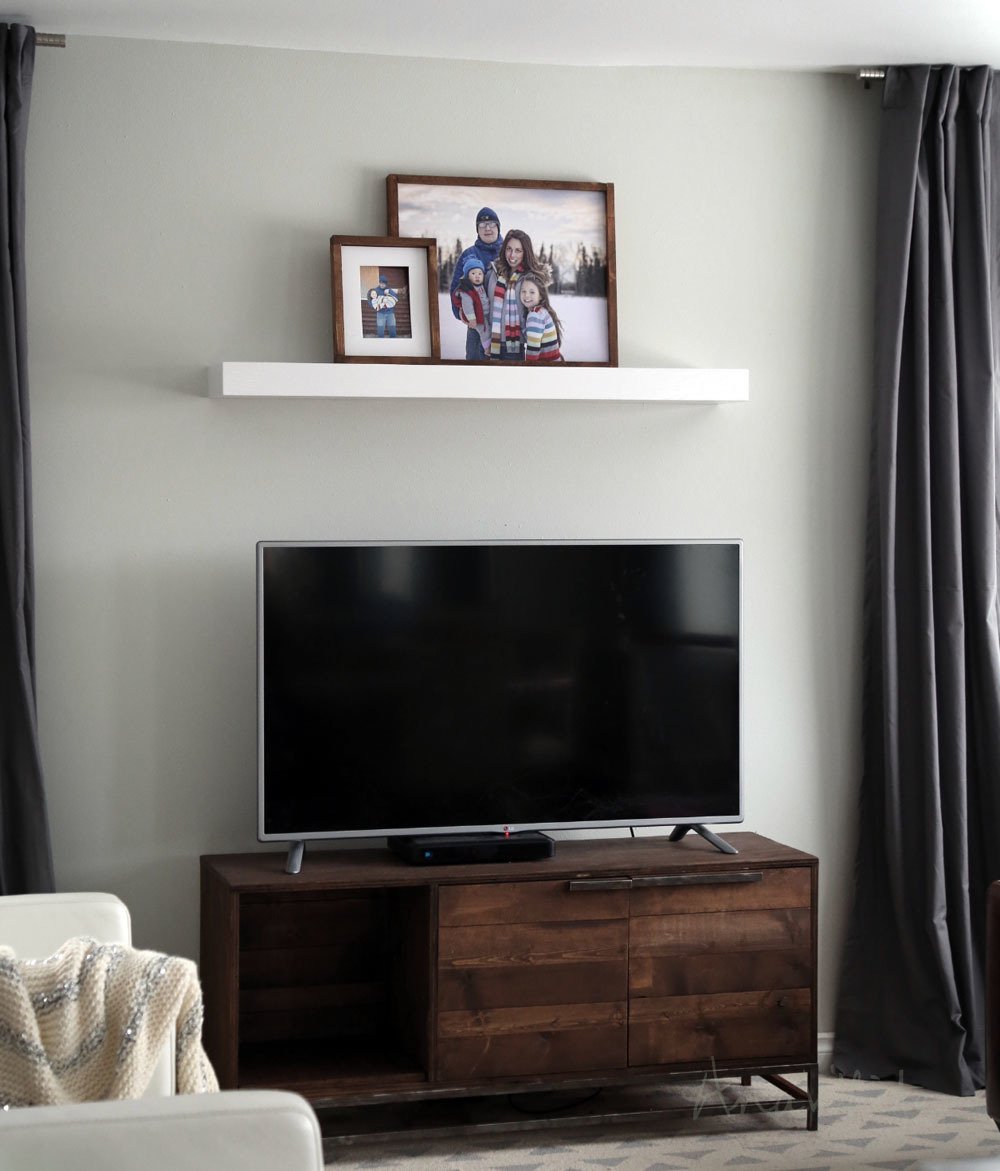
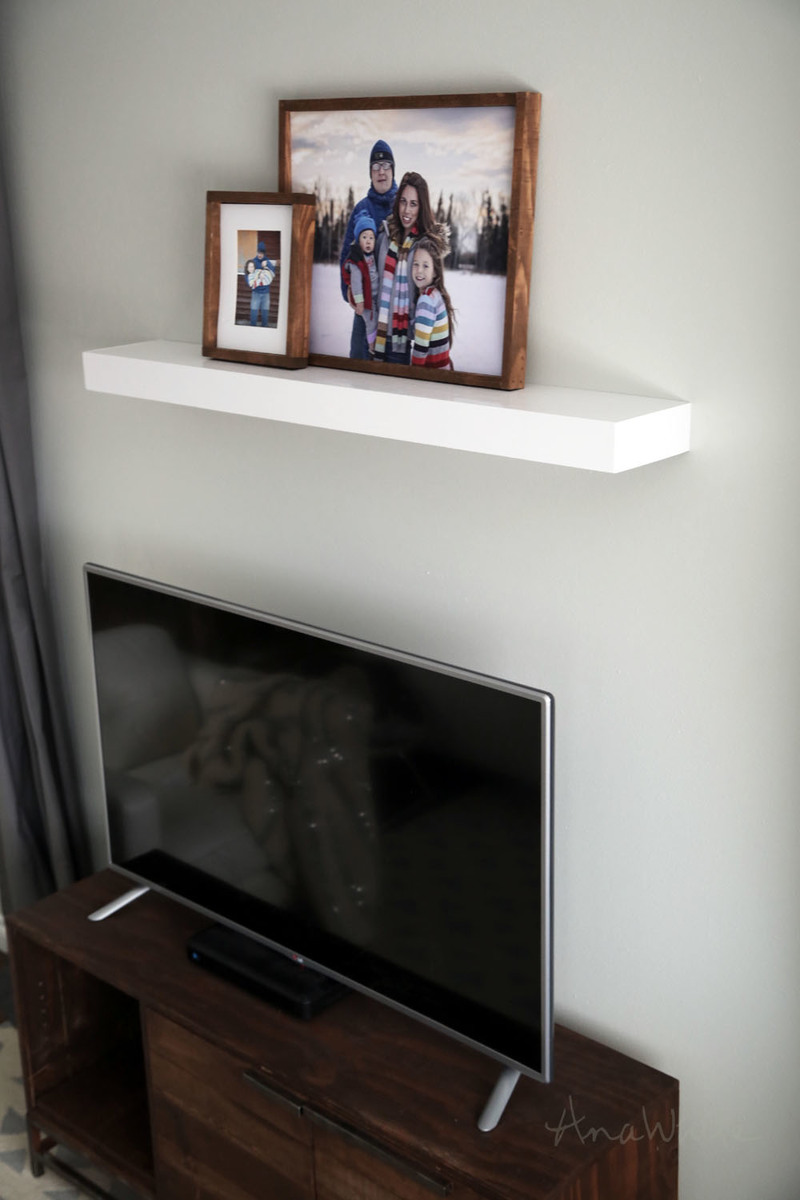
A floating shelf for over the TV! I got tired of looking at the blank void begging to be decorated over the TV and decided to make a shelf over the TV.
I decided on a floating shelf because of the modern lines in the media cabinet (I promsie I'll get you those plans real soon) and the modern vibe of this living room.
That, and I wanted to make a secret storage spot (that's now not so secret as of seven words ago).
I built this shelf out of a 24" x 48" 1/4" thick project panel (MDF is about $6) and 2 - 1x3 boards (about $1.50 each) - so with a couple of screws and nails, about $10 to make. Here's how I built this floating shelf -

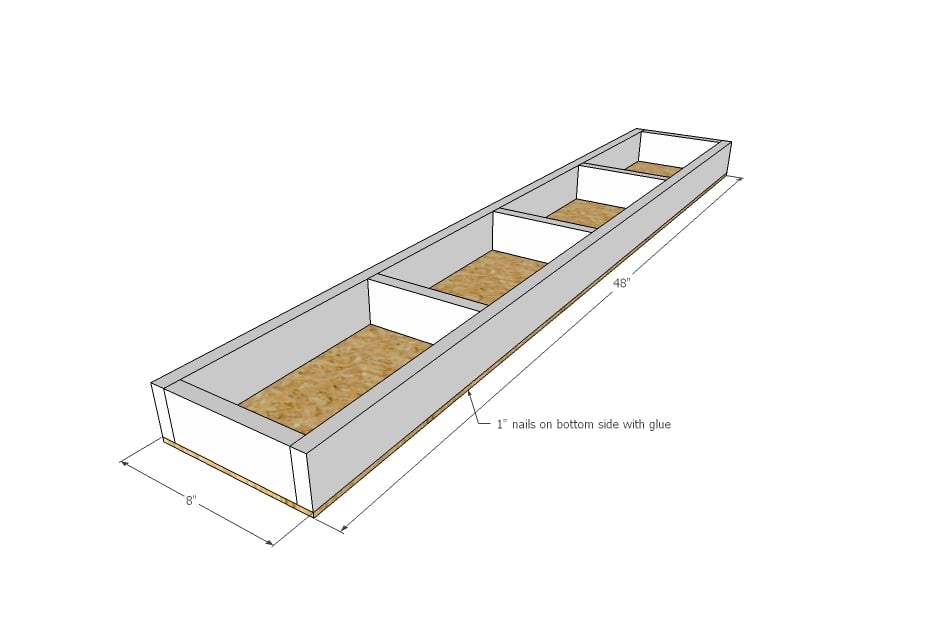
I cut all my 1x3 boards (see cut list in plan below)
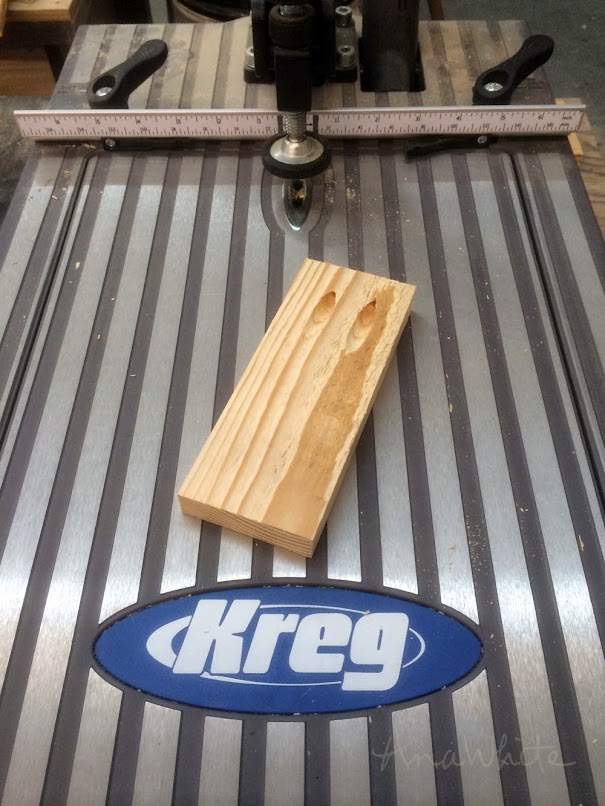
Then I drilled 3/4" pocket holes on one end of all the shorter 1x3 boards. I recommend pocket holes for this joint because it is the main structure for this shelf. You can use any Kreg Jig for this.

Then I attached the shorter 1x3s to one of the longer 1x3s. TIP: On the outsides, place pocket holes on outsides - it's stronger this way.

The reason I didn't do pocket holes on both sides is because you won't be able to fit a standard drill in there to add the screws. So on the second side, just attach with 1-1/4" or longer finish nails and glue.
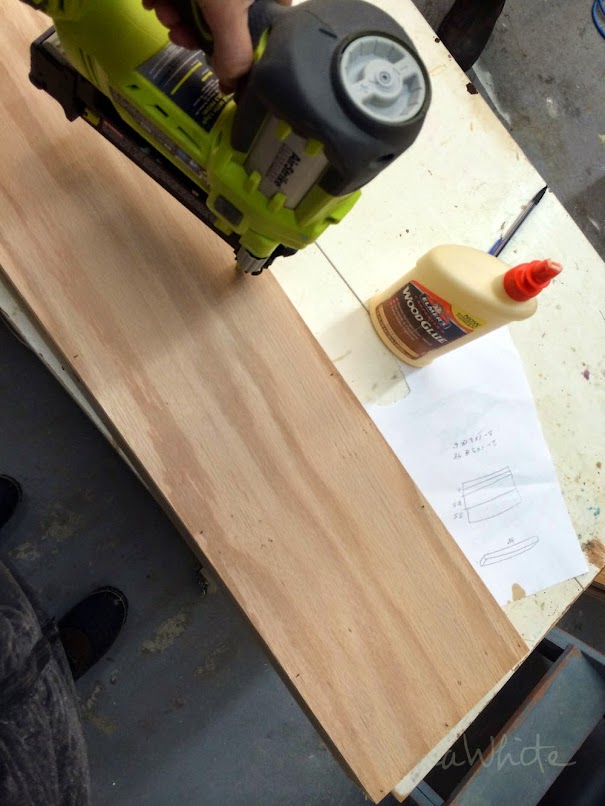
Now attach plywood to one side of the shelf, with glue and 1" long finish nails. DO NOT attach the second side just yet.

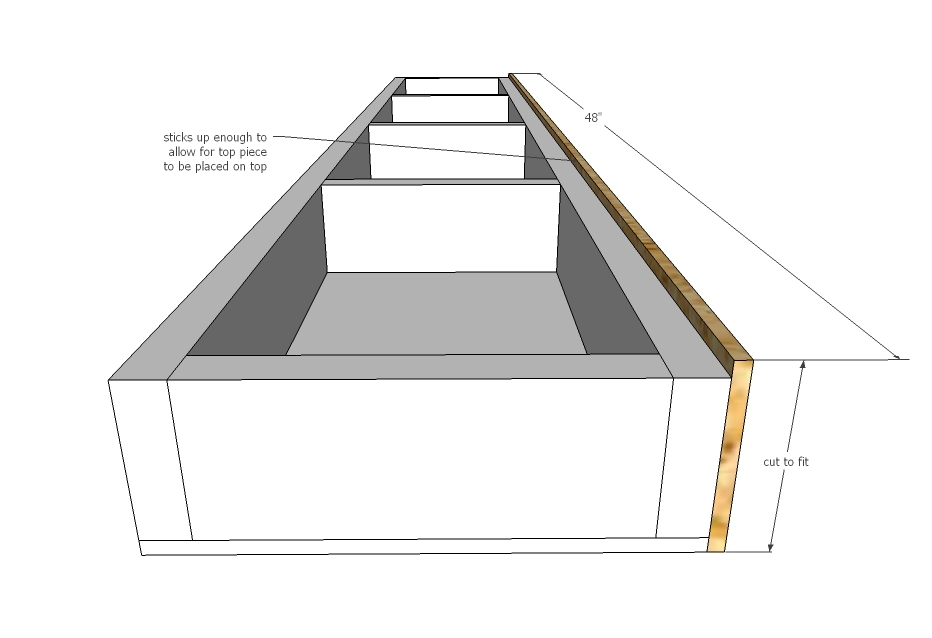
Measure the thickness of the completed shelf (with one side nailed on and one side clamped on). Cut with a table saw or circular saw (use a guide or Kreg Rip Cut here) two strips of 1/4" thick plywood to this width (for me this ended up being 2-3/4")

Nail the plywood strips around the sides and front. Notice the 1/4" overhang on the bottom in this photo - that's for placing the top plywood on after we attach it to the wall.
Now it's time to finish this baby!

A little wood filler in those nail holes ..
 Followed by quite a bit of sanding. For modern furniture, that clean crisp sharp edge is a must, so roll up your sleeves and put in the elbow grease here.

Then I painted the shelf and the remaining plywood piece seperately using a semi-gloss paint.
After it dried, time to hang!
We found and marked the wall studs,
 Drilled directly through the back inside of the shelf into the wall studs. Make sure you attach the shelf so the pocket hole joint is screwed to the wall.

After a quick adjustment for level -
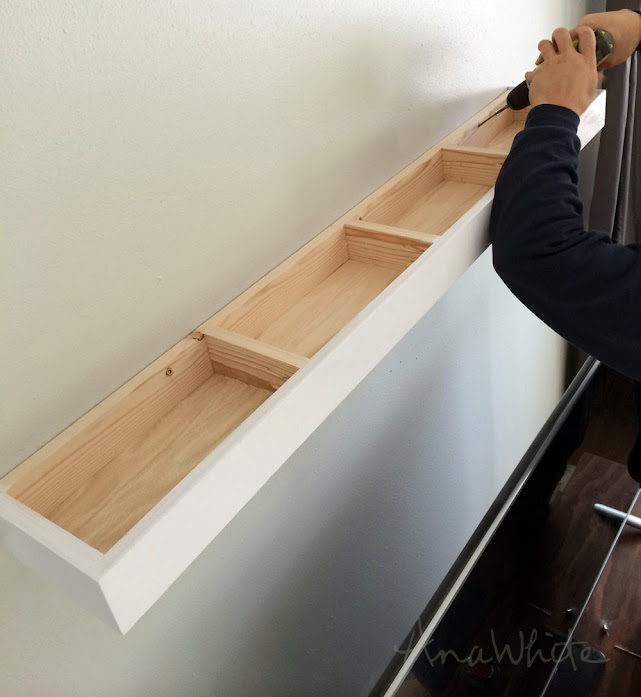
We added more screws to more studs in the wall. Do two screws per stud, stacked vertically.
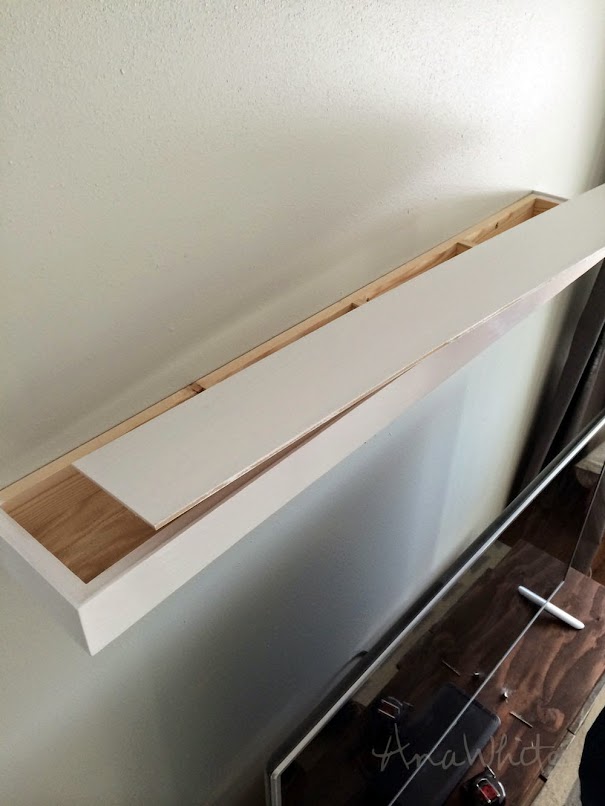
No need to attach the top plywood piece - just set it in place.

Perfect! And if you ever wanted to hide something - that might just be the place! Or if you want to know where I hid something, it's probably there.
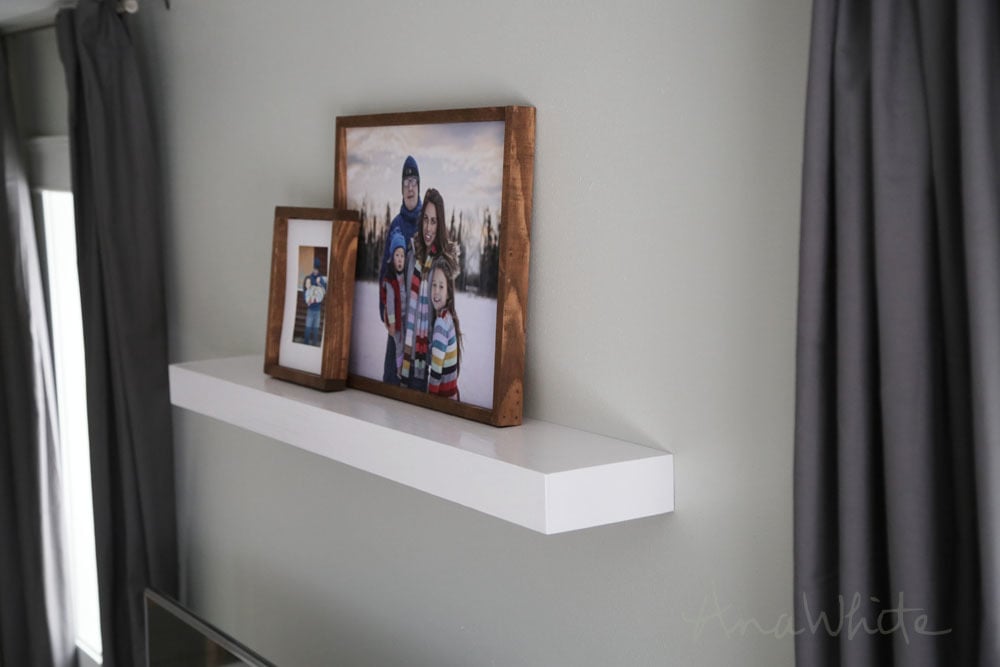
I stole a few pictures from my gallery wall (small frame plans here and large frame video tutorial here) to finish this modern floating shelf over my tv off.

Hope you love it as much as we do!
Of course the plans follow (click READ MORE below if this is the home page). If you build, please share - we can't wait to see how yours turns out too!
Have a awesome weekend!
XO Ana

Preparation
1 - 1/4" thick 24" x 48" project panel
2 - 1x3 @ 8 feet long
Long wood screws for hanging (at least 2-1/2")
2 - 1x3 @ 48"
5 - 1x3 @ 6-1/2"
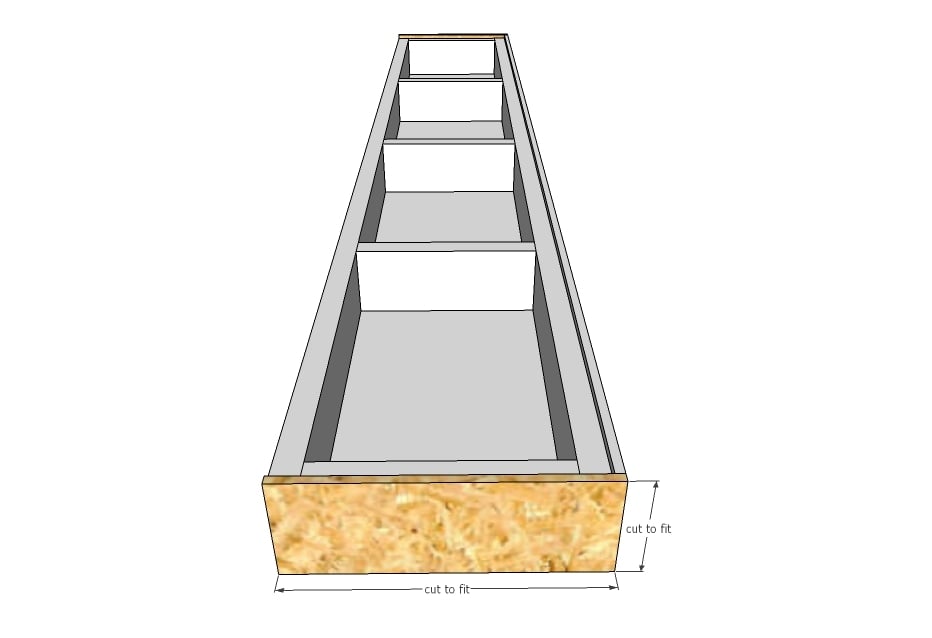
2 - 1/4" plywood @ 48" x 8" (cut to fit)
1 - 1/4" plywood @ 48" x 3" (cut to fit)
2 - 1/4" plywood @ 8-1/4" x 3" (cut to fit)


Please read through the entire plan and all comments before beginning this project. It is also advisable to review the Getting Started Section. Take all necessary precautions to build safely and smartly. Work on a clean level surface, free of imperfections or debris. Always use straight boards. Check for square after each step. Always predrill holes before attaching with screws. Use glue with finish nails for a stronger hold. Wipe excess glue off bare wood for stained projects, as dried glue will not take stain. Be safe, have fun, and ask for help if you need it. Good luck!
Instructions
Step 1

Build the basic frame for the shelf.
Step 2
Attach 1/4" plywood or MDF to the bottom of the shelf with 3/4" finish nails and glue (can use 1" nails too).
Step 3
Cut to fit the plywood strips for the sides. Attach front plywood strip with 3/4" nails and glue.
Step 4
Attach side plywood pieces.
Step 5

It is always recommended to apply a test coat on a hidden area or scrap piece to ensure color evenness and adhesion. Use primer or wood conditioner as needed.

Comments
jrbamberg
Mon, 03/09/2015 - 08:56
Looks great
This is a great project. I like the tv stand below the shelf too... do you have a plan for that as well?
Ana White Admin
Tue, 03/10/2015 - 12:36
Stand
Media stand plan to come!
Pam the Goatherd
Mon, 03/09/2015 - 13:39
Can't wait to see the plans
Can't wait to see the plans for the media console. I've been wanting to build that. I've been following your blog for long enough now that I think I could probably do it without plans, but it would be nice to have plans all laid out so I don't have to wing it on my own.
I plan to use some of the metallic spray paint to do the support frame underneath and paint the body of the console white to make it really pop.
rainbow_warrior
Mon, 03/09/2015 - 23:34
weight?
What weight do you think this could take? like strong enough for a large tv?!
Ana White Admin
Tue, 03/10/2015 - 13:02
Concerning weight load
The weight of this shelf would depend on how it is attached to the wall. To make the shelf stronger, go with a wider width board (2x4s for the internal framing). Another option would be to hang the tv on the wall immediately above the shelf.
Phillip G
Mon, 03/16/2015 - 12:26
Hidden Safe in Plain Sight
This 'shelf' is a brilliant the idea for the ultimate hiding place!
Analisa Shawver
Tue, 07/21/2015 - 15:45
How deep?
I want to build these shelves in my bathroom but I want them to be about 14 inches deep. Would this be too deep?
milleall
Thu, 10/15/2015 - 08:15
Ready to share the media stand plans yet?
A new tv stand will be one of my next projects. I've been thinking about the http://ana-white.com/2013/10/plans/emersen-consle-or-buffet but I'm not yet convinced. I've been hoping you would share the plans for the stand pictured in this post as well as some others. I'm also curious about the finish you ended up using (seems like it was pictured with a lighter finish earlier on)
MarionH
Sat, 01/09/2016 - 05:01
thickness
could you use 1x2's instead of 1x3's? I prefer a shelf not as thick - I plan to do these in a kitchen and will put some dishes and decorative ceramics on them.