
DIY bookrack plans by ana-white.com
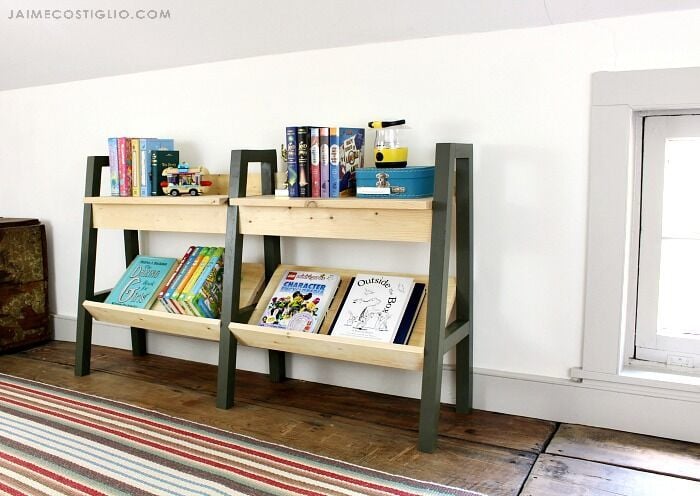
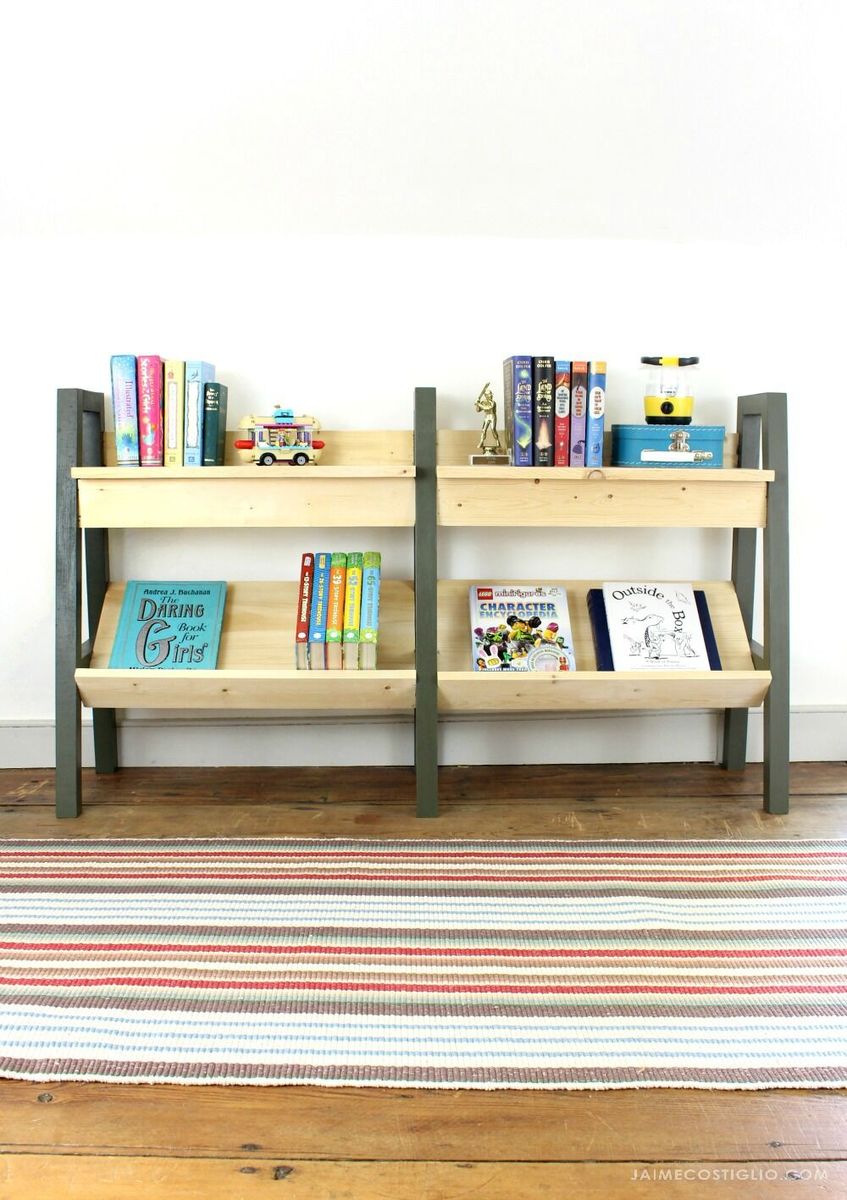
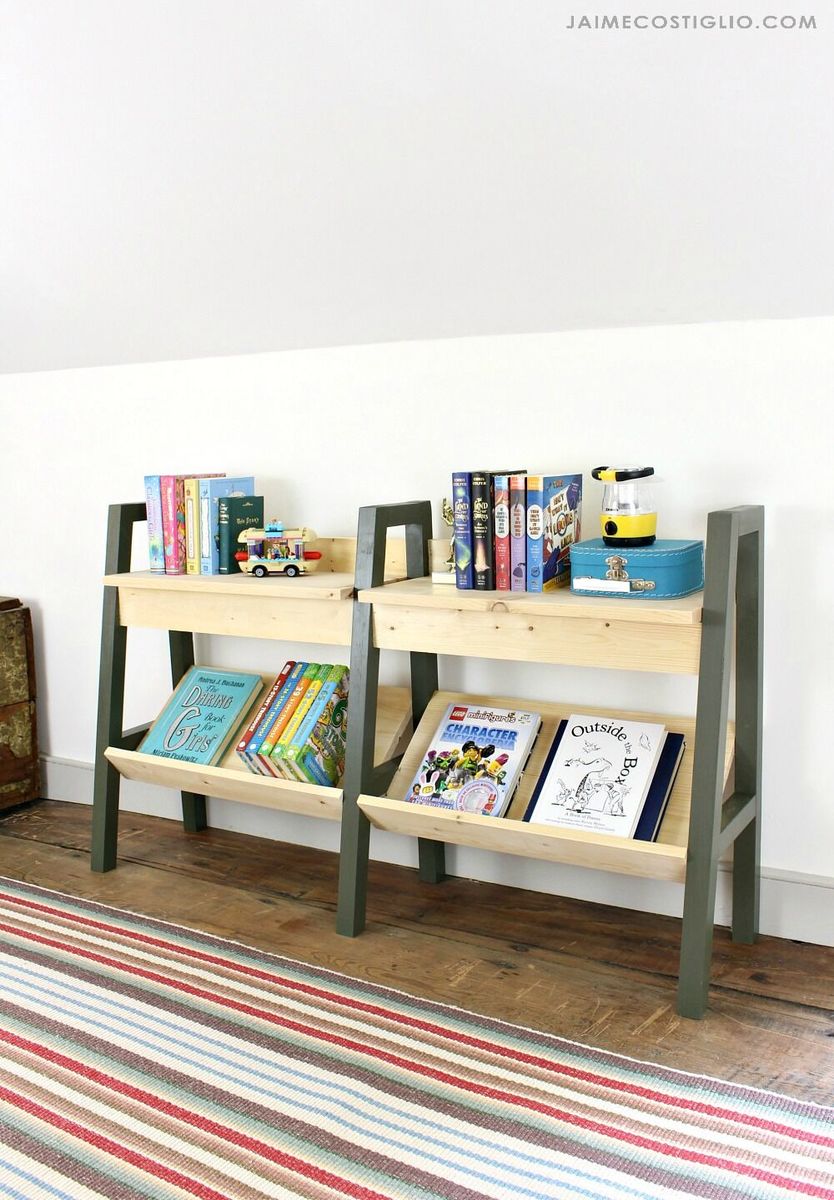
Want to add a farmhouse style modern bookrack to your child's room or nursery? This modern style bookrack is stylish and functional at the same time.
As part of Handbuilt Holiday - a weekly series put on by Jaime Costiglio and myself to bring you a new free gift plan every Friday in the weeks leading up to Christmas -

We are excited to share brand new plans with you today!


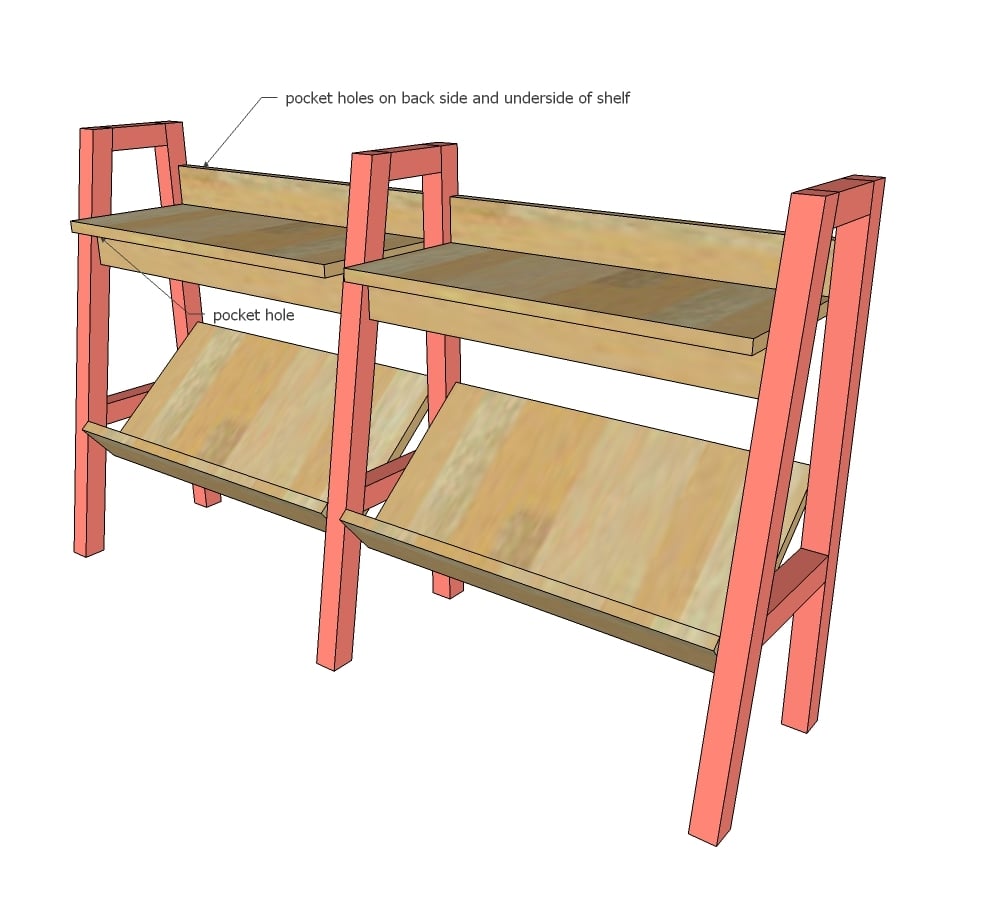
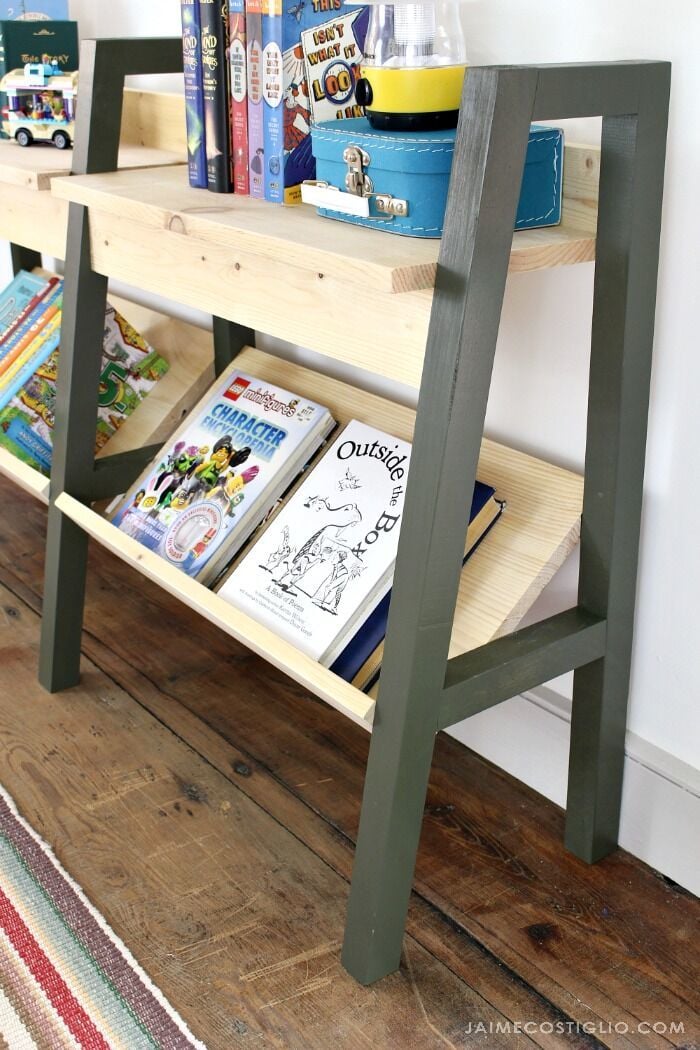
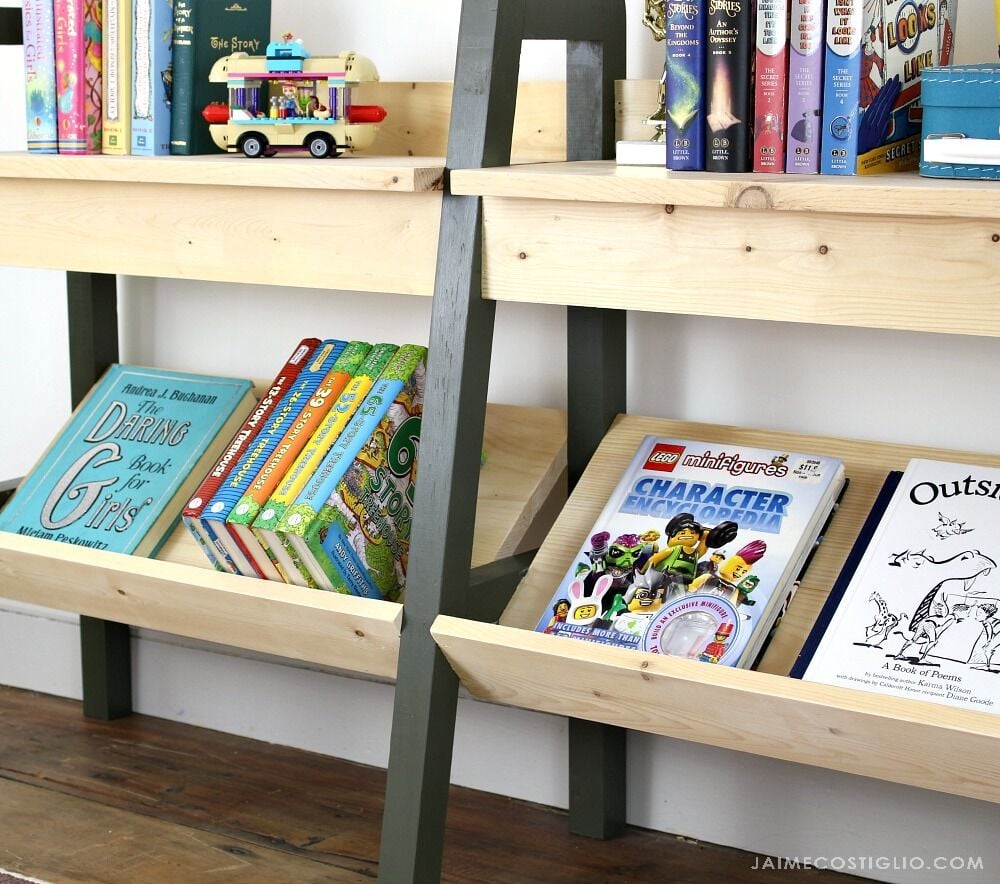
This modern bookrack features an angled bottom shelf and a smaller top shelf - perfect for displaying the most favorite books and toys.
The free plans follow - do grab them - but first, take a second to check out Jaime Costiglio's build post with lots more photos and tips and tricks to help you on your build.
Enjoy and please share when done, we love seeing your finished projects!
XO Ana + Friends
CLICK HERE FOR MORE PHOTOS AND TIPS FROM JAIME COSTIGLIO
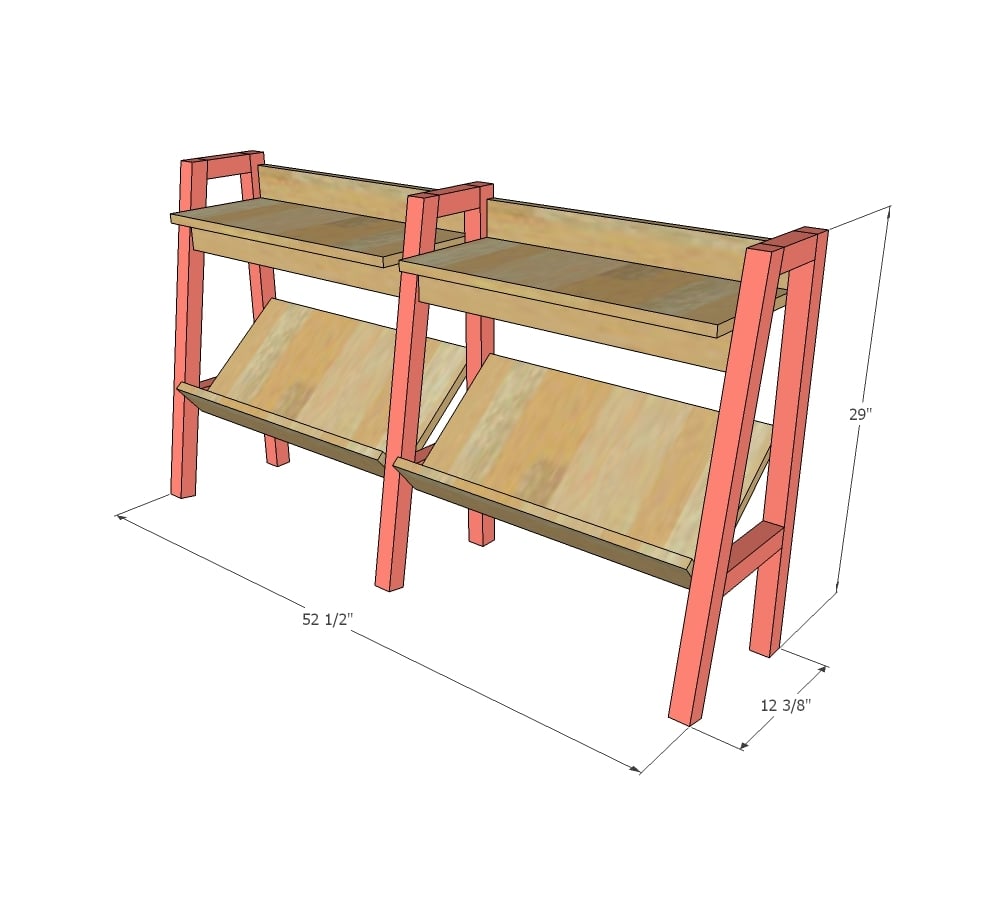
Preparation
3 - 2x2 @ 8 feet long
1 - 1x10 @ 4 feet long
1 - 1x12 @ 4 feet long
1 - 1x4 @ 12 feet lont
3 - 2x2 @ 30"
3 - 2x2 @ 30-1/2" - both ends cut parallel at 10 degrees off square, long point to short point measurment
3 - 2x2 @ 4-5/8" - one end cut at 10 degrees off square, longest point measurement
3 - 2x2 @ 8" - one end cut at 10 degrees off square, longest point measurement
2 - 1x10 @ 24"
2 - 1x12 @ 24"
6 - 1x4 @ 24"


Instructions
Step 1
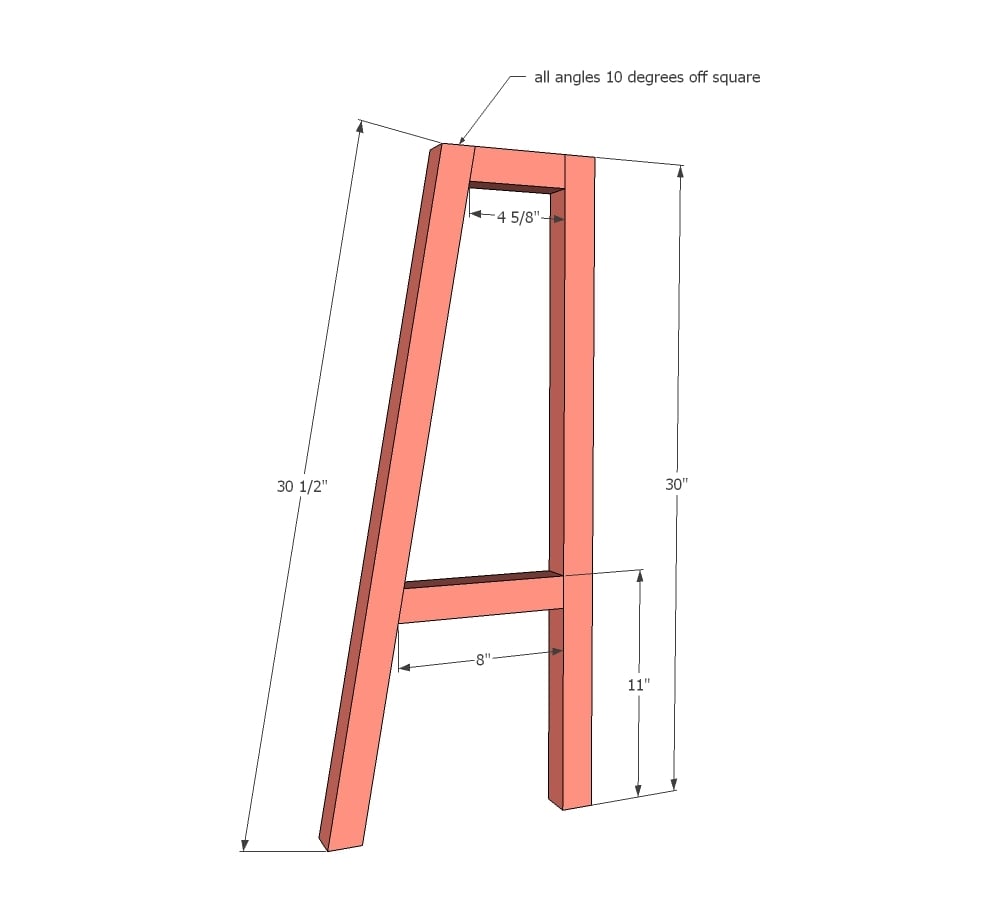
Build three of the leg sets. On the bottom horizontal piece, it may be easier to place pocket holes on sides instead of top/bottom if you don't have a right angle drill.
If you want to finish your legs different than the rest of the piece, paint or stain the legs now - it will be much more difficult after further assembly.
Step 2
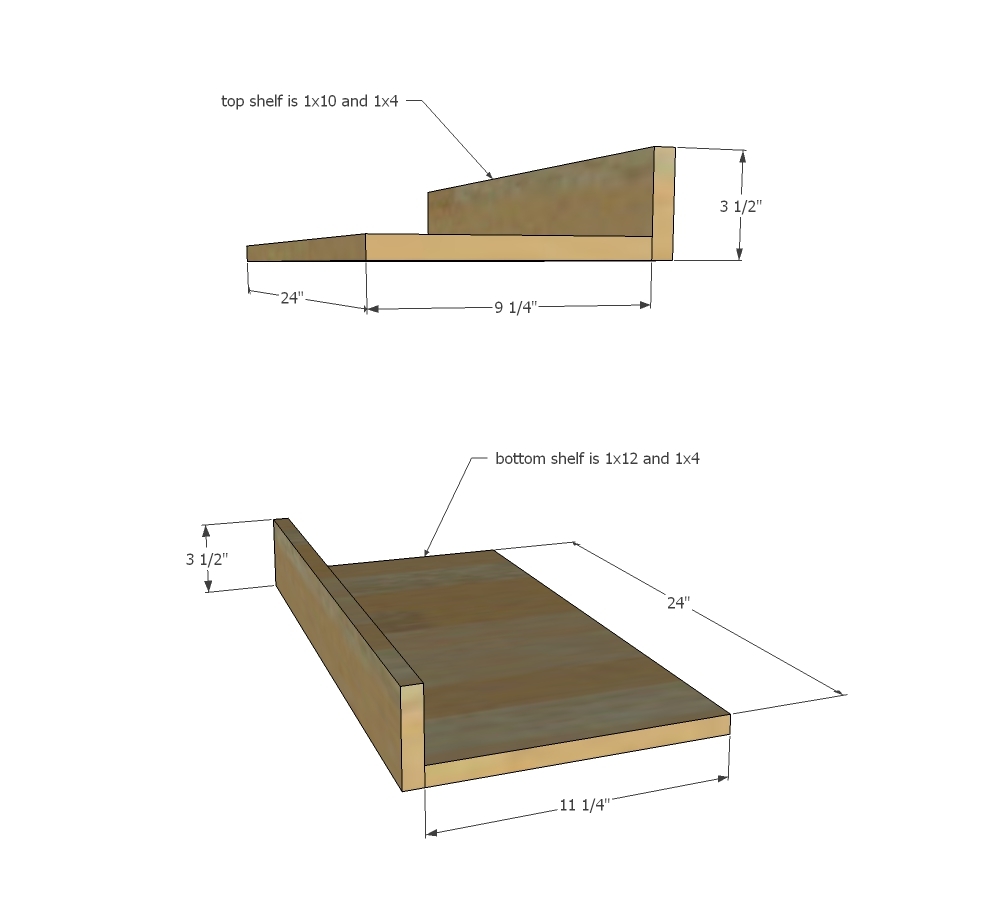
Build the four shelves as shown above.
Step 3

Attach aprons between legs.
Step 4

Mark back legs at a 45 degree angle and attach bottom shelf inside.
Step 5