
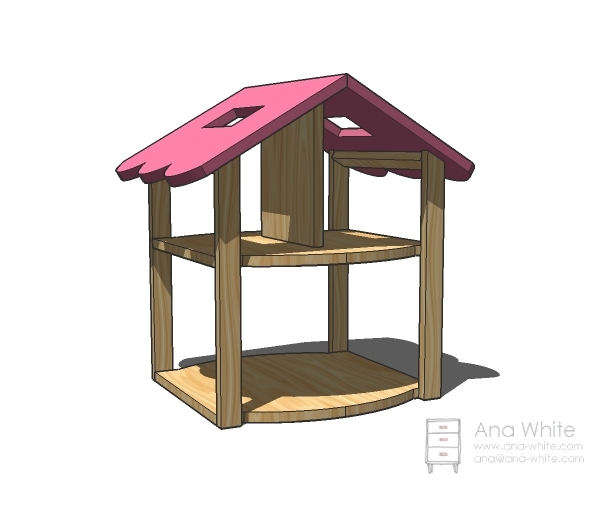

Delight your children with this modern dollhouse! Customize to suit your child's needs.

The dollhouse has grown up.
I'm not saying I don't still love traditional dollhouses with their detailed wallpaper and shutters. But a simple, fully accessible dollhouse like this one might be the toy for your smaller child or children - and I say children, because I can just imagine this dollhouse on a playtable surrounded by little ones.
This dollhouse is not suitable for Barbies and fashion dolls. More for wood dolls and figures, around 6" in height.
Preparation
1 – 72″ Long 18″ wide Pine Project Panel (Try both Blue and Orange, they carry different sizes)
1 – 1×2
1 – 1×10 scrap 12″ long
2 – Project Panel Pieces @ 18″ x 18″ (Floors)
4 – 1×2 @ 19″ (Legs, top end cut at 30 degrees off square)
2 – 1×2 @ 14″ (Eaves)
1 – 1×10 @ 11 1/4″ (Second Story Wall)
2 – Project Panel Pieces @ 18″ x 14″ (Roof)
Instructions
Step 1
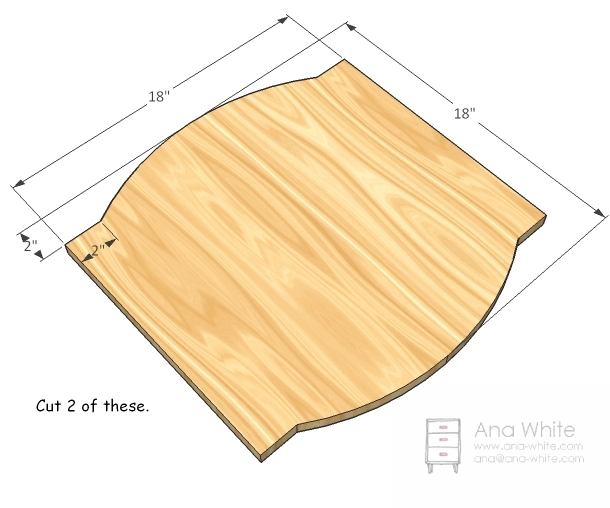
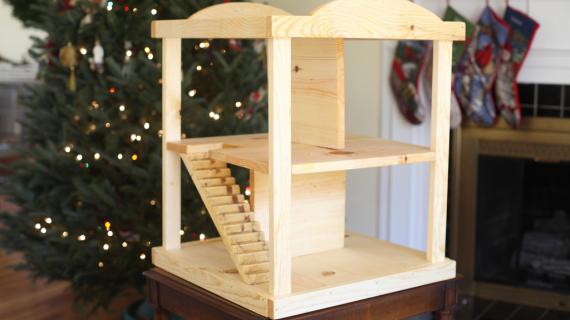
Floors
Cut the floors with a jigsaw as shown above. Sand the edges well at this stage – will be much easier than when assembled!
Step 2
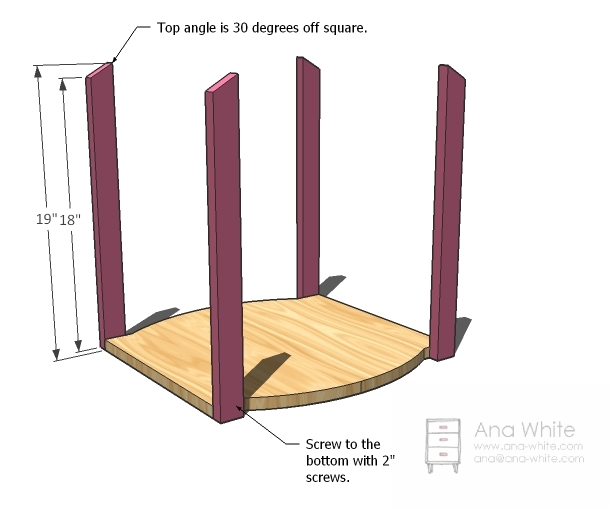
Legs
Attach the legs to one of the floors as shown above. Use glue for a permanent bond, and two screws per leg. Predrill and countersink your screw holes.
Step 3
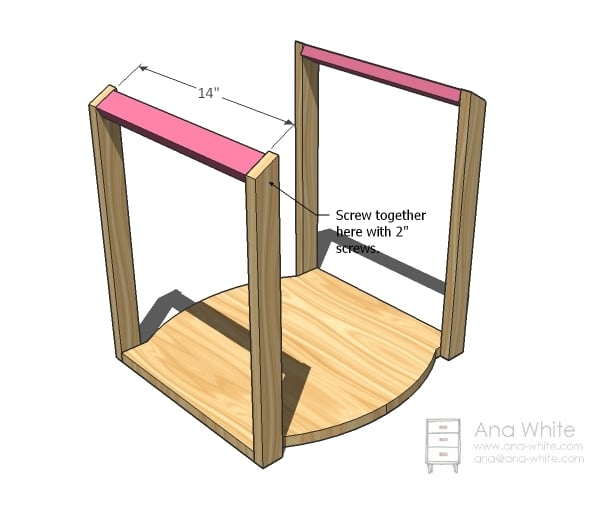
Eaves
Attach the tops of the legs to the eaves as shown above with 2″ screws and glue.
Step 4
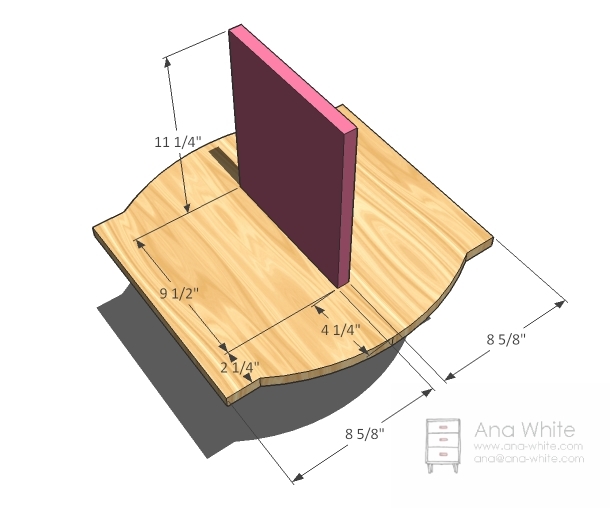
Second Story
Screw the 1×10 center wall to the remaining floor as shown above. Use 2″ screw and glue. Screw from the underside.
Step 5
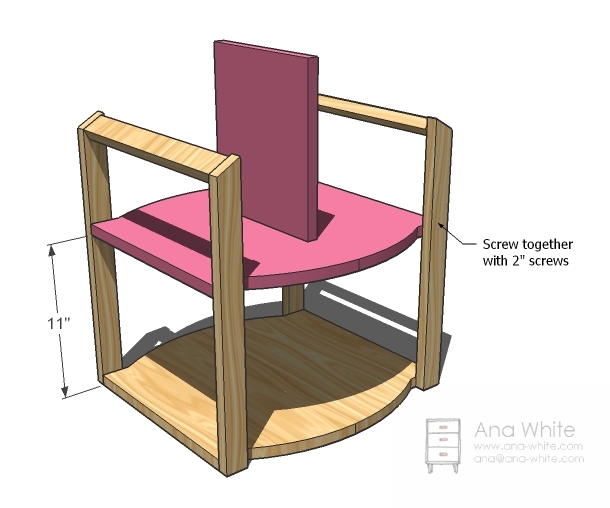
Step 6
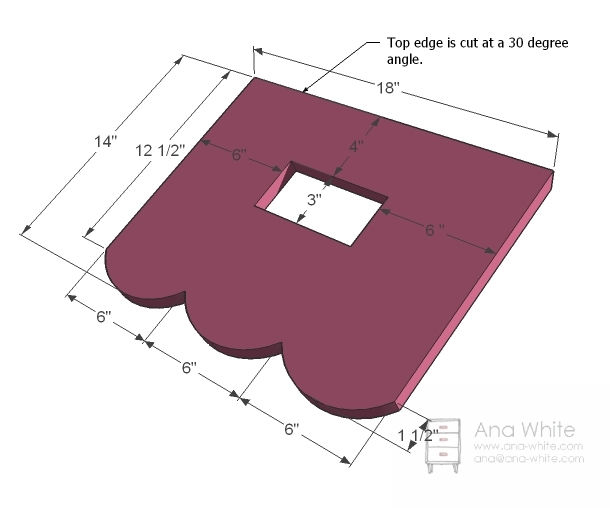
Roof
Cut the roof boards out as shown above. To get the angle on the top, adjust either your circular saw, jigsaw or tablesaw to a 30 degree angle and cut edge. Use a jigsaw to cut out the scallops and the skylights.
Step 7
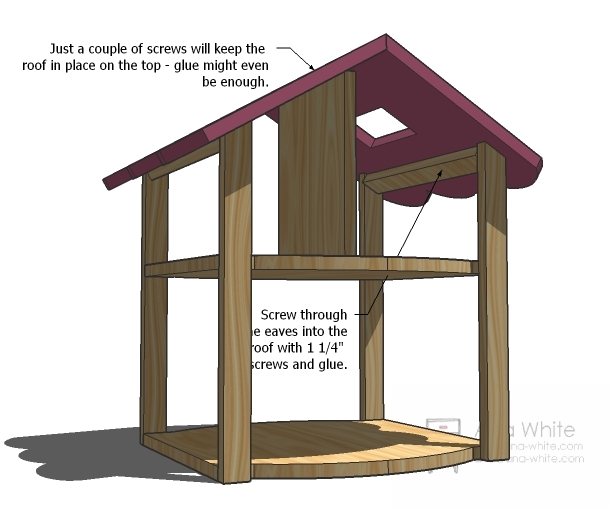
Roof
Attach the roof with 1 1/4″ screws and glue.

Comments
Loni (not verified)
Sun, 09/26/2010 - 05:47
To Cute! I think my
To Cute! I think my step-daughter and neice would love this! Thanks so much!
tamiknits (not verified)
Sun, 09/26/2010 - 06:00
Oh! I have been looking for a
Oh! I have been looking for a dollhouse just like this, but, of course, they were all VERY expensive! Thanks for posting these plans, I have a sudden NEED to go to Blue:)
Dolores Wilkes (not verified)
Mon, 09/27/2010 - 12:19
Ana - Thank you for this
Ana - Thank you for this plan. I'm going to make it for my granddaughter.
I was going over all of it step by step in my head while looking at the measurements - is there a mistake on the dimensions of the second story wall? The cut list says 1 x 19 x 11.25. Should that be 1 x 9.5 x 11.25?
GerlingGirl (not verified)
Tue, 09/28/2010 - 04:58
Ana, How hard would it be
Ana,
How hard would it be to add some ramps to this and turn it into a two-story car port for a little boy? My daughters will love the dollhouse (I'm thinking Christmas present), but my little boy would rather something he can run his cars along. I thought with just ramps and a trim change this might work.
Ana White (not verified)
Tue, 09/28/2010 - 07:31
I really like that idea! I
I really like that idea! I plan to add a garage or fire house too.
Dolores Wilkes (not verified)
Tue, 09/28/2010 - 15:17
Ana - what are the dimensions
Ana - what are the dimensions of the second story wall? The cut list says 1 x 19 x 11.25. Should that be 1 x 9.5 x 11.25?
Dolores Wilkes (not verified)
Fri, 10/01/2010 - 12:43
Never mind - I see it has
Never mind - I see it has been changed. Thanks.
Stacy Krager (not verified)
Tue, 11/16/2010 - 03:54
How stinkin cute!! I'm
How stinkin cute!! I'm browsing your site this morning determined to find something to make for our 2 year old daughter for Christmas. This might just be it!
Chantelle (not verified)
Sat, 11/27/2010 - 08:04
Love it! Wouldn't it be easy
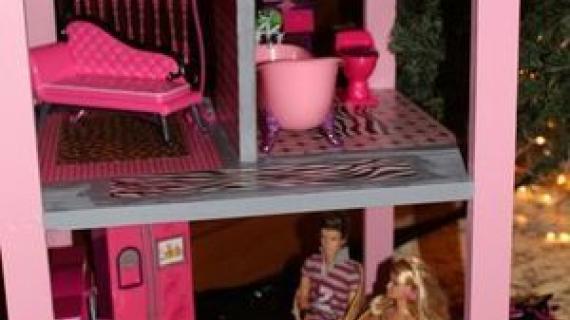
Love it! Wouldn't it be easy to make a little bigger to accommodate Barbies?
Brian (not verified)
Wed, 12/22/2010 - 05:18
2 comments - yes it is easy
2 comments - yes it is easy to up the height to accomodate Barbie style dolls, you'll just have to buy a longer 1x2, or use more than one. I upped it to 24" height and it's working ok.
Any Advice for cutting the rounds on the 2 floors and the scallops?
I'm finishing one right now as a Santa gift, and I'm close to scrapping those pieces and starting over. My jigsaw skills aren't the greatest, and coarse sandpaper is usually my friend, but I'd like it to be KIND of aesthetically pleasing if I'm giving it to my daugher...
THANKS ANA!
Chantelle (not verified)
Wed, 12/29/2010 - 05:15
Christmas was a hit! Our 8
Christmas was a hit! Our 8 year old LOVES her doll house!!! We made it a bit taller and wider so her Barbies fit perfectly. Thank you so much for the plans! (We also did the kitchen set... the kids are in heaven!)
woodchuck (not verified)
Sun, 01/02/2011 - 07:19
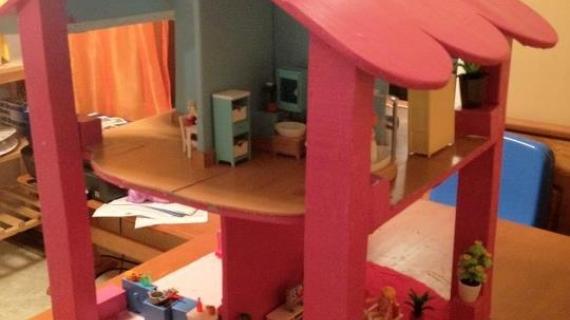
Thanks, Ana for the plans.
Thanks, Ana for the plans. Here is a photo of the dollhouse I made my granddaughter for Christmas. I added a wall downstairs and cut a door through both wall. I mounted it on a turntable and built a table for it to set on.

Melisa (not verified)
Tue, 02/22/2011 - 08:21
My husband and I made this
My husband and I made this dollhouse for our daughter and we were very pleased with the results. Is there any chance of a castle dollhouse in the near future?
Keri Beth (not verified)
Fri, 11/25/2011 - 20:35
Can I make this with pocket
Can I make this with pocket holes? If so, are there any modifications I should make? Thanks in advance! I plan to make this for my boys for Christmas.
Ginna (not verified)
Sun, 12/25/2011 - 13:46
Interested in Barbie furniture 12"
Hi! I would love to know if you have patterns for wooden furniture for 12" dolls or if you have any idea where i can purchase them so I can make my own? Any sugestions? this barbie doll house is awesome!!