Rectangle End Table with Shelf

rectangle end table for sofa with shelf
Difficulty
Beginner Projects
| Print this plan

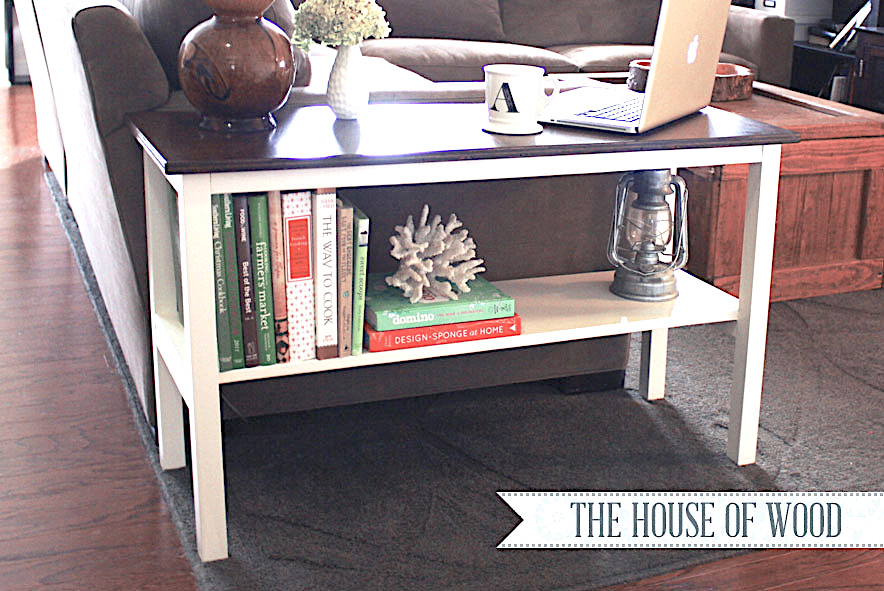
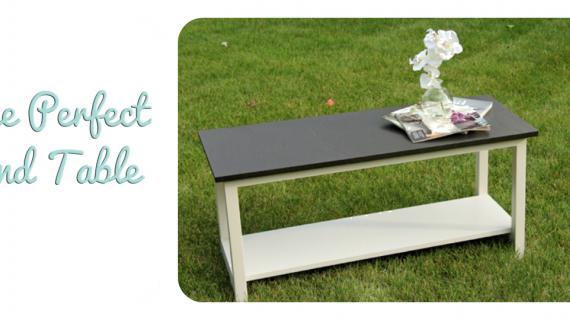
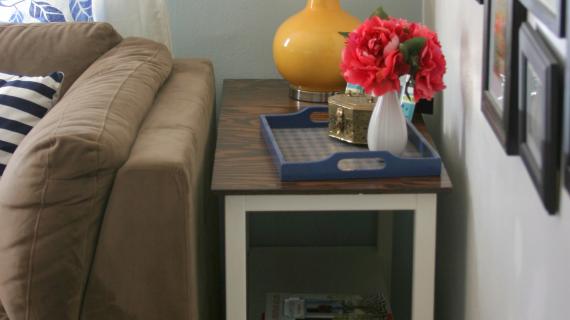
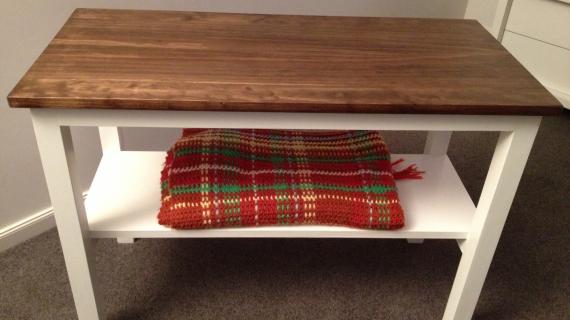
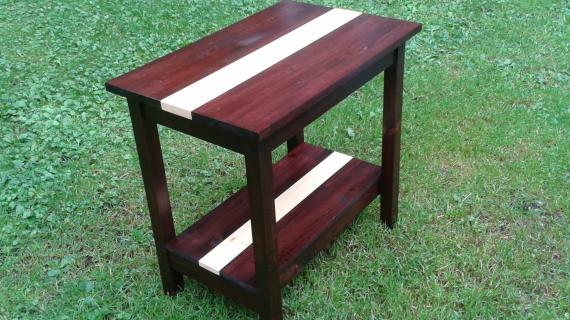
This rectangle shaped end table works on the end of a sofa or sectional.  With a roomy top and generous shelf, display and store everything you need in your living room.  Free step by step plans by Ana-White.com

it!!!!


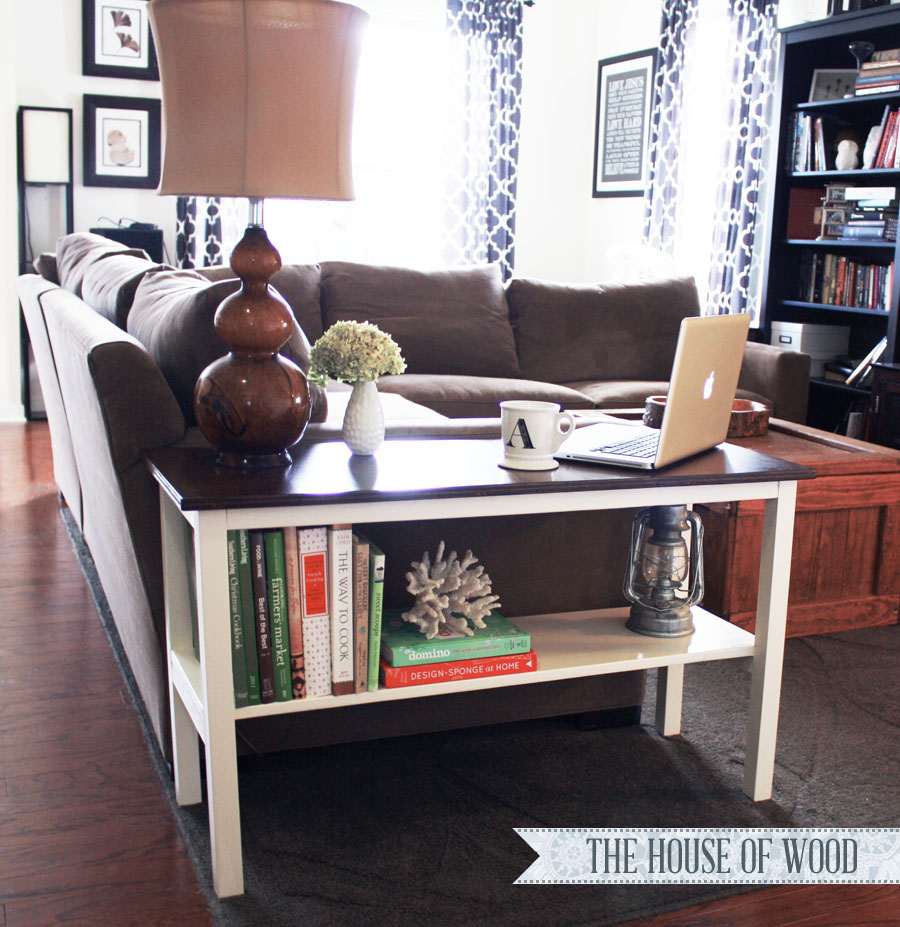
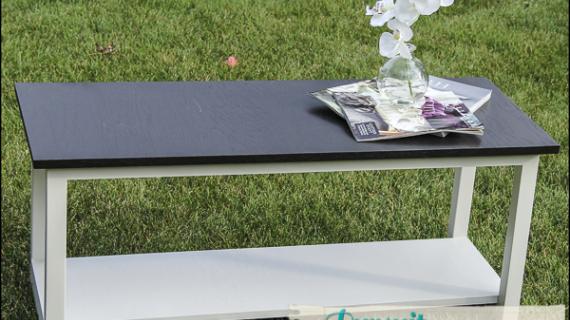
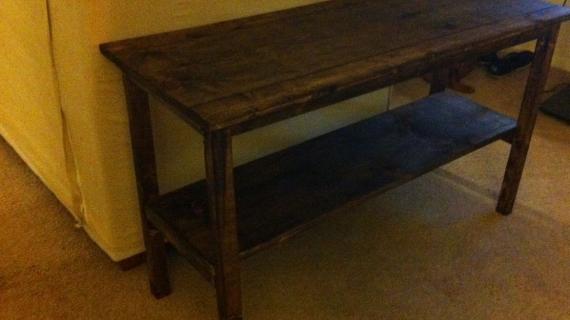
Built by Jen Woodhouse from House of Wood - please, take a second to stop over and visit Jen and see step by step how she built this end table. Thanks Jen!

Good luck building, have a great weekend!


Pin for Later! 

Rectangle End Table with Shelf

Dimensions
rectangle end table plans
Dimensions shown above.

Preparation

Shopping List

3 – 2x2 @ 8 feet long

1 – 1x12 @ 8 feet long

1 – 1x3 @ 8 feet long

1 ¼” and 2 ½” PH screws

1-1/4” brad nails or screws for attaching shelves
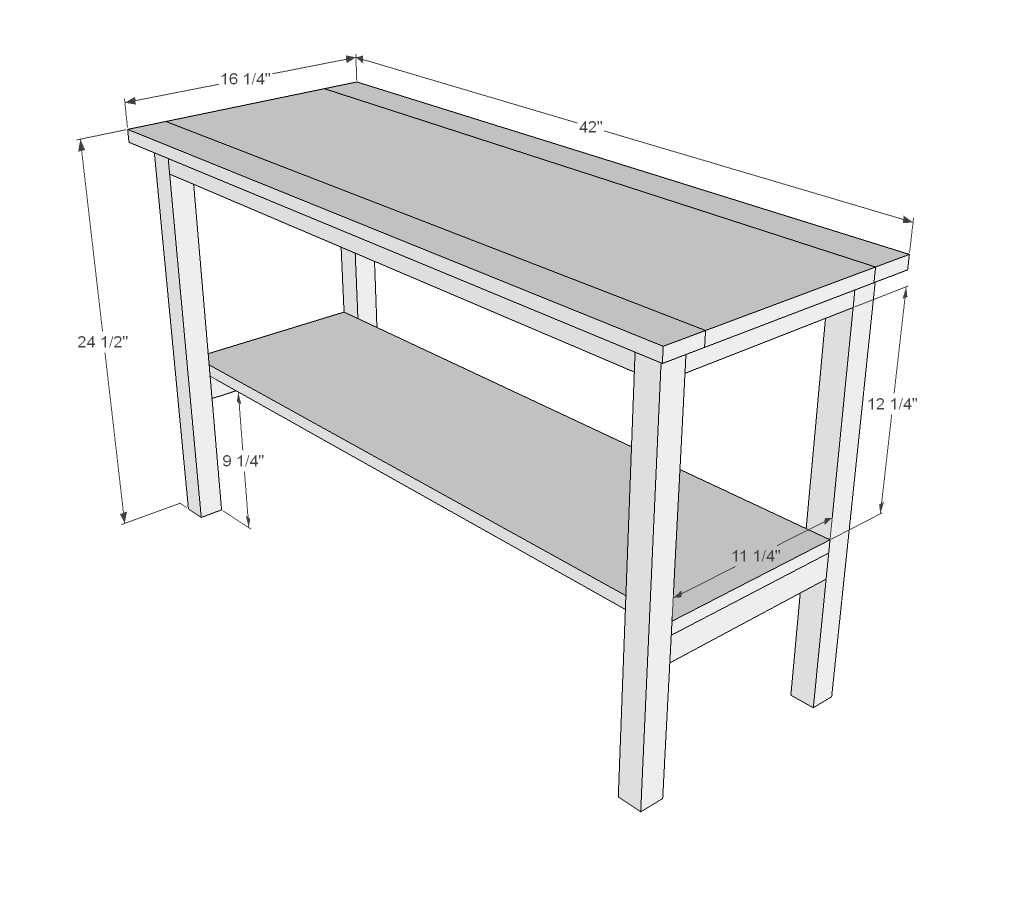
Cut List

4 – 2x2 @ 23 3/4"

4 – 2x2 @ 11 1/4" (cut these to the width of your 1x12, expected to be 11 1/4")

3 – 2x2 @ 37”

1 – 1x12 @ 40”

1 – 1x12 @ 42”

2 – 1x3 @ 42”

Tools
Tape Measure
Speed Square
Pencil
Safety Glasses
Hearing Protection
Kreg Jig
Drill
Circular Saw
Brad Nailer
Power Sander
Drill Bit Set
General Instructions

Please read through the entire plan and all comments before beginning this project. It is also advisable to review the Getting Started Section. Take all necessary precautions to build safely and smartly. Work on a clean level surface, free of imperfections or debris. Always use straight boards. Check for square after each step. Always predrill holes before attaching with screws. Use glue with finish nails for a stronger hold. Wipe excess glue off bare wood for stained projects, as dried glue will not take stain. Be safe, have fun, and ask for help if you need it. Good luck!

Instructions

Step 1

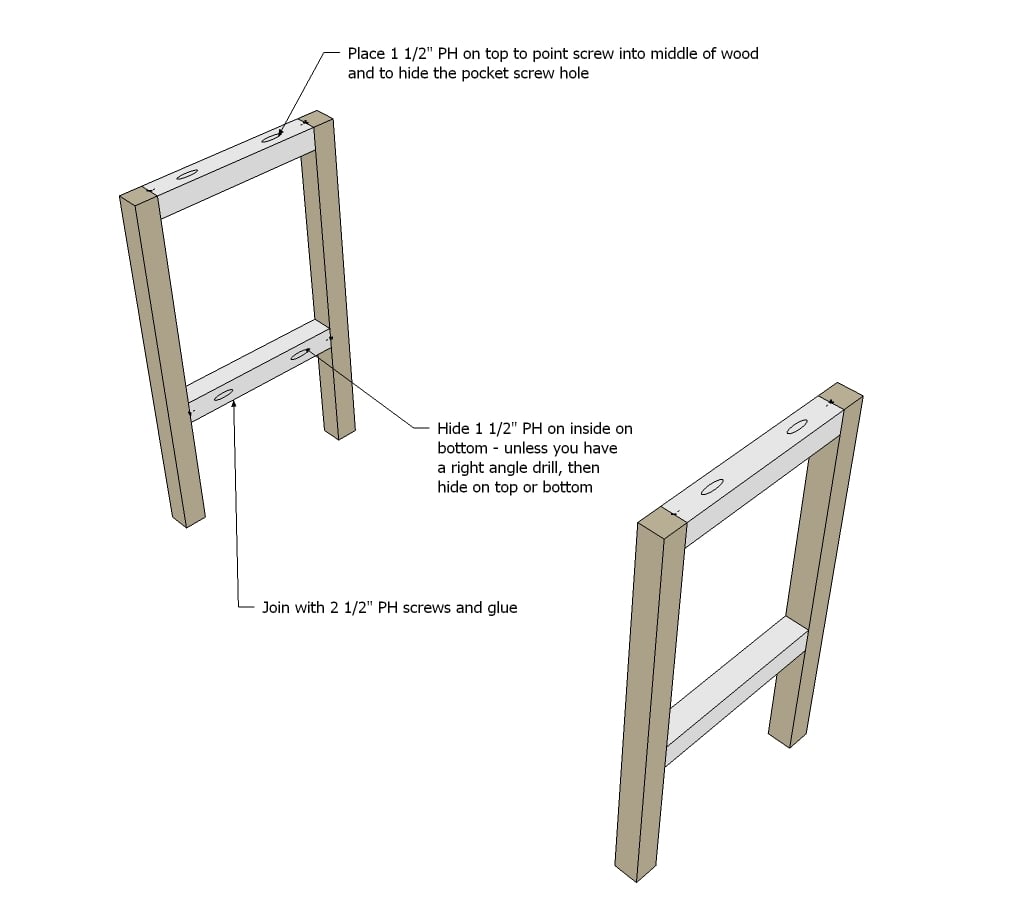
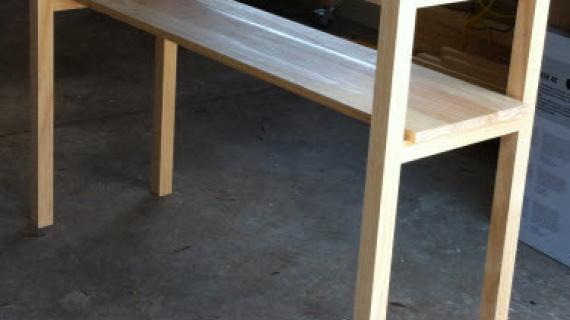
First build two of the legs.

Step 2

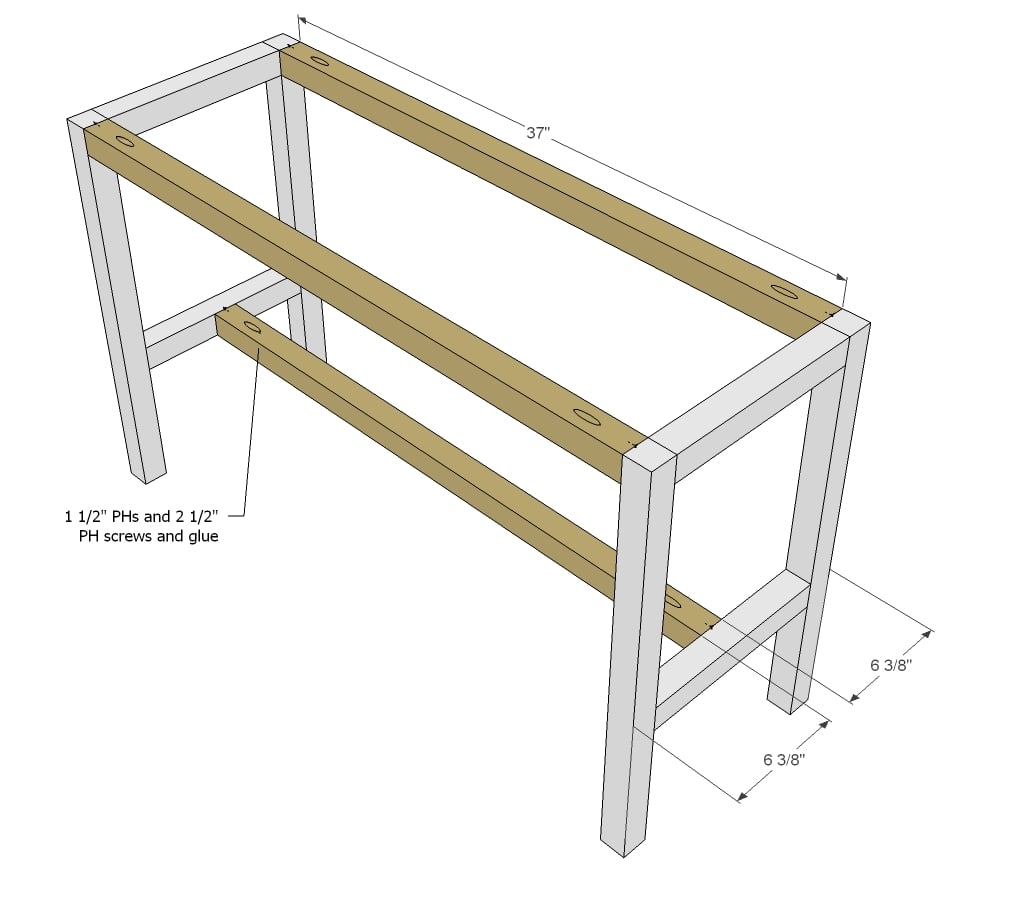
Then join the two legs up with the side aprons and bottom support. The bottom support will make sure your bottom shelf doesn't sag.
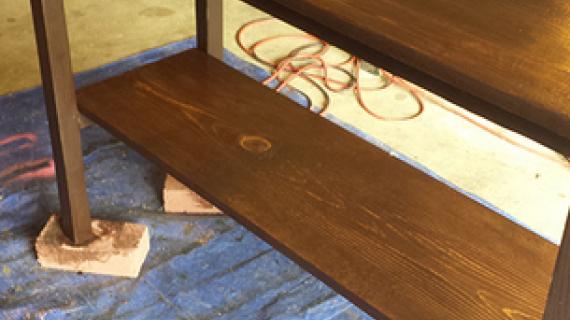
Step 3

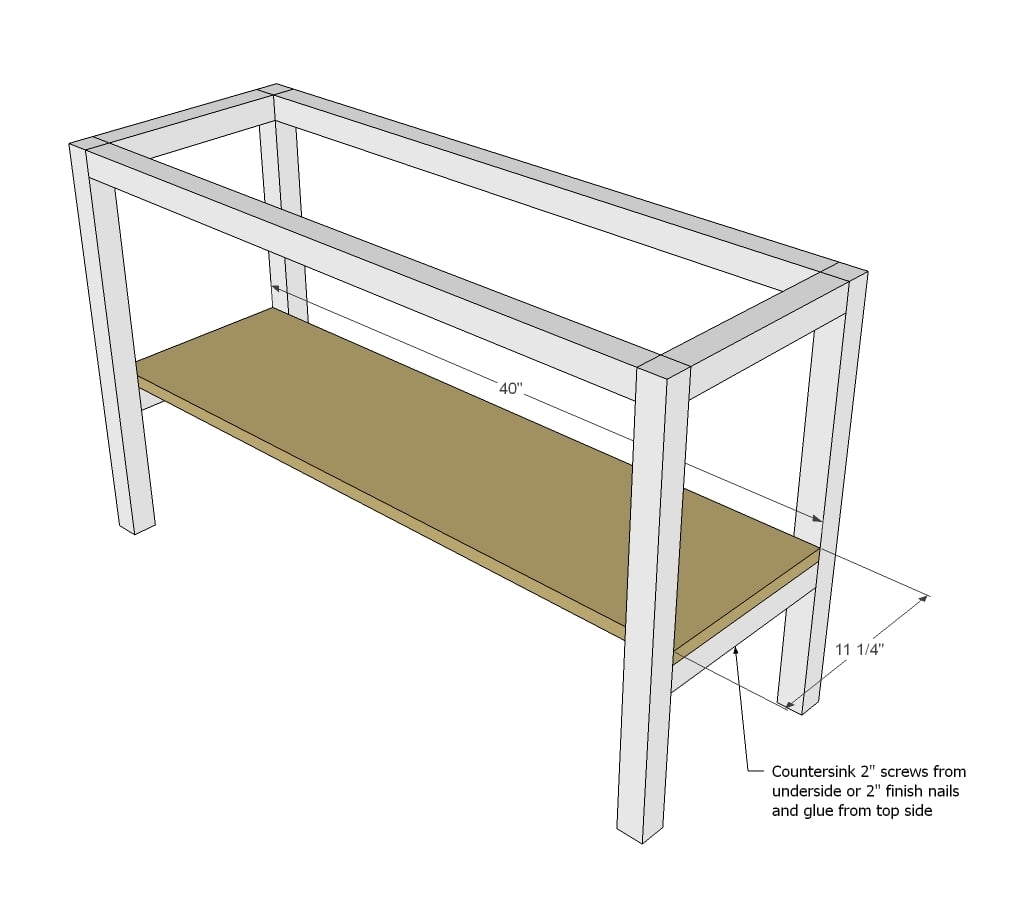
Now add your bottom shelf - super easy - just screw through the bottom supports into underside of shelf.

Step 4

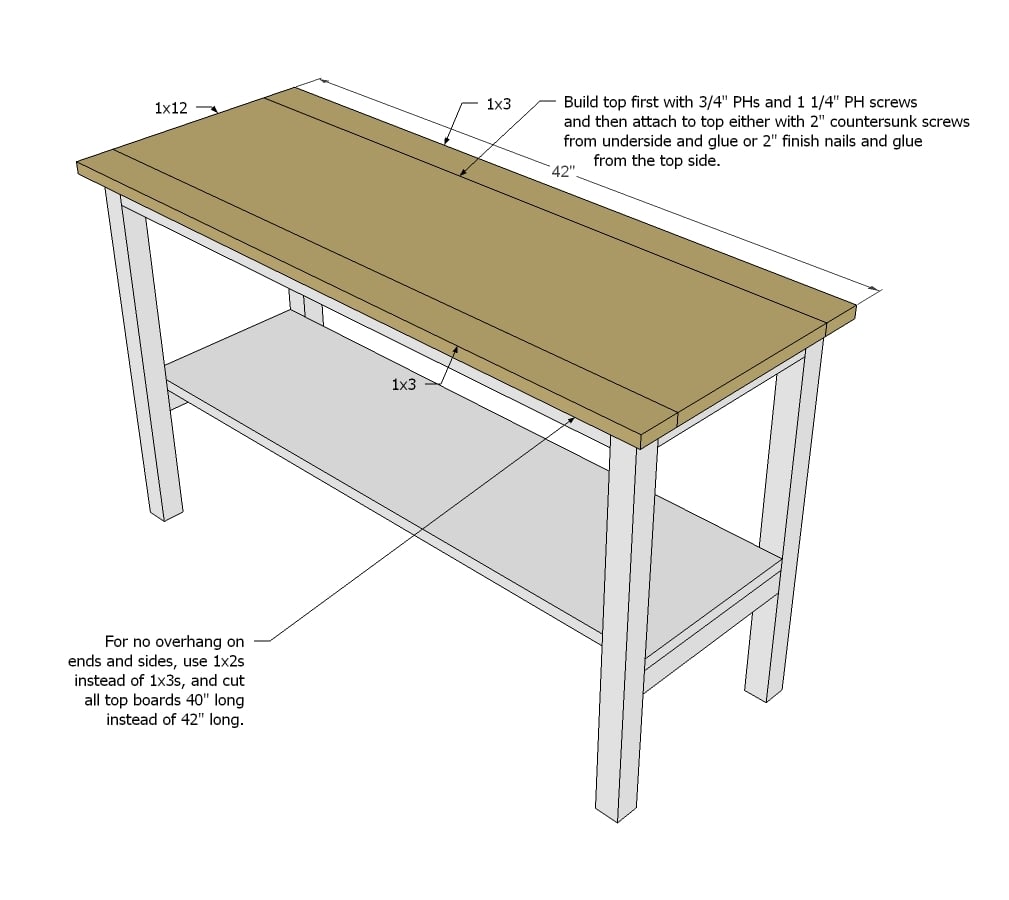
And then build your top first with 3/4" PHs (pocket holes) and 1 1/4" PH screws (pocket hole screws) and attach same as the bottom shelf. Note: Jen used 3/4" plywood for her top instead - you can do that too!

Finishing Instructions
Preparation Instructions
Fill all holes with wood filler and let dry. Apply additional coats of wood filler as needed. When wood filler is completely dry, sand the project in the direction of the wood grain with 120 grit sandpaper. Vacuum sanded project to remove sanding residue. Remove all sanding residue on work surfaces as well. Wipe project clean with damp cloth.

It is always recommended to apply a test coat on a hidden area or scrap piece to ensure color evenness and adhesion. Use primer or wood conditioner as needed.

Comments

Crystal Cassagne (not verified)

Fri, 08/31/2012 - 19:25

This IS the perfect side table! In fact, when I told my husband that the plans were posted today, he asked where the hidden microphones are in our house, because it is EXACTLY what we were just discussing that we wanted! THANKS

Pam the Goatherd

Sat, 09/01/2012 - 15:41

This is exactly what my son wants me to build for a side table to his computer desk. His desk is too small to really keep a mouse and mouse pad on, so he currently has his mouse/pad on a cardboard box next to his desk. I was going to adapt a different table to fit his need, but this one is exactly perfect, no adapting needed. And I believe I have all the wood sitting in my workshop so I don't even have to go to the lumberyard!
Thanks, Ana!

Lynnette (not verified)

Sun, 09/02/2012 - 07:58

The Kreg master system is at lowes now for $139. It includes the face clamp. For a limited time (don't know how long), you get a right angle clamp for free as an add on.

I purchased the Kreg master system and the dremel trio and some scrap wood to practice. This end table is perfect to replace the computer junk area in my living room. This will be my first project.

Any idea on if the dremel trio will be powerful enough to route the tabletop?

Burt VC (not verified)

Mon, 11/05/2012 - 15:22

Thanks for the plans Ana! I love your site and I've just started following it. I'm actually building two of these tables for my livingroom.

DanielleR (not verified)

Tue, 11/06/2012 - 11:57

This is perfect! Do you have an estimated cost of materials? Just for the wood?

Mrs.Ajj

Fri, 12/14/2012 - 18:11

I would estimate the cost of the furring strips to be cheaper than my $2.25 for cedar balusters. I would say for one table you are looking at about $25. If you have a piece of plywood already for the top and shelf you can do this for about $10.

tivaclare

Sun, 02/10/2013 - 15:12

Would it be terribly difficult to do this w/o a kreg jig? This would be project #2 (first was the spa bench) and a surprise for the husband. Had to forfeit a lot of furniture in a recent move and this piece would be perfect and the price of materials is just right! :) Would love a Kreg, but there is definitely no room in the budget for one. We have a regular drill and my dad has tons of power tools/saws, but no jig.

Crystal Cassagne

Mon, 05/12/2014 - 05:21

My sweet husband made this table for me over the weekend, but we're both a little confused. The boards across the top when you touch them wiggle and move and they do not match up flat. Any tips on correcting our issue? Or should we scrap the top and get a piece of hardwood board?

Frequently Asked Questions

Wood Questions

What kind of wood should I use?
Most of our plans use standard construction lumber like pine or fir. It's affordable, easy to work with, and easy to find. It's also rapidly renewing and biodegradable, so a great eco friendly choice!

Can I use hardwoods instead?
Yes—just keep in mind they're heavier, cost more, and can be tougher on tools and harder to join together and finish. I recommend not tackling a hardwood project until after you have built several softwood projects.

What if my boards are warped?
Choose the straightest boards at the store. You can often work around slight warps by cutting them into shorter pieces.

What wood should I use for outdoor furniture?
Use red-toned or pressure-treated 2x lumber for framing, and cedar or cedar fence pickets for the decking. Outdoor furniture should be built like a deck—your local home center can help recommend the right wood for your climate.

Will my wood move or warp after I build?
Potentially, especially in humid climates. Let your wood acclimate indoors before building. Once acclimated and kept in a stable environment, movement should be minimal. Remember, most houses are built using framing lumber - it's all about keeping moisture down indoors.

Cutting Questions

Do I need a miter saw?
A miter saw is great, creating fast, safe, and precise cuts, even for beginners. But most plans can be built with a circular saw and a straight edge. If using a circular saw to cut, take time to practice, and get good at making cuts, before cutting your project boards.

How do I get clean cuts with a circular saw?
Clamp your board, measure twice, cut slow, and use a sharp blade. This takes practice, so spend some time making cuts. I go through becoming proficient at freehand cutting in my course, it is worth taking if you want to master this skill.

Will the store cut my wood?
Yes—most stores will do rough cuts to help you transport your materials home. But from store to store, the quality of cuts could greatly vary.

Joinery Questions

What screws should I use?
We recommend star-head self tapping screws for framing, most common sizes are 2-1/2", 1-3/4". Pre-drill if close to the edge or you find your wood is splitting.

Do I have to use pocket holes?
Pocket holes are the cheapest, easiest and fastest way to do some joints - like edge to edge or a hidden fastener joint. There are other methods, but these can be time consuming and expensive. We recommend using pocket holes as indicated in plans for best results.

How do I keep things square?
Use a speed square and measure diagonals after each step. Always clamp joints before screwing to keep them tight and flush.

Finishing Questions

Stain or paint before or after building?
A quick sand before and a full finish after gives the best results. Pre-finish if you're doing two-tone or detailed finishes.

What type of finish?
Use oil-based or water-based stain. For paint, cabinet-grade latex or enamel works great. High use surfaces on indoor projects should get a coat of polyurethane, I recommend a Helsman or Spar or other flexible poly that won't crack or peel with wood movement. For exterior projects, use a finish suitable for exterior fences.

How to get a smooth finish?
Start with a well sanded project. Sand between coats (220 grit), wipe clean, and apply light coats with a foam brush or roller.

Plan Questions

Can I change the size?
Many people do, and that's the great thing about building your own furniture! But do keep in mind going bigger might mean more supports are required, and often plans are optimized for minimal material waste.

Are these beginner-friendly?
Yes—plans are written with simple tools and clear steps in mind, with every effort to make plans as simple as possible.

Can I sell what I build?
Absolutely! Just don’t resell or repost the plans themselves.

General Questions

What tools do I really need?
A drill, circular saw, tape measure, square, and a few clamps will get you through most projects.

Do I need a workshop?
Nope! A driveway or small patio is plenty to get started, just make sure you have a level place to work. If you find you are building several projects a year, creating a small workbench is a great way to store tools and have a dedicated workspace.

What if I mess up?
Wood filler, sanding, or flipping boards goes a long way. Mistakes are part of the process!

What can I do to make my projects look more professional?
Start with straight boards, make accurate cuts, clamp all joints, and line up everything neatly. Sand thoroughly, use a neutral finish, and apply it in light coats for a clean look.

I've never built anything before. Where should I start?
Start with a few smaller softwood projects to get hands-on experience. Or if you're tackling a big project, buy a little extra lumber and practice your cuts and joints first. If possible, work with someone who has a bit of experience.

Care & Maintenance

How long will my furniture last?
With good joinery and regular care, your DIY furniture can last for decades. I have pieces in my own home that are over 20 years old and still going strong! One of the best parts about DIY furniture is that it’s easy to repaint, refinish, or repair—so your projects can grow and adapt with you.

How should I care for outdoor furniture?
Lightly pressure wash or hose it down once or twice a year. Tighten screws and reapply finish as needed to protect it—just like a deck or fence. A little upkeep goes a long way in extending the life of your furniture.

How about indoor furniture?
Regularly dust or wipe with a damp cloth. If it starts to look worn, a light sanding and touch-up paint or stain can refresh it in no time. DIY pieces are meant to be durable and fixable—so don’t be afraid to give them some love now and then.

Want to Build with Confidence?

Check out my ebook: 12 Skills to Build Your Own Furniture
It walks you through the core skills every builder needs—measuring, cutting, joinery, and finishing—so you can build beautiful furniture that lasts.

Still Have Questions?

Email us anytime at [email protected] and we’ll be happy to help!