Roll Out Pantry - For Narrow Gaps in Kitchen Cabinets or Fridge

roll out pantry
Difficulty
Beginner Projects
| Print this plan

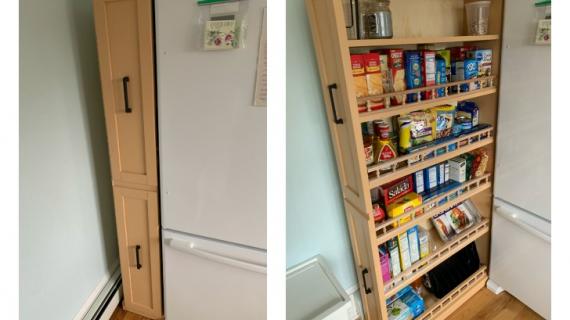
If you have a narrow open space in your kitchen, maybe next to your fridge, you can make this space useful.  In this tutorial, we'll walk you through how to build a roll out pantry shelf that can slide in the wasted space.  Free plans with step by step diagrams from Ana-White.com

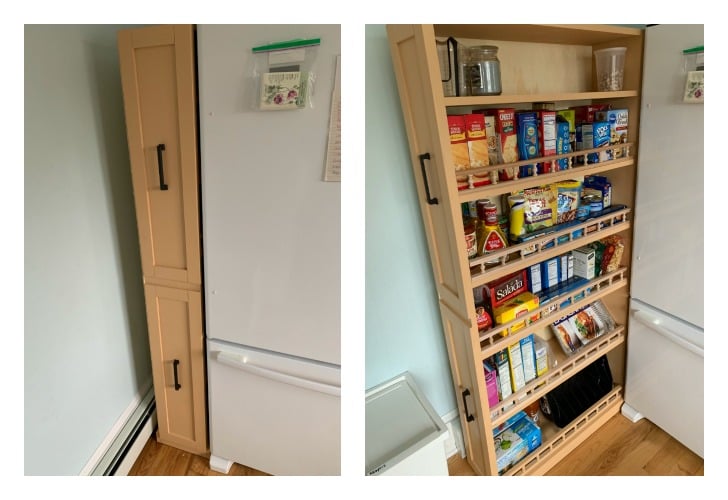
READER SUBMITTED PHOTO BY MIKEW 

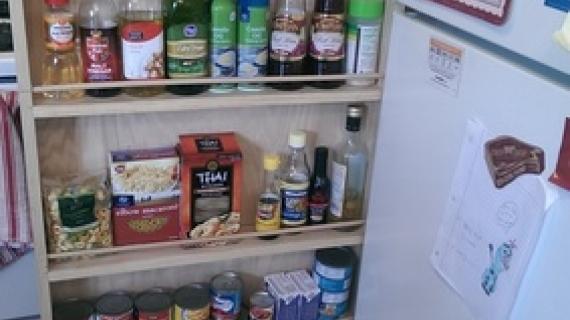
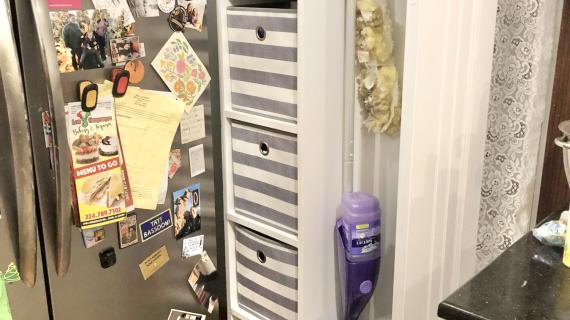
This is a great way to add some extra storage in an awkward gap in the kitchen!  You can use as a pantry, a spice rack, or even a cleaning closet!

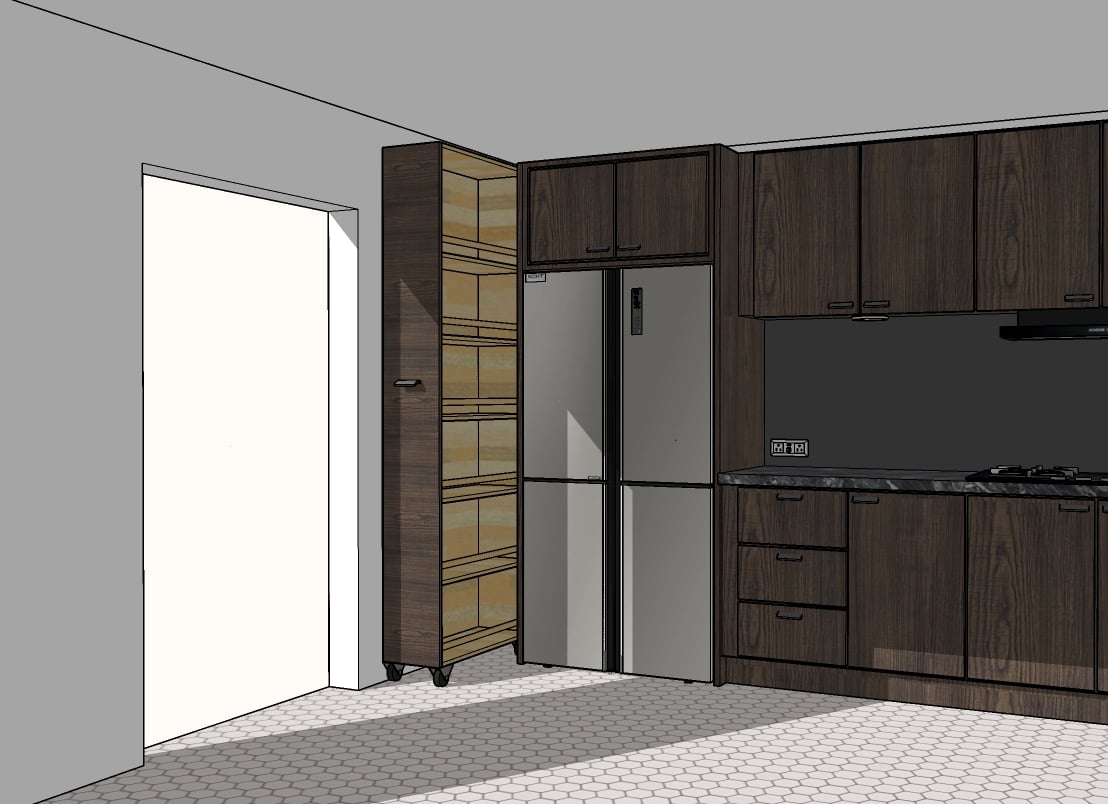
We love this idea so much, you could even incorporate into a new kitchen design.

roll out pantry plans

Dimensions
diagram showing dimensions of roll out pantry
Customize to fit your kitchen space

Preparation

Shopping List
  • 1x boards in desired width (about 4 boards, each 8 feet long)

    • 1x4s for 4" gap
    • 1x6s for 6" gap
    • 1x8s for 8" gap
    • 1x10s for 10" gap
    • 1x12s for 12" gap
  • 3/4" diameter wood dowels, 36" long each, one per shelf
  • One full sheet of 1/4" thick plywood
  • 4 fixed caster wheels, 2-3" in height with screws
  • 1-1/4" pocket hole screws (recommended) or 2" self tapping wood construction screws (about 25 for 1x4, 1x6, 1x8 widths, about 40 for 1x10, 1x12 widths)
  • 5/8" brad nails or staples for attaching the back
  • 1-1/4" brad nails or 2" wood trim screws for attaching the wood dowels (two screws per dowel)
Cut List
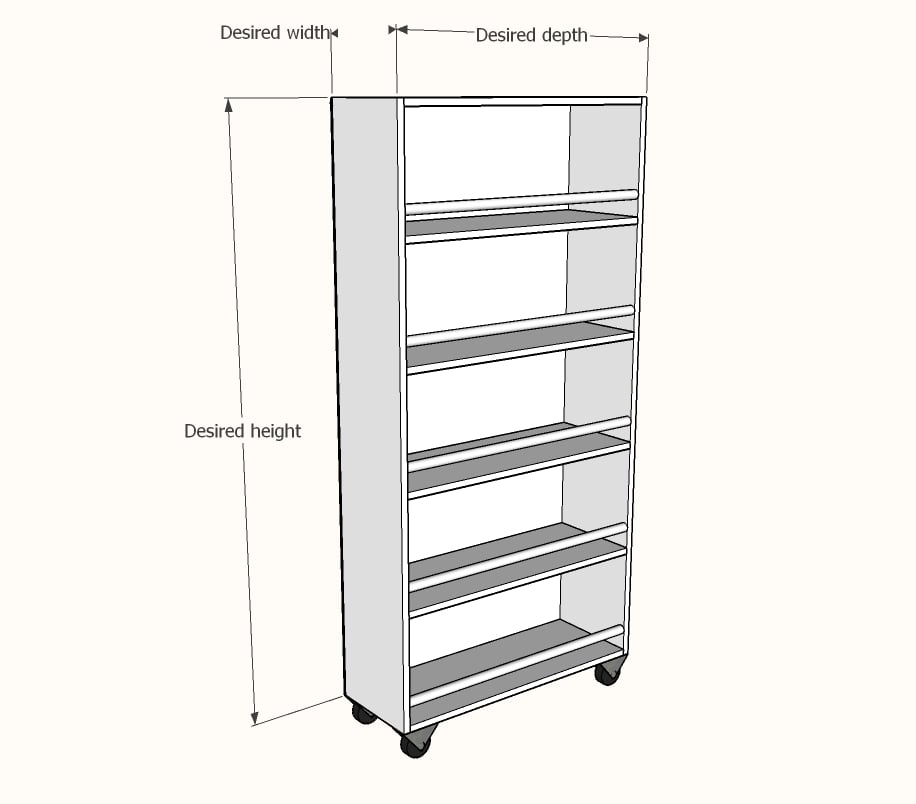
  • 2 - 1x boards @ desired height minus height of caster wheels - sides
  • 6 - 1x boards @ desired depth minus 2" - shelves (can have more or less shelves)
  • 6 - 3/4" wood dowels @ same length as shelves (if more or less shelves, adjust number of dowels to match)
  • 1/4" plywood for back is cut to fit
Tools
Tape Measure
Speed Square
Pencil
Safety Glasses
Kreg Jig
Drill
Miter Saw
Brad Nailer
Power Sander

Instructions

Step 1

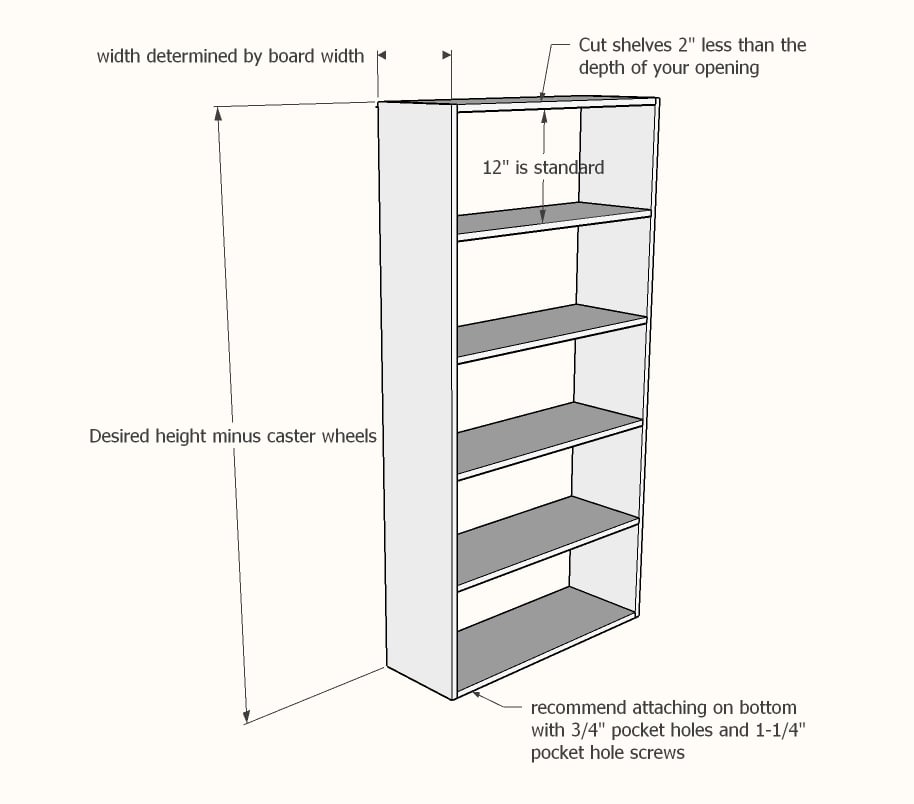
Figure the measurement for the sides and the shelves and cut using a compound miter saw.

Attach the shelves to the sides using a Kreg Jig on the 3/4" setting and 1-1/4" pocket holes (recommended for strength).

Step 2

Measure and cut the back 1/4" plywood to fit.

Nail and glue to all back edges of 1x boards.

Step 3

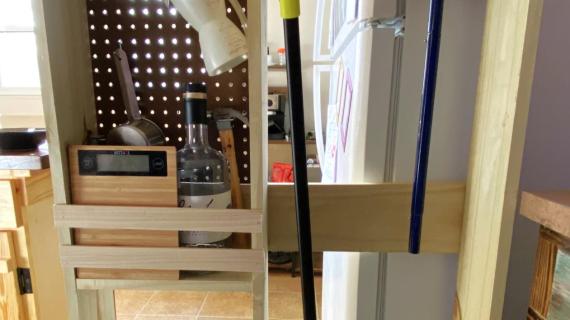
Attach dowels to inside of sides.

Step 4

Attach caster wheels to base of shelf.  

Add handle as desired.

Comments

Carpenters_Daughter

Tue, 09/24/2019 - 16:30

Do you think this can be made deeper?  I need one about 15 inches deep (side) by 38 inches wide (front) and 72 inches tall.  I will be making it look like it is a "pantry" by using faux cabinet doors on one end but it will be a pull out.  Any suggestions would be appreciated.

Ana White

Wed, 09/25/2019 - 12:01

Yes, the size should actually be better bigger, as it will increase stability.

I'd use 3/4" plywood ripped into strips of the width you need, and then just go from there.

Please post a pic when you are done!

Frequently Asked Questions

Wood Questions

What kind of wood should I use?
Most of our plans use standard construction lumber like pine or fir. It's affordable, easy to work with, and easy to find. It's also rapidly renewing and biodegradable, so a great eco friendly choice!

Can I use hardwoods instead?
Yes—just keep in mind they're heavier, cost more, and can be tougher on tools and harder to join together and finish. I recommend not tackling a hardwood project until after you have built several softwood projects.

What if my boards are warped?
Choose the straightest boards at the store. You can often work around slight warps by cutting them into shorter pieces.

What wood should I use for outdoor furniture?
Use red-toned or pressure-treated 2x lumber for framing, and cedar or cedar fence pickets for the decking. Outdoor furniture should be built like a deck—your local home center can help recommend the right wood for your climate.

Will my wood move or warp after I build?
Potentially, especially in humid climates. Let your wood acclimate indoors before building. Once acclimated and kept in a stable environment, movement should be minimal. Remember, most houses are built using framing lumber - it's all about keeping moisture down indoors.

Cutting Questions

Do I need a miter saw?
A miter saw is great, creating fast, safe, and precise cuts, even for beginners. But most plans can be built with a circular saw and a straight edge. If using a circular saw to cut, take time to practice, and get good at making cuts, before cutting your project boards.

How do I get clean cuts with a circular saw?
Clamp your board, measure twice, cut slow, and use a sharp blade. This takes practice, so spend some time making cuts. I go through becoming proficient at freehand cutting in my course, it is worth taking if you want to master this skill.

Will the store cut my wood?
Yes—most stores will do rough cuts to help you transport your materials home. But from store to store, the quality of cuts could greatly vary.

Joinery Questions

What screws should I use?
We recommend star-head self tapping screws for framing, most common sizes are 2-1/2", 1-3/4". Pre-drill if close to the edge or you find your wood is splitting.

Do I have to use pocket holes?
Pocket holes are the cheapest, easiest and fastest way to do some joints - like edge to edge or a hidden fastener joint. There are other methods, but these can be time consuming and expensive. We recommend using pocket holes as indicated in plans for best results.

How do I keep things square?
Use a speed square and measure diagonals after each step. Always clamp joints before screwing to keep them tight and flush.

Finishing Questions

Stain or paint before or after building?
A quick sand before and a full finish after gives the best results. Pre-finish if you're doing two-tone or detailed finishes.

What type of finish?
Use oil-based or water-based stain. For paint, cabinet-grade latex or enamel works great. High use surfaces on indoor projects should get a coat of polyurethane, I recommend a Helsman or Spar or other flexible poly that won't crack or peel with wood movement. For exterior projects, use a finish suitable for exterior fences.

How to get a smooth finish?
Start with a well sanded project. Sand between coats (220 grit), wipe clean, and apply light coats with a foam brush or roller.

Plan Questions

Can I change the size?
Many people do, and that's the great thing about building your own furniture! But do keep in mind going bigger might mean more supports are required, and often plans are optimized for minimal material waste.

Are these beginner-friendly?
Yes—plans are written with simple tools and clear steps in mind, with every effort to make plans as simple as possible.

Can I sell what I build?
Absolutely! Just don’t resell or repost the plans themselves.

General Questions

What tools do I really need?
A drill, circular saw, tape measure, square, and a few clamps will get you through most projects.

Do I need a workshop?
Nope! A driveway or small patio is plenty to get started, just make sure you have a level place to work. If you find you are building several projects a year, creating a small workbench is a great way to store tools and have a dedicated workspace.

What if I mess up?
Wood filler, sanding, or flipping boards goes a long way. Mistakes are part of the process!

What can I do to make my projects look more professional?
Start with straight boards, make accurate cuts, clamp all joints, and line up everything neatly. Sand thoroughly, use a neutral finish, and apply it in light coats for a clean look.

I've never built anything before. Where should I start?
Start with a few smaller softwood projects to get hands-on experience. Or if you're tackling a big project, buy a little extra lumber and practice your cuts and joints first. If possible, work with someone who has a bit of experience.

Care & Maintenance

How long will my furniture last?
With good joinery and regular care, your DIY furniture can last for decades. I have pieces in my own home that are over 20 years old and still going strong! One of the best parts about DIY furniture is that it’s easy to repaint, refinish, or repair—so your projects can grow and adapt with you.

How should I care for outdoor furniture?
Lightly pressure wash or hose it down once or twice a year. Tighten screws and reapply finish as needed to protect it—just like a deck or fence. A little upkeep goes a long way in extending the life of your furniture.

How about indoor furniture?
Regularly dust or wipe with a damp cloth. If it starts to look worn, a light sanding and touch-up paint or stain can refresh it in no time. DIY pieces are meant to be durable and fixable—so don’t be afraid to give them some love now and then.

Want to Build with Confidence?

Check out my ebook: 12 Skills to Build Your Own Furniture
It walks you through the core skills every builder needs—measuring, cutting, joinery, and finishing—so you can build beautiful furniture that lasts.

Still Have Questions?

Email us anytime at [email protected] and we’ll be happy to help!