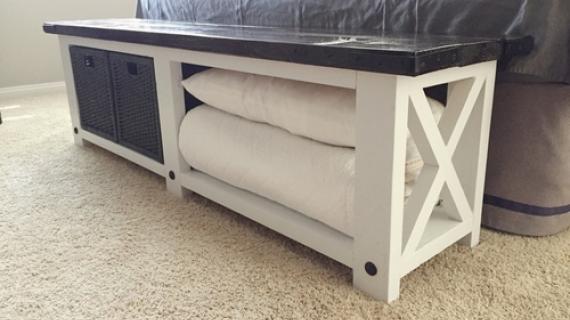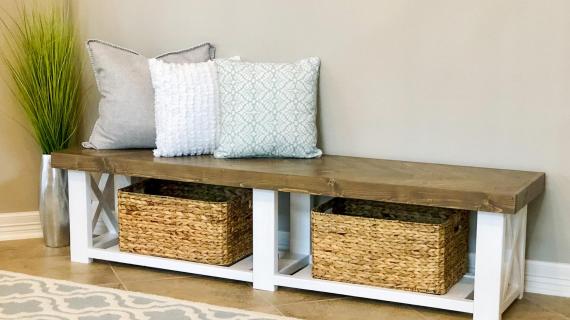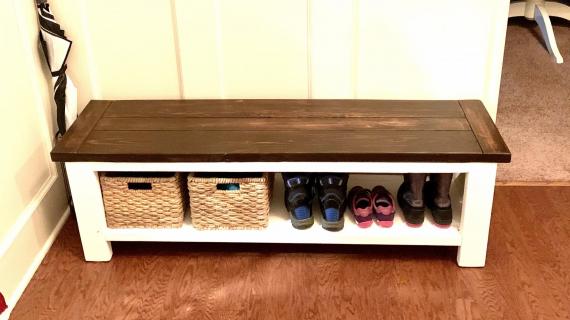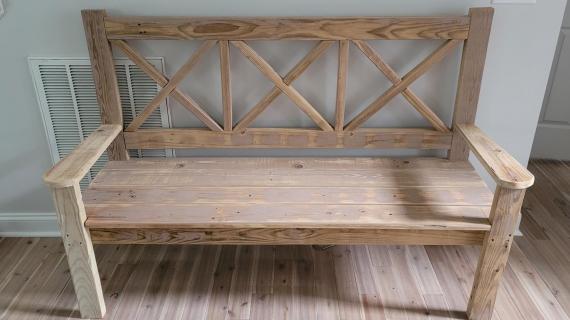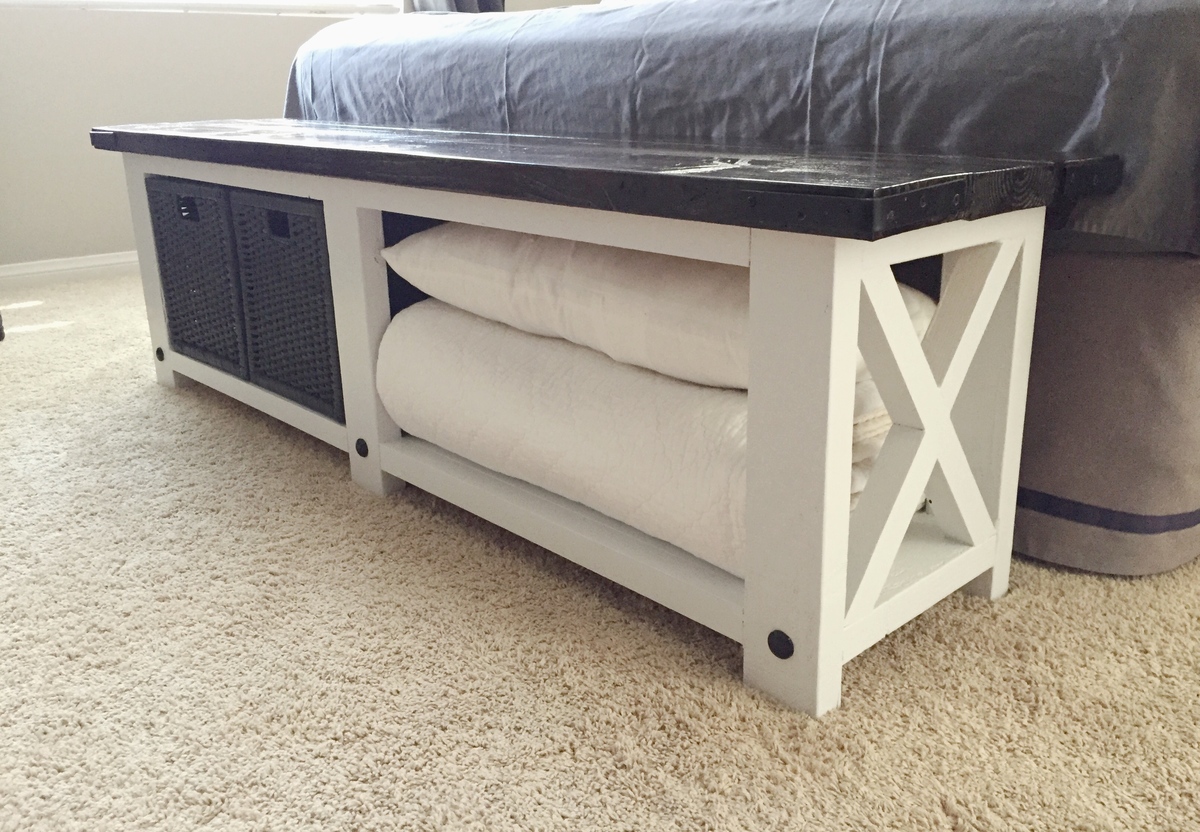

Build the Rustic X Entryway Bench. This beautiful and sturdy bench is perfect in the entryway, at the foot of the bed, or anywhere you might need a beautiful bench with storage. You'll love our free step by step plans with diagrams and shopping and cut list.
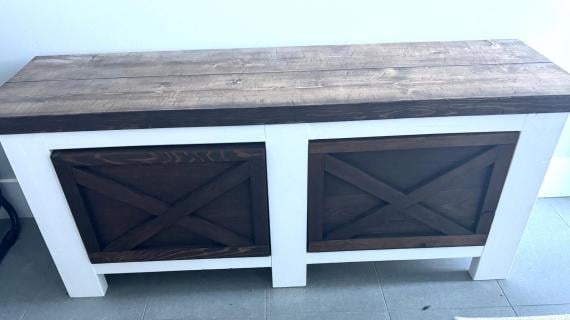
Also in this collection: Rustic X Console Table Plans, Rustic X Coffee Table Plans, Rustic X End Table Plans
Reader submitted photo by CREATIVEKIDD
Customization Ideas
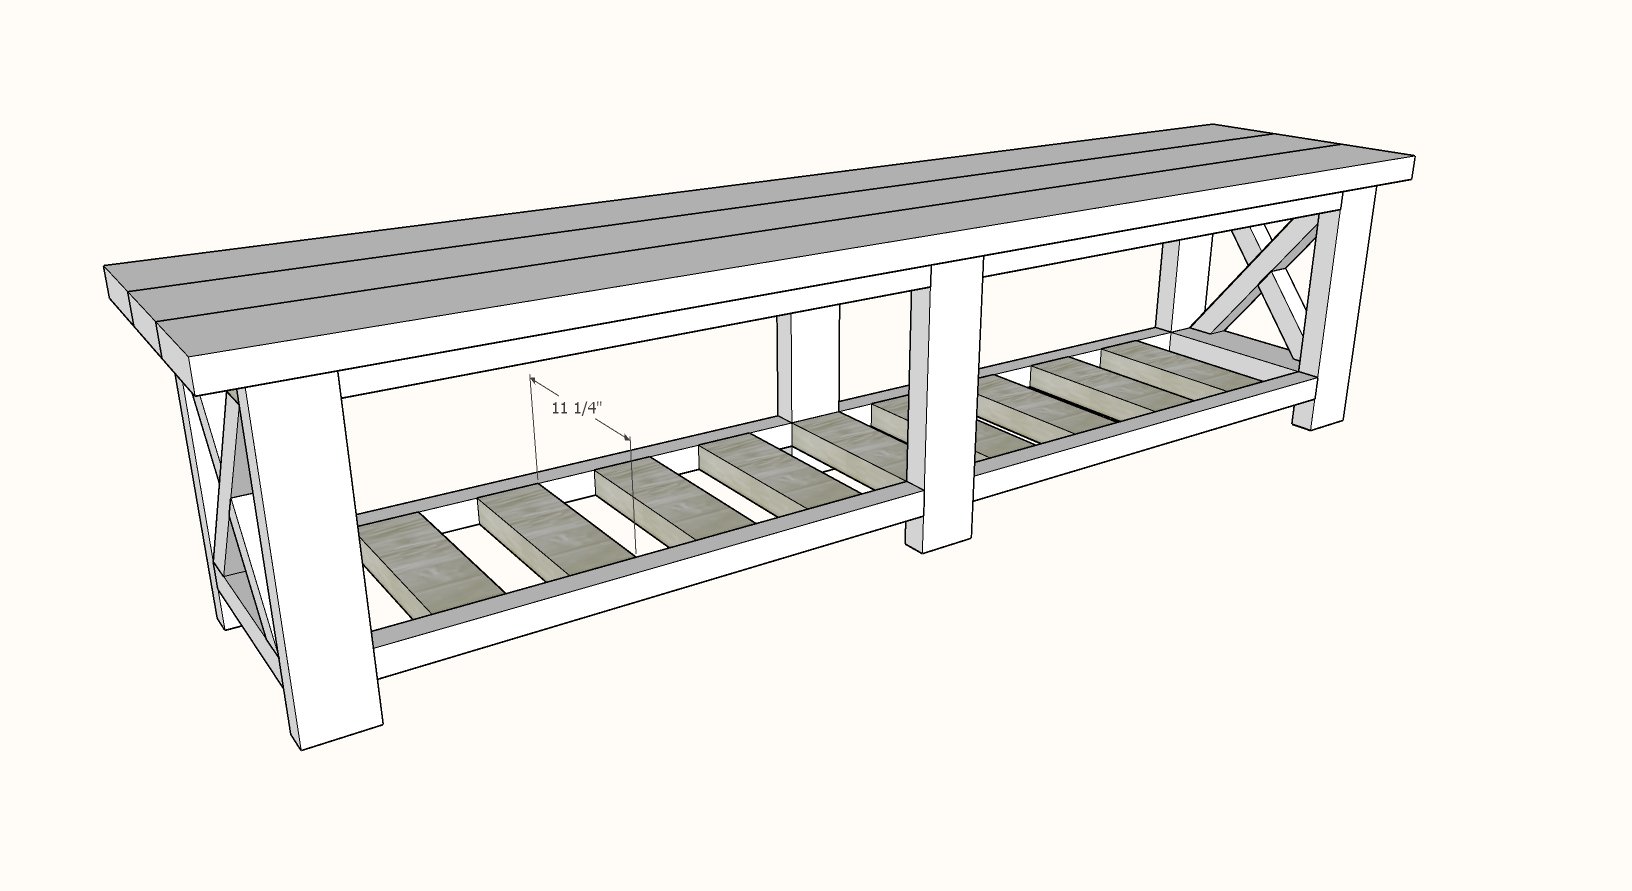 Slatted Bottom Shelf
A slatted shelf may be better suited for an entryway. The good news 2x4s are cheaper than a 1x12 (as used in the unmodified plans) and you won't need to buy 1-1/4" pocket hole screws.
To make this modification, simply omit the 1x12 and skip step 2. In step 3, add 9 more 2x4 @ 11-1/4" for the shelf. You'll also need to add another 2x4 to your shopping list.
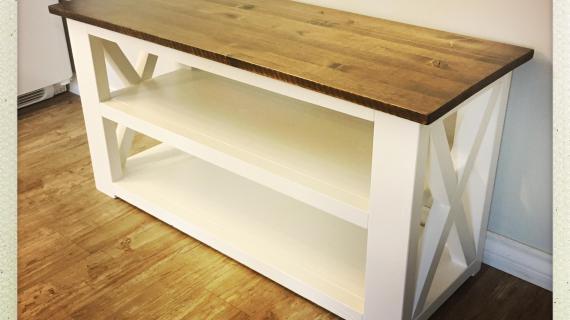
Smaller Overhangs
Perhaps you need the same bench, but the width not quite as wide? Or you'd like a more modern look?
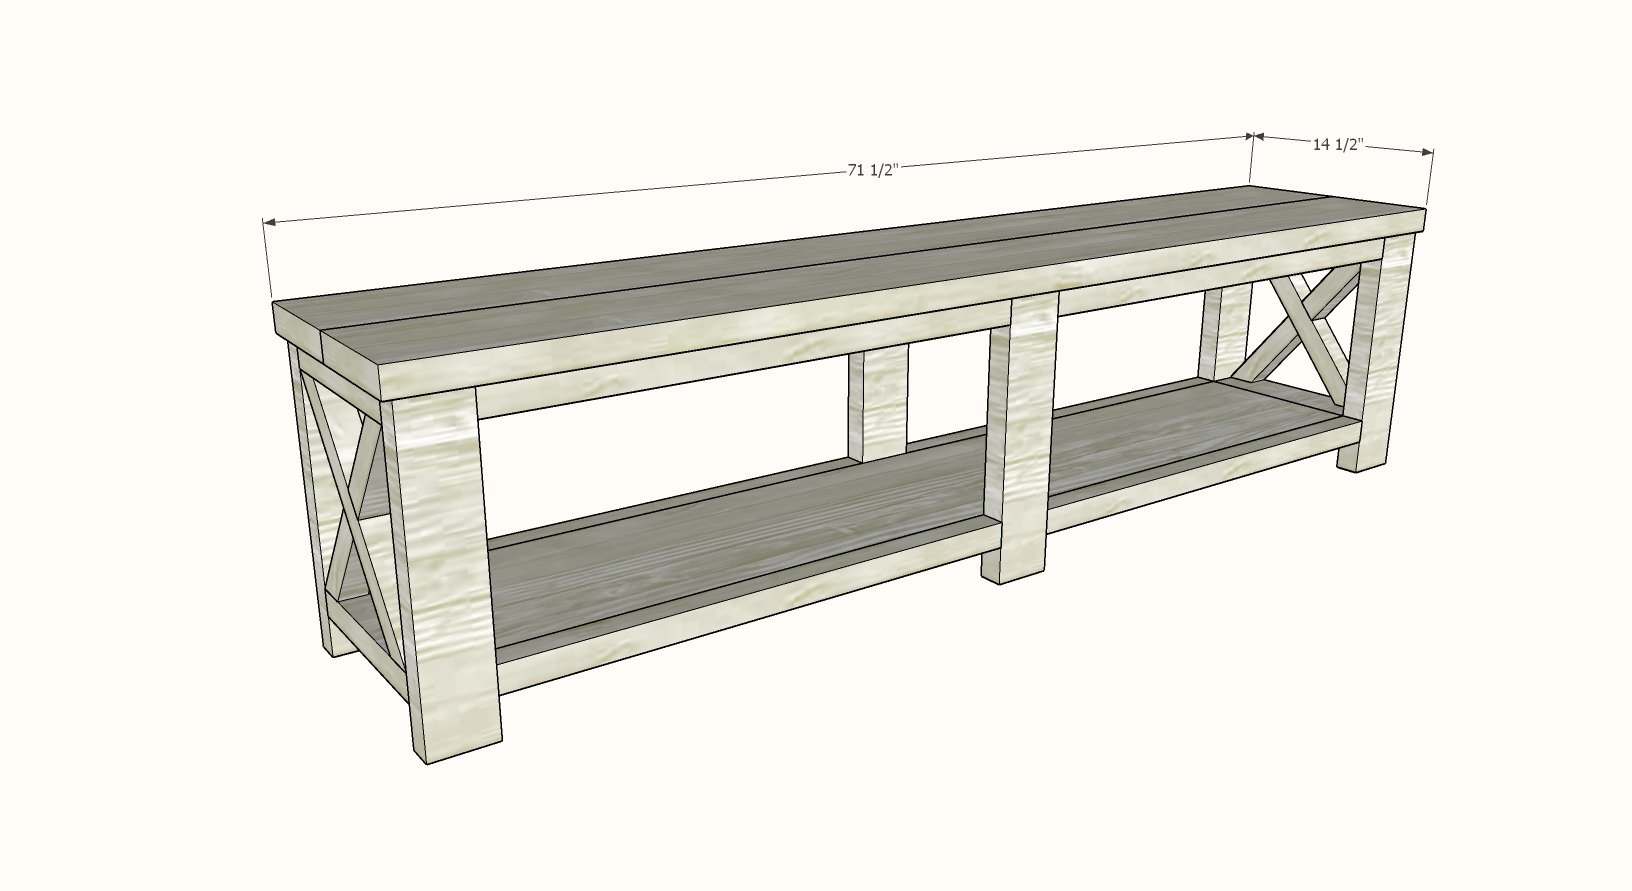
It's easy to swap out the three 2x6s for just two 2x8s for the top. Instead of buying the 2x6s, buy one 2x8x12 feet long and cut it into two pieces, each 71-1/2" long. Join the two boards together with 1-1/2" pocket holes and 2-1/2" pocket hole screws and attach to the top of the base.
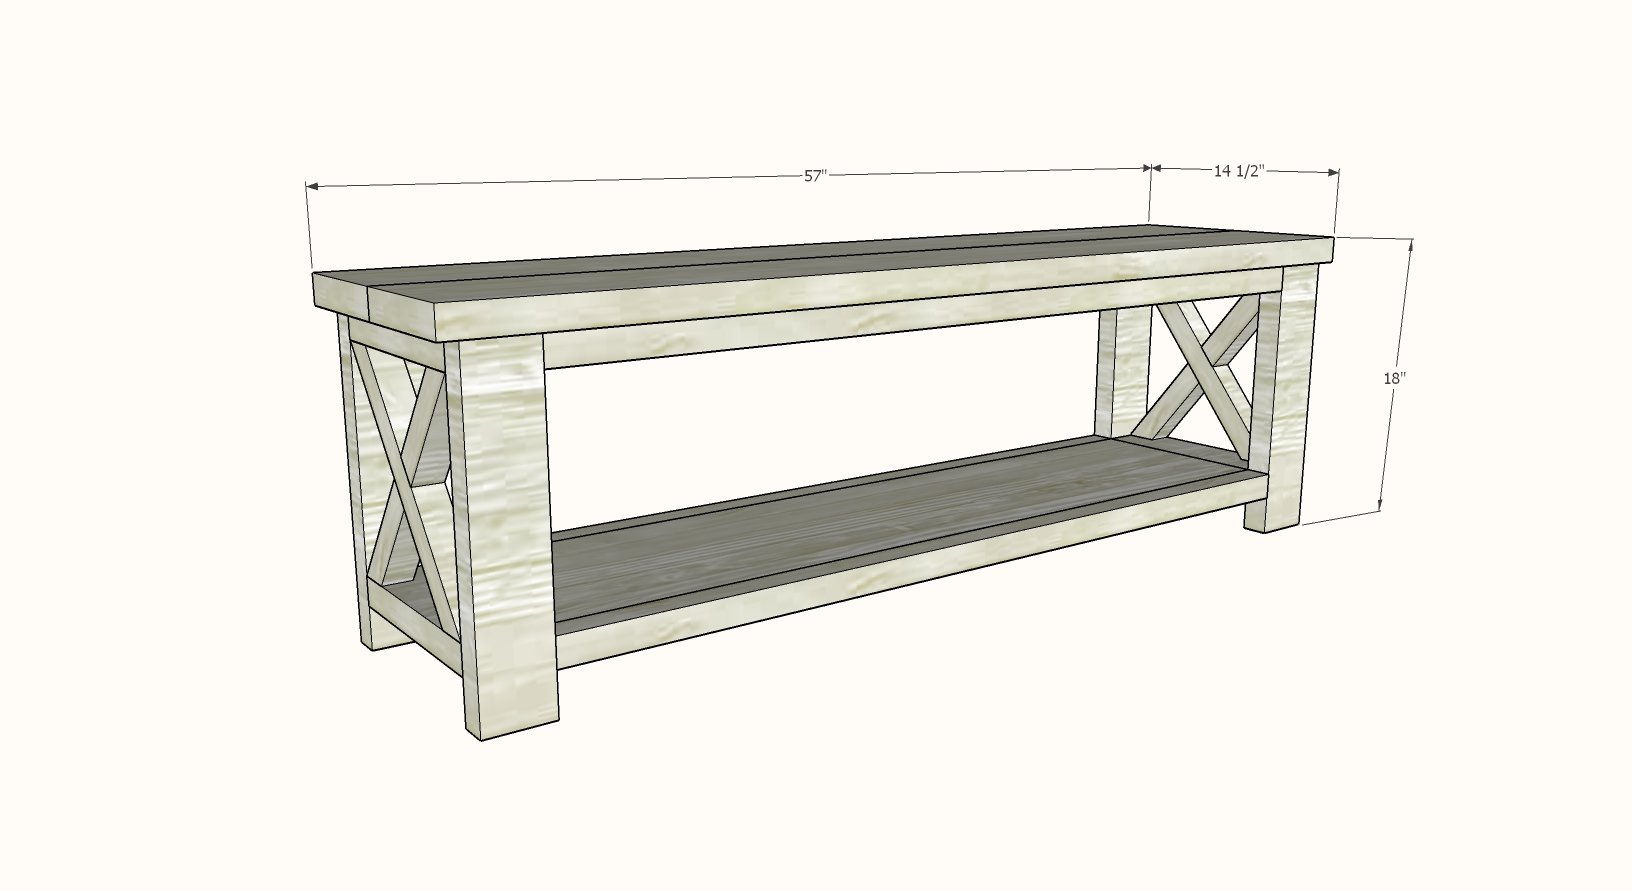
Five Foot Bench Version
Do you need a shorter version? That's easy to do too! Just skip the center leg. We've even got the modified shopping and cut lists to help you out with that. Follow the same building steps as the unmodified plans.
Five Foot Bench Shopping List
- 2 - 2x4 @ 8 foot or stud length
- 3 - 2x2 @ 8 feet long
- 1 - 1x12 @ 4 feet long
- 1 - 2x8 @ 10 feet long (can cut in half for transport)
- 2-1/2" and 1-1/4" pocket hole screws
Five Foot Bench Cut List
- 4 - 2x4 @ 16-1/2" - legs
- 4 - 2x4 @ 11-1/4" - end supports
- 4 - 2x2 @ 48" - side aprons, shelf support
- 1 - 1x12 @ 48" - shelf
- 2 - 2x8 @ 57" - top
Rustic X Bench Plans
The rustic X bench plans follow. If you build, we'd love to see your photos in brag posts - please do share!
Preparation
- 2 - 2x4 @ 8 feet long
- 3 - 2x6 @ 8 feet or stud length (whatever is cheaper)
- 1 - 1x12 @ 6 feet long
- 4 - 2x2 @ 8 feet long
- If you have a brad nailer, 2" brad nails would make construction easier but is not required
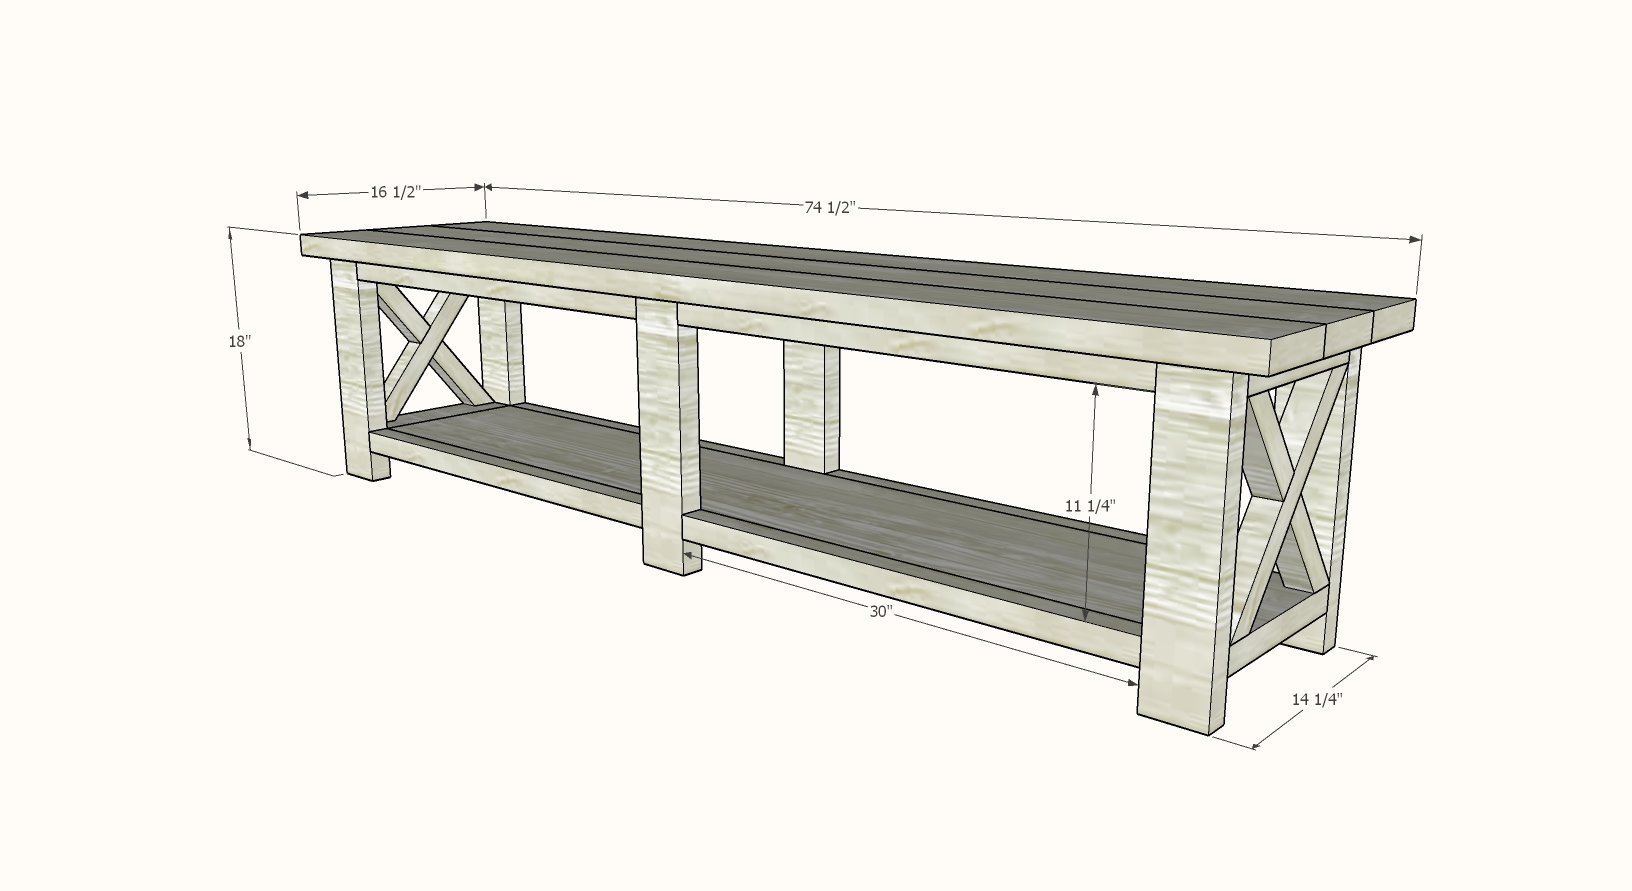
- 6 - 2x4 @ 16-1/2" - legs
- 8 - 2x2 @ 30" - aprons
- 1 - 1x12 @ 63-1/2" - bottom shelf
- 5 - 2x4 @ 11-1/4" - side supports - adjust this length to match the width of your 1x12 boards
- 3 - 2x6 @ 74-1/2" - top
- 2x2 Xs should be cut to fit the openings
The best way to cut boards is with a compound miter saw. But you can also use a circular saw or jigsaw - just make sure your cuts are straight and square. Using a straight edge as a guide can really help.
You'll also need to use a circular saw to make the angled cuts in the legs if your miter saw cannot cut these angles.


To avoid setting your Kreg Jig multiple times, I recommend drilling 3/4" pocket holes around the sides of your 1x12 shelf first, pocket holes about every 8".
Then set your Kreg Jig for 1-1/2" thick material and proceed with the plan.
Instructions
Step 1
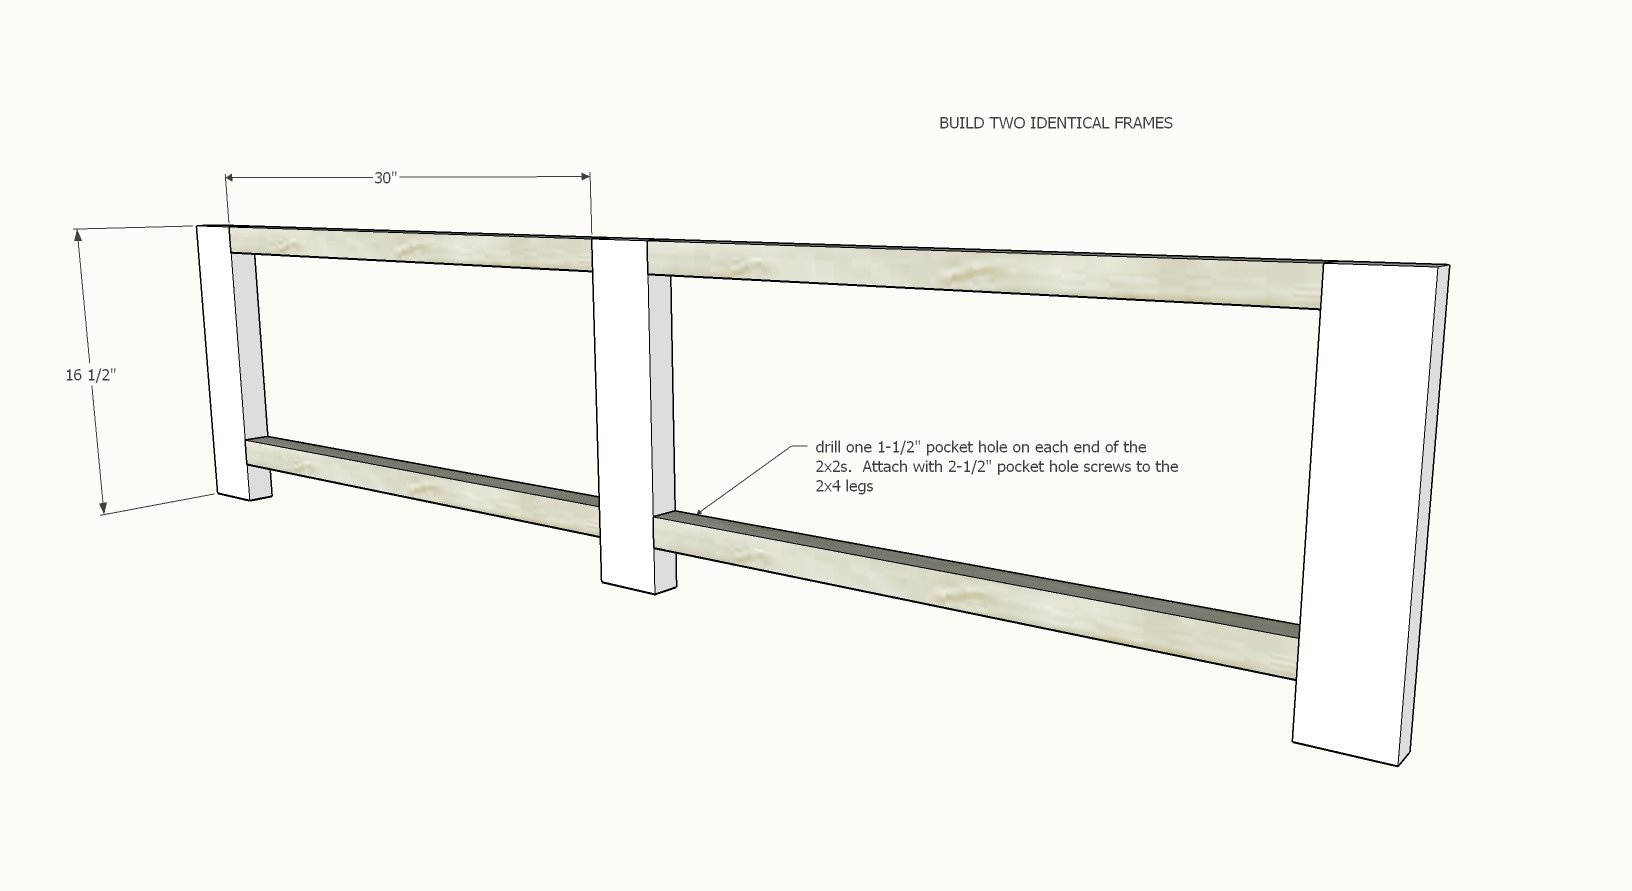
Build two of the frames first on a flat level surface.
Step 2

Attach the 1x12 shelf to the bottom.
Step 3
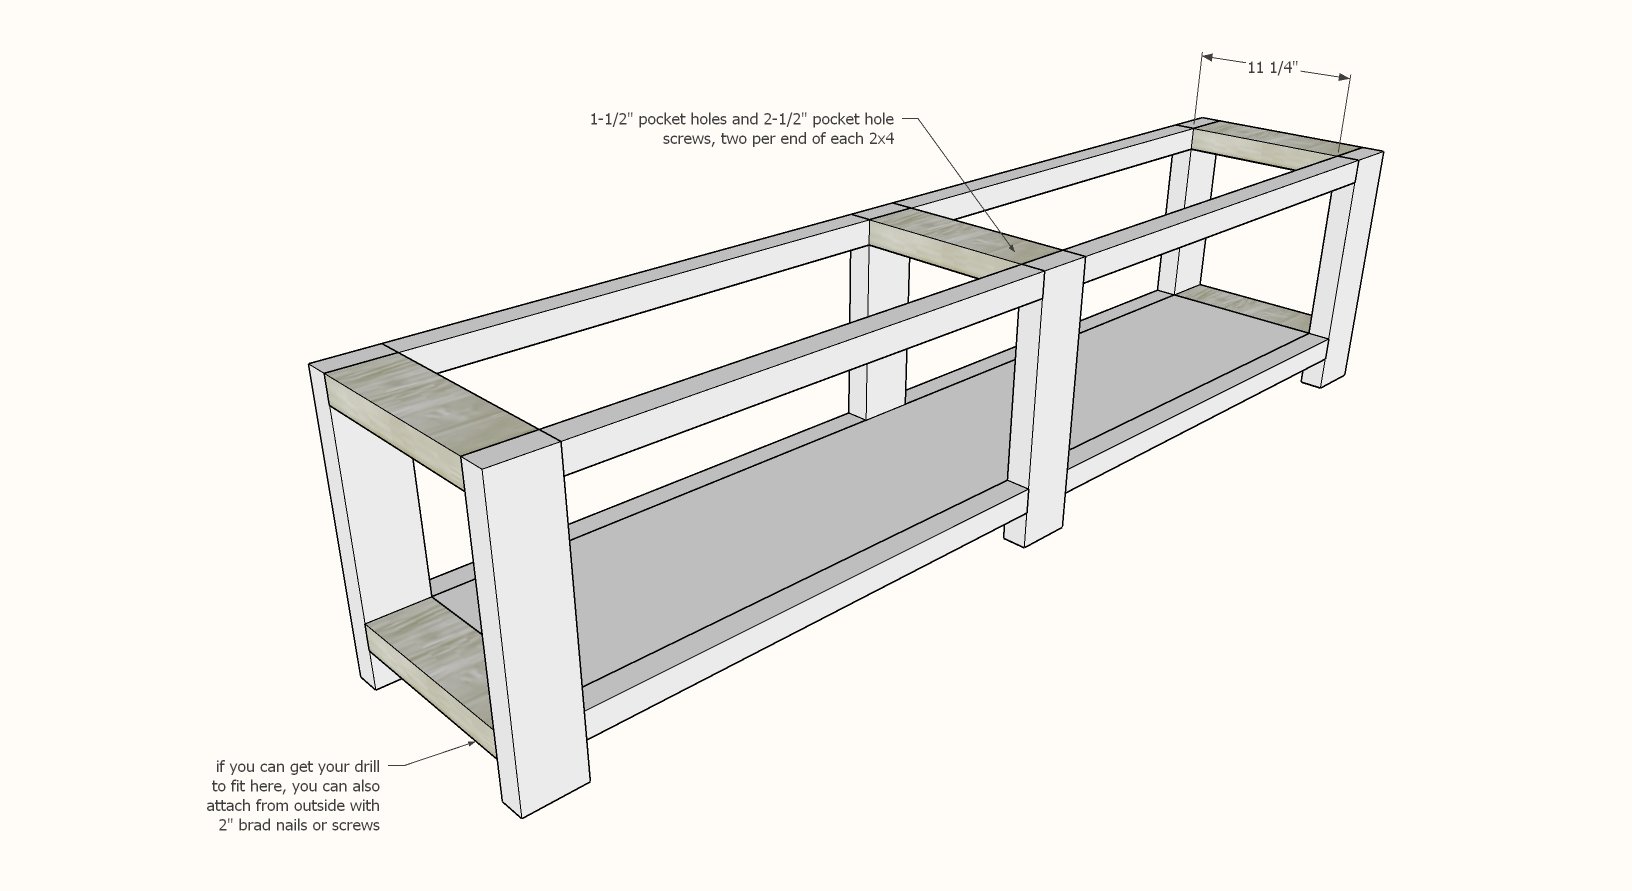
Attach the 2x4 end supports as shown.
Step 4
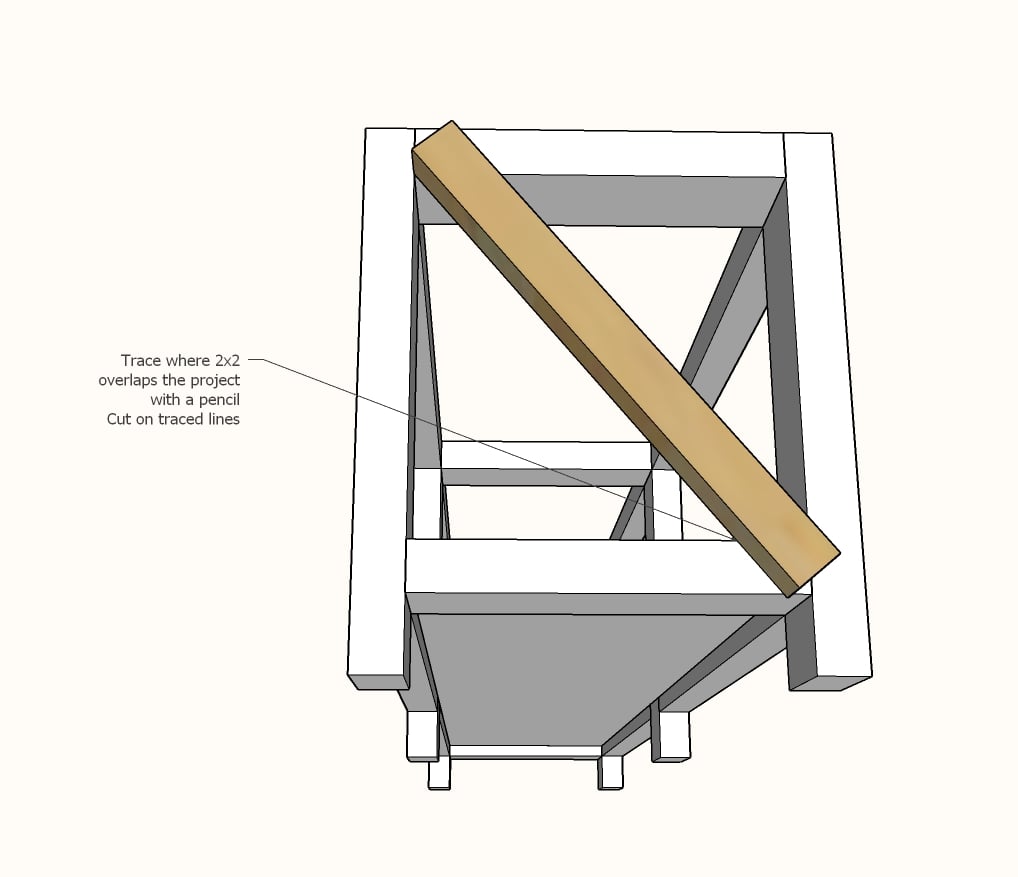
Trace the angles for the 2x2 supports.
Cut with a circular saw or miter saw.
Repeat for the shorter pieces.
Join the X pieces on a flat level surface with a single 1-1/2" pocket hole and 2-1/2" pocket hole screw per joint.
Step 5
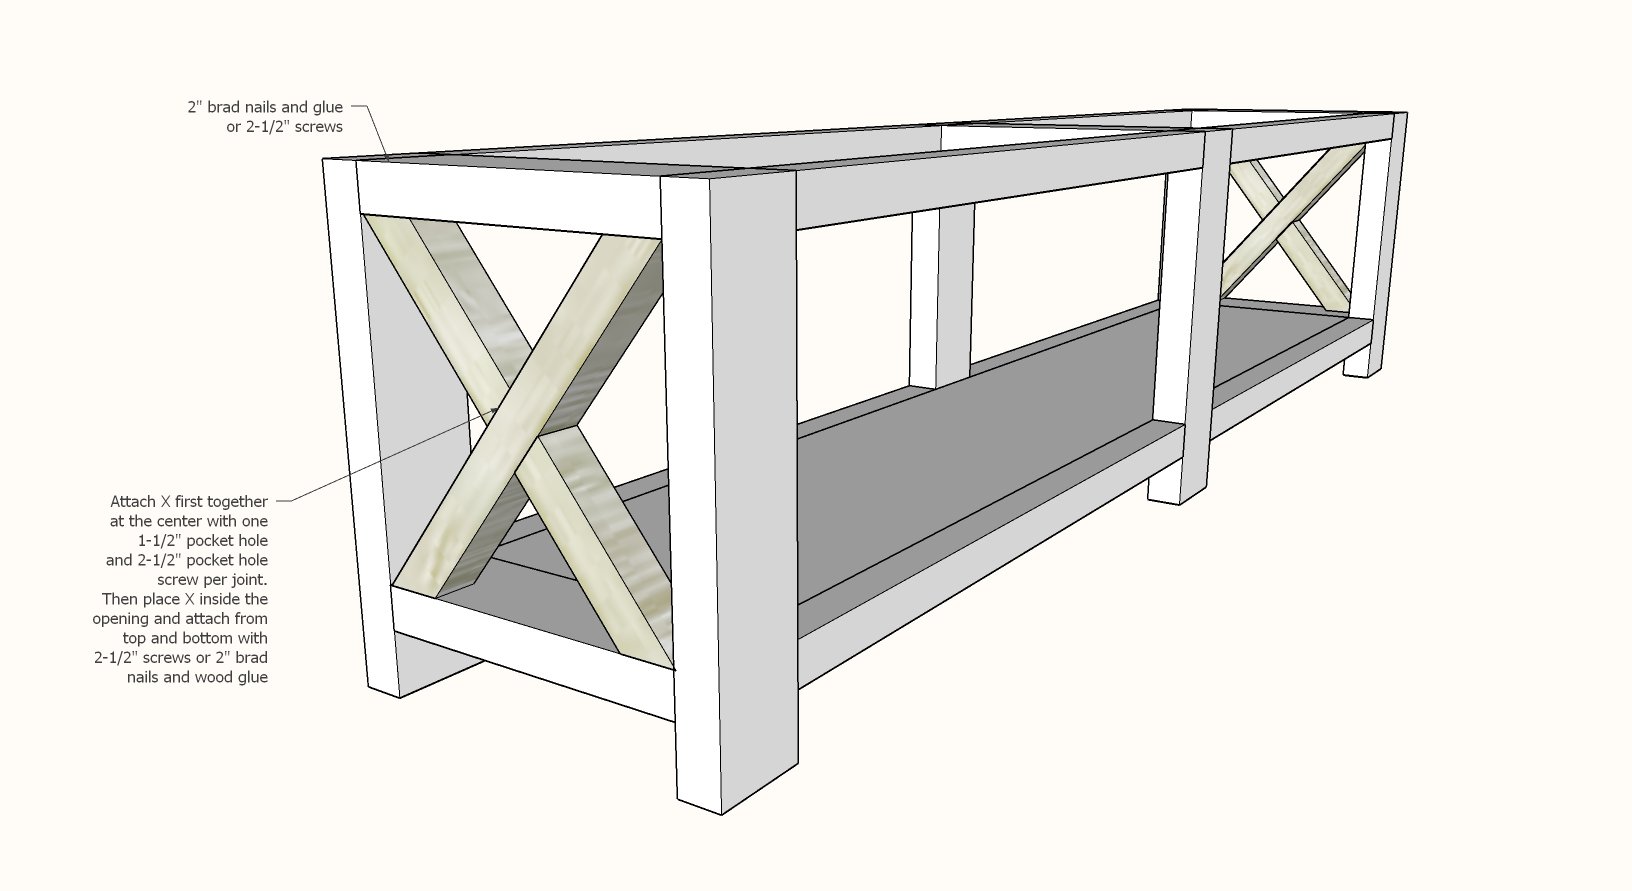
Attach entire X inside the bench. 2" brad nails are easier and cheaper (with glue) but you can also use screws (pocket hole screws are fine if you don't want to buy more screws).
Step 6
Join the top boards together with a 1-1/2" pocket hole and 2" pocket hole screw every 12".
Attach completed top to the base with even overhangs on all sides.