Rustic X Hall Tree

Ana white rustic x hall tree
Difficulty
Intermediate
| Print this plan

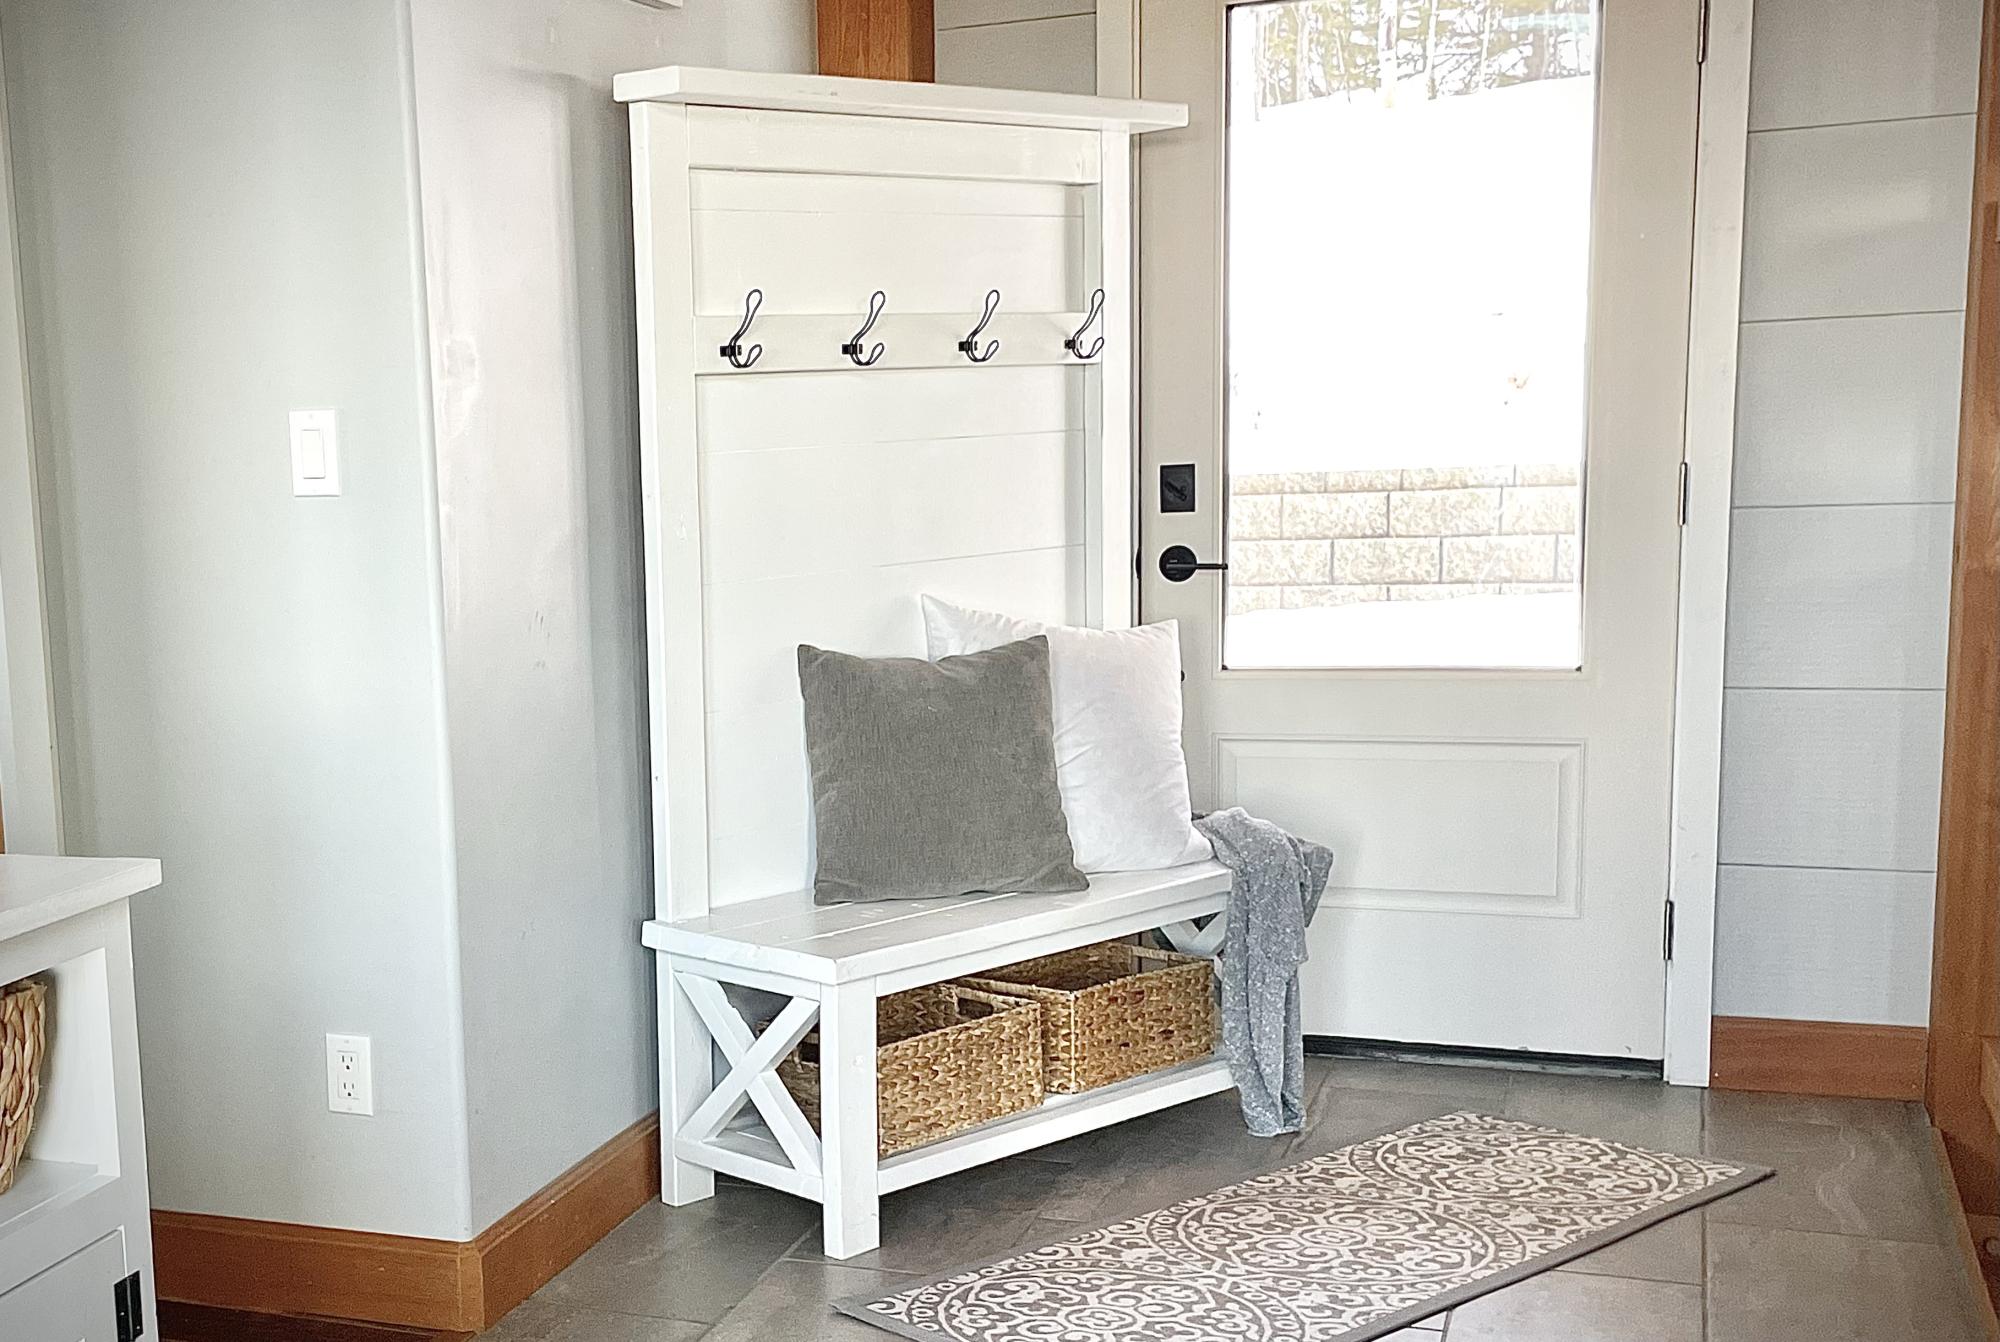
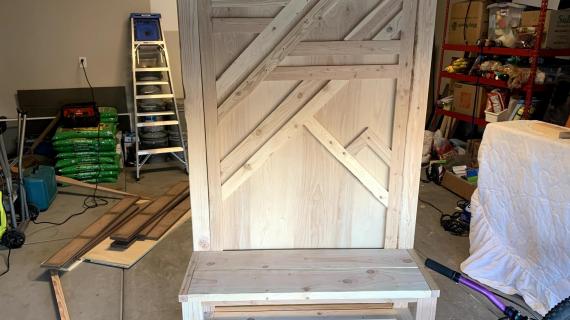
Create a beautiful entry for about $80 with our rustic hall tree.  Built using 2x lumber, it's sturdy, functional, and gorgeous!  Our free step by step plans include shopping and cut lists, and full diagrams.  Plans by Ana-White.com

Build the entire collection and upgrade your home -

White hall tree plans


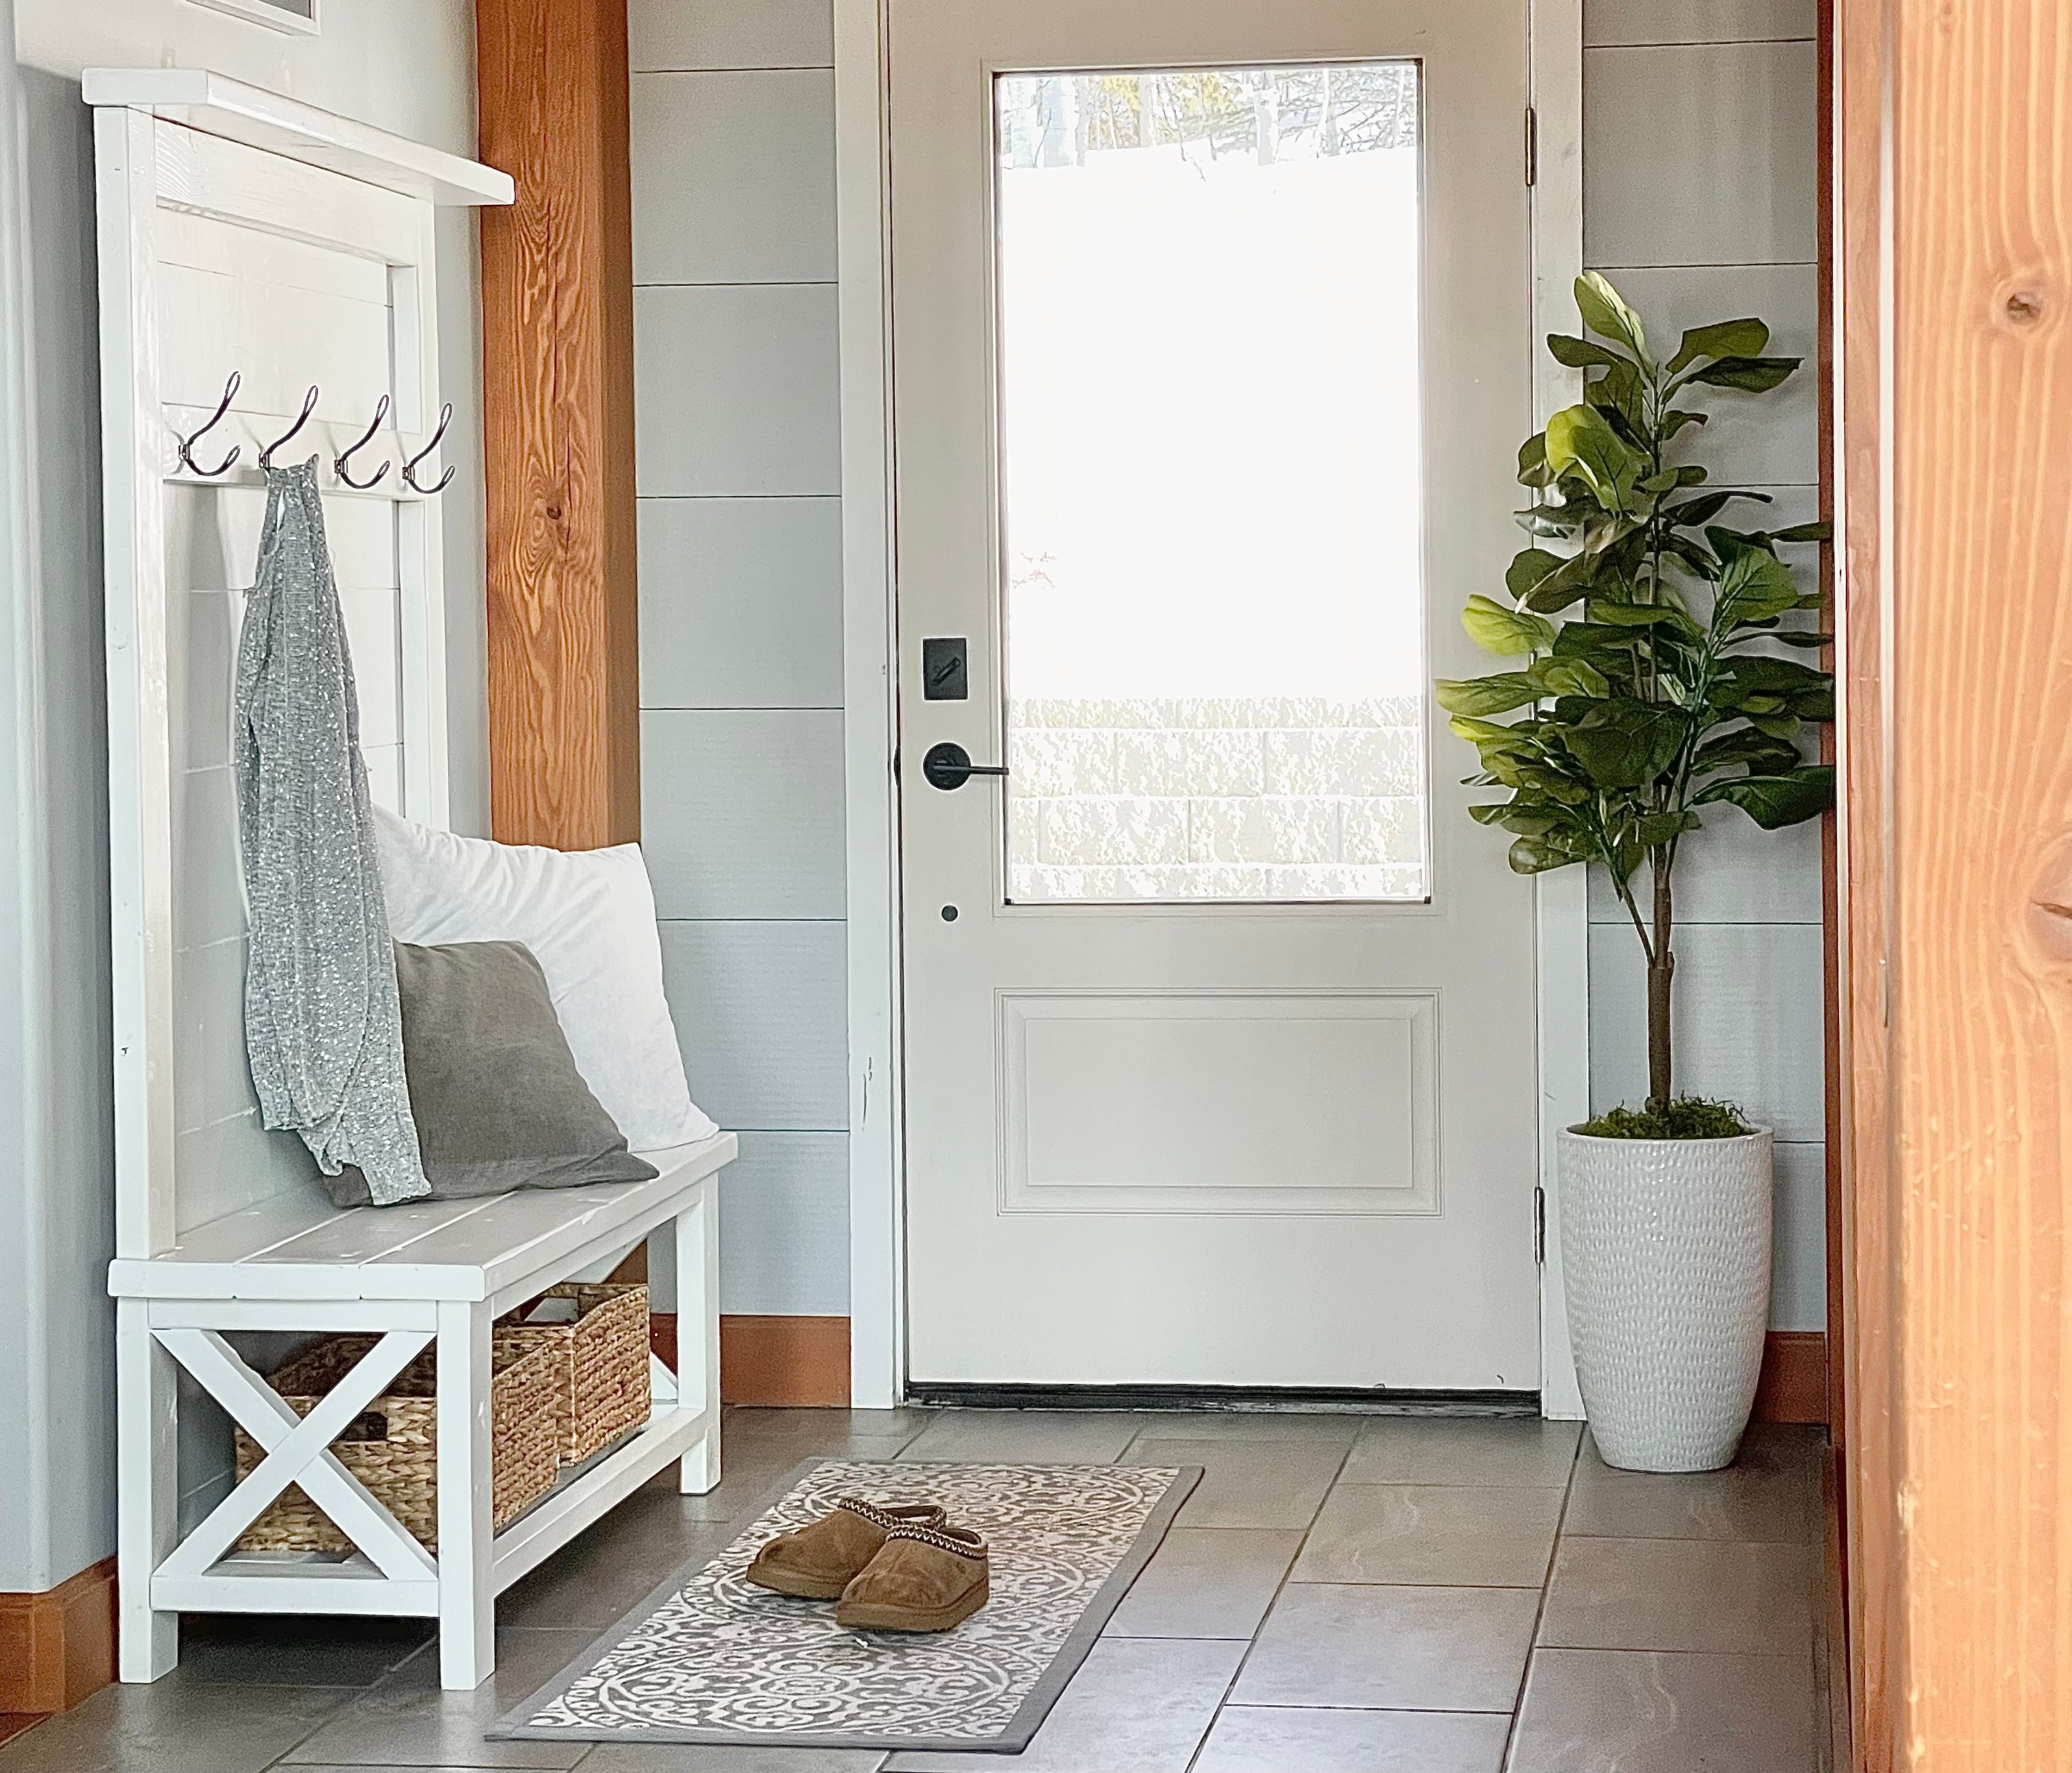
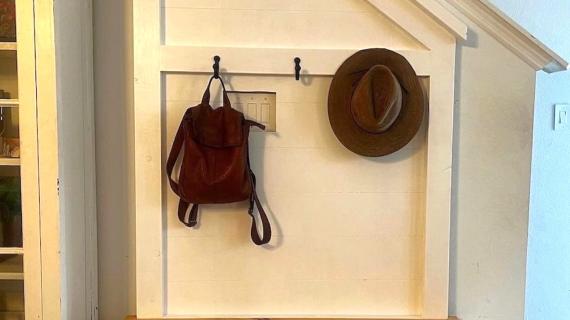
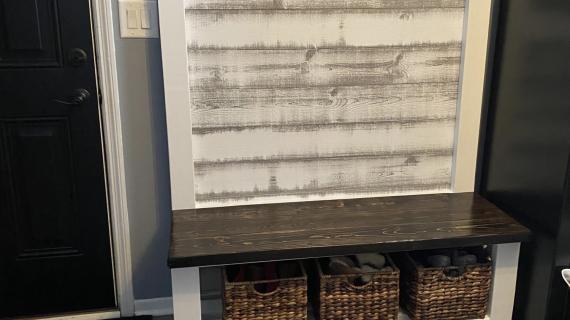
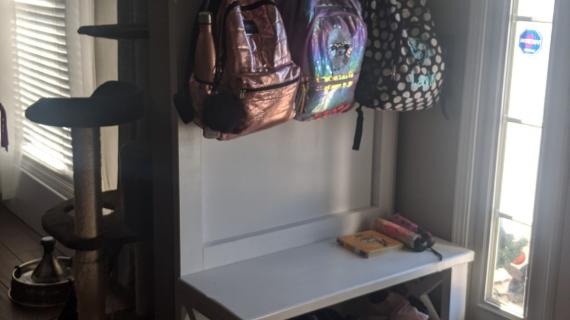
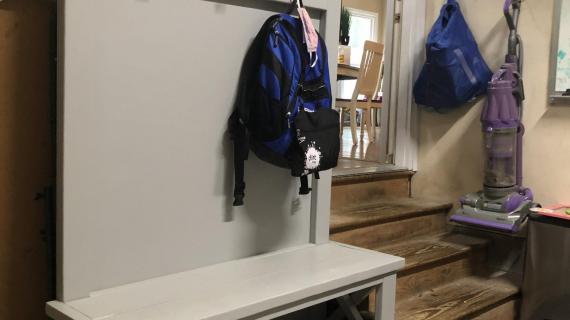
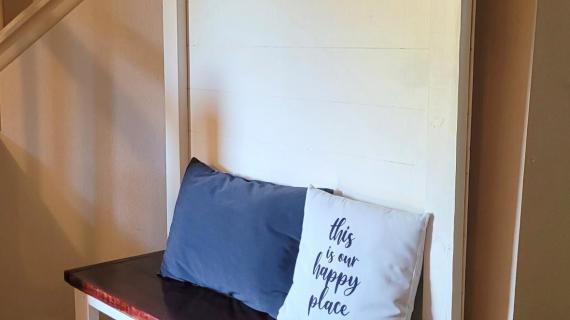
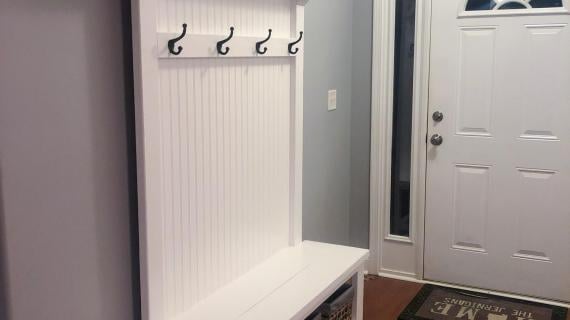
With just one piece of furniture, you can totally transform your home's first impression.Our bill new rustic hall tree is so beautiful!  It dressed up my entry, without having to hang a heavy organizer on the wall, without having to paint, with minimal decor - the art above was $8.  

It's like magic - just bring the hall tree in and your entryway is instantly transformed.


Why a White Hall Tree?

Our home has alot of saturated wood tones from the timber framing, so I knew I wanted a white hall tree to balance and avoid competing, but this hall tree would have been so beautiful stained.  I just can't wait to see someone do that!


The Rustic X Collection

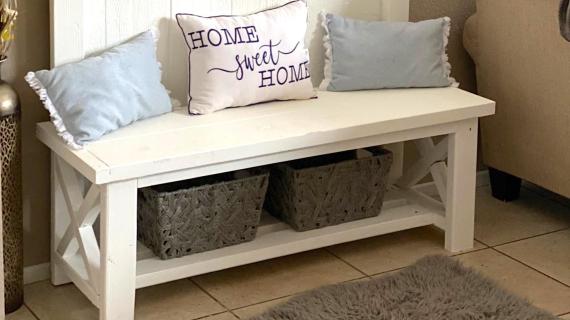
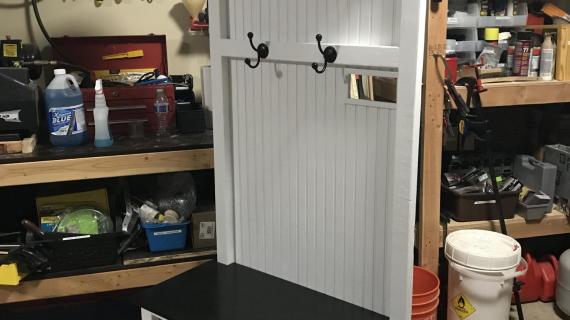
This plan is part of our Rustic X collection of plans.  It is simply our Rustic X Bench plans with the back legs extended up. Here's the console - 

farmhouse behind the sofa table

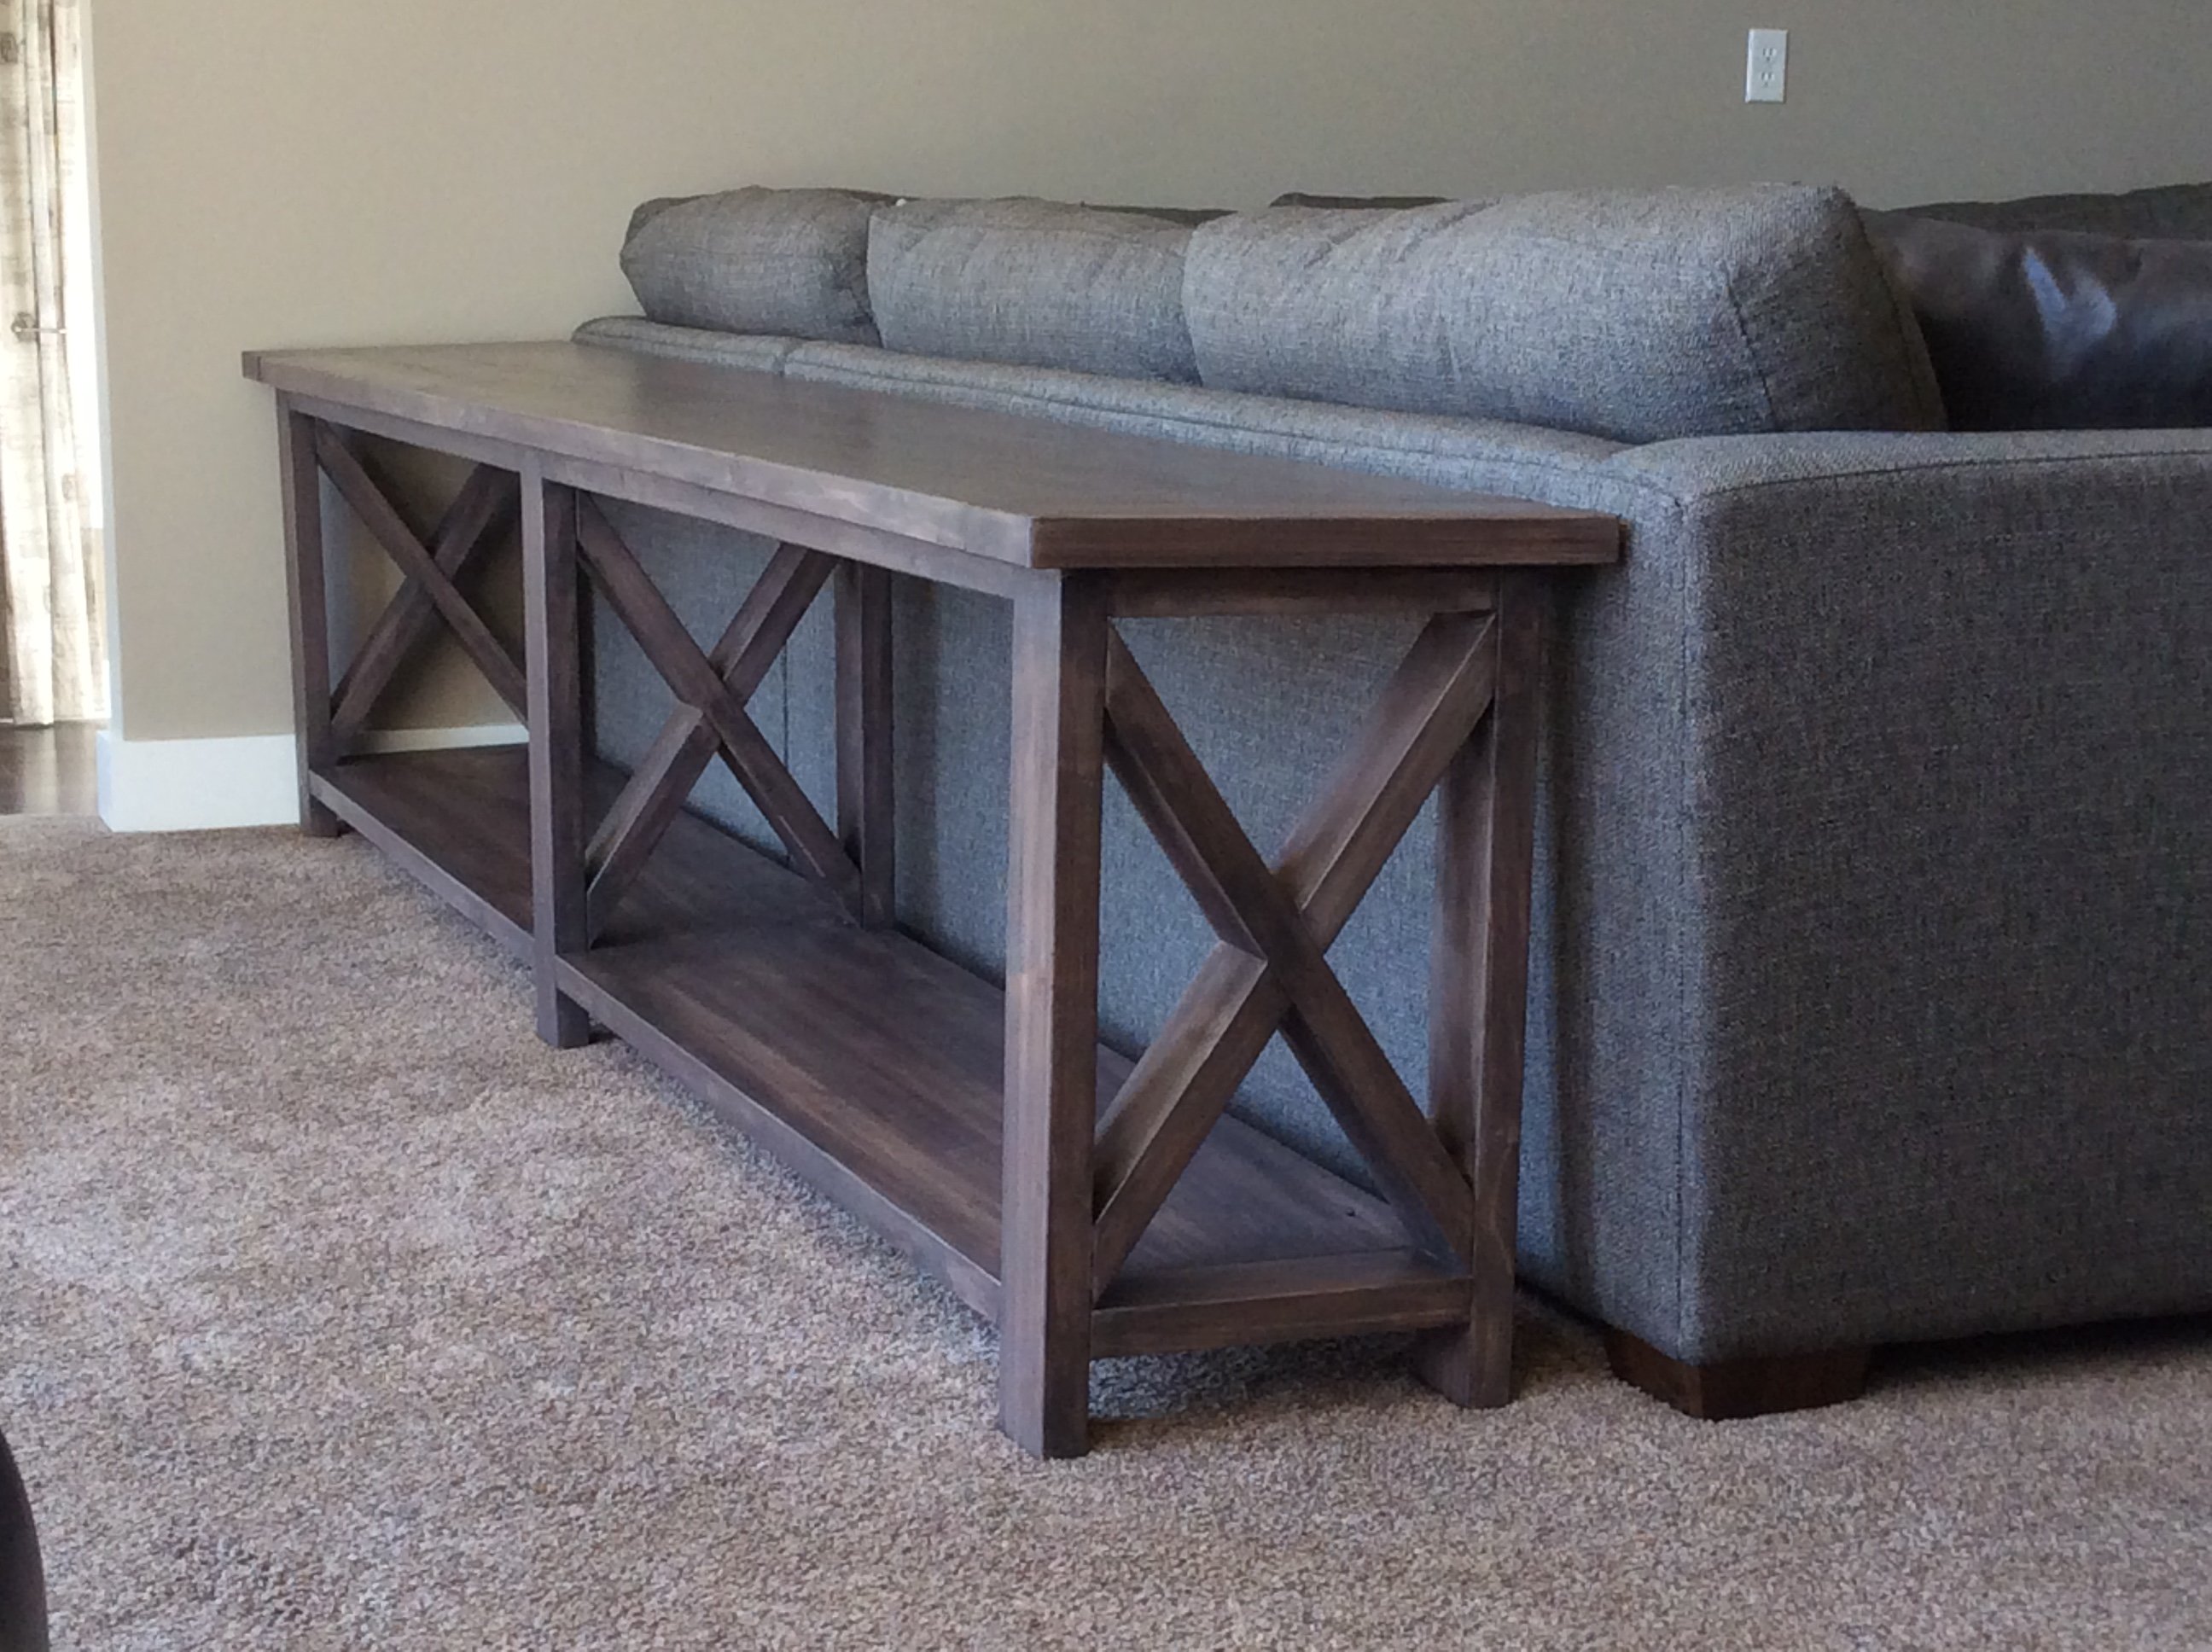
Make sure you check out all the plans in this collection, matching furniture throughout can make your home feel more cohesive and less cluttered.


Video Tutorial

We put together a video showing all the steps, with lots of tips and trick, for this hall tree build.  Please watch it before building.


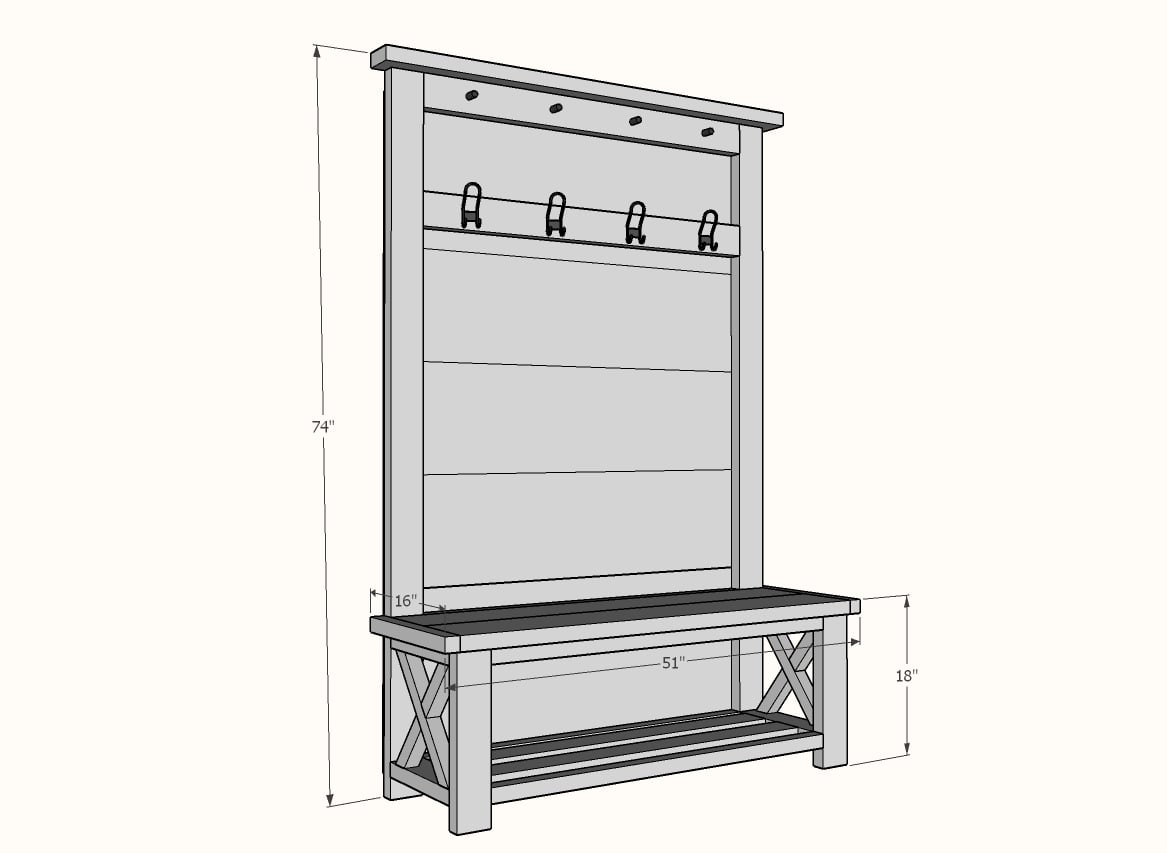
Rustic Hall Tree Plans

This is not a beginner build, but certainly, you don't need to be an expert carpenter or have a ton of tools.  If you can make straight cuts and use a Kreg Jig, you can tackle this one.

The free step by step plans follow.  Thanks for using our plans, we sure do appreciate you sending in brag posts of your completed projects!

Dimensions
rustic hall tree plans
Dimensions shown in diagram

Preparation

Shopping List
  • 6 - 2x4 x 8 feet long
  • 3 - 2x2 x 8 feet long
  • 1 - 2x8 x 8 feet long
  • 50 - 2-1/2" pocket hole screws
  • 25 - 2-1/2" self tapping wood screws for attaching the top (can use the pocket hole screws too)
  • 3/4" brad nails for attaching the back and wood glue
  • 4 hooks
Cut List
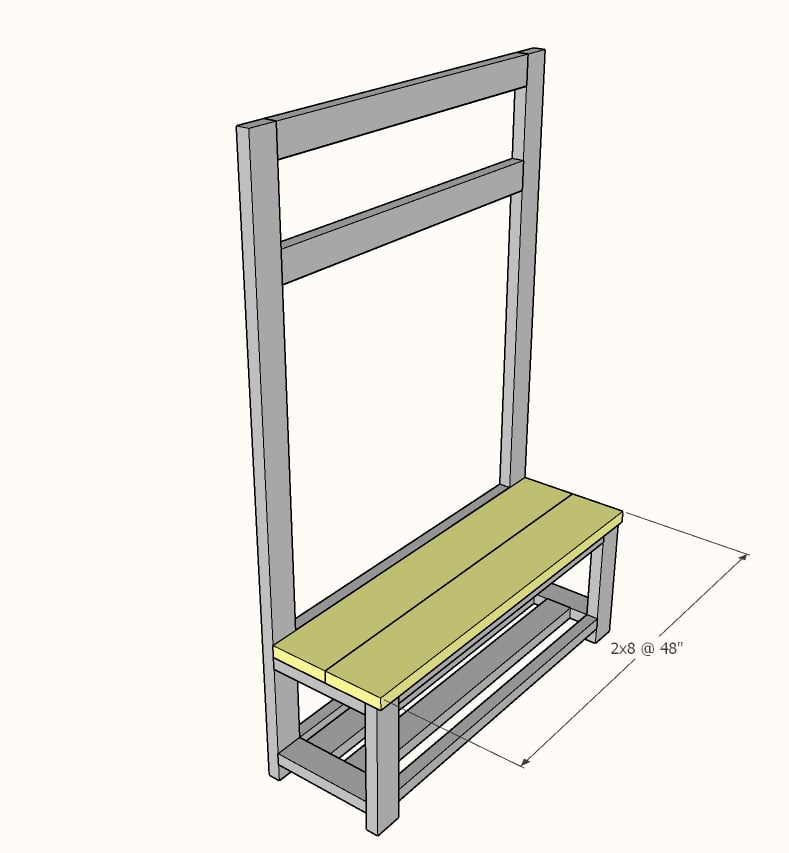
  • 2 - 2x4 @ 16-1/2" - front legs
  • 4 - 2x4 @ 12-1/2" - ends
  • 2 - 2x4 @ 72-1/2" - back legs
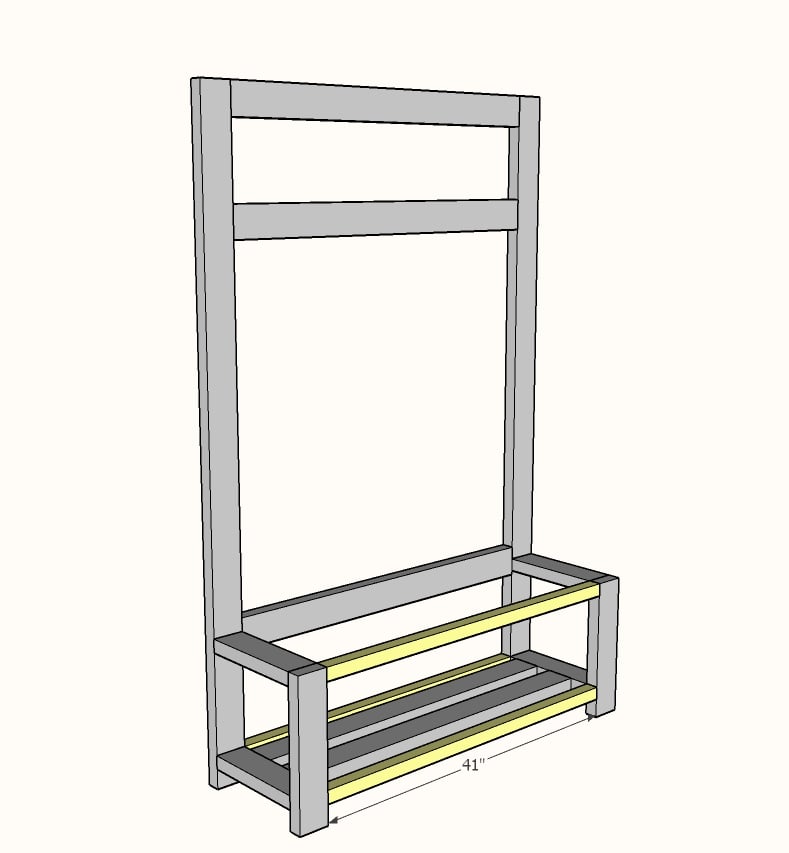
  • 5 - 2x4 @ 41" - horizontal tie ins
  • 3 - 2x2 @ 41" - horizontal tie ins
  • 2x2s for the Xs scribed and cut in plan
  • 2 - 2x8 @ 48" - seat
  • 2 - 2x2 @ 16" - seat ends
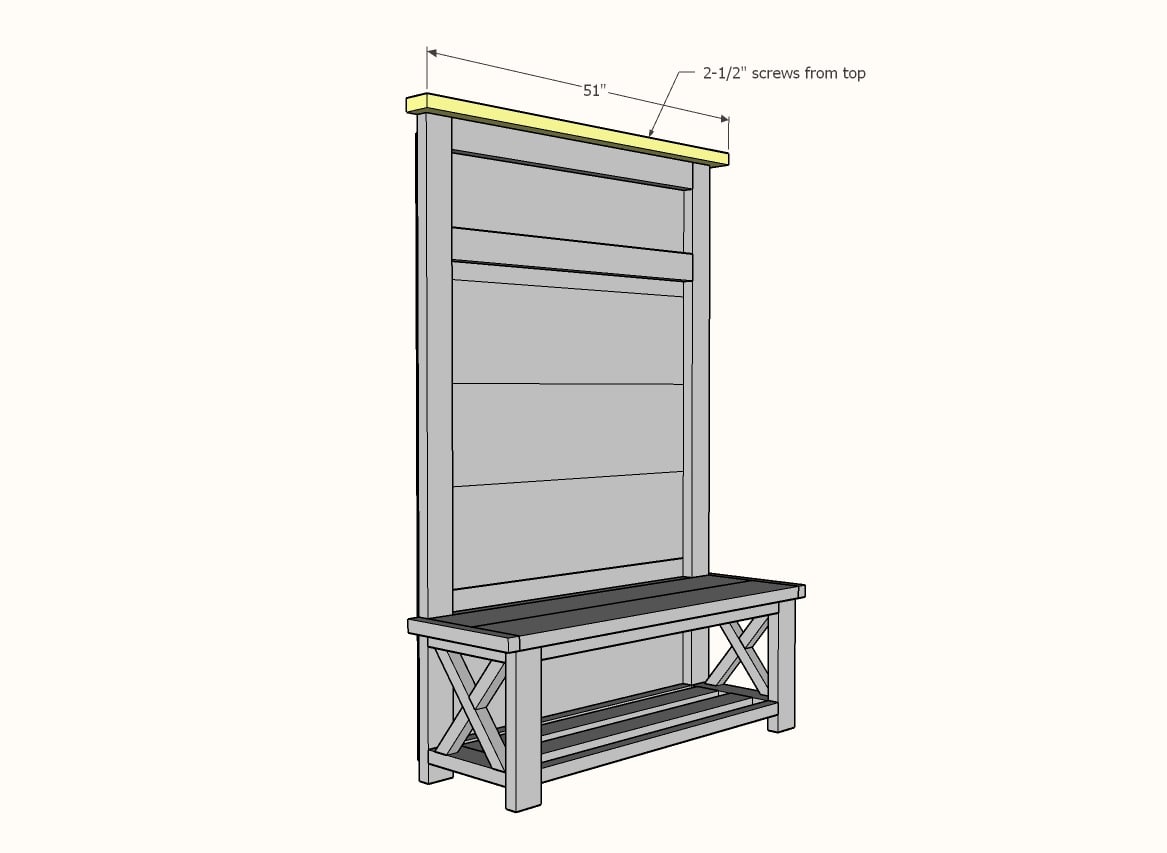
  • 1 - 2x4 @ 51" - top
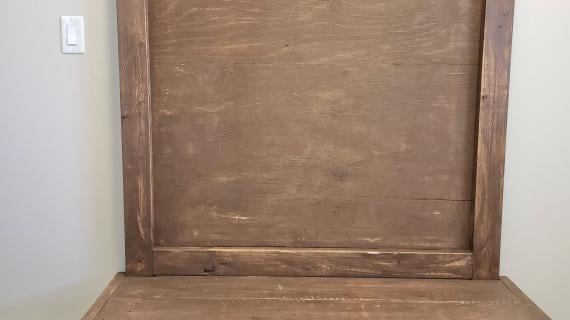
  • 1/4" plywood 48" x 68-1/2" - back


Tools
Tape Measure
Speed Square
Pencil
Safety Glasses
Hearing Protection
Kreg Jig
Drill
Circular Saw
Brad Nailer
Power Sander

Instructions

Step 1

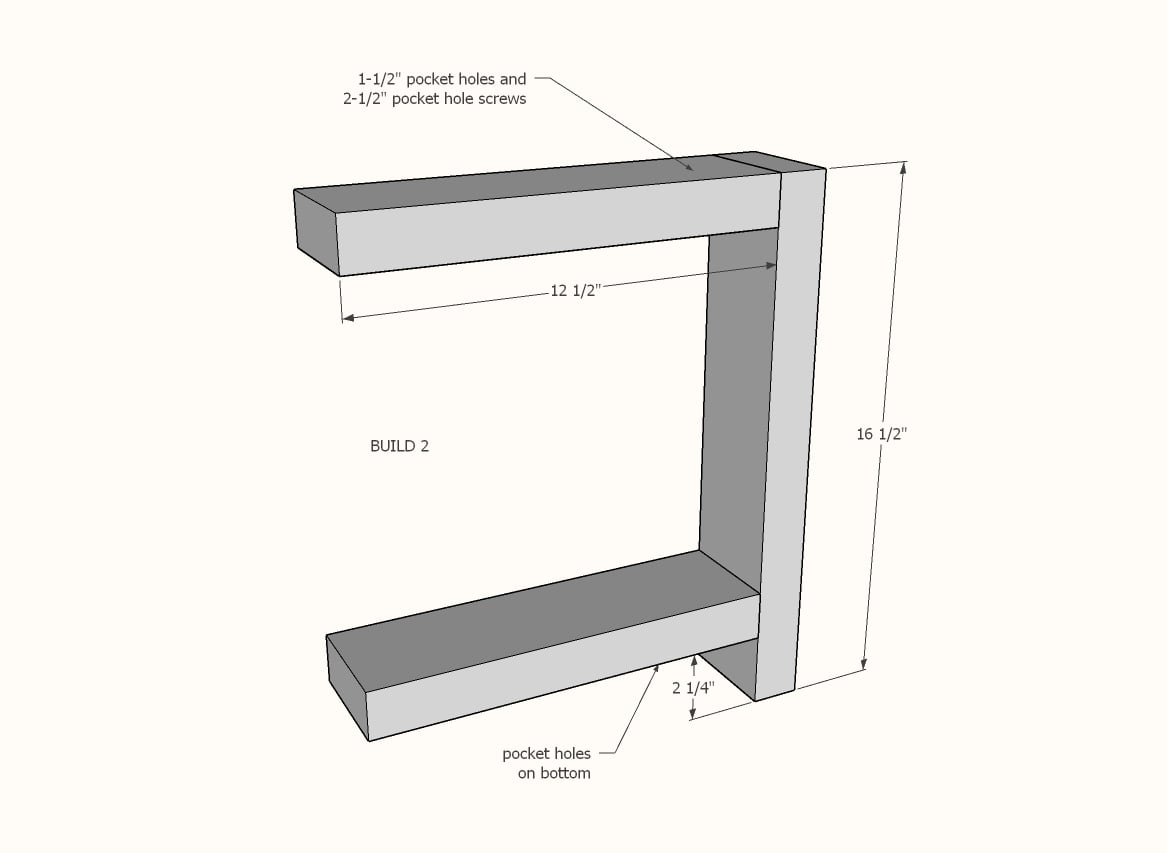
Drill two 1-1/2" pocket holes on each end of all of the 2x4 @ 12-1/2" long.

Attach to the front legs as shown in the diagram with 2-1/2" pocket hole screws.

Step 2

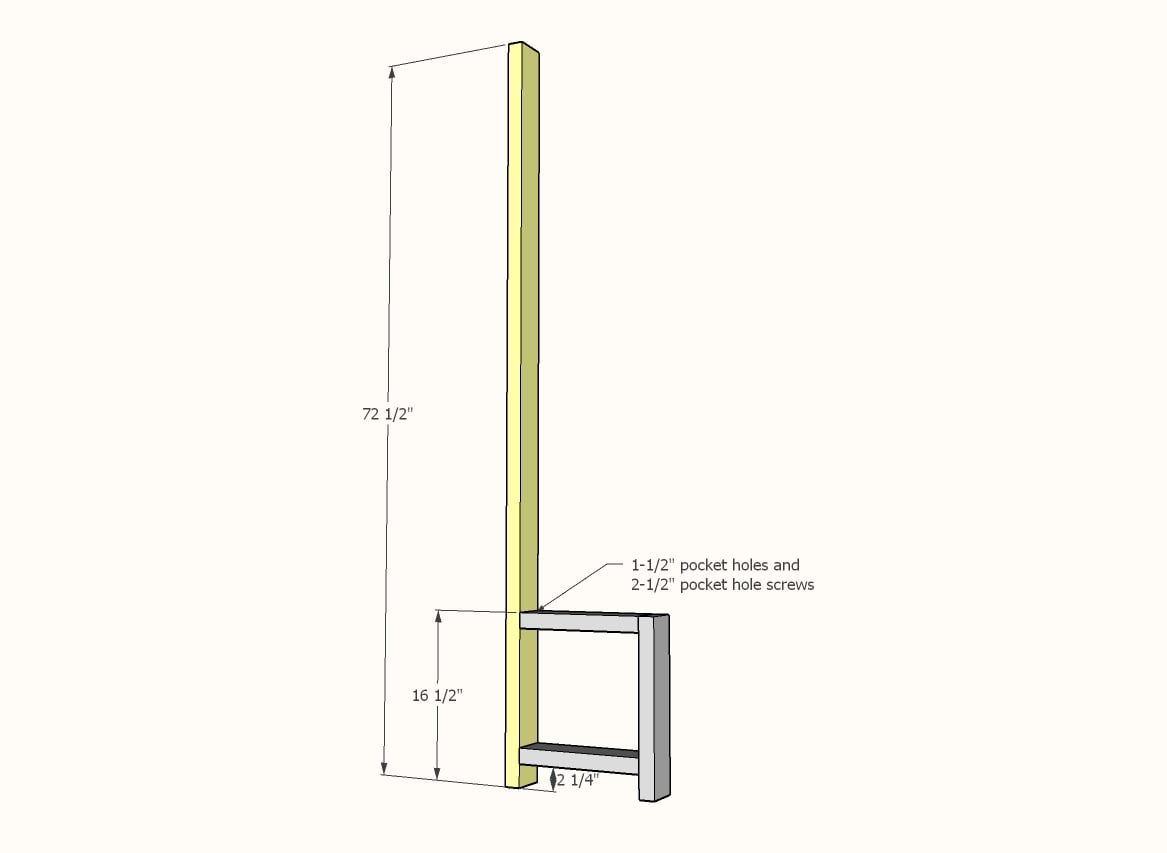
Attach to the back leg with 2-1/2" pocket hole screws.

Step 3

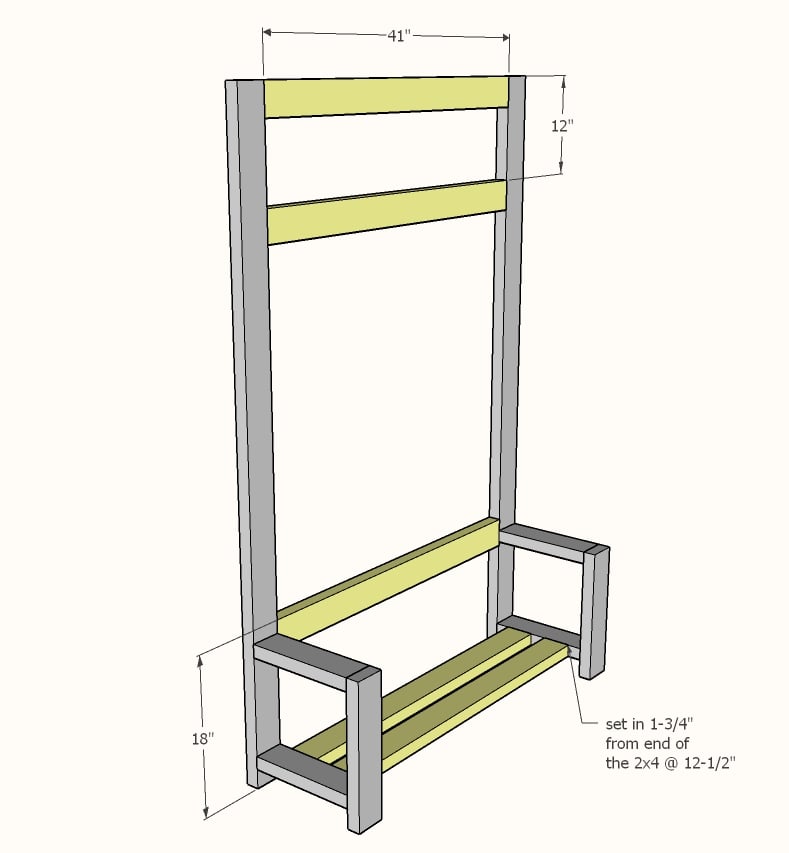
Drill two 1-1/2" pocket holes on each end of the 2x4 @ 41".

Attach to the legs with 2-1/2" pocket hole screws.

Step 4

Drill one 1-1/2" pocket hole on the ends of the 2x2s @ 41".

Attach to the legs with 2-1/2" pocket hole screws.

Step 5

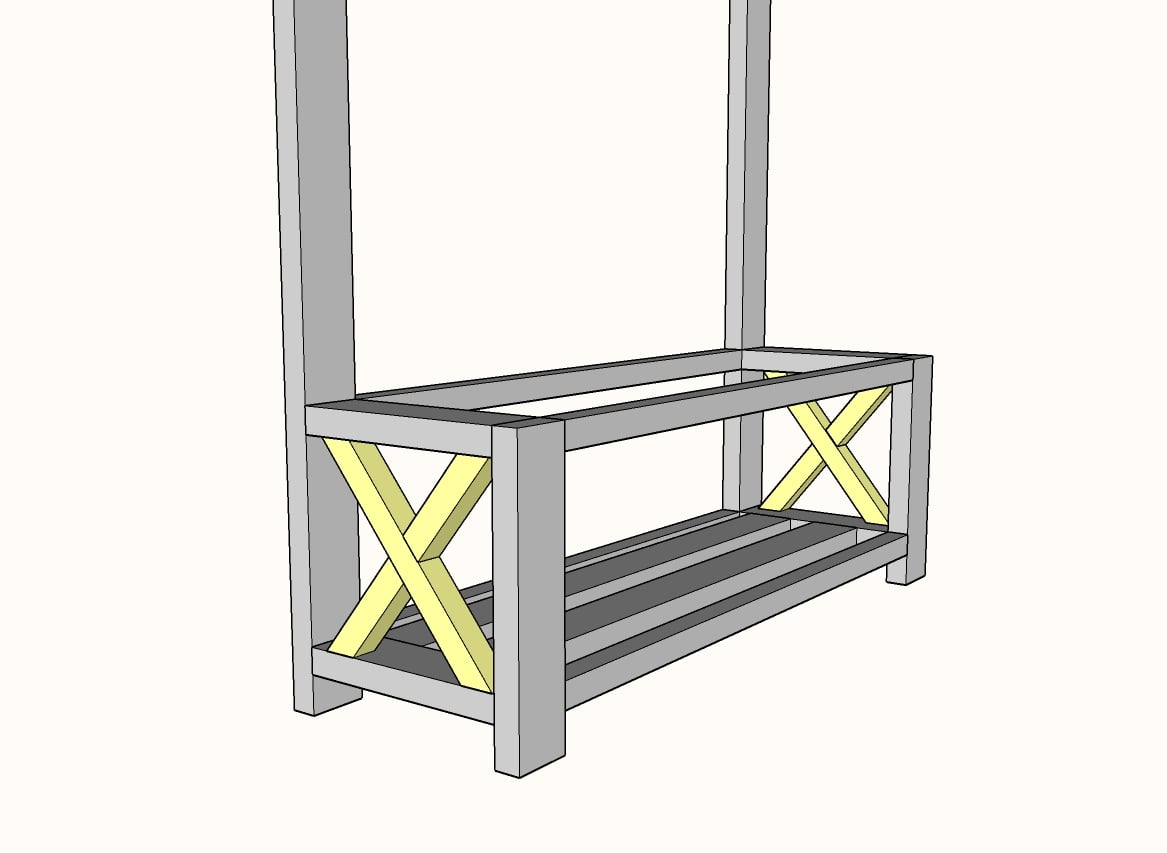
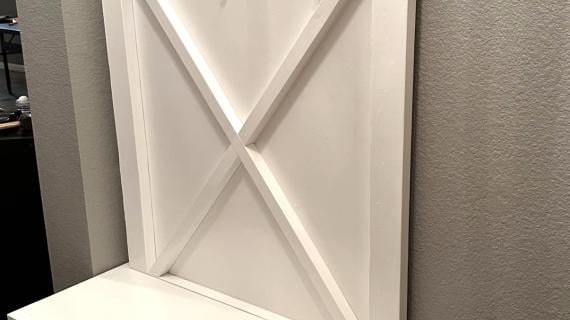
Scribe and cut the Xs as demonstrated in the video.

Attach the smaller X pieces to the larger piece with single 1-1/2" pocket holes with 2-1/2" pocket hole screws.  

Then use 2-1/2" screws to attach the X from the outside of the legs.  You can also use 2-1/2" pocket hole screws if you don't have other screws.

Step 6

We recommend attaching the two 2x8 boards together along the long edge with 1-1/2" pocket holes and 2-1/2" pocket hole screws.

Then attach the entire top from underneath with 2-1/2" screws, four screws should be plenty.

Step 7

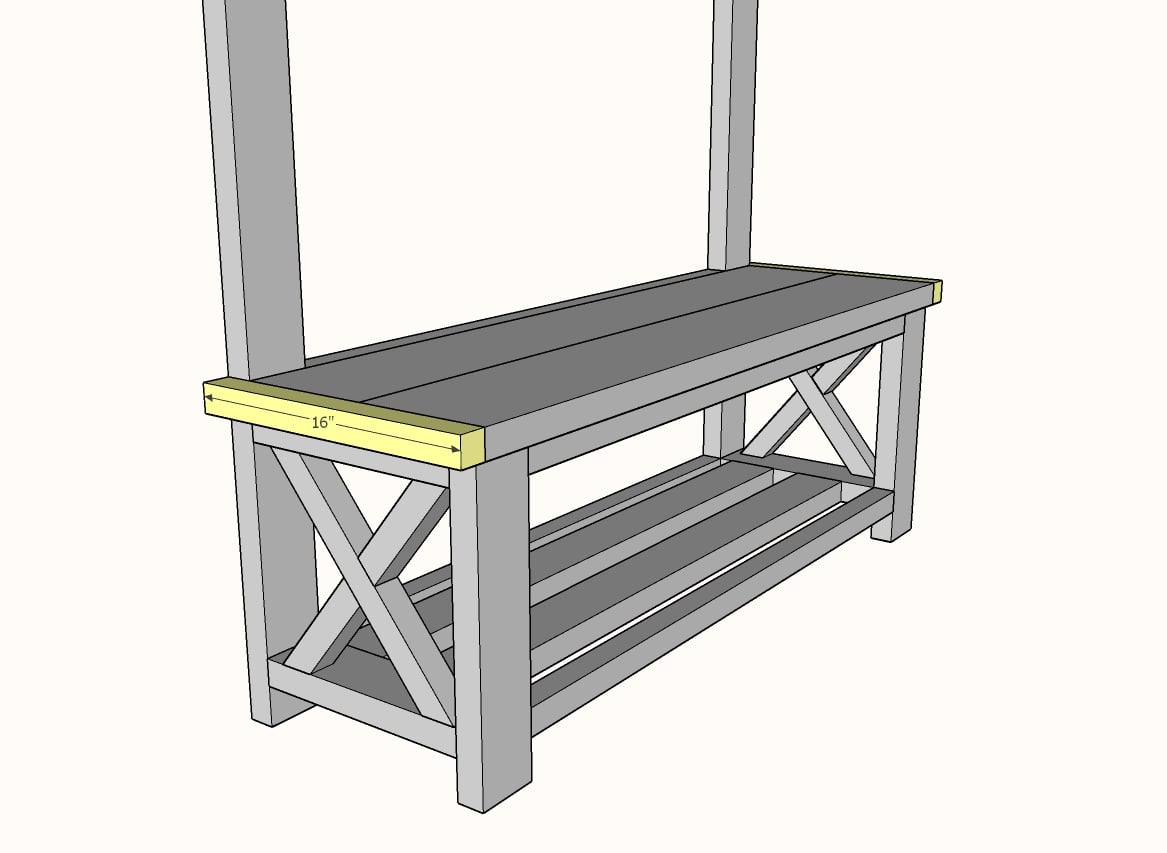
Use either 2" brad nails or 2-1/2" self tapping screws (can use pocket hole screws) to attach the 2x2 end trim.

Step 8

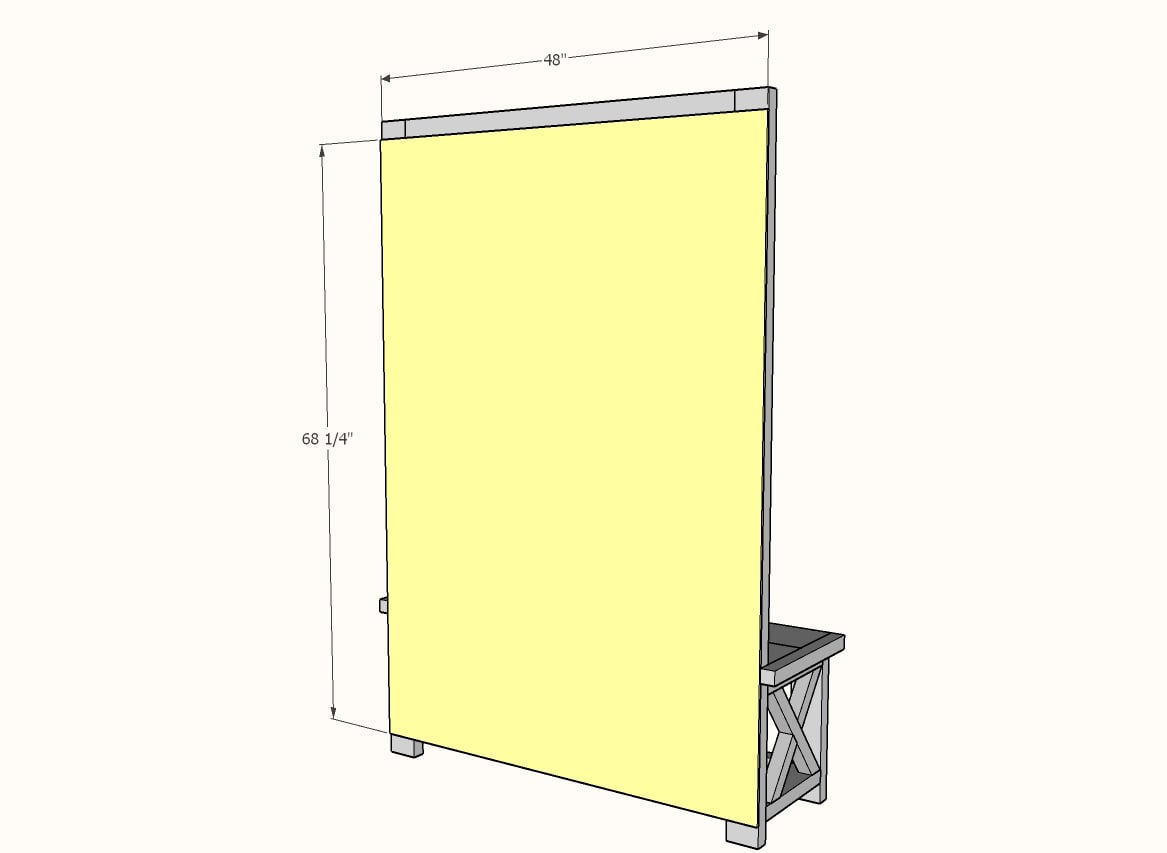
Attach back with 3/4" brad nails and wood glue.

Step 9

Attach header with 2-1/2" self tapping screws (can also use pocket hole screws).

Step 10

Finishing Instructions
Finish Used
For the finish we used Behr Marquee in off the shelf white in a semi-gloss finish. We sprayed and then finished with rollers and brushes.

Comments

SuperGeorge

Mon, 12/30/2019 - 12:02

Completed this about a week ago. As usual, I went with the "--" instead of the "X", but it still turns out great. Would have loved to upload, but no such opportunity. I need to look for my next project (preferably a bookshelf)

mpbmw94

Mon, 03/08/2021 - 11:46

Thank you for the plan Ana. I changed it up a bit but I enjoyed building this halltree.

Frequently Asked Questions

Wood Questions

What kind of wood should I use?
Most of our plans use standard construction lumber like pine or fir. It's affordable, easy to work with, and easy to find. It's also rapidly renewing and biodegradable, so a great eco friendly choice!

Can I use hardwoods instead?
Yes—just keep in mind they're heavier, cost more, and can be tougher on tools and harder to join together and finish. I recommend not tackling a hardwood project until after you have built several softwood projects.

What if my boards are warped?
Choose the straightest boards at the store. You can often work around slight warps by cutting them into shorter pieces.

What wood should I use for outdoor furniture?
Use red-toned or pressure-treated 2x lumber for framing, and cedar or cedar fence pickets for the decking. Outdoor furniture should be built like a deck—your local home center can help recommend the right wood for your climate.

Will my wood move or warp after I build?
Potentially, especially in humid climates. Let your wood acclimate indoors before building. Once acclimated and kept in a stable environment, movement should be minimal. Remember, most houses are built using framing lumber - it's all about keeping moisture down indoors.

Cutting Questions

Do I need a miter saw?
A miter saw is great, creating fast, safe, and precise cuts, even for beginners. But most plans can be built with a circular saw and a straight edge. If using a circular saw to cut, take time to practice, and get good at making cuts, before cutting your project boards.

How do I get clean cuts with a circular saw?
Clamp your board, measure twice, cut slow, and use a sharp blade. This takes practice, so spend some time making cuts. I go through becoming proficient at freehand cutting in my course, it is worth taking if you want to master this skill.

Will the store cut my wood?
Yes—most stores will do rough cuts to help you transport your materials home. But from store to store, the quality of cuts could greatly vary.

Joinery Questions

What screws should I use?
We recommend star-head self tapping screws for framing, most common sizes are 2-1/2", 1-3/4". Pre-drill if close to the edge or you find your wood is splitting.

Do I have to use pocket holes?
Pocket holes are the cheapest, easiest and fastest way to do some joints - like edge to edge or a hidden fastener joint. There are other methods, but these can be time consuming and expensive. We recommend using pocket holes as indicated in plans for best results.

How do I keep things square?
Use a speed square and measure diagonals after each step. Always clamp joints before screwing to keep them tight and flush.

Finishing Questions

Stain or paint before or after building?
A quick sand before and a full finish after gives the best results. Pre-finish if you're doing two-tone or detailed finishes.

What type of finish?
Use oil-based or water-based stain. For paint, cabinet-grade latex or enamel works great. High use surfaces on indoor projects should get a coat of polyurethane, I recommend a Helsman or Spar or other flexible poly that won't crack or peel with wood movement. For exterior projects, use a finish suitable for exterior fences.

How to get a smooth finish?
Start with a well sanded project. Sand between coats (220 grit), wipe clean, and apply light coats with a foam brush or roller.

Plan Questions

Can I change the size?
Many people do, and that's the great thing about building your own furniture! But do keep in mind going bigger might mean more supports are required, and often plans are optimized for minimal material waste.

Are these beginner-friendly?
Yes—plans are written with simple tools and clear steps in mind, with every effort to make plans as simple as possible.

Can I sell what I build?
Absolutely! Just don’t resell or repost the plans themselves.

General Questions

What tools do I really need?
A drill, circular saw, tape measure, square, and a few clamps will get you through most projects.

Do I need a workshop?
Nope! A driveway or small patio is plenty to get started, just make sure you have a level place to work. If you find you are building several projects a year, creating a small workbench is a great way to store tools and have a dedicated workspace.

What if I mess up?
Wood filler, sanding, or flipping boards goes a long way. Mistakes are part of the process!

What can I do to make my projects look more professional?
Start with straight boards, make accurate cuts, clamp all joints, and line up everything neatly. Sand thoroughly, use a neutral finish, and apply it in light coats for a clean look.

I've never built anything before. Where should I start?
Start with a few smaller softwood projects to get hands-on experience. Or if you're tackling a big project, buy a little extra lumber and practice your cuts and joints first. If possible, work with someone who has a bit of experience.

Care & Maintenance

How long will my furniture last?
With good joinery and regular care, your DIY furniture can last for decades. I have pieces in my own home that are over 20 years old and still going strong! One of the best parts about DIY furniture is that it’s easy to repaint, refinish, or repair—so your projects can grow and adapt with you.

How should I care for outdoor furniture?
Lightly pressure wash or hose it down once or twice a year. Tighten screws and reapply finish as needed to protect it—just like a deck or fence. A little upkeep goes a long way in extending the life of your furniture.

How about indoor furniture?
Regularly dust or wipe with a damp cloth. If it starts to look worn, a light sanding and touch-up paint or stain can refresh it in no time. DIY pieces are meant to be durable and fixable—so don’t be afraid to give them some love now and then.

Want to Build with Confidence?

Check out my ebook: 12 Skills to Build Your Own Furniture
It walks you through the core skills every builder needs—measuring, cutting, joinery, and finishing—so you can build beautiful furniture that lasts.

Still Have Questions?

Email us anytime at [email protected] and we’ll be happy to help!