Shanty Open Shelf Console

tall open shelf console table
Difficulty
Intermediate
| Print this plan

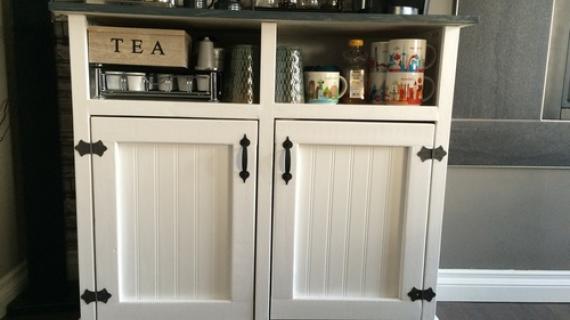
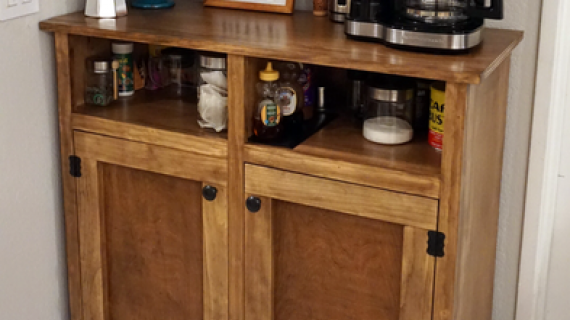
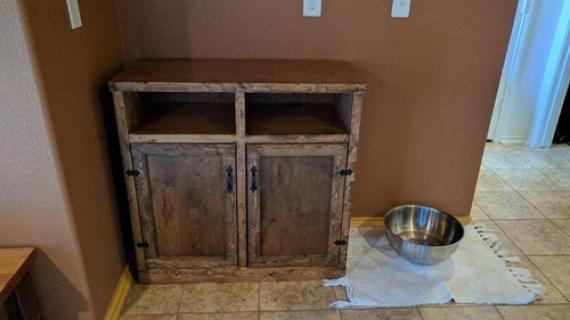
Free plans to build an open shelf console from Ana-White.com.  This beautiful console features two cubbies for baskets and cabinet doors to hide more storage. 

Step by step plans include shopping and cut list, diagrams, and lots of reader submitted photos.  

Why We Built this Console Table

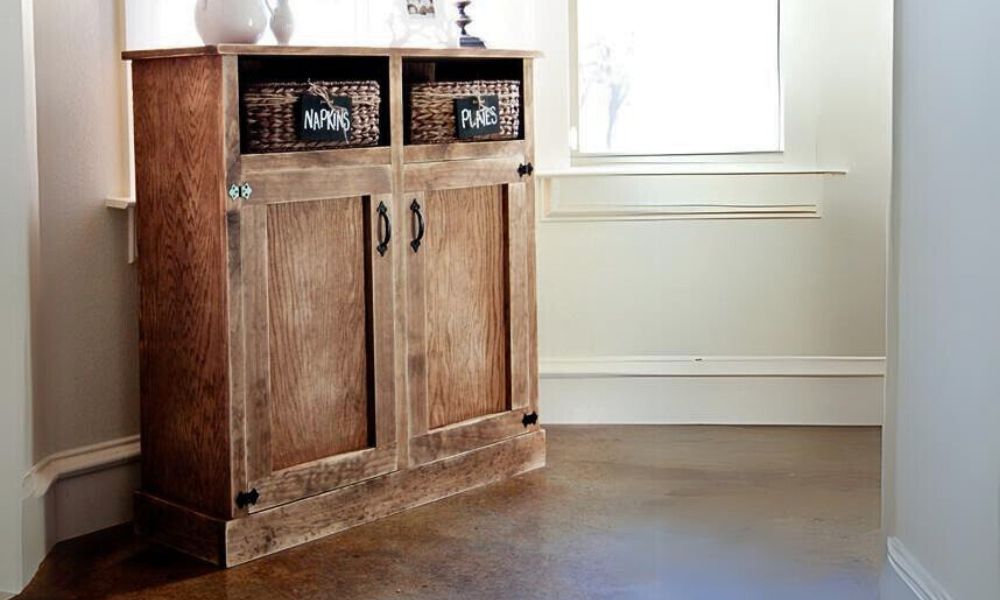
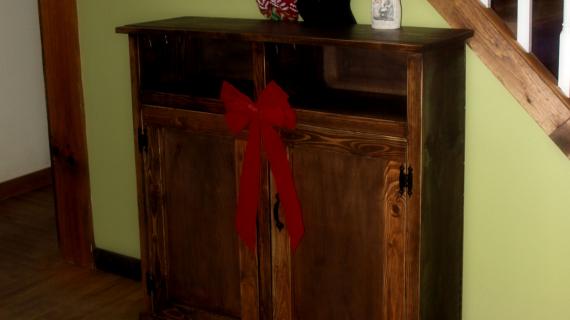
My friend Whitney from Shanty2Chic loved the Cyndi Console Plans, but wanted something a little taller.  So she modified the plans and came up with this!  

And of course, we had to share the new plans with you!  I love this little console - it could work in any room of the home and store soooo much!  

Here's from Whitney: "I LOVE my new table! I needed a little height in this part of my kitchen and this baby fit the bill. I love DIY... I love that I don't have to shop around forever, and spend a ton of money to get a piece that fits my home. I can build it myself! Thanks so much for working with me on this one Ana!"


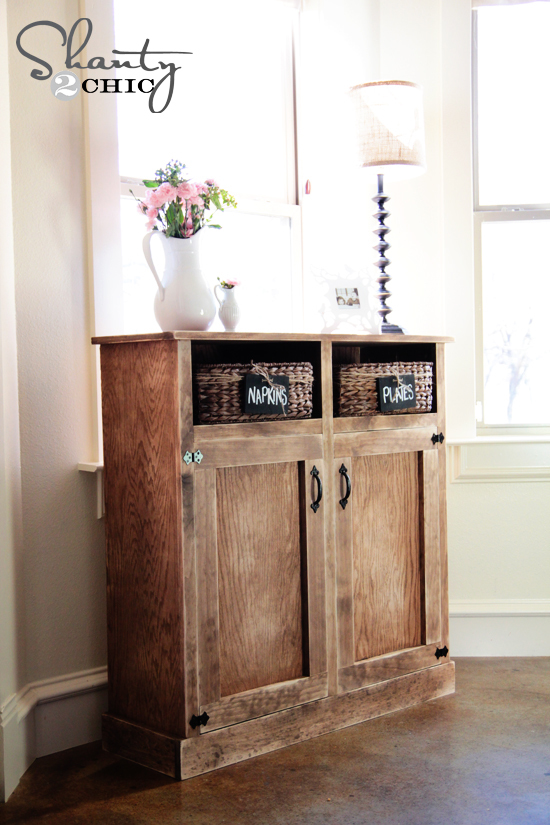
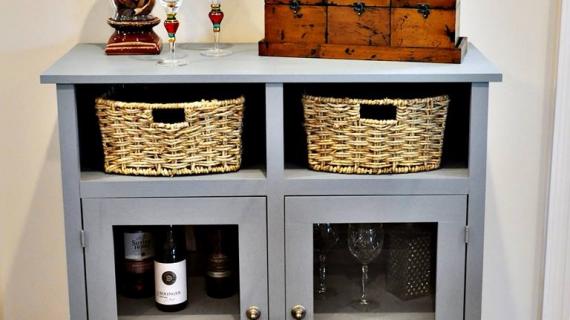
Want to build it too?  Of course, we've got the plans right below, but please, first take a second and check out tons more photos and building tips in Whitney's post over at Shanty2Chic.  


Dimensions
console table plans with baskets
Dimensions shown above.

Preparation

Shopping List
  • 1 sheet 3/4" plywood cut into strips 11 1/4" wide (Whitney used PureBond Formaldehyde Free Plywood) or you can use 3 - 1x12 boards @ 8 feet long
  • 1 - 1x4 @ 6 feet long
  • 2 - 1x2 @ 8 feet long
  • 2 - 1x3 @ 6 feet long
  • 1/4 plywood (Whitney used PureBond) for back and door backs
  • Recommend pocket hole construction with 1 1/4" pocket hole screws
  • 1" and 1 1/4" brad nails for attaching face frame and 1/4" plywood
Cut List
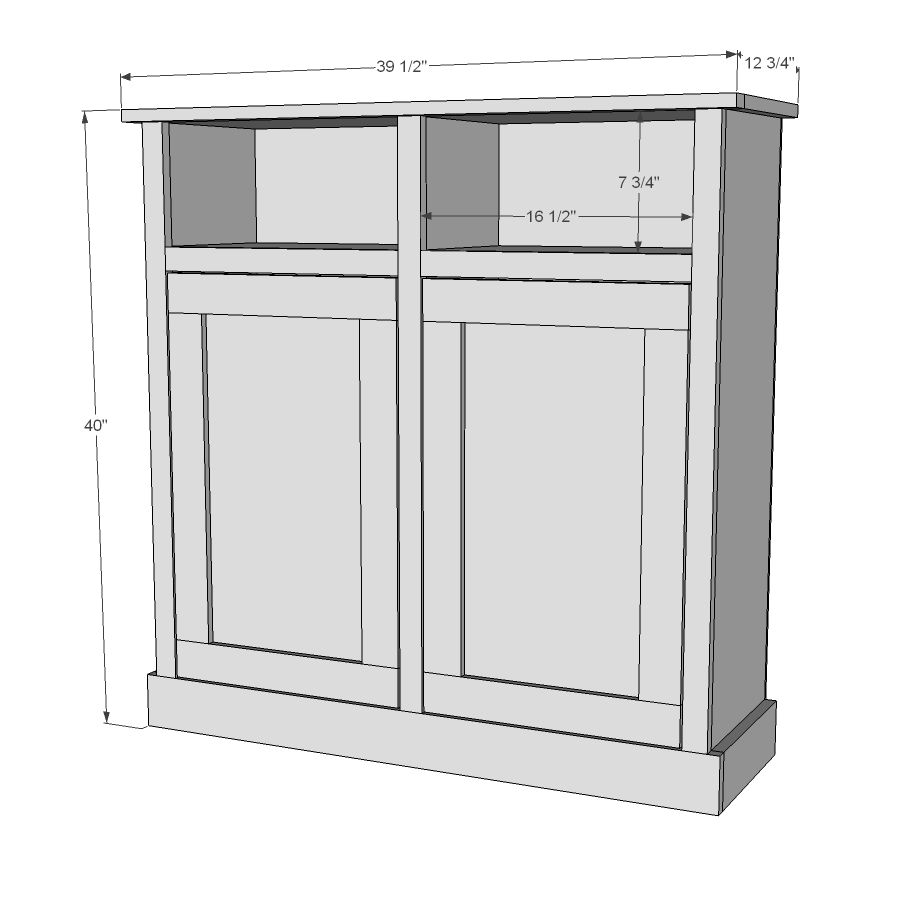
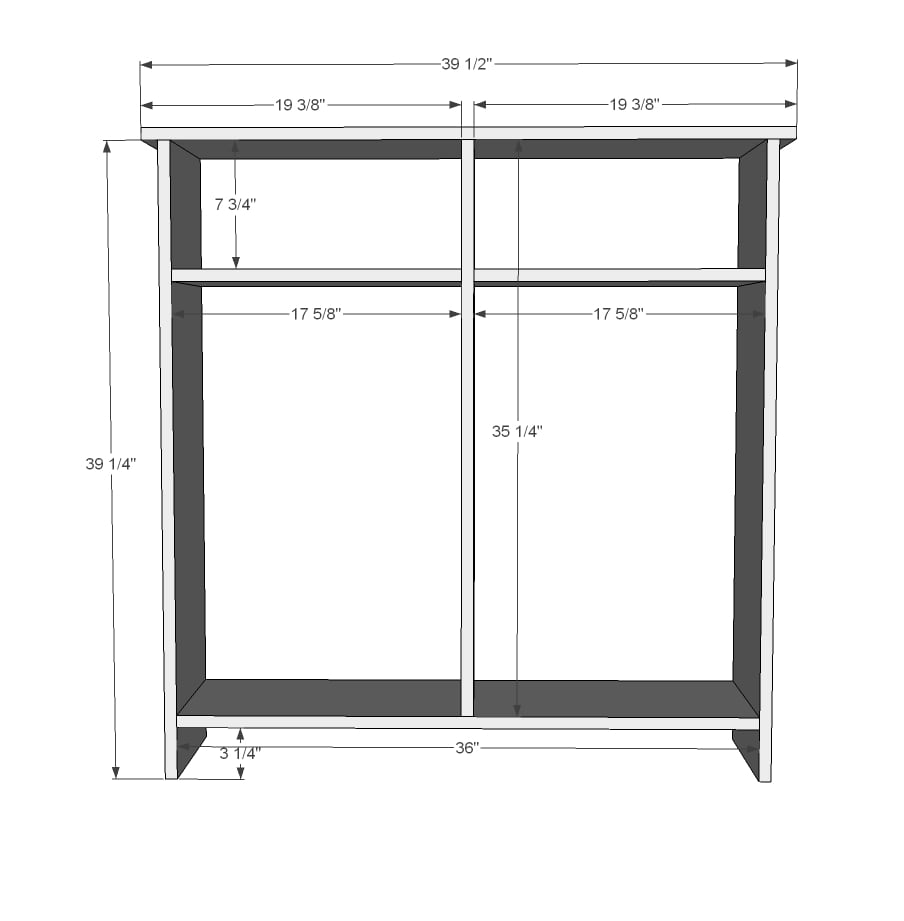
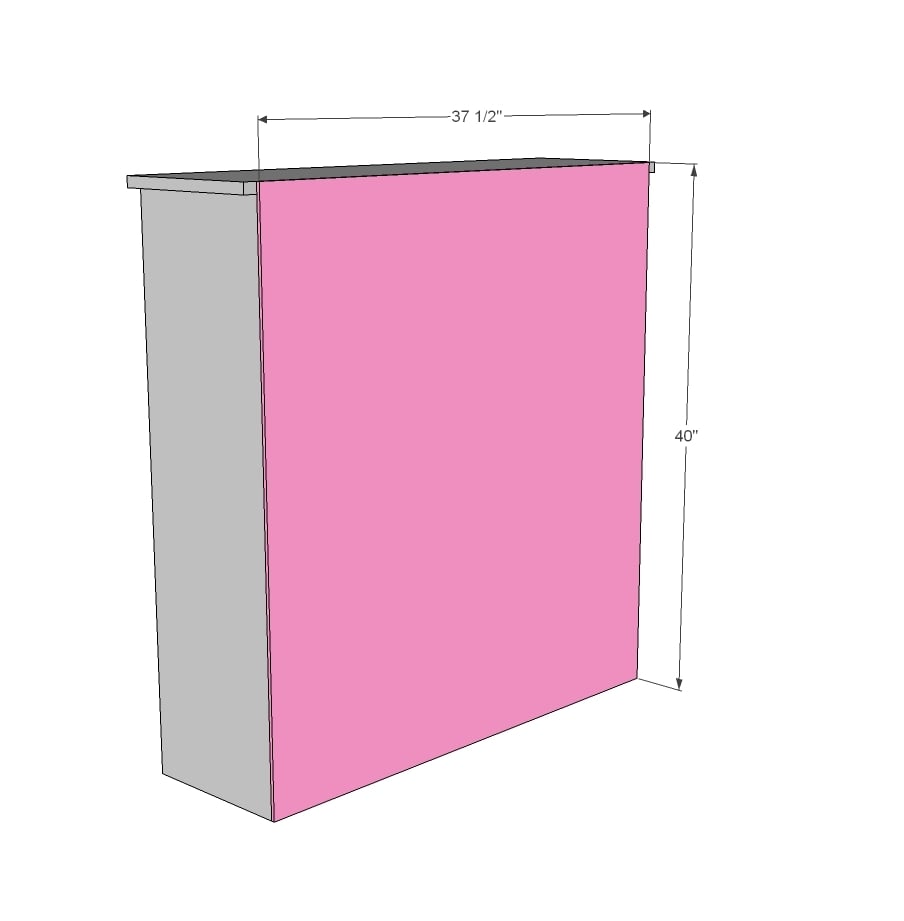
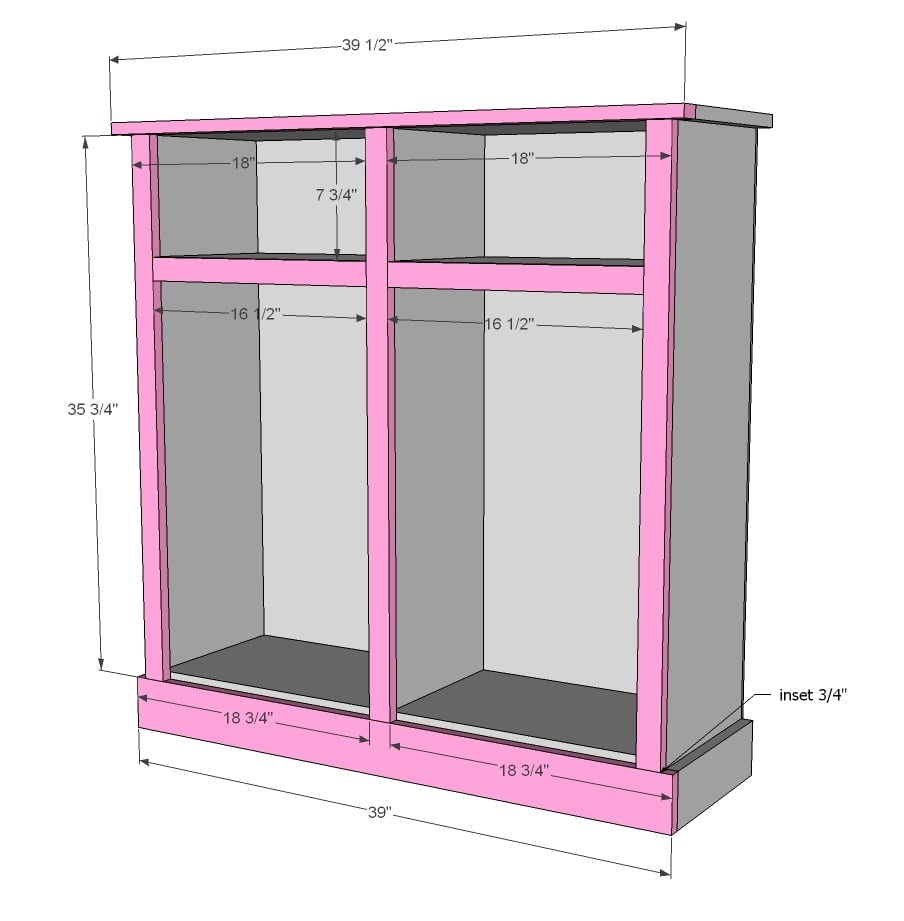
  • Sides - 2- 1x12 @ 39 1/4"
  • Top - 1- 1x12 @ 39 1/2"
  • Bottom Shelf - 1- 1x12 @ 36" (I positioned this shelf where the top of the shelf is 7 3/4" from the top of the cabinet)
  • Center Divider - 1- 1x12 @ 35 3/4"
  • Shelves under baskets - 2 - 1x12 @ 17 5/8"
  • Footer Front - 1- 1x4 @ 39"
  • Footer sides - 2 - 1x4 @ 11 1/4"
  • Front Trim - 3 - 1x2 @ 35 3/4"
  • Top front - 1- 1x2 @ 39 1/2"
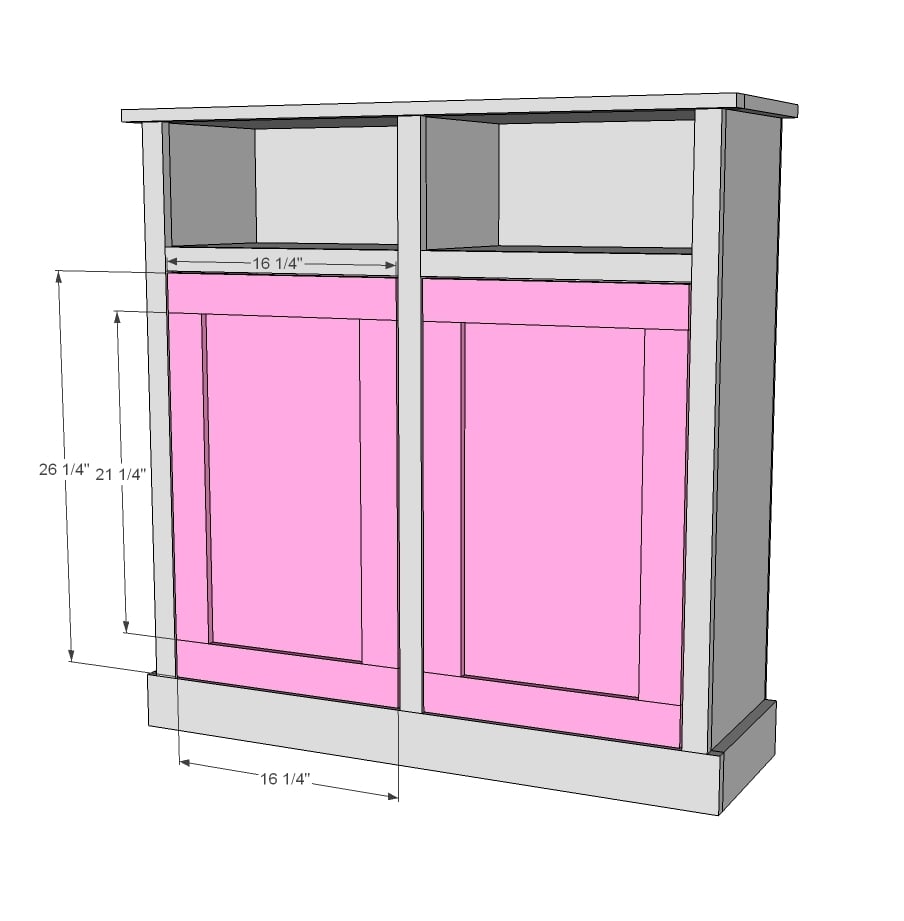
  • Doors - Whitney used 1x3 for the doors.
  • Door tops - 16 1/4"
  • Door Sides - 21 1/4" 1/4"
  • PureBond for the doors at 16"x26"
  • Optional shelves on inside from scraps. If you use the 1x12 it will need to be cut down about an inch to make room for the flush doors.
  • Back - 1/4" PureBond @ 37 1/2 x 39"
Tools
Tape Measure
Speed Square
Pencil
Safety Glasses
Hearing Protection
Kreg Jig
Drill
Circular Saw
Miter Saw
Brad Nailer
Power Sander
General Instructions


For long term durability and more professional results, I recommend using a pocket hole joinery system for wood joints.  Here is a video with tips for using a pocket hole jig:

Instructions

Step 1

Build the box first. I recommend using 3/4" pocket holes and 1 1/4" pocket hole screws and glue.

Step 2

Attach back with glue and finish nails. Attach to center divider and all fixed shelves.

Step 3

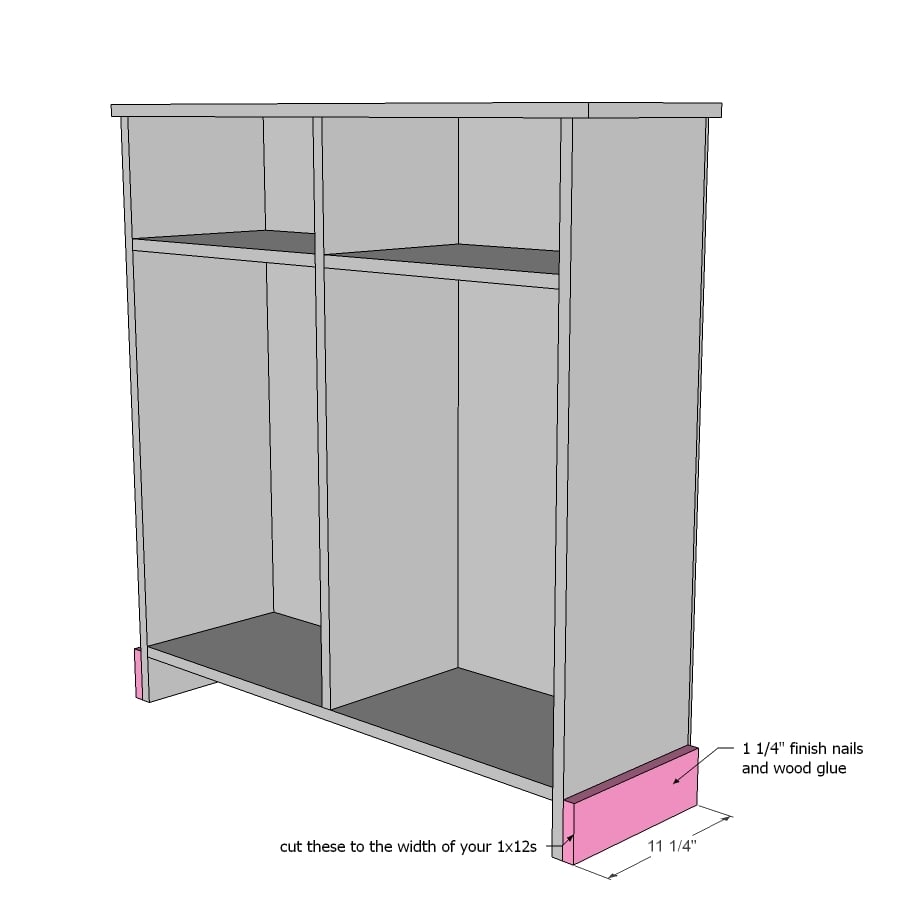
Attach footer sides with finish nails and glue.

Step 4

I recommend building face frame first with pocket holes, then attaching completed face frame to front of cabinet with glue and finish nails.

Step 5

Finishing Instructions
Preparation Instructions
Fill all holes with wood filler and let dry. Apply additional coats of wood filler as needed. When wood filler is completely dry, sand the project in the direction of the wood grain with 120 grit sandpaper. Vacuum sanded project to remove sanding residue. Remove all sanding residue on work surfaces as well. Wipe project clean with damp cloth.

It is always recommended to apply a test coat on a hidden area or scrap piece to ensure color evenness and adhesion. Use primer or wood conditioner as needed.

Comments

lscrandall

Tue, 08/06/2013 - 20:14
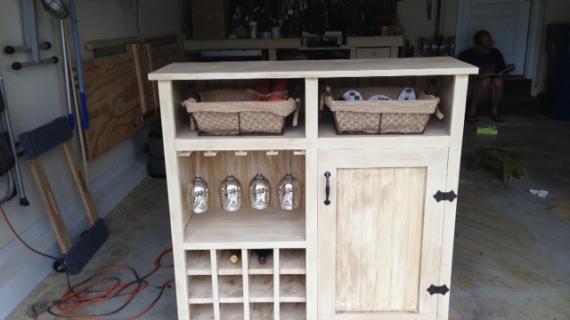
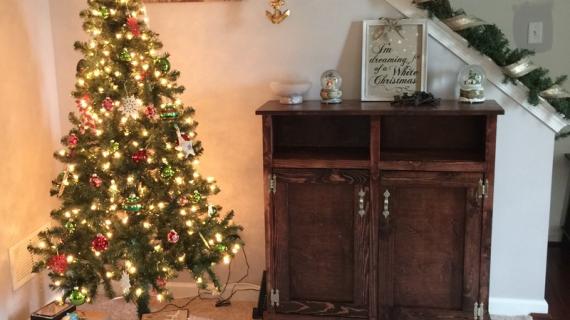
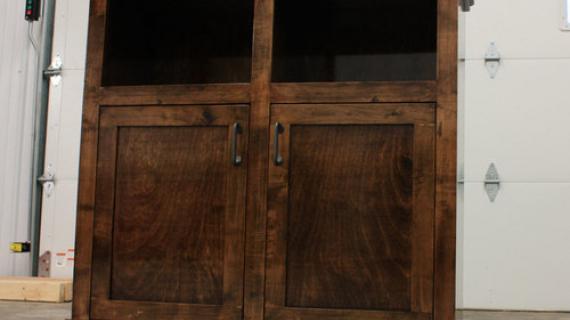
This weekend I took the plans from the SHANTY OPEN SHELF CONSOLE and modified it to become a wine cabinet. This wine cabinet is being donated to a local children's charity (United Services for Children) for their big auction night on August 17th here in St Charles Missouri. We hope the piece brings their school the much needed funds. Thank you Ana for providing a plan I could modify in a weekend to get this piece completed! You are awesome!!! PS - The momplex is looking great!

cassiet717

Tue, 10/22/2013 - 13:44

Step 4 shows trim for the bottoms of the open shelves (2 - 16 1/2" pieces), but I don't see that on the cut list. Is it not supposed to be trimmed there or was it maybe left out?

SarahC

Wed, 11/18/2015 - 14:59

What kind of wood do you suggest using for the 1x2, 1x3, 1x4? Are furring strips ok or not for this kind of project? It's my first build and I plan on painting it.

Ana White Admin

Thu, 11/19/2015 - 12:23

I'd go with pine or doug fir and stir away from firring strips for this project. 

cslavinsky

Fri, 01/08/2016 - 18:46

We have a slab of granite in our garage that would make the perfect top for this cabinet.  Are there any adjustments that I would need to make in order to use the granite for the top?  It's pretty heavy.  Also, would I be able to use casters on the bottom, or should I leave it as is if I'm going to use the granite?

Frequently Asked Questions

Wood Questions

What kind of wood should I use?
Most of our plans use standard construction lumber like pine or fir. It's affordable, easy to work with, and easy to find. It's also rapidly renewing and biodegradable, so a great eco friendly choice!

Can I use hardwoods instead?
Yes—just keep in mind they're heavier, cost more, and can be tougher on tools and harder to join together and finish. I recommend not tackling a hardwood project until after you have built several softwood projects.

What if my boards are warped?
Choose the straightest boards at the store. You can often work around slight warps by cutting them into shorter pieces.

What wood should I use for outdoor furniture?
Use red-toned or pressure-treated 2x lumber for framing, and cedar or cedar fence pickets for the decking. Outdoor furniture should be built like a deck—your local home center can help recommend the right wood for your climate.

Will my wood move or warp after I build?
Potentially, especially in humid climates. Let your wood acclimate indoors before building. Once acclimated and kept in a stable environment, movement should be minimal. Remember, most houses are built using framing lumber - it's all about keeping moisture down indoors.

Cutting Questions

Do I need a miter saw?
A miter saw is great, creating fast, safe, and precise cuts, even for beginners. But most plans can be built with a circular saw and a straight edge. If using a circular saw to cut, take time to practice, and get good at making cuts, before cutting your project boards.

How do I get clean cuts with a circular saw?
Clamp your board, measure twice, cut slow, and use a sharp blade. This takes practice, so spend some time making cuts. I go through becoming proficient at freehand cutting in my course, it is worth taking if you want to master this skill.

Will the store cut my wood?
Yes—most stores will do rough cuts to help you transport your materials home. But from store to store, the quality of cuts could greatly vary.

Joinery Questions

What screws should I use?
We recommend star-head self tapping screws for framing, most common sizes are 2-1/2", 1-3/4". Pre-drill if close to the edge or you find your wood is splitting.

Do I have to use pocket holes?
Pocket holes are the cheapest, easiest and fastest way to do some joints - like edge to edge or a hidden fastener joint. There are other methods, but these can be time consuming and expensive. We recommend using pocket holes as indicated in plans for best results.

How do I keep things square?
Use a speed square and measure diagonals after each step. Always clamp joints before screwing to keep them tight and flush.

Finishing Questions

Stain or paint before or after building?
A quick sand before and a full finish after gives the best results. Pre-finish if you're doing two-tone or detailed finishes.

What type of finish?
Use oil-based or water-based stain. For paint, cabinet-grade latex or enamel works great. High use surfaces on indoor projects should get a coat of polyurethane, I recommend a Helsman or Spar or other flexible poly that won't crack or peel with wood movement. For exterior projects, use a finish suitable for exterior fences.

How to get a smooth finish?
Start with a well sanded project. Sand between coats (220 grit), wipe clean, and apply light coats with a foam brush or roller.

Plan Questions

Can I change the size?
Many people do, and that's the great thing about building your own furniture! But do keep in mind going bigger might mean more supports are required, and often plans are optimized for minimal material waste.

Are these beginner-friendly?
Yes—plans are written with simple tools and clear steps in mind, with every effort to make plans as simple as possible.

Can I sell what I build?
Absolutely! Just don’t resell or repost the plans themselves.

General Questions

What tools do I really need?
A drill, circular saw, tape measure, square, and a few clamps will get you through most projects.

Do I need a workshop?
Nope! A driveway or small patio is plenty to get started, just make sure you have a level place to work. If you find you are building several projects a year, creating a small workbench is a great way to store tools and have a dedicated workspace.

What if I mess up?
Wood filler, sanding, or flipping boards goes a long way. Mistakes are part of the process!

What can I do to make my projects look more professional?
Start with straight boards, make accurate cuts, clamp all joints, and line up everything neatly. Sand thoroughly, use a neutral finish, and apply it in light coats for a clean look.

I've never built anything before. Where should I start?
Start with a few smaller softwood projects to get hands-on experience. Or if you're tackling a big project, buy a little extra lumber and practice your cuts and joints first. If possible, work with someone who has a bit of experience.

Care & Maintenance

How long will my furniture last?
With good joinery and regular care, your DIY furniture can last for decades. I have pieces in my own home that are over 20 years old and still going strong! One of the best parts about DIY furniture is that it’s easy to repaint, refinish, or repair—so your projects can grow and adapt with you.

How should I care for outdoor furniture?
Lightly pressure wash or hose it down once or twice a year. Tighten screws and reapply finish as needed to protect it—just like a deck or fence. A little upkeep goes a long way in extending the life of your furniture.

How about indoor furniture?
Regularly dust or wipe with a damp cloth. If it starts to look worn, a light sanding and touch-up paint or stain can refresh it in no time. DIY pieces are meant to be durable and fixable—so don’t be afraid to give them some love now and then.

Want to Build with Confidence?

Check out my ebook: 12 Skills to Build Your Own Furniture
It walks you through the core skills every builder needs—measuring, cutting, joinery, and finishing—so you can build beautiful furniture that lasts.

Still Have Questions?

Email us anytime at [email protected] and we’ll be happy to help!