
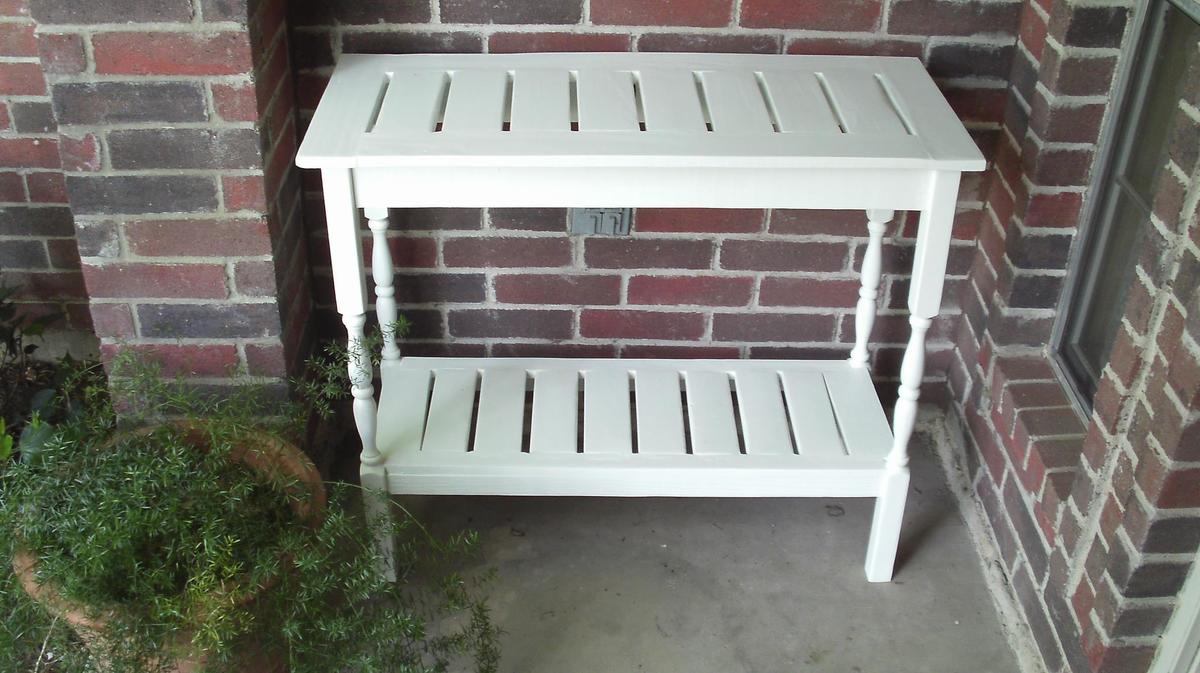

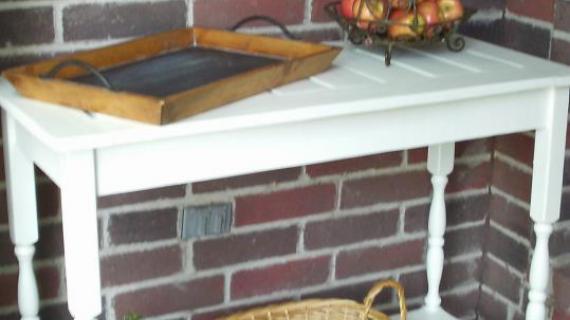
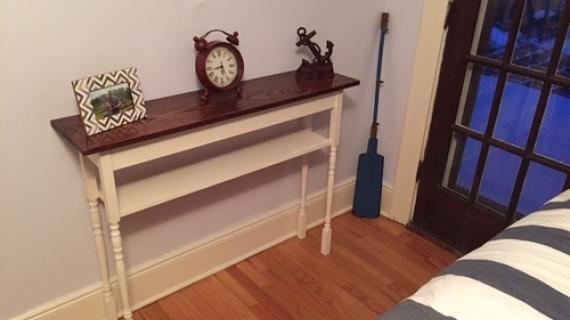
Free plans to build an outdoor console table using stair balusters for legs!
After 600 of you liked Sonya's Stair Baluster Outdoor Console Table on our Facebook Page, I had to ask (okay, so I begged) Sonya to let me hack some plans for you!
And she said yes!!!
So please extend a special thank you today to Sonya for letting us share plans with you today for this Stair Baluster Console Table.
Love it? Pin it to your to-do list!

Preparation
4 - Stair Balusters (as shown 34" tall x 1 1/4" x 1 1/4")
2 - 1x3 @ 8 feet long
5 - 1x4 @ 8 feet long
1 1/4" pocket hole screws
exterior wood glue
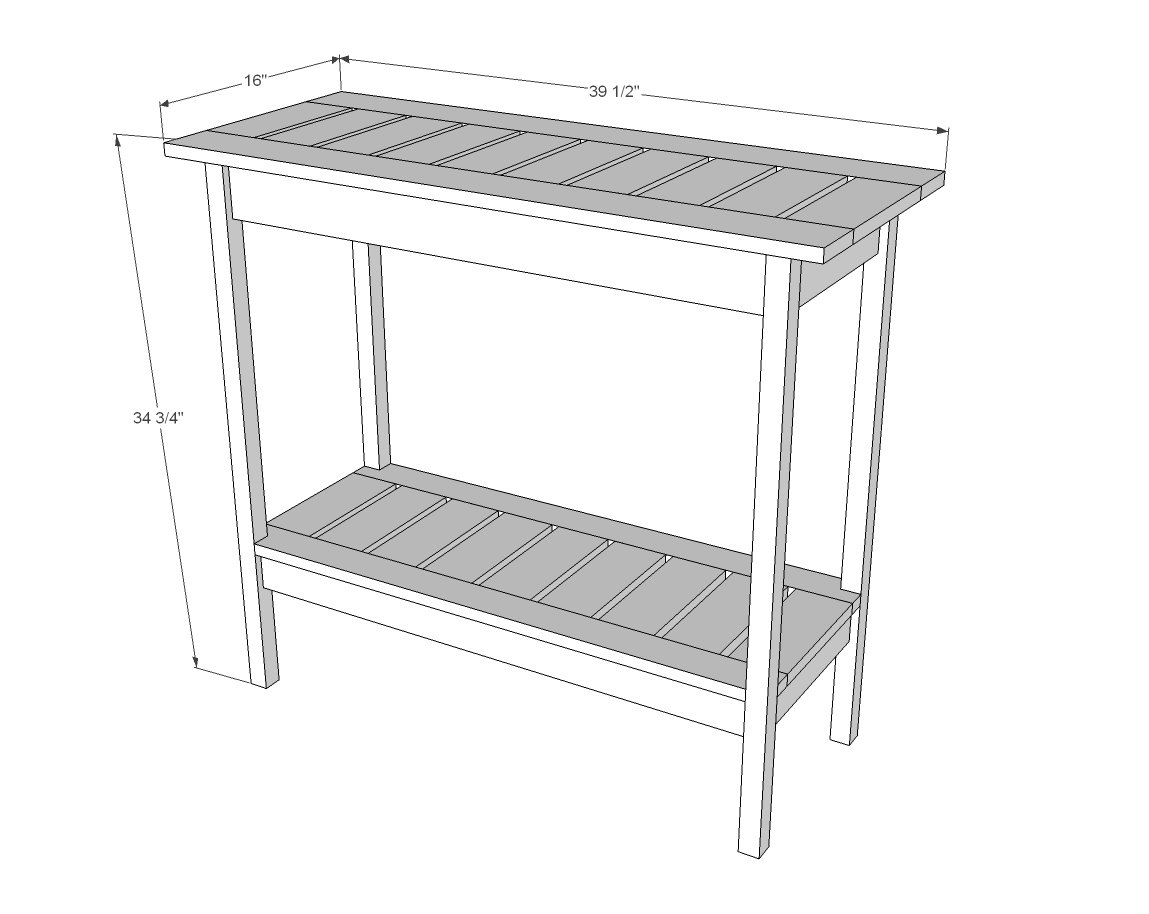
19 - 1x4 @ 9" long
2 - 1x4 @ 39 1/2" long
2 - 1x3 @ 35 1/2" long
4 - Stair Balusters (as shown 34" tall x 1 1/4" x 1 1/4")
2 - 1x4 @ 11 1/2" (top aprons)
2 - 1x4 @ 33" (top aprons)
2 - 1x3 @ 11 1/2" (bottom aprons)
2 - 1x3 @ 33" (bottom aprons)


Please read through the entire plan and all comments before beginning this project. It is also advisable to review the Getting Started Section. Take all necessary precautions to build safely and smartly. Work on a clean level surface, free of imperfections or debris. Always use straight boards. Check for square after each step. Always predrill holes before attaching with screws. Use glue with finish nails for a stronger hold. Wipe excess glue off bare wood for stained projects, as dried glue will not take stain. Be safe, have fun, and ask for help if you need it. Good luck!
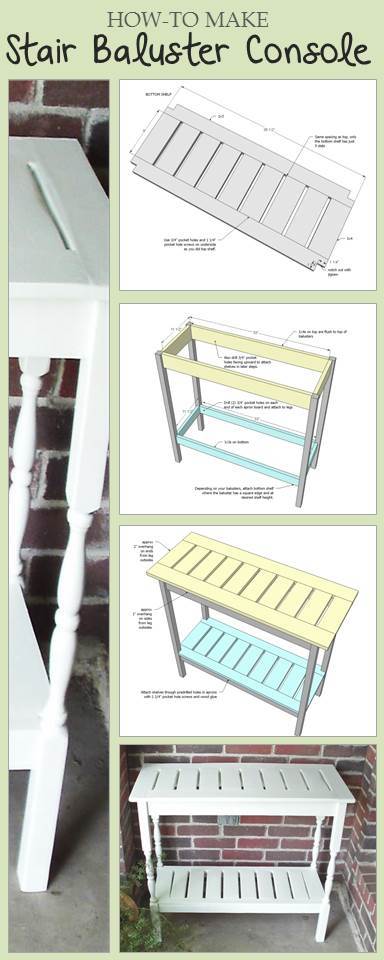
Instructions
Step 1
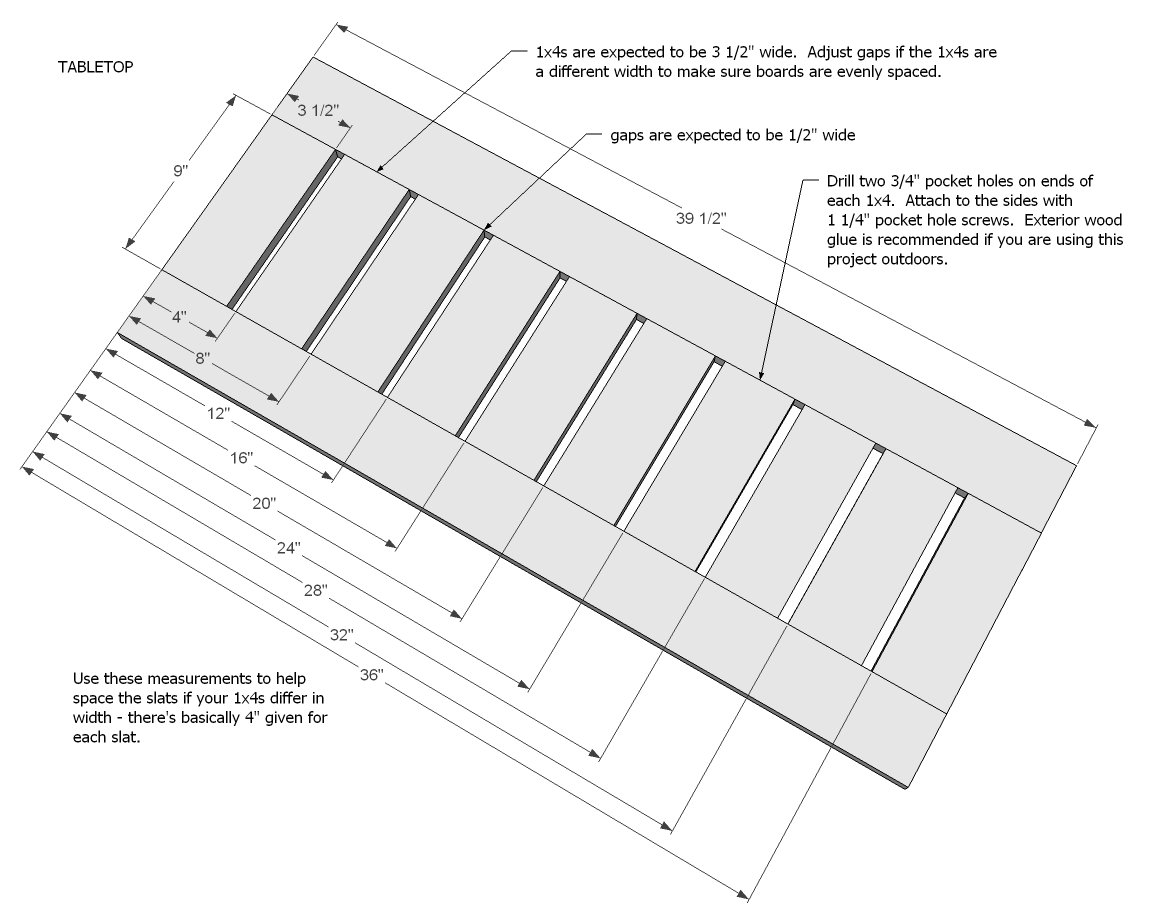
Build the top as shown here. Clamp each joint as you attach to get the smoothest top.
Step 2
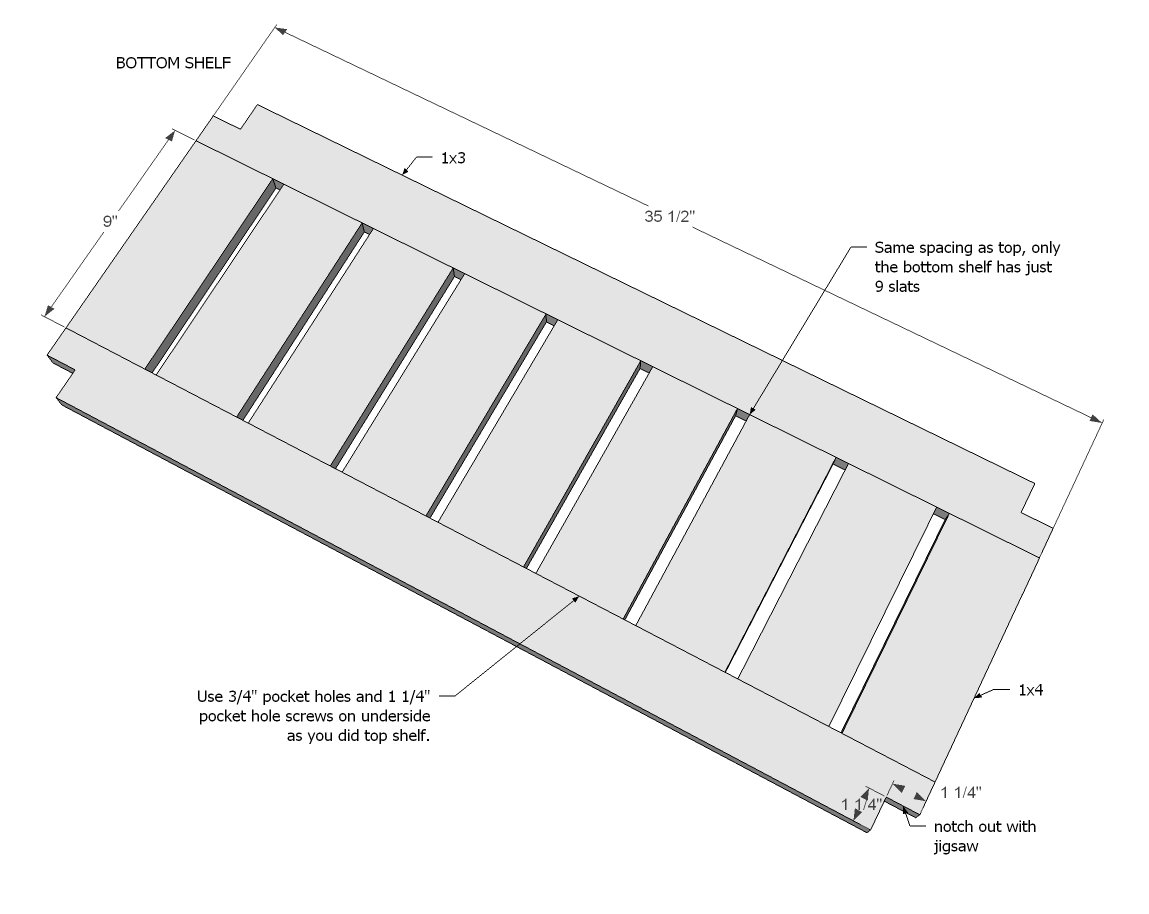
Build bottom shelf, only this time, notch out for legs.
Step 3
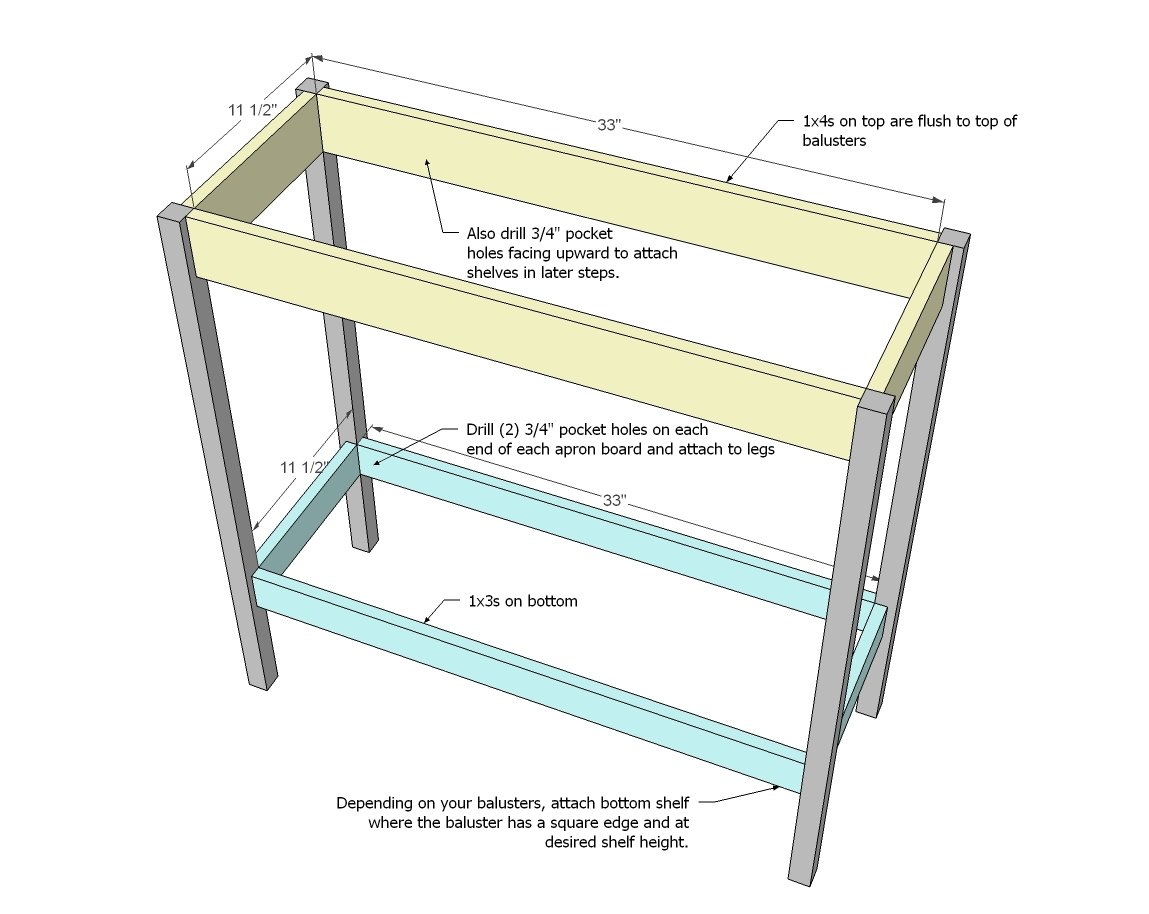
Start by attaching end aprons to the two legs each. Then attach front/back aprons to the two leg sets.
Don't forget to drill pocket holes in aprons facing upward for attaching tabletops in later steps.
Step 4
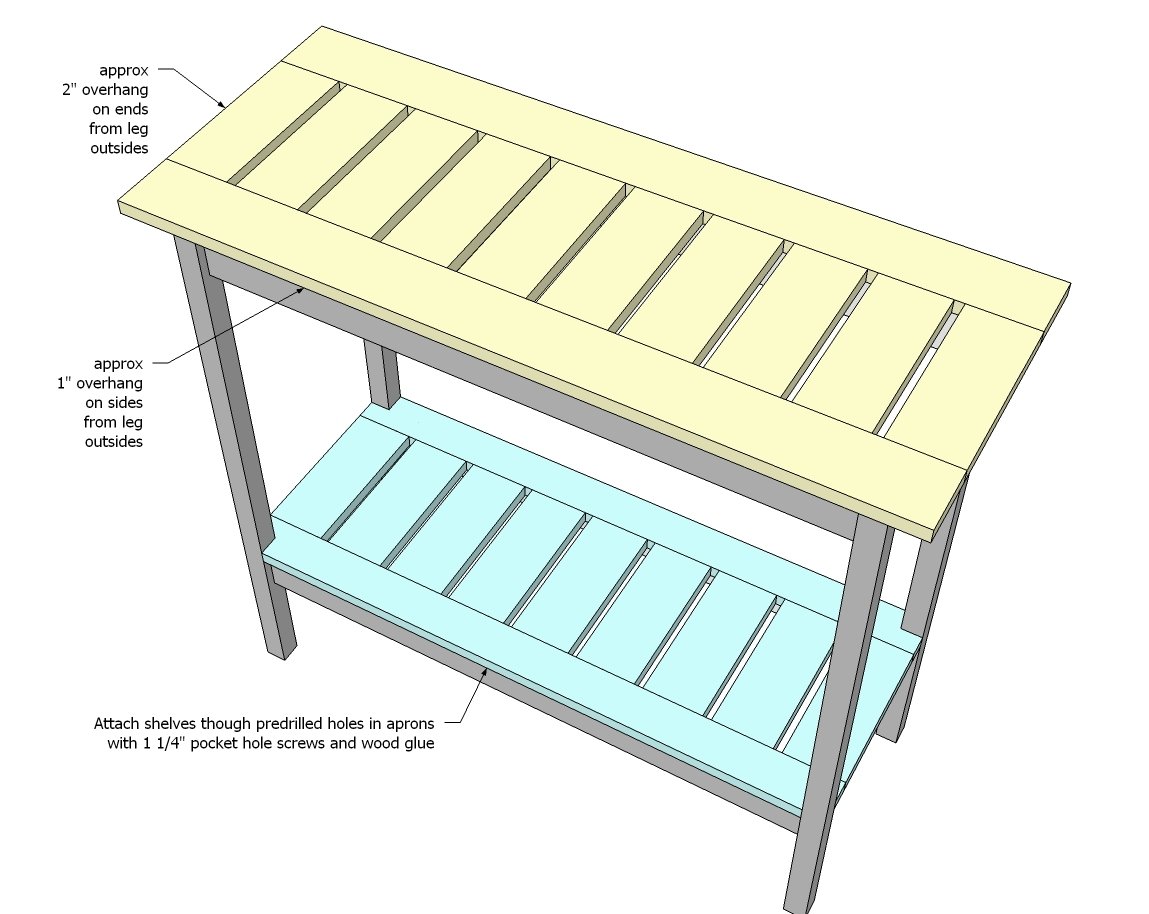
Attach top and shelves to frame.
It is always recommended to apply a test coat on a hidden area or scrap piece to ensure color evenness and adhesion. Use primer or wood conditioner as needed.

Comments
noregrets11
Wed, 09/04/2013 - 15:57
This table is ticking me off!
Has anyone else built this table yet? Every single screw I've screwed in has popped out the other side of my pocket holes. Every. Single. Screw. I've tried changing sizes, brands of the screws, angles of the drill- nothing works. At first I just said "oh well" and figured the glue would hold those early joints together. Now, at this point, the entire table will be held together by glue. (Which makes for a very LONG timetable for completion.) This is Project #4 for me, so I'm not a pro, but I definitely haven't had these problems with my other builds, and I'm not doing anything different. Anyone else?
In reply to This table is ticking me off! by noregrets11
Lady Goats
Wed, 09/04/2013 - 16:44
Pocket hole jig
Have the settings changed on your jig? Did you check the collar of the drill bit? I know you're saying you haven't changed anything, but the collar moves and should be checked before each use, and changing the settings is an easy thing to do (and overlook!). When this happens to me (and I have way more than four builds, so it doesn't matter if you've been doin' this a while or not - it'll probably happen again :-/) I reset everything. I take the collar off. I change all of the jig settings. Then I look at the instruction manual, set everything back as it tells me to, and try again. And if that fails, I throw stuff. And cry. Or at least *want* to cry. Ok, I might actually cry.
But that's only happened once. And then I bought a new board and everything worked perfectly. So sometimes it's not you. It's your wood.
(That last part makes me really glad I'm typing this because I burst out laughing... And then I realized I have no idea if you're a gal or guy, but the statement could give a guy serious man issues. LOL!).
In reply to Pocket hole jig by Lady Goats
noregrets11
Thu, 09/05/2013 - 15:01
Ha! That part made me laugh,
Ha! That part made me laugh, too! I'm a girl, so no strain on my psyche. (Except when I go to the big box stores to get my lumber and they ask me if my husband is going to help me sand??? WTH!?!?!?) I did figure out one part of my problem- I had the table legs lined up with the outside of my apron, not the inside, so I should be able to fix those. As for the table top slats, I'll take your advice and recheck my jig. Although it pains me, I think I'm going to scrap my table top and start over. Maybe the second time around will be better? Thanks for the advice!