
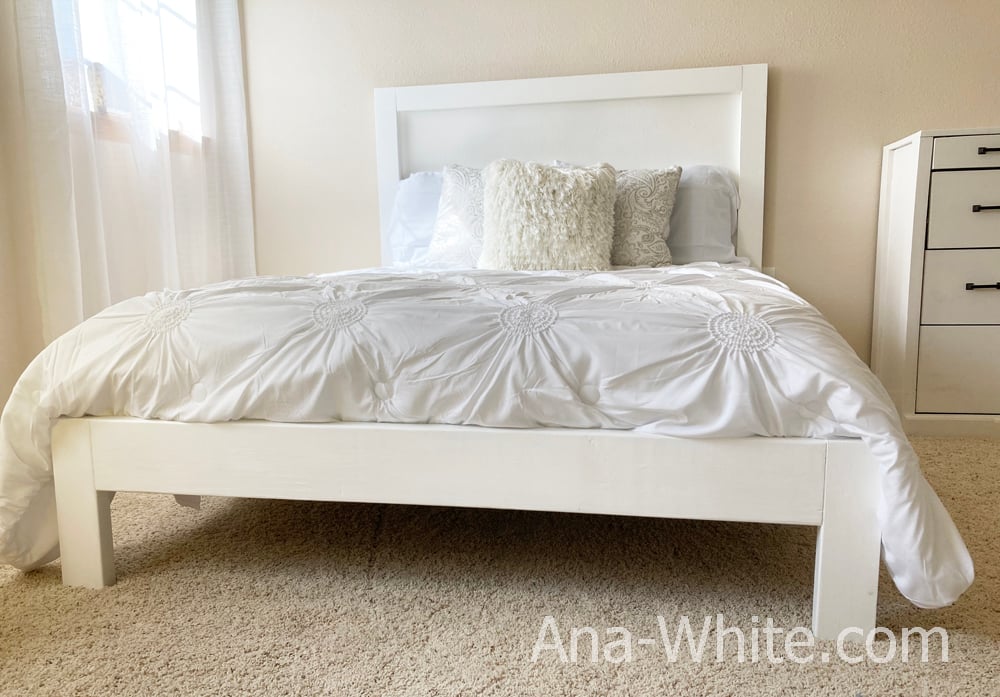

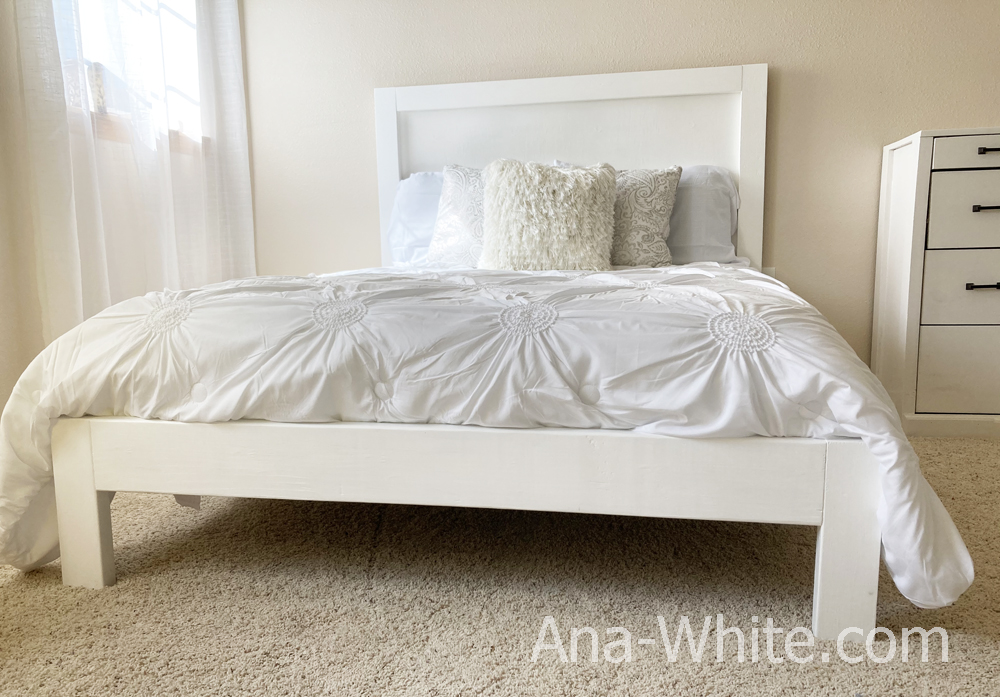
Do you need a nice, sturdy, great looking bed frame, but don't want to pay a fortune? Here's how you can DIY your own for about the cost of the box spring (and you don't need a box spring!). This is the perfect bed for kids, guest rooms, an airbnb, or apartment life. Free plans by Ana-White.com
YESTERDAY My sister called me and said she wanted to build my niece a new bed in the next 24 hours. She wanted something beautiful, sturdy, but also inexpensive and simple to build. So we got our heads together and designed a 2x4 framed bed (the plans are below).
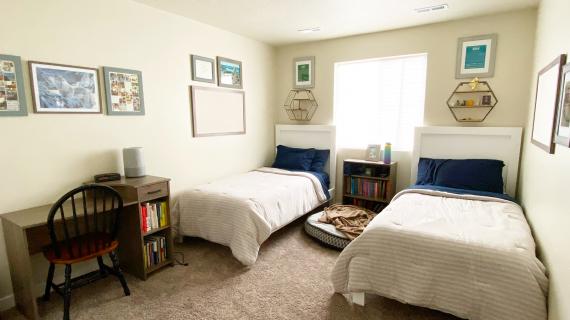
TODAY She sends me these photos!
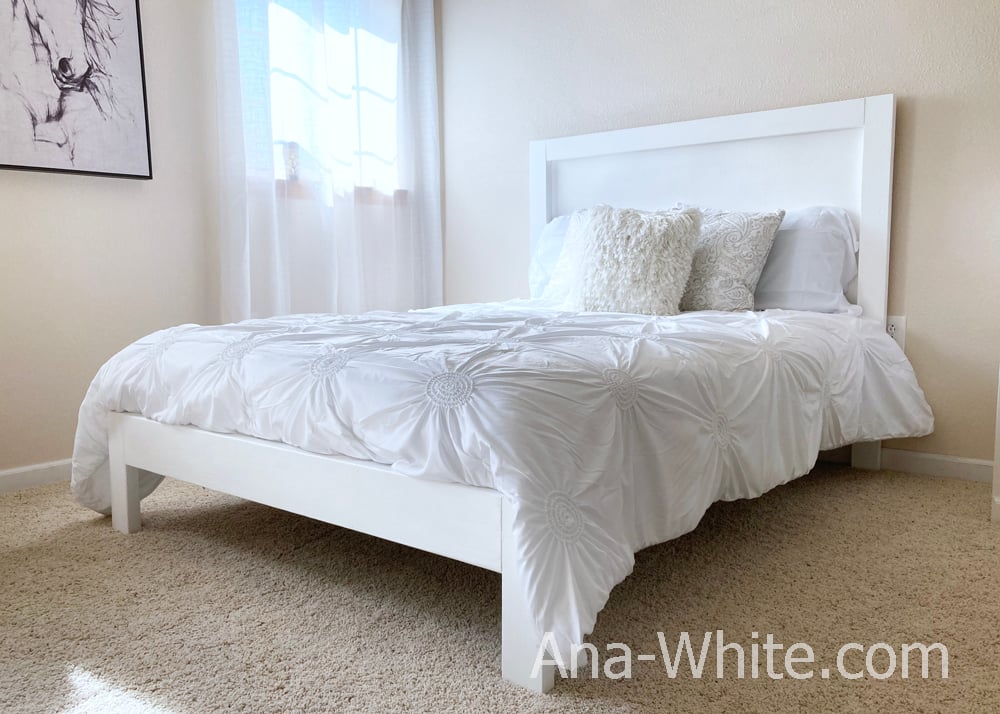
LESS THAN 24 HOURS ago I sent her the plans.

My sister said this bed cost about $50 for her to build!
Here's how she built it:
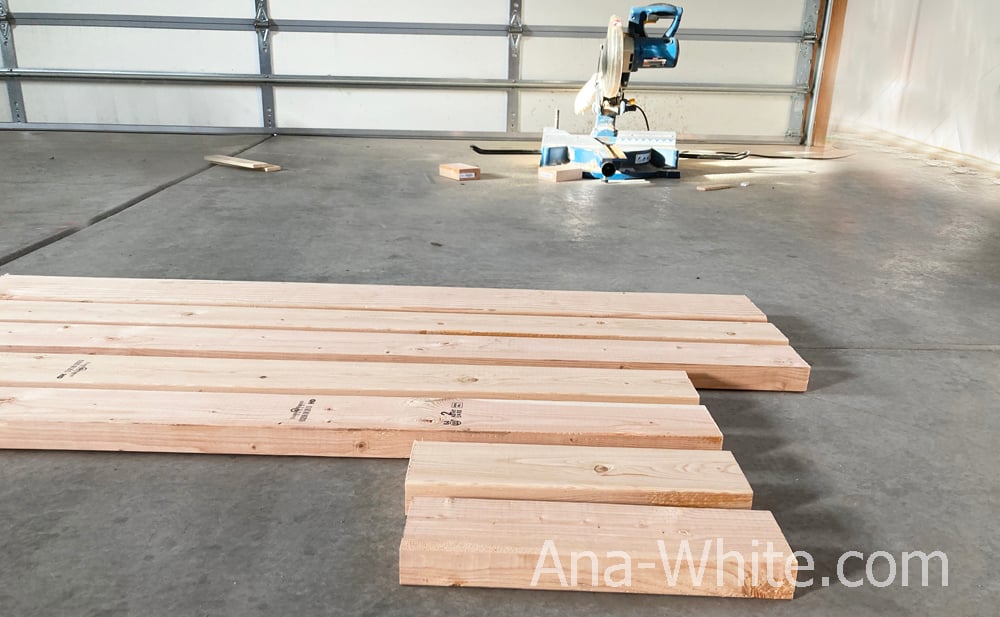
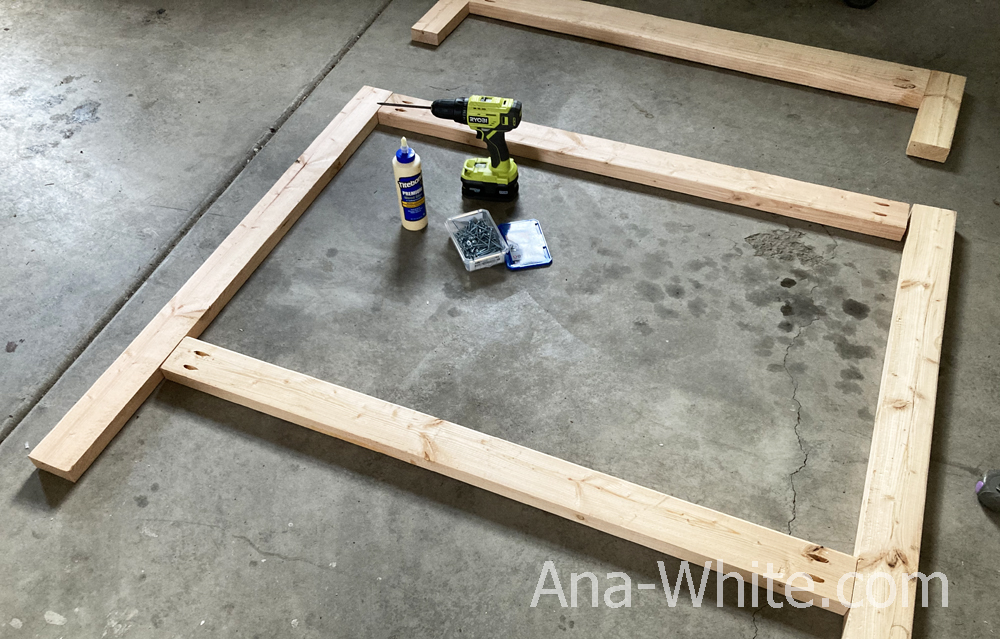
Cut all the boards. She used a miter saw, but you can also use a circular saw.
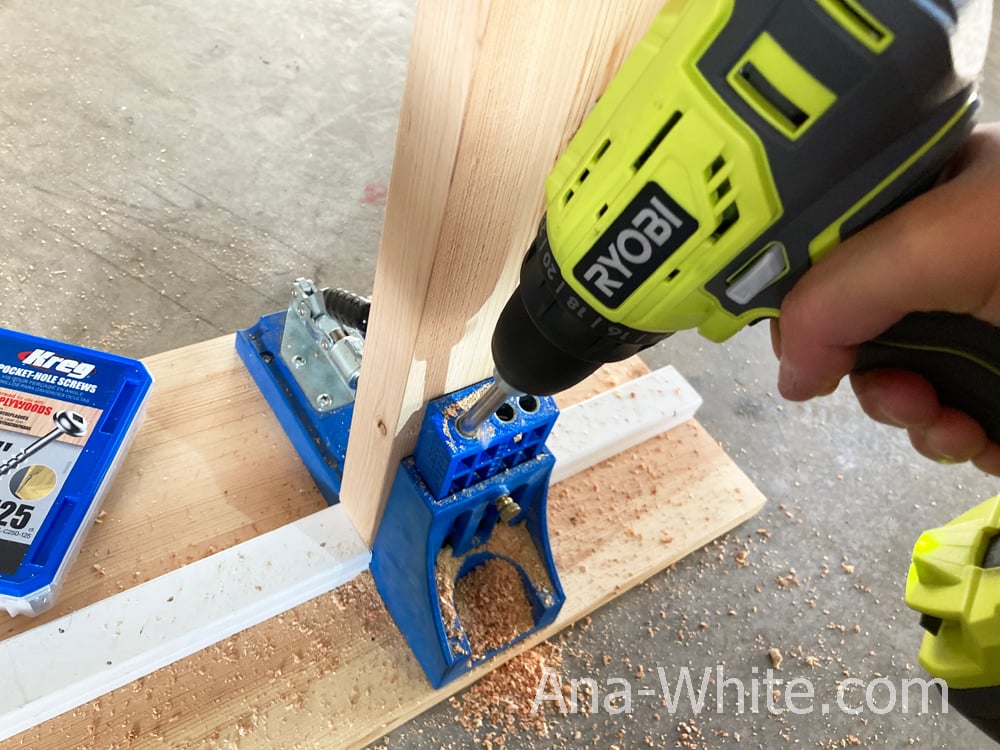
Predrill holes for attaching the boards together.

Attach the boards with screws and glue.
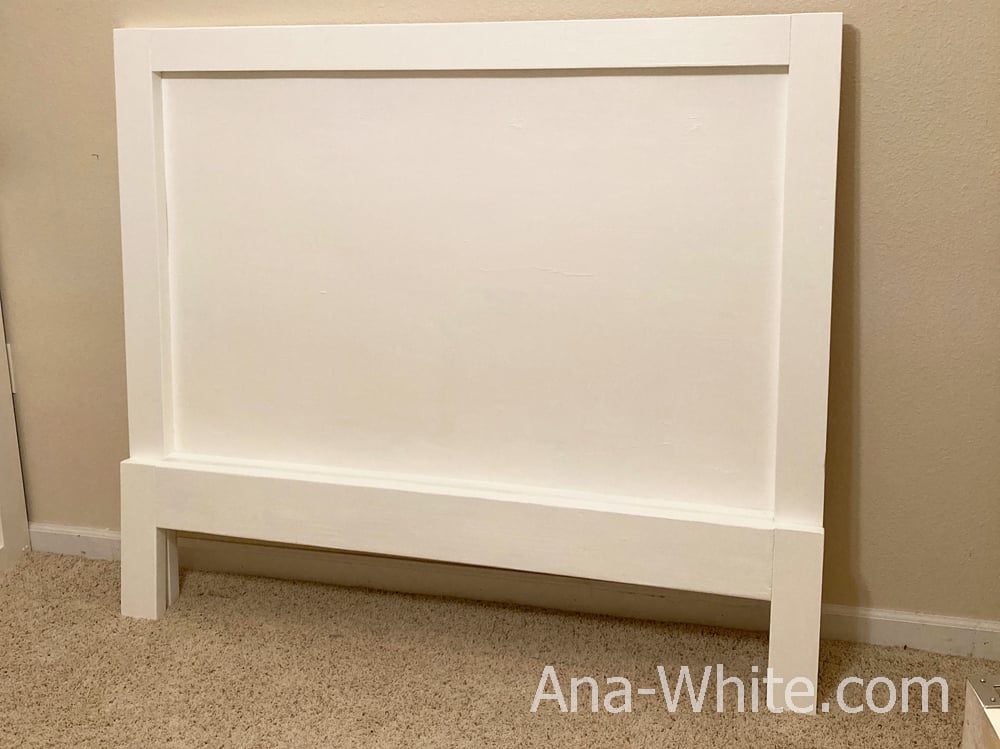
Here's the headboard frame completed.
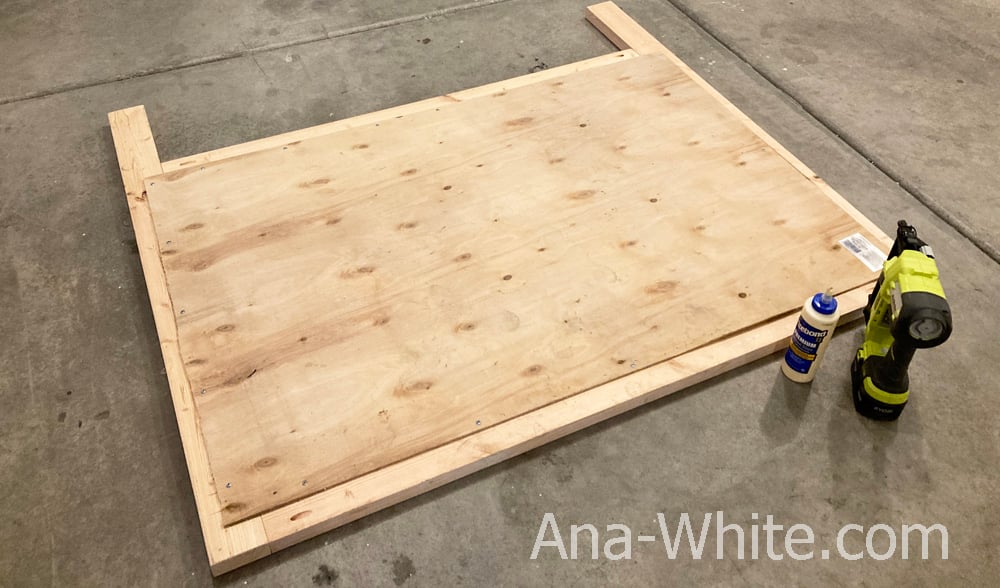
Add plywood to the back with screws, nails, or staples. YES you can use 1-1/4" Kreg Jig screws here.
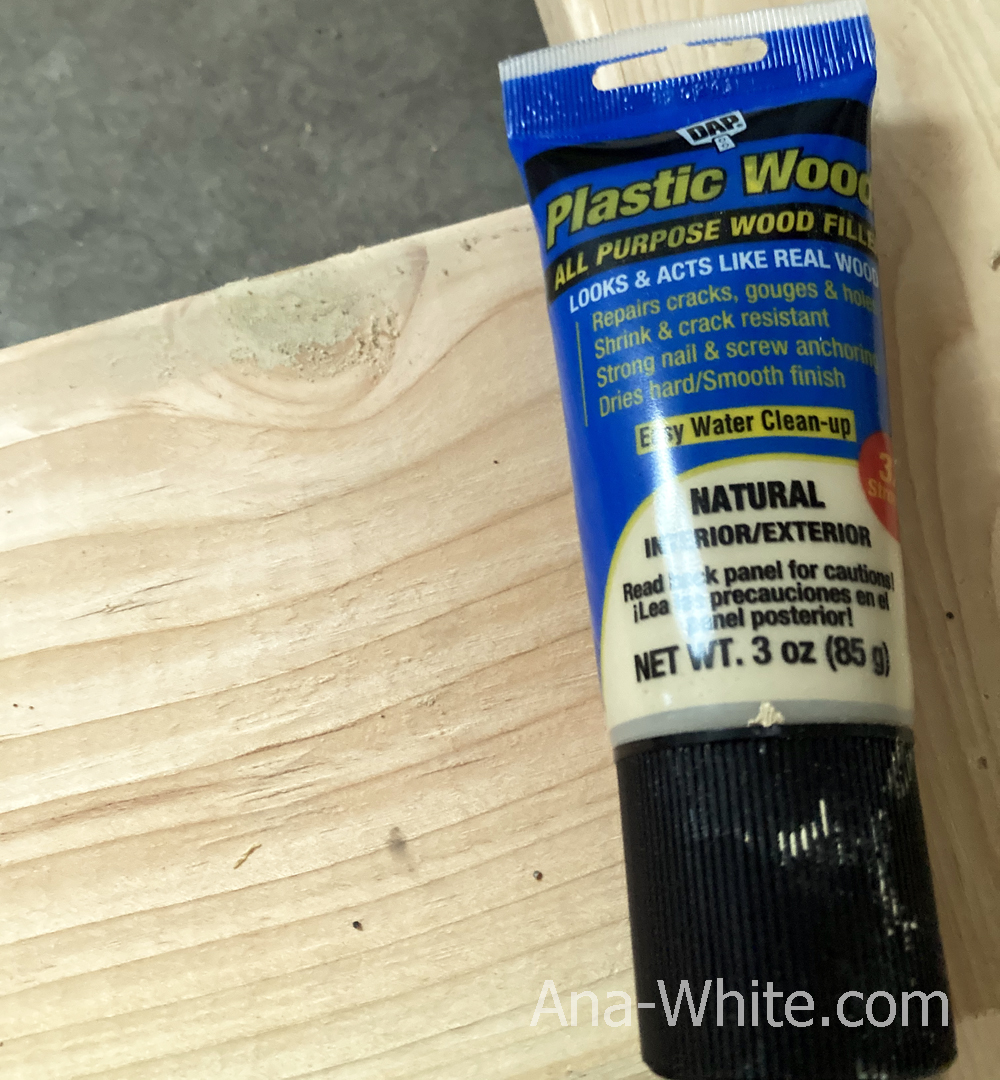
Fill any holes or imperfections with this stuff. Sand with medium grit sandpaper. Finish with fine grit sandpaper.
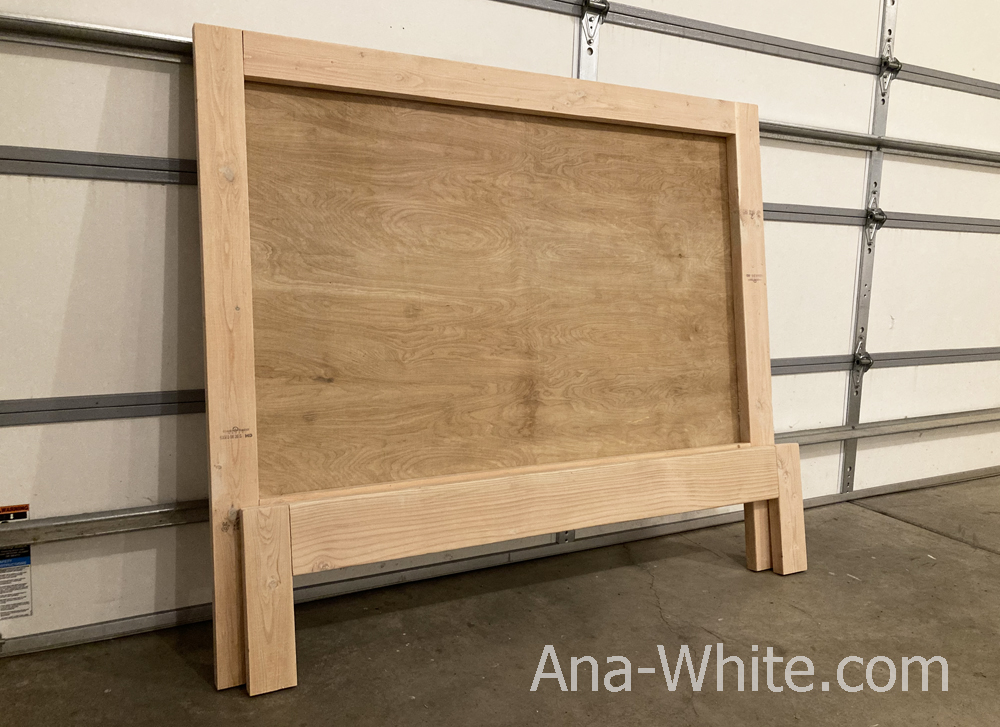
Here's the headboard and footboard done.
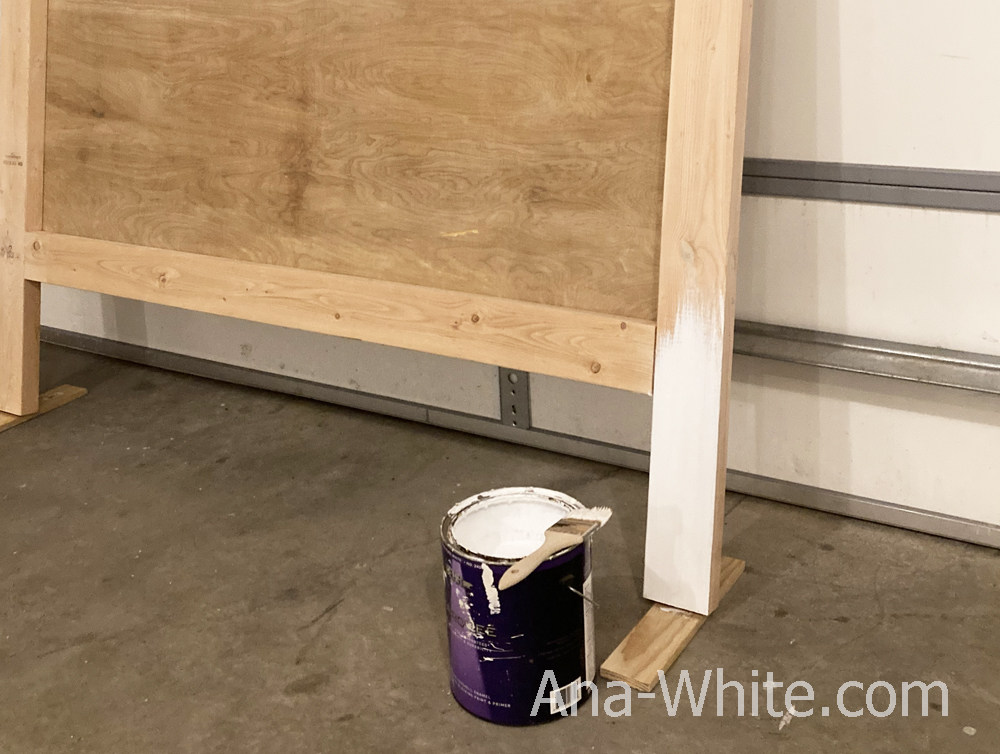
Then paint or stain. She choose a paint and primer to save time. But this bed would take stain just as well!
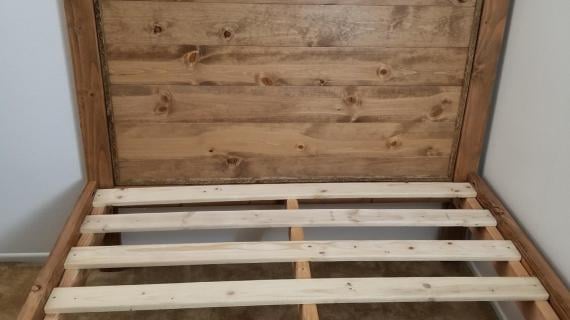
Move the pre-painted pieces into the room and assemble.
We love how this bed frame turned out so much that we are sharing queen, full and twin plans for you!
Thank you for using the plans on this site. If you do build, please share, we love seeing your projects! Youc an tag me on Instagram @anawhitediy or create a brag post on this website.
Preparation
TWIN BED FRAME SHOPPING LIST - Mattress 39" x 75"
- 4 - 2x4 @ 8' long or 92-5/8" stud length
- 1 - 2x6 @ 10' long
- 1 - 2x6 @ 8' long or 92-5/8" stud length
- 1 - 1/4" to 1/2" thick plywood or similar @ 40" x 40-3/4" (a half sheet is enough)
- 6 - 1x4 or 7 - 1x3 @ 8 feet long
- About 40 - 2-1/2" long Kreg Pocket Hole Screws
- About 50 - 1-1/4" long screws, brad nails, or staples for attaching back plywood and slats
- Wood Glue
FULL OR DOUBLE BED FRAME CUT LIST - Mattress 54" x 75"
- 3 - 2x4 @ 8' long or 92-5/8" stud length (cut 75" pieces from these boards and footboard legs)
- 2 - 2x4 @ 10' long or 104-5/8" stud length (cut the 50" pieces from these boards)
- 3 - 2x6 @ 8' long or 92-5/8" stud length
- 1 - 1/4" to 1/2" thick plywood or similar @ 55" x 40-3/4"
- 6 - 1x4 or 7 - 1x3 @ 10 feet long
- About 45 - 2-1/2" long Kreg Pocket Hole Screws
- About 60 - 1-1/4" long screws, brad nails, or staples for attaching back plywood and slats
- Wood Glue
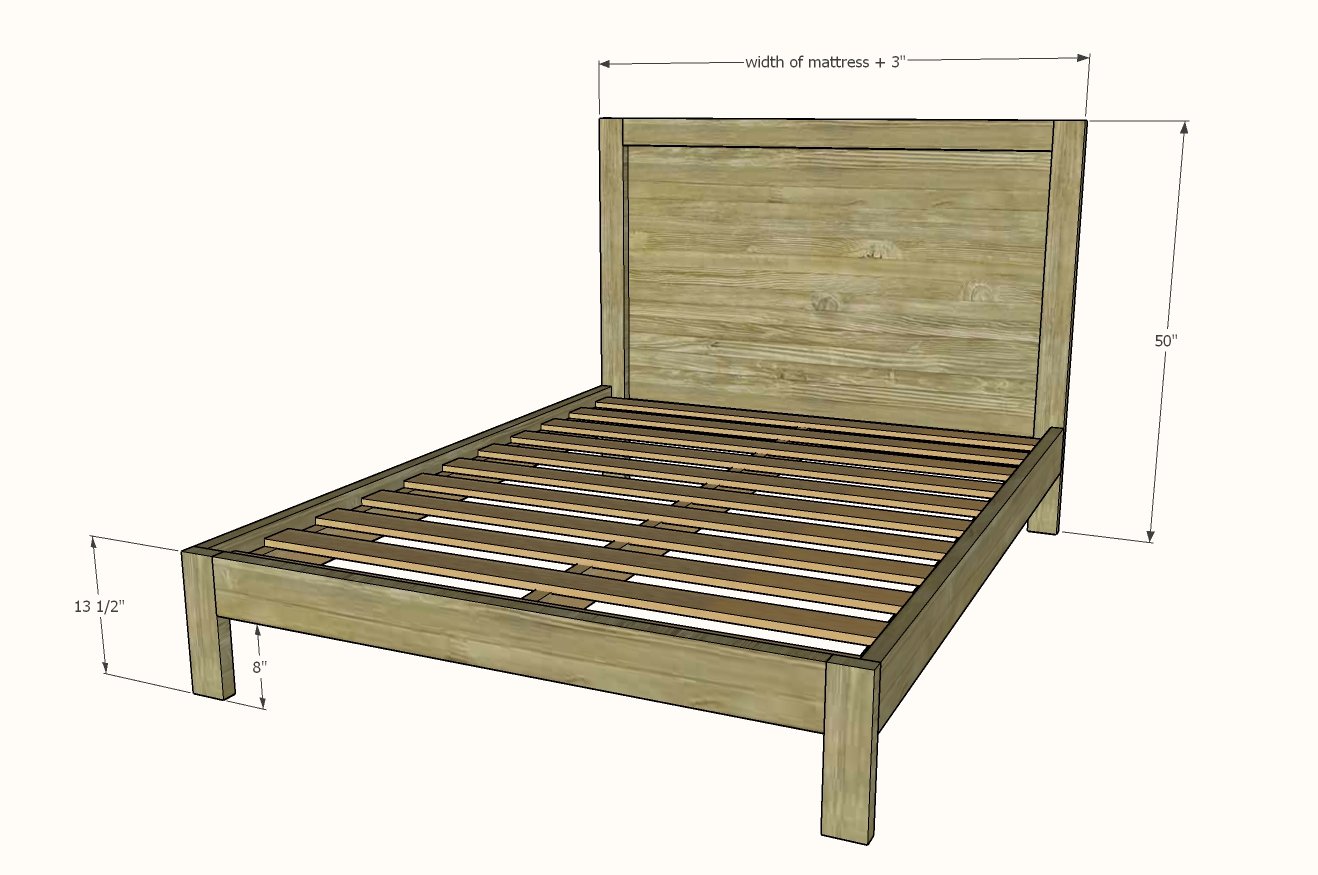
QUEEN BED FRAME CUT LIST - Mattress 60" x 75"
- 3 - 2x4 @ 8' long or 92-5/8" stud length (cut 75" pieces from these boards and footboard legs)
- 2 - 2x4 @ 10' long (cut the 50" and 56" pieces from these boards)
- 3 - 2x6 @ 8' long or 92-5/8" stud length
- 1 - 1/4" to 1/2" thick plywood or similar @ 61" x 40-3/4"
- 6 - 1x4 or 7 - 1x3 @ 10 feet long
- About 45 - 2-1/2" long Kreg Pocket Hole Screws
- About 60 - 1-1/4" long screws, brad nails, or staples for attaching back plywood and slats
- Wood Glue
TWIN BED FRAME CUT LIST - Mattress 39" x 75"
- 2 - 2x4 @ 50" - headboard legs
- 2 - 2x4 @ 35" - headboard top and bottom
- 2 - 2x4 @ 13-1/2" - footboard legs
- 1 - 2x6 @ 35" - footboard main board
- 1 - 1/4" to 1/2" thick plywood or similar @ 40" x 40-3/4"
- 2 - 2x6 @ 75" - siderails
- 2 - 2x4 @ 75" - inside cleats
- 12 - 1x4 or 14 - 1x3 @ 39" - bed slats
FULL OR DOUBLE BED FRAME CUT LIST - Mattress 54" x 75"
- 2 - 2x4 @ 50" - headboard legs
- 2 - 2x4 @ 50" - headboard top and bottom
- 2 - 2x4 @ 13-1/2" - footboard legs
- 1 - 2x6 @ 50" - footboard main board
- 1 - 1/4" to 1/2" thick plywood or similar @ 55" x 40-3/4"
- 2 - 2x6 @ 75" - siderails
- 2 - 2x4 @ 75" - inside cleats
- 12 - 1x4 or 14 - 1x3 @ 54" - bed slats
QUEEN BED FRAME CUT LIST - Mattress 60" x 75"
- 2 - 2x4 @ 50" - headboard legs
- 2 - 2x4 @ 56" - headboard top and bottom
- 2 - 2x4 @ 13-1/2" - footboard legs
- 1 - 2x6 @ 56" - footboard main board
- 1 - 1/4" to 1/2" thick plywood or similar @ 61" x 40-3/4"
- 2 - 2x6 @ 80" - siderails
- 2 - 2x4 @ 80" - inside cleats
- 12 - 1x4 or 14 - 1x3 @ 60" - bed slats
The plywood cut doesn't have to be perfect - so have the hardware store make the cuts for you - it will be easier to transport and handle too.


Instructions
Step 1
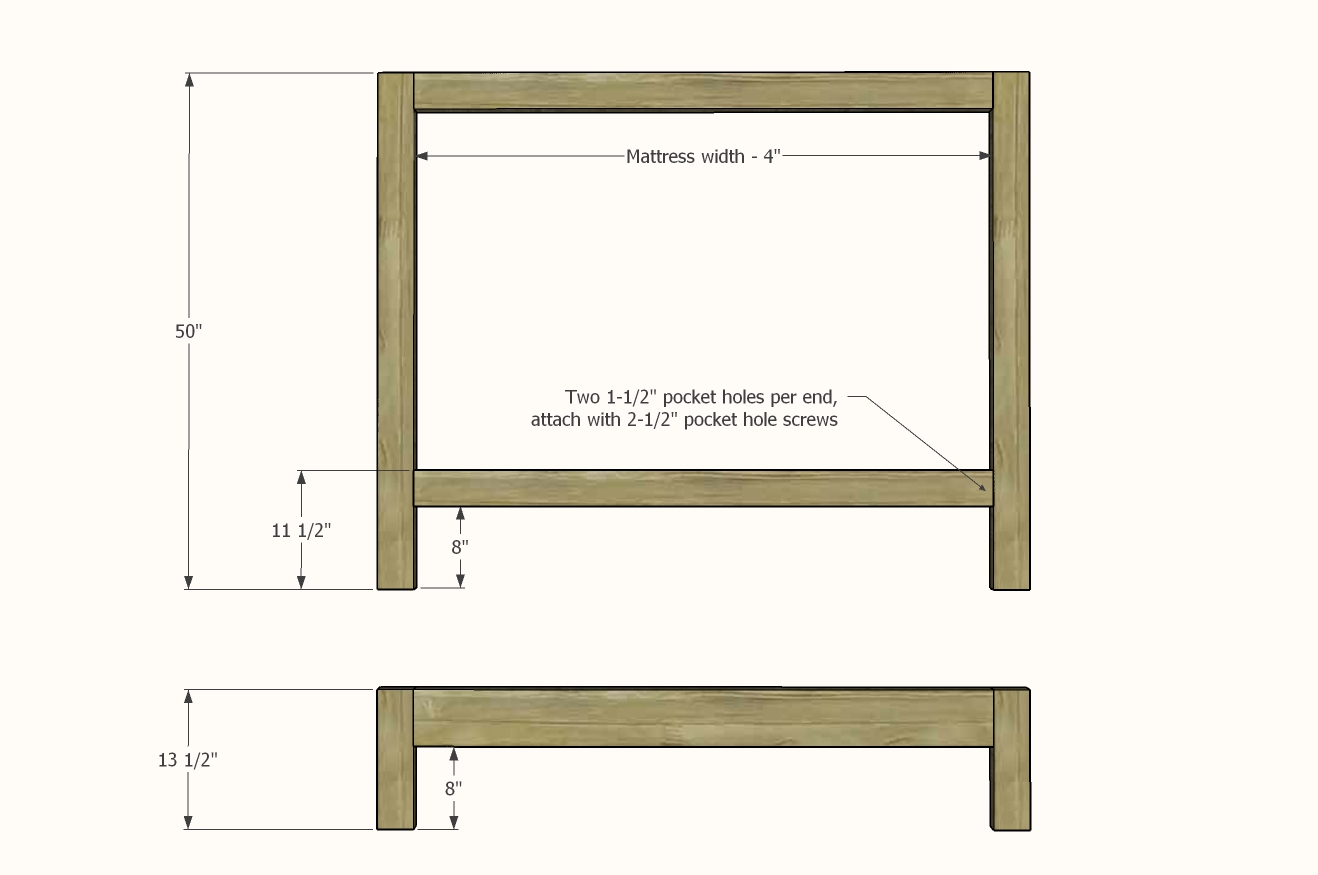
Drill two 1-1/2" pocket holes on each end of the horizontal boards and attach to the legs as shown.
Step 2
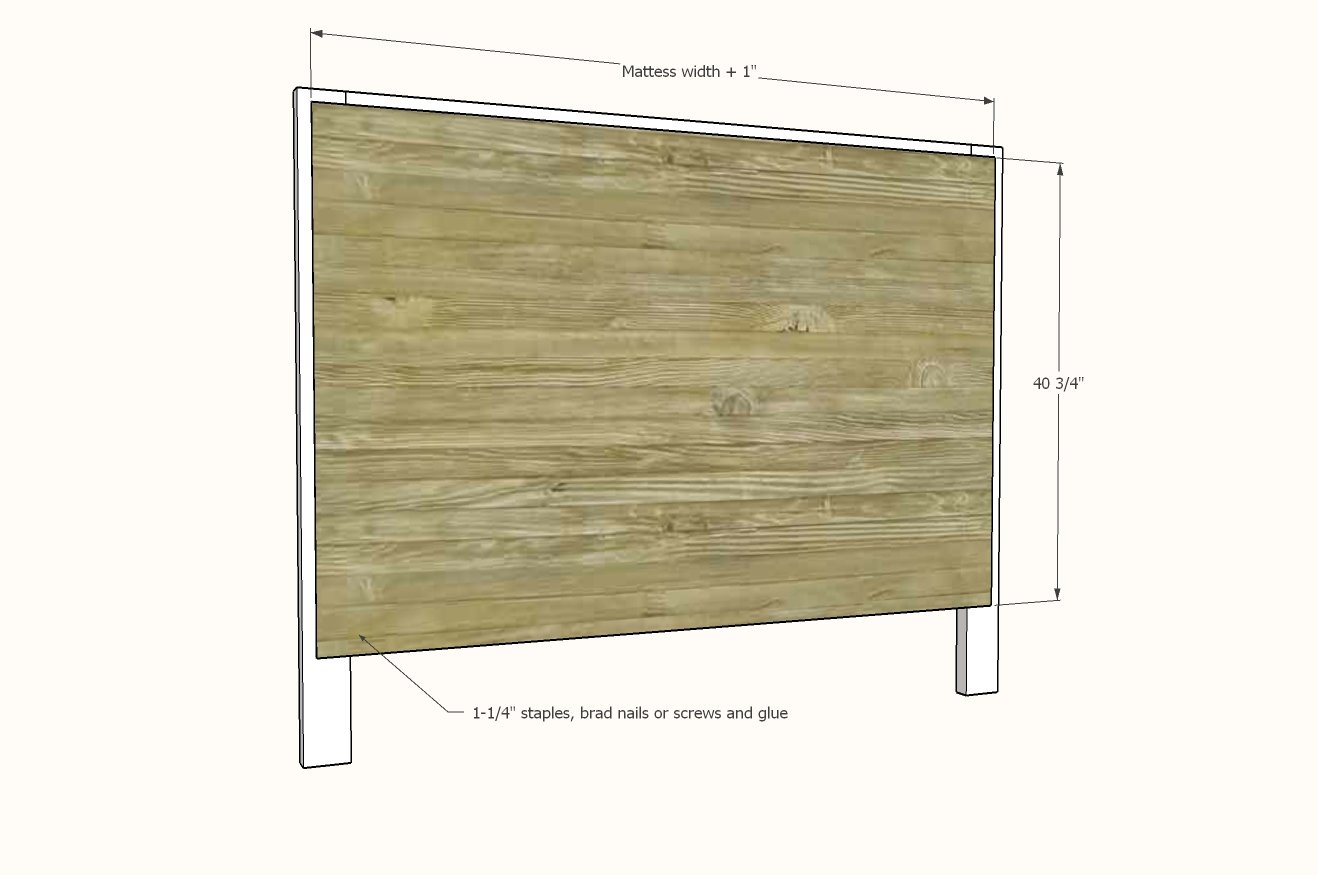
Attach plywood to the back with screws, nails or staples and glue.
Step 3
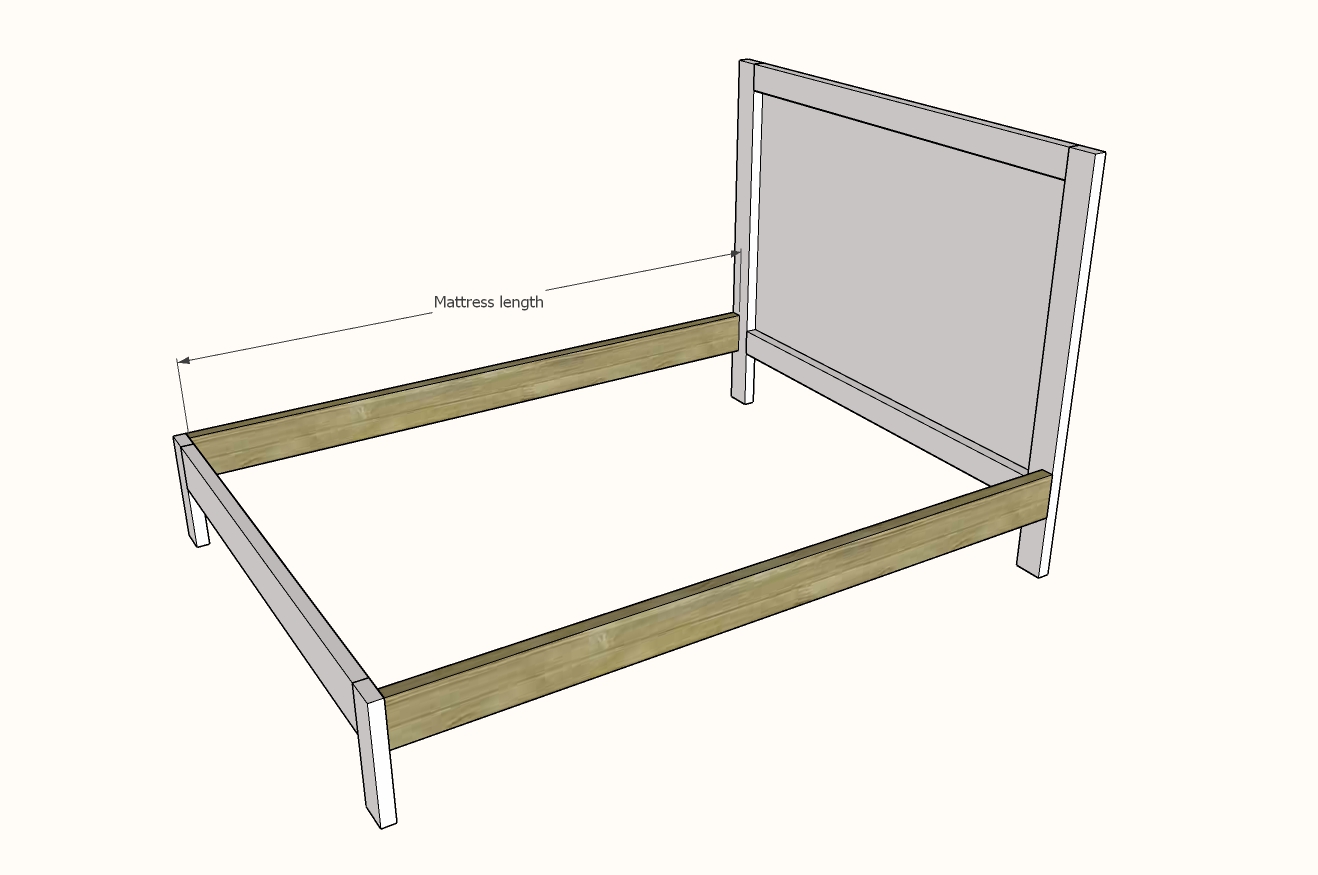
Drill three 1-1/2" pocket holes on each end of the 2x6 siderails.
Paint or stain the headboard, footboard and siderails.
In the room, attach siderails to the headboard and footboard, with 2-1/2" pocket hole screws.
The headboard attachment height is 13-1/2" (matches height of footboard).
Step 4
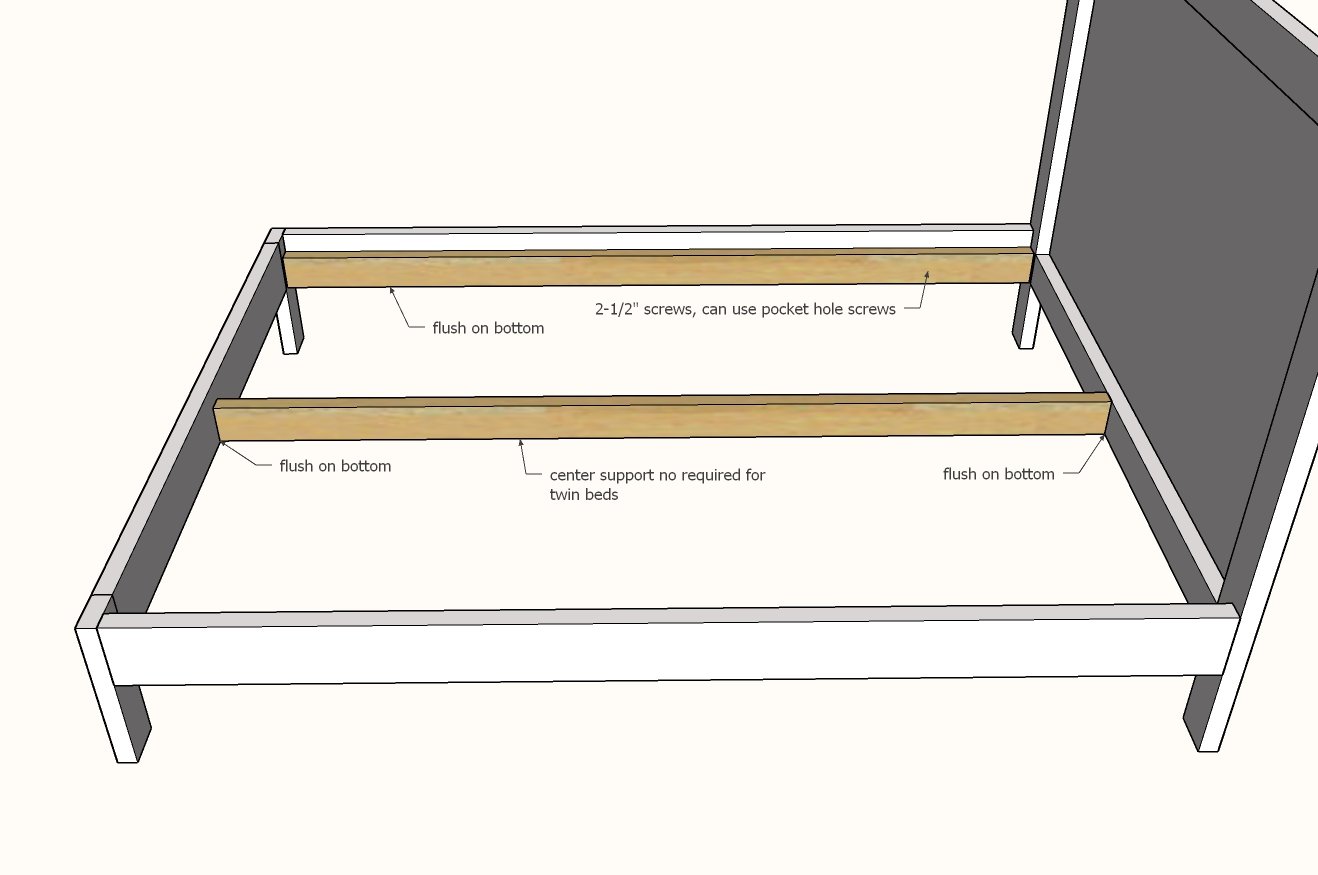
Add the inner cleats.
For queen and full size a center cleat is recommended.
For contract grade (airbnb) or extra strength, center legs can be added to the center 2x4.
Step 5
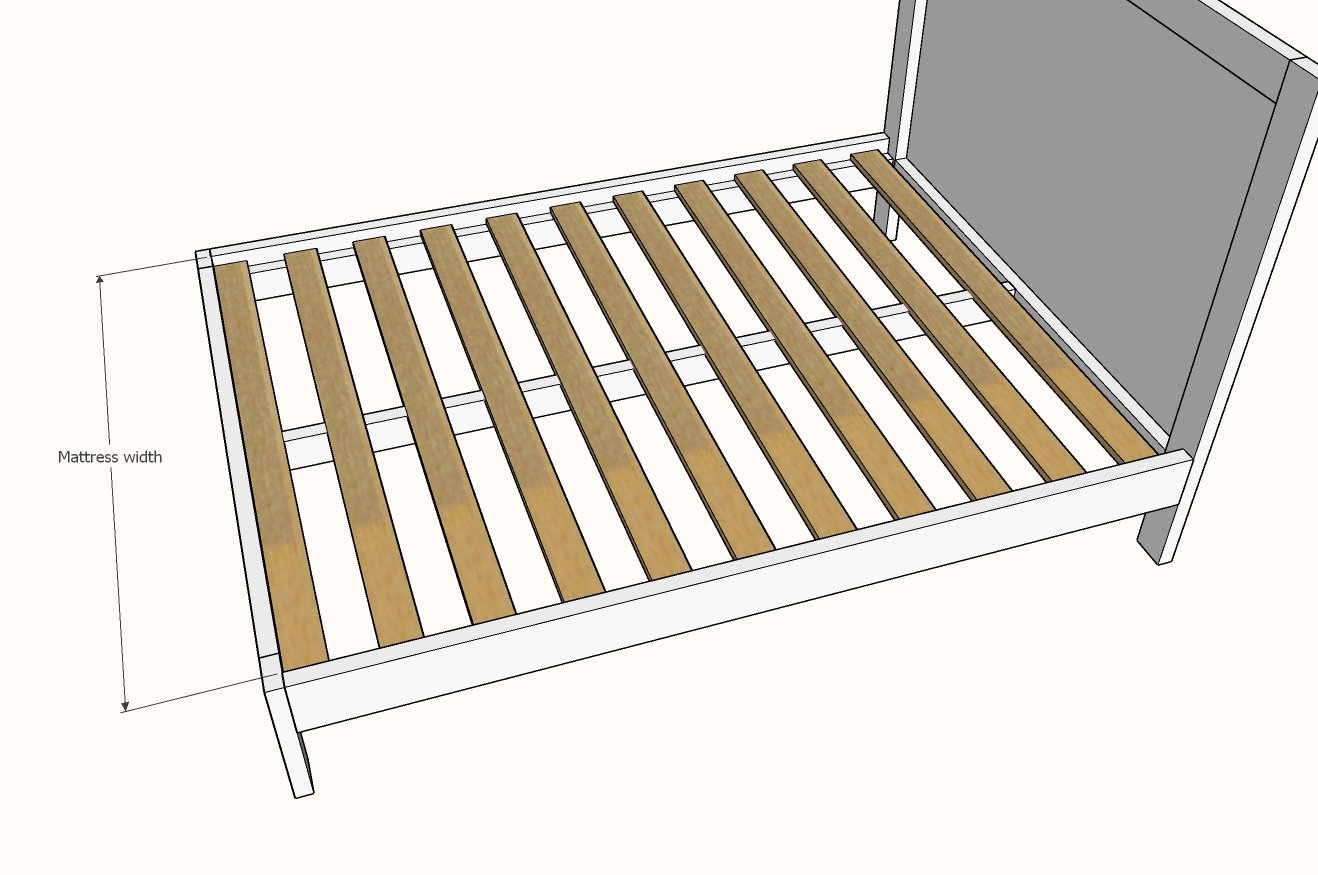
Place slats about 4" apart on cleats and attach with the 1-1/4" fasteners.


Comments
Chantcaps
Tue, 10/13/2020 - 08:48
Wow!
This is amazing! Do you happen to have plans for a king?
DitchGuru
Sat, 10/17/2020 - 09:31
Standard King
A standard king bed (not a cali king) is the same length, but it is 16" wider than a queen bed so all your width measurements would have to be increased by 16". So the plans would be the same as a queen, except the headboard top and bottom and the footboard main board cut lengths would be 72" instead of 56".
Also you would increase the bed slats from 60" to 76" and your plywood would be cut to 77" x 40-3/4", instead of 61" x 40-3/4".
Don't forget when purchasing your wood, this would change your shopping list.
DitchGuru
Sat, 10/17/2020 - 10:01
Twin XL and Cali King
Also anyone making a Twin XL as I am, everything would be the same as a twin except the siderails and the inside cleats would be 80" instead of 75".
A cali king is 72" x 84", so both width (12") and length (4") would have to be increased accordingly to the queen plans. So the plans would be the same as a queen, except the headboard top and bottom and the footboard main board cut lengths would be 68" instead of 56".
Also you would increase the bed slats from 60" to 72" and your plywood would be cut to 73" x 40-3/4", instead of 61" x 40-3/4". The siderails and the inside cleats would be 84" instead of 75".
Hope this helps everyone.
aunty jay
Wed, 10/14/2020 - 12:39
Down load plans
How do I get the plans