
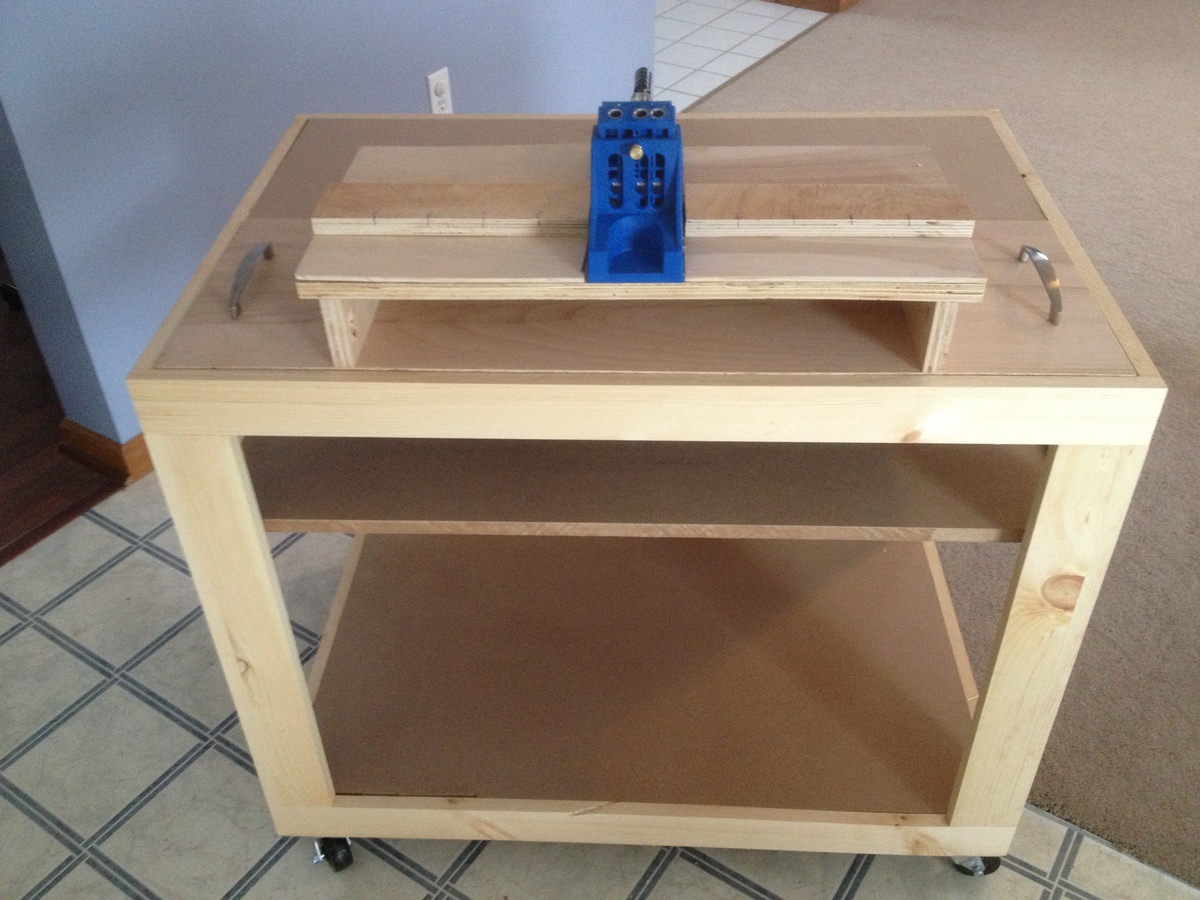

Versatile Shop Cart with inserts for miter saw and kreg jig...or just a workbench top
Preparation
- MDF or Plywood 3/4" - 2 sheets
- Plywood - 1/4" 2' x 4'
- 3 - 1 x 3 x 8
- 4 - 1 x 4 x 8
- 1 - 1 x 2 x 8
- 1-1/4" kreg screws
MDF or Plywood 3/4"
- (2) 36 x 24
- (1) 36 x 23 3/4 plywood
1/4" Plywood - 36 x 23
3/4 Pine
- (4) 1 x 4 x 37.7
- (4) 1 x 4 x 24
- (8) 1 x 3 x 21
- (2) 1 x 3 x 19
- (2) 1 x 2 x 23 3/4


Please read through the entire plan and all comments before beginning this project. It is also advisable to review the Getting Started Section. Take all necessary precautions to build safely and smartly. Work on a clean level surface, free of imperfections or debris. Always use straight boards. Check for square after each step. Always predrill holes before attaching with screws. Use glue with finish nails for a stronger hold. Wipe excess glue off bare wood for stained projects, as dried glue will not take stain. Be safe, have fun, and ask for help if you need it. Good luck!
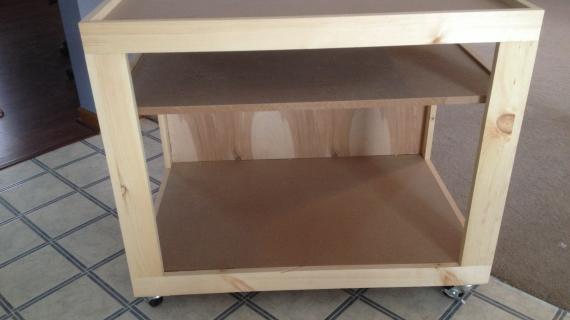
Instructions
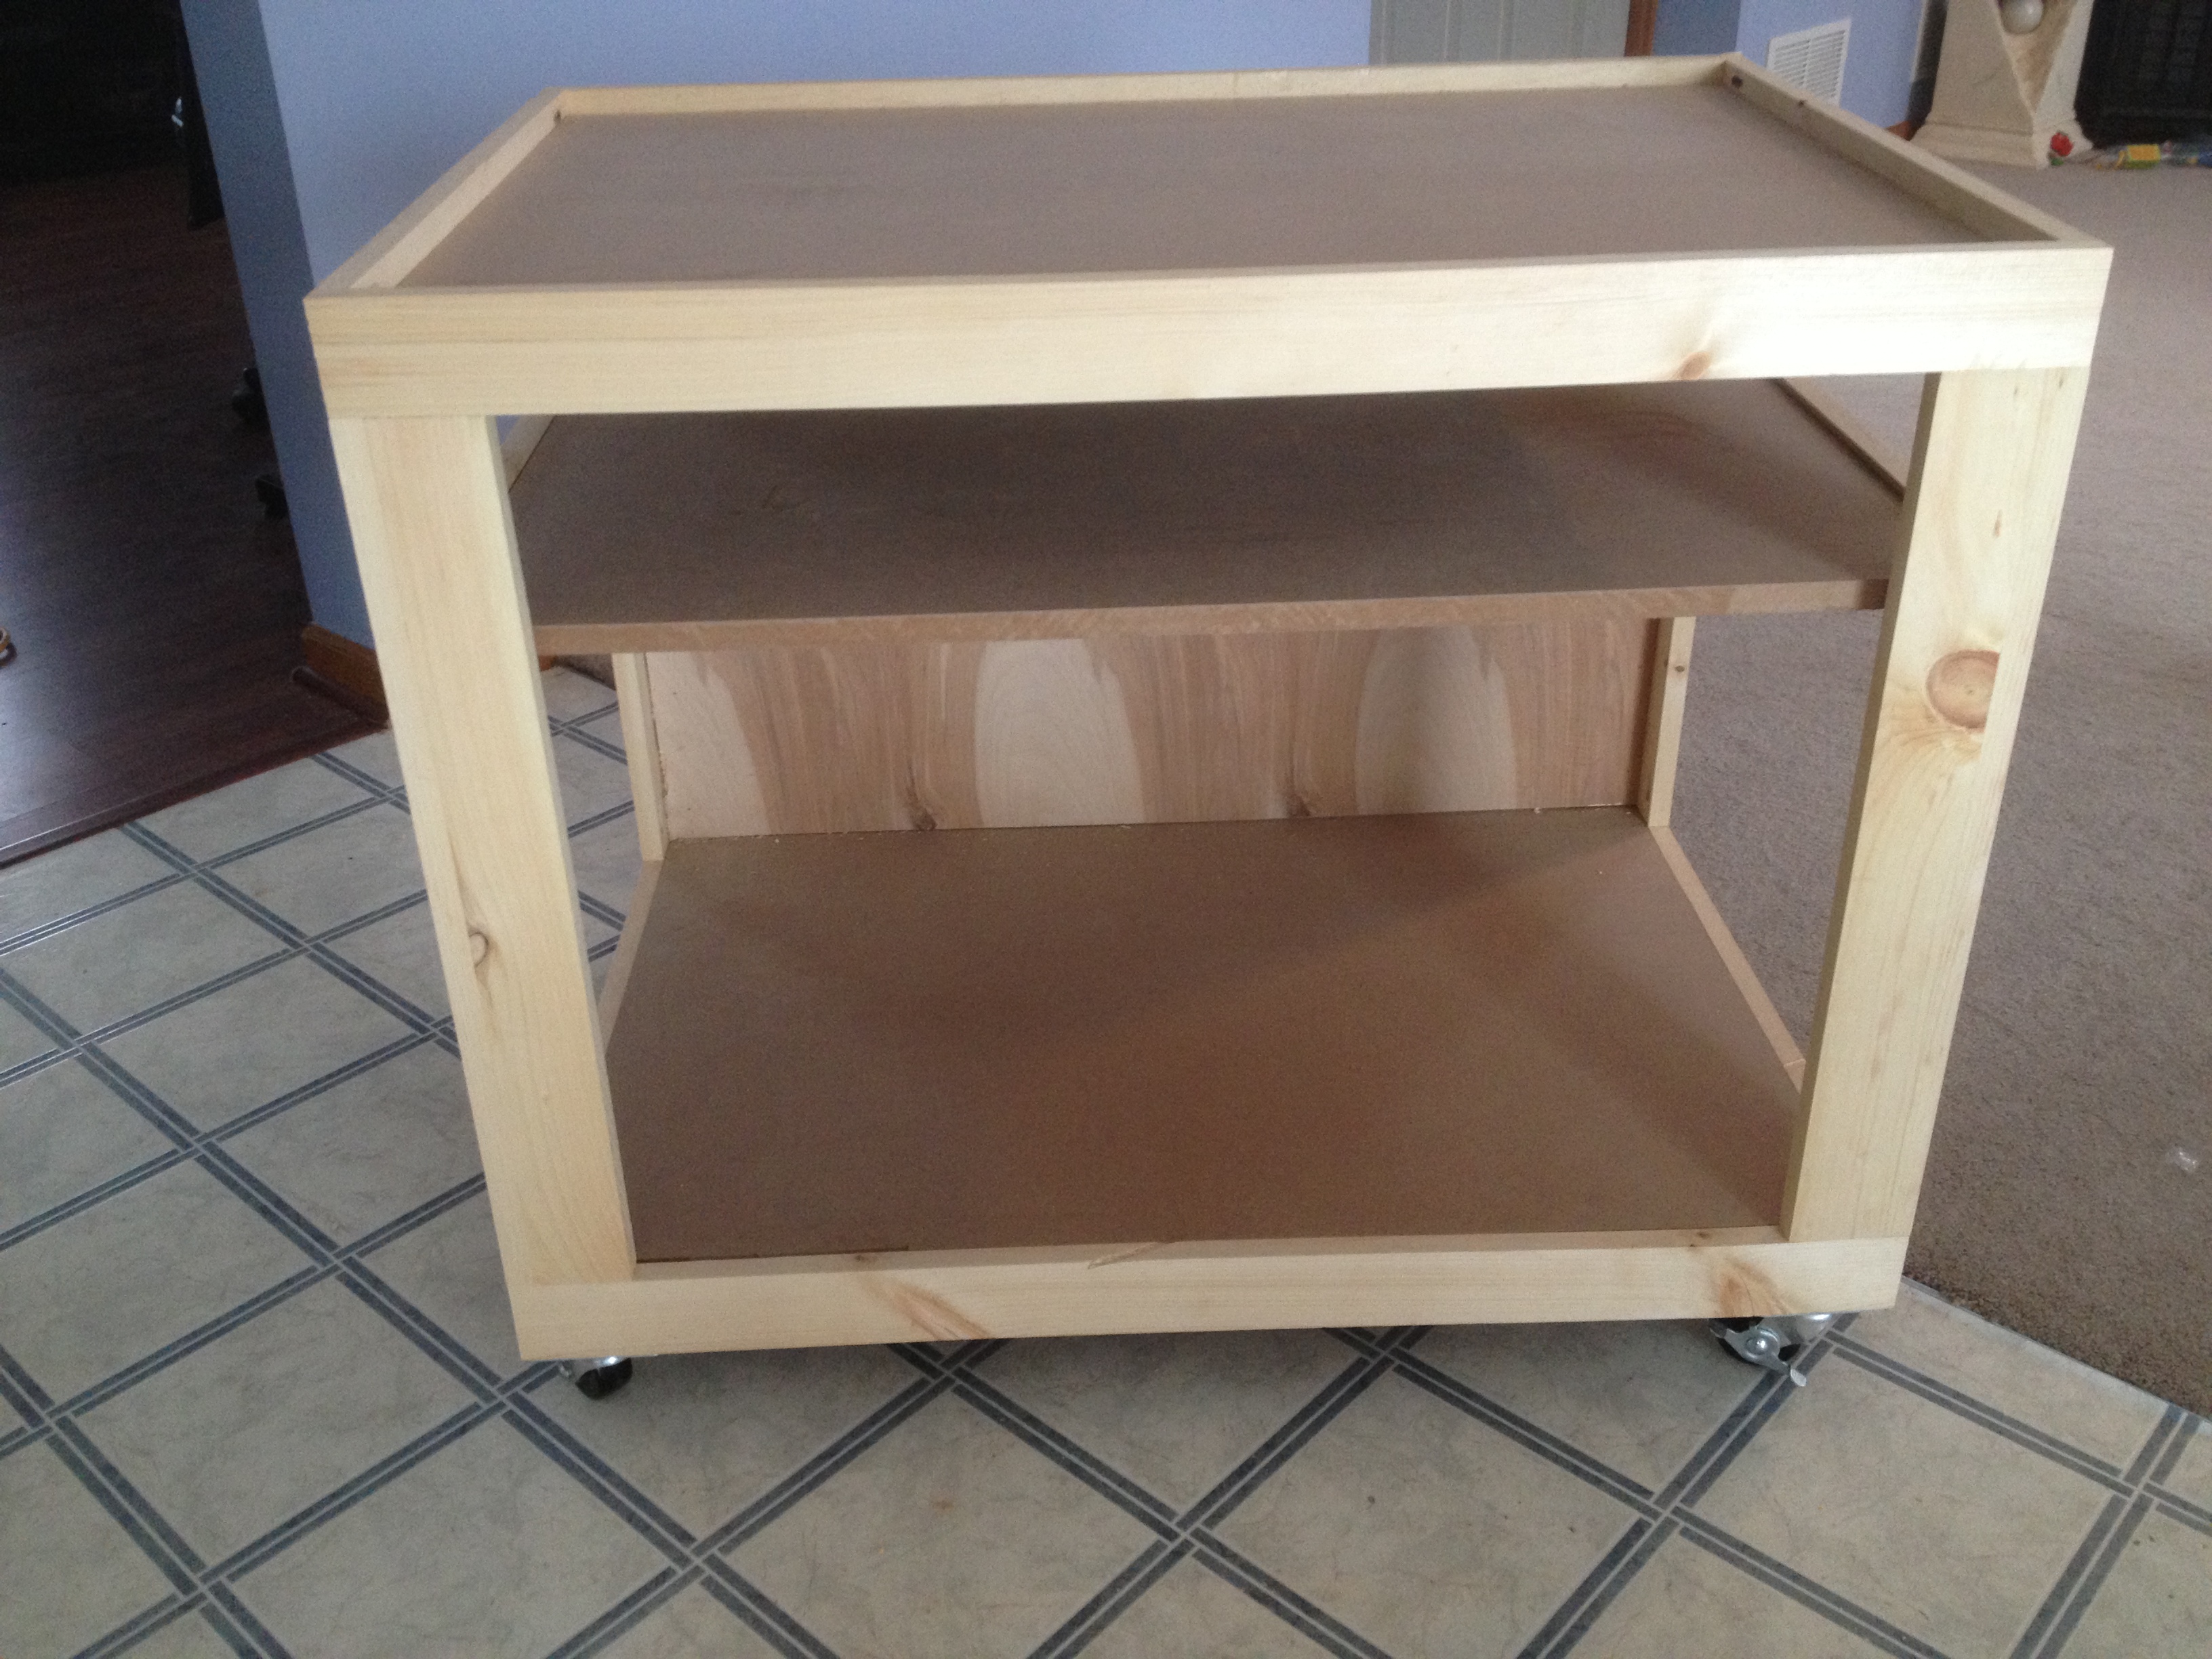
Step 1

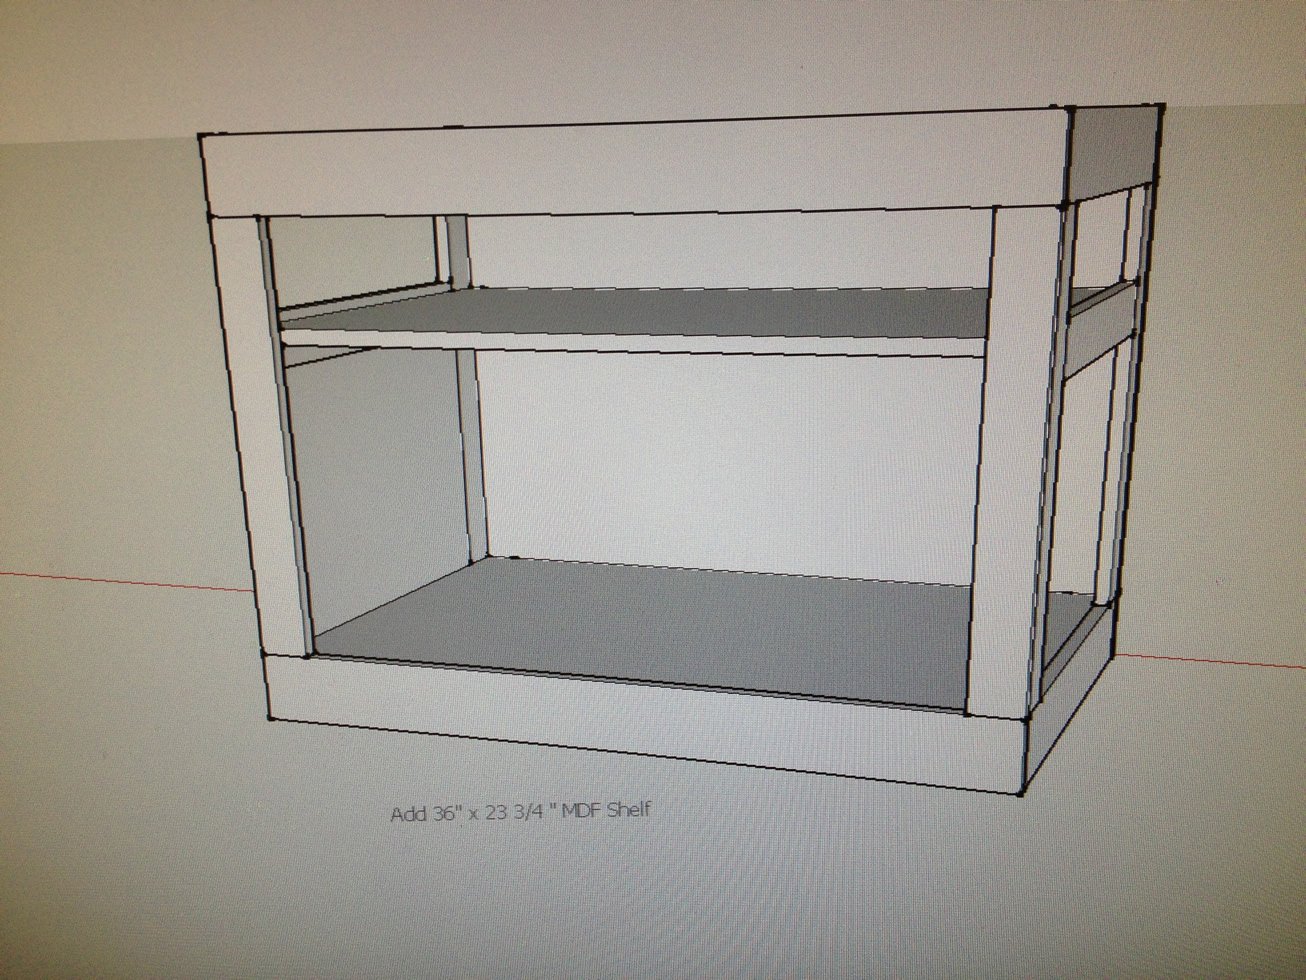
Create the base by using (2) 1 x 4 x 37.5" pieces and (2) 1 x 4 x 24" pieces
drill pocket holes on both ends of each 1 x 4 x 24" piece to attach to the end pieces...the 24" pieces go inside the 37.5:"ones
Step 2

using the (8) 1 x 3 x 21" pieces, attach two together to form a leg...do this to make four legs
drill pocket hols to attach them and also pocket holes on each end to attach to the base and the top in the next step
Step 3

Same as step one, just this goes on the top of the legs you just made
Step 4

Insert the top MDF or Plywood 3/4 " piece. Inset this down 3/4 of an inch to leave room for all the inserts you can make
drill pocket holes all the way around the mdf or plywood piece to attach.
easy way for a little help is to attach two 1 x 2 pieces 1.5" down for support while you are putting the mdf sheet in place
Step 5

Step 6

attach the back 1/4" plywood piece using a brad nailer, small screws, or small nails
Step 7

add side supports 1 x 3 x 19" on each side. measure 17 1/2 inches up from the bottom as your starting point
Step 8

on the inside of those supports add a 1 x 2 x 23 3/4 piece.
this will be your shelf support
Step 9

add the 36 x 23 3/4" mdf or plywood piece for the shelf...drill pocket holes on the sides of the mdf or plywood to attach it to the side supports
Step 10

at the bottom add 2 1 x 3 x 24 piece for the casters to attach too...(the casters will attache in three spots without this piece, so it may not be necessary, but i like the added support
Step 11

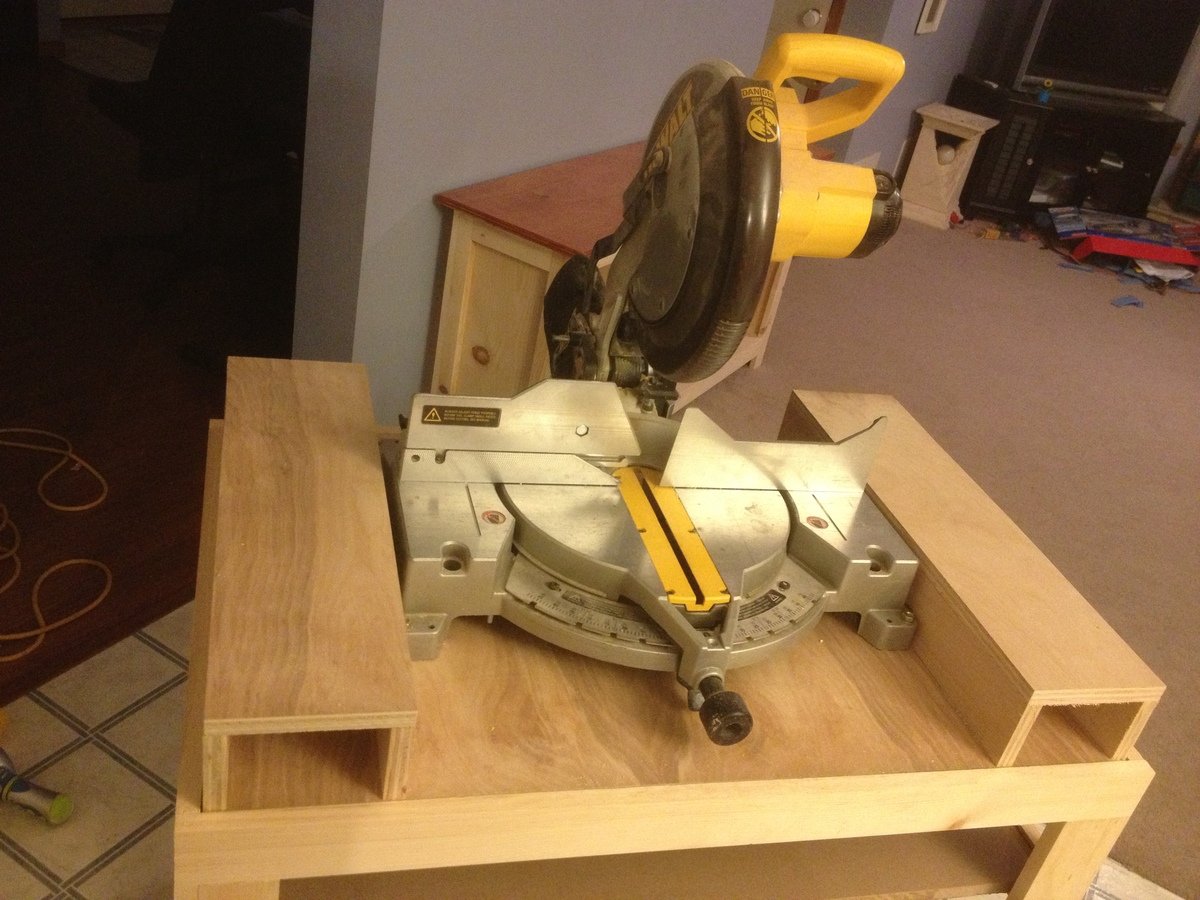
Here is the miter saw insert I made - LOVE THIS!!!!!!!!!!!
insert is 35 7/8" x 23 7/8"
i made the top pieces as high as my miter saw surface for extra board support
turns out those are nice and handy storage spots for smaller cut pieces to use later
Step 12

Kreg jig insert I made
this insert is 12 x 35 7/8
i placed the jig in the middle on the top and made the pieces 1 inch high on each side (same height as board height on jig....nice for longer boards
i also placed handles on the outside top sides of this for easy carrying
It is always recommended to apply a test coat on a hidden area or scrap piece to ensure color evenness and adhesion. Use primer or wood conditioner as needed.

Comments
davidmauer14
Tue, 02/26/2013 - 14:53
Thanks for the plans
There as good Ana's plans. I will probably adapt the plans to build my own version of this shop cart, but I'll use 2x4s to strengthen it. And I'll add my own suggestion for a work top.
D.
DorothyJean
Sun, 04/12/2015 - 09:05
2X4's?
Hi David;
I am a newbie, I like this cart tho'. Would you be replacing all the 1X4's/1X3's with 2x4's? or just the 1X4's?
adecesare4
Wed, 02/27/2013 - 21:35
Thanks David!
Sure...sounds like a perfect plan...it is very sturdy as but 2 x 4's will definitely do that...and your top idea was great as well...I did do that...just didnt take a pic of that....
David suggested also making a workbench insert that basically would use a 35 7/8" x 23 7/8 inch insert piece with another piece that would be slightly larger like 40 x 26 attached above it to make a nice solid workbench station as well. Great ideas, love collaboration