Wall Mount Closet Tower - Customizeable Size

DIY Closet systems
Difficulty
Beginner Projects
| Print this plan

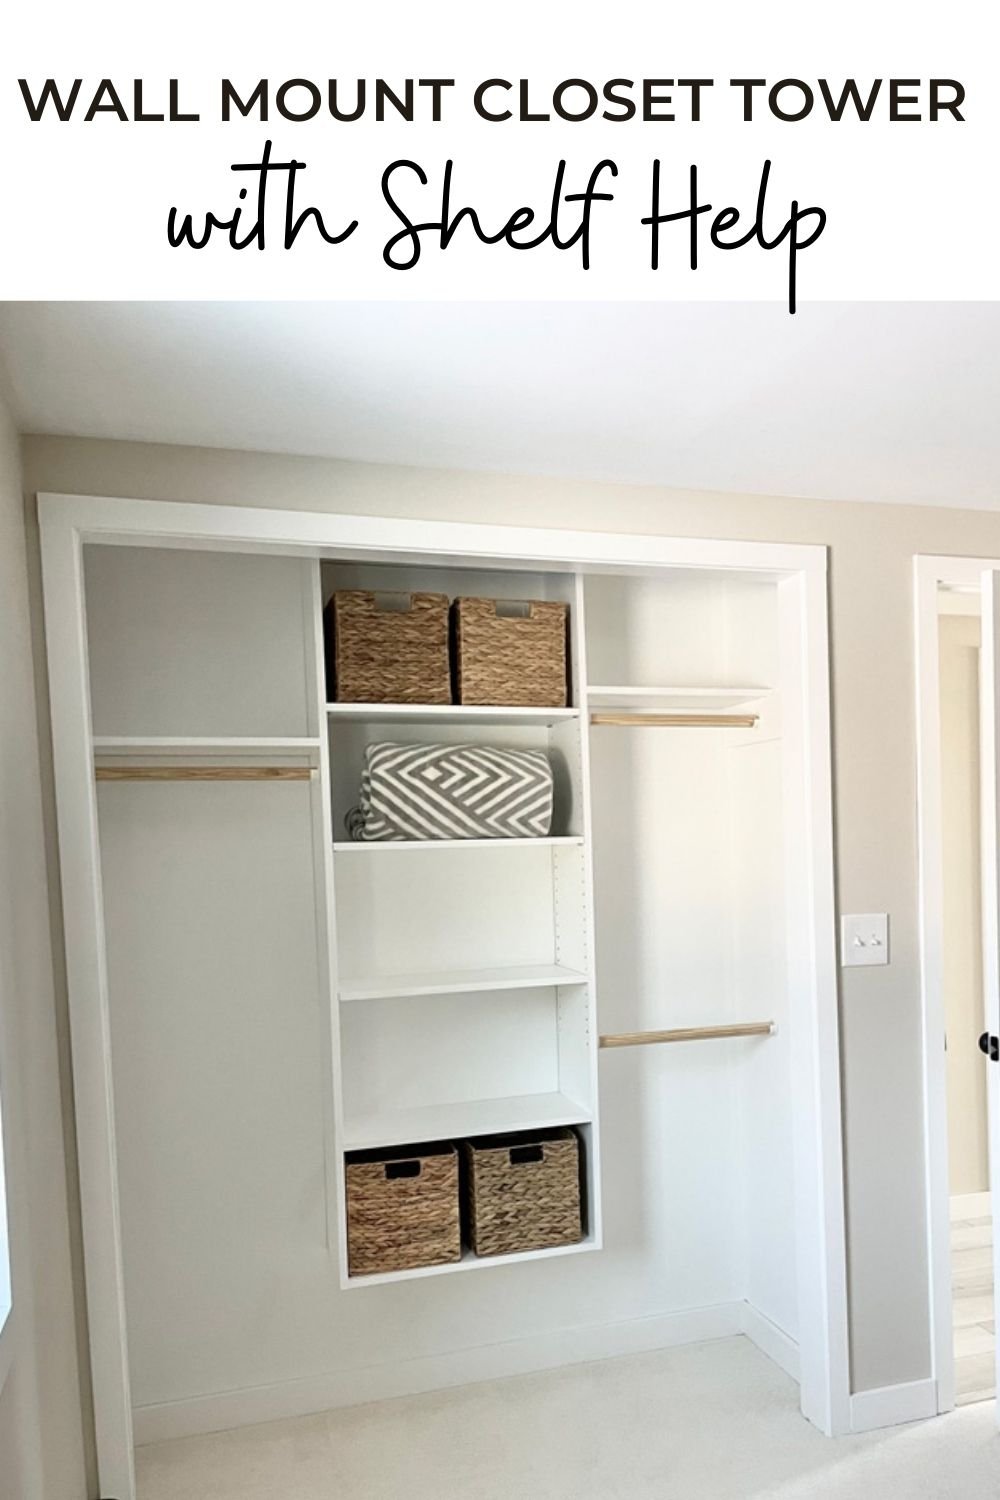
Good closets make clean houses!  Here's how you can build your own custom closet towers to create a dream closet system!  Use just one tower for a small space, or many towers for a large master closet. Free tutorial by Ana-White.com

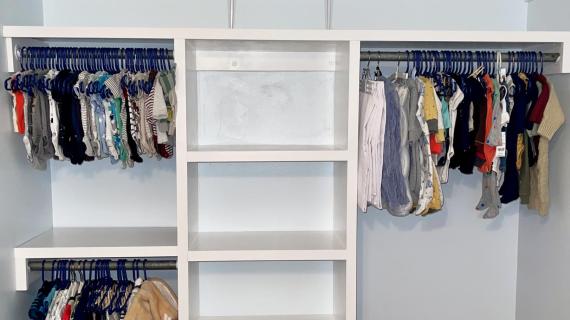
Do you want to upgrade your closet storage systems to something that is durable and custom to your needs?  In this tutorial, I'm going to show you how we tackled a small reach-in closet, adding shelving and multiple hanging storage options.  

closet tower

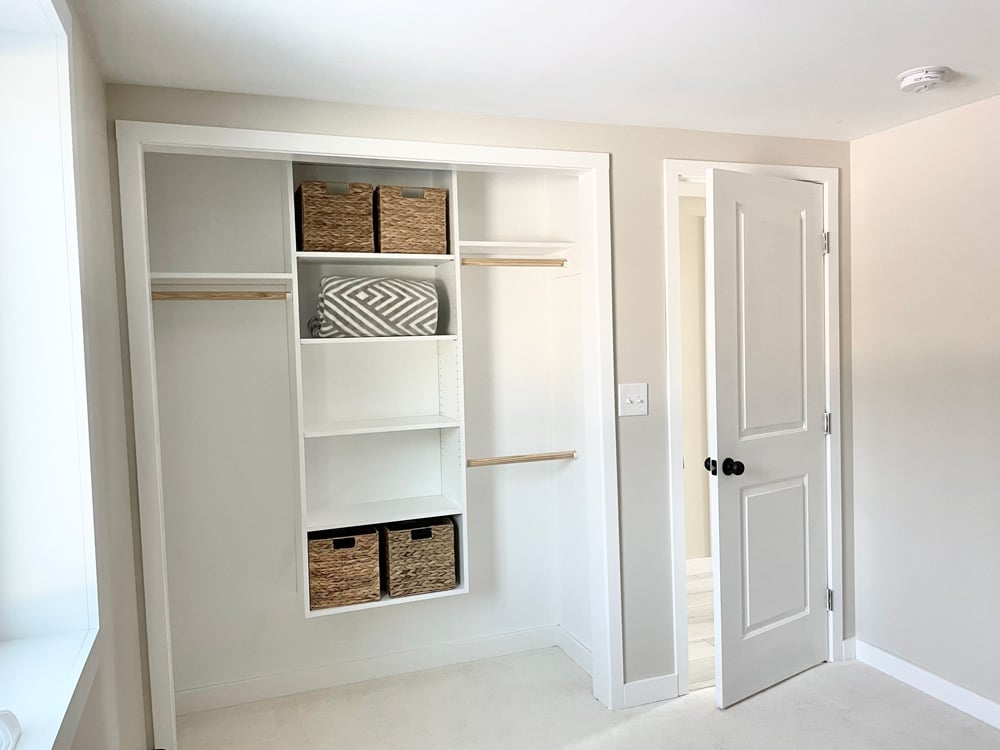
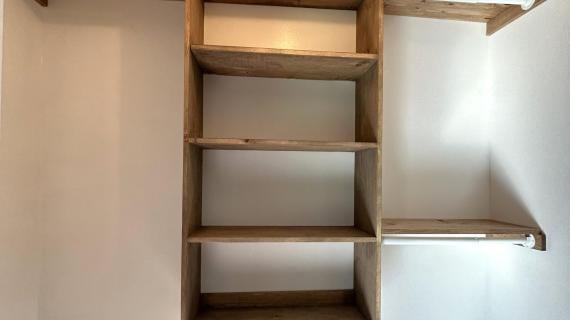
Towers are such a great way to break up closet spaces.  The days of one long hanging rod are over - it is so much more functional to break up hanging space to sort items, and to increase folding space.

organizing a kids closet

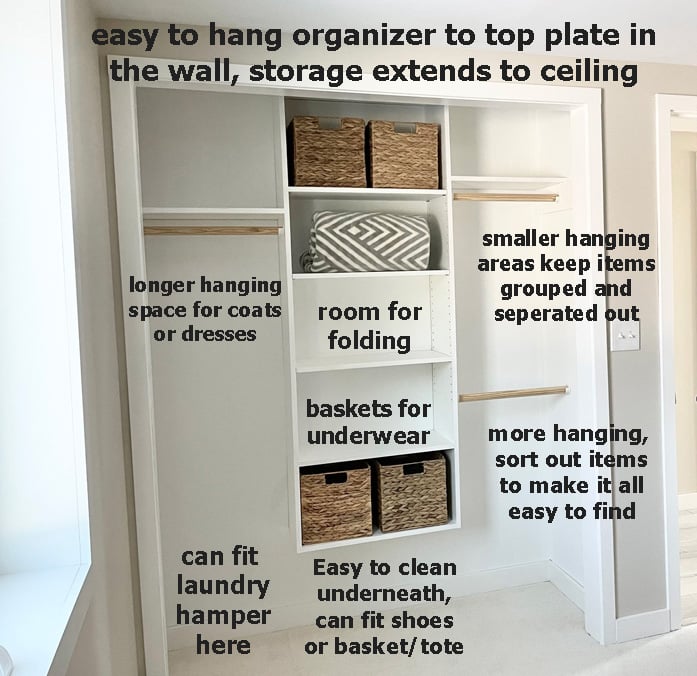
Here's what we love about this closet:

  • Off the floor, so easy to clean under and space could be used for totes, baskets or shoes
  • No need to remove baseboards under closet or cut around
  • Attached to top plate in wall, so easy to hang without drywall anchors or finding studs
  • Storage all the way to the ceiling
  • Smaller hanging areas to help sort out different hanging items (for example, short sleeves on one, long sleeves on the other)
  • Plenty of easy to reach folding space
  • Can be designed to fit specific baskets
  • Divided out upper space for lesser used items
  • High quality construction will last forever (not particle board!)
  • Can be changed up, reconfigured, added on since it's real wood
  • Can be repainted or finished since it's a home finish and not a plastic sticker finish
  • Easy to customize for the space

Watch Me Build This with Basic Tools!

We did a fun video on this closet build that you can watch here.

And also created a plan to help further explain the steps.  The plans follow (scroll down).  Thank you for watching and using our plans, please share photos of your completed projects, we do love seeing your work!


Pin For Later!

Wall Mount Closet Tower with Shelf Help

Preparation

Shopping List
  • 3/4" plywood ripped to 15-1/4" width and front edges finished
  • 1x3 pine furring strips or similar used to create bay supports for hanging the closet on the wall
  • Shelf pins matching the shelf pin jig
  • 1-1/4" coarse thread pocket hole screws
  • 3" self tapping wood screws (for hanging the closet)
  • Closet rod dowels and sockets
Tools
Tape Measure
Speed Square
Pencil
Safety Glasses
Kreg Jig
Drill
Circular Saw
Level

Instructions

Step 1

Designing the Closet Tower

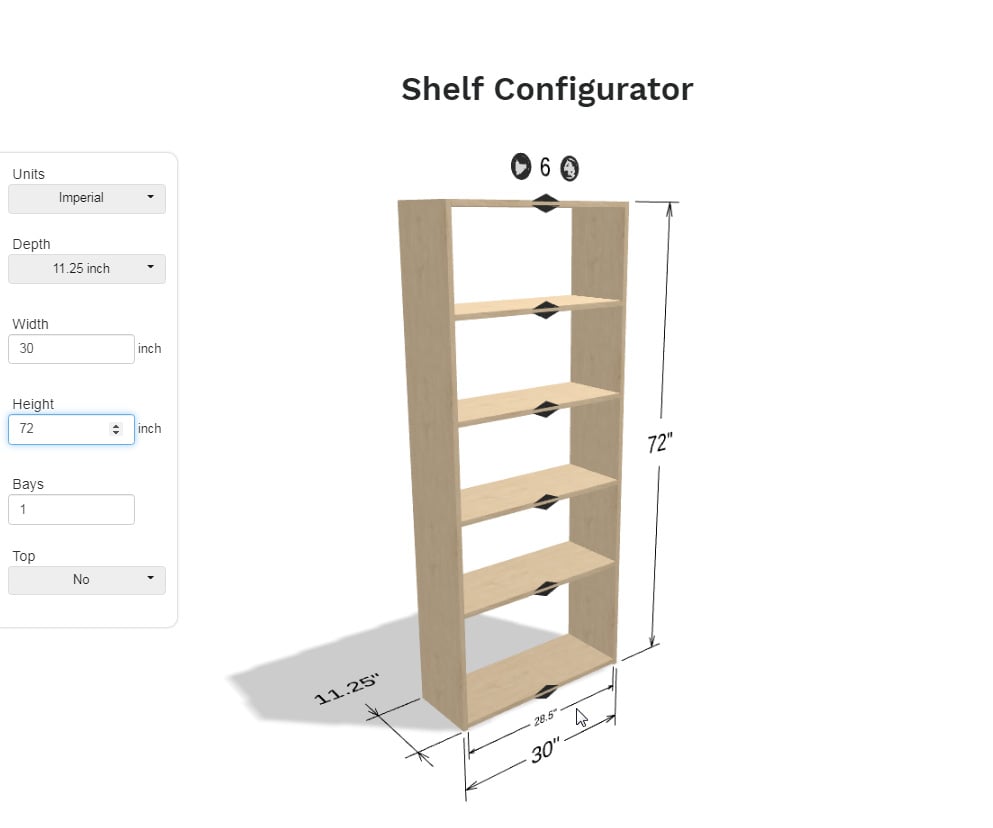
Use my free Carcass Design Tool to create the design plans and cut list custom for your project.

  • Depth should be either 11.25" or 15.25" , I recommend 11.25" for users with shorter heights, 15.25" for taller users (so folded pants and shirts fit on the shelves)
  • Height should be between 72" and 84" for 96" ceilings, but could be shorter or taller depending on needs and space
  • Keep shelves less than 36" wide to avoid sagging shelves

For blanks for shelf sides, simply set Bay=0 and you can order shelf blanks.

Step 2

Building the Closet Tower

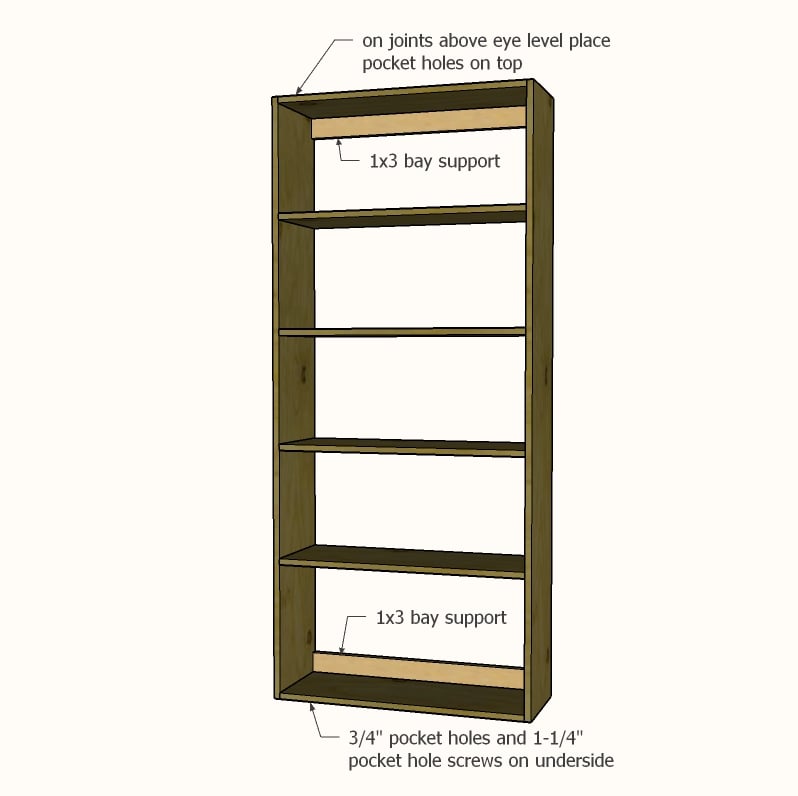
Build the closet tower is pretty simple - just drill two (three for 15.25" width) pocket holes on each end of all the shelf (horizontal) boards.

Attach to the vertical side pieces with 1-1/4" pocket hole screws.  You can also use shelf pins as done in the video for middle shelves, but at least two shelves, possibly three for taller closets, need to be fixed.

1x3 bay supports need to be added at the very top and on one other fixed shelf to give the closet lateral strength and also a cleat to hang on the wall.  Bay supports are the same length as the shelves and are just attached with pocket holes on the back side.

Step 3

Hanging the Closet Tower

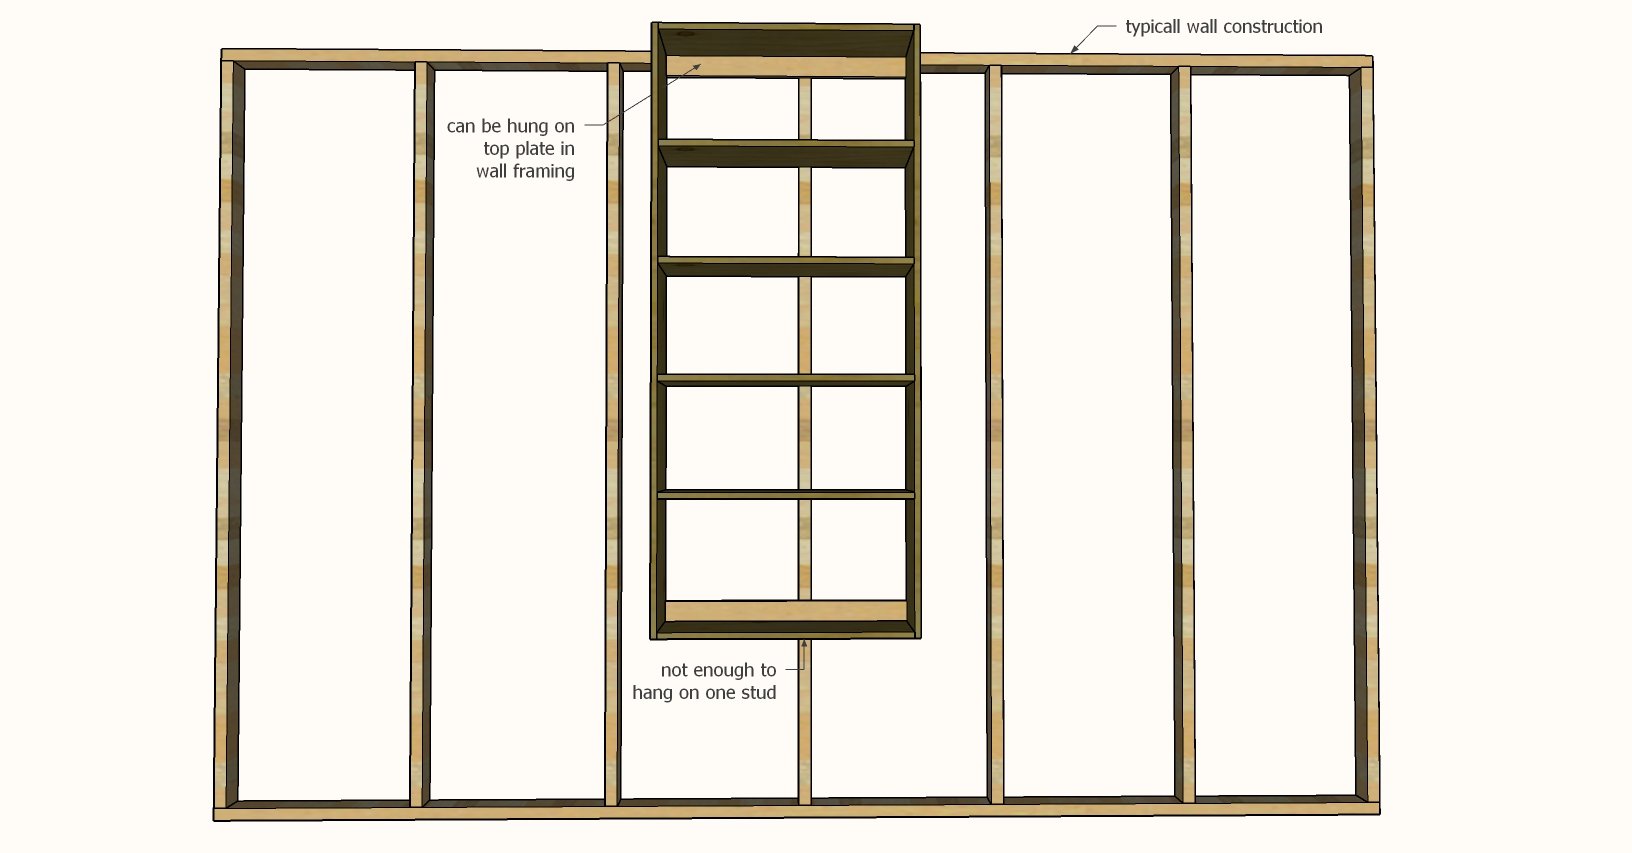
Typical wall framing might make it hard to hang a narrow closet organizer - you might not even have a stud in your desired location to hang the organizer.  

What I like to do is hang my organizers to the top plate in the wall, at the very top of the wall, using 3" self tapping screws.  That way I can place the tower wherever I want it, and know it is hung solid.  This also give room below for baskets and totes, and makes it easy to clean under the tower (and you don't have to remove baseboard mouldings).  You should also anchor at the bottom to a stud in the wall (if possible) or use a drywall anchor, to keep the closet secured at the bottom.

Step 4

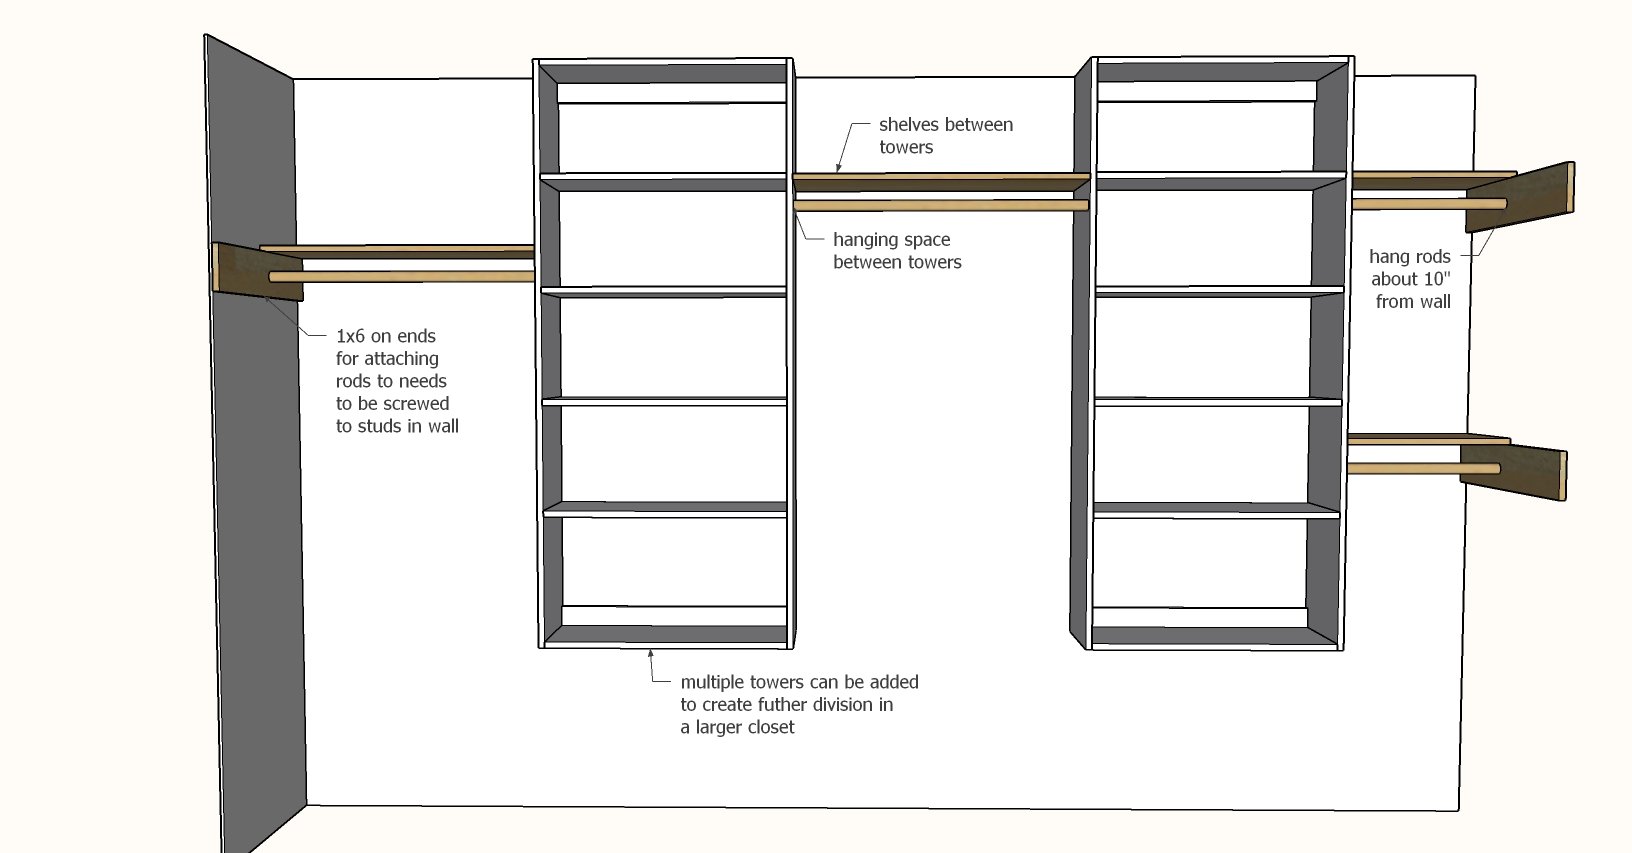
Between Tower Shelves and Rods

Multiple towers can be hung in larger closets.  In between, hanging space is created by simply hanging rods on the towers (aren't you glad the towers are secured well now?).  Shelves can also be used to added folding space above rods.


Comments

chattympc

Tue, 12/21/2021 - 06:41

Hi,

Excited to get started on this project which will be one of my firsts. Did you install a wall plate at top for the towers or assume it exists at top of your wall framing? Would you recommend a French cleat system to allow for adjusting location and if so, any tips?

Frequently Asked Questions

Wood Questions

What kind of wood should I use?
Most of our plans use standard construction lumber like pine or fir. It's affordable, easy to work with, and easy to find. It's also rapidly renewing and biodegradable, so a great eco friendly choice!

Can I use hardwoods instead?
Yes—just keep in mind they're heavier, cost more, and can be tougher on tools and harder to join together and finish. I recommend not tackling a hardwood project until after you have built several softwood projects.

What if my boards are warped?
Choose the straightest boards at the store. You can often work around slight warps by cutting them into shorter pieces.

What wood should I use for outdoor furniture?
Use red-toned or pressure-treated 2x lumber for framing, and cedar or cedar fence pickets for the decking. Outdoor furniture should be built like a deck—your local home center can help recommend the right wood for your climate.

Will my wood move or warp after I build?
Potentially, especially in humid climates. Let your wood acclimate indoors before building. Once acclimated and kept in a stable environment, movement should be minimal. Remember, most houses are built using framing lumber - it's all about keeping moisture down indoors.

Cutting Questions

Do I need a miter saw?
A miter saw is great, creating fast, safe, and precise cuts, even for beginners. But most plans can be built with a circular saw and a straight edge. If using a circular saw to cut, take time to practice, and get good at making cuts, before cutting your project boards.

How do I get clean cuts with a circular saw?
Clamp your board, measure twice, cut slow, and use a sharp blade. This takes practice, so spend some time making cuts. I go through becoming proficient at freehand cutting in my course, it is worth taking if you want to master this skill.

Will the store cut my wood?
Yes—most stores will do rough cuts to help you transport your materials home. But from store to store, the quality of cuts could greatly vary.

Joinery Questions

What screws should I use?
We recommend star-head self tapping screws for framing, most common sizes are 2-1/2", 1-3/4". Pre-drill if close to the edge or you find your wood is splitting.

Do I have to use pocket holes?
Pocket holes are the cheapest, easiest and fastest way to do some joints - like edge to edge or a hidden fastener joint. There are other methods, but these can be time consuming and expensive. We recommend using pocket holes as indicated in plans for best results.

How do I keep things square?
Use a speed square and measure diagonals after each step. Always clamp joints before screwing to keep them tight and flush.

Finishing Questions

Stain or paint before or after building?
A quick sand before and a full finish after gives the best results. Pre-finish if you're doing two-tone or detailed finishes.

What type of finish?
Use oil-based or water-based stain. For paint, cabinet-grade latex or enamel works great. High use surfaces on indoor projects should get a coat of polyurethane, I recommend a Helsman or Spar or other flexible poly that won't crack or peel with wood movement. For exterior projects, use a finish suitable for exterior fences.

How to get a smooth finish?
Start with a well sanded project. Sand between coats (220 grit), wipe clean, and apply light coats with a foam brush or roller.

Plan Questions

Can I change the size?
Many people do, and that's the great thing about building your own furniture! But do keep in mind going bigger might mean more supports are required, and often plans are optimized for minimal material waste.

Are these beginner-friendly?
Yes—plans are written with simple tools and clear steps in mind, with every effort to make plans as simple as possible.

Can I sell what I build?
Absolutely! Just don’t resell or repost the plans themselves.

General Questions

What tools do I really need?
A drill, circular saw, tape measure, square, and a few clamps will get you through most projects.

Do I need a workshop?
Nope! A driveway or small patio is plenty to get started, just make sure you have a level place to work. If you find you are building several projects a year, creating a small workbench is a great way to store tools and have a dedicated workspace.

What if I mess up?
Wood filler, sanding, or flipping boards goes a long way. Mistakes are part of the process!

What can I do to make my projects look more professional?
Start with straight boards, make accurate cuts, clamp all joints, and line up everything neatly. Sand thoroughly, use a neutral finish, and apply it in light coats for a clean look.

I've never built anything before. Where should I start?
Start with a few smaller softwood projects to get hands-on experience. Or if you're tackling a big project, buy a little extra lumber and practice your cuts and joints first. If possible, work with someone who has a bit of experience.

Care & Maintenance

How long will my furniture last?
With good joinery and regular care, your DIY furniture can last for decades. I have pieces in my own home that are over 20 years old and still going strong! One of the best parts about DIY furniture is that it’s easy to repaint, refinish, or repair—so your projects can grow and adapt with you.

How should I care for outdoor furniture?
Lightly pressure wash or hose it down once or twice a year. Tighten screws and reapply finish as needed to protect it—just like a deck or fence. A little upkeep goes a long way in extending the life of your furniture.

How about indoor furniture?
Regularly dust or wipe with a damp cloth. If it starts to look worn, a light sanding and touch-up paint or stain can refresh it in no time. DIY pieces are meant to be durable and fixable—so don’t be afraid to give them some love now and then.

Want to Build with Confidence?

Check out my ebook: 12 Skills to Build Your Own Furniture
It walks you through the core skills every builder needs—measuring, cutting, joinery, and finishing—so you can build beautiful furniture that lasts.

Still Have Questions?

Email us anytime at [email protected] and we’ll be happy to help!