
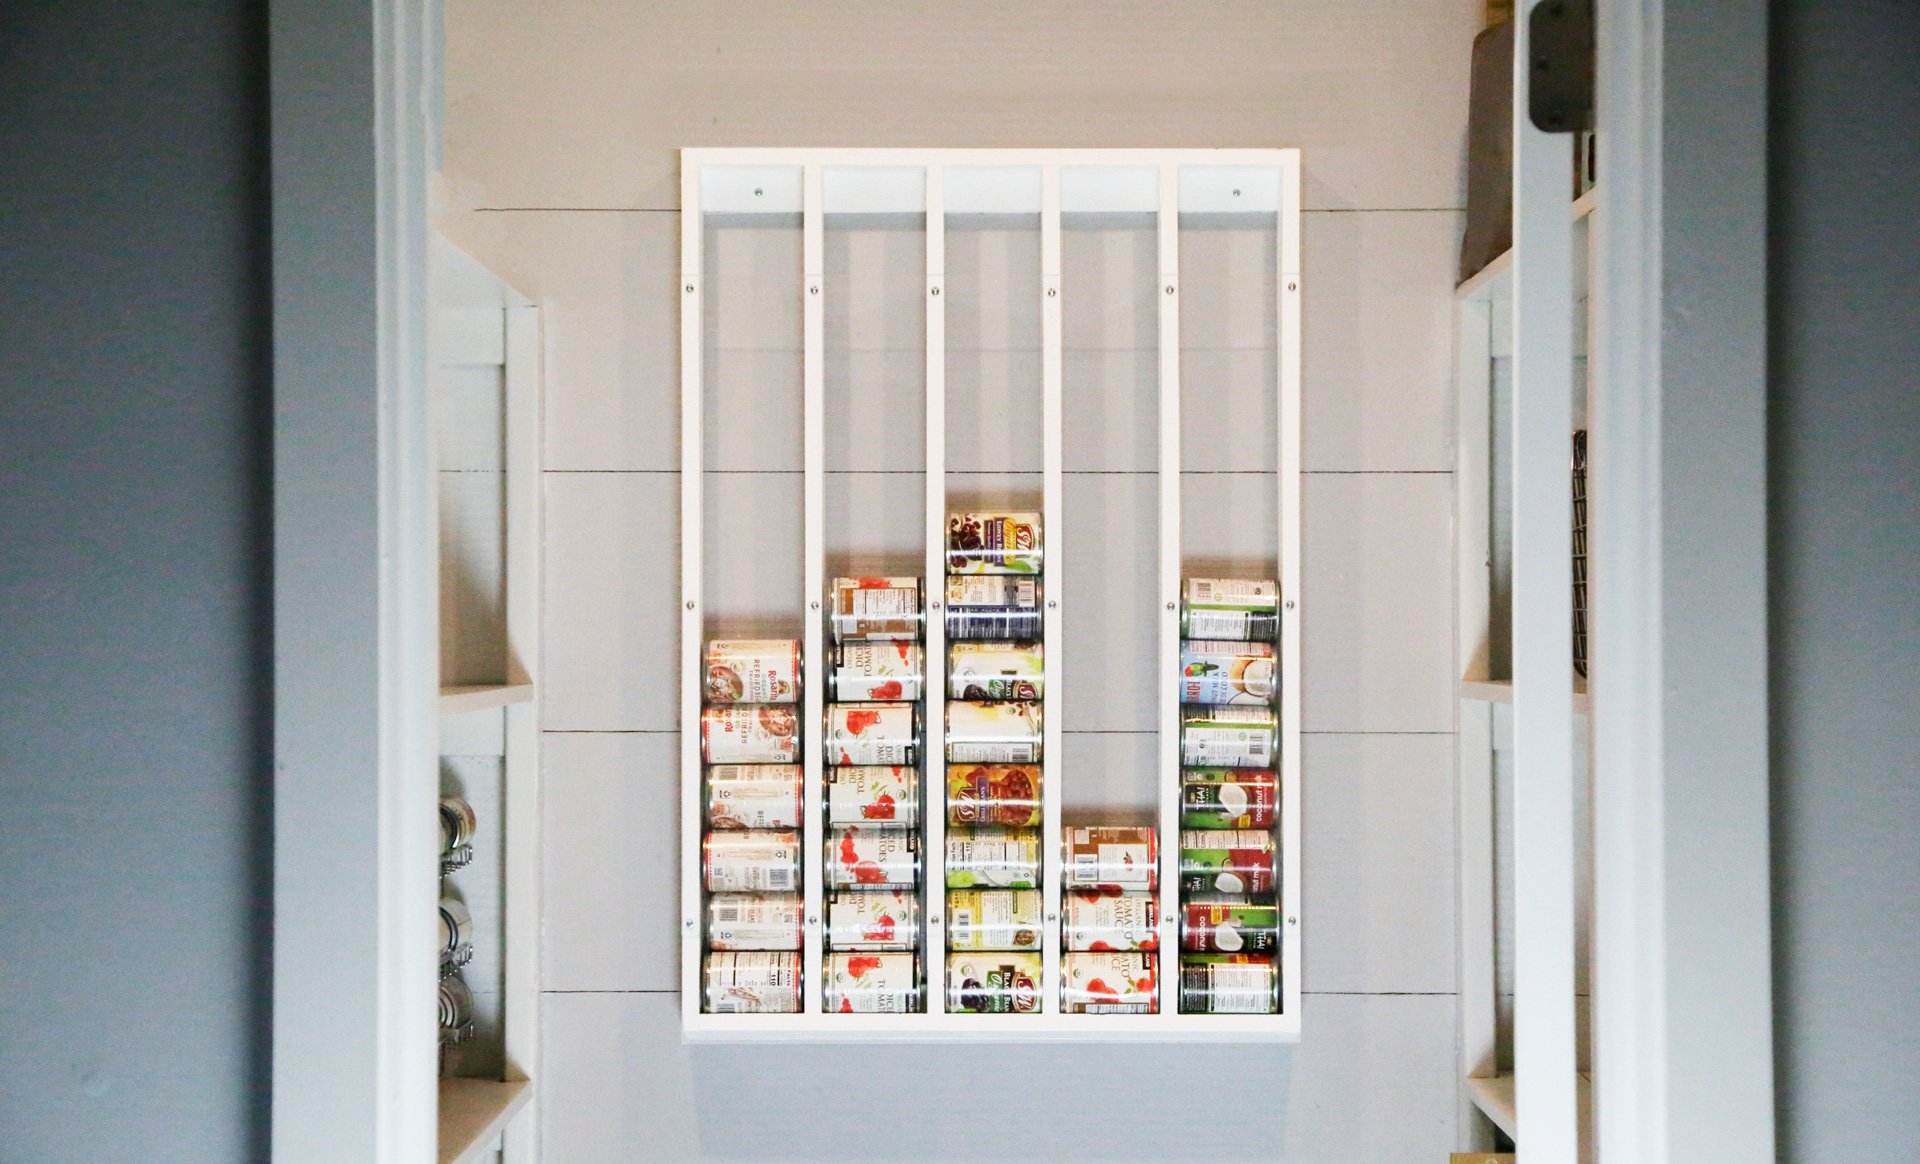

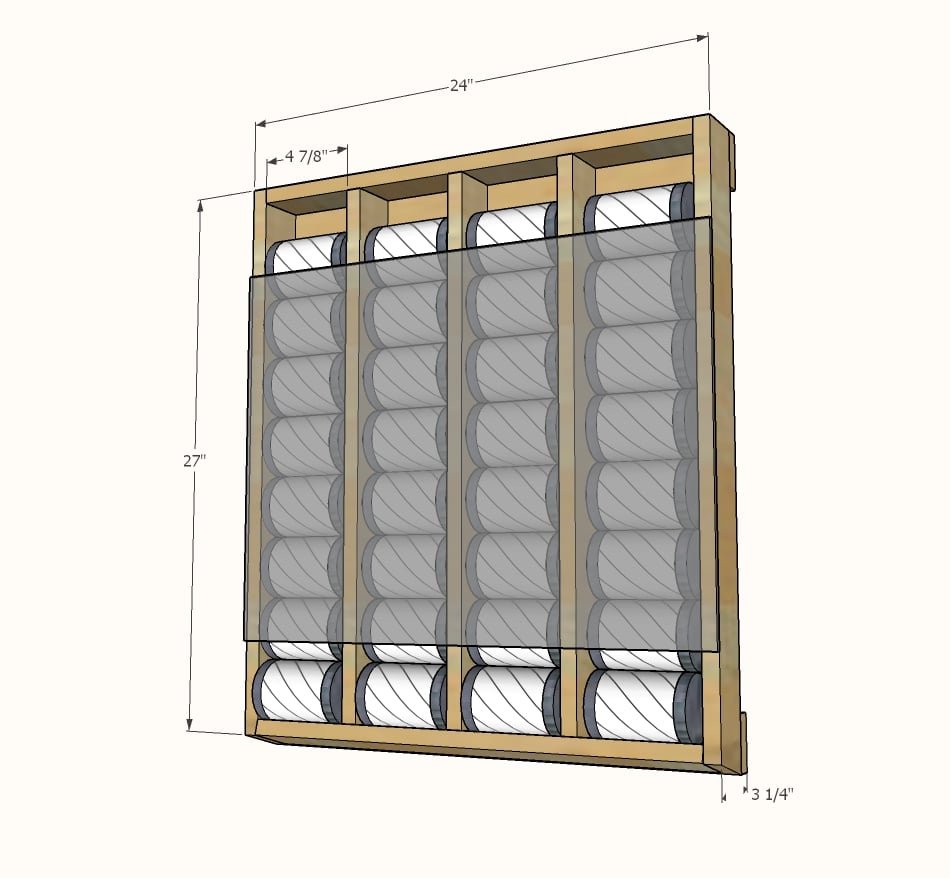
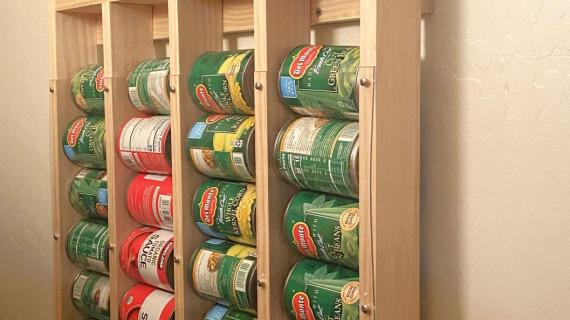
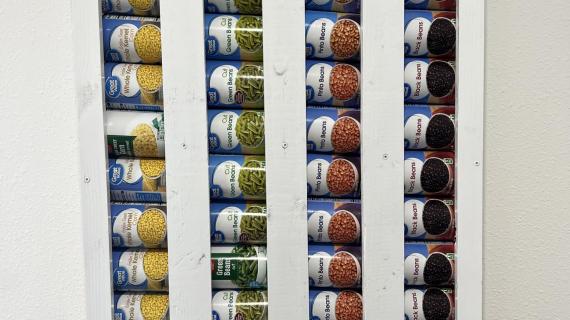
This can organizer will free up so much pantry space! It fits 32 cans in less than 4" on the wall. The clear acrylic glass (in an off the shelf size) keeps cans visible so you know when you are running low, and automatically rotates older cans to the front.
It's made of inexpensive 1x3s and is screwed together with a drill. It's super easy to hang too! Our free plans and video walk you through the process, so even a novice DIYer can tackle this project!
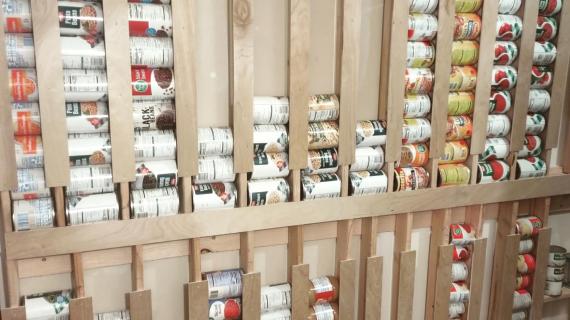
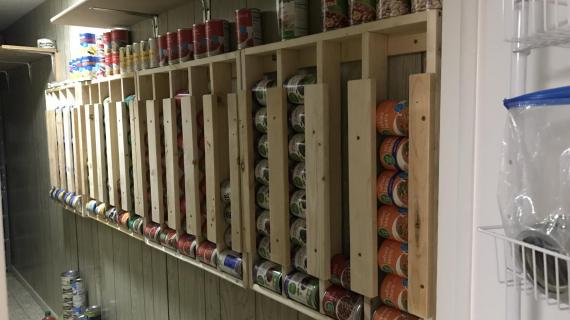
We have a good sized pantry with deep shelves, but the can food situation never was quite right. We have ample shelving space - it was more keeping the cans organized AND visible, but not having to go rearrange cans every couple of days. Who wants to do that?
On my last trip home from Costco, when I realized I had THREE cases of diced tomatoes already in the pantry, I had my moment. The canned food situation had to change.
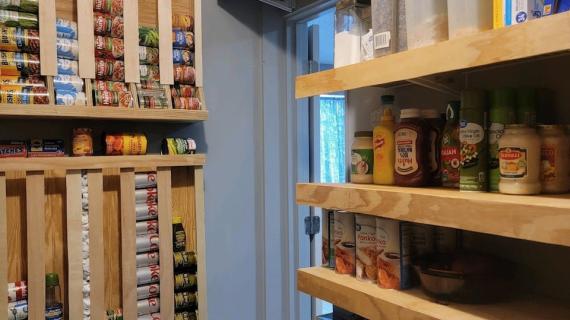
At first, I thought of ways to create canned food systems on the shelf. We had been gifted a wire rack for the shelf, but the problem was keeping only one kind of can in each row - if one person went rouge on you, it's was all over.
And then it hit me. The canned food needed to be in a dispenser on the big blank wall at the end of my pantry.
How did I not see that sooner.
Anyway, after a couple of days of thinking about it, I built this!
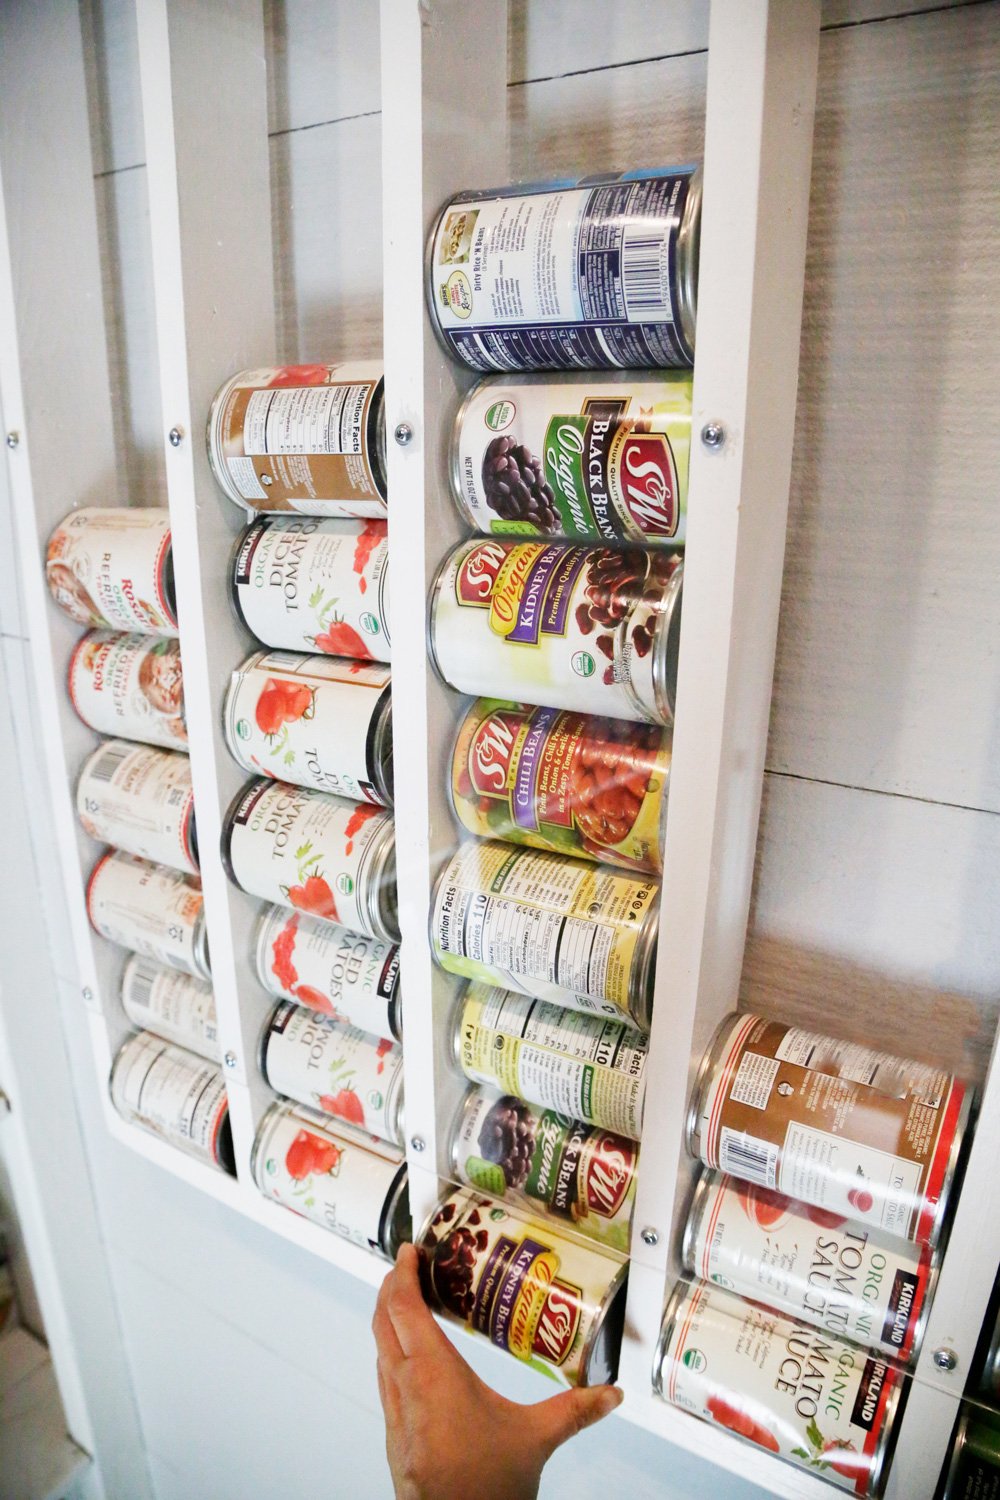
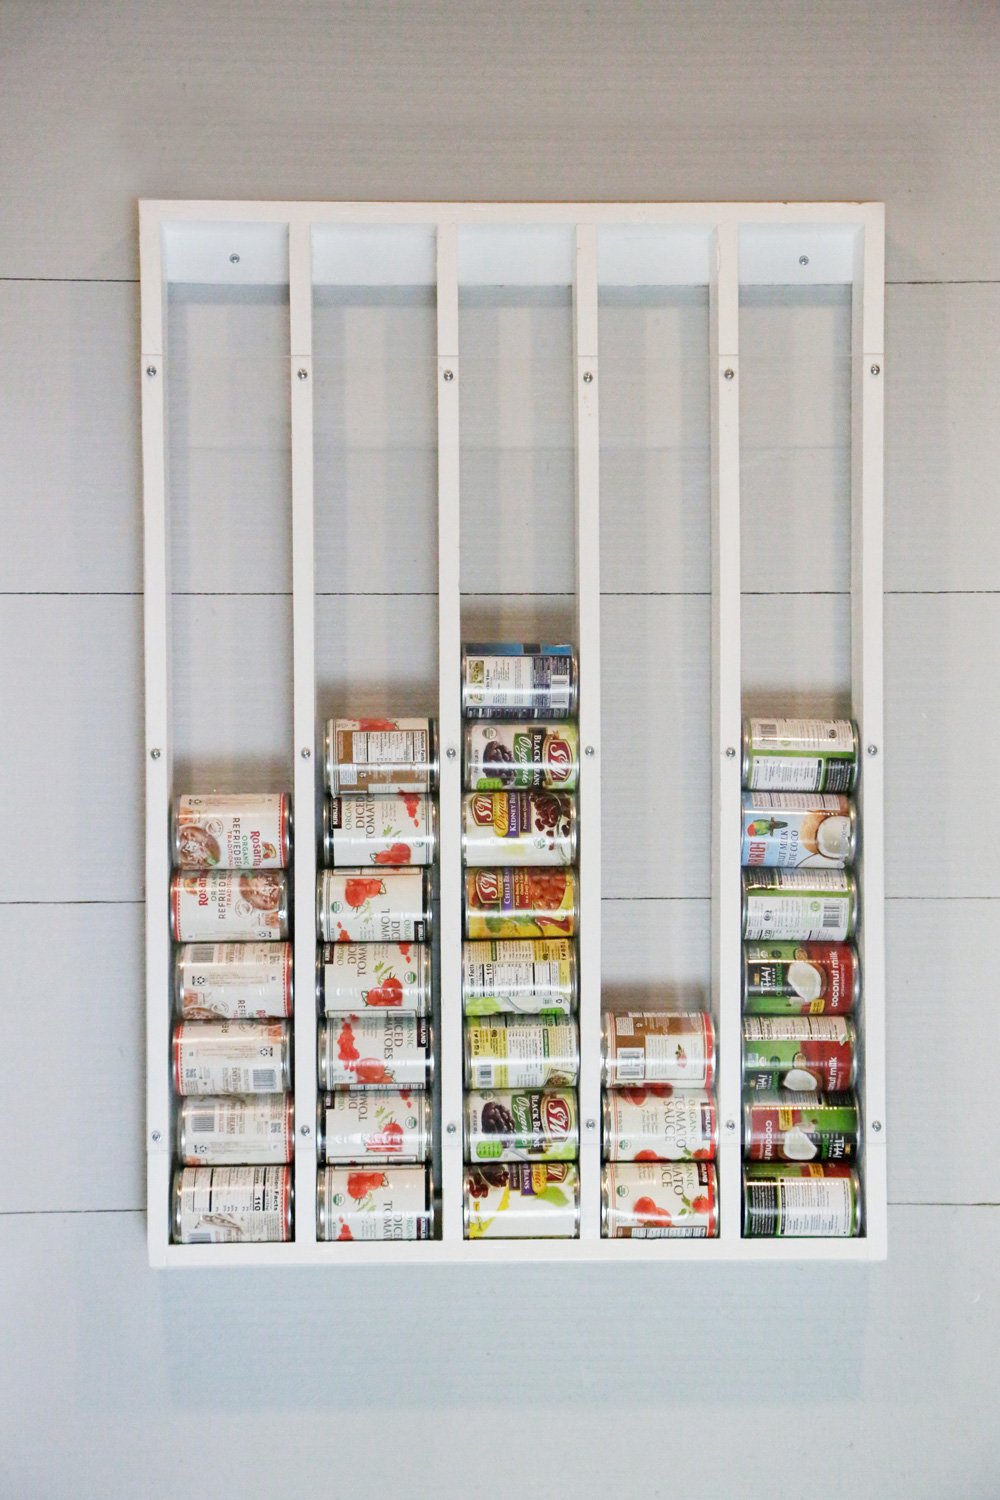
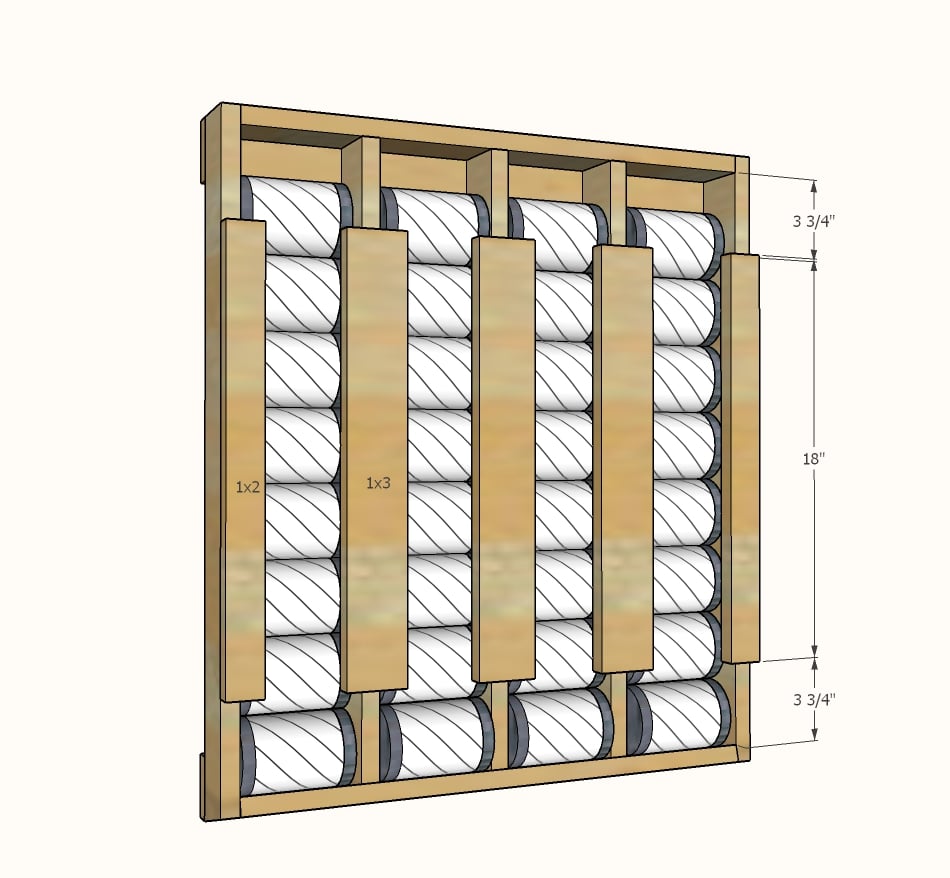
It's pretty simple - all 1x3 boards, just screwed together with acrylic glass on top. The trick was cutting the bottom at an angle, so the cans stay inside the divider. And the acrylic glass on the front so I can see exactly how many cans of diced tomatoes I have all the time. I was lazy, so I designed the entire organizer to fit so I wouldn't have to cut the acrylic glass.
Features
- Low profile design takes up minimal space on the wall
- Automatically rotates older cans to the front
- Cans dispense easily, but won't fall out on their own
- Simple build using all off the shelf materials and basic tools
- Clear glass front keeps cans in plain sight so you know when you are running low
- Easy to hang with built in hanging supports on the back
- Can be easily modified to fit different height cans
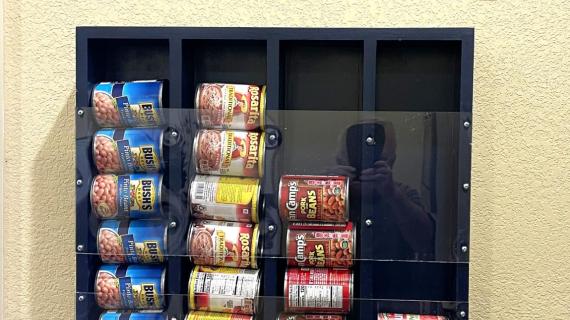
No Acrylic Glass? No Problem!
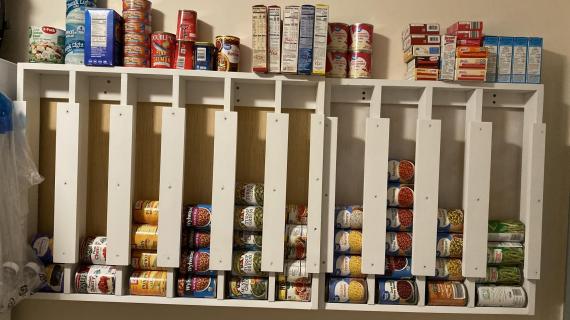
You can use 1x2s and 1x3s instead of the acrylic glass, if that's your preference. It'll be cheaper and easier to build this way too. Just screw the 1x2s and 1x3s to the front of the dividers.
Plans Sized Down from Photos
I do need to tell you that the canned food organizer that I built was a full 12 cans high - which is super awesome - but dropping the first can in 12 cans high is a little sketchy - will the can blow up? Will it shatter out the front acrylic glass? It hasn't yet on me, maybe it never will, but just to be safe, for these plans, I adjusted so its only 8 cans high.
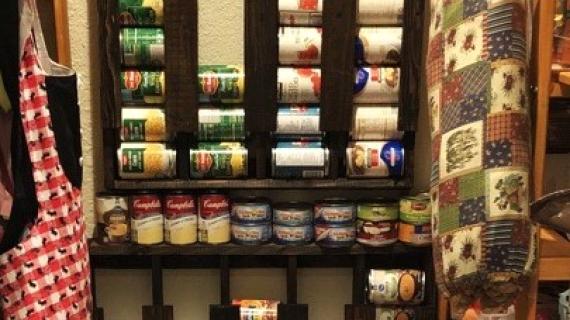
If you need more can storage, my recommendation is simply to build two (or more) organizers, and stack them up.
Video Tutorial
We filmed the build process for this project, so please watch before you build for lots of tips and tricks.
Can Organizer Plans
The free plans for this can organizer follow. We hope your project turns out amazing and can't wait to see photos. Please send some our way when done via creating a brag post or tagging me on Instagram #anawhite
Preparation
- 18" x 24" sheet of acrylic glass like this from Lowes or 1x2s and 1x3s can be substituted
- 3 - 1x3 @ 8 feet long
- 50 - 2" self tapping wood screws
- 15 - 1-1/4" wood screws for attaching acrylic glass to the front, make sure the back of the screw head is flat to avoid breaking the acrylic glass (can use Kreg Jig screws) - if using the acrylic glass
- Wood glue
2 - 1x3 @ 22-1/2"
2 - 1x3 @ 27-3/4" - long point measurement, one end cut at 15 degrees off square
3 - 1x3 @ 26-1/8" - long point measurement, one end cut at 15 degrees off square
2 - 1x3 @ 24"
Cut the 1x3 boards with a compound miter saw.


Instructions
Step 1
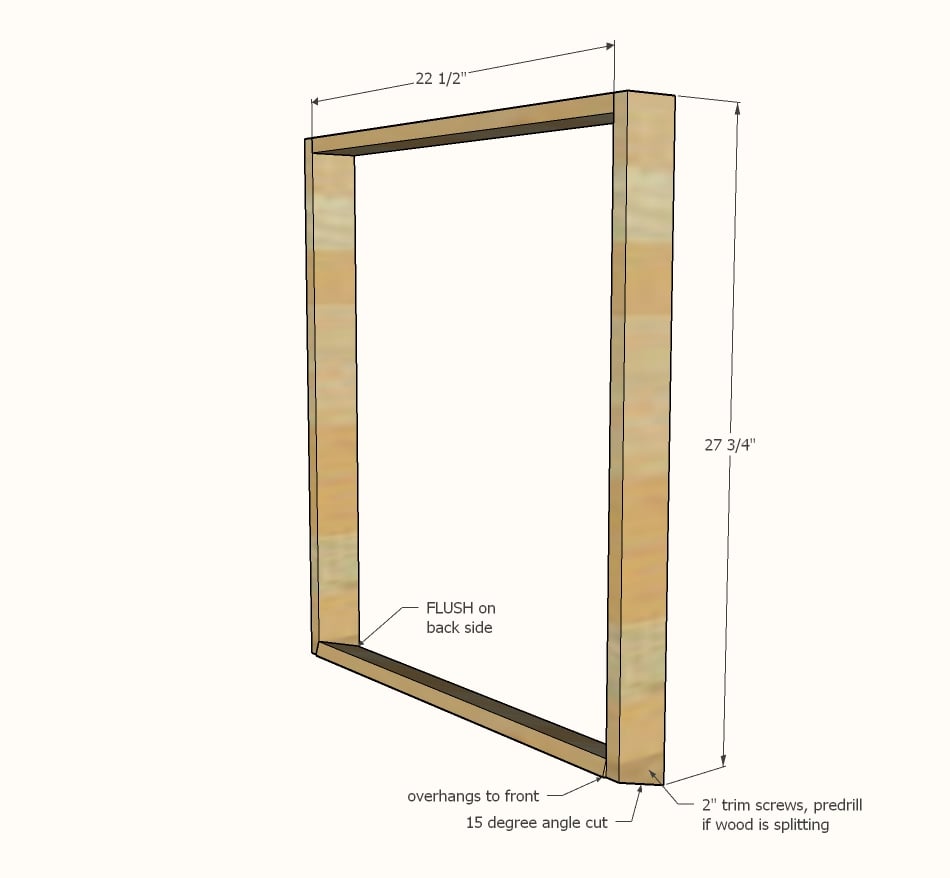
Attach sides to top and bottom pieces.
Note that the back should be completely flush, the front of the angled bottom will overhang.
Use glue and 2" screws.
If wood is splitting, predrill holes with a drill bit sized to match the screw shaft (not including the threads).
Use the speed square to adjust the project for square before glue fully dries.
Step 2

Add the vertical dividers, two screws on top and two on bottom.
Step 3

The back supports are very important to give you something to hang the canned food organizer on the wall.
Apply ample glue.
Attach with 2" screws.
Make sure you attach with screws into the bottom angled 1x3 as this board will bear all the weight of the canned food.
Step 4

Place acrylic glass on top.
Predrill holes sized bigger than the screw (including threads) through the acrylic glass (but not fully into the wood) over every vertical divider, one at top, one at bottom, and one in the middle.
Attach with the 1-1/4" screws.
Step 5
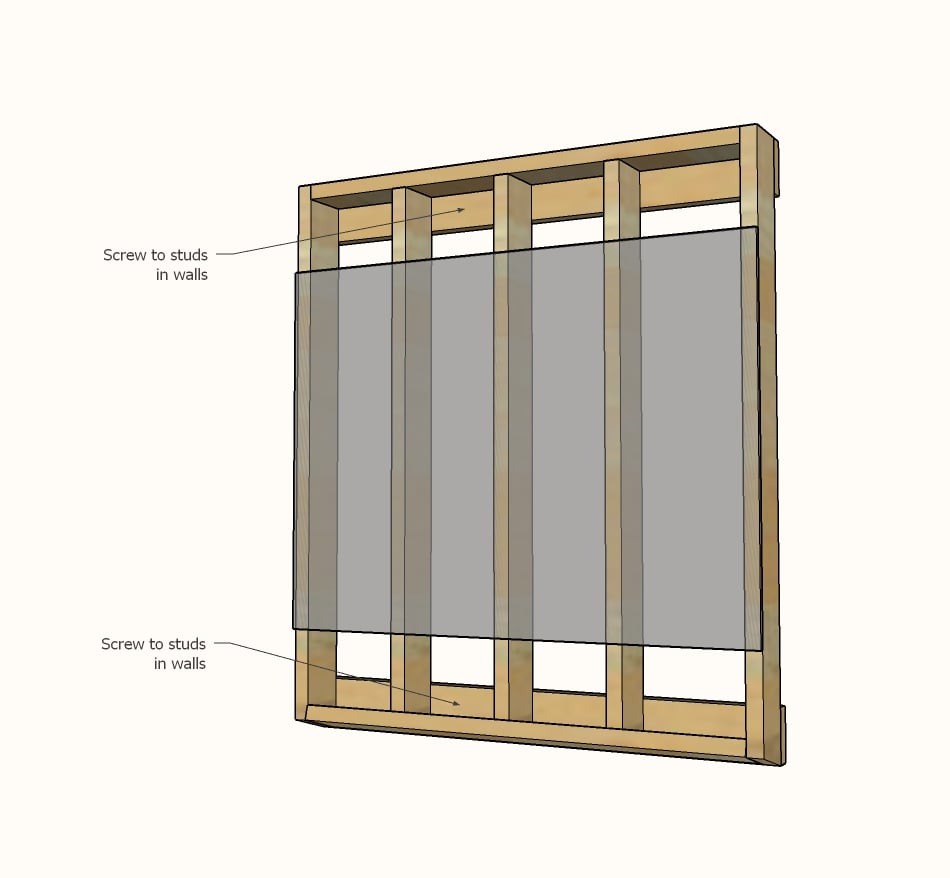
Hang the organizer to studs in the wall.
I painted everything white with Behr Marquee satin in off the shelf white.


Comments
sduerk
Tue, 10/29/2019 - 11:22
project dimensions
Great idea. Thanks Ana.
I got stuck on a project yesterday that I don't understand. Your plan above addresses it. I built a bench with 3 cubbies under it for kids "stuff". I could not figure out mathematically how to determine how wide every cubby should be with my 3/4" dividers. I thought I should take the width of the bench, subtract out the width of the dividers (2x3/4 = 1.5") and divide by three. However, I always ended up with one cubby being much larger than the other two. What was I doing wrong? Thanks in advance for your help and thank you for your awesome website.
Scott
In reply to project dimensions by sduerk
Ana White
Fri, 11/01/2019 - 14:48
Sometimes wood can be…
Sometimes wood can be thicker (or thinner) or other small issues that add up.
What I often will do is place all the dividers in the shelf, all to one side. Then measure the opening that is left, and divide by the number of desired openings.
DiNeums70
Sat, 07/11/2020 - 10:43
Perfect Ana! Thanks for that…
Perfect Ana! Thanks for that tip. KISS-keep it simple stupid, I always forget this!!
Thanks for making your plans so easy to follow. The diagrams are so very helpful.
Happy Building!
Di
jtholland
Sat, 11/02/2019 - 12:34
For the pantry
For the pantry
merlinpatt
Tue, 03/03/2020 - 09:05
Cans scrape wall?
Do the cans scrape the wall as they fall? What can I do to prevent the cans from you touching the wall?
In reply to Cans scrape wall? by merlinpatt
jiffyone2001
Wed, 10/07/2020 - 22:15
Put a piece of quarter inch…
Put a piece of quarter inch thick backing on it.
abelandaddie@y…
Mon, 07/27/2020 - 08:02
My cans are too fat (regular…
My cans are too fat (regular sized cans) for the glass to go over it using 1x3s :(