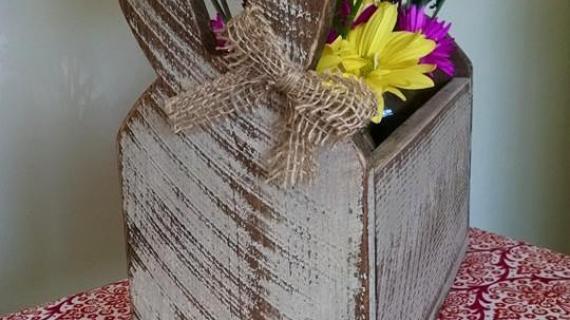

Make a wood Easter basket with bunny ears and tail!


My goodness you all have inspired me!
I cannot believe the projects you are making with scrap wood! There's just a few days left to share your projects and get entered to win over $1000 in building funds, so if you have a scrap wood project, make sure you share it and include #GetBuilding2015 and #ScrapWorkLove in your post.
This year, for Easter, I didn't want to buy my kiddos Easter baskets, especially since I still have a little scrap wood to use up. And it's always way more fun to make something.
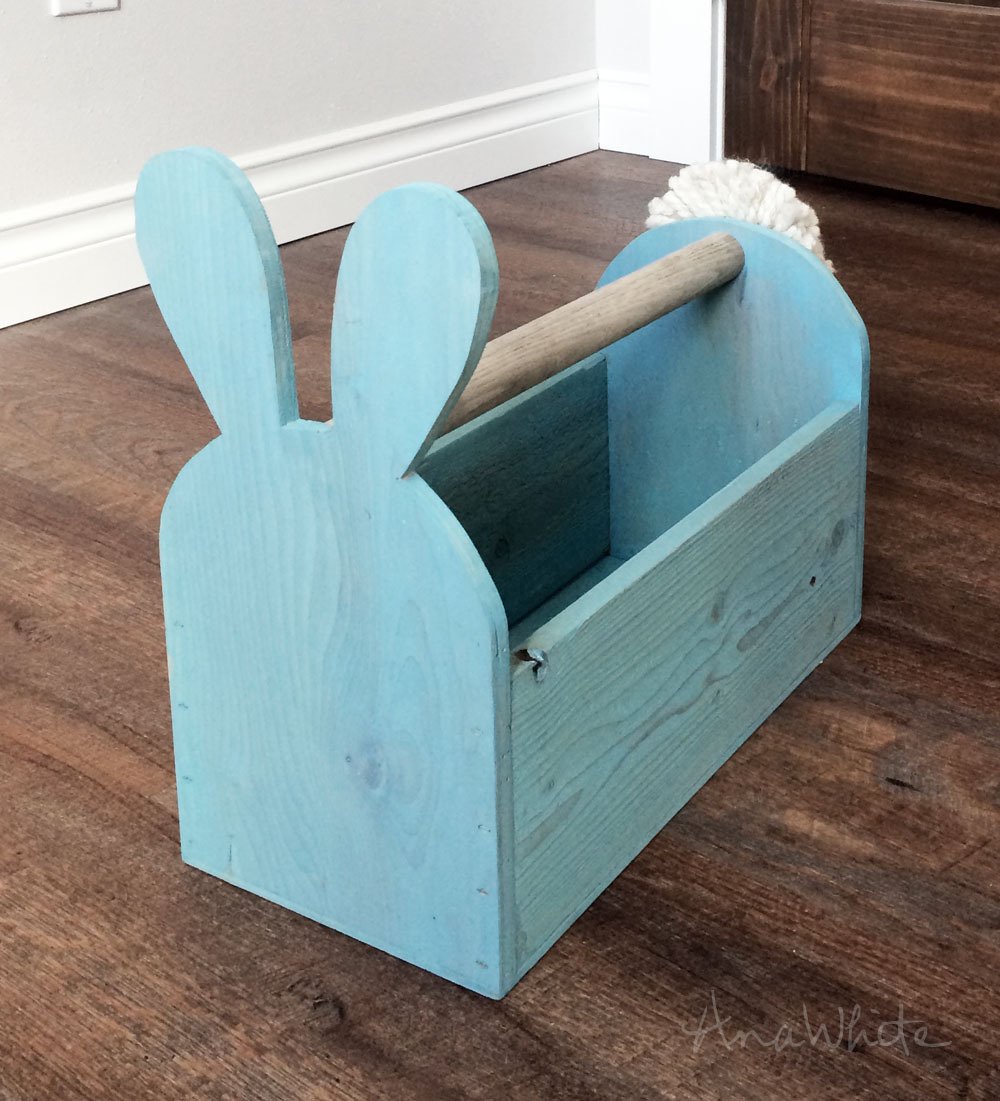
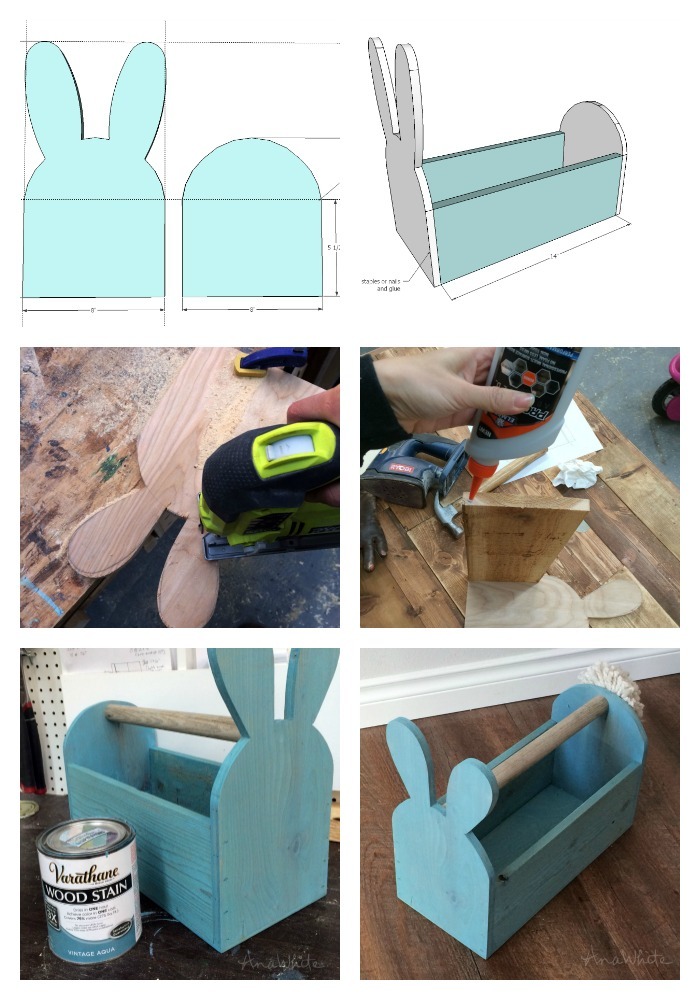
So I thought, why not take the age old wood trug caddy design ... and add bunny ears?

I'm still pretty shocked at how cute it turned out!
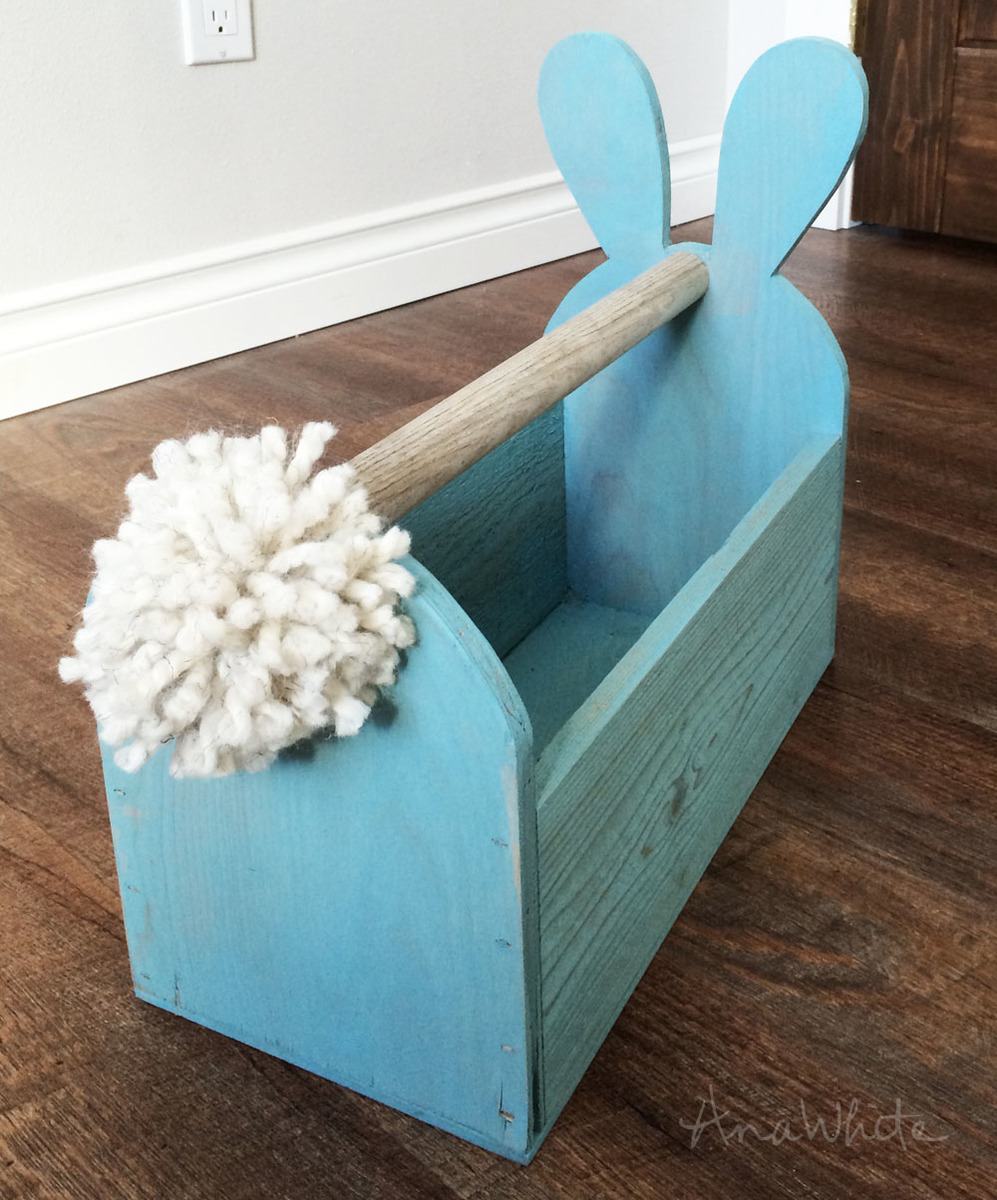
So cute, I borrowed my daughter's pom-pom making supplies and made a fluffy little tail.

The baby instantly loved it and started filling it up with toys.
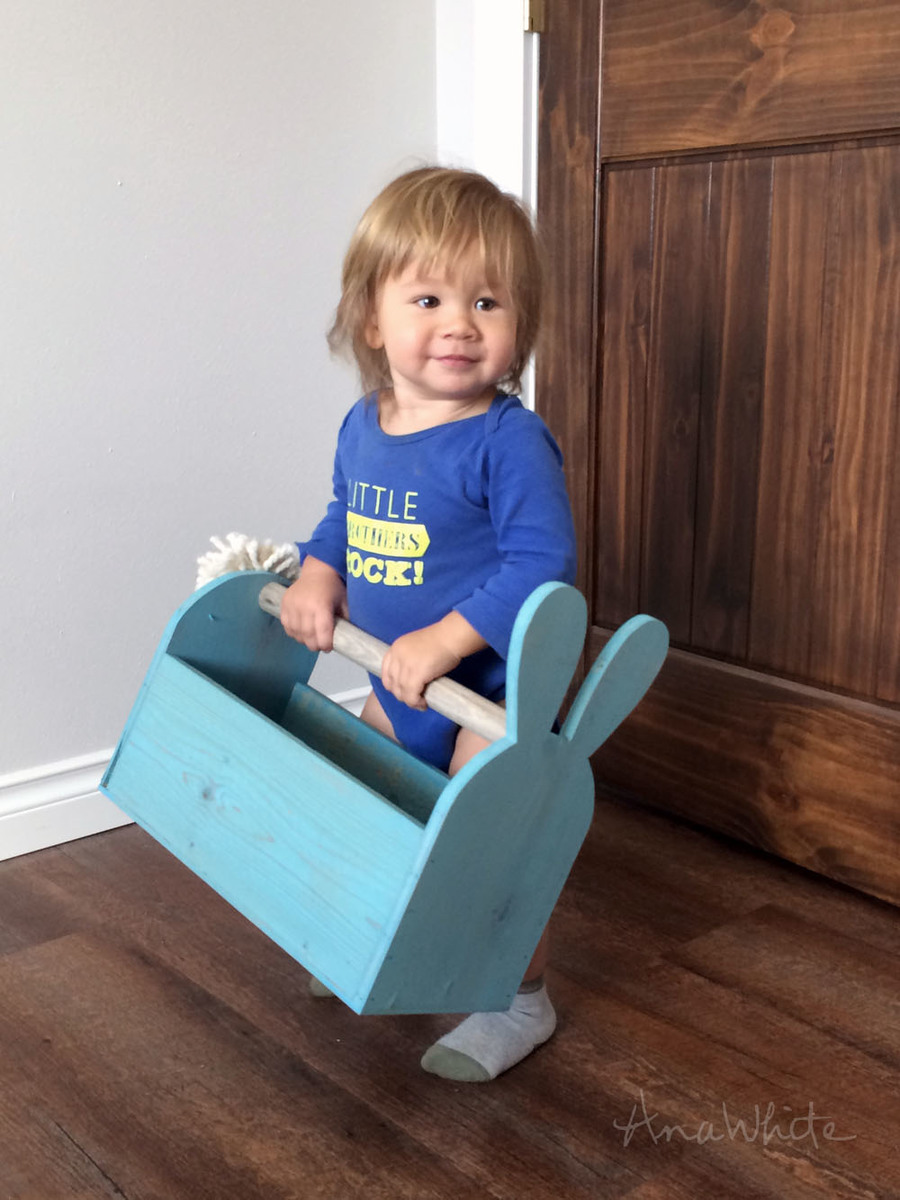
And although this version is a little big, at one, he can carry it around. I might have to make him a smaller version more his size before Easter. This one is for big sister.
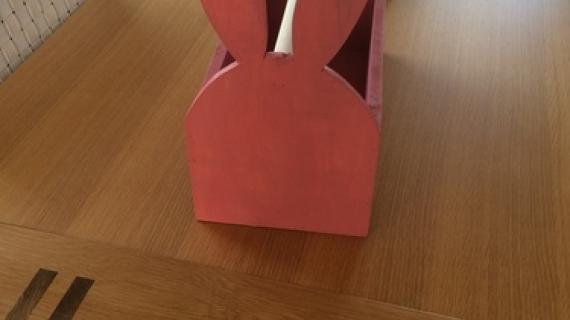
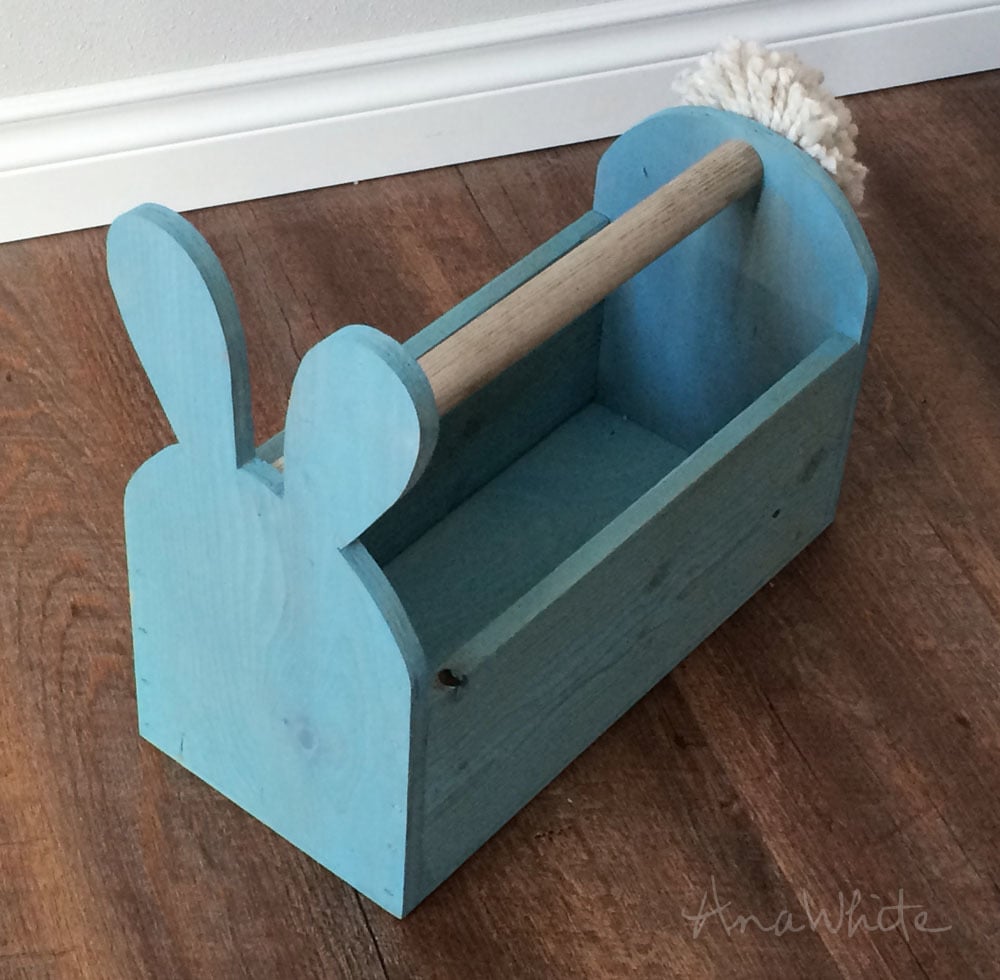
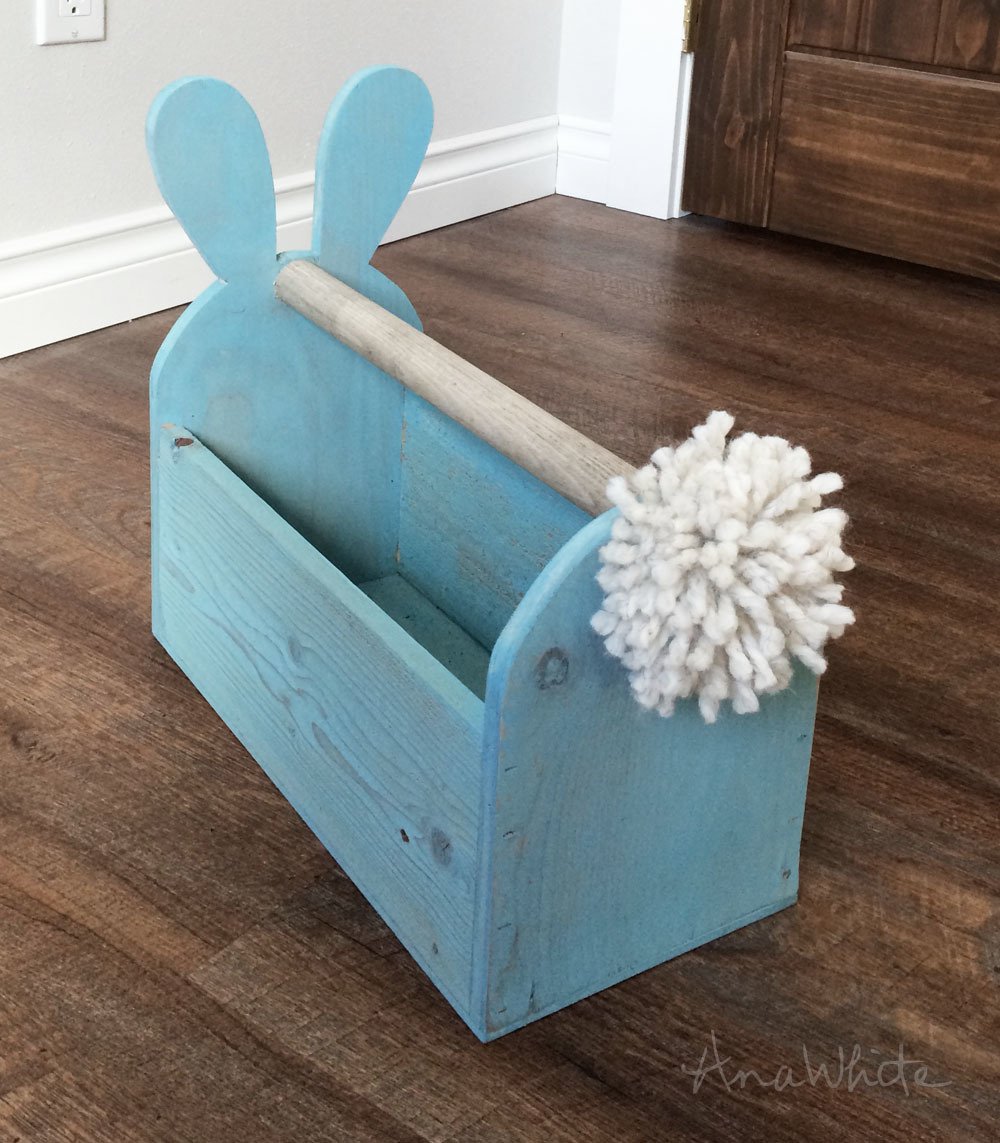
I still can't get over that this beautiful one-of-a-kind wood Easter basket was just scrap wood and an old broken shovel handle a few hours earlier!
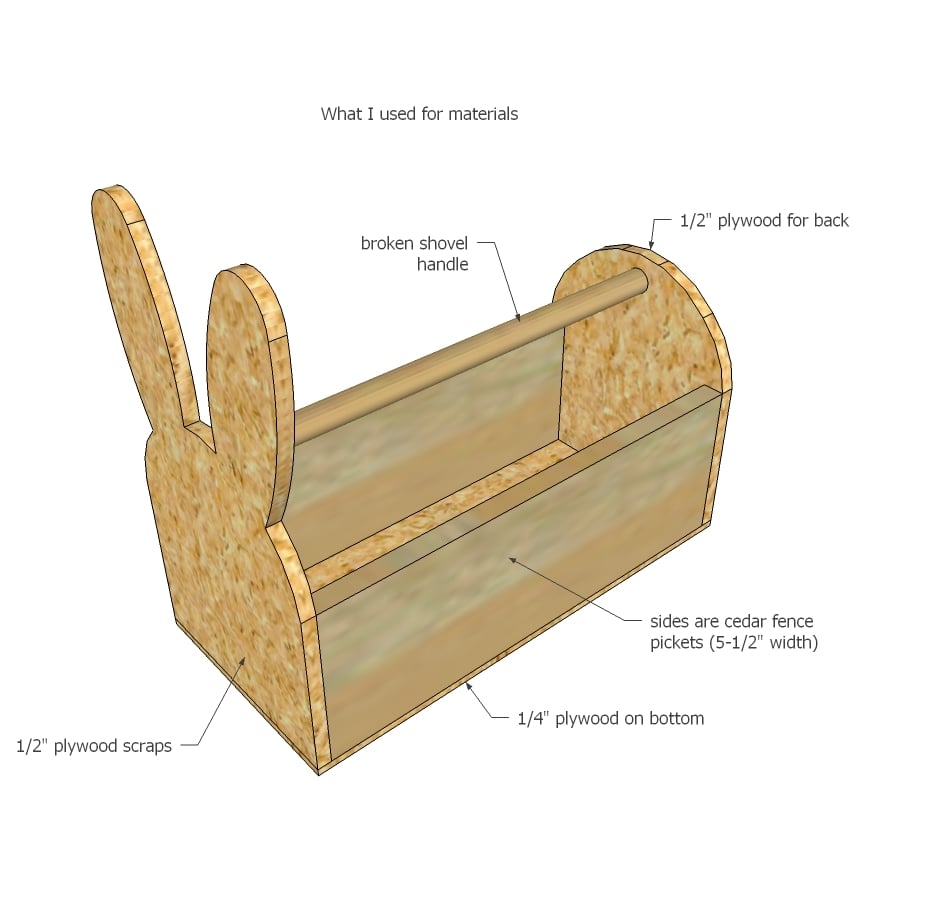
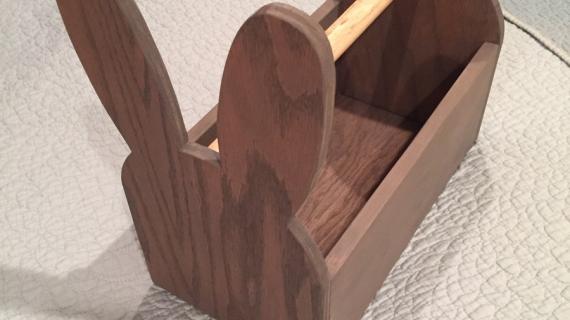
I did not buy ANY supplies for this project - the ends are made of 1/2" thick plywood scraps. I used the 1/2" plywood because it's lighter weight than 3/4", but still strong enough for those bunny ears to not just bust right off (like 1/4" might). The sides are cedar fence picket pieces - I used them because its what I had on hand, but a 1x6 or plywood scrap would do. The bottom is then just 1/4" plywood scraps. And the handle is a broken shovel handle.
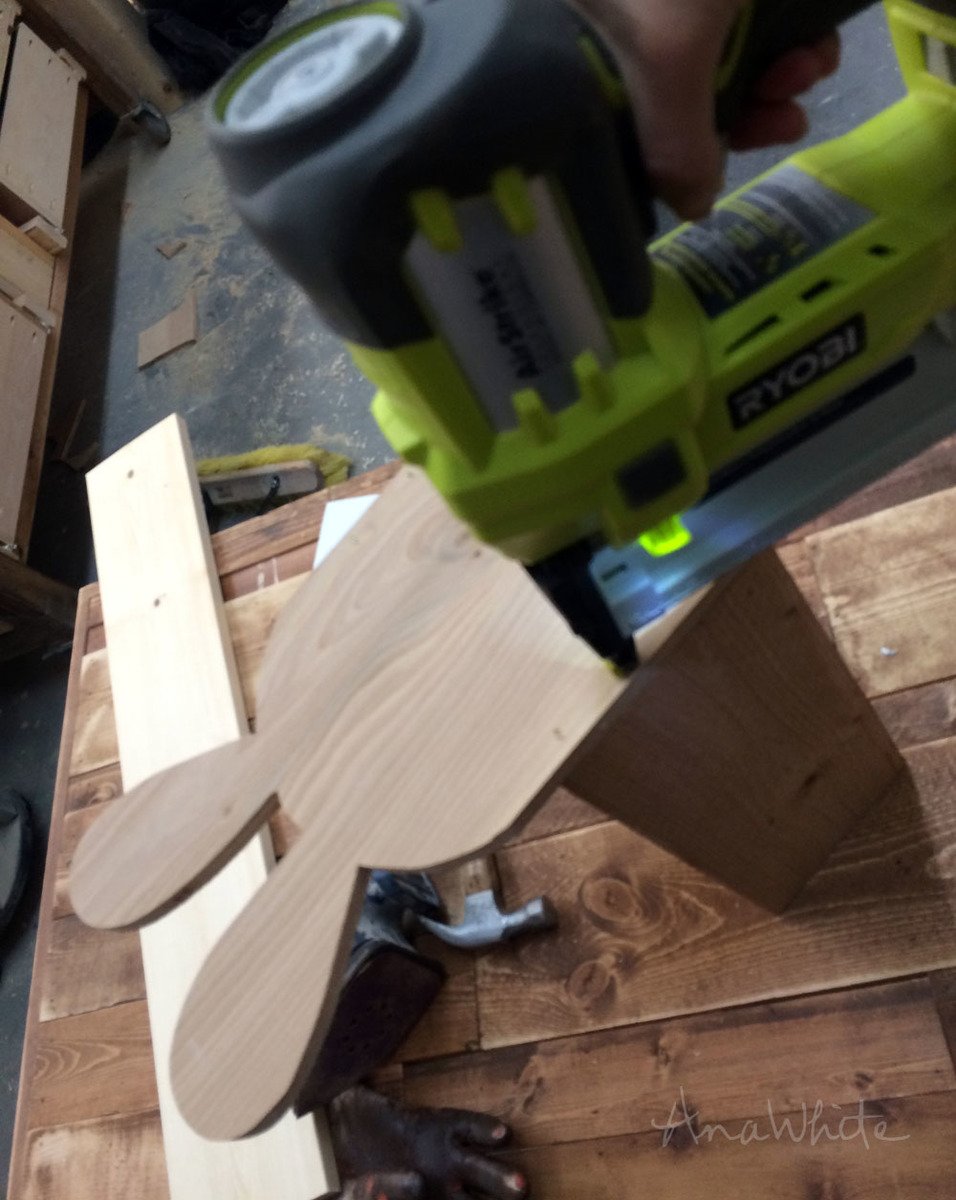
I started this project by taking the 1/2" plywood pieces, and cutting in a rectangle to the size of the bunny face.
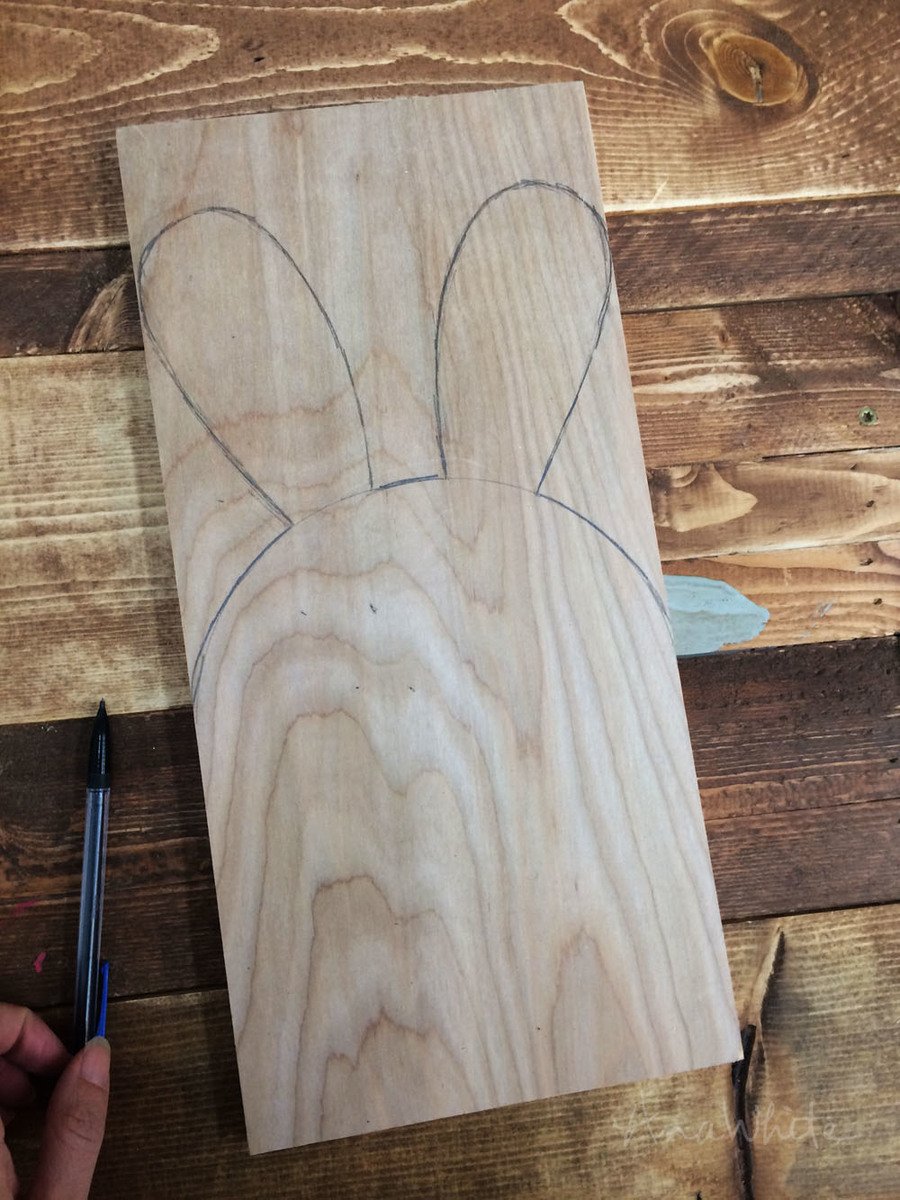
Then I used a paint can to trace the round head and free hand drew the ears - they are not the same. If you would like to use a perfect pattern I made one for you here.
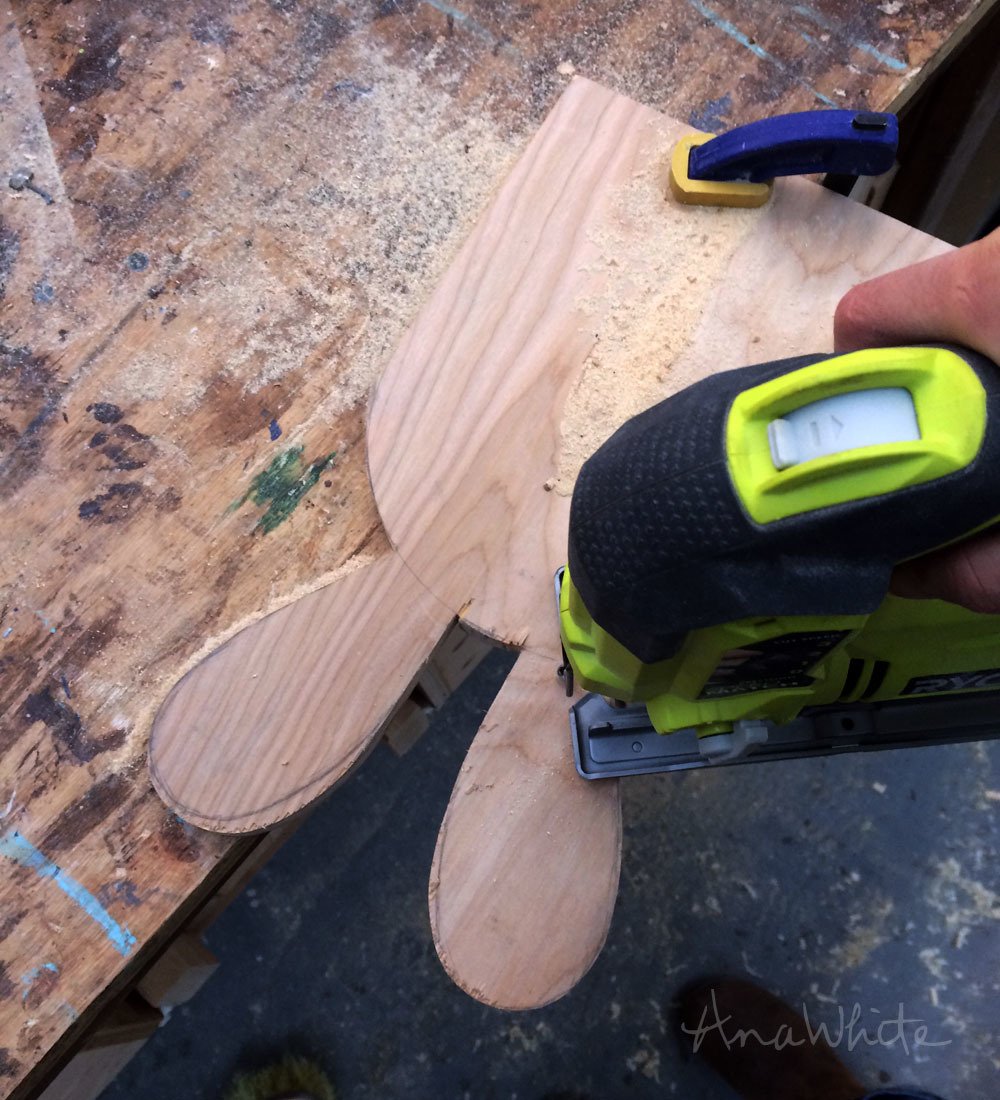
Now the fun part - jigsawing it out! I got a little off on my lines, but since my lines are freehand anyway, what's the difference between free jigsawing, right?
NOTE: I was okay with my cuts not being super smooth since I'm using scrap wood and mixed materials, but try a laminate blade for cutting with a jigsaw to prevent plywood from splintering off as you cut.
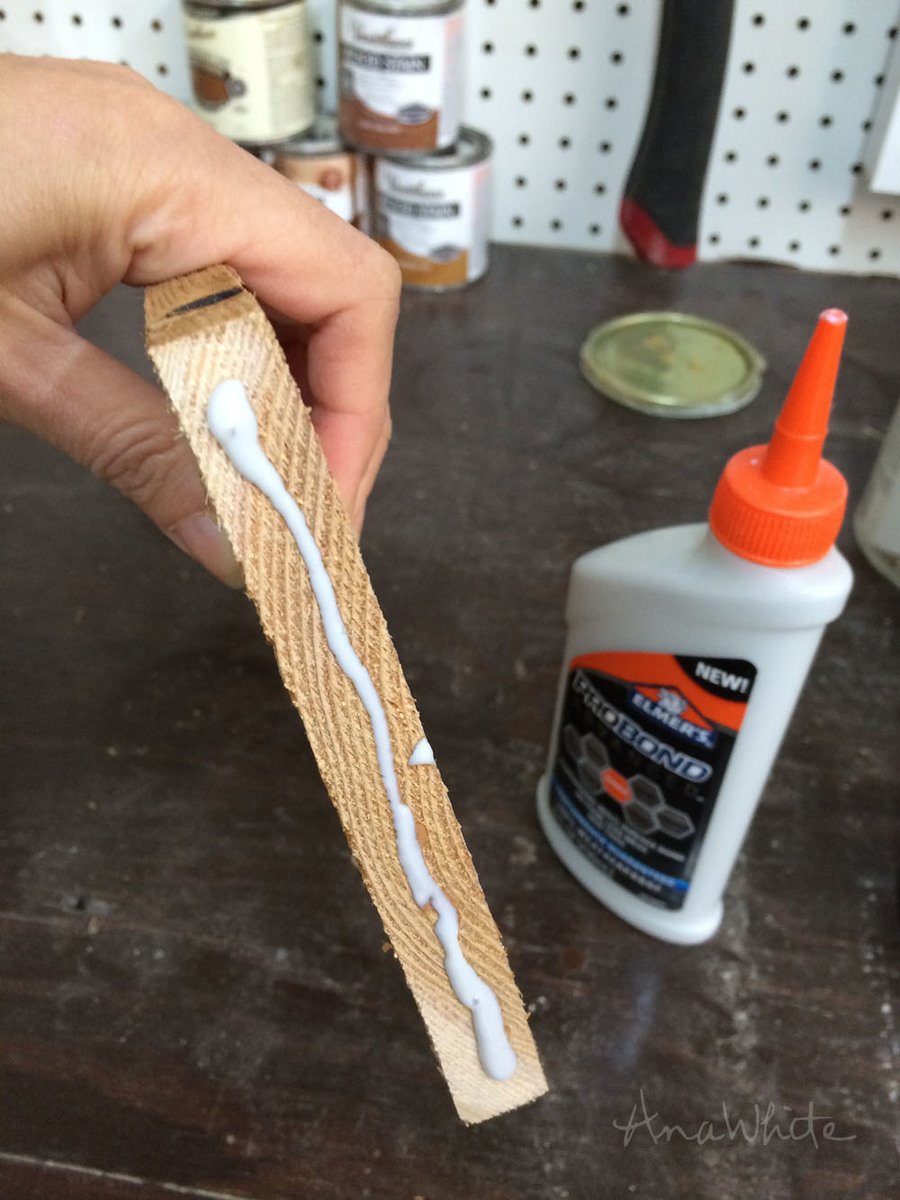
Since I'm just stapling the whole project together (I used 1" staples), glue is essential. I was pretty generous with the glue. I used Elmer's Pro Bond Advanced - my kids can be pretty rough on their stuff, I need all the help I can get with a glue.
And then just stapled the ends to the sides. Sorry for the blurry photo. It's not easy to take a selfie while nailing.
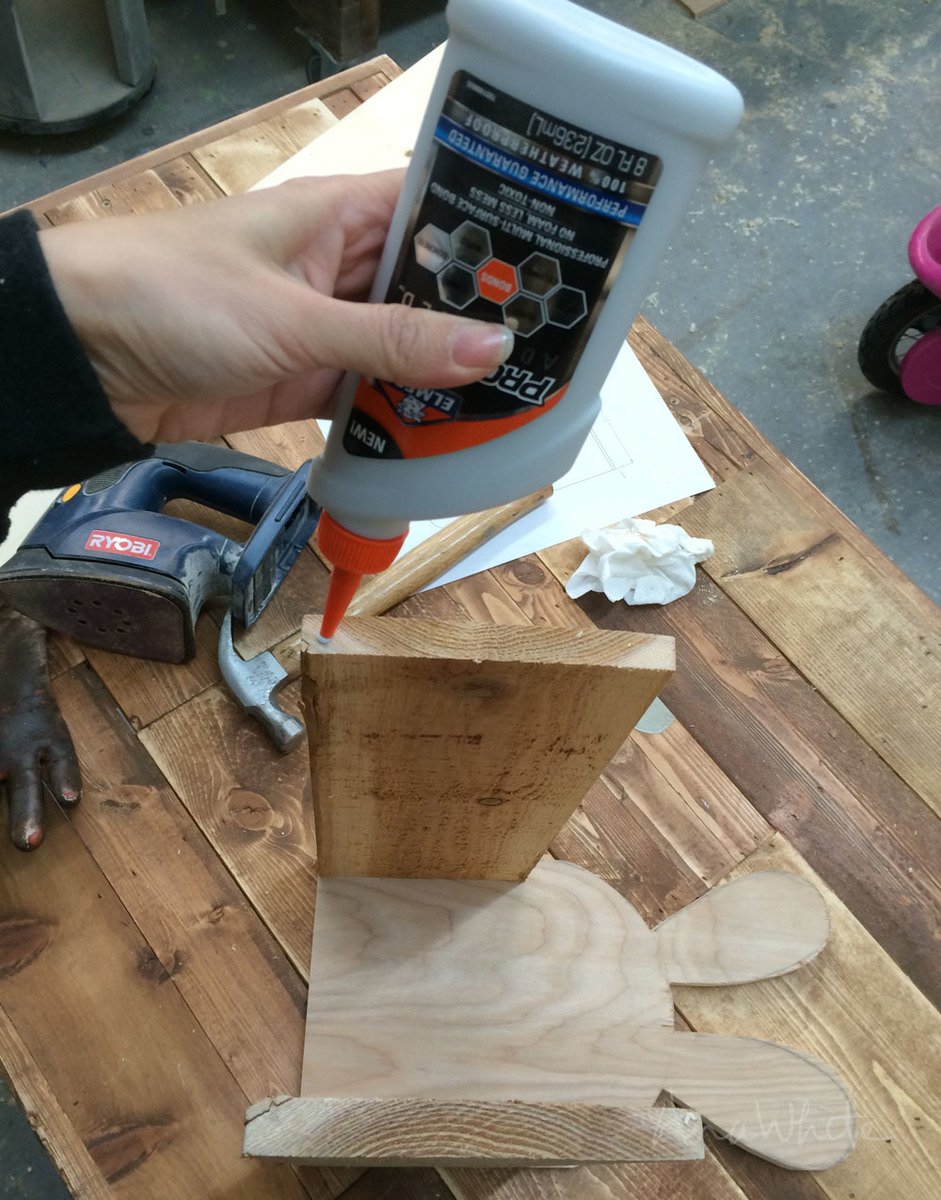
Then more glue, more staples, to finish off the back side. Haha, back side.
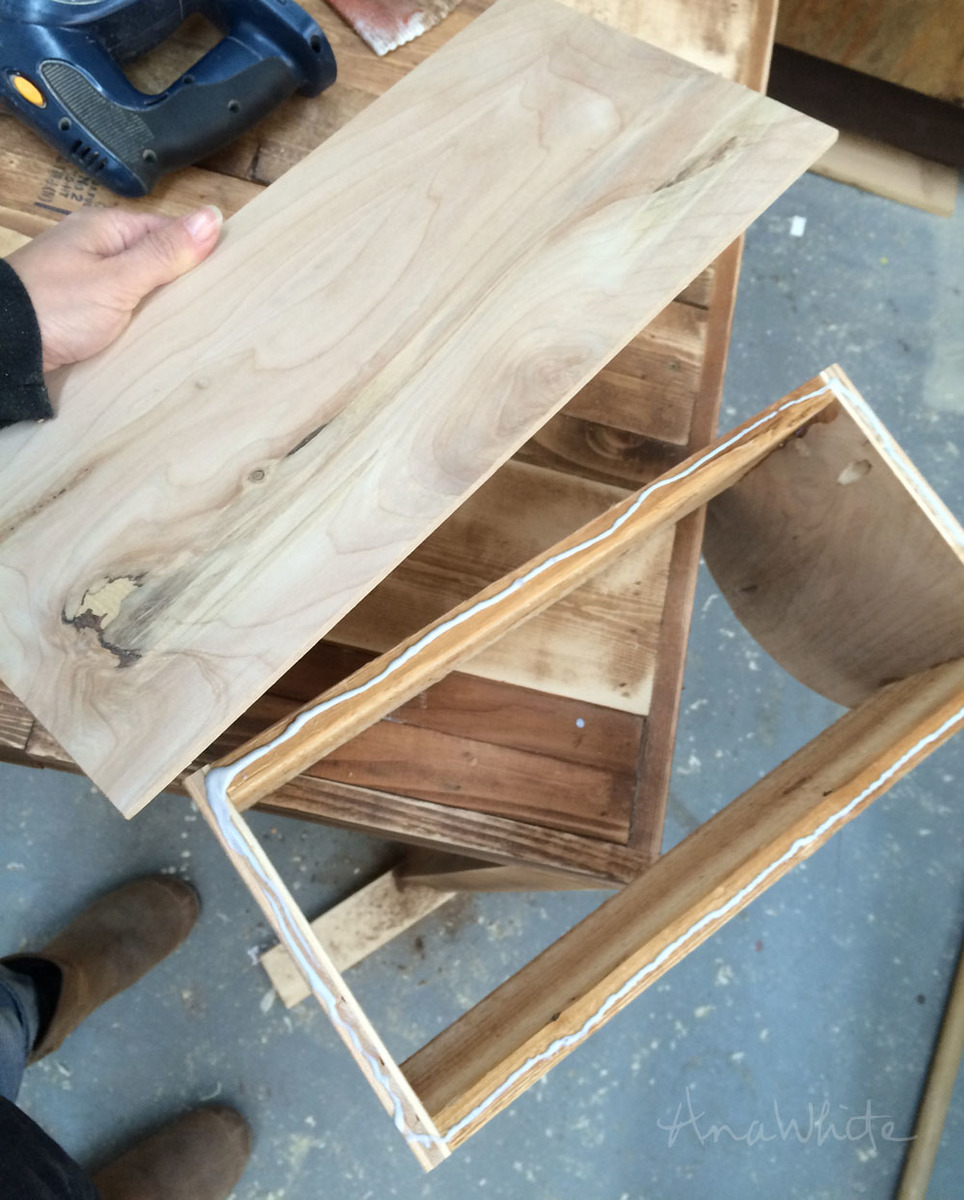
And then I added the bottom with lots more glue and 1" staples.
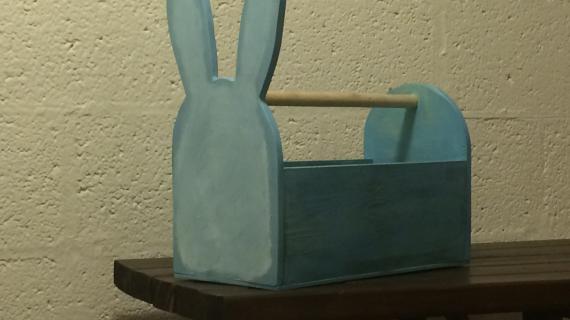
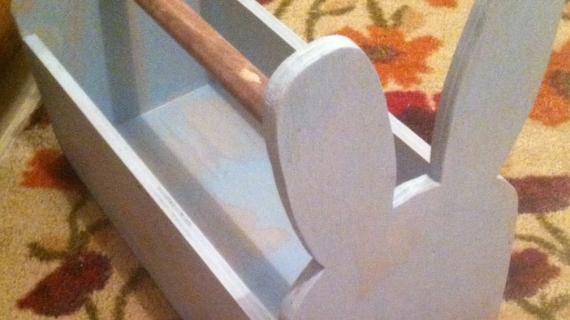
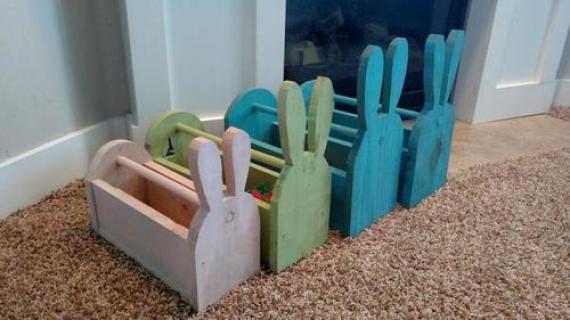
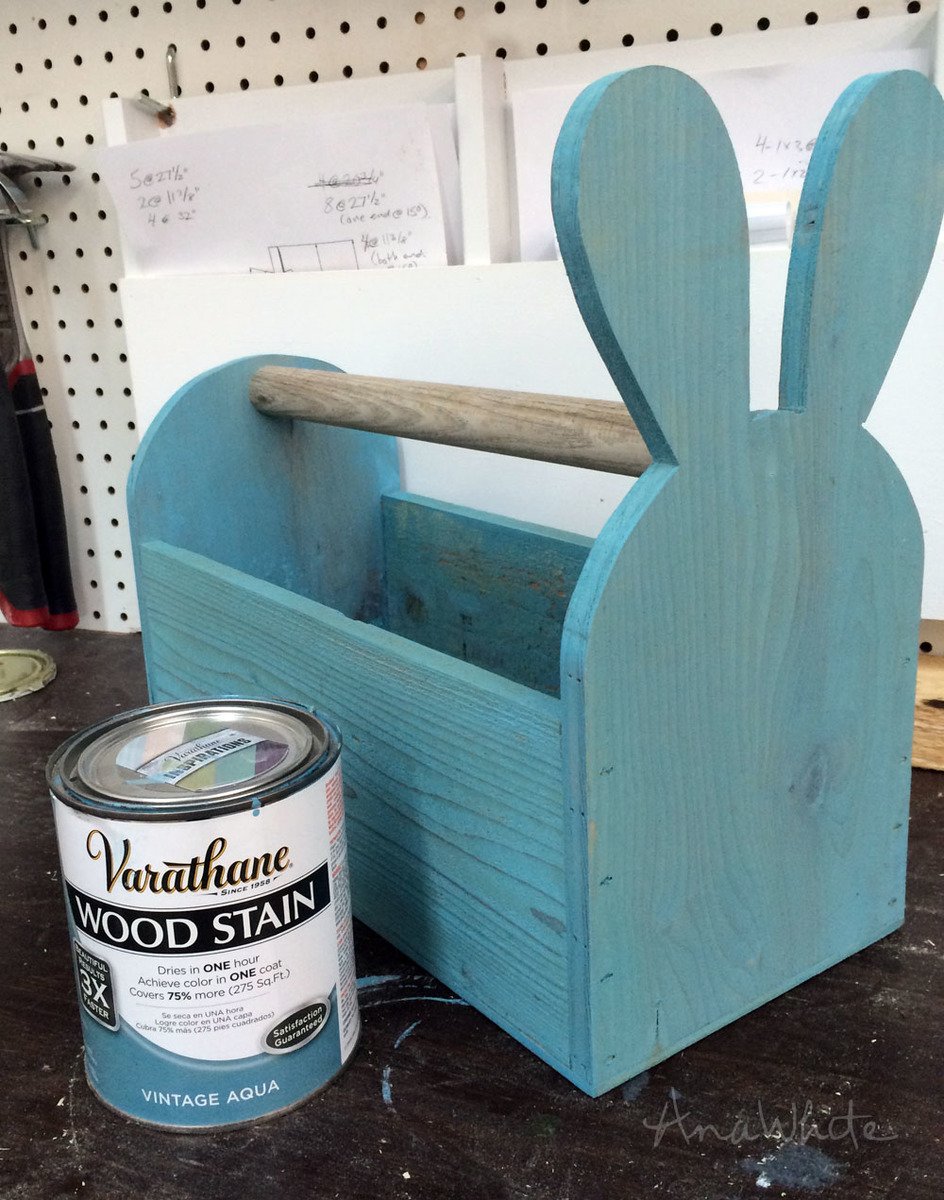
For the finish, my daughter's favorite color is turquoise, but I didn't want a paint. So I went with this beautiful stain by Varathane in Vintage Aqua
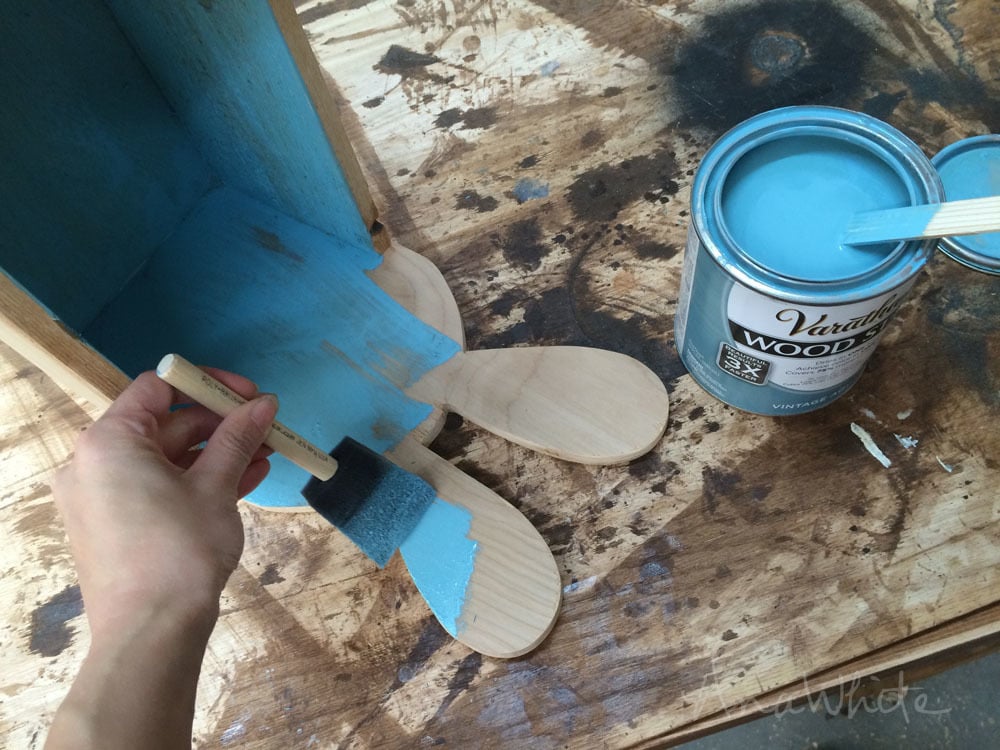
Starting with the inside, I stained outward with a foam brush, wiping afterwards with a paper towel.
This is why you use stain. Because you can still see the wood grain.
Isn't this color gorgeous?
Before I forget - the handle is an old shovel handle that was broken. I just cut it to fit and glued and stapled it in place.
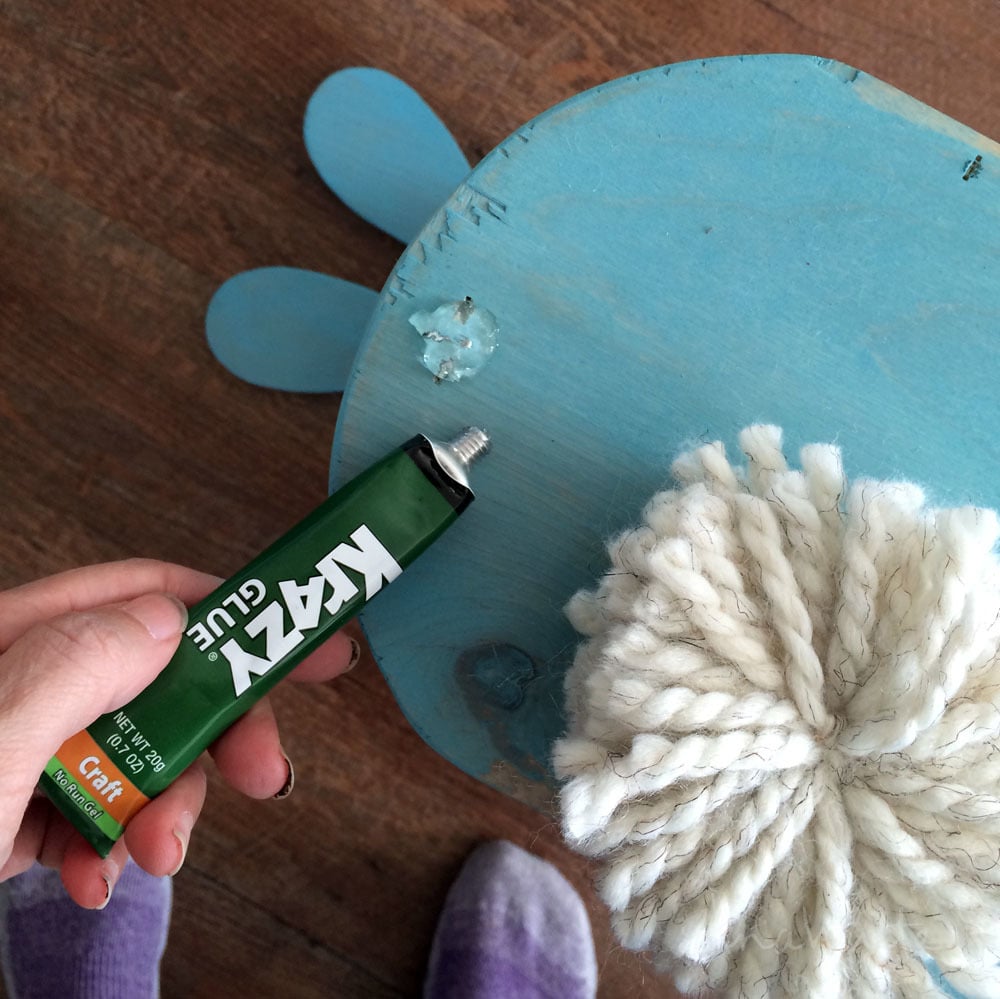
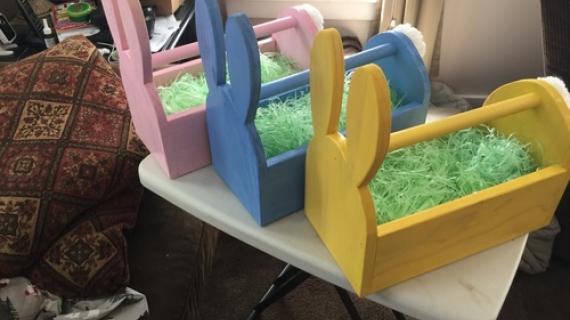
Now for the tail. I made up a pom pom out of yarn, and just used craft glue to attach it to the back of the project.
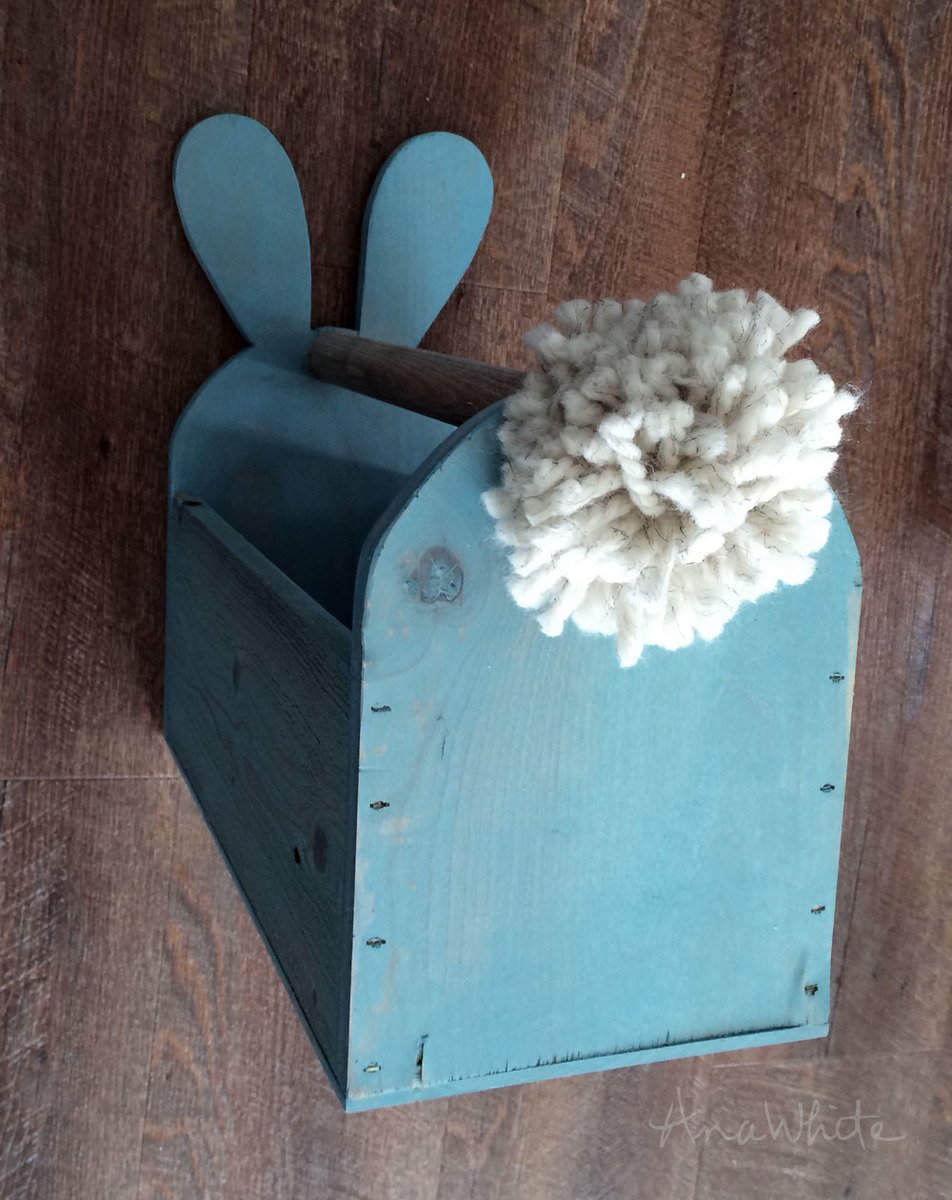
You gotta have a fluffy tail on a bunny!

All done ...
So I thought. I made this Easter basket for my daughter,
Looks like I'll be making a smaller version too.
If you love this, please share and pin!
Have an awesome weekend! Bust out some bunny baskets!
XO Ana
Preparation
Scrap 1/2" thick plywood
1x6 boards or fence pickets (total of 28" used)
scrap 1/4" plywood for bottom
1-1/4" staples (can also use nails)
Stain
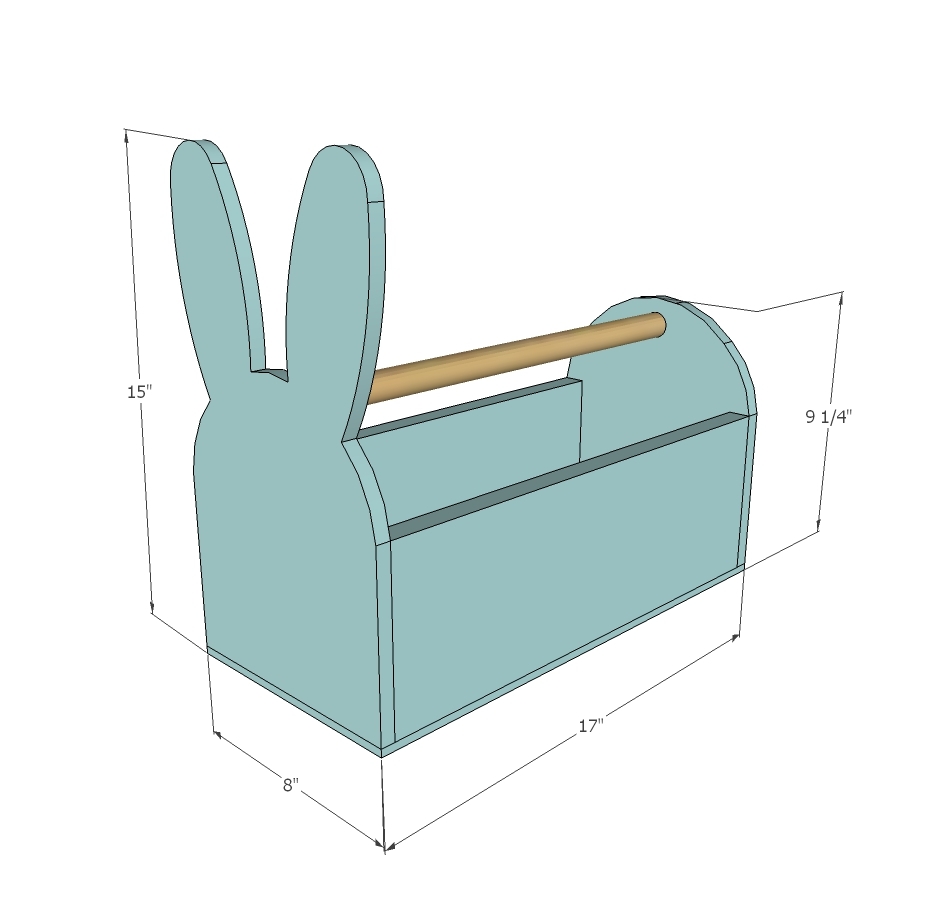
1 - 1/2" plywood piece @14-1/2" x 8" (bunny face)
1 - 1/2" plywood piece @ 9" x 8"
2 - 5-1/2" wide fence pickets @ 14" long
Cut bottom to fit out of 1/4" plywood (approx 8" x 15")


Please read through the entire plan and all comments before beginning this project. It is also advisable to review the Getting Started Section. Take all necessary precautions to build safely and smartly. Work on a clean level surface, free of imperfections or debris. Always use straight boards. Check for square after each step. Always predrill holes before attaching with screws. Use glue with finish nails for a stronger hold. Wipe excess glue off bare wood for stained projects, as dried glue will not take stain. Be safe, have fun, and ask for help if you need it. Good luck!
Instructions
Step 1
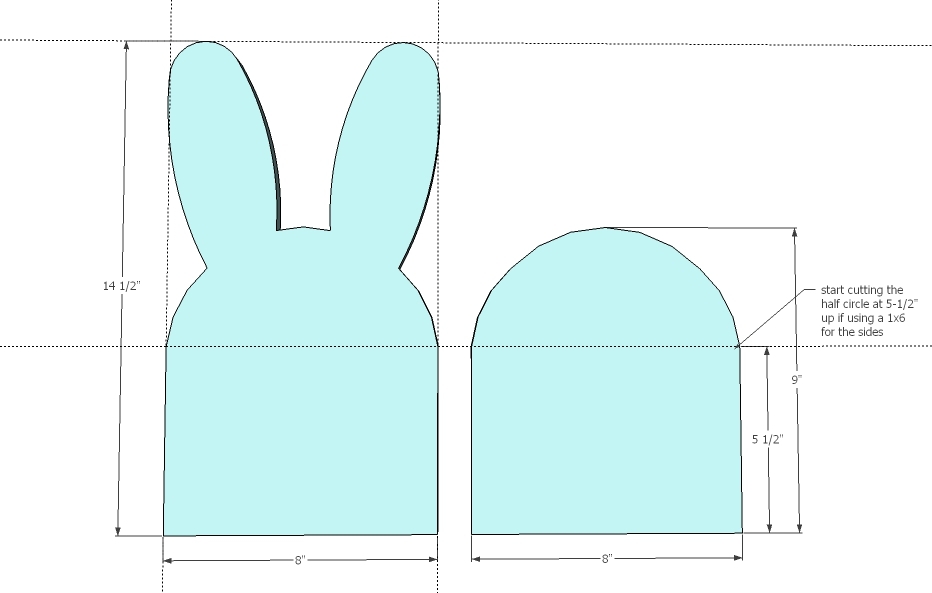
Trace out the patterns for the bunny face and back on to the 1/2" plywood and cut out with a jigsaw.
Step 2
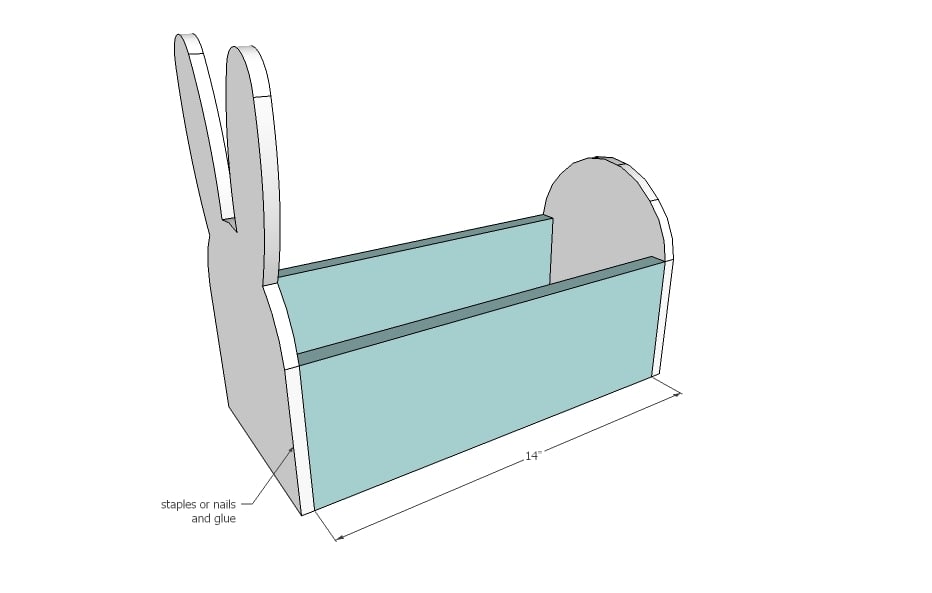
Use 1-1/4" staples to attach the face and back to the sides with glue.
Step 3

Attach bottom with glue and staples to sides and front. Add handle.
It is always recommended to apply a test coat on a hidden area or scrap piece to ensure color evenness and adhesion. Use primer or wood conditioner as needed.