
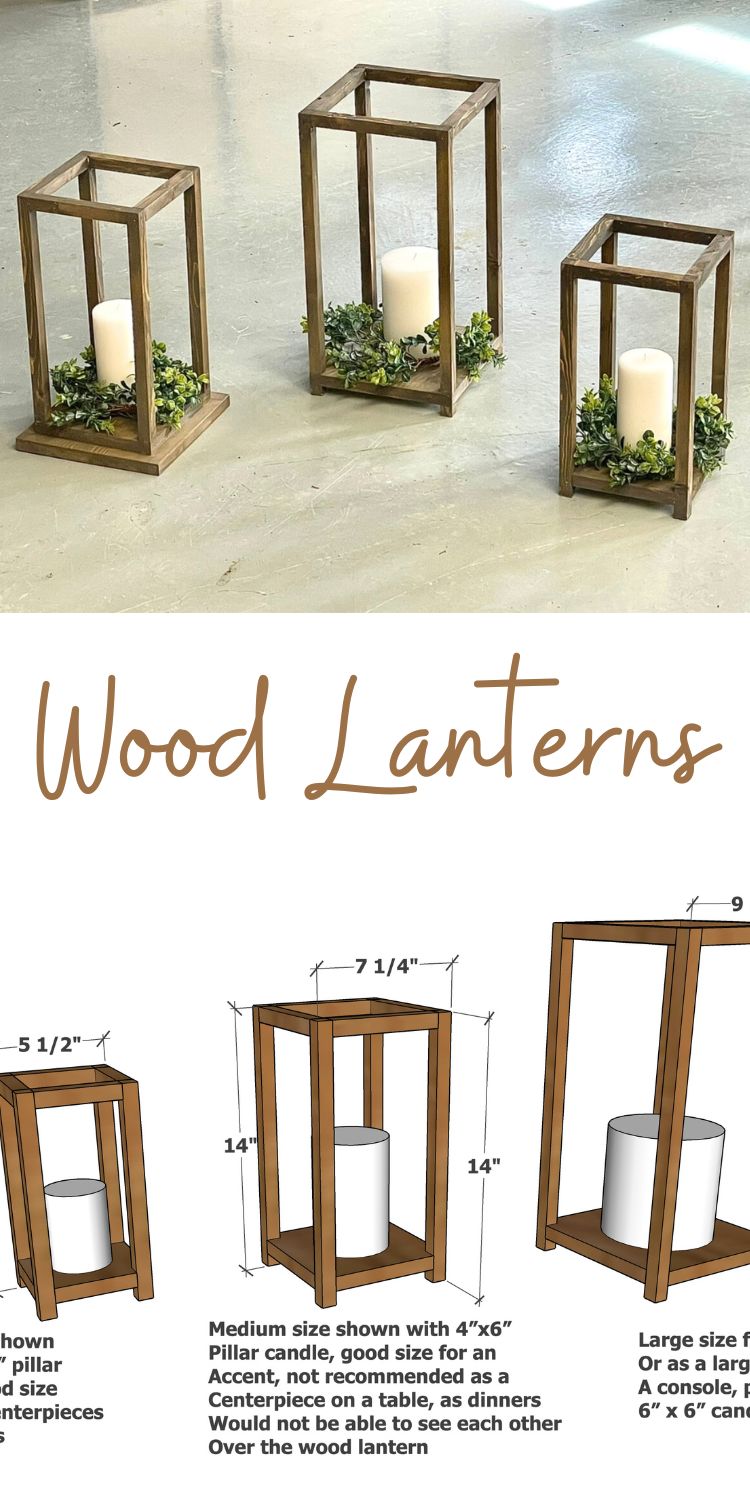
The ultimate wood lantern tutorial! Plans for three different sizes, and three different styles.
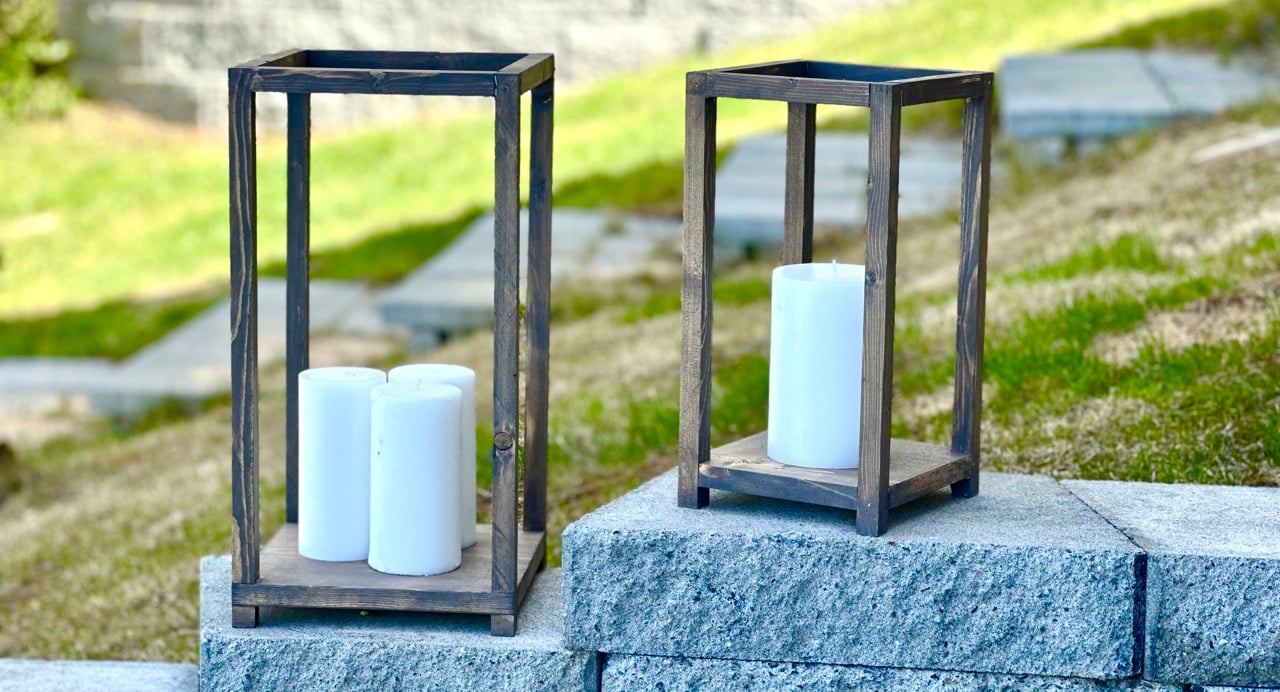
Build in bulk for a wedding, or a few to add decor to your space, these beautiful wood lanterns are inexpensive and easy to make.
Free step by step plans with video, diagrams, shopping and cut lists from Ana-White.com
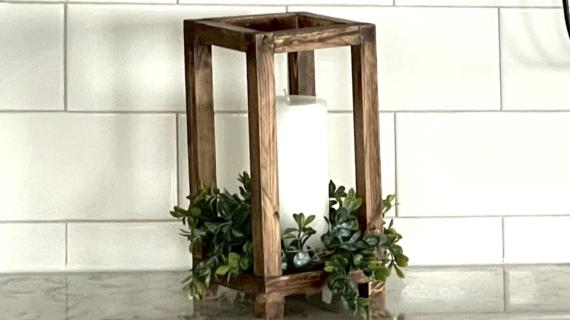
Like a frame for a picture, this wood lantern frames a candle, creating a beautiful decor piece for your outdoor space. We love wood lanterns as wedding centerpieces.
How Much Does it Cost to Make a Wood Lantern?
If you have scrap wood, this project could be free! With new materials, building your own wood lanterns will be just a fraction of the cost to buy.
What Materials Do I Need?
To build these wood lanterns, you'll need pine or "whitewood" boards for the base, in 1x6, 1x8 or 1x10 sizes (depending on the size of lantern you are building).
For the 3/4" x 3/4" pieces, you can buy 3/4" square dowels online or at most home improvement stores. If you are building in bulk, it is much less expensive to take a wider width board, like a 1x8 or 1x12, and rip it into 3/4" strips. Ripping is not easy for this small of a piece, do not attempt without experience using a table saw.

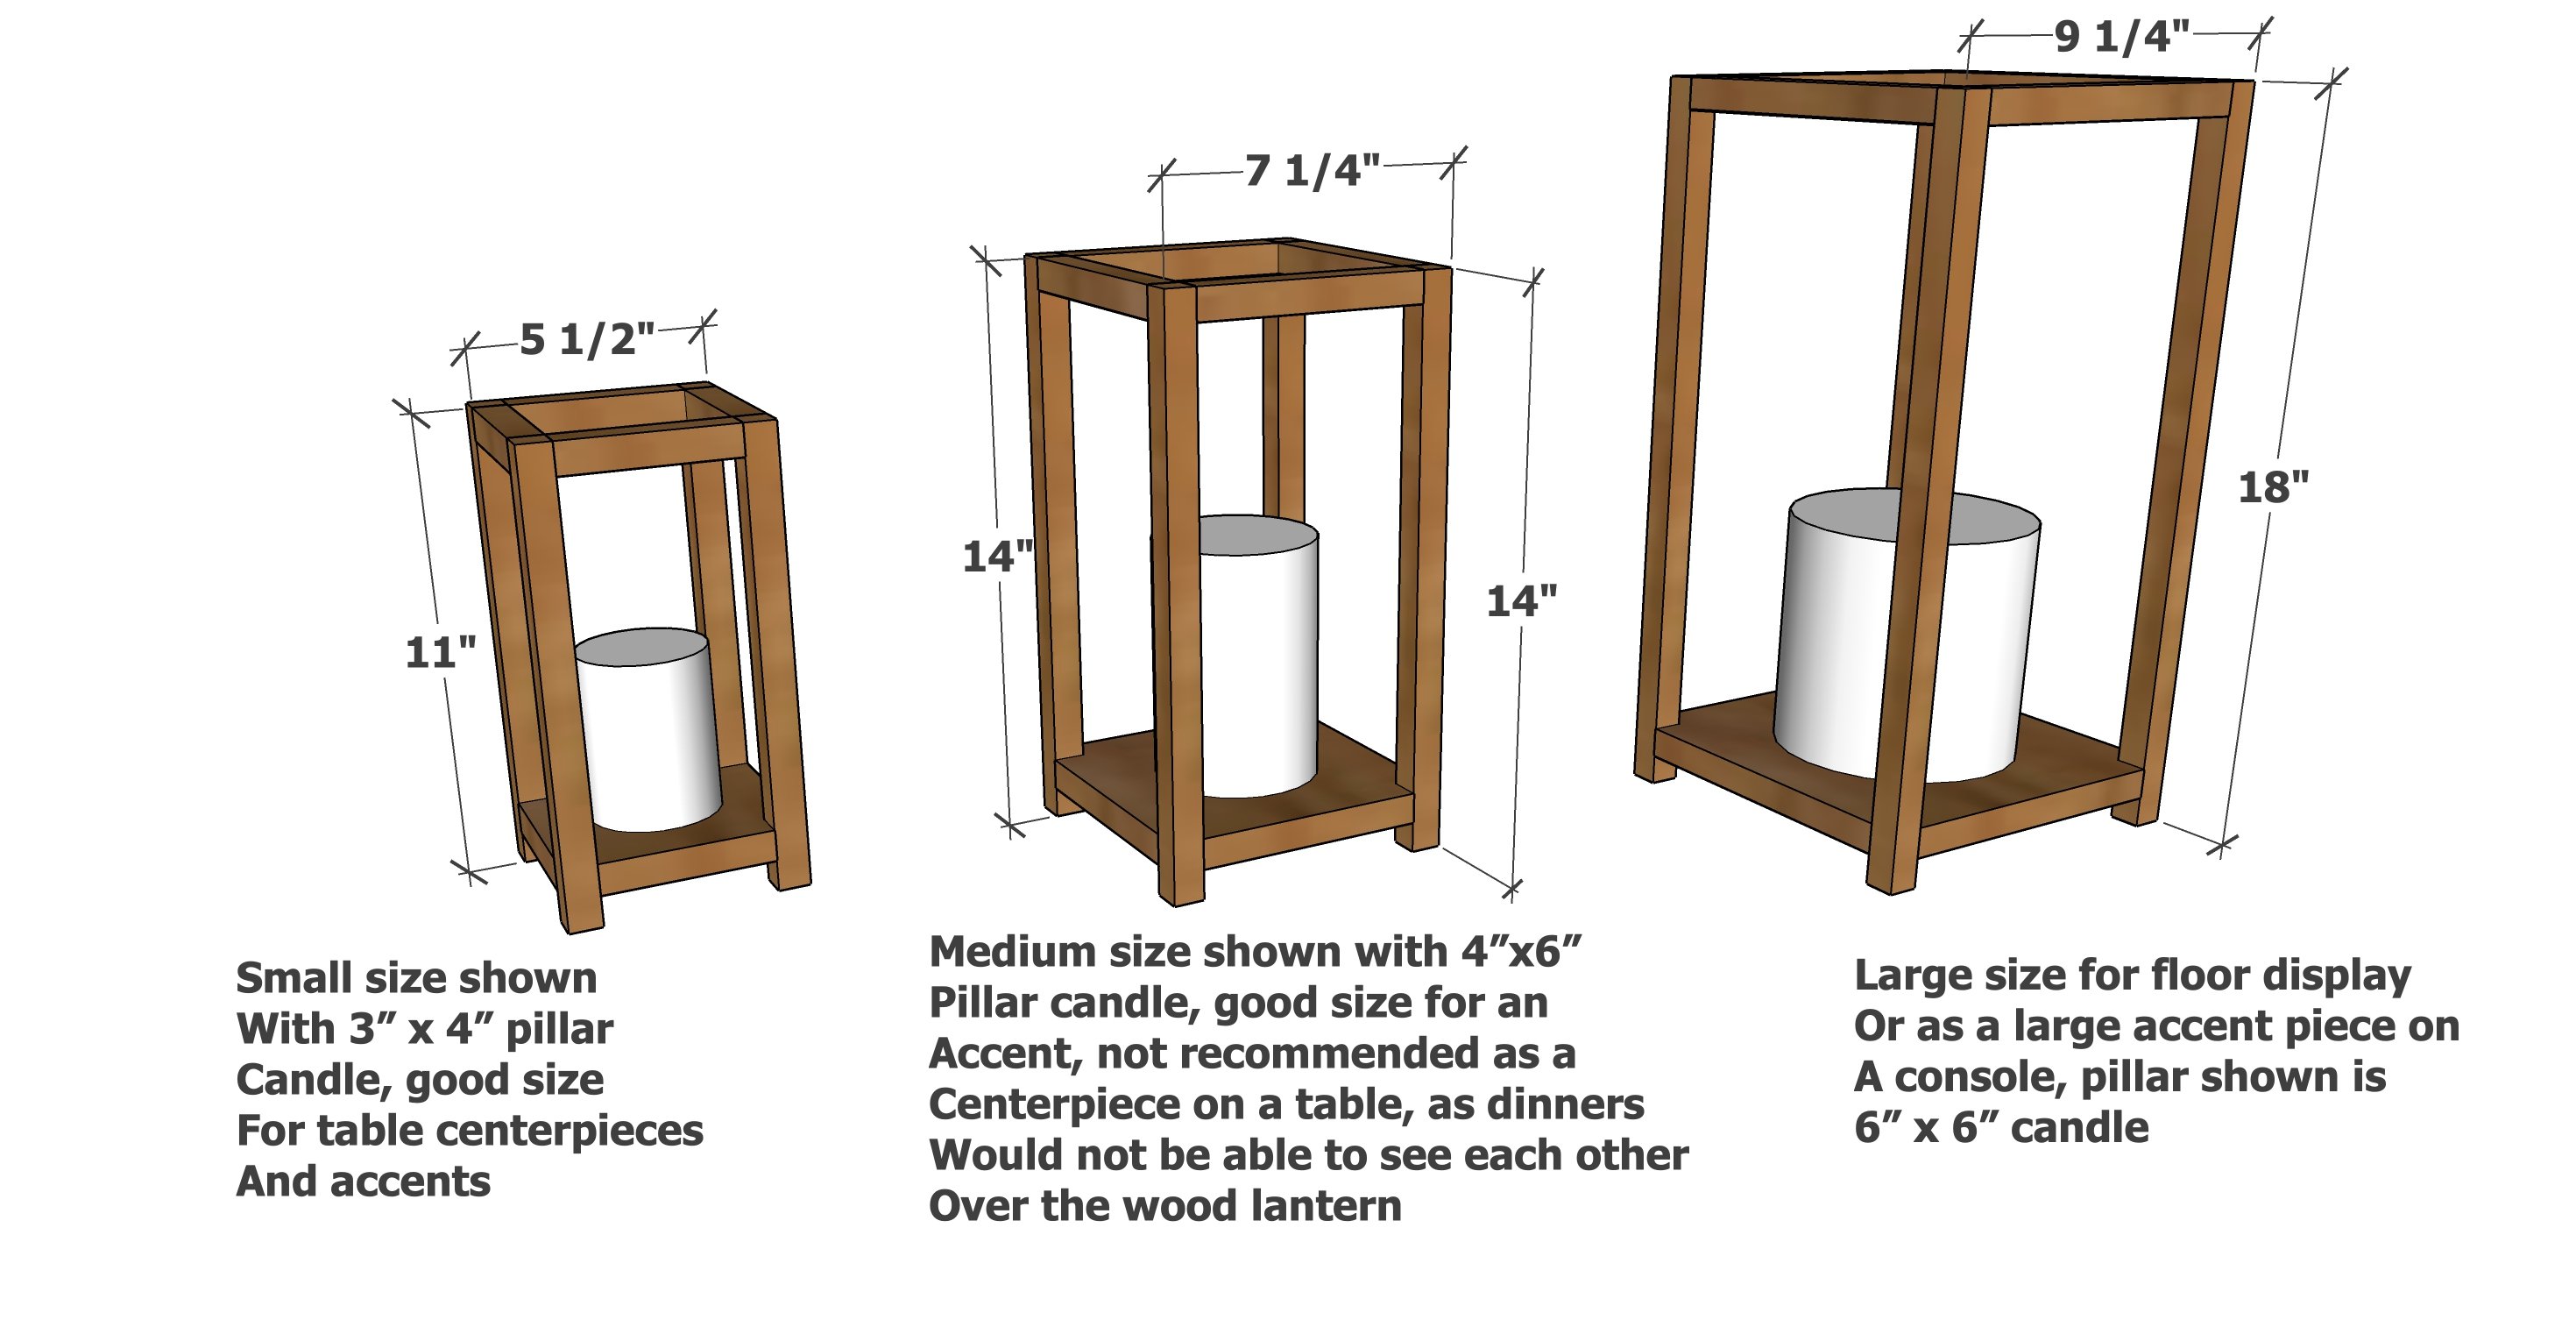
Different Style Bases
This plan include three different style bases, for your personal preference. Use the cut list that matches your base to build your lantern.
Pin For Later!
Preparation
Option 1 - Jigsawed Out Corners - Shopping list for 1 Lantern
| Small | Medium | Large | |
|---|---|---|---|
| 3/4" x 3/4" wood dowels | 60" | 80" | 104" |
| Bottoms | 1x6 @ 5-1/2" | 1x8 @ 7-1/4" | 1x10 @ 9-1/4" |
|
1-1/4" brad nails wood glue |
Option 2 - Small Feet at Each Corner - Shopping list for 1 Lantern
| Small | Medium | Large | |
|---|---|---|---|
| 3/4" x 3/4" wood dowels | 60" | 80" | 104" |
| Bottoms | 1x6 @ 5-1/2" | 1x8 @ 7-1/4" | 1x10 @ 9-1/4" |
|
1-1/4" brad nails wood glue |
Option 3 - Double Bases - Shopping list for 1 Lantern
| Small | Medium | Large | |
|---|---|---|---|
| 3/4" x 3/4" wood dowels | 60" | 80" | 104" |
| Bottoms |
1x6 @ 5-1/2" 1x8 @ 7-1/4" |
1x8 @ 7-1/4" 1x10 @ 9-1/4" |
1x10 @ 9-1/4" 1x12 @ 11-1/4" |
|
1-1/4" brad nails wood glue |
Option 1 - Jigsawed Out Corners
| Small | Medium | Large | |
|---|---|---|---|
| (4) 3/4" x 3/4" wood dowels | 11" | 14" | 18" |
| (4) 3/4" x 3/4" wood dowels | 4" | 5-3/4" | 7-3/4" |
| Bottom, cut one | 1x6 @ 5-1/2" | 1x8 @ 7-1/4" | 1x10 @ 9-1/4" |
Option 2 - Small Feet at Each Corner
| Small | Medium | Large | |
|---|---|---|---|
| (4) 3/4" x 3/4" wood dowels | 9-1/2" | 12-1/2" | 16-1/2" |
| (4) 3/4" x 3/4" wood dowels | 4" | 5-3/4" | 7-3/4" |
| Bottom, cut one | 1x6 @ 5-1/2" | 1x8 @ 7-1/4" | 1x10 @ 9-1/4" |
| (4) 3/4" x 3/4" wood dowels | 3/4" | 3/4" | 3/4" |
Option 3 - Double Bases
| Small | Medium | Large | |
|---|---|---|---|
| (4) 3/4" x 3/4" wood dowels | 9-1/2" | 12-1/2" | 16-1/2" |
| (4) 3/4" x 3/4" wood dowels | 4" | 5-3/4" | 7-3/4" |
| Bottom, cut one | 1x6 @ 5-1/2" | 1x8 @ 7-1/4" | 1x10 @ 9-1/4" |
| Second bottom, cut one | 1x8 @ 7-1/4" | 1x10 @ 9-1/4" | 1x12 @ 11-1/4" |
Be careful making small cuts, always cut from a larger piece, to keep hands well clear of the saw.


Instructions
Step 1
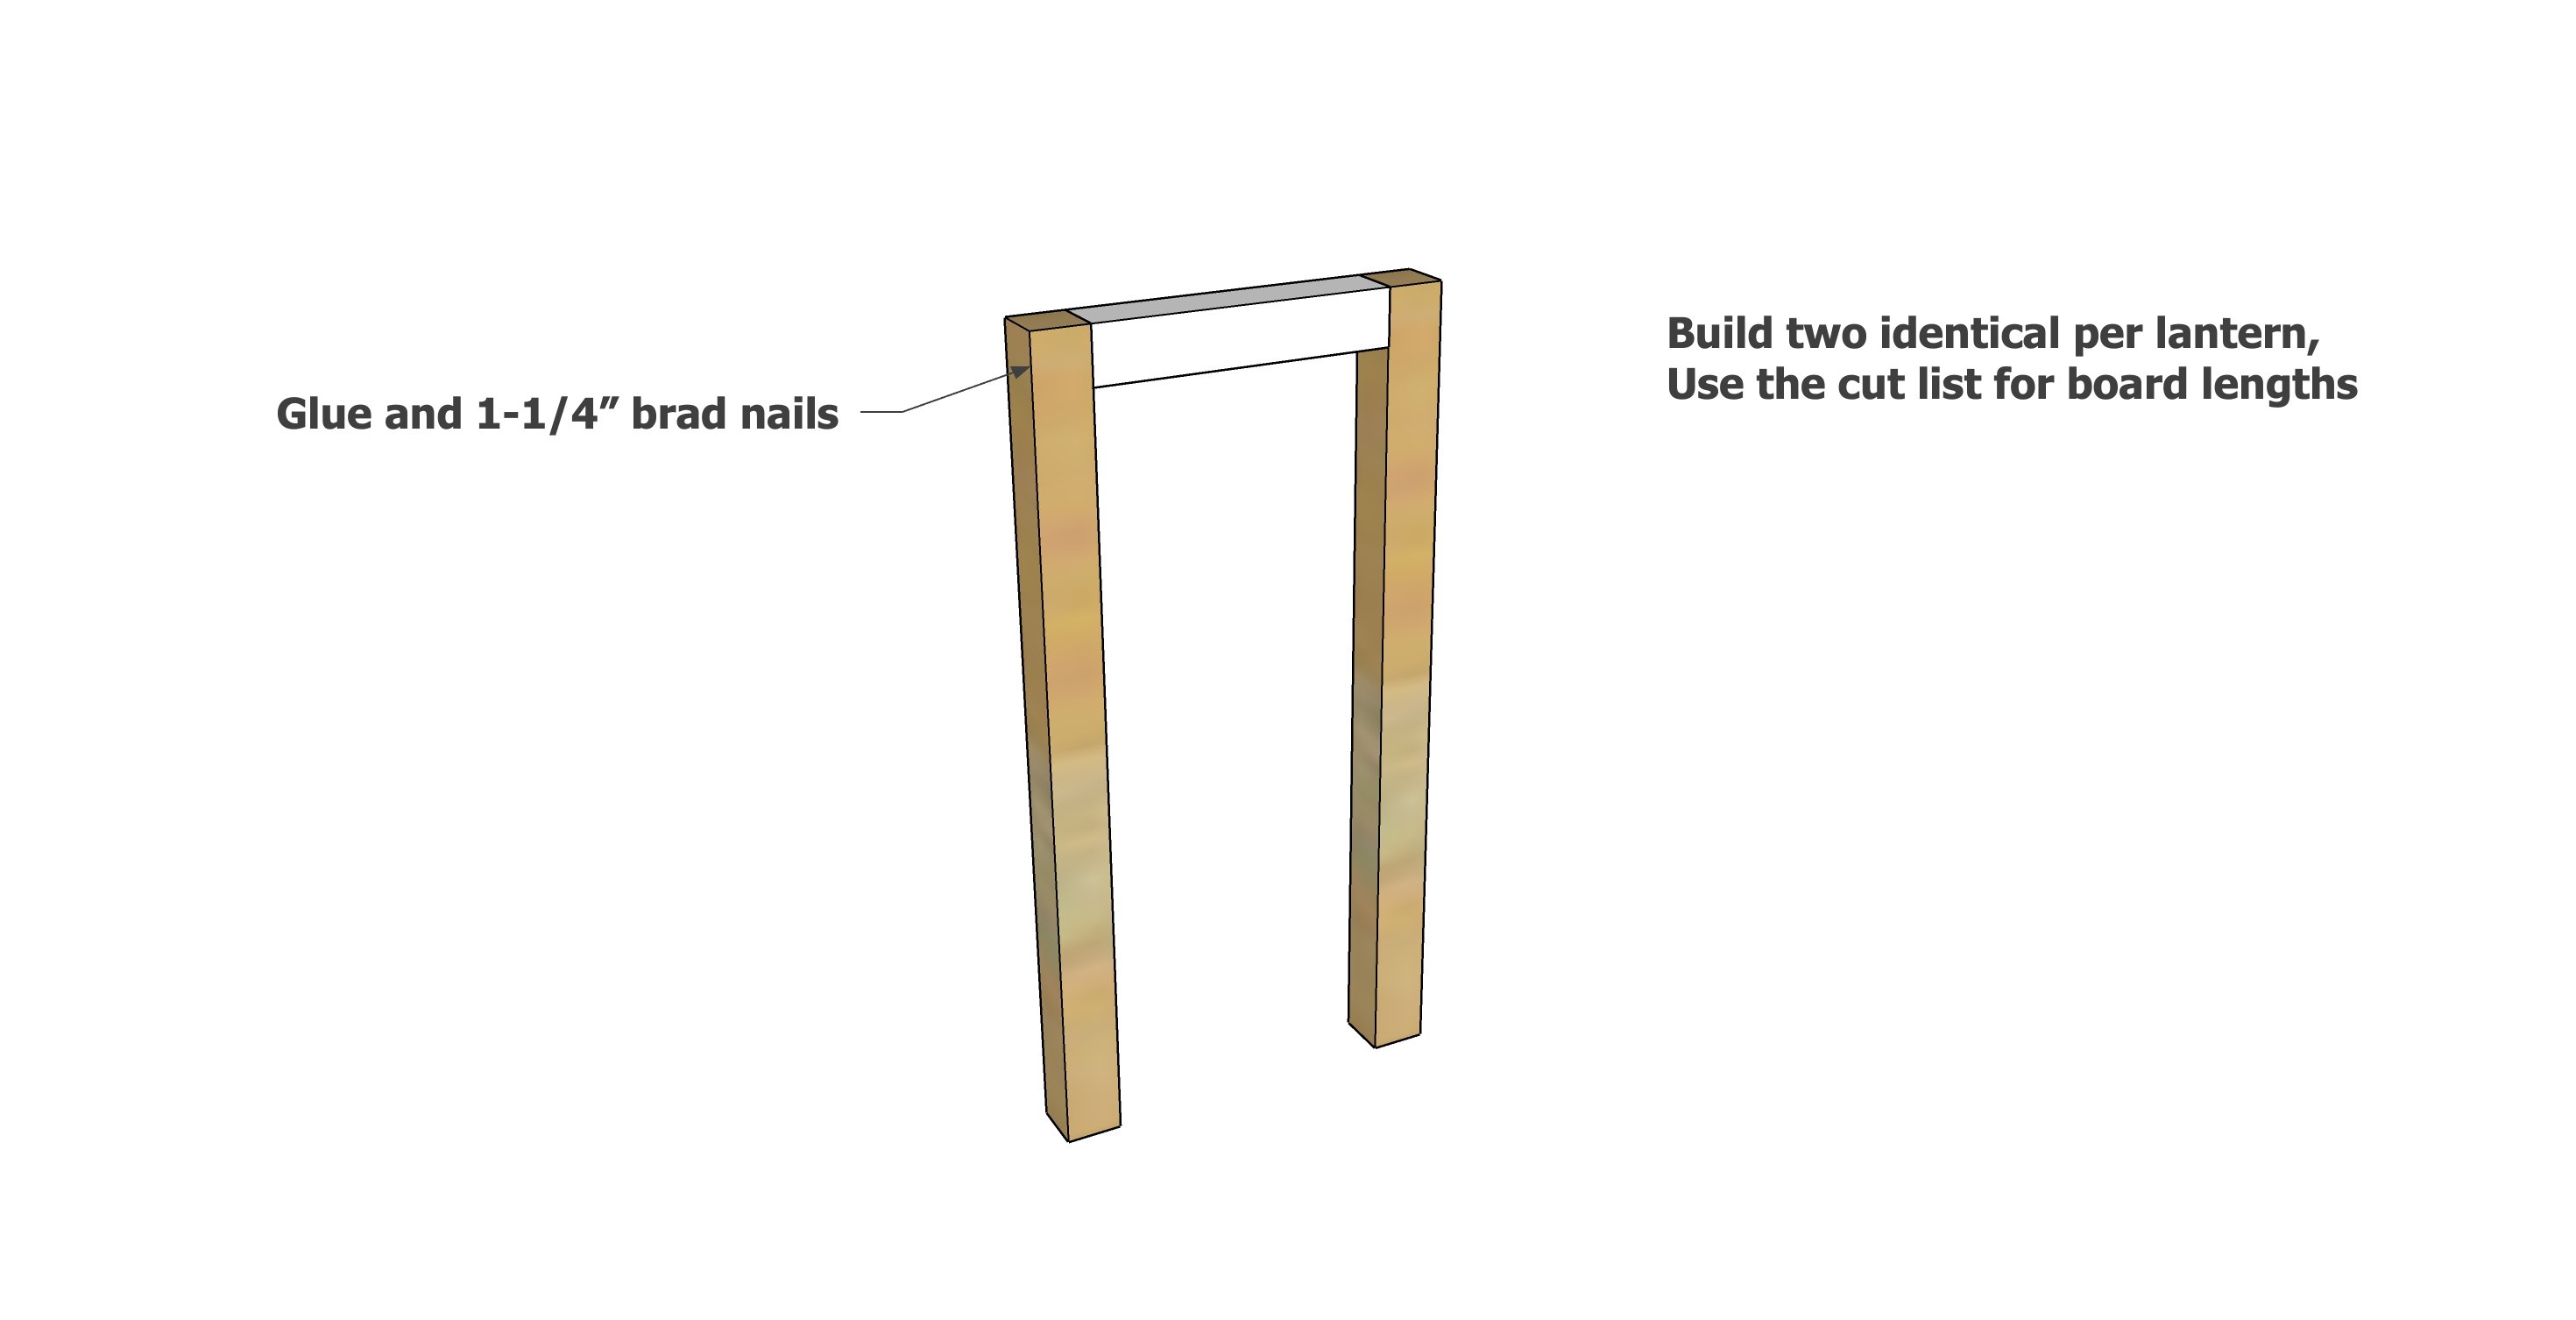
Attach two of the longer 3/4" dowel pieces to one of the shorter 3/4" dowel pieces. Build two identical.
Step 2
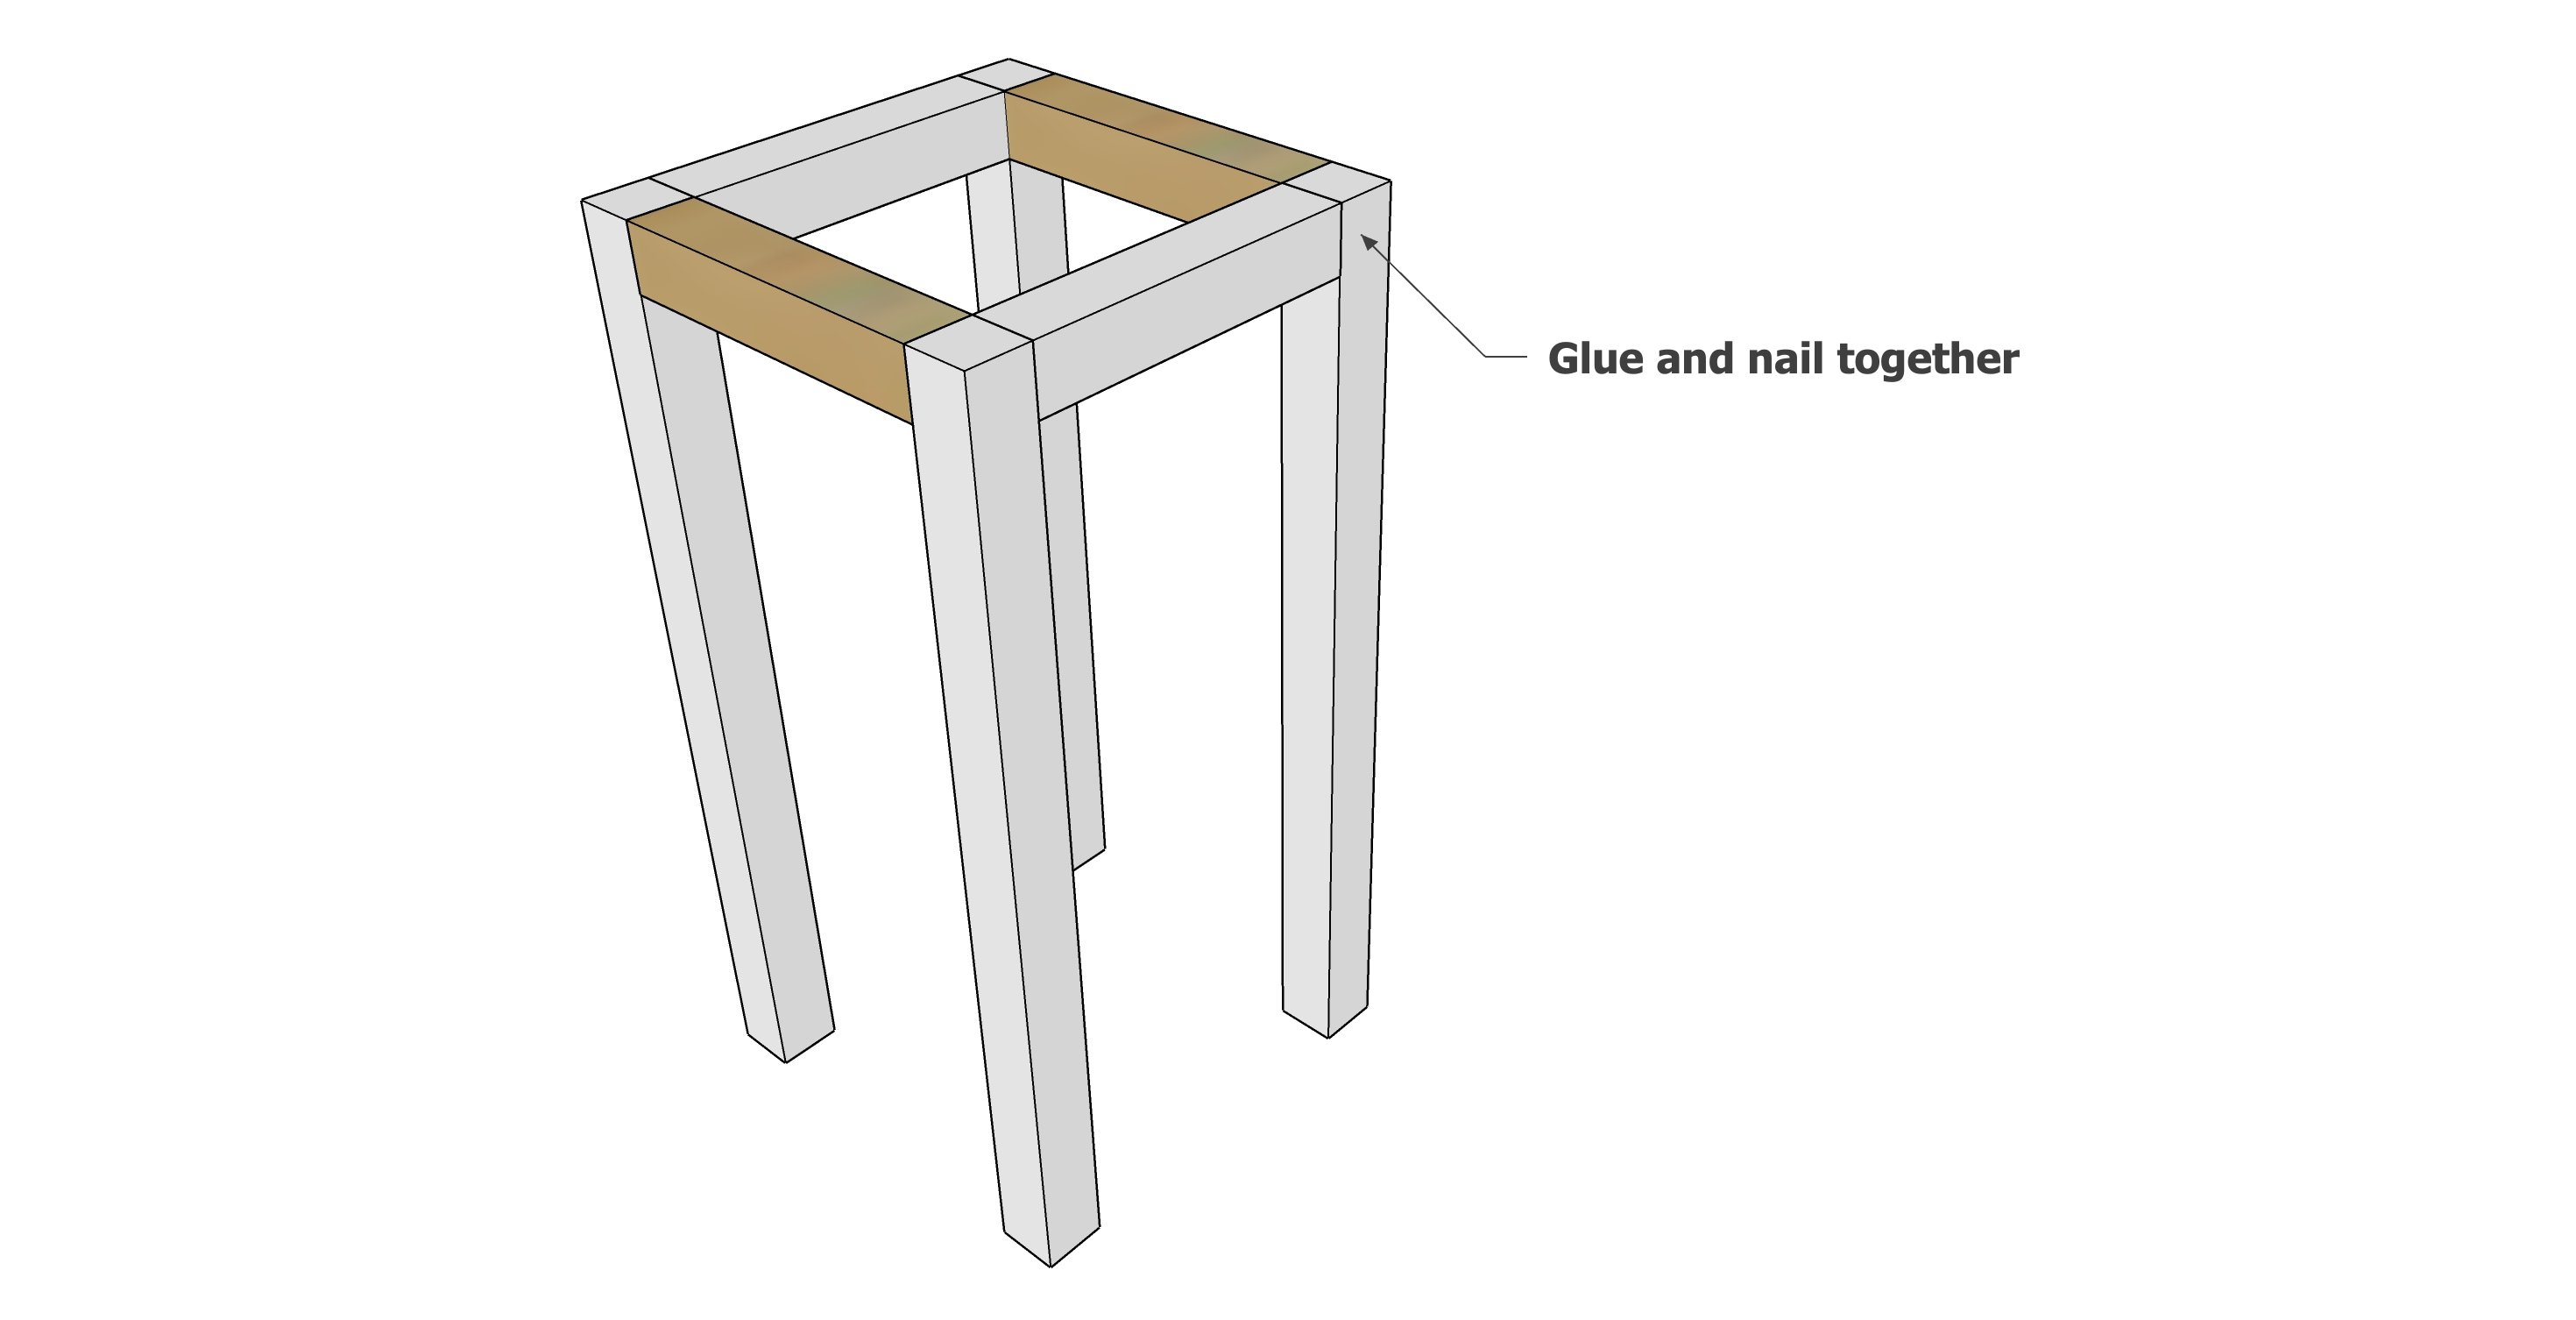
Attach the two pieces built in step 1 together with the remaining 3/4" dowel pieces.
Step 3
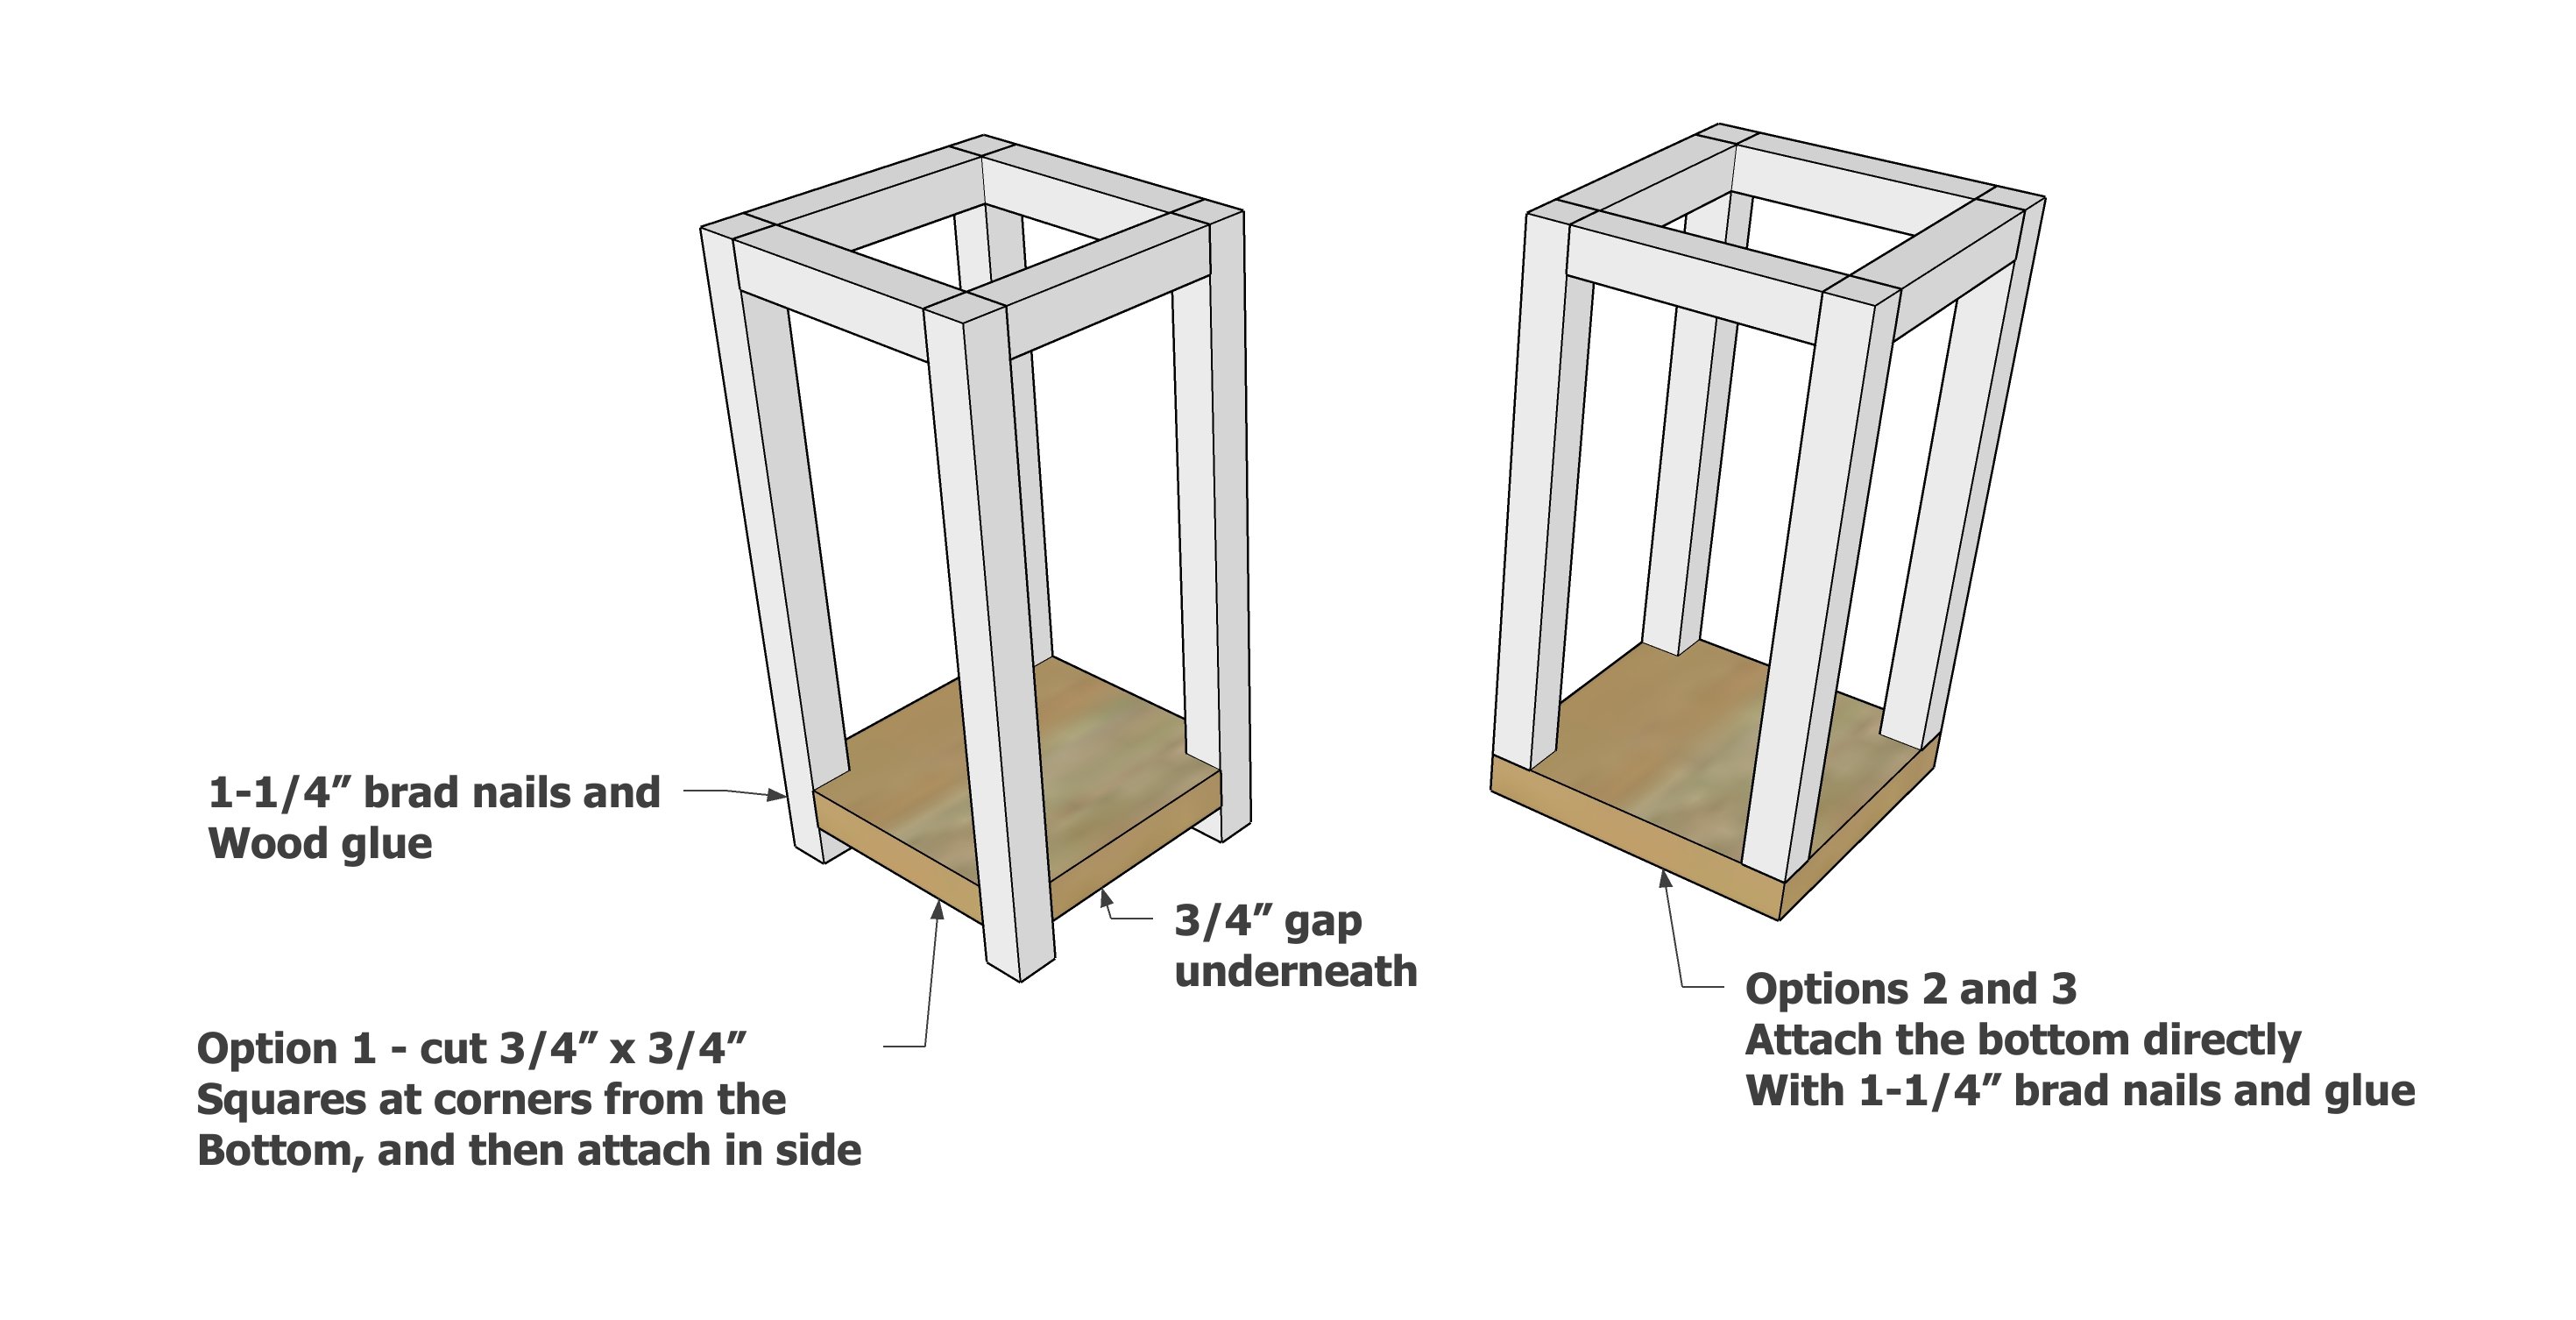
For option 1, cut the corners of the base out with a jigsaw, cutting out a 3/4" x 3/4" space. Attach the base inside the lantern legs with 1-1/4" brad nails and glue.
For options 2 and 3, simply attach to the base with brad nails from the bottom.
Step 4

For options 2 and 3, add the feet or second base to the bottom with glue and 1-1/4" brad nails.