

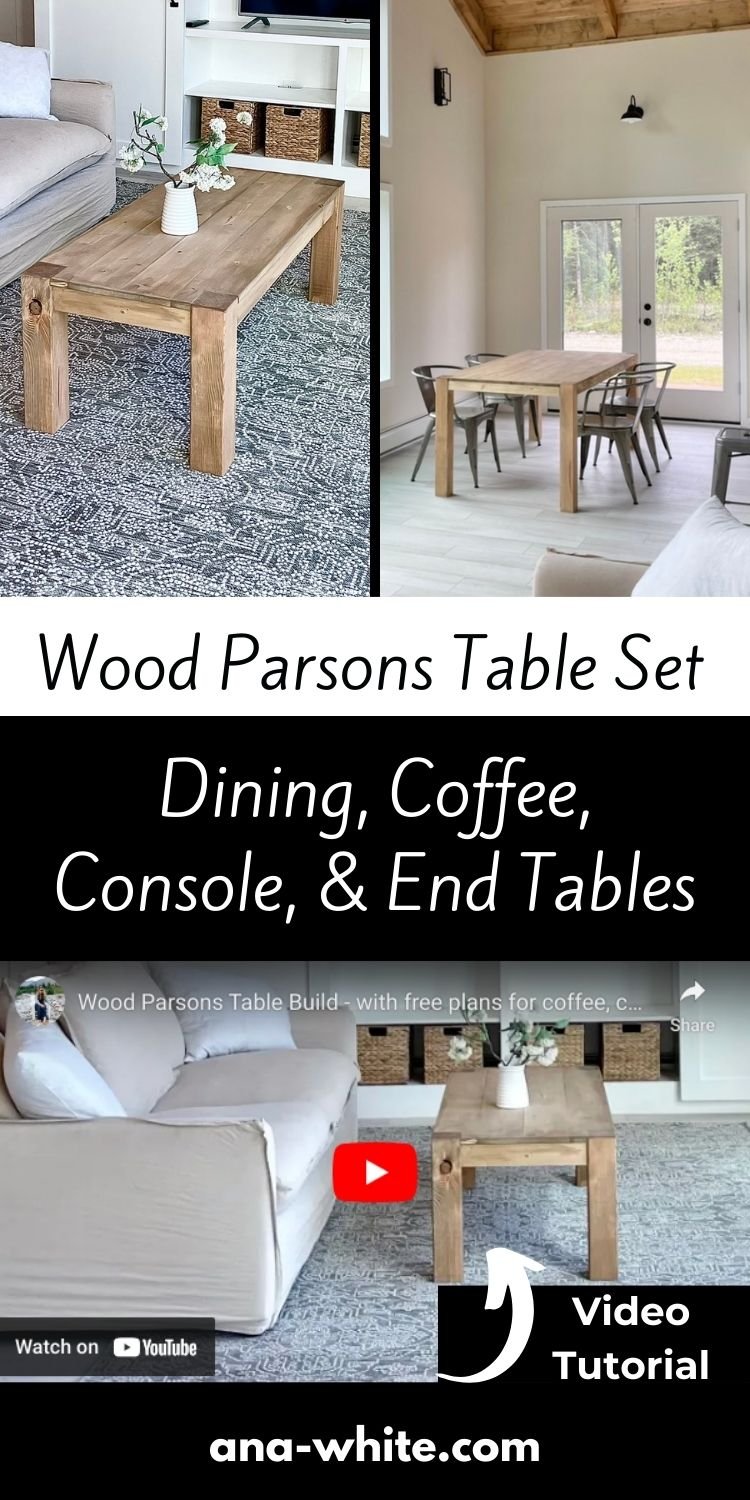
Build your own wood Parson's tables with our free plans - includes coffee table, console table, end table, and dining table.
Parson's tables are a classic in modern design. I especially love them in stained wood - because it brings texture to your space, without visually cluttering.
The simple clean lines are not just appealing to the eye. They are comfortable, with no hard corners to subconsiously be aware of and avoid. This makes parson tables a great choice for small spaces and homes with active children.
We choose this collection of occasional tables for our Cabin House Build for these reasons - and because they are easy and quick to build. It's a great option for staging homes too!
Here's how I built the coffee table
The other tables are built in the same method - you can opt to use the 1x4 method as outlined in the plans below - but just changing up your cut lengths. Here's a few standard sizes to make your life easier.
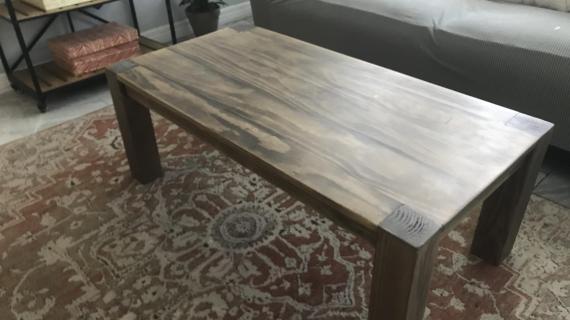
Rectangle Coffee Table
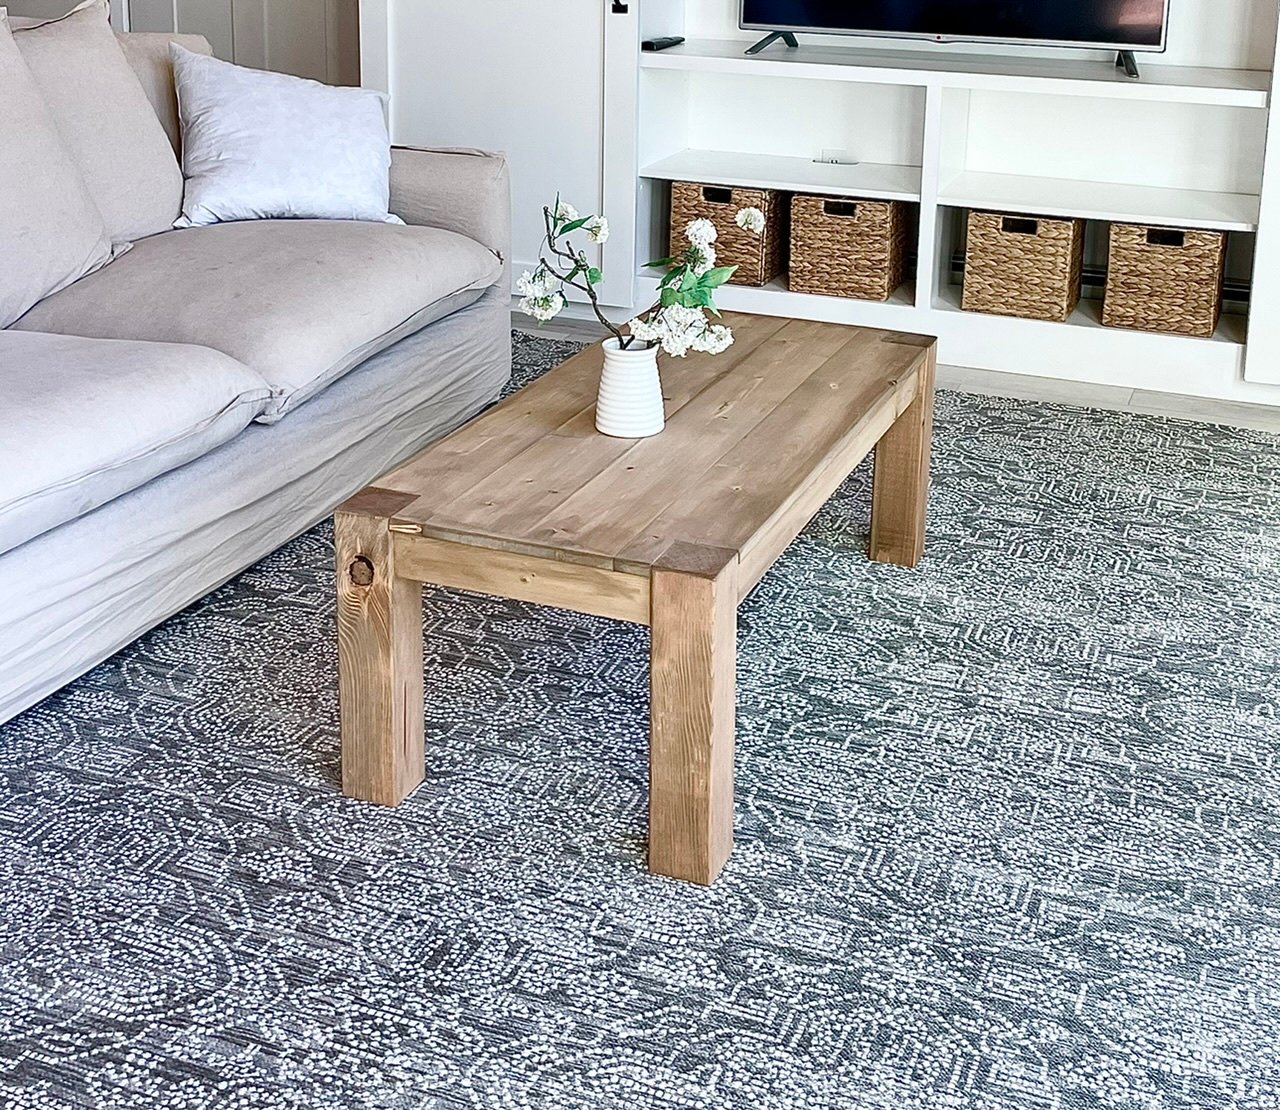
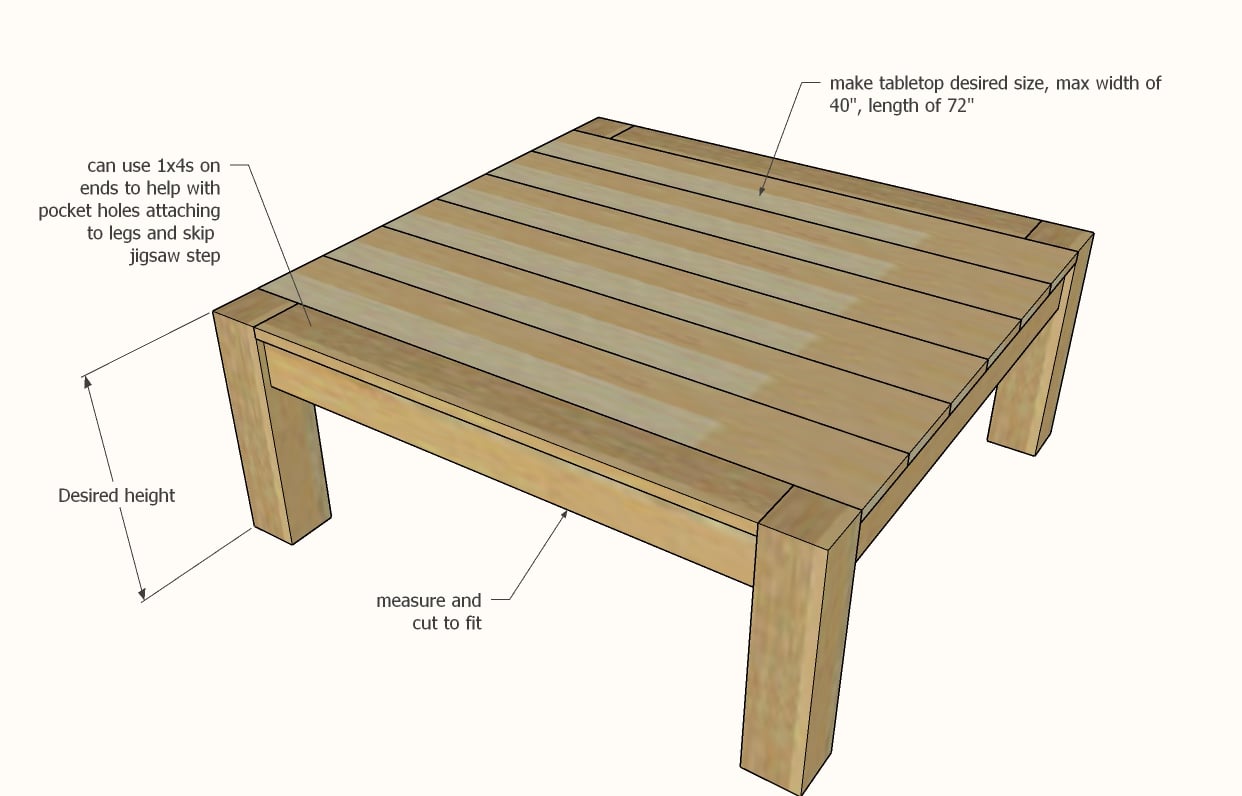
Here's the rectangle coffee table that I built, it's a pretty standard size and works with most standard sofas. It's on the shorter side, so if you want to add a bottom shelf I'd increase the leg length to 18". Notice in this design I used the 1x4s - you can also jigsaw out if you have the tools - the plan will work either way.
Cut list for rectangle coffee table as shown:
- 4 - 4x4 @ 16"
- 3 - 1x6 @ 48"
- 2 - 1x4 @ 41"
- 2 - 1x3 @ 41"
- 2 - 1x3 @ 16-1/2"

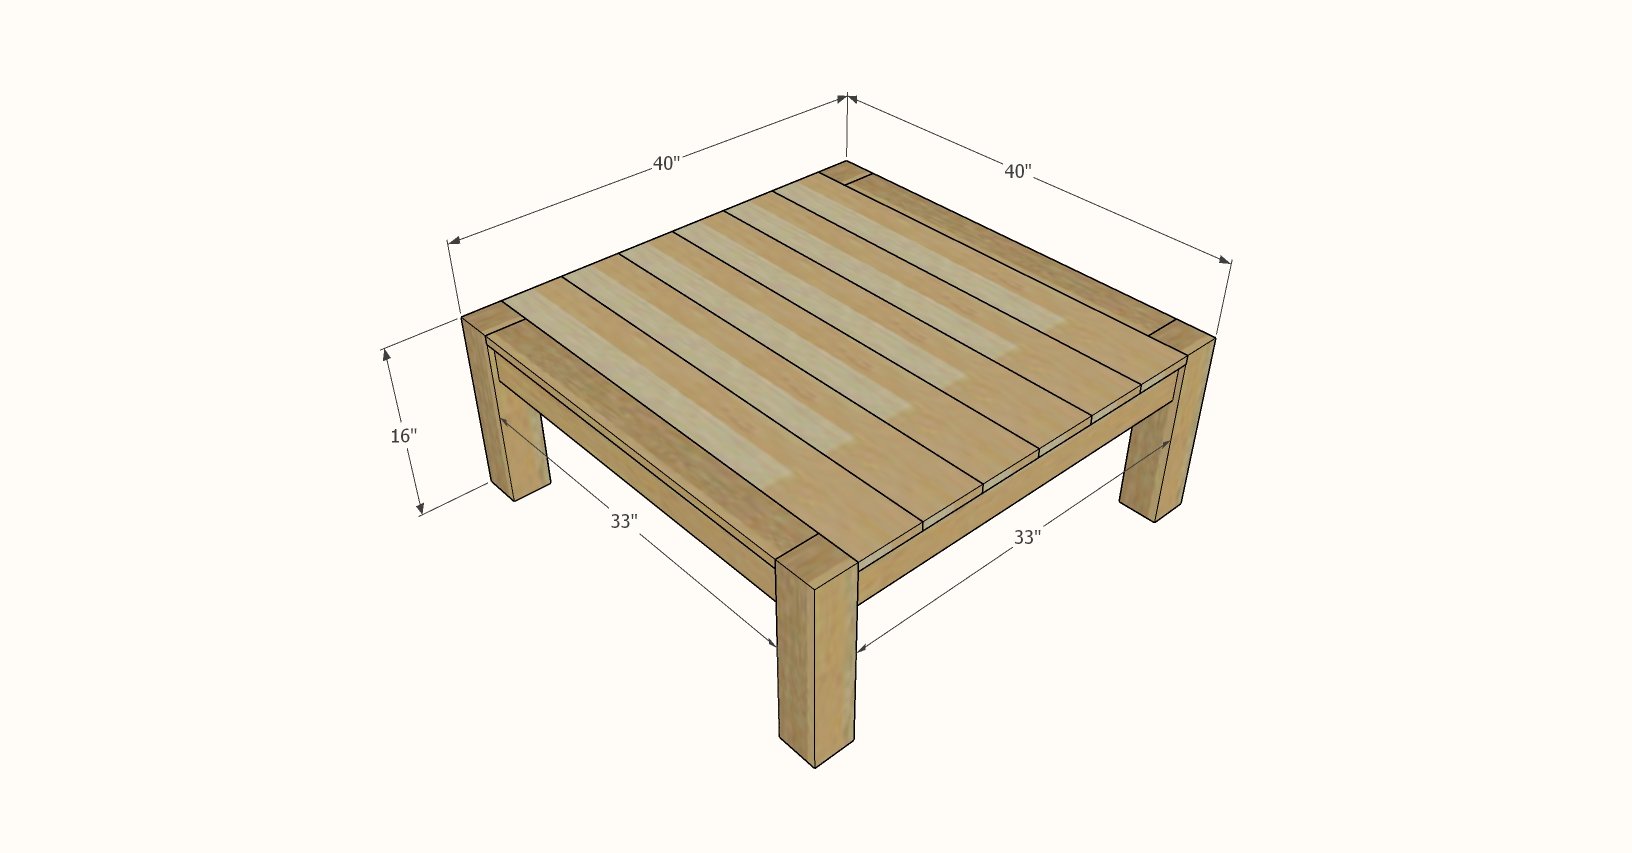
Square Coffee Table
The square version is great for sectionals and larger living rooms with seating on multiple sides.
Here's the cut list as shown for the square coffee table:
- 4 - 4x4 @ 16"
- 6 - 1x6 @ 40"
- 2 - 1x4 @ 33"
- 4 - 1x3 @ 33"
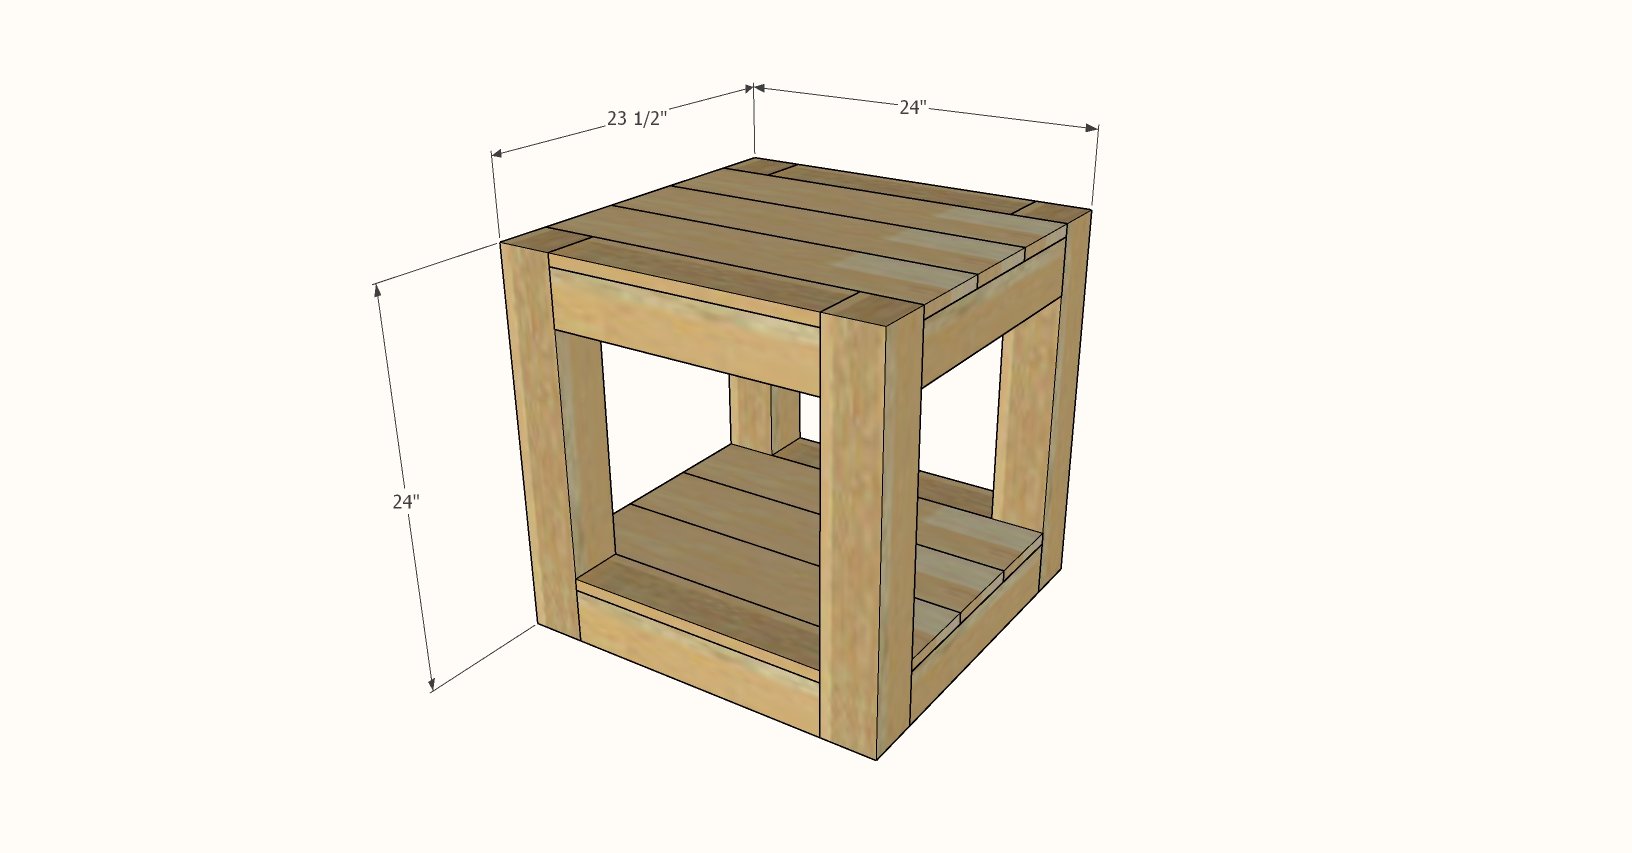
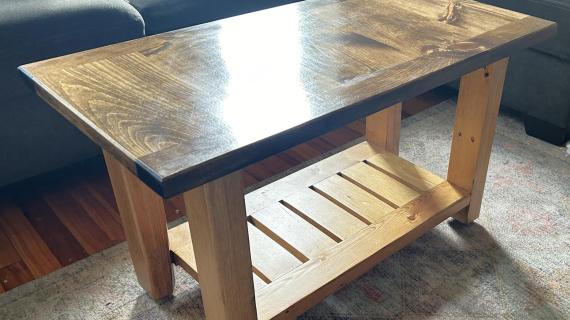
End Table with Bottom Shelf - Also Nightstand
End tables are a little taller, so a bottom shelf will create more function and also support the legs at the base. But the bottom shelf is completely optional.
Here's this end table cut list as shown:
- 4 - 4x4 @ 24"
- 6 - 1x6 @ 24"
- 4 - 1x4 @ 17"
- 4 - 1x3 @ 17"
- 4 - 1x3 @ 16-1/2"
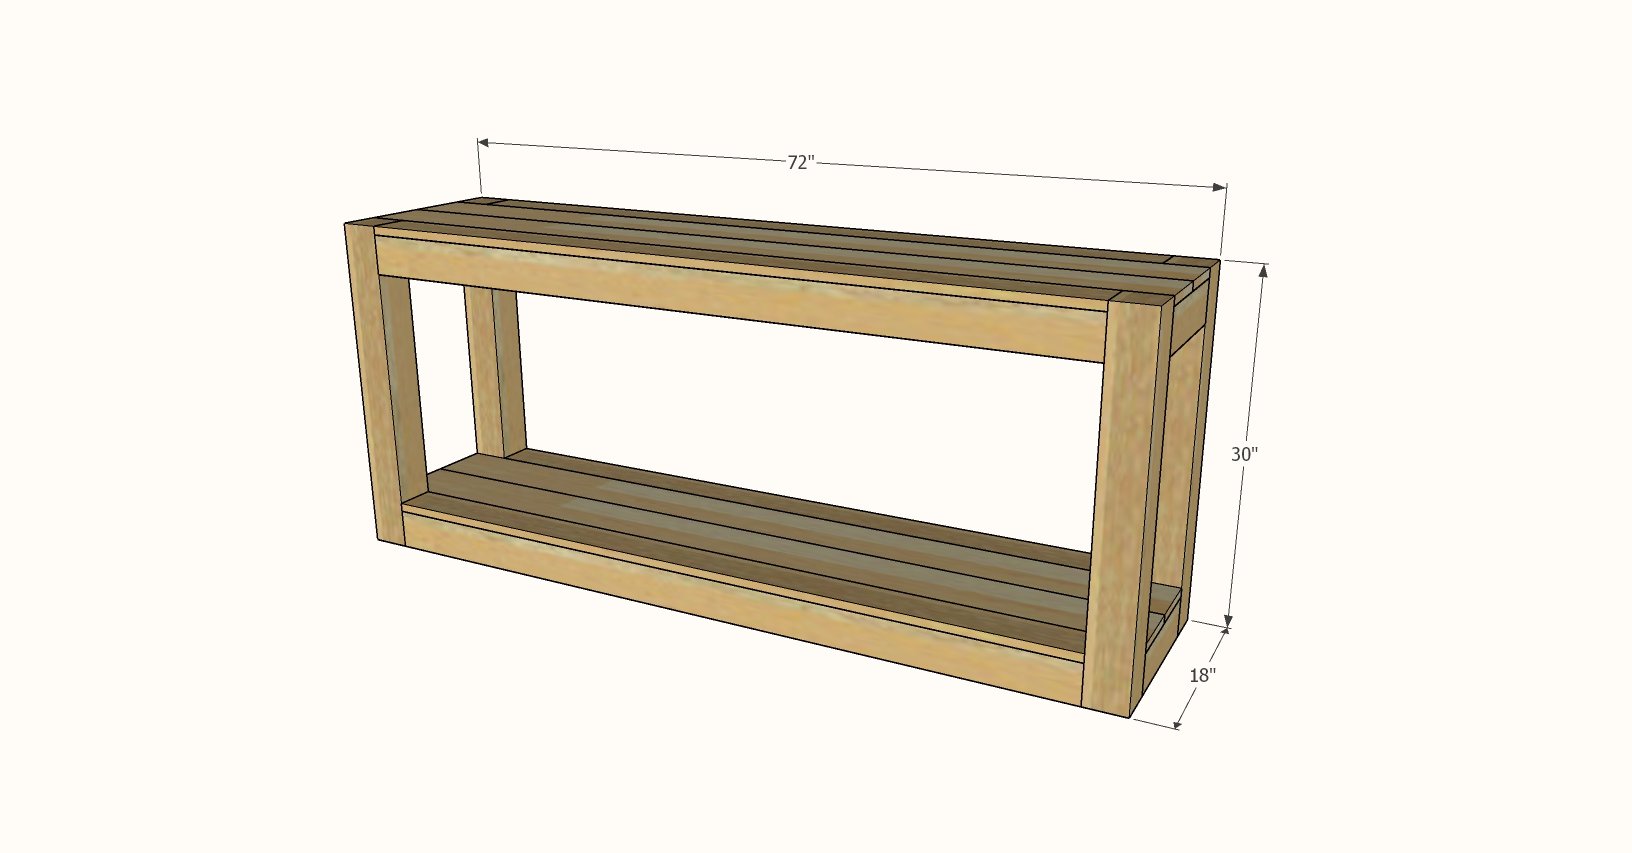
Console Table with Bottom Shelf - Also Media Center, Sideboard, or Bath Vanity
The parsons console table is also ideal for a bottom shelf. I'd love to see it with baskets of shoes, or pillows in blankets in a living room media console setting. This version is pretty wide, but you can make it narrower by using less top boards.
Here's the cut list for the console as shown:
- 4 - 4x4 @ 30"
- 4 - 1x6 @ 72"
- 4 - 1x4 @ 65"
- 4 - 1x3 @ 65"
- 2 - 1x3 @ 11"
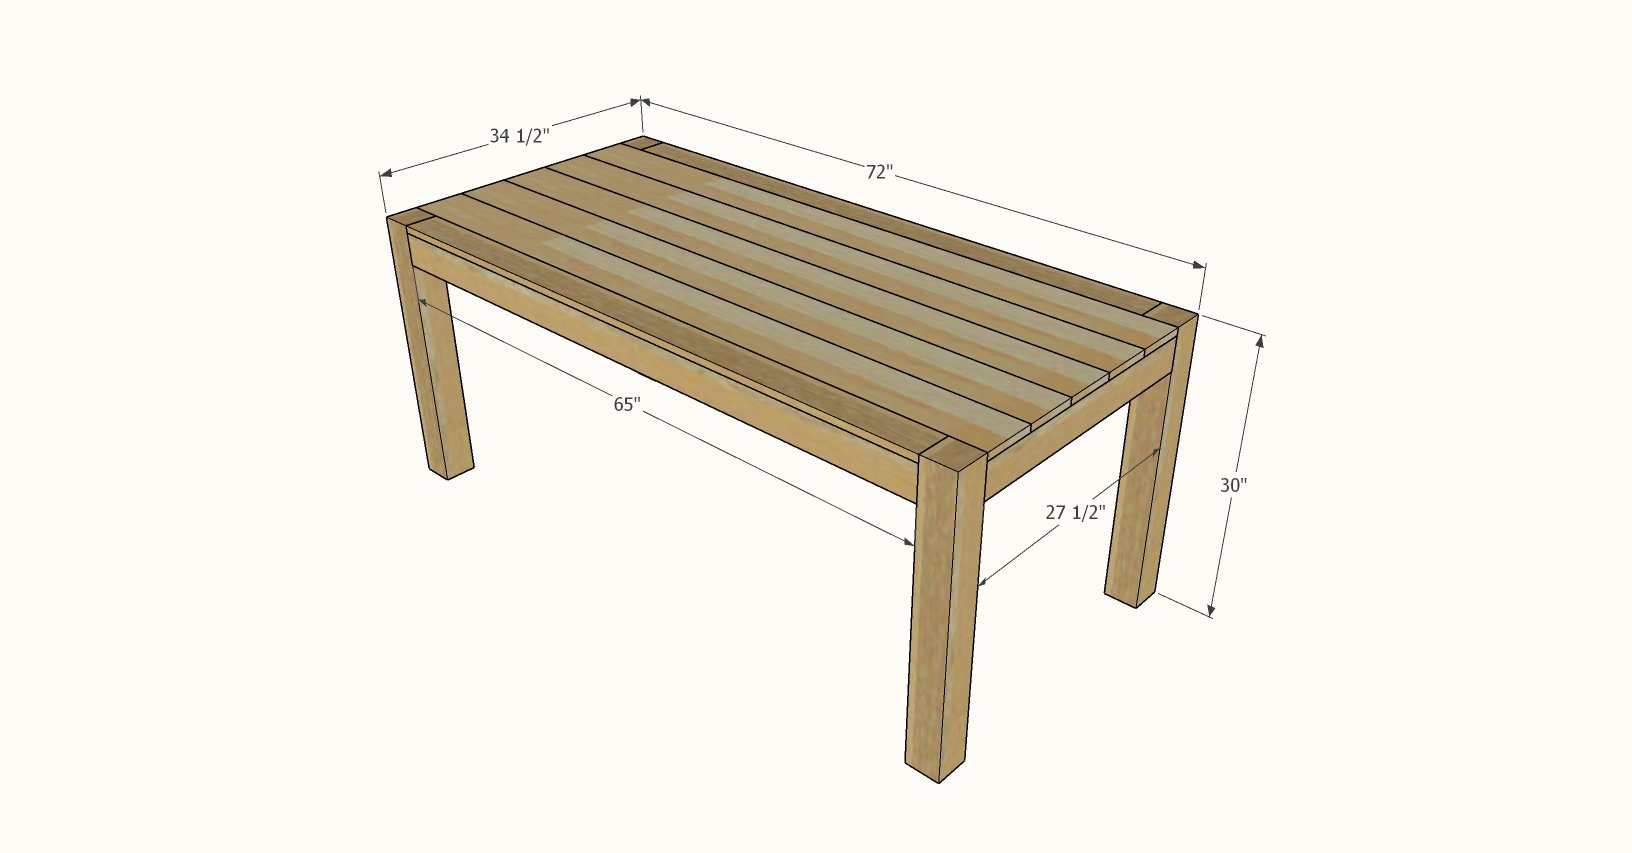
Dining Table
And finally, the dining table! One change is I did use 2x3s for the dining table aprons instead of the 1x3s, to increase support. Also I did 45 supports under the tabletop from apron to apron, also screwing into the legs (this is shown in step 4 of the plans).
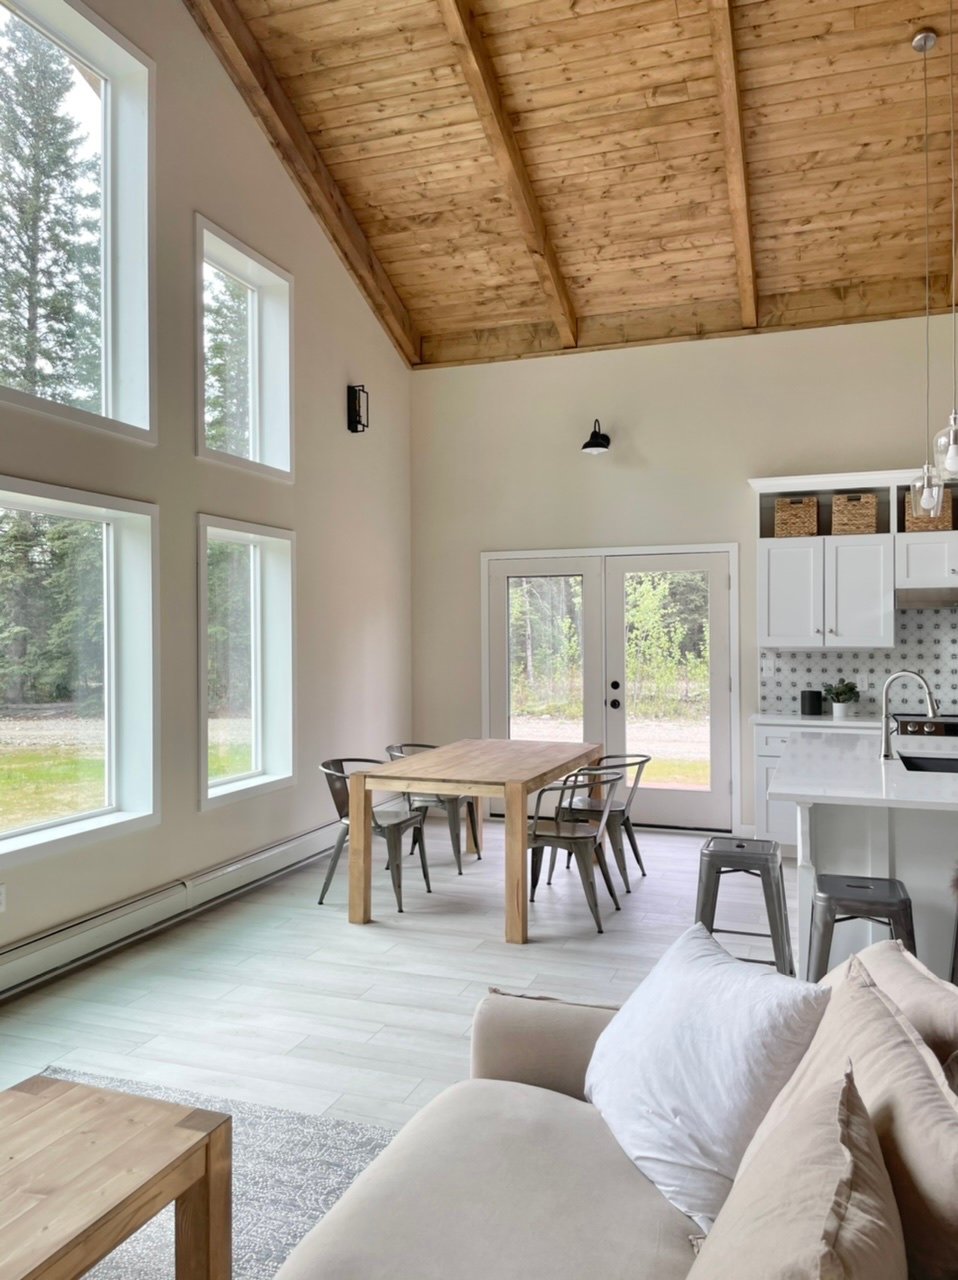
This is a good sized table that will easily seat 6. But it feels perfect in a small dining room.
Here's the cut list for this dining table as shown:
- 4 - 4x4 @ 30"
- 5 - 1x6 @ 72"
- 2 - 1x4 @ 65"
- 2 - 2x3 @ 65" - or 2x4s, especially if you do a longer table for added strength
- 2 - 2x3 @ 27-1/2" - or 2x4s, especially if you do a longer table for added strength
- 4 - 2x3 @ about 9" (depending on apron thickness and placement) with ends cut at 45 degrees, perpendicular, for the cross supports
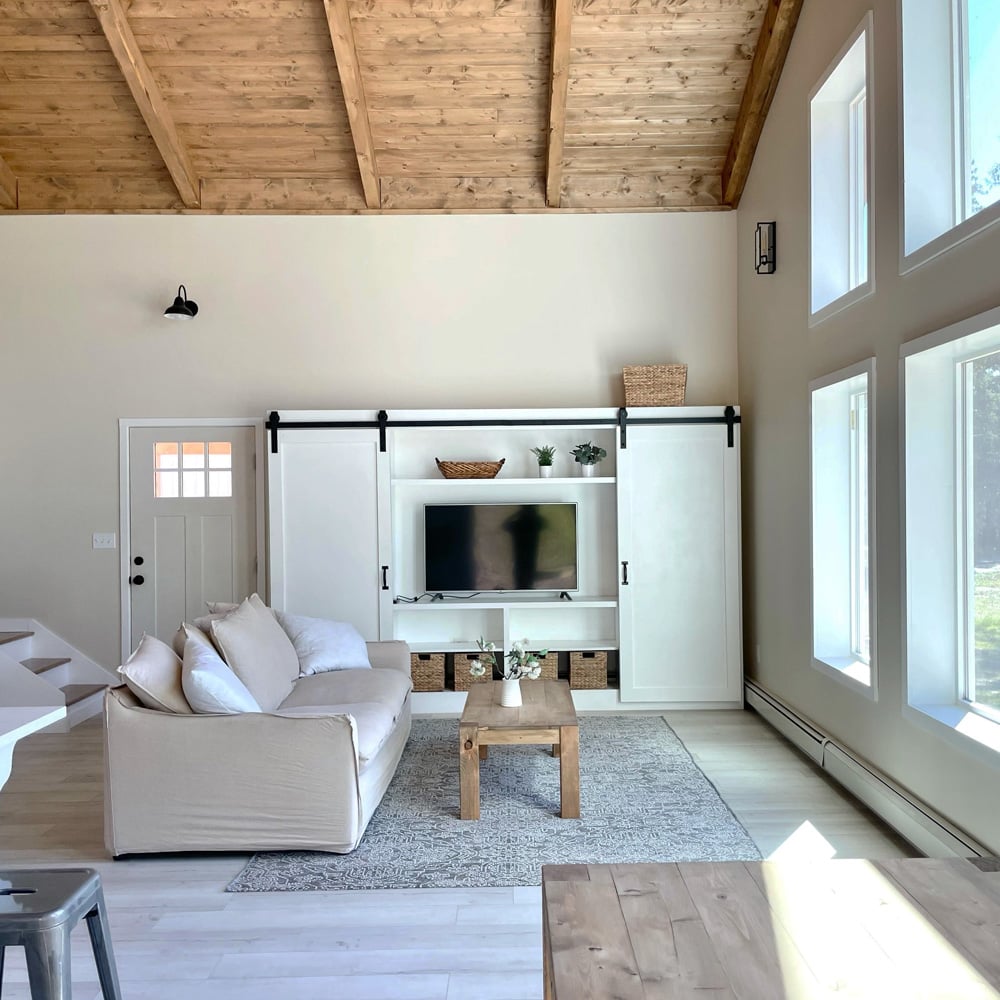
FAQ: Are There Plans for the Barn Door Media Center?
Yes! Here are the plans for the Barn Door Media Center.
Parson's Style Table Build Steps
Here's the basic steps for building these parson's tables:
Pin for Later!
Preparation
The shopping list will vary for the type of Parson's table you are building, but essentially, you will need the following
- 4x4s for the legs (I used douglas fir)
- 1x6 for the main part of the tabletop
- 1x4 between the legs (if not jigsawing out the tabletop for the legs)
- 1x3s for the aprons, can go with 2x3, 1x4 or 2x4 with minimal changes to increase strength
- 1-1/4" coarse thread Kreg Pocket Hole screws for attaching everything


Instructions
Step 1
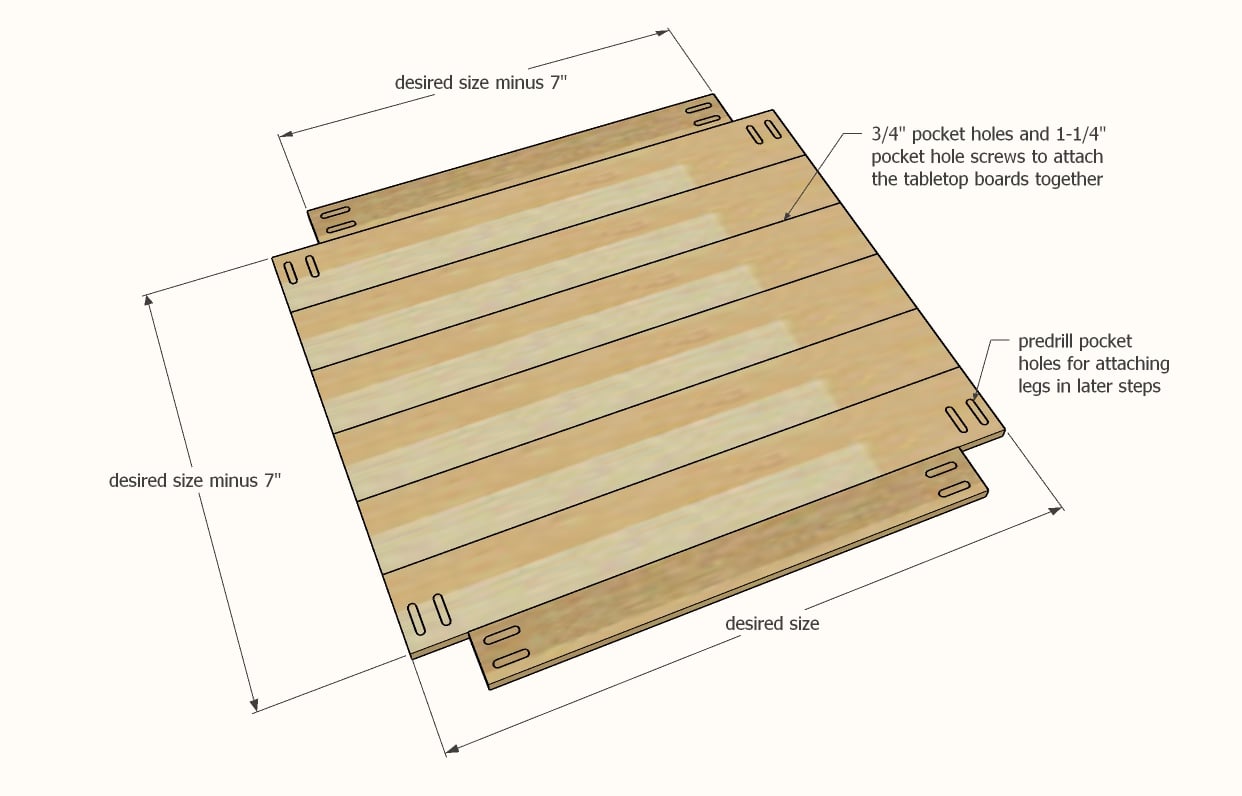
Cut out the 1x6 boards for the tabletop.
Drill 3/4" pocket holes and attach the 1x6 boards together edge to edge.
Then drill the pocket holes for attaching the legs and the 1x4 tabletop boards.
Drill the 3/4" pocket holes for attach the legs on the 1x4s.
TIP: Measure and cut the aprons at this step, before legs are in the way of measurements.
Step 2
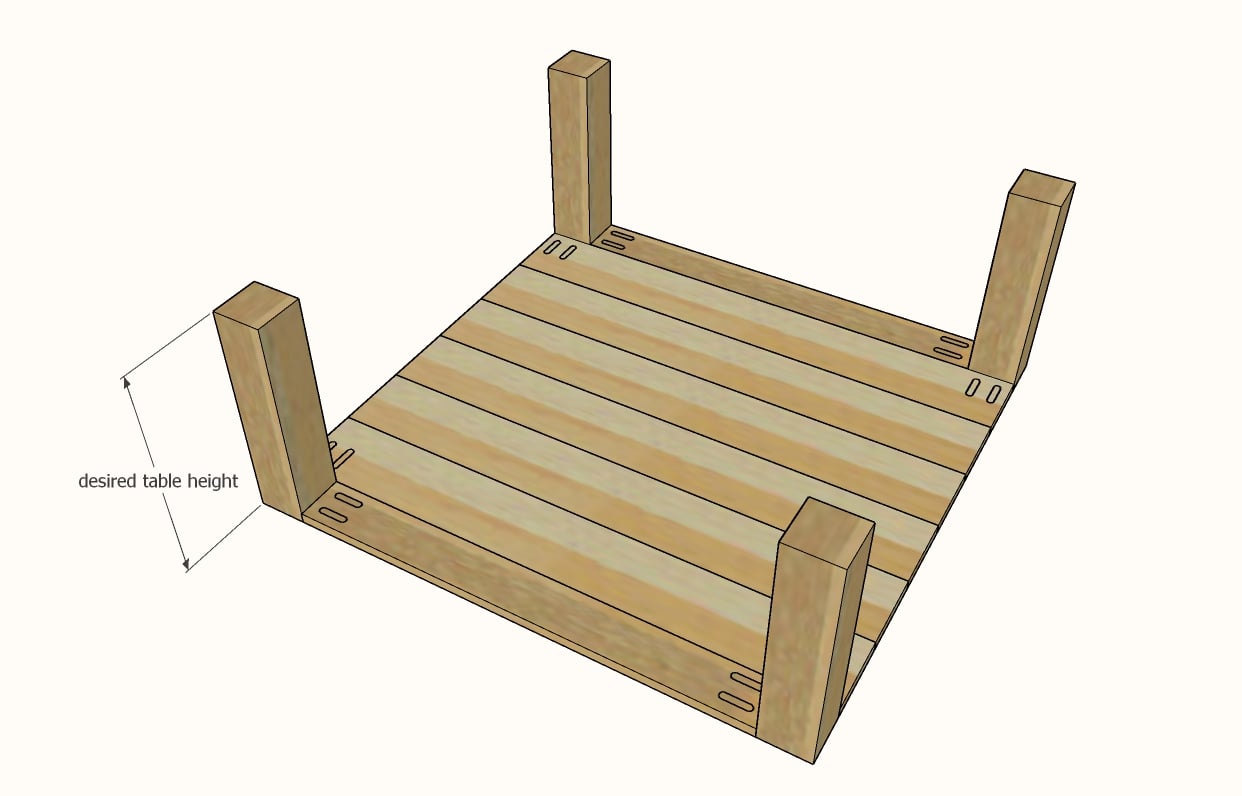
Then attach the legs to the tabletop with 1-1/4" pocket hole screws.
Step 3
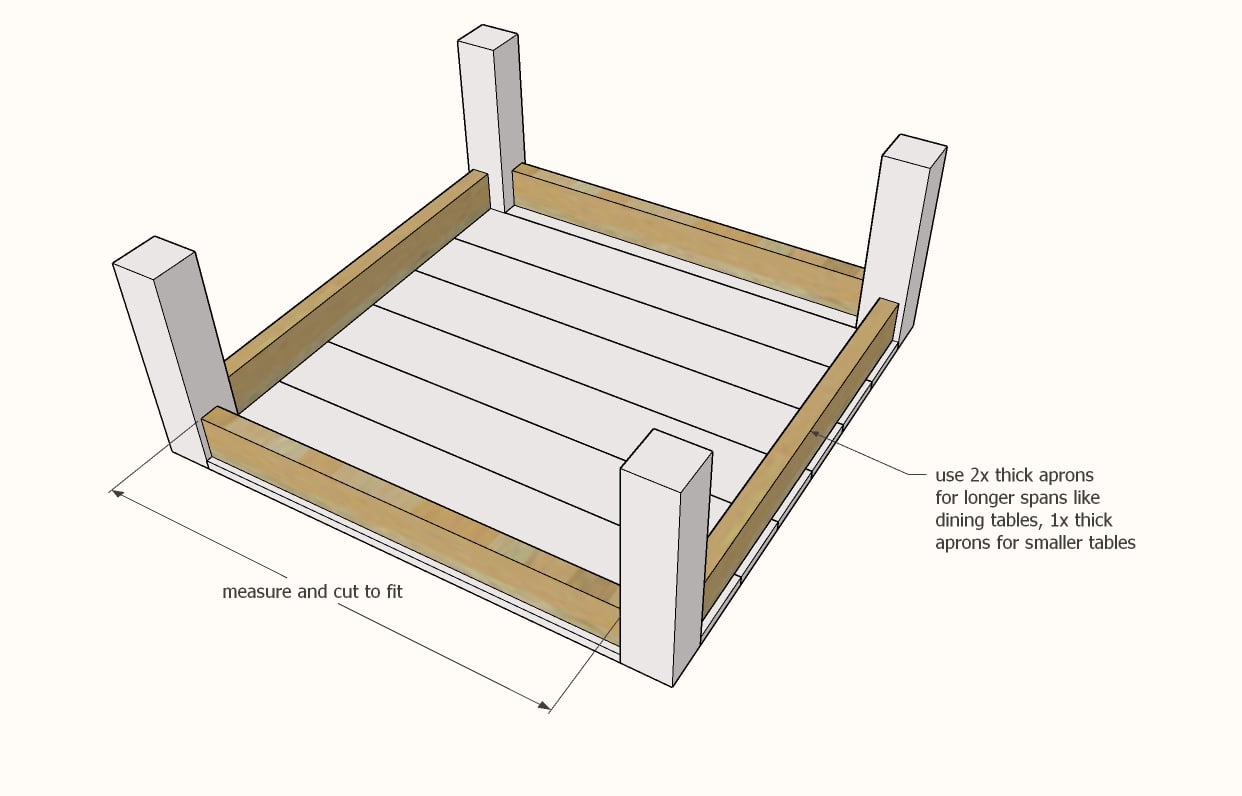
Attach aprons between the legs to secure legs. Also attach aprons to the tabletop.
The aprons can be attached flush to the outside, or inset on the leg - it is all on visual preference.
Step 4

For added strength for the legs, a cross support can be added to each leg, in between the aprons at a 45 degree angle. Make sure you screw also into the legs. Material should be same as the aprons.
Center support can be added by running "ribs" between the aprons using the same material as the aprons if necessary on larger tabletops.

Comments
Ana White
Fri, 05/28/2021 - 11:05
The finish I used on my set…
The finish I used on my set of tables was Varathane Wood Accelerator in Aged Brown.