
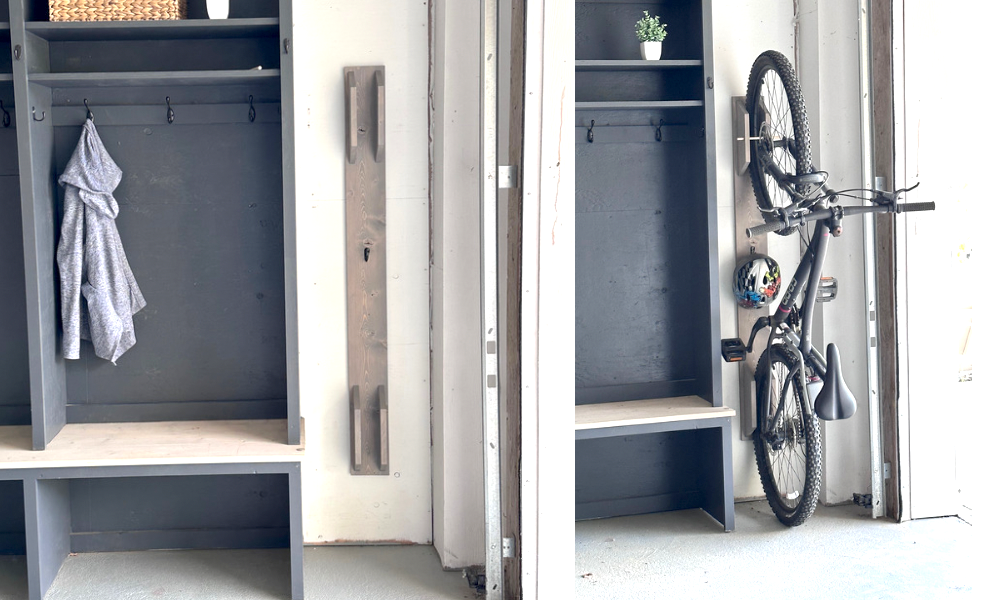

A vertical bike rack made of wood to accent your space, this DIY wall bike mount protects your wall, stores a helmet, and is easy to hang and use.
This is a free DIY project plan with video, steps, and supplies list from Ana-White.com
Store your bike inside in style, while protecting your walls - this vertical bike rack is easy to build and stores your helmet too.
Hangs direct to studs in the wall - so it's easy to mount the vertical bike rack on your wall.
What color are you staining yours?
WATCH - Video of Me Building a Vertical Bike Rack
Alternative Design Options
You can modify this design to create your best vertical bike rack!
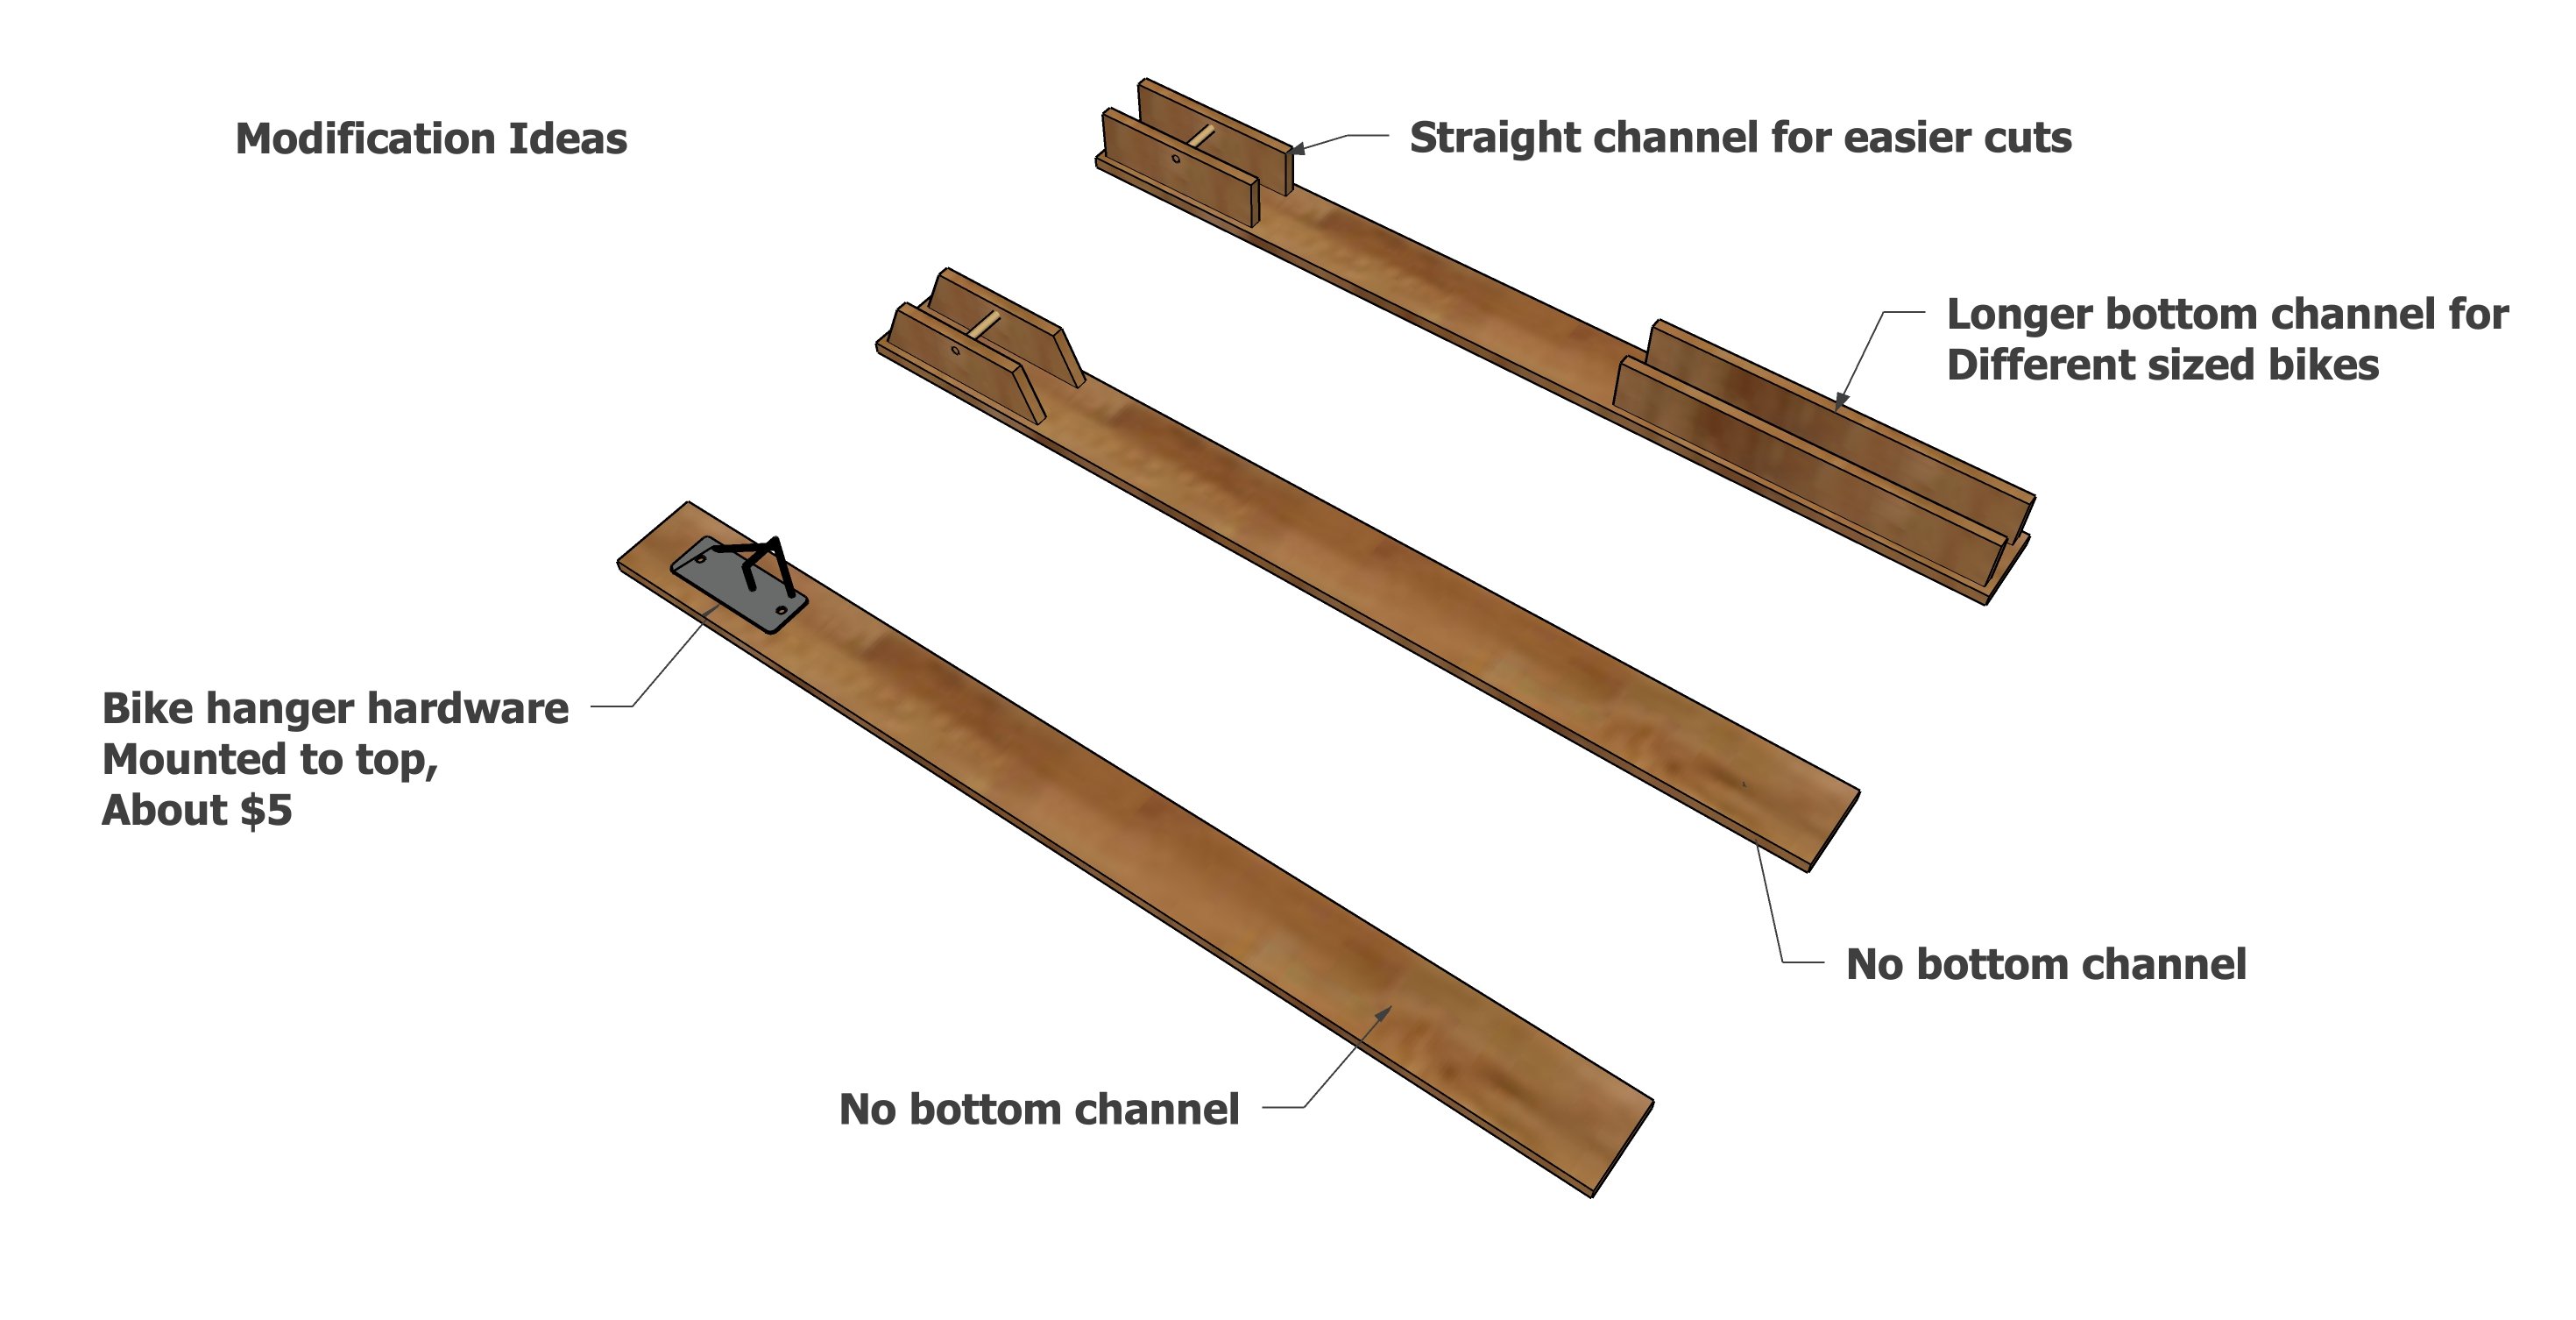
- Use a bike hardware hook at the top - these cost about $5, here's one from Home Depot.
- The bottom channel isn't essential - you could make this without the bottom piece for a more streamlined look
- No miter saw? The angled pieces could be cut straight.
- The dimensions are easy to modify for a perfect fit
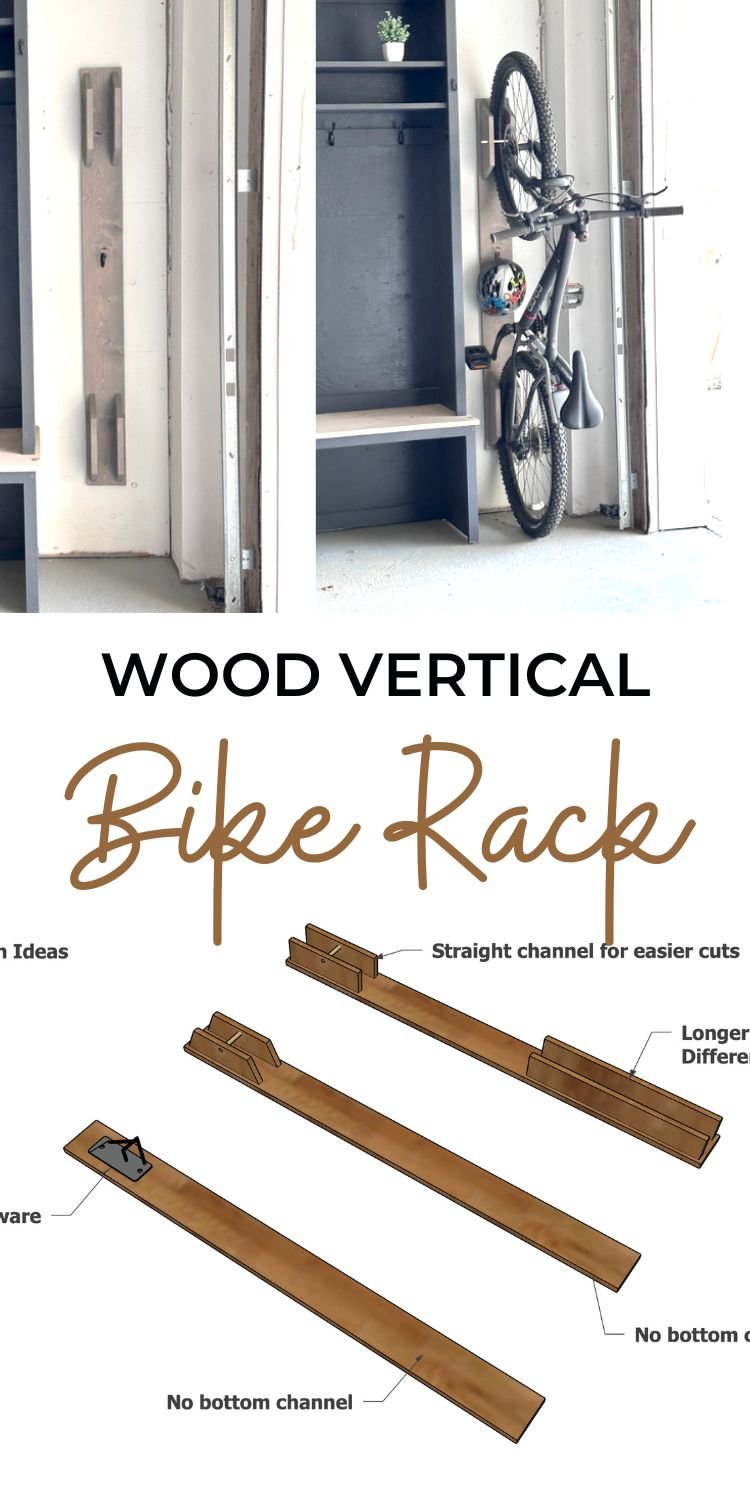
Pin For Later!
Preparation
- 1 - 1x6 @ 6 feet long
- 1 - 1x4 @ 4 feet long
- 8" of 1/2" wood dowel
- 2-1/2" self tapping screws (about 14 screws needed)
- wood glue
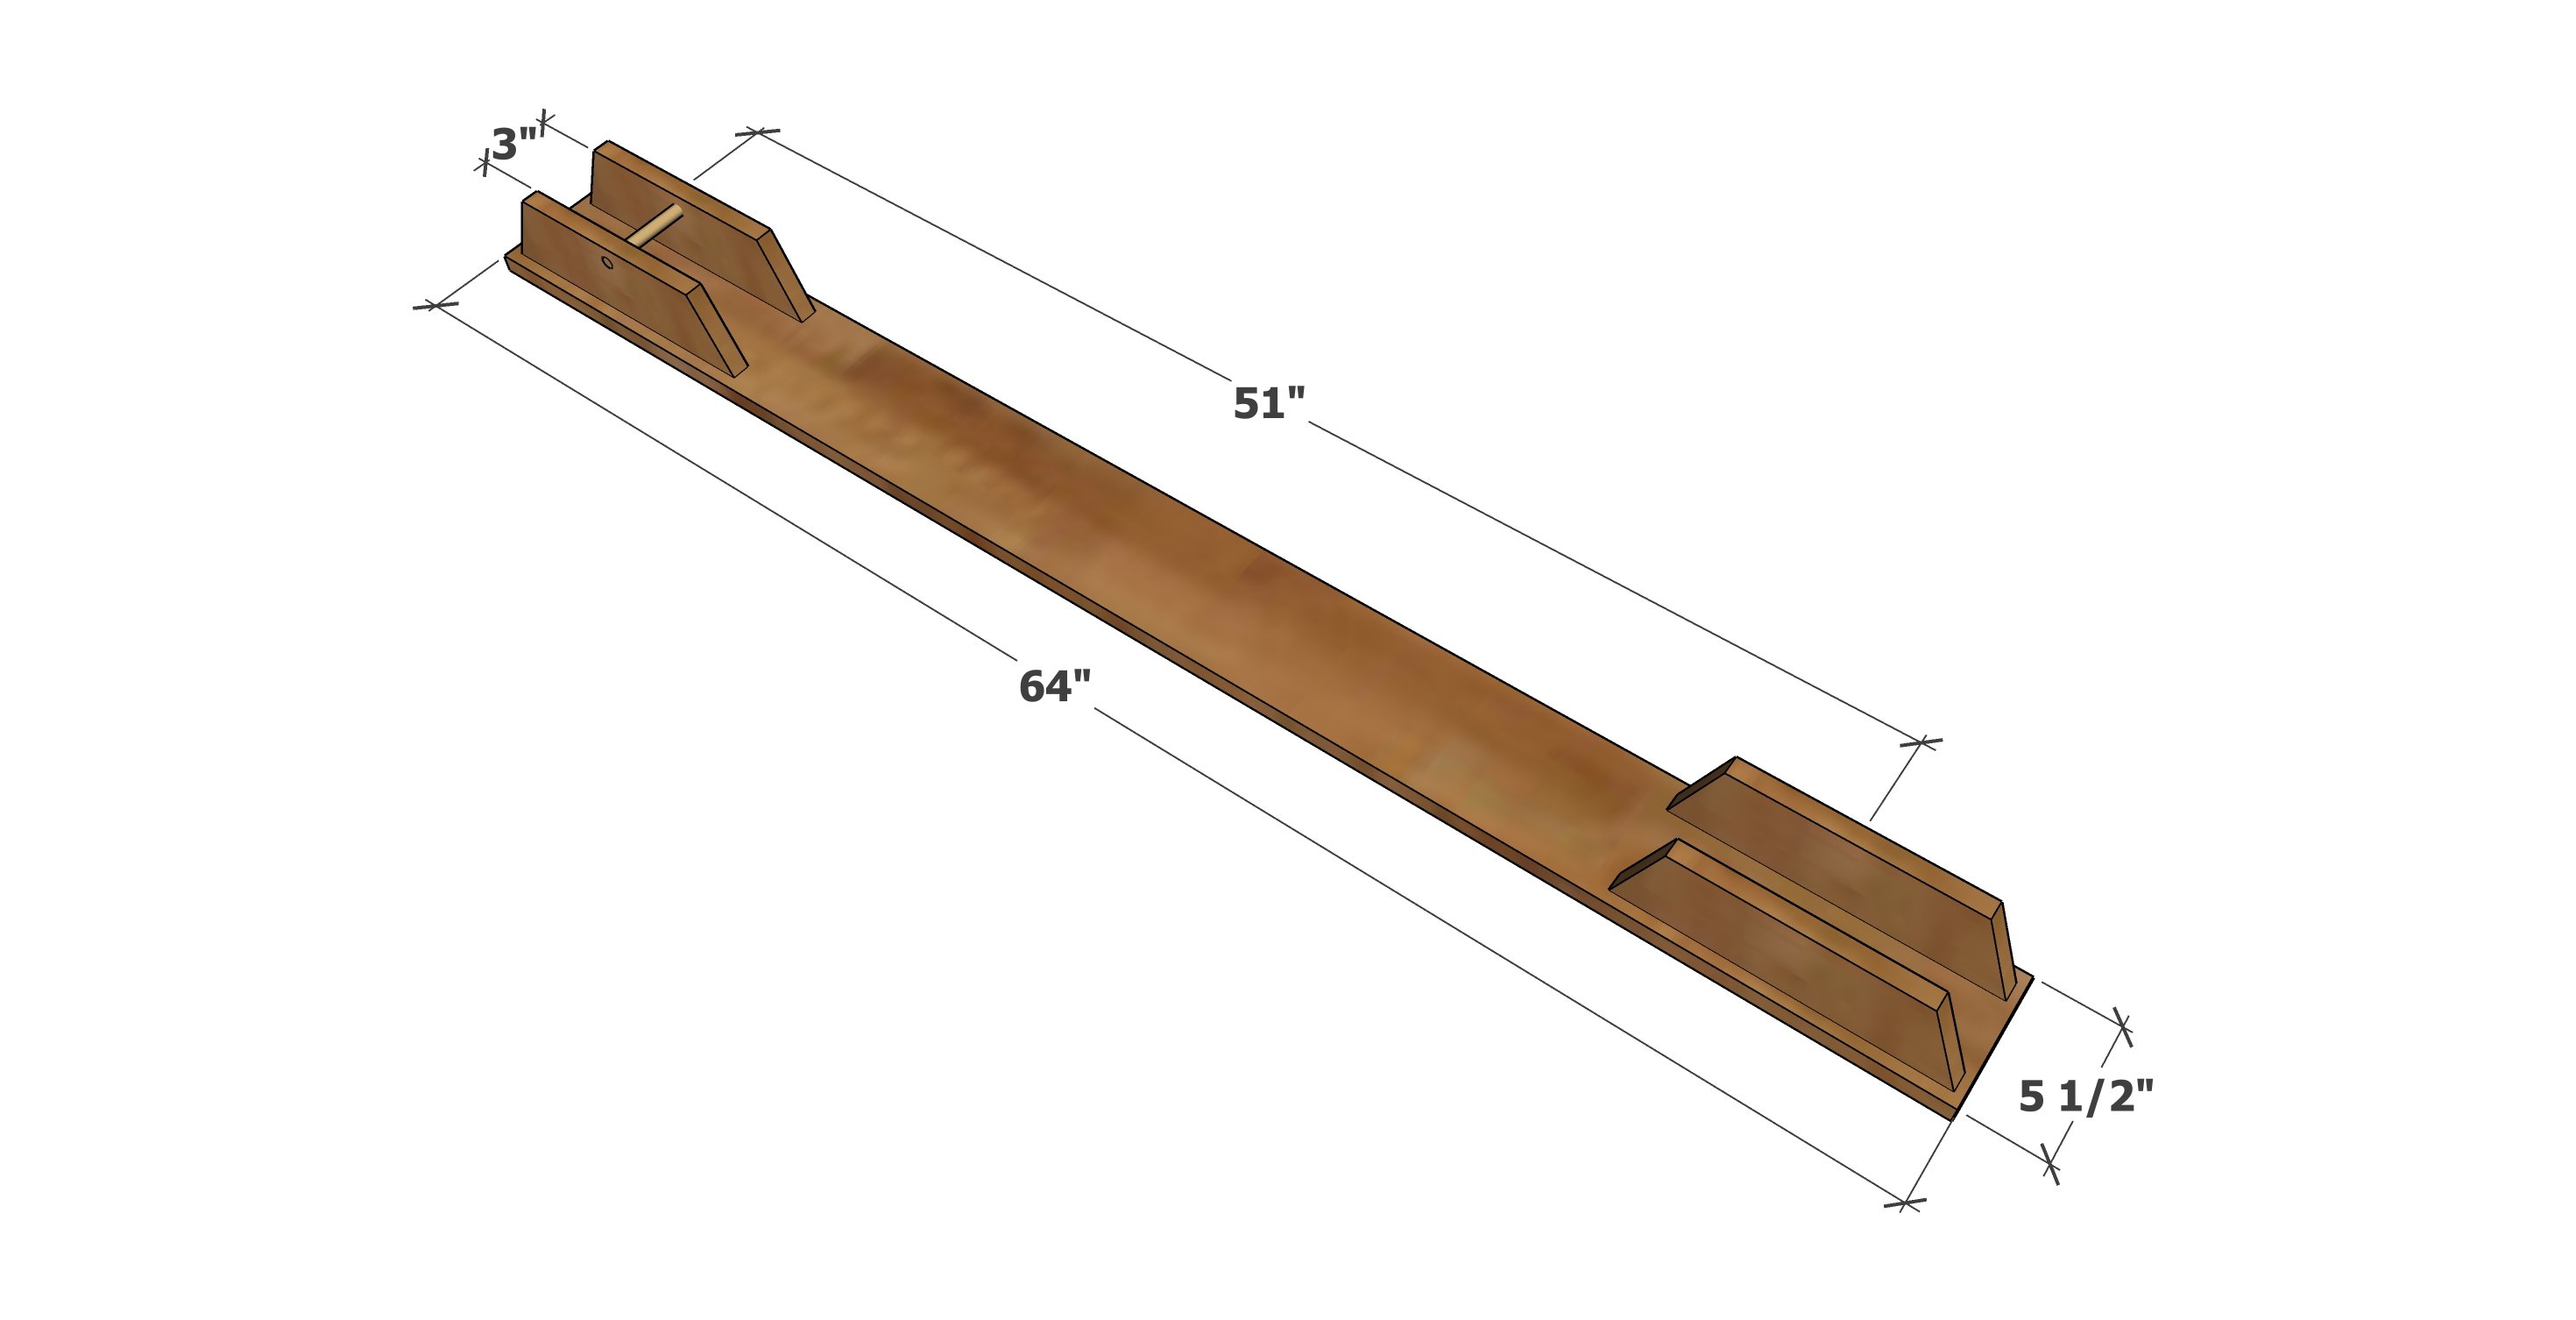
- 1 - 1x6* @ 64"
- 4 - 1x4** @ 12" - long point to long point measurement, both ends cut at 30 degrees off square, ends NOT parallel
- 1 - 1/2" dowel @ 8" long
*For fat tire bikes or wide bike tires, use a 1x8 instead
**For bigger bike tires, like mud tires or fat bike tires, use a 1x6 instead


Instructions
Step 1
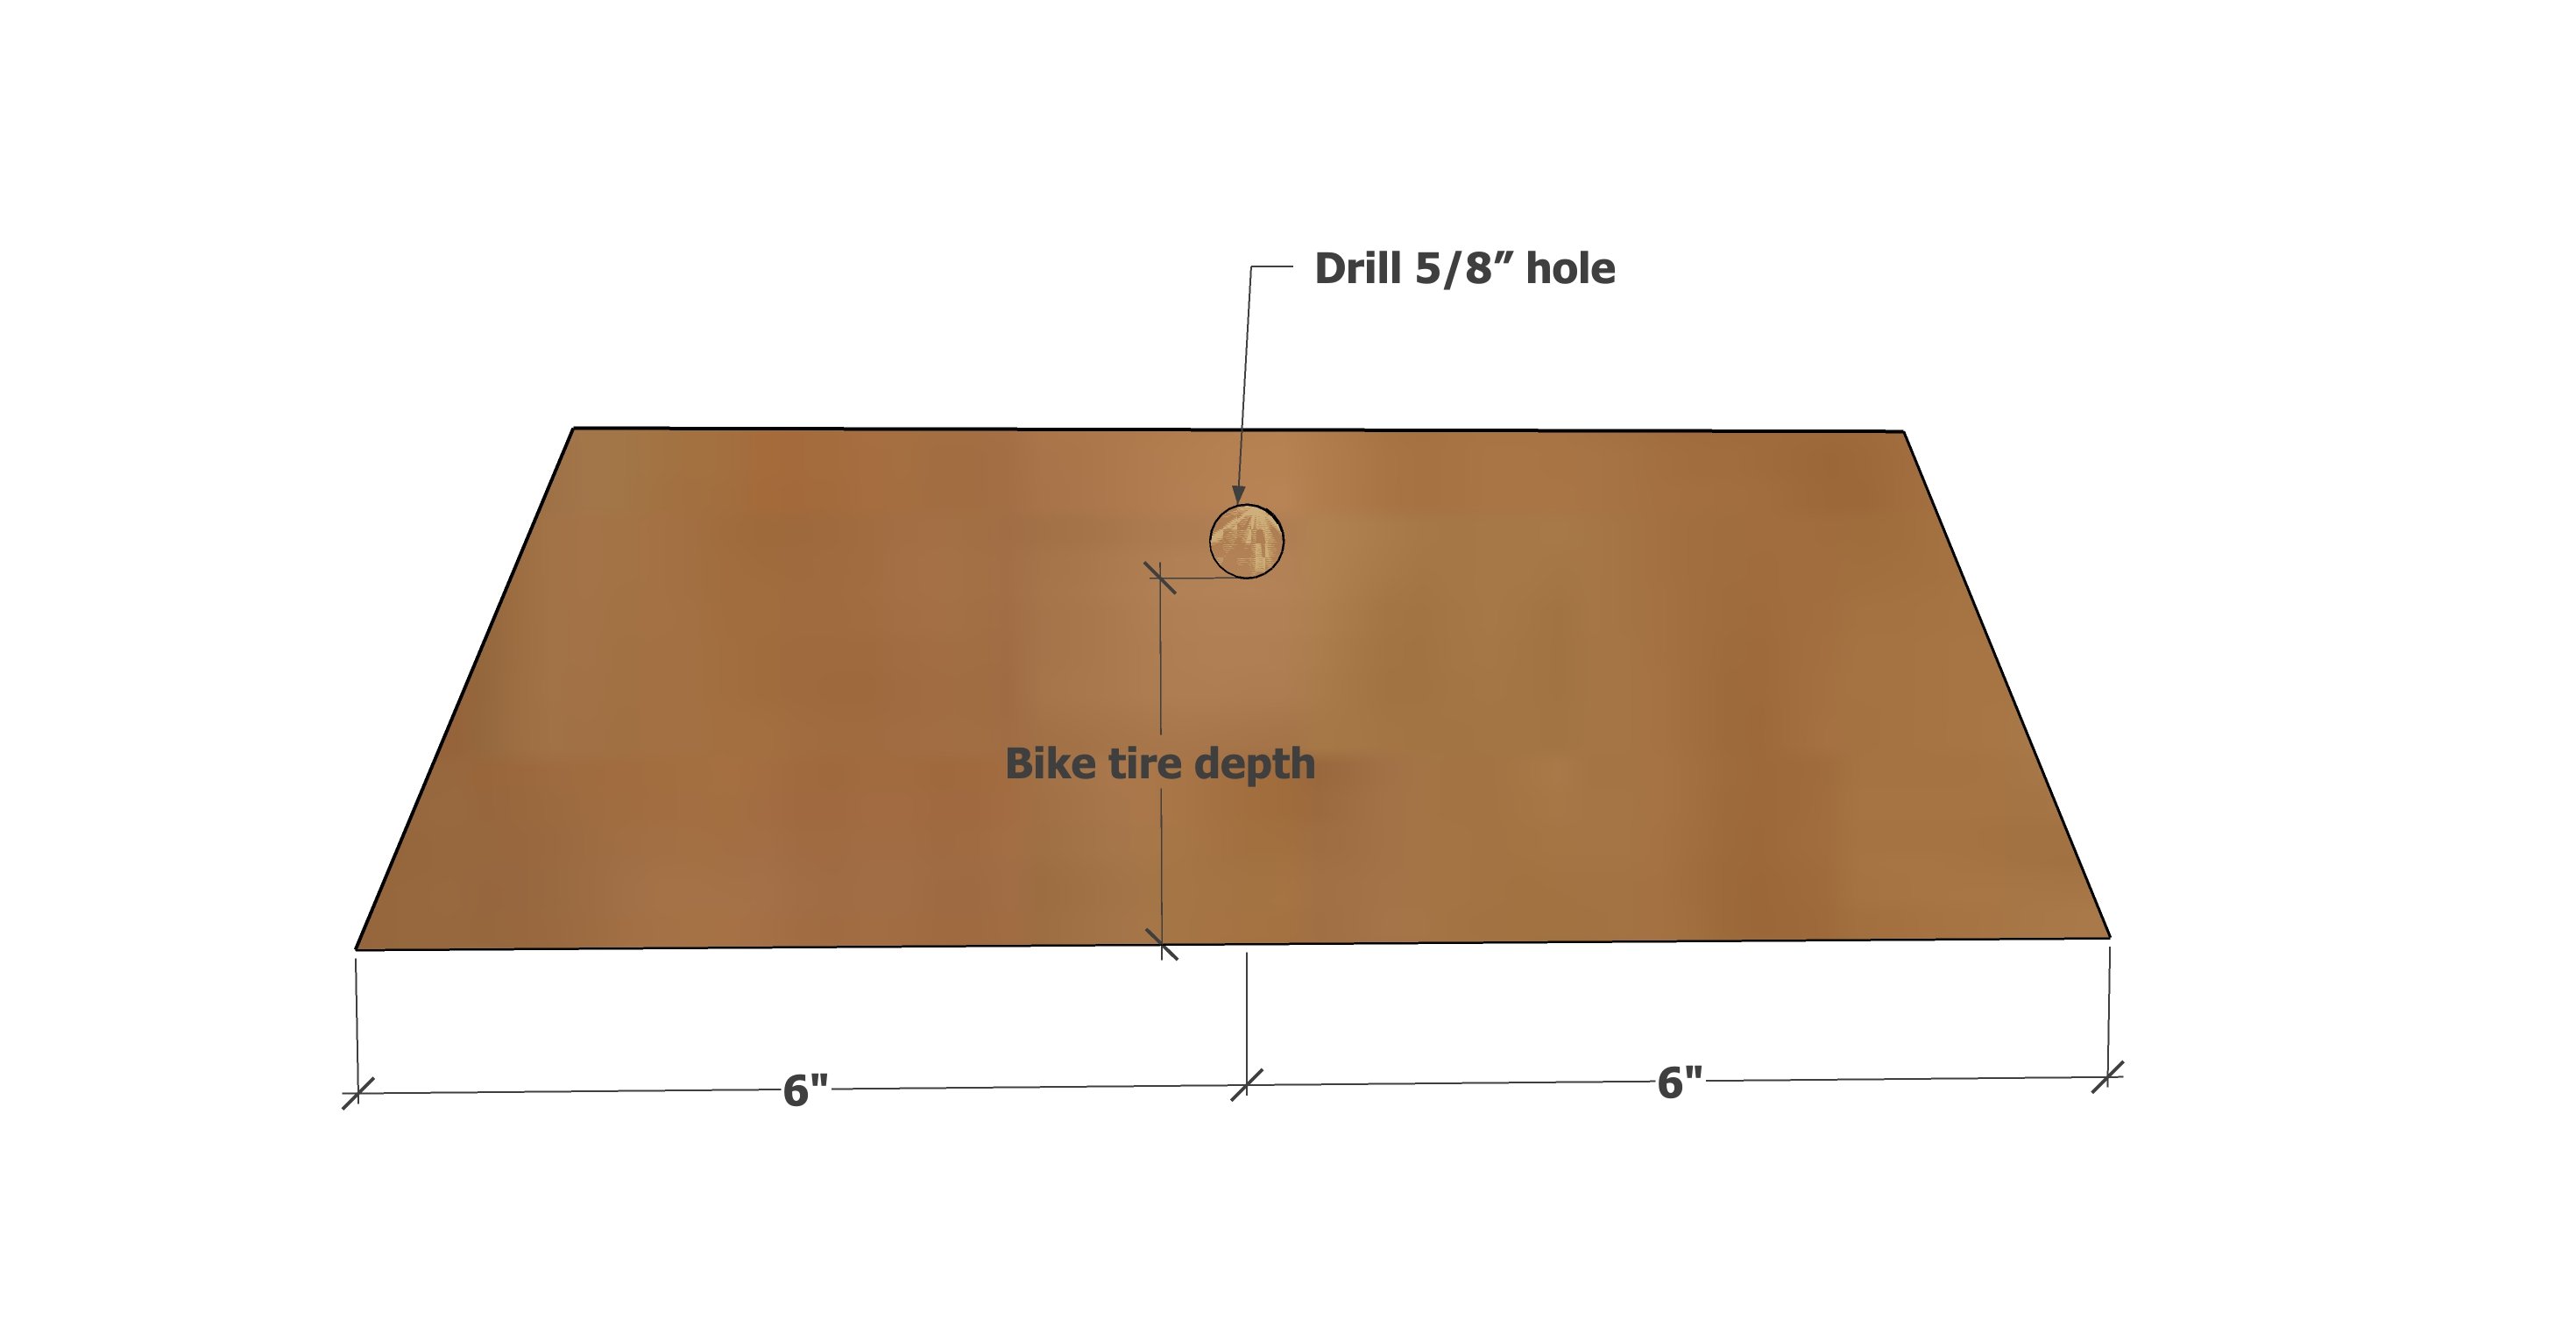
Measure your bike tire depth and drill a hole to match as shown using a 5/8" drill bit.
Step 2
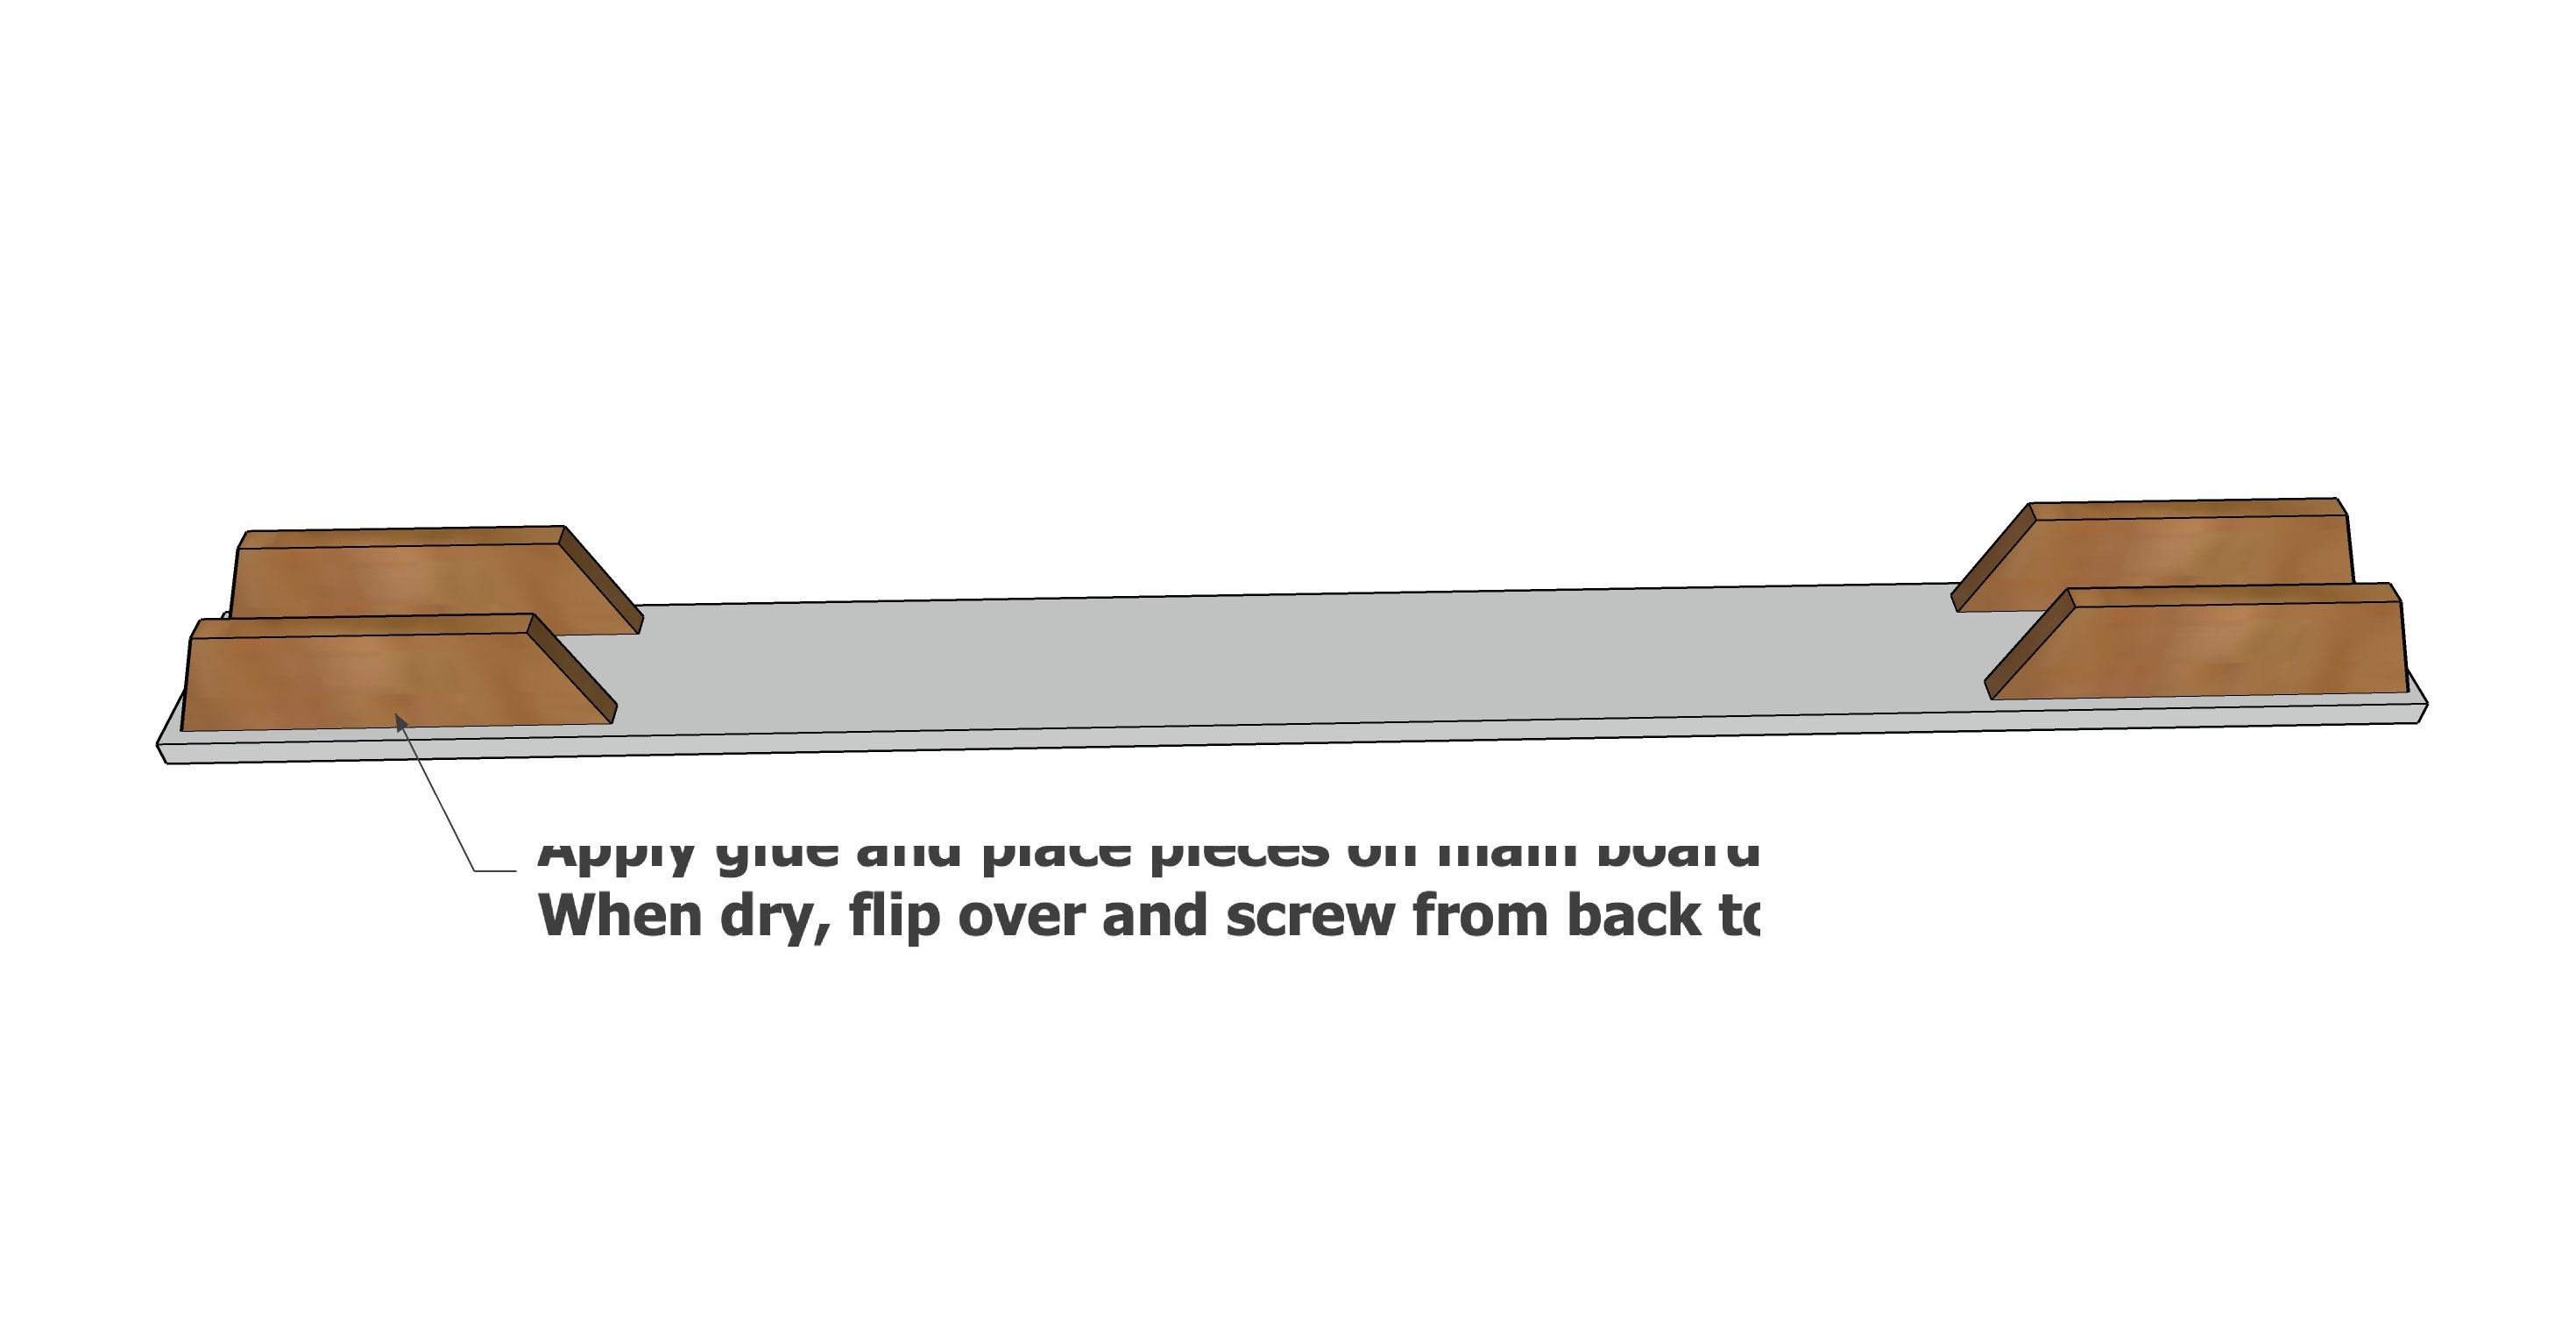
Apply glue to back edges of 1x4 pieces and set on the 1x6. Let dry.
When dry, flip over and attach with screws from back side.
Step 3
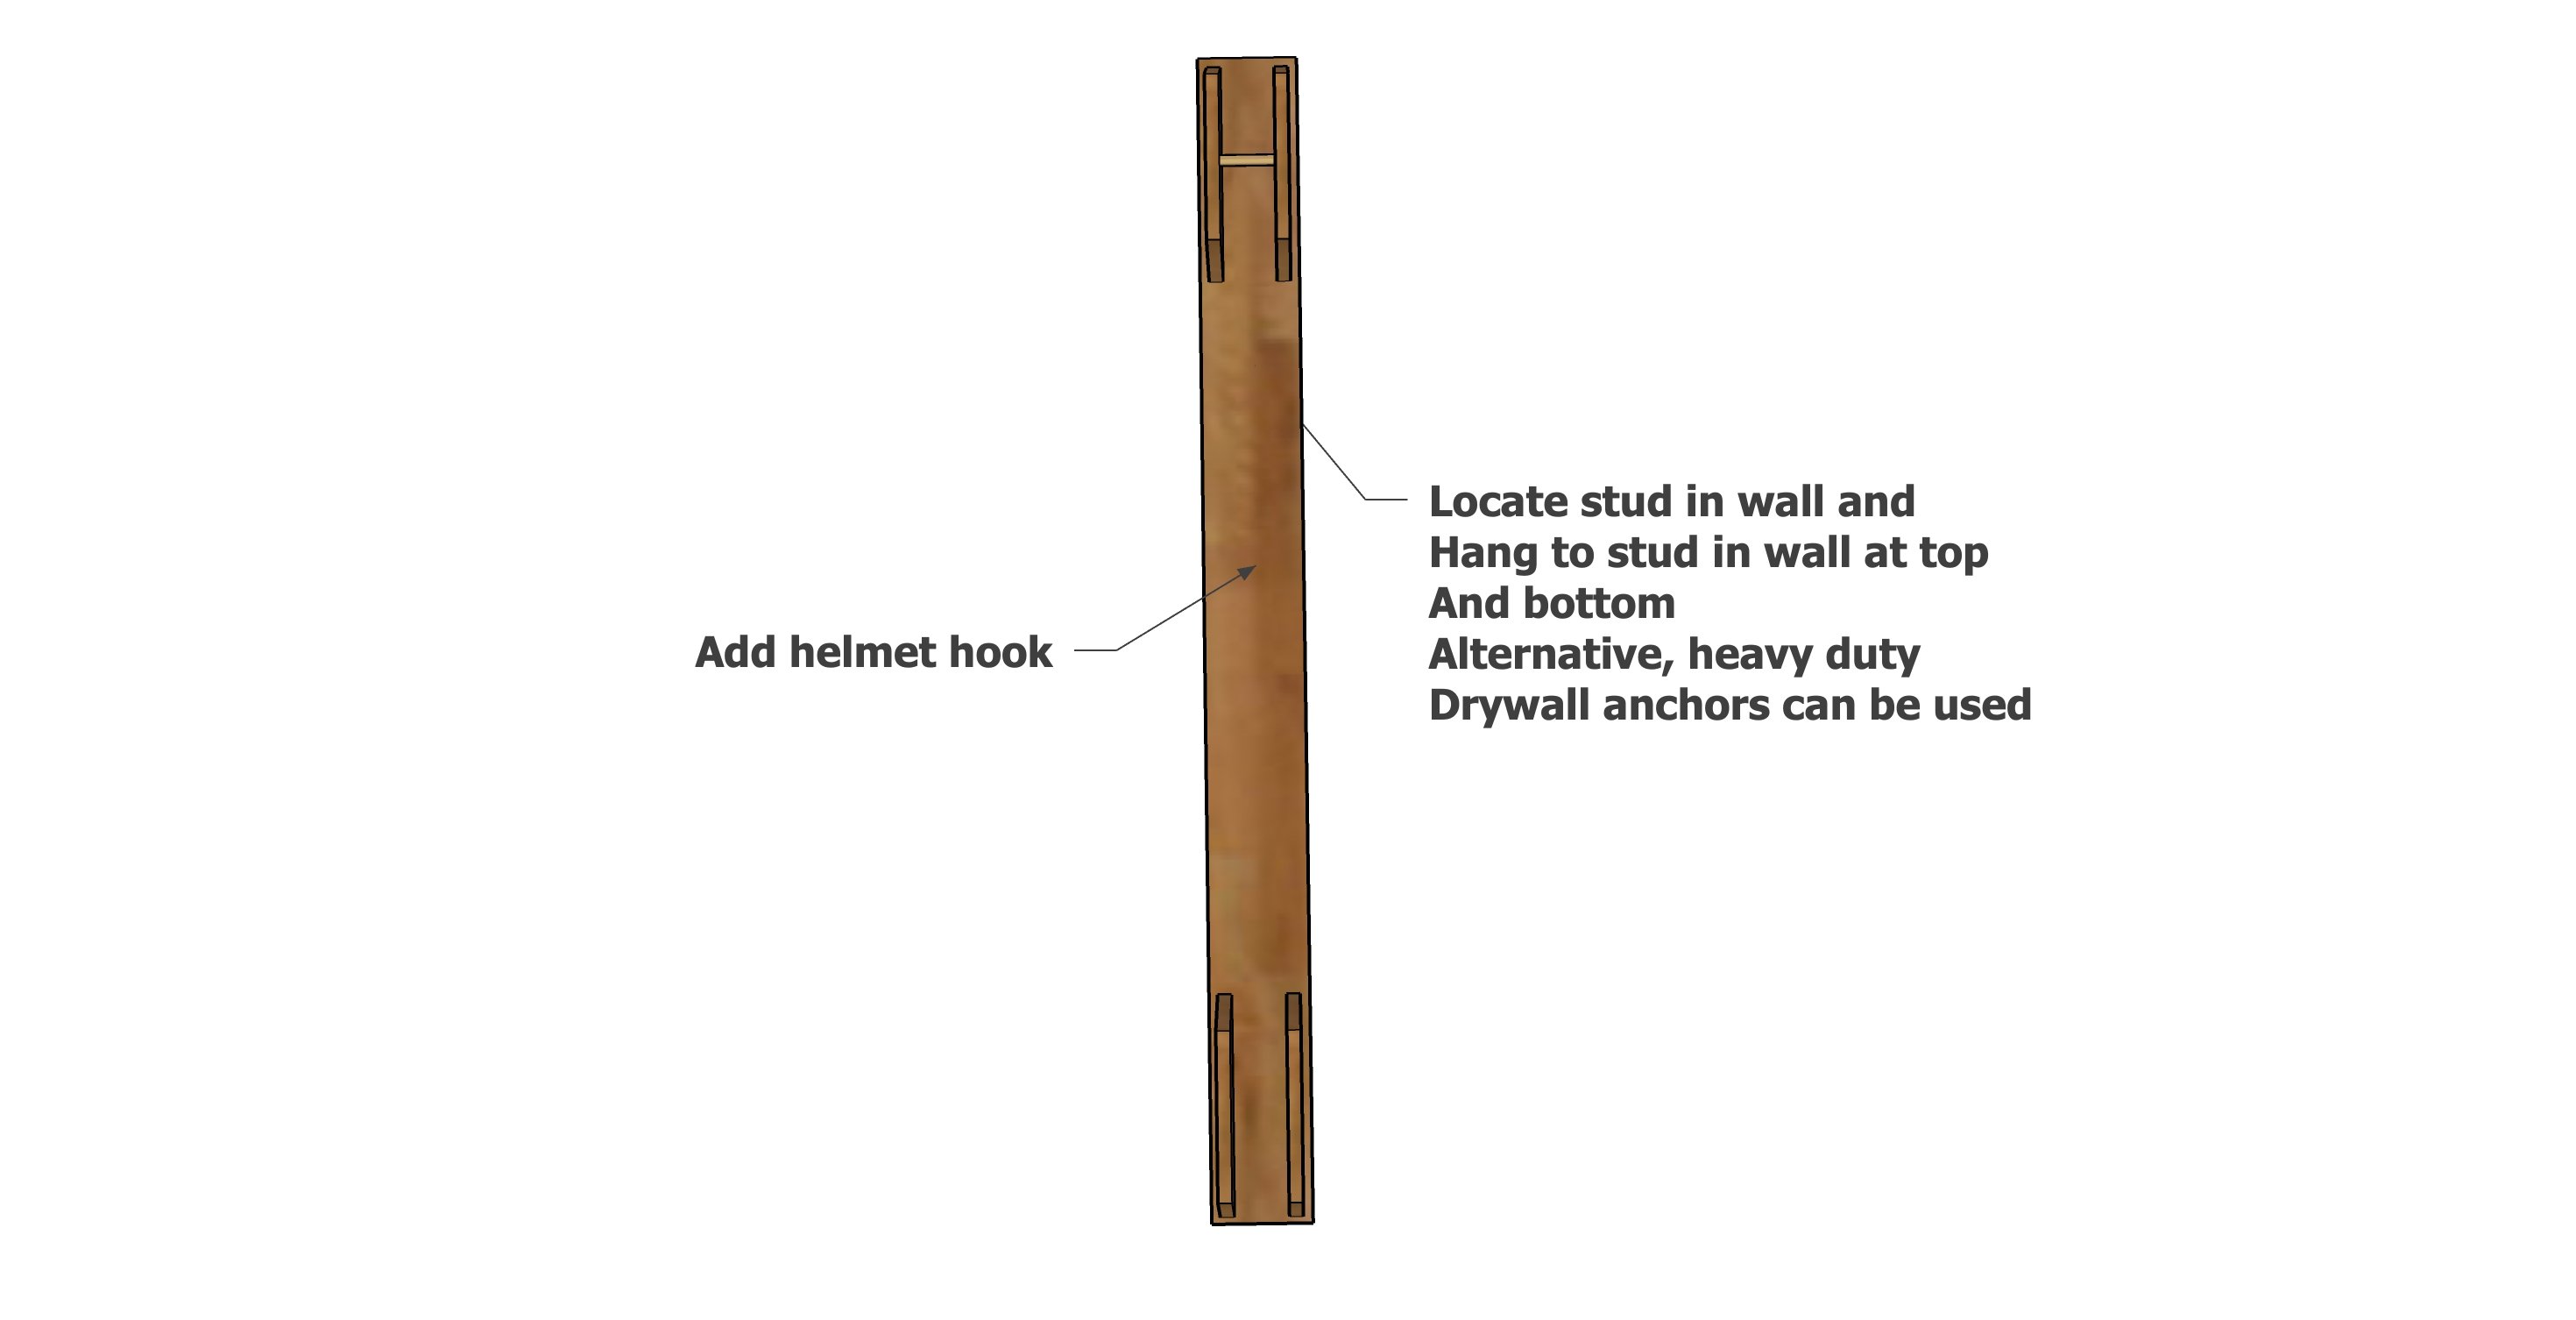
Locate studs in the wall and hang.
Add the helmet hanger.
