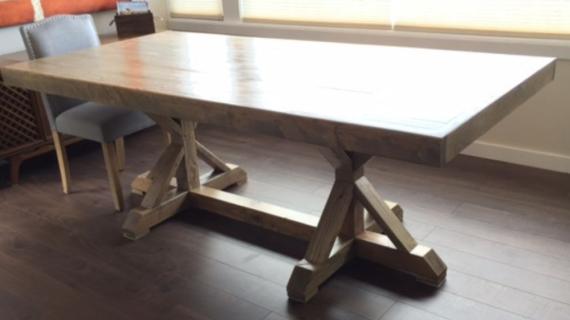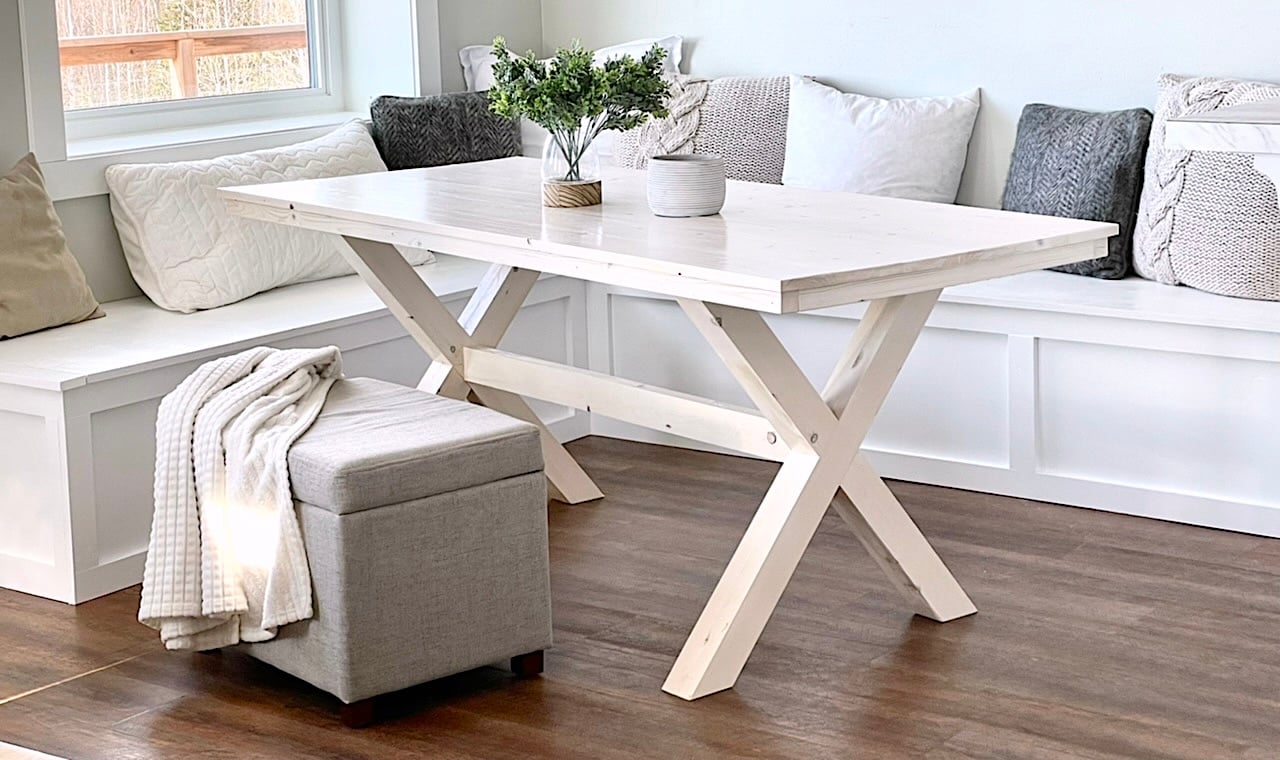

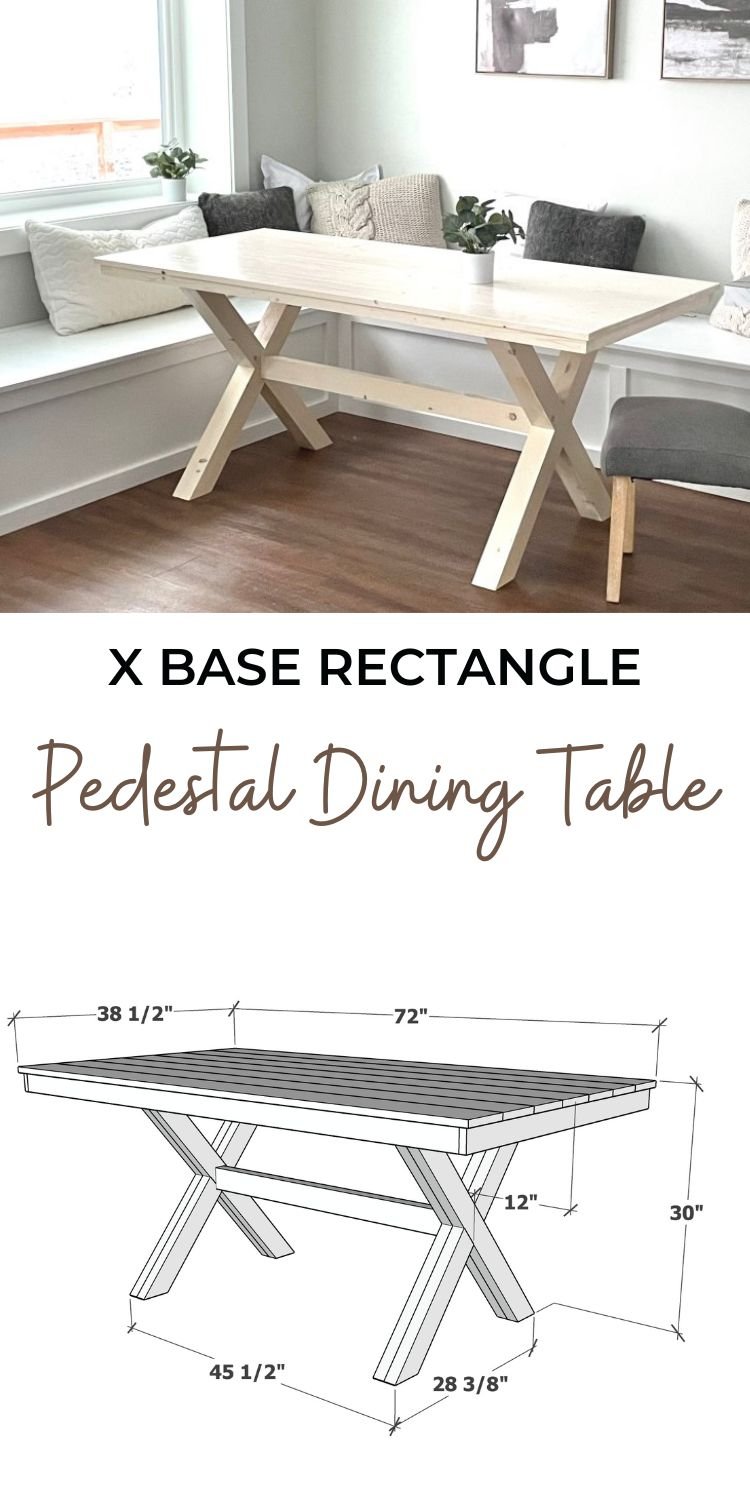
Build your own rectangle dining table with an X base. This table features no outside legs, so it's perfect for banquettes or smaller dining rooms. Pair with our free dining banquette plans.
Free step by step plans from Ana-White.com include step by step diagrams, shopping and cut list and a build video.

Why Built this X Base Dining Table
-
An X base dining table is a modern take on the pedestal table.
-
A pedestal table allows easier movement around the table
-
Is great for small spaces
-
Perfect for a banquette or corner seating
-
Sturdy but lightweight
-
Easy to build design
Video Tutorial for Building this X Base Dining Table
Watch this table being built. It's not a difficult build and the finish is everything.
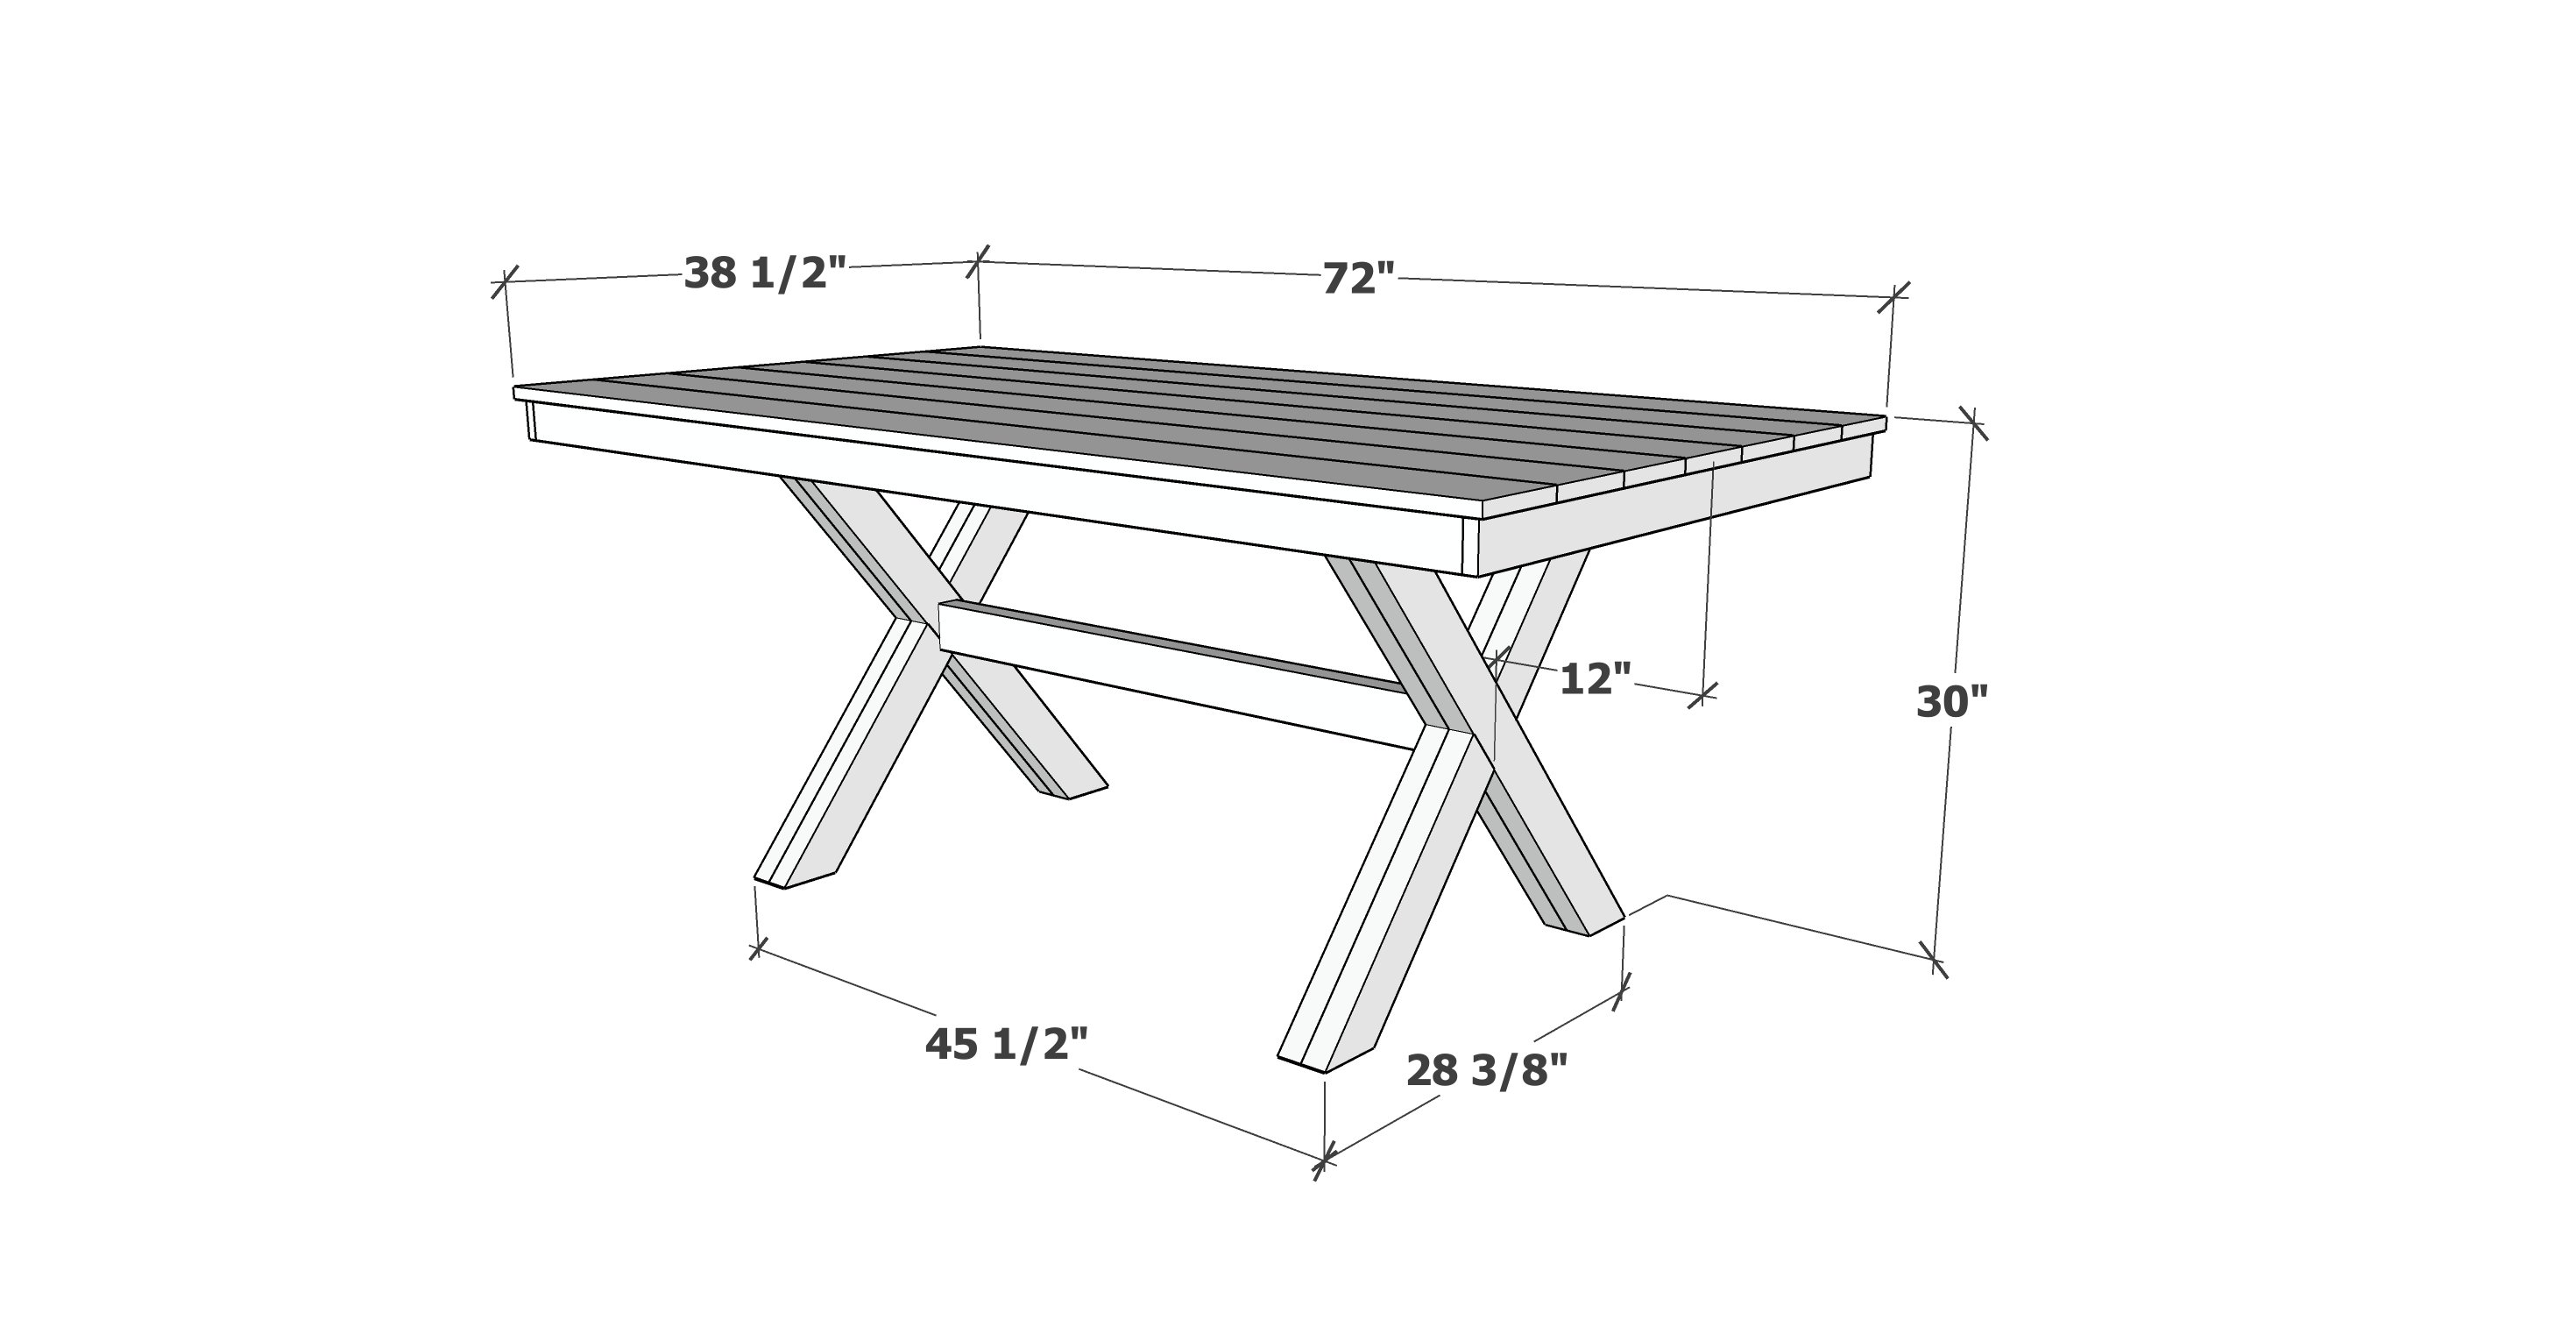
Pin For Later!
Preparation
- 7 - 1x6 boards, 6 feet long
- 3 - 1x3 boards
- 4 - 2x4 boards, 10 feet long
- (75) 1-1/4" pocket hole screws
- (12) 2-1/2" pocket hole screws
- 2" brad nails
- wood glue
- 120 grit sandpaper
- 220 grit sandpaper
- Primer and paint, or wood stain and poly
Tabletop
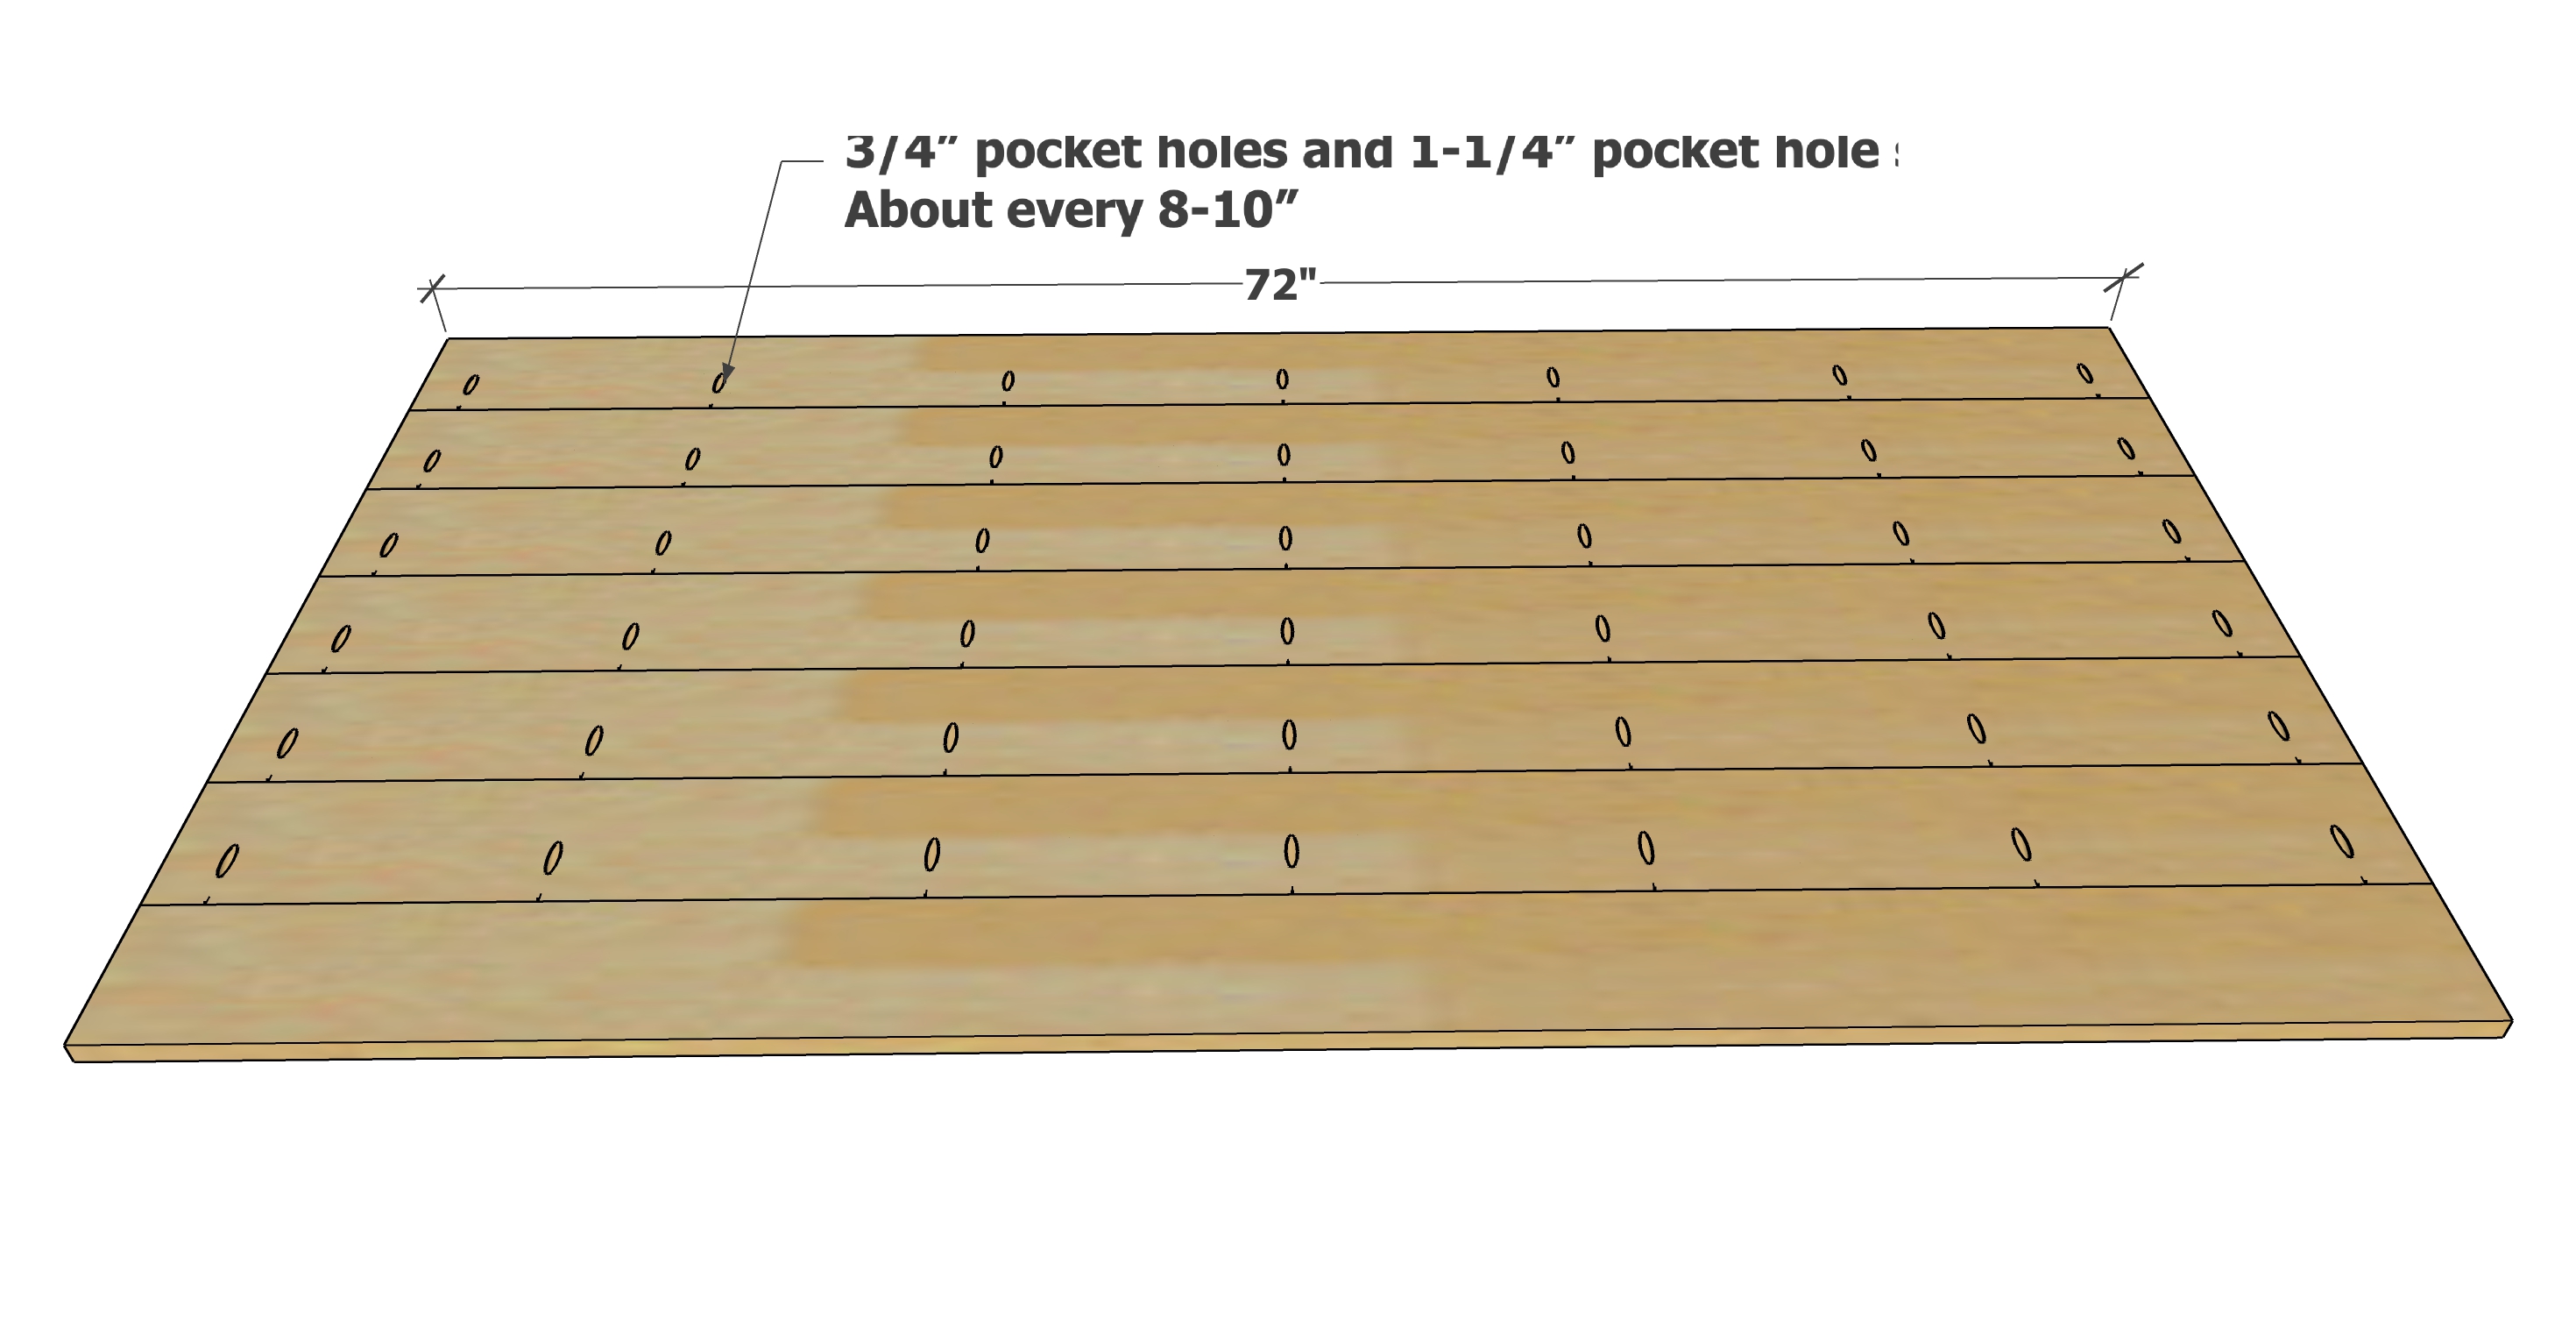
- 7 - 1x6 @ 72" - tabletop boards
- 2 - 1x3 @ 69-1/2" - tabletop apron sides
- 2 - 1x3 @ width of tabletop MINUS 1" - tabletop ends
X Base
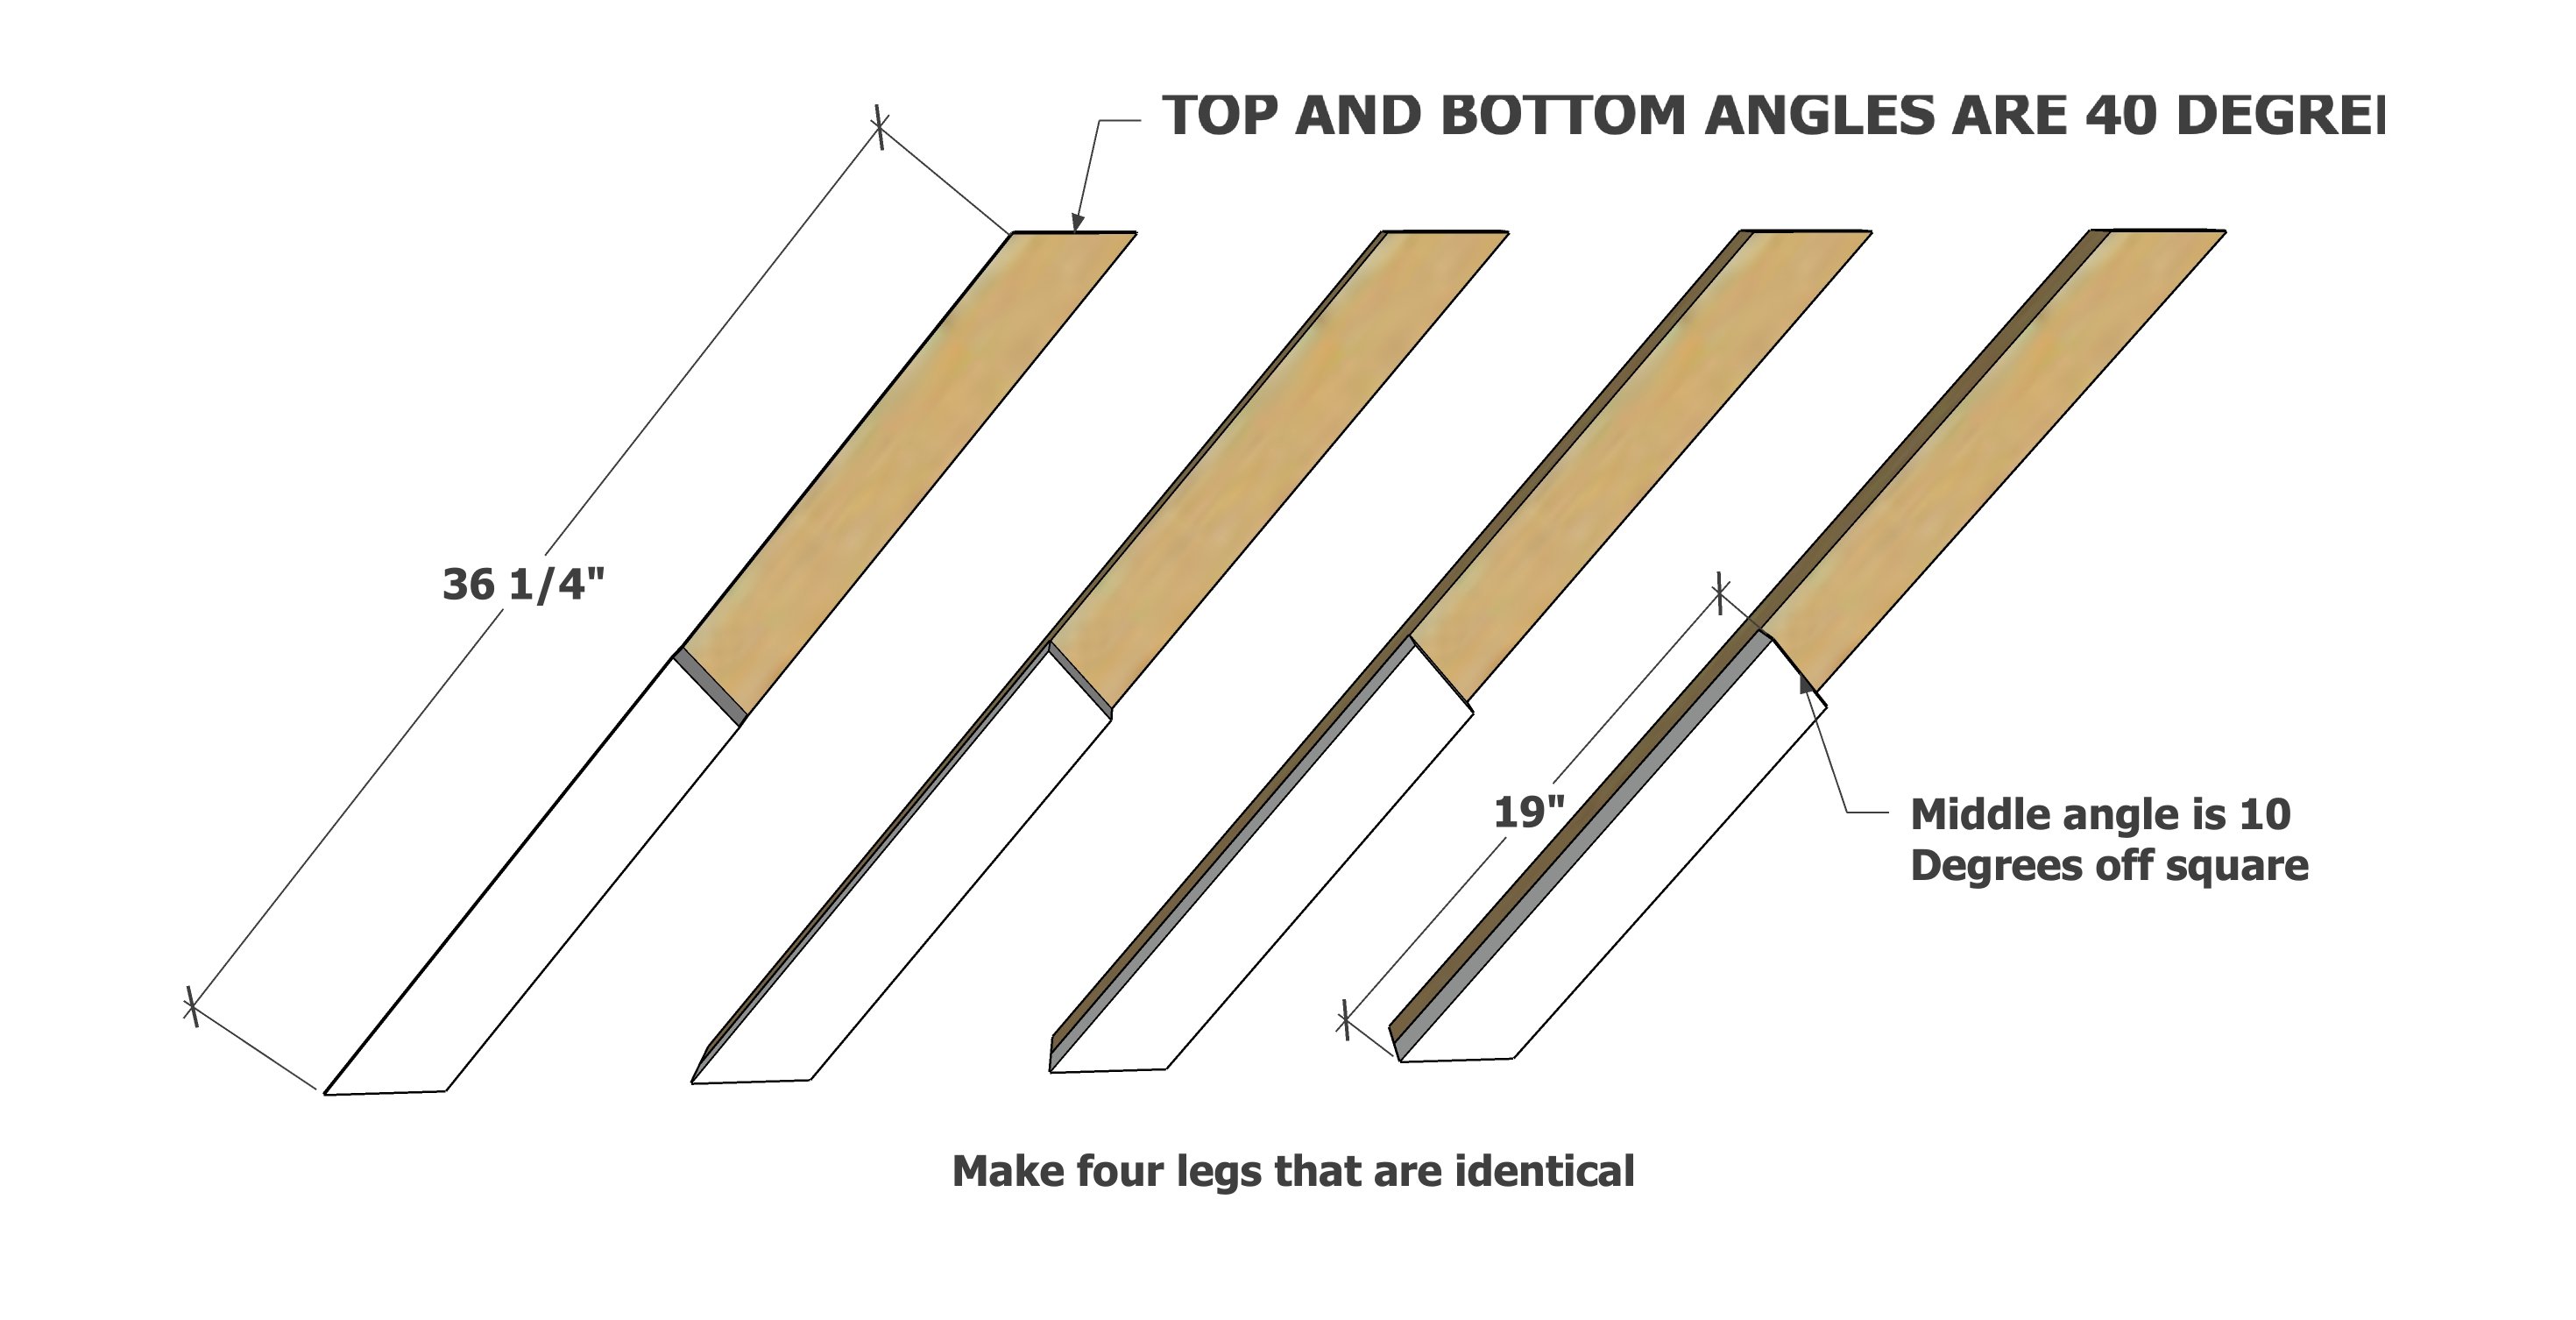
- 4 - 2x4 @ 36-1/4" - both ends cut at 40 degrees off square, long point to short point measurement, ends ARE parallel
- 4 - 2x4 @ 19" - one end cut at 40 degrees off square, other end cut at 10 degrees off square, long point to long point measurement
- 4 - 2x4 @ about 17" (measure and cut to fit) - one end cut at 40 degrees off square, other end cut at 10 degrees off square, long point to long point measurement
- 2 - 2x4 @ about 36" (measure and cut to fit) - top of the Xs
- 1 - 2x4 @ about 42" (measure and cut to fit) - center leg support to tie X together


Instructions
Step 1
NOTE: For a nicer tabletop, the 1x6 boards can be ripped on the edges to create a square edge. Run the boards through a tablesaw, taking 1/4" off each side. This will affect the overall tabletop size, but this plan has accounted for that adjustment.
Drill 3/4" pocket holes every 8" on all but one of the tabletop boards underside. Attach with 1-1/4" kreg pocket hole screws.
Step 2

Measure and cut the tabletop aprons.
Drill 3/4" pocket holes as shown for attaching the tabletop. Also drill on ends of longer aprons boards, two 3/4" pocket holes for building the apron.
Build the apron first with 1-1/4" pocket hole screws. Then attach completed apron to underside of tabletop with 1/2" gap on all sides.
This completes the tabletop build. Sand well with 120 grit sandpaper working in the direction of the wood grain.
Step 3
NOTE: For a nicer base, I did rip my 2x4s on the tablesaw down to 3" wide (taking 1/4" off each side). This plan does account for this adjustment.
Cut the 36-1/4" and the 19" leg pieces using a compound miter saw.
Attach the 19" pieces to the 36-1/4" pieces with glue and 2" brad nails.
All four leg pieces should be identical.
TIP: Mark the 19" piece as the bottom piece - it may get confusing to orientate in late steps.
Step 4
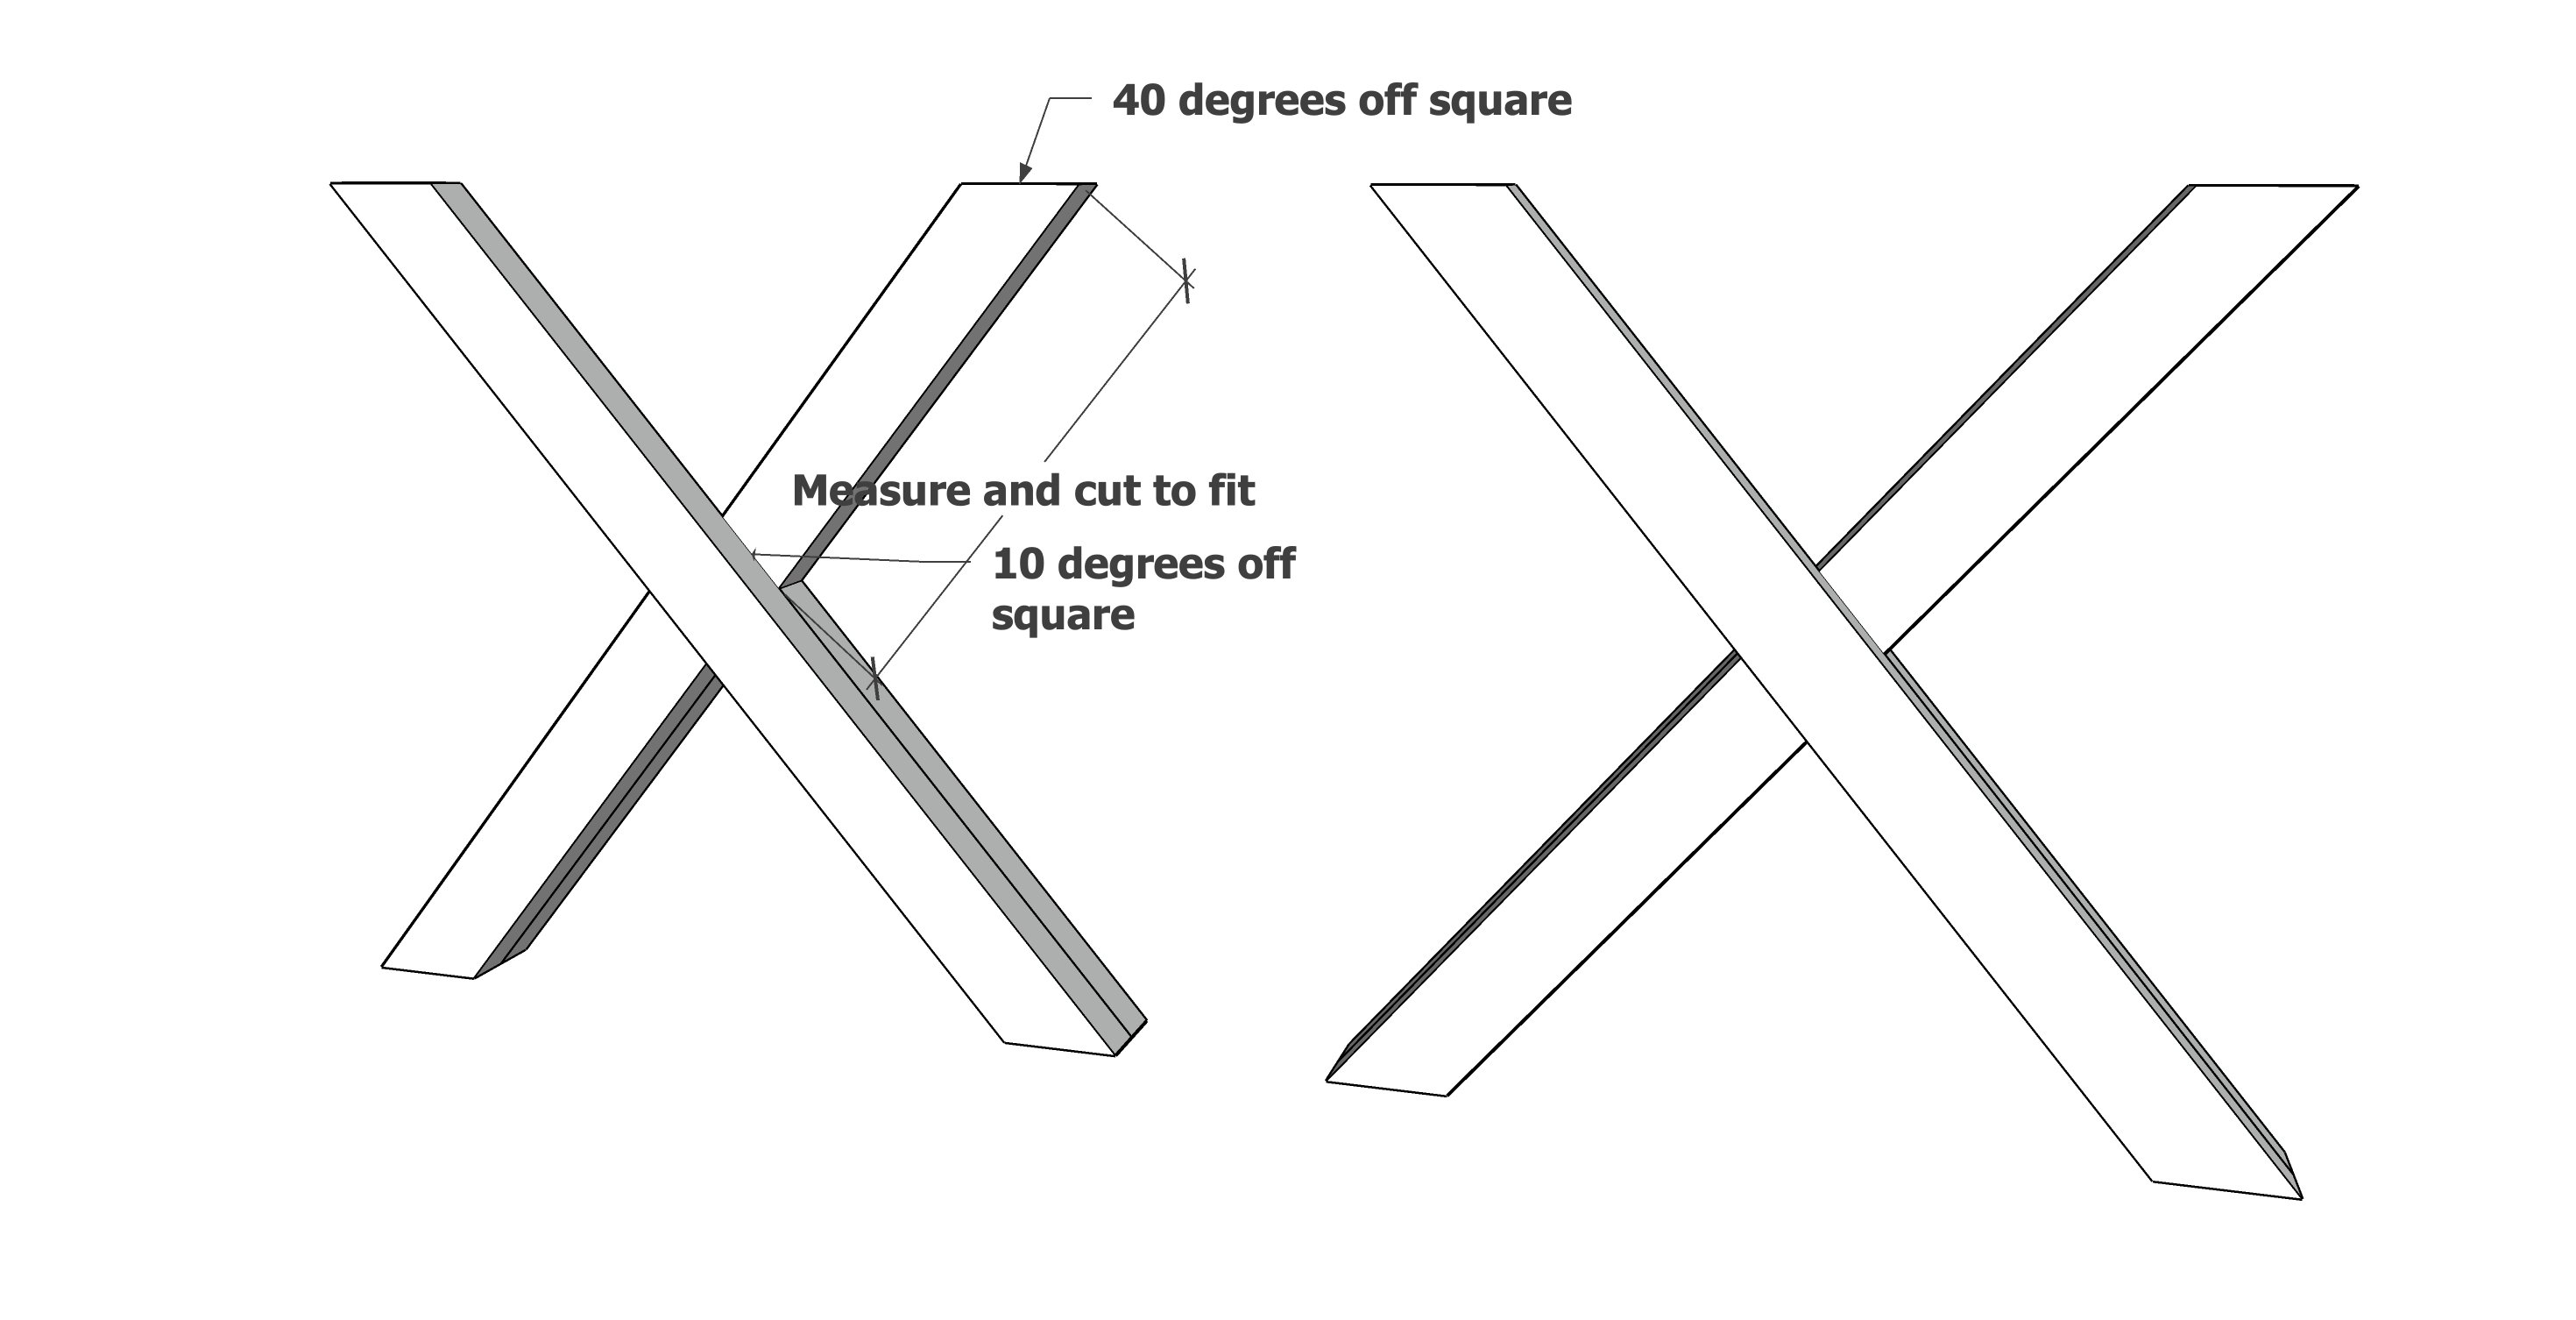
Cross two of the leg pieces and mark.
Measure the marked area and cut to fit the fill in leg pieces.
Attach the main leg pieces together at the center.
Step 5

Attach the fill in leg pieces with 2" brad nails and wood glue.
Step 6
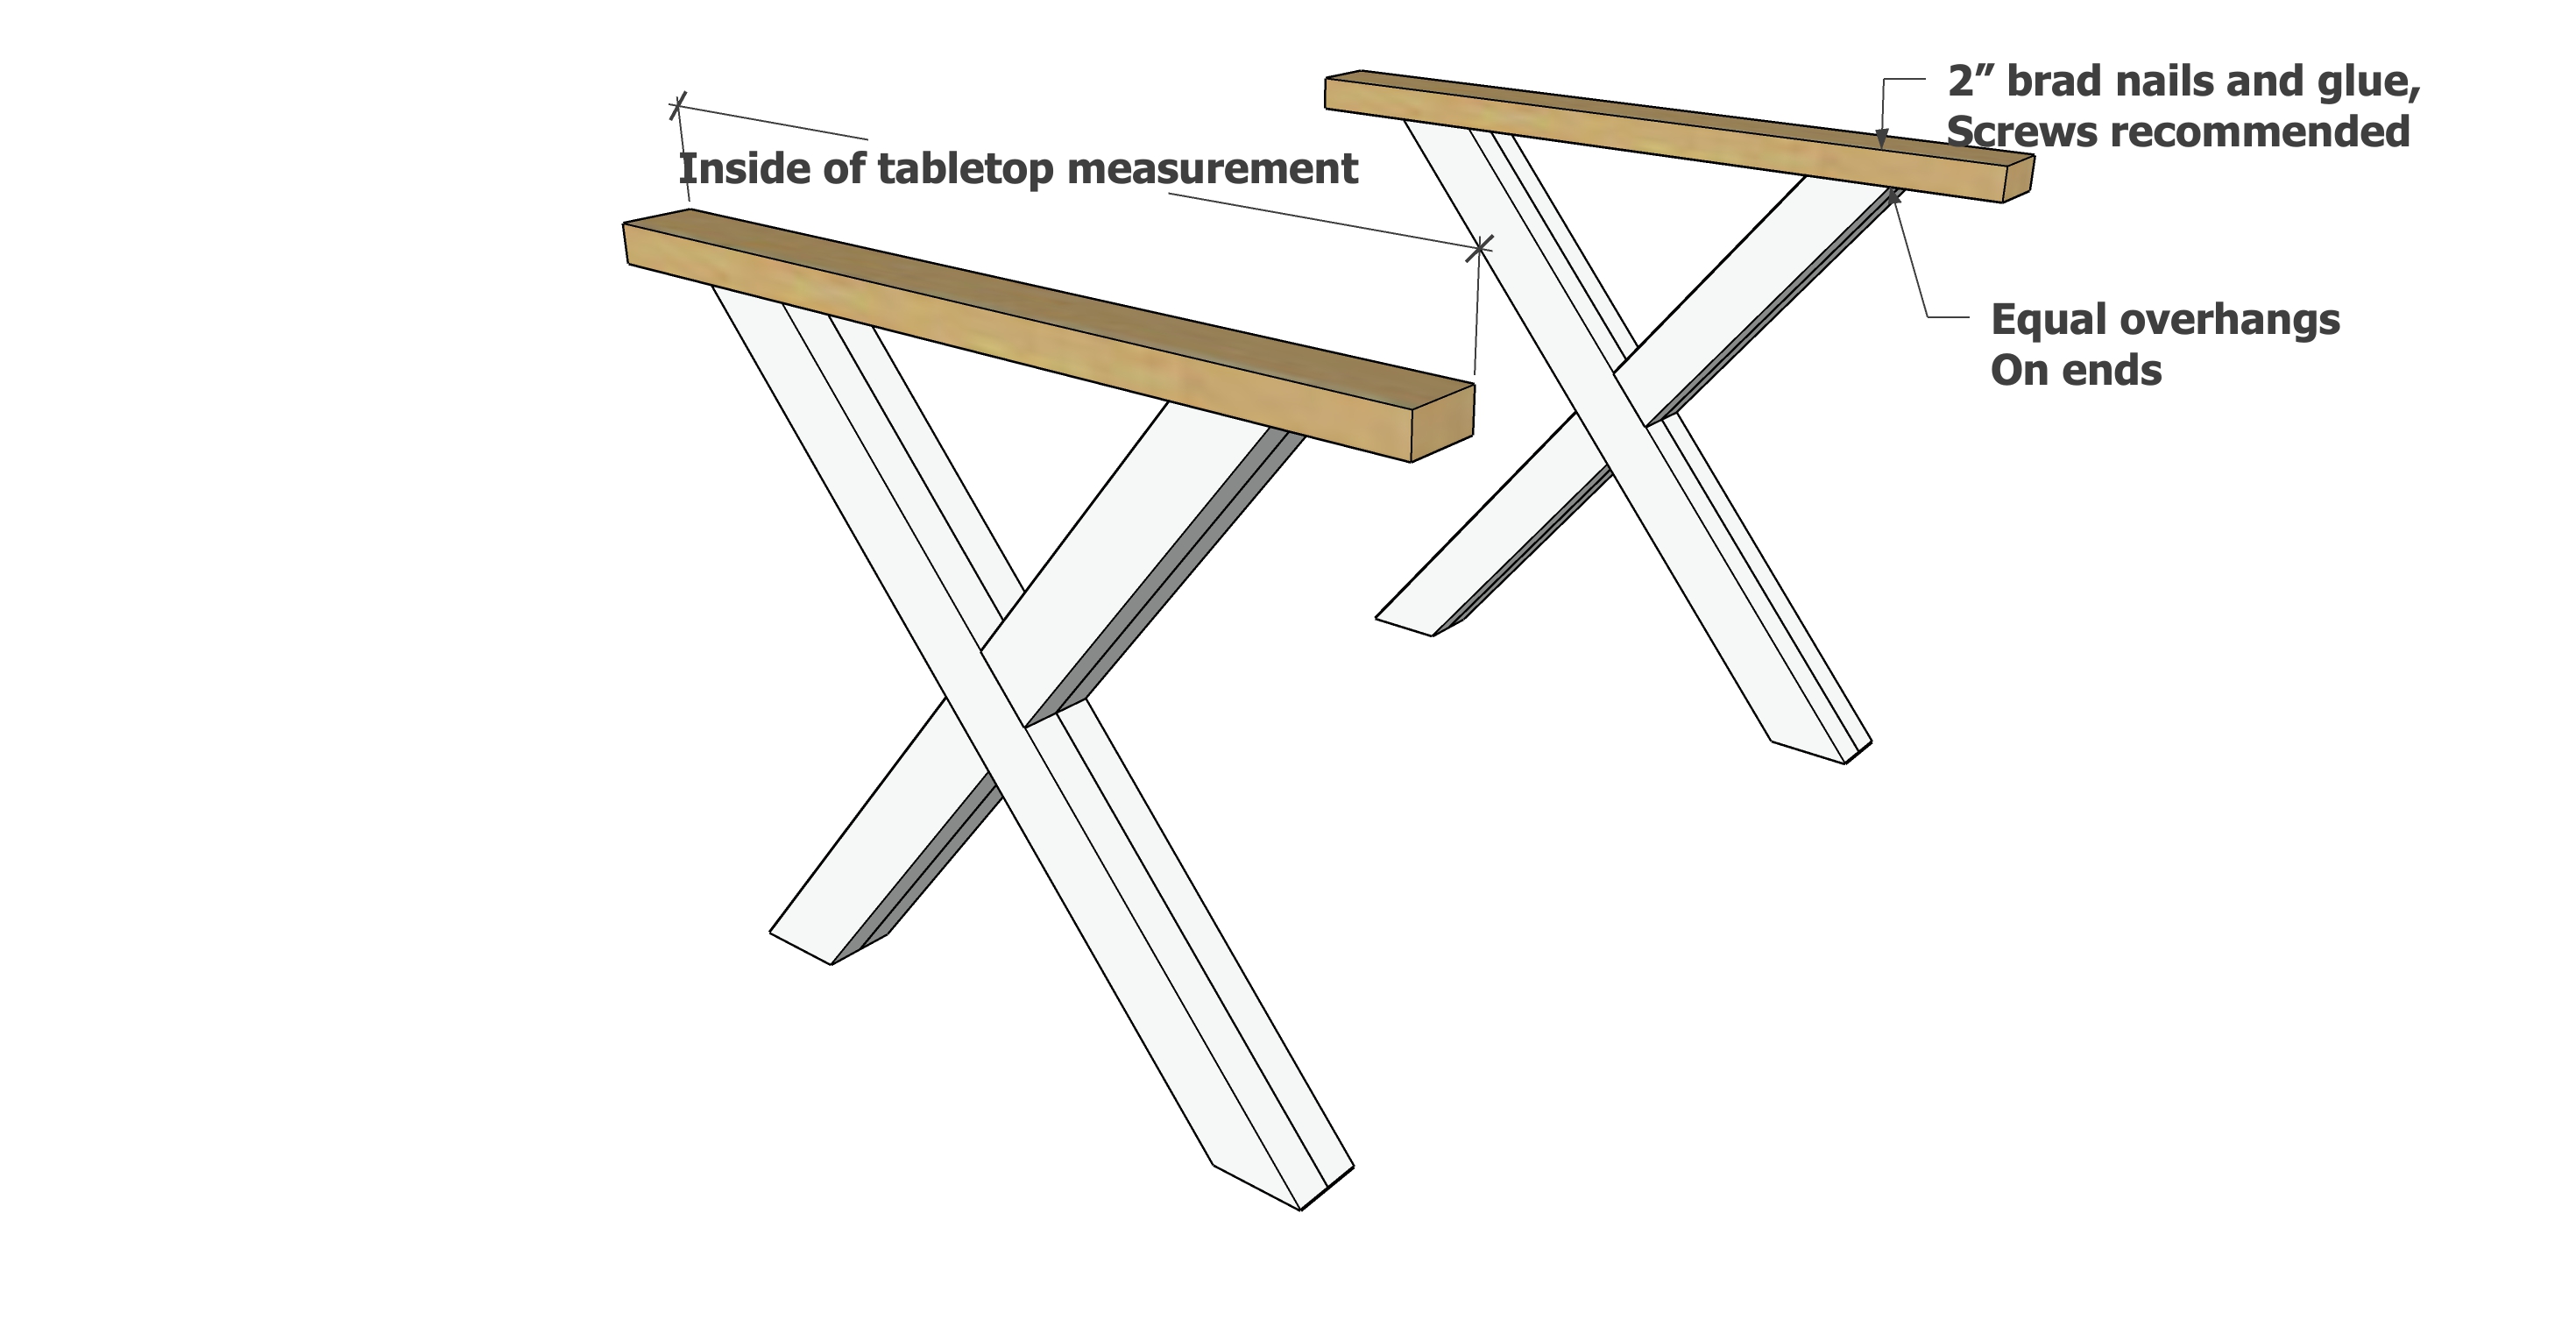
Measure the inside of your tabletop (between the 1x3 aprons) and cut two 2x4s to this length.
Attach to the tops of the leg sets using 2-1/2" screws (you can use Kreg Screws)
Step 7

Set the legs inside the table and screw through the apron to attach.
Then measure at the base and cut the center support piece.
Drill two 1-1/2" pocket holes on each end of the center piece and attach to the center of the Xs with 2-1/2" pocket hole screws.