Community Brag Posts
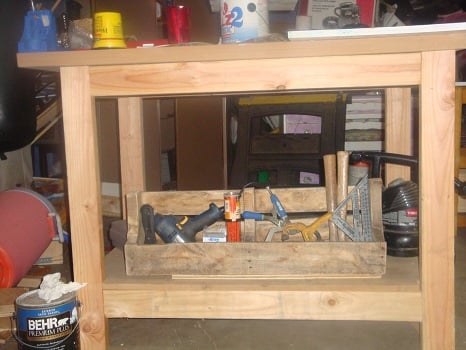
Kreg Jig Workbench

I wanted to start building right away....But had nowhere to build! Anna suggested the Kreg Jig, and since my birthday is when I found the site, "suggested" this as a gift to my daughter, who passed it on to the big guy...and viola, Master Kreg Jig. Happy Birthday to me! I got the plans from the Kreg Jig Community....super helpful site, answer all questions, and a great resource to beginner builders.
The worktop is made of 2 pieces of MDF, which is SUPER durable. Loved working with it. This took a day, and not a day goes by that I don't use or get some kind of compliment on it. What's really neat is there is a utube video to follow as you build geared towards the just starting out builder, which shows layout, cuts, jigging, very easy to follow. Plan is on Kreg Jig Community, free if you register, as well as lots of cool free plans....not quite as cool as Anna's :)
Very reasonably priced about $70 inc 100 ct Kreg screws
Estimated Cost
72.00
Estimated Time Investment
Afternoon Project (3-6 Hours)
Finish Used
left unfinished
Recommended Skill Level
Starter Project
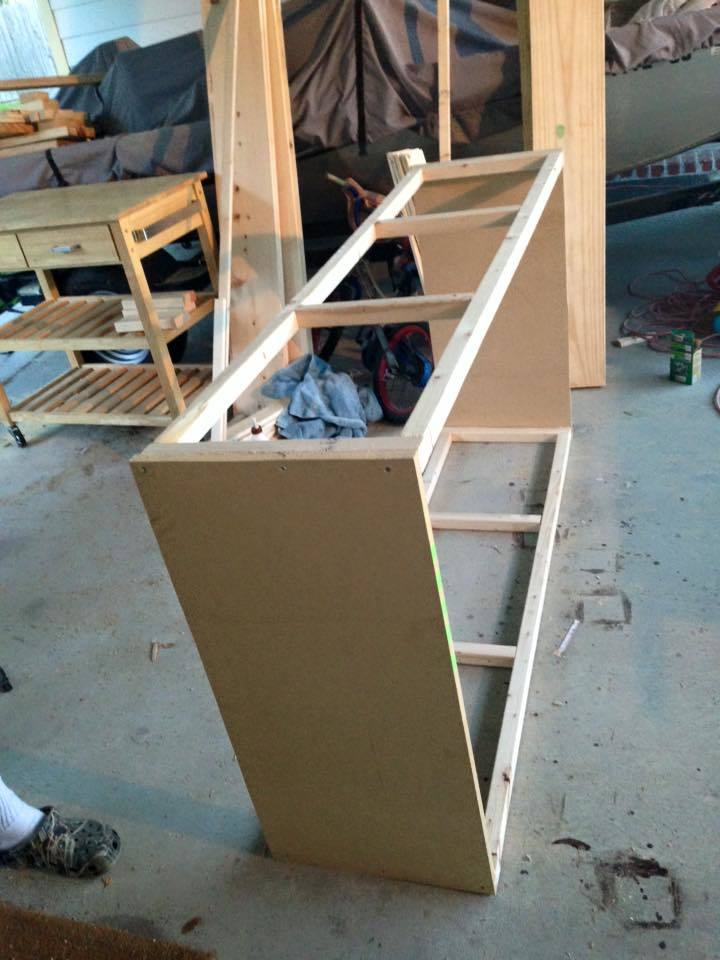
Wine Cabinet

I made this wine cabinet for my daughter Alicia from a picture she sent me from one she had seen someplace

Estimated Cost
Less than $50.00
Estimated Time Investment
Weekend Project (10-20 Hours)
Finish Used
A solution of extra fine steel wool disolved in Apple Cider Vinegar and Satin Polyurethane
Recommended Skill Level
Intermediate
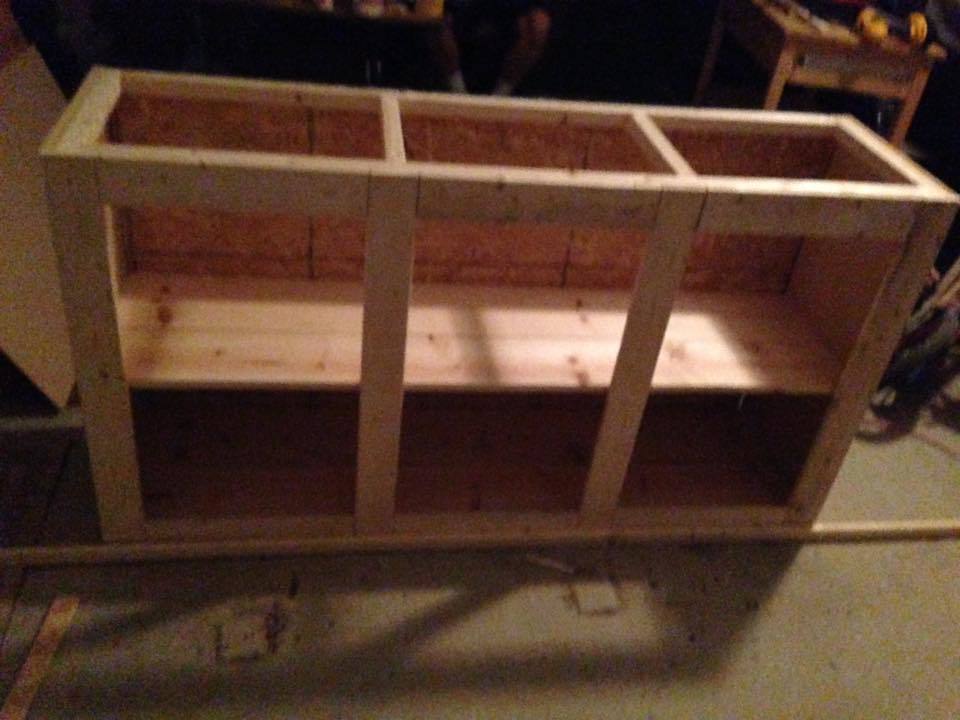
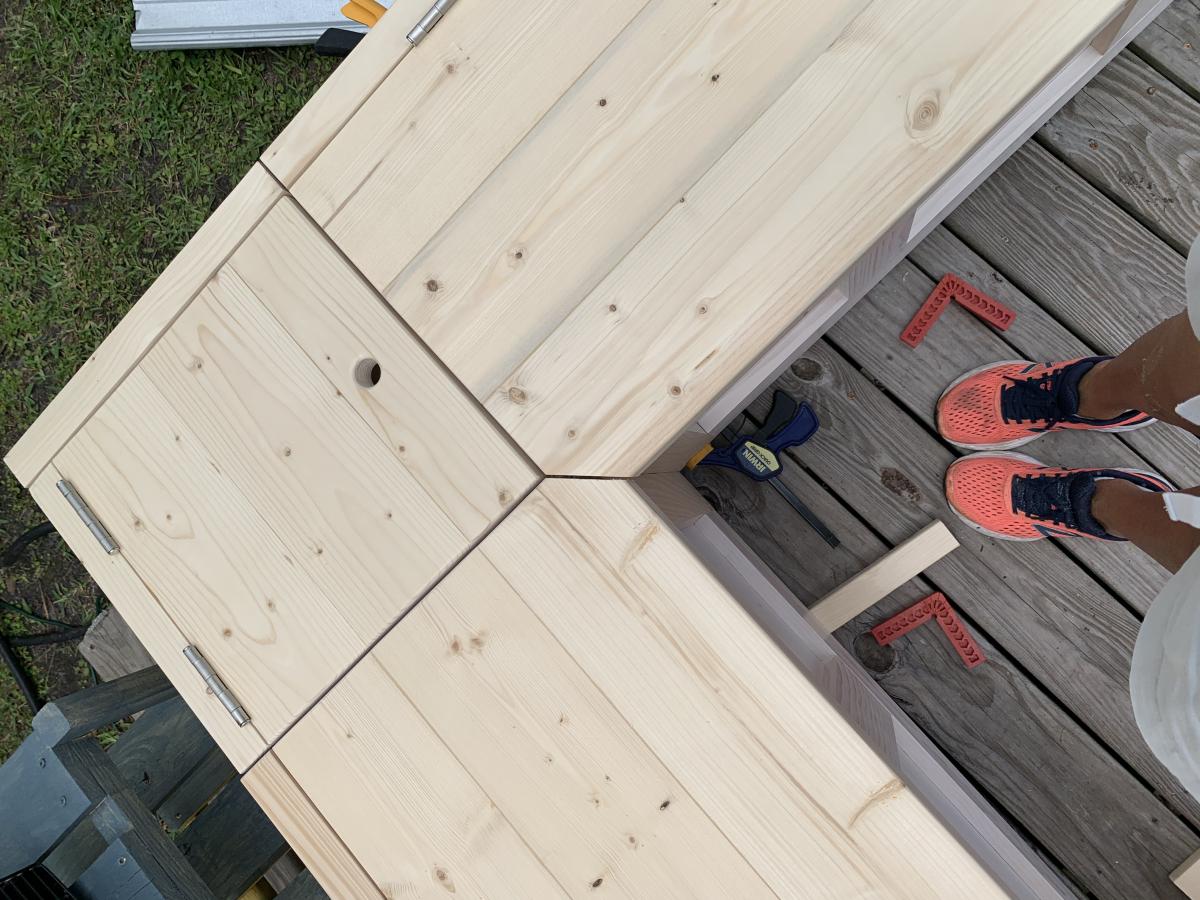
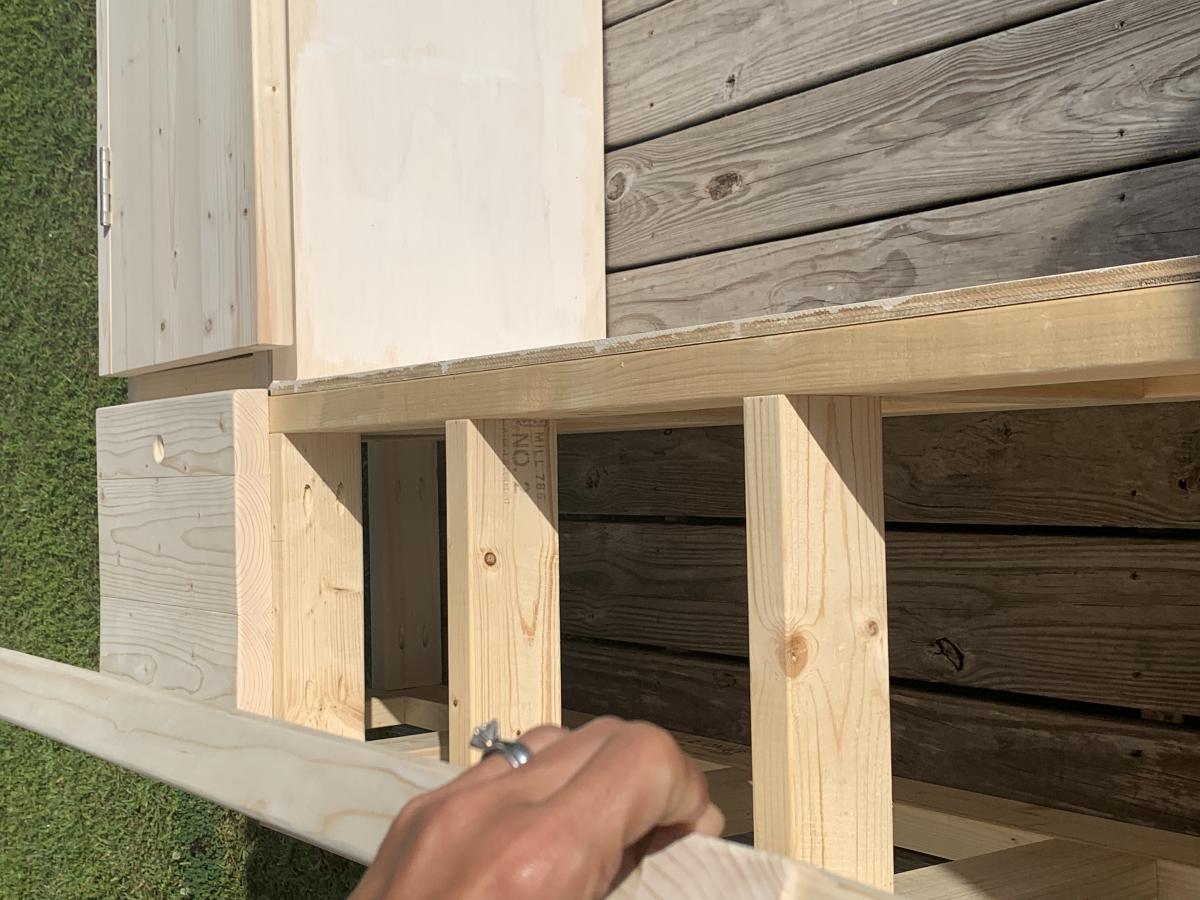
Sliding Door Console
I loved the sliding doors on this project! We decided to go with J hooks instead of wheels and did three spaces for shelves instead of 4 due to the amount of space we were filling.
This was an easy plan to follow, I just wish it would have had specific instructions for the sliding doors itself. I had to go on a search for an explanation on how to achieve it.
My husband and I work on our projects a few couple hours a day, so I would say this took about 6-8 hours, the staining of course takes time to dry, so I did not include that in the assembly time line.

Built from Plan(s)
Estimated Cost
I want to say we spent about $250.
We had stain and a few supplies from our previous project, but we did have to buy chalk paint and the brown gloss for finishing. I also excluded the cost for us buying the brad nailer.
We had stain and a few supplies from our previous project, but we did have to buy chalk paint and the brown gloss for finishing. I also excluded the cost for us buying the brad nailer.
Estimated Time Investment
Day Project (6-9 Hours)
Recommended Skill Level
Beginner
Comments
Fri, 12/11/2015 - 19:55
Love the J hooks!
Looks great! Any chance you could share how you did the doors and j hooks? Thanks!
Sister project
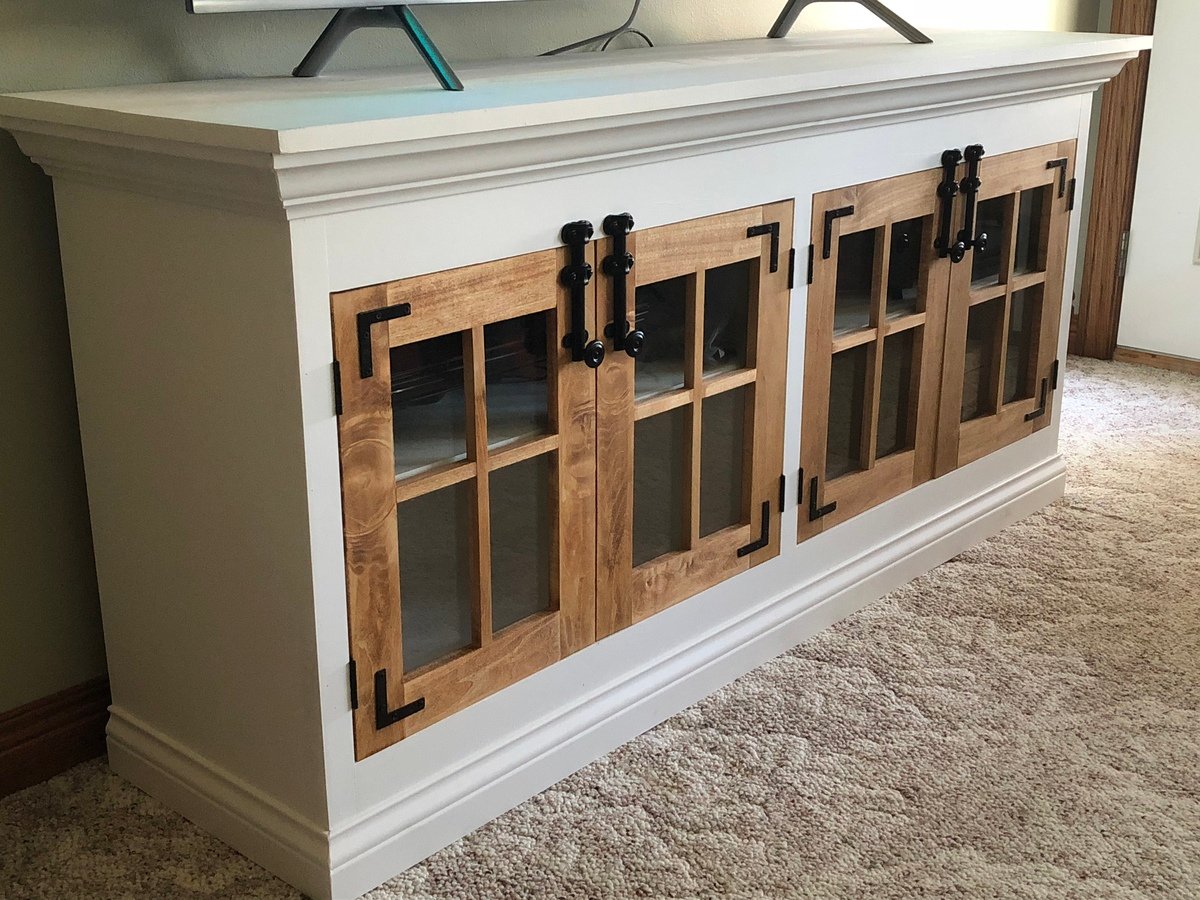
Built for my sister. Bolts from Home Depot. Flat corner brackets are spray painted and hinges ordered from Lowe’s.

Built from Plan(s)
Estimated Cost
About 475 with custom glass panes.
Estimated Time Investment
Week Long Project (20 Hours or More)
Finish Used
Used a white paint with enamel finish for hardness. Doors are stained for trim match in my sisters house but have a coat of wipe on poly on top.
Recommended Skill Level
Intermediate
Comments

Tue, 06/05/2018 - 14:48
Gorgeous Media Console for Sister!
Bet your sister is happy!!! Stunning!
Thanks for adding a brag post!
Ana
Banquette Seating with storage
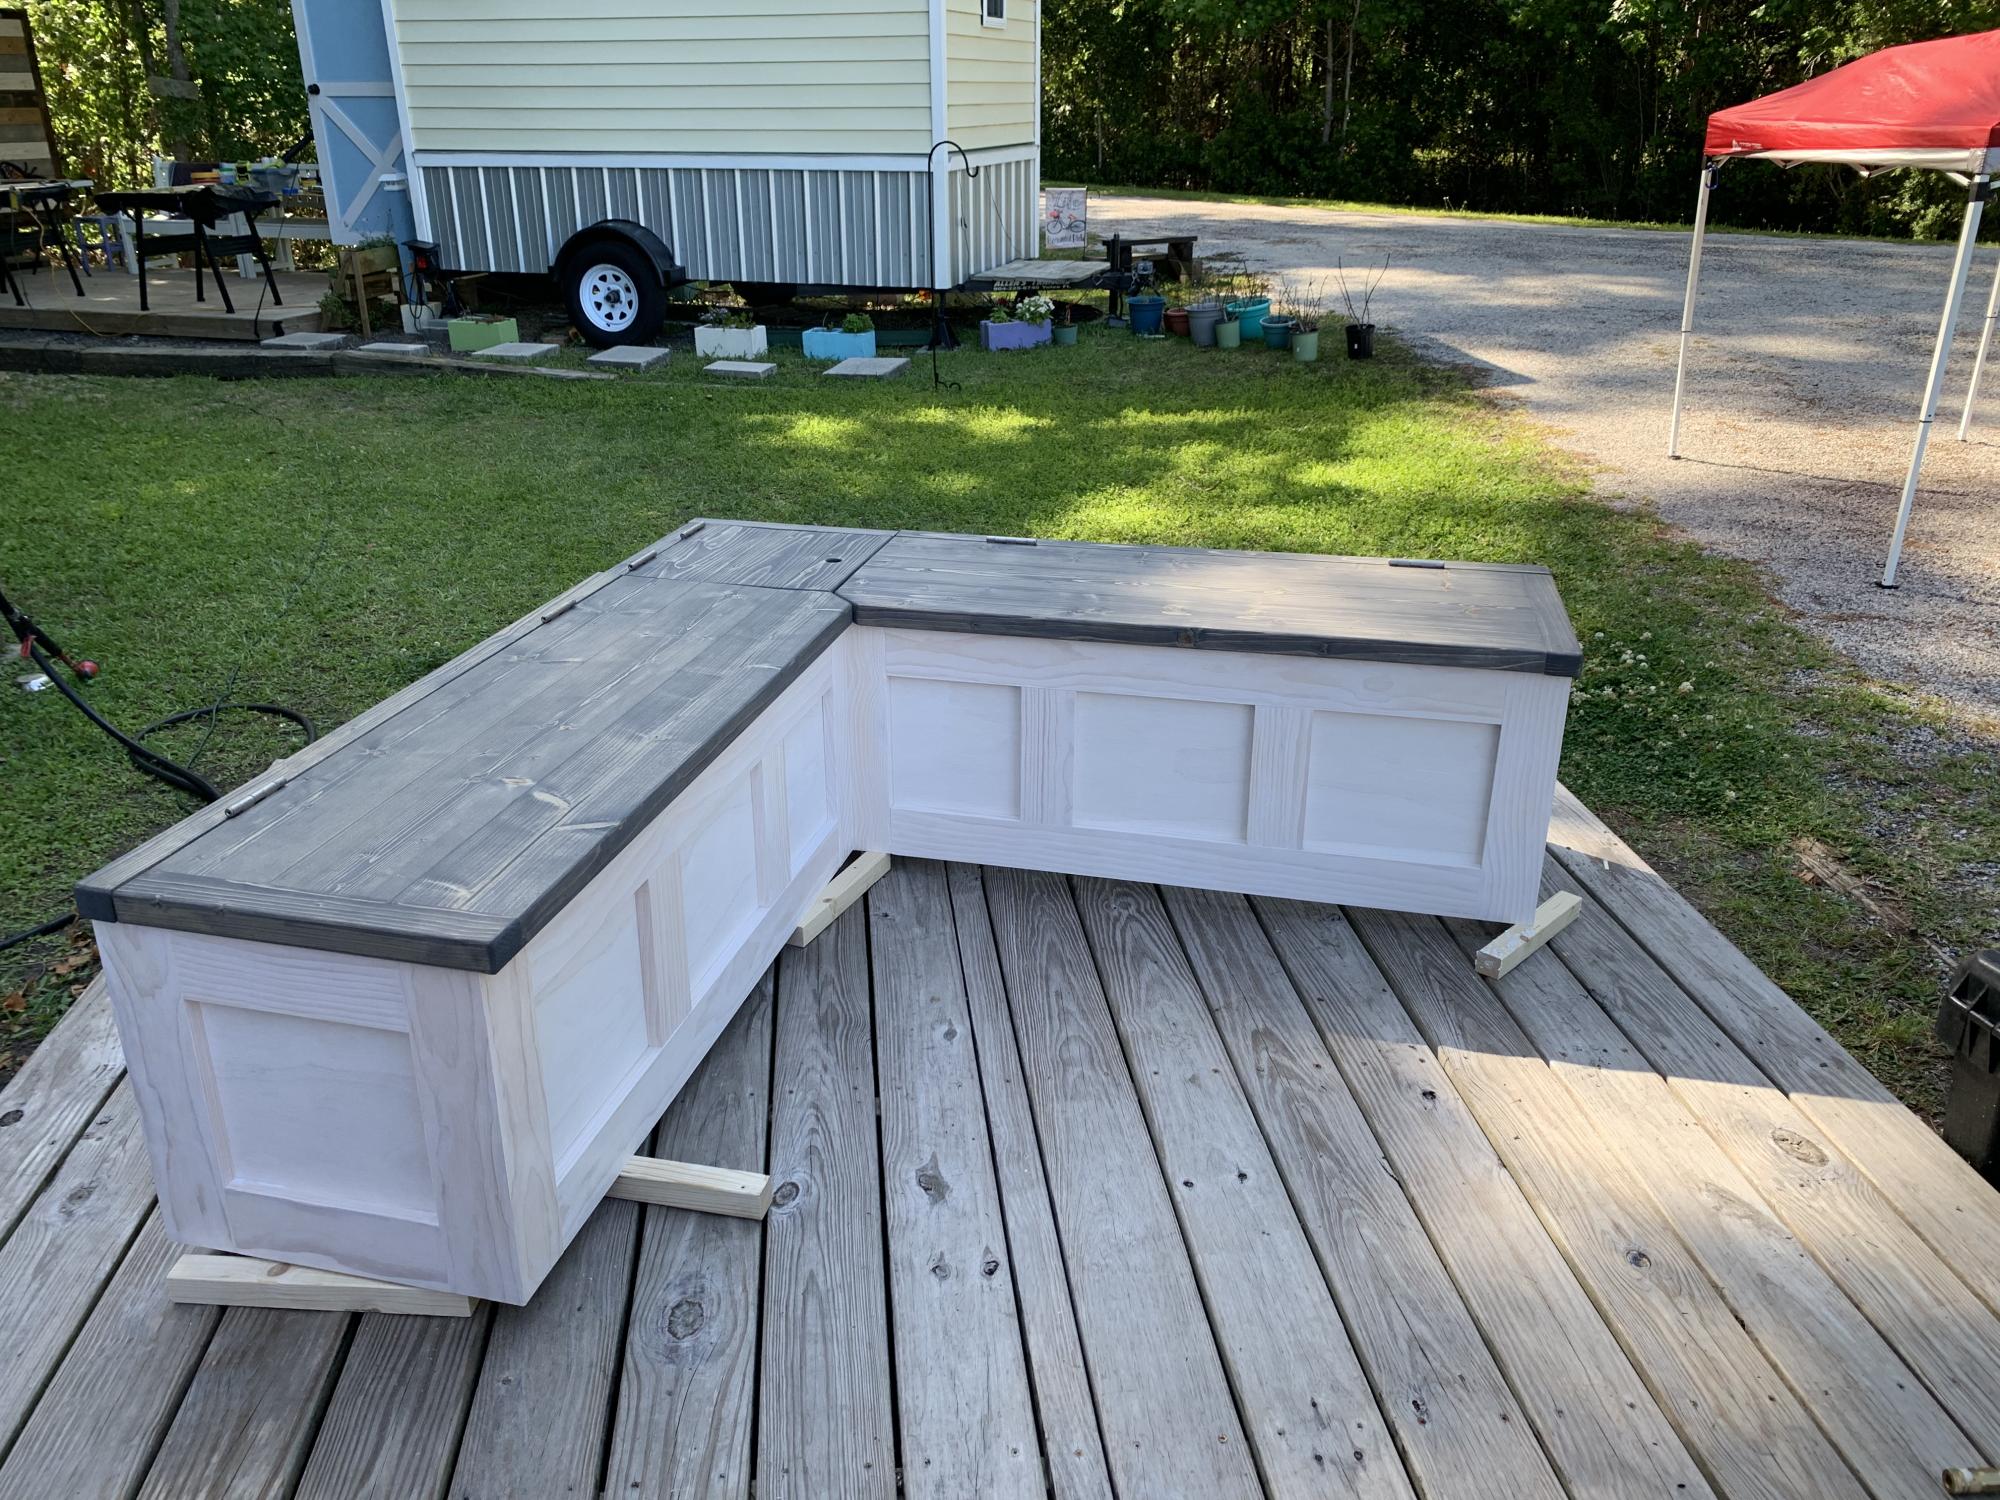
You didn’t have plans, so I had to “wing it” without you; however, I couldn’t have done it without all the practice I’ve had from all your plans on this website these past several years!
Built from Plan(s)
Comments
Tue, 04/26/2022 - 11:34
WOW, so much storage and just beautiful!
Job well done, that looks amazing! Thank you for sharing.
My Outdoor Modern Farm Table
I have a rustic outdoor room made out of our garage. We started the project last summer but it took until this weekend to get a table built. I was skeptical that I would be able to build a table myself, but I knew this table would fit in my backyard decor and I had to do it!
Using the plans from the site, I was able to build this almost entirely by myself. I got help for flipping it and adding the side aprons.
I started around noon with a trip to Lowe's and was done by about 7:30. The wood and screws cost around $50. I still have to finish it and am thinking of staining it dark brown.
Also, the guy at Lowe's recommended that I used deck screws. So that is what I used. I did not pre-drill all the holes. I also put the 2x6s in the table top, then flipped it over and added the 2x2 supports and screwed them in. I think that saved some time and seemed to work out okay.
Thanks for a great project, Ana! I am so proud of myself that I did this! Now I am off to make a bench to match.
Built from Plan(s)
Estimated Cost
50
Estimated Time Investment
Day Project (6-9 Hours)
Recommended Skill Level
Beginner
Picture frame
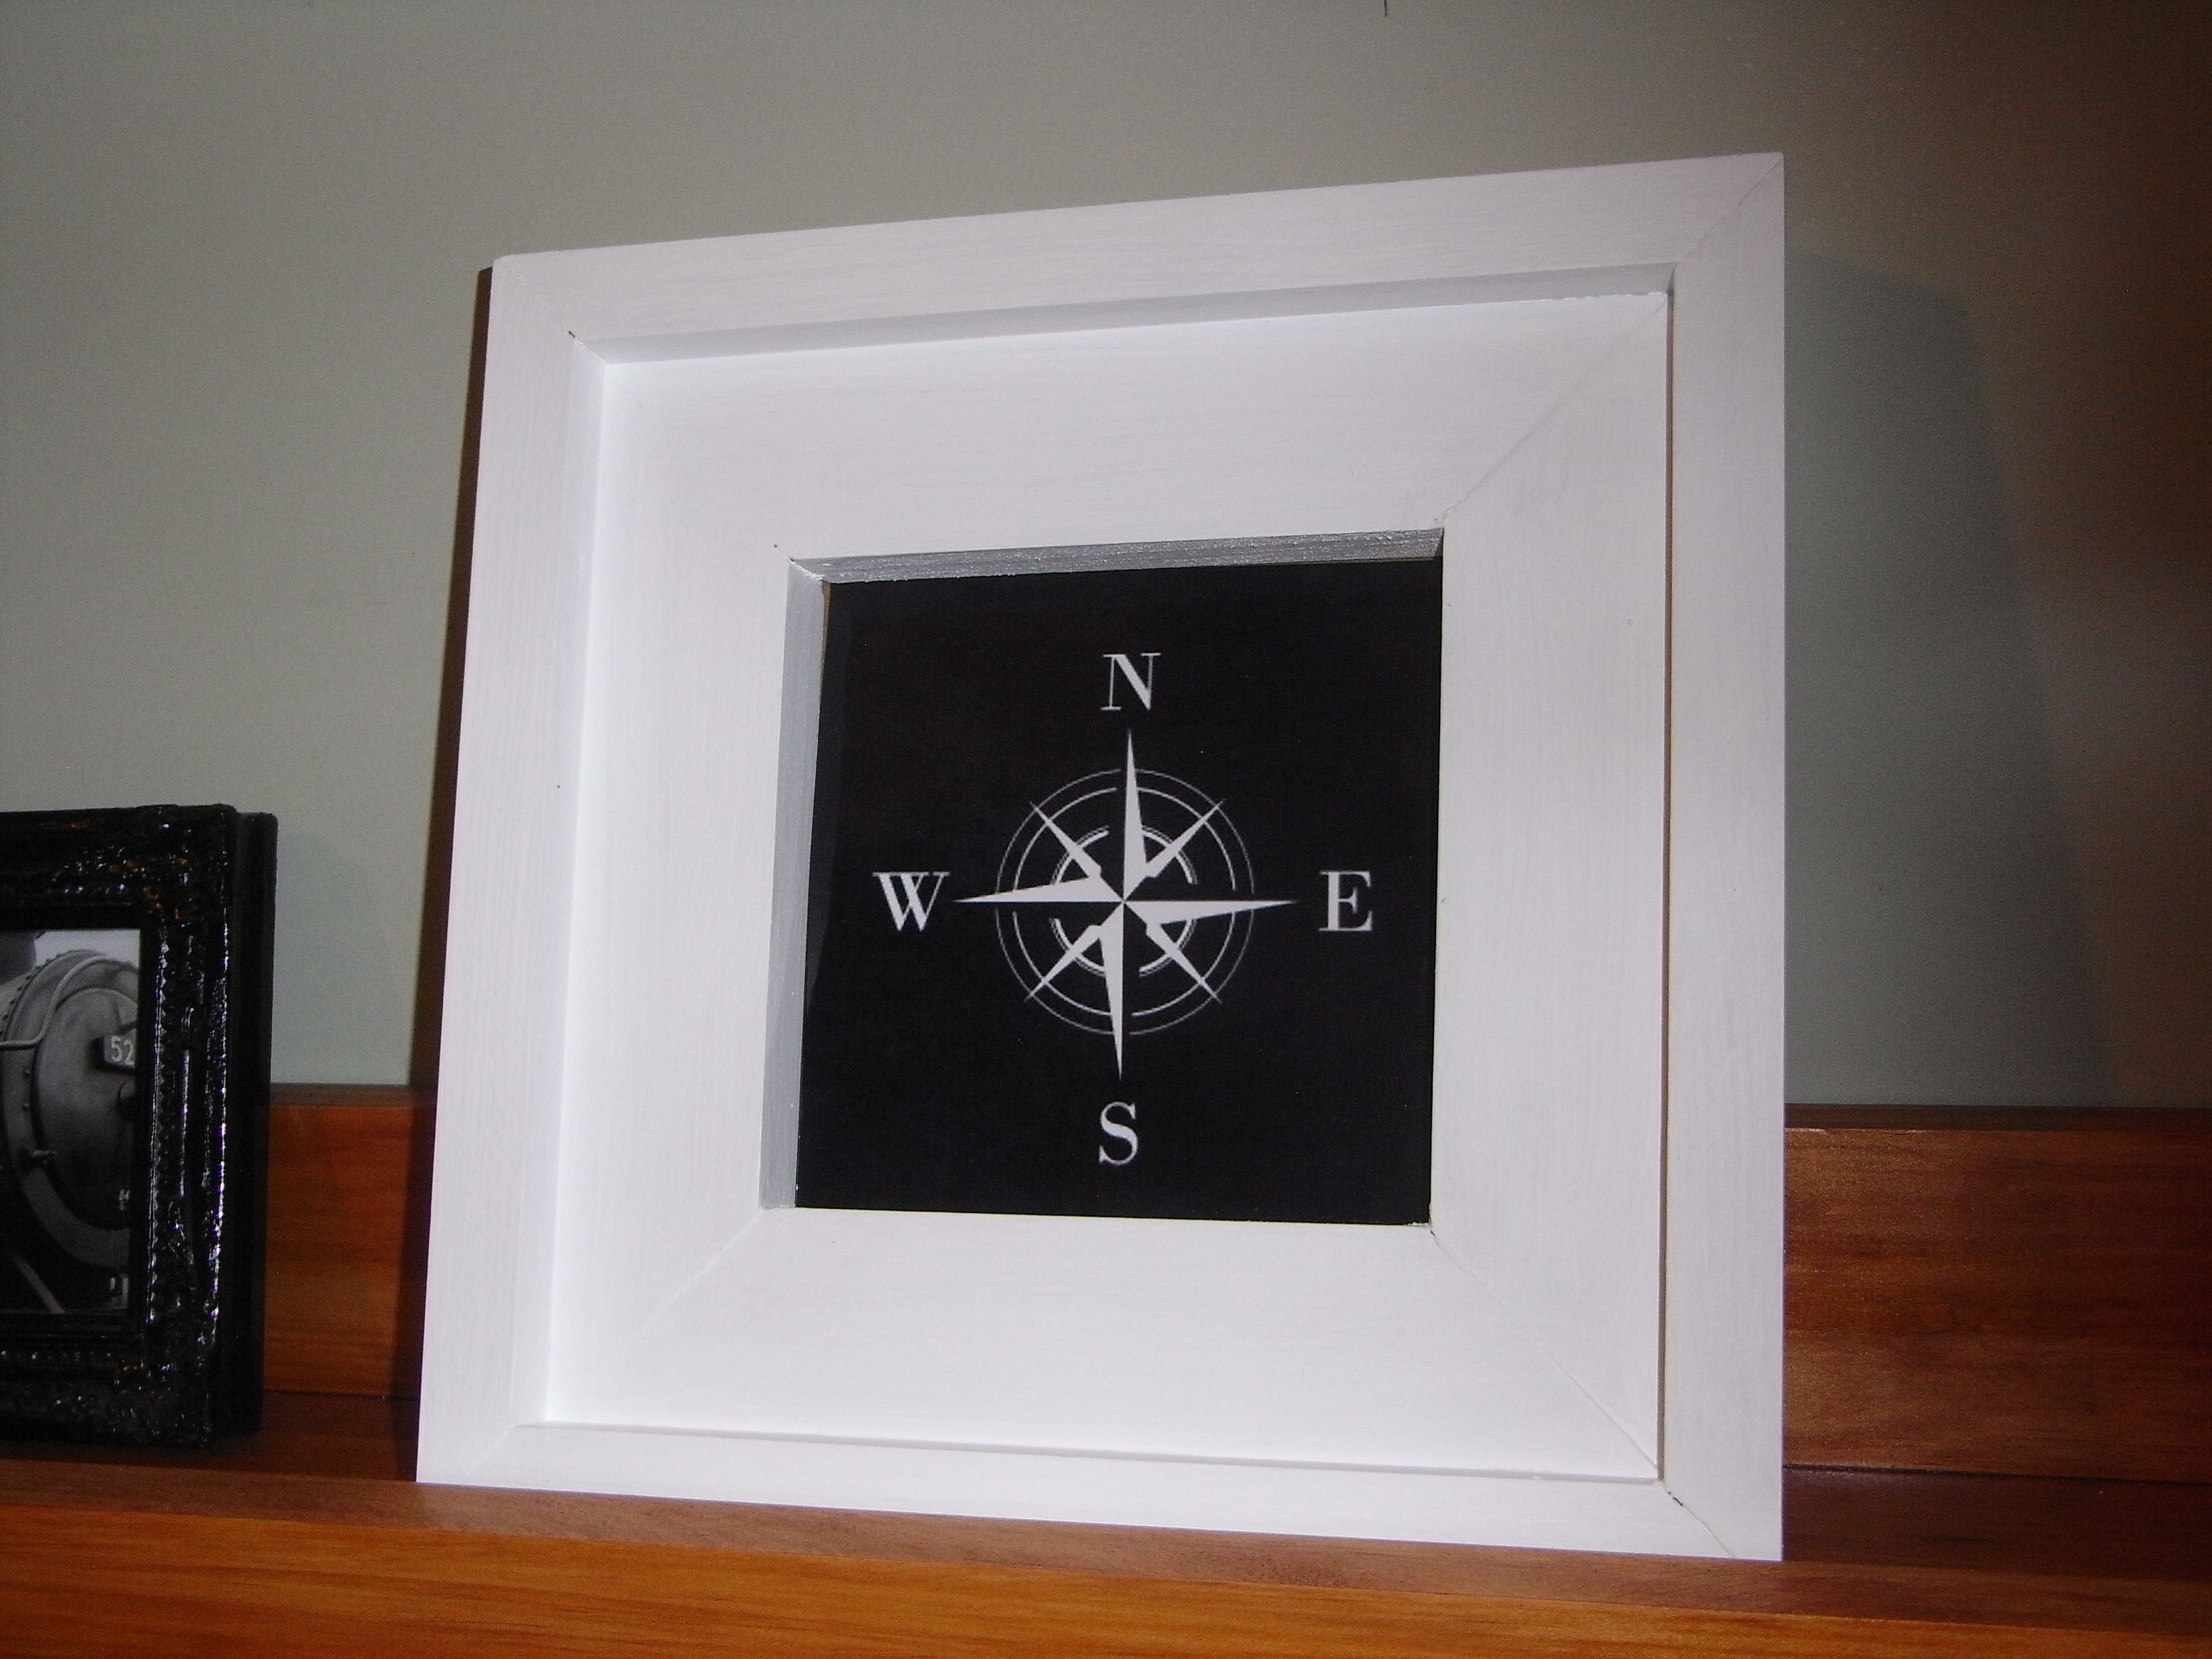
Quick and simple little picture frame.
Built from Plan(s)
Estimated Cost
$1
Finish Used
Paint
Recommended Skill Level
Starter Project
Armoire
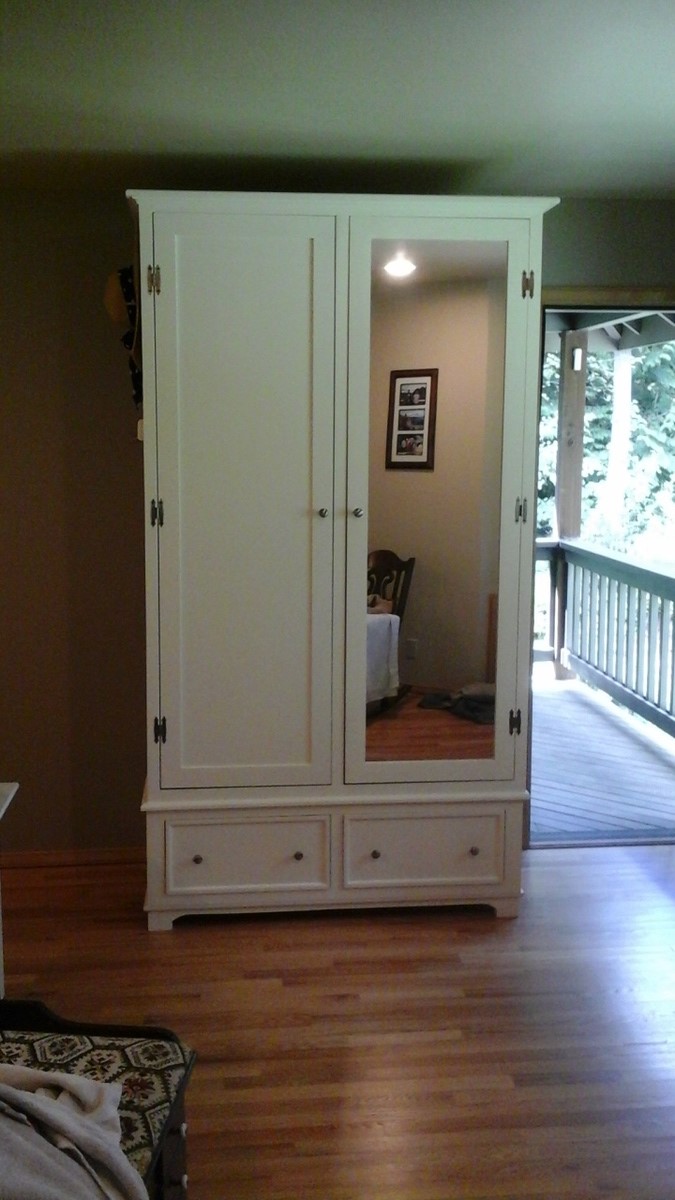
Built this armoire for the master bedroom and constructed it to match the existing furnishings. This thing is huge and weighs a ton. 7 1/2 feet by 4 feet. I had to make sections in the shop and then assemble and paint it in the second story bedroom. If we ever need to move it out of the house we are fortunate to have a balcony off the bedroom. With help from a whole bunch of guys we should be able to lower it down ... if it ever comes to that!
Built from Plan(s)
Estimated Cost
450.00
Estimated Time Investment
Week Long Project (20 Hours or More)
Finish Used
BEHR paint. Home Depot matched the paint perfectly.
Recommended Skill Level
Intermediate
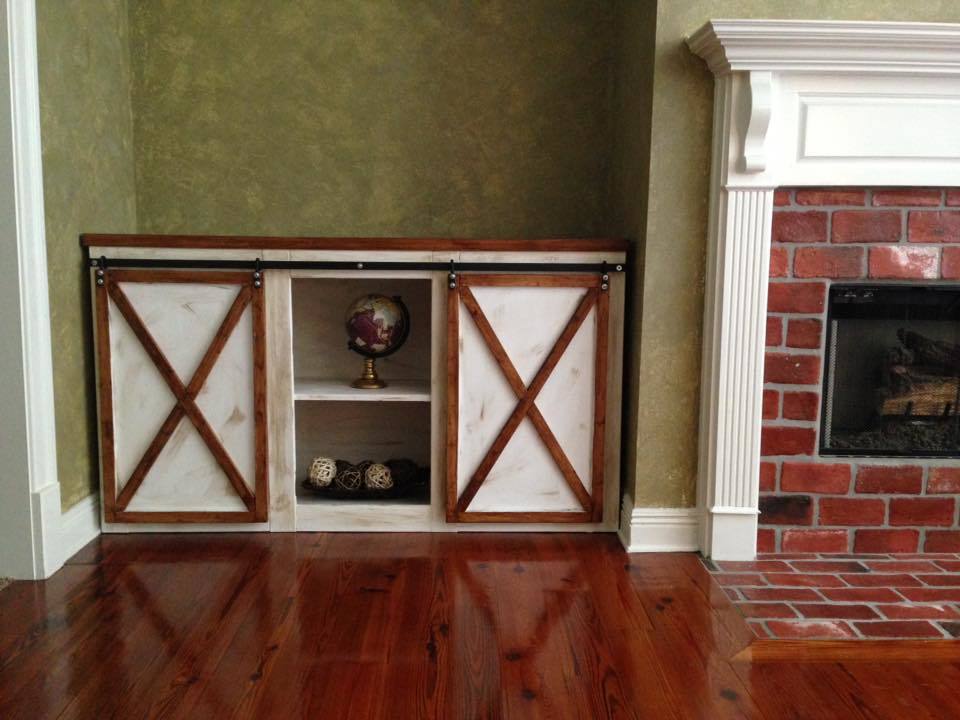
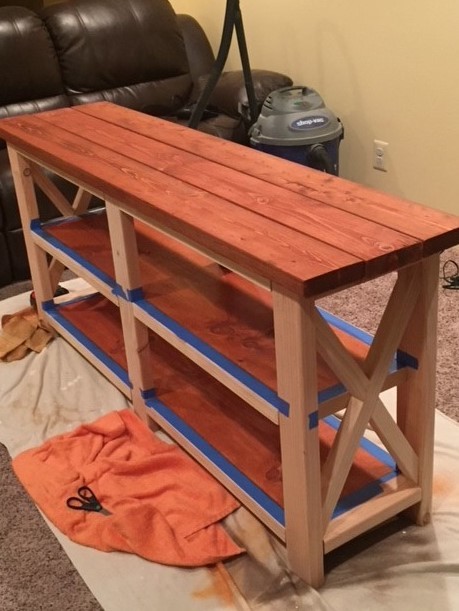
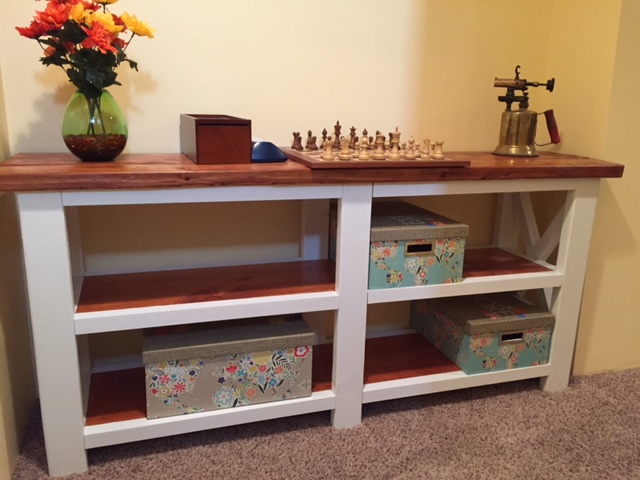
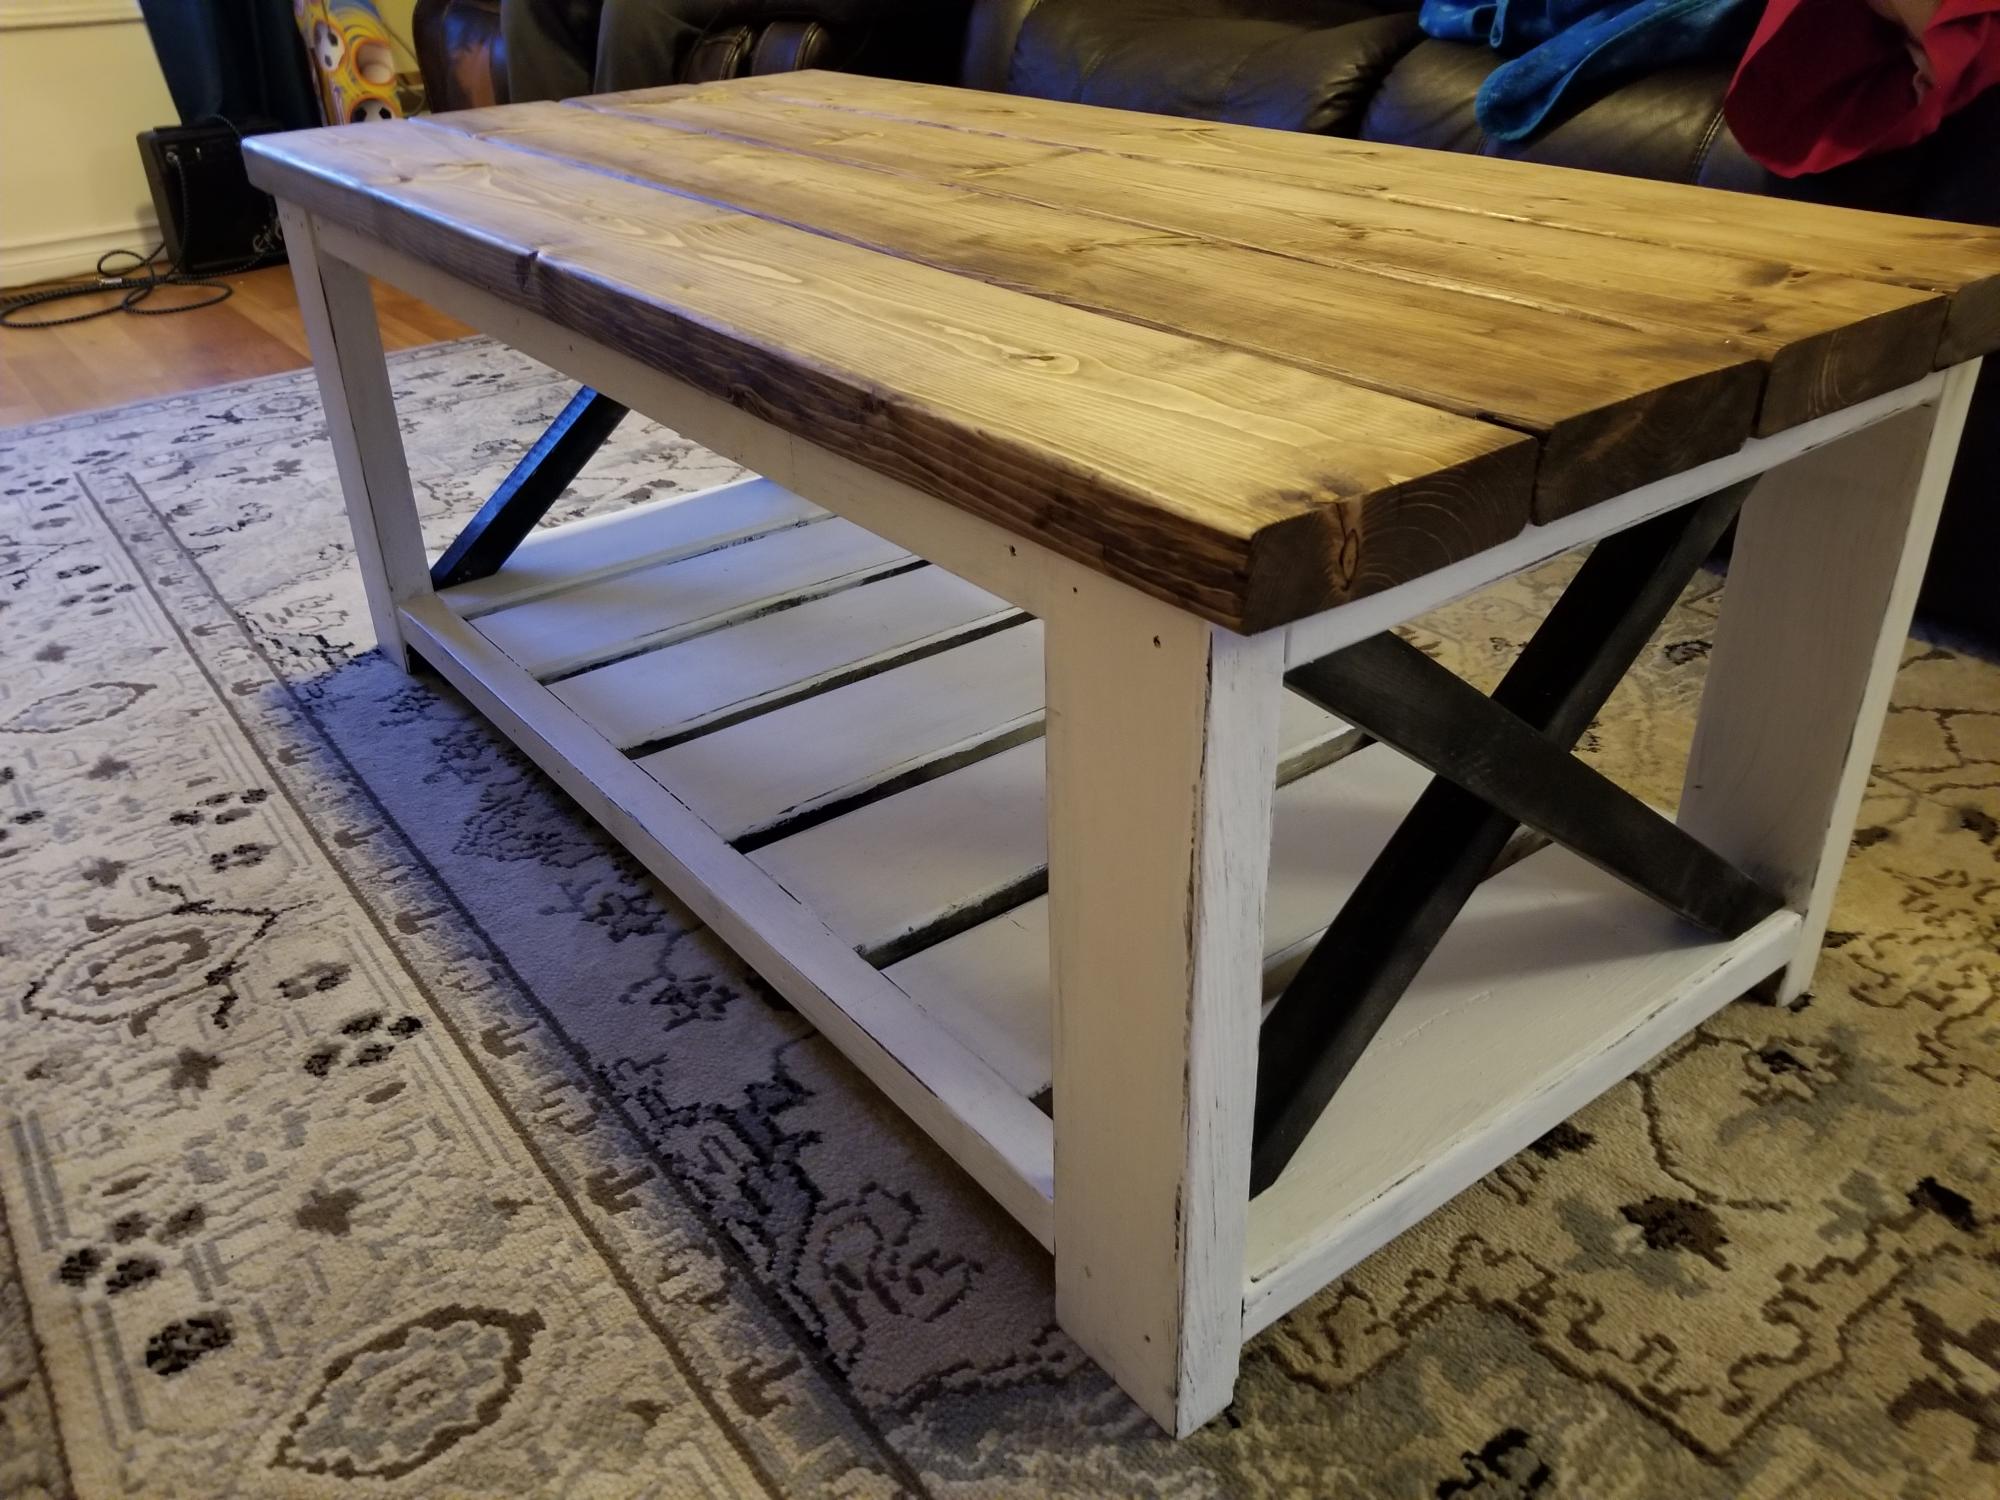
Rustic X Console

This was my first project after discovering the "Ana White" web site. After looking through the brag photos I zeroed in the Rustic X Console. I was specifically inspired by the photos from "Celeste808" and "aDIYguy". It also gave me an opportunity to try out my new Kreg Pocket jig. I hope you like the pictures.


Built from Plan(s)
Estimated Cost
I figure i spent about $95 in materials at the local Home depot. I already had some items at home that I used.
Estimated Time Investment
Weekend Project (10-20 Hours)
Finish Used
Miniwax Gunstock #231, Miniwax fast drying Polyurethane (1/2 pint), Behr-ultra Pure white eggshell finish paint and primer in one (quart)
Recommended Skill Level
Beginner
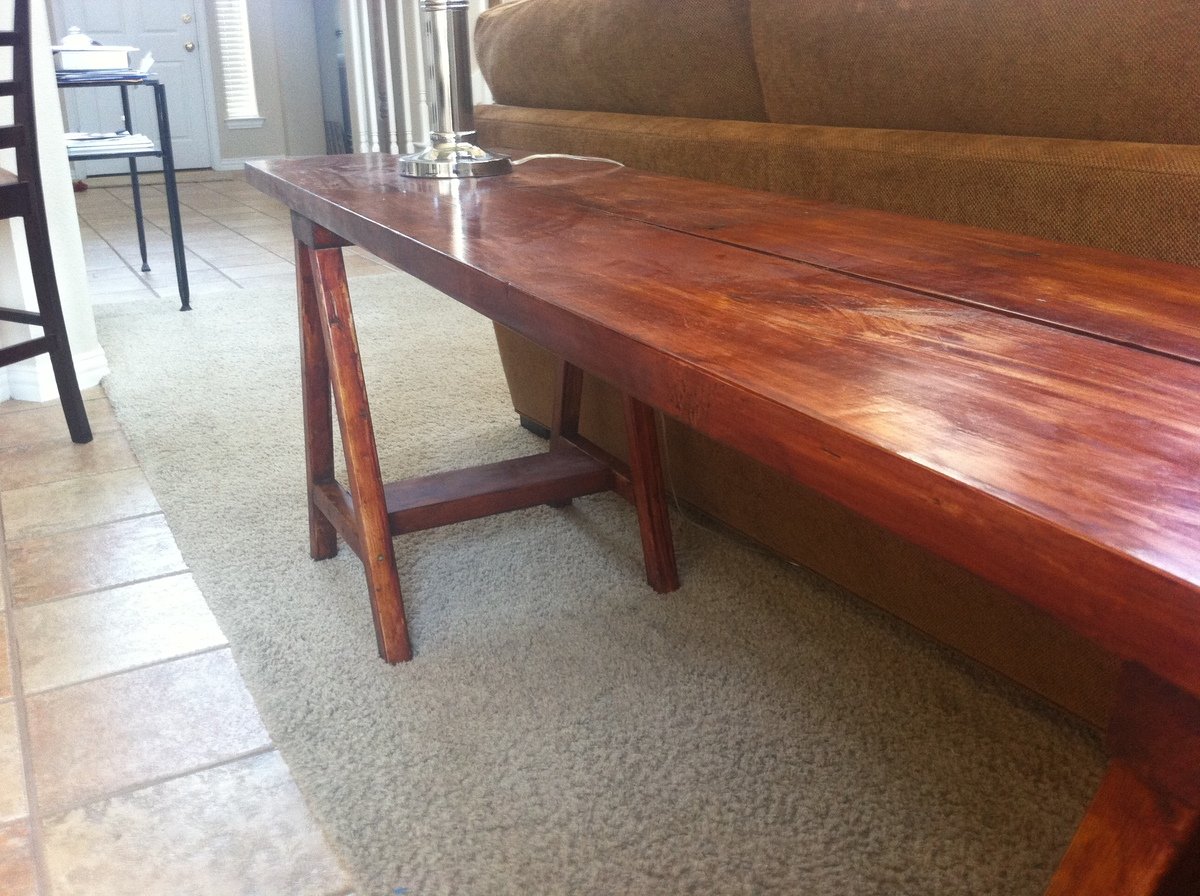
First Project - Sawhorse Table
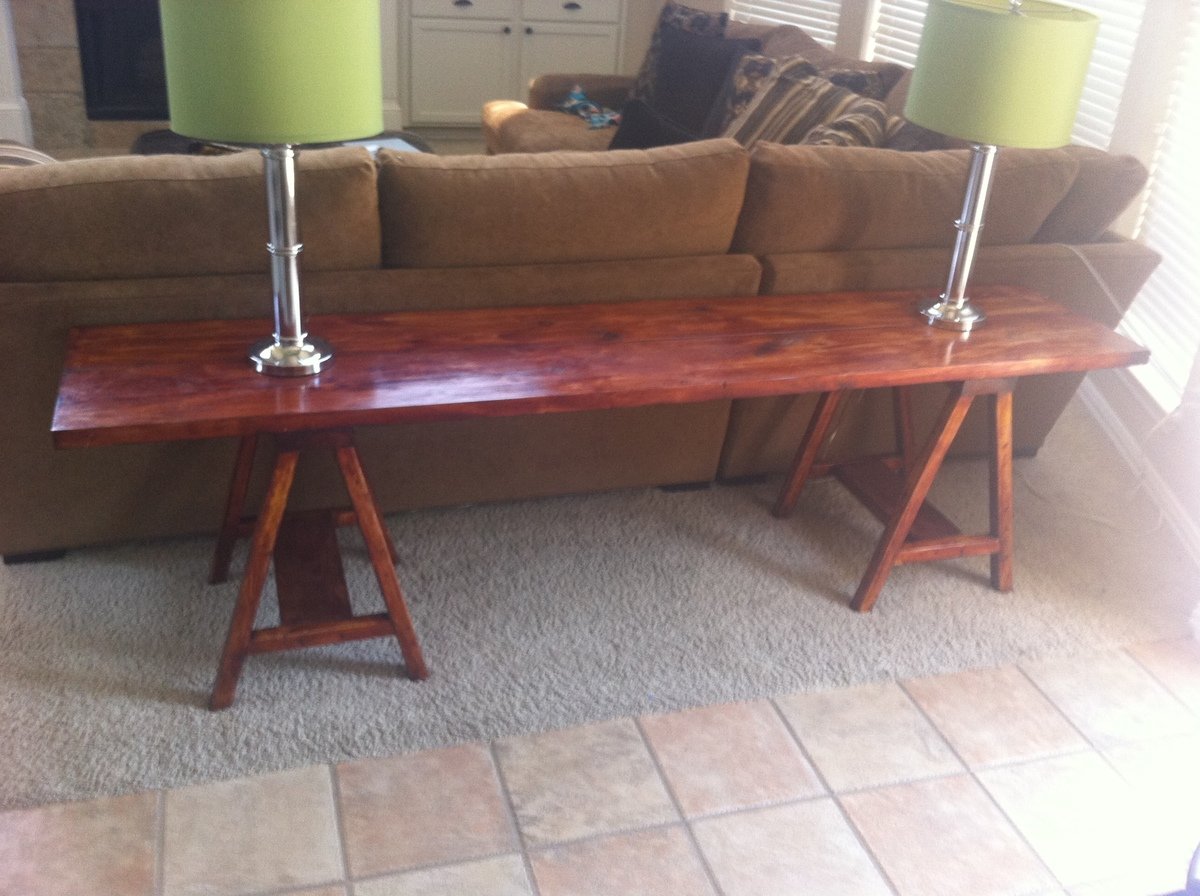
This was my first project that I took on from this site, and I was very happy with the result.
I used the plans from the Simple Sawhorse Table, and adjusted to our needs.
The only real adjustments were instead of using a solid top, I used 2 2x10's. I also made the total length 90" on top.
Very great site, and hope to be building more soon.
Built from Plan(s)
Estimated Cost
$50
Estimated Time Investment
Afternoon Project (3-6 Hours)
Finish Used
For finishing this project I sanded, then put a layer of Amber Shellac down. After that dried, I sanded with a finer grit. I then put a layer of rosewood stain down, and let it dry without wiping excess off. Finally, I sanded the entire table with 0000 steel wool.
Recommended Skill Level
Starter Project
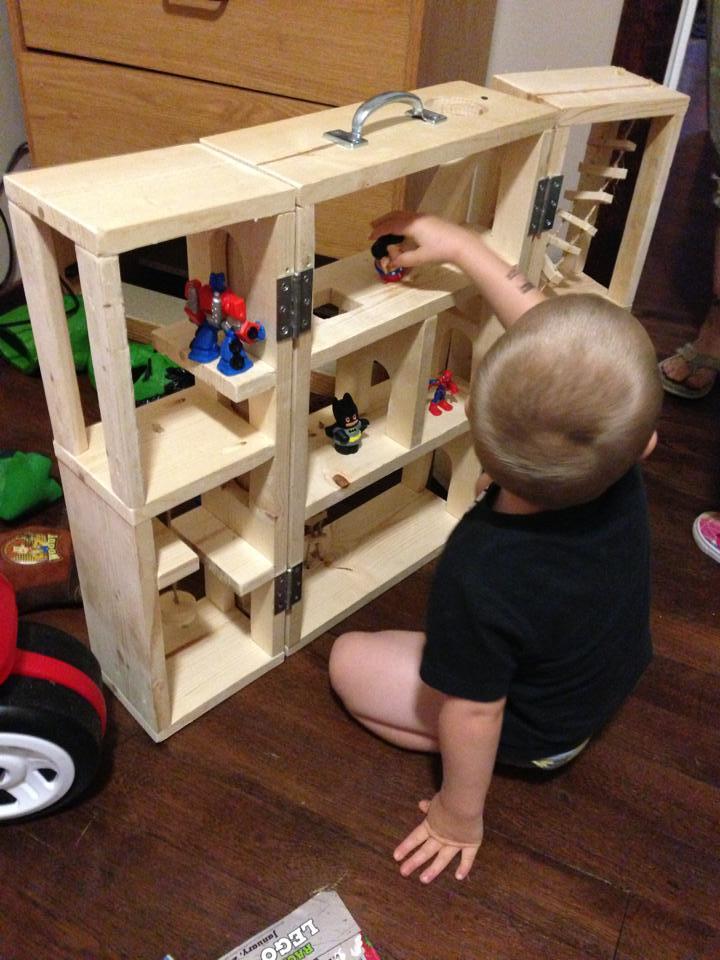
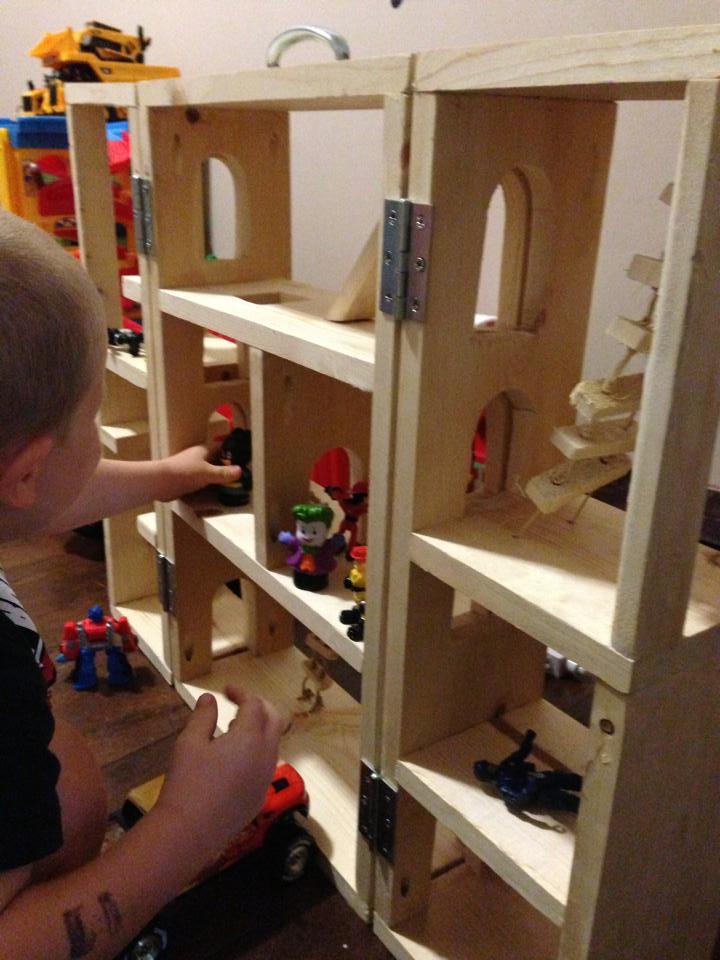
Super Hero House
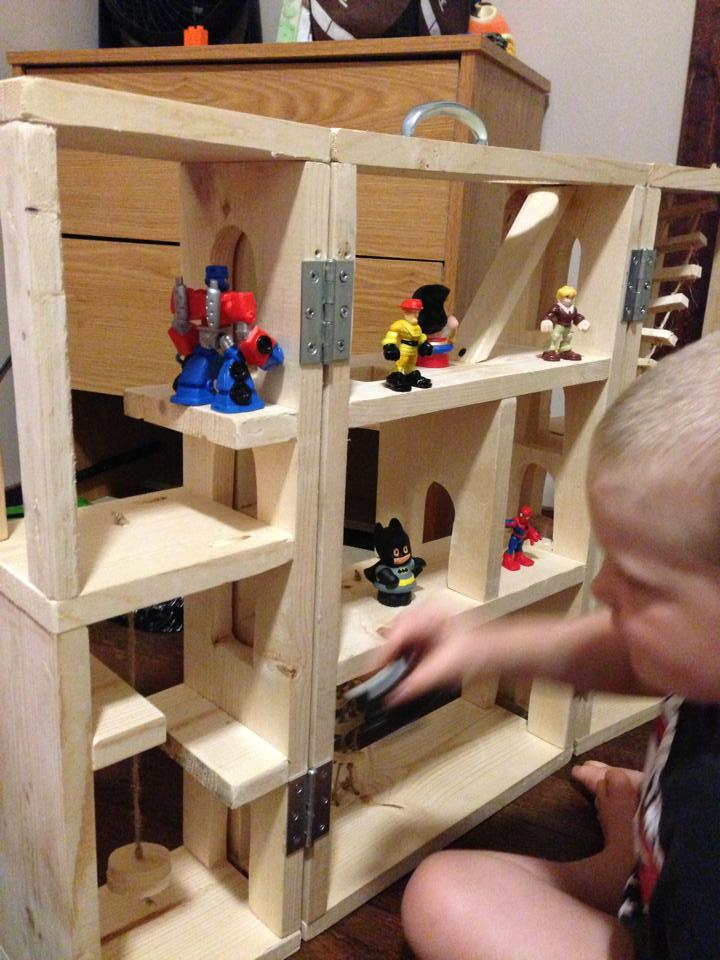
This was hard for me because I am horrible at using the jigsaw. If I do another one I'll probably not do as many door openings.
It took longer than expected due to filling in all the pocket holes an waiting for the wood filler to dry.
My grandson loves it, he didn't care about my mistakes on it.

Built from Plan(s)
Estimated Time Investment
Weekend Project (10-20 Hours)
Finish Used
None
Recommended Skill Level
Beginner
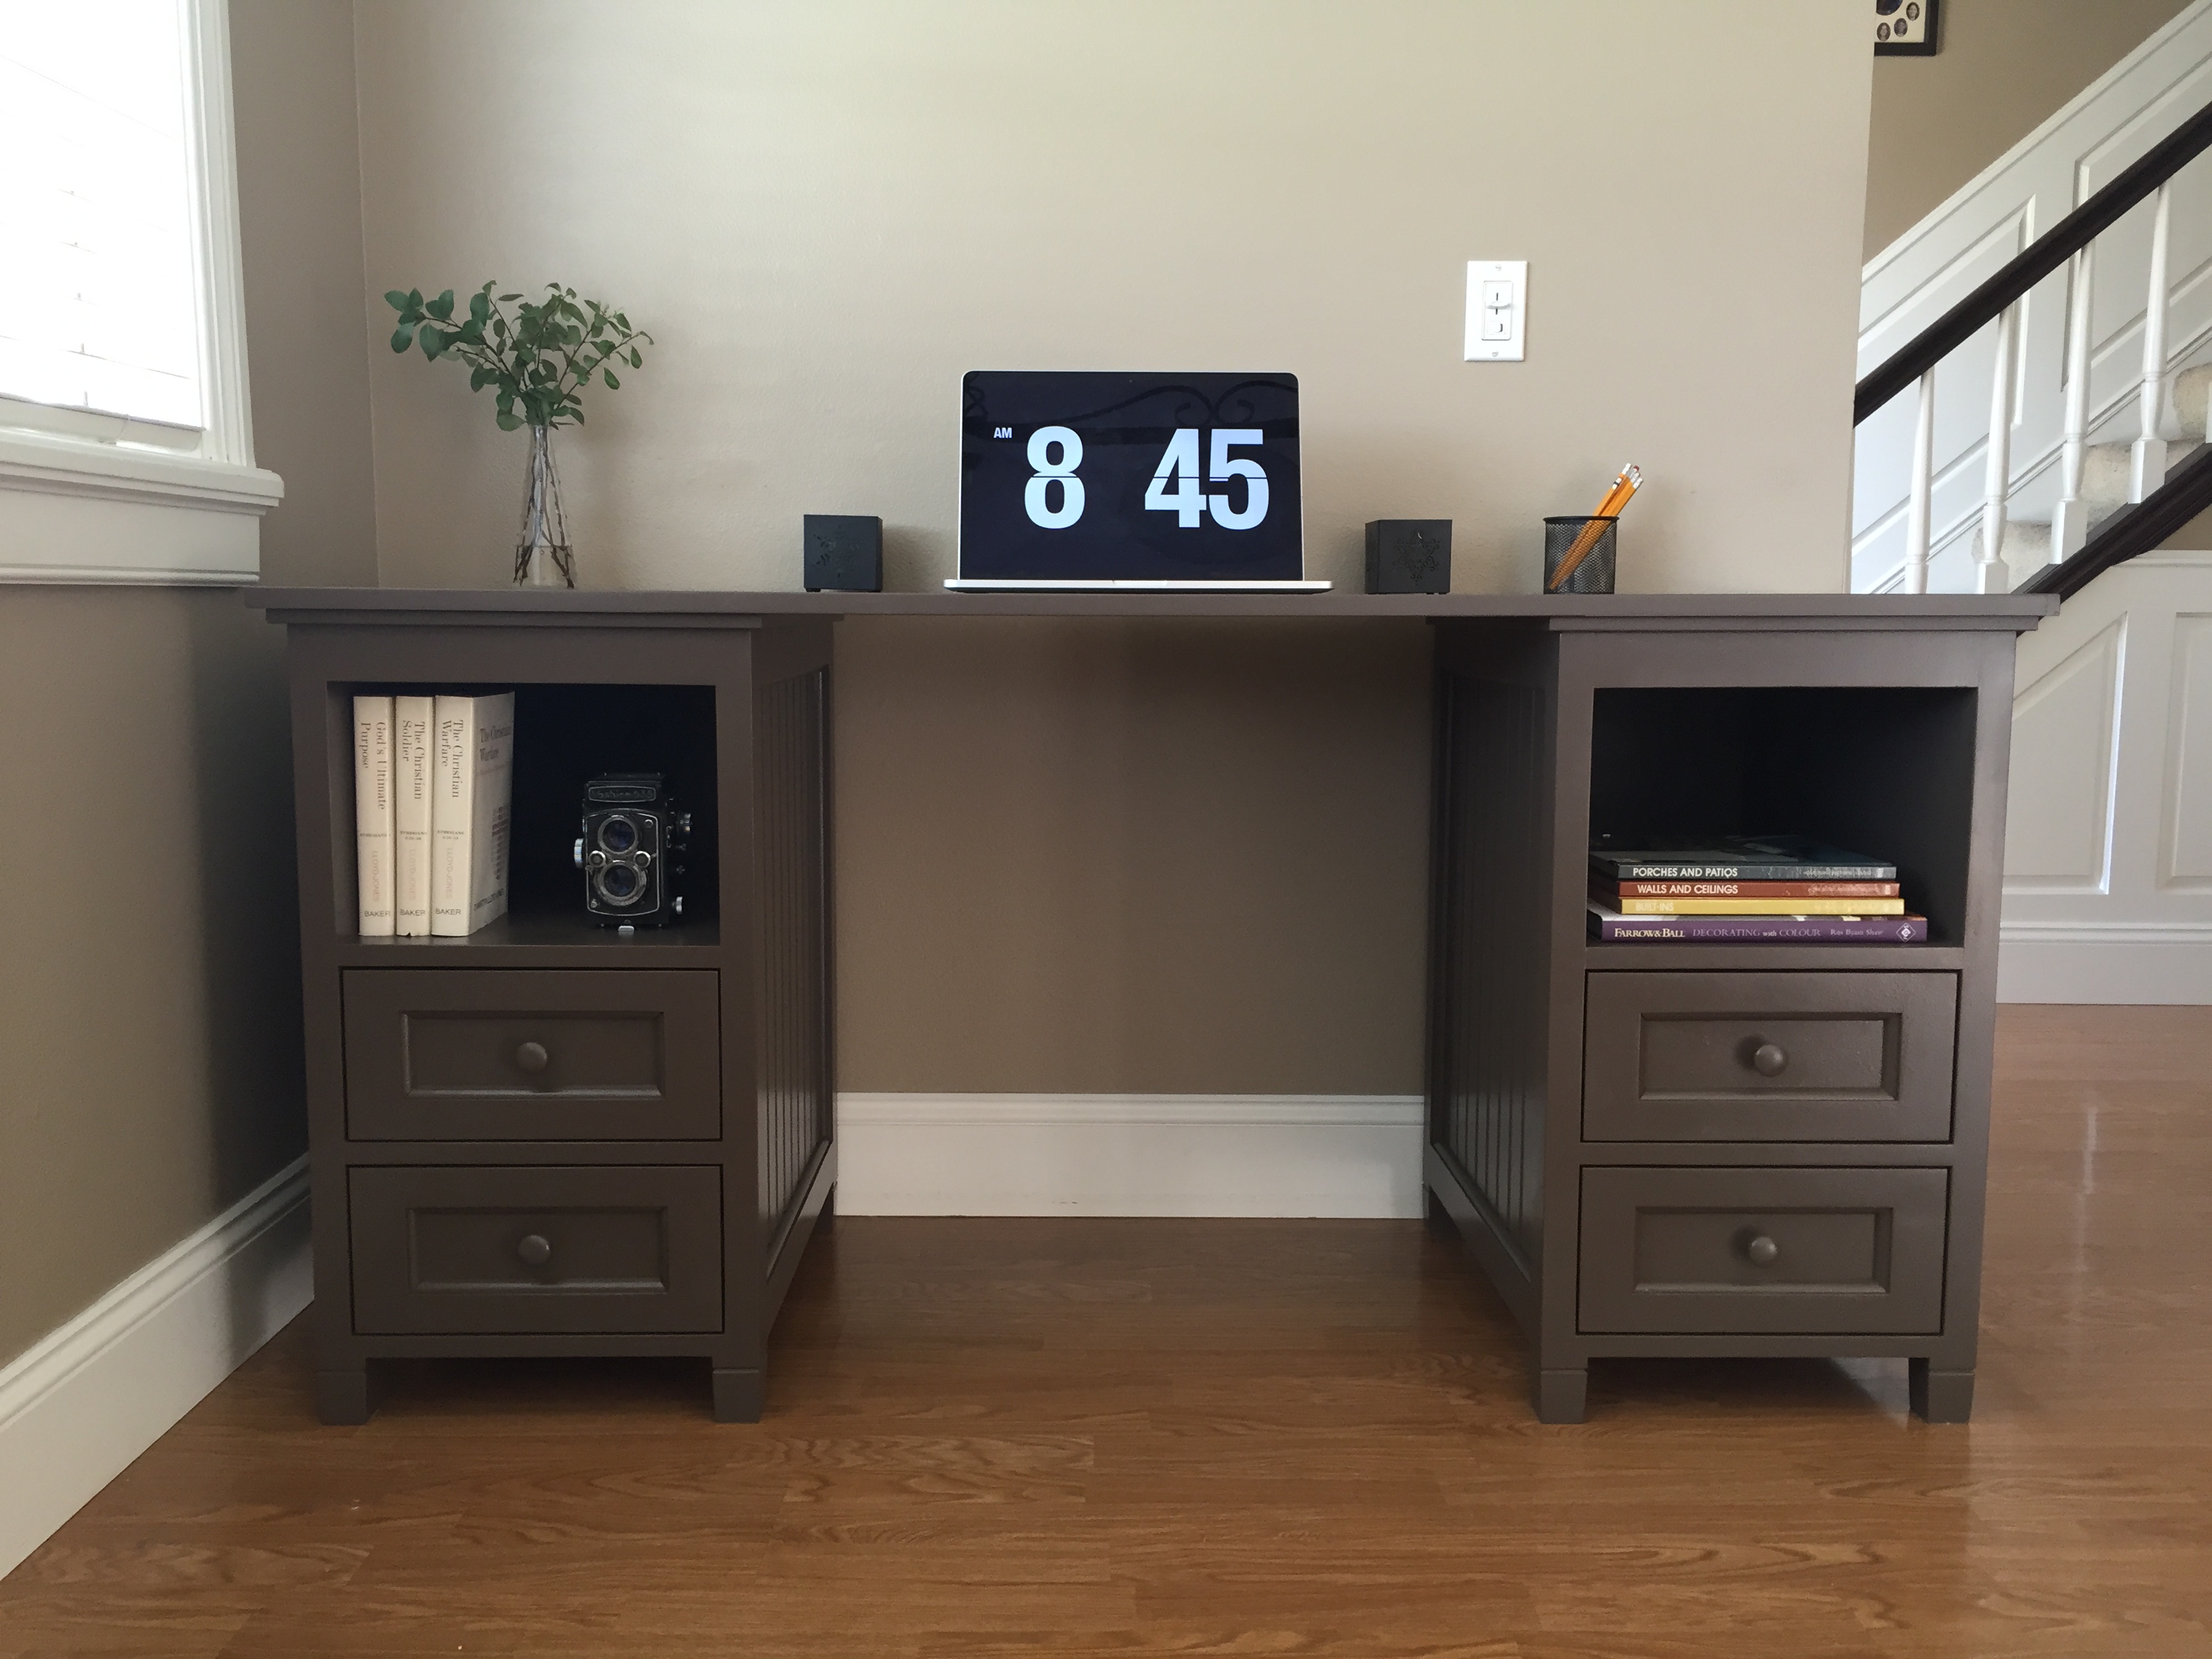
computer desk
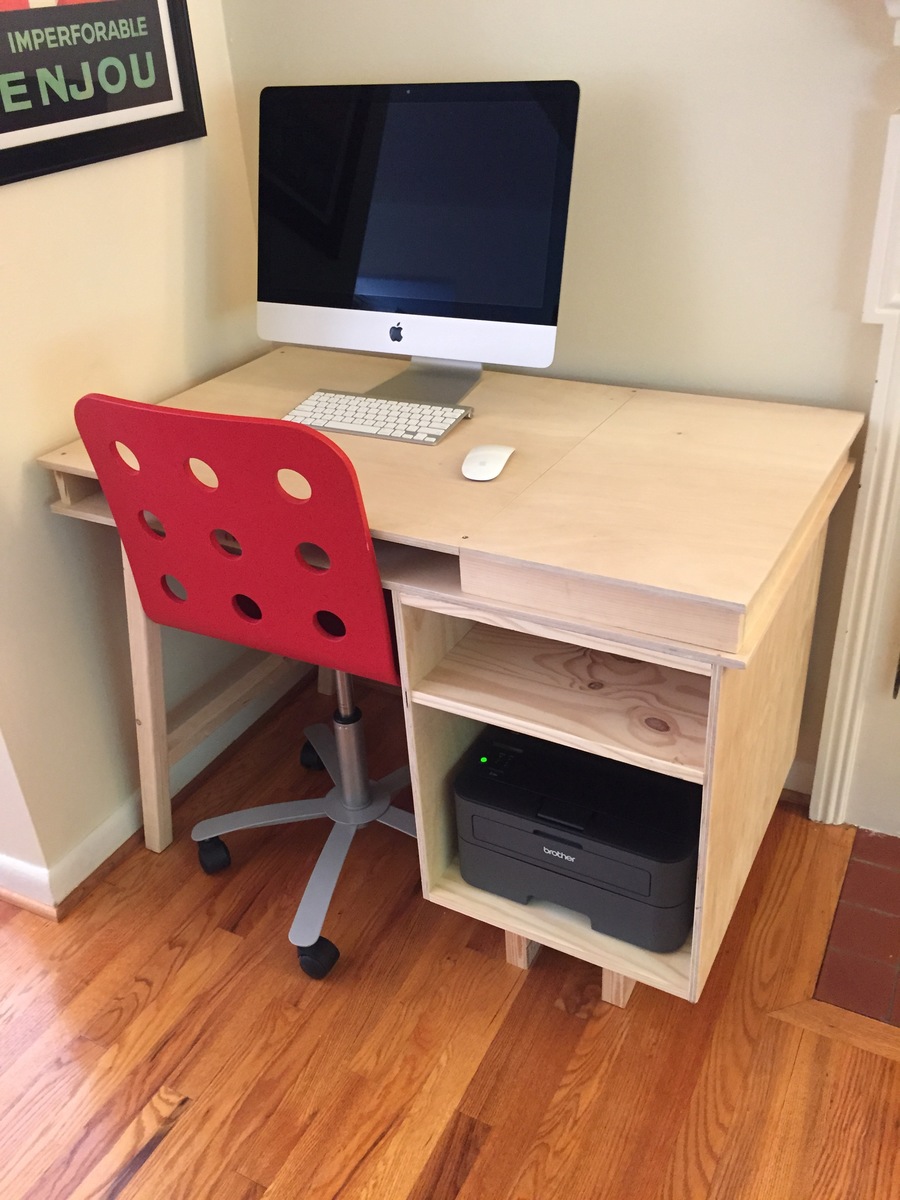
I modified the plans in several ways. First I made the desk smaller to fit the space. In doing so I decided it would work better to have only one part of the desk flip up for storage. I also made the box that makes up the base larger to fit a printer. That left a smaller space for a chair. Turns out the chair I had fit perfectly. I decided not to finish with paint, stain or varnish. I may do that later. Over all I am very happy with this project.
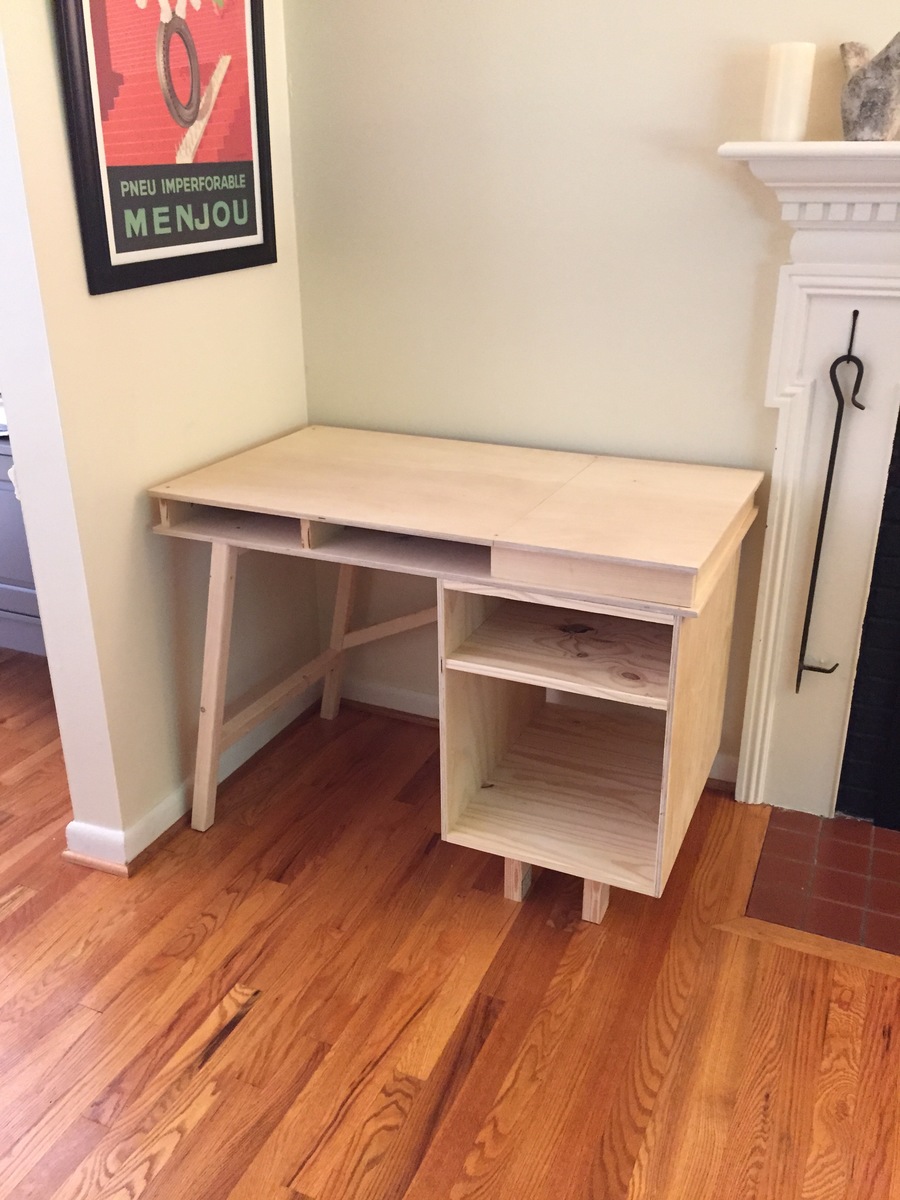
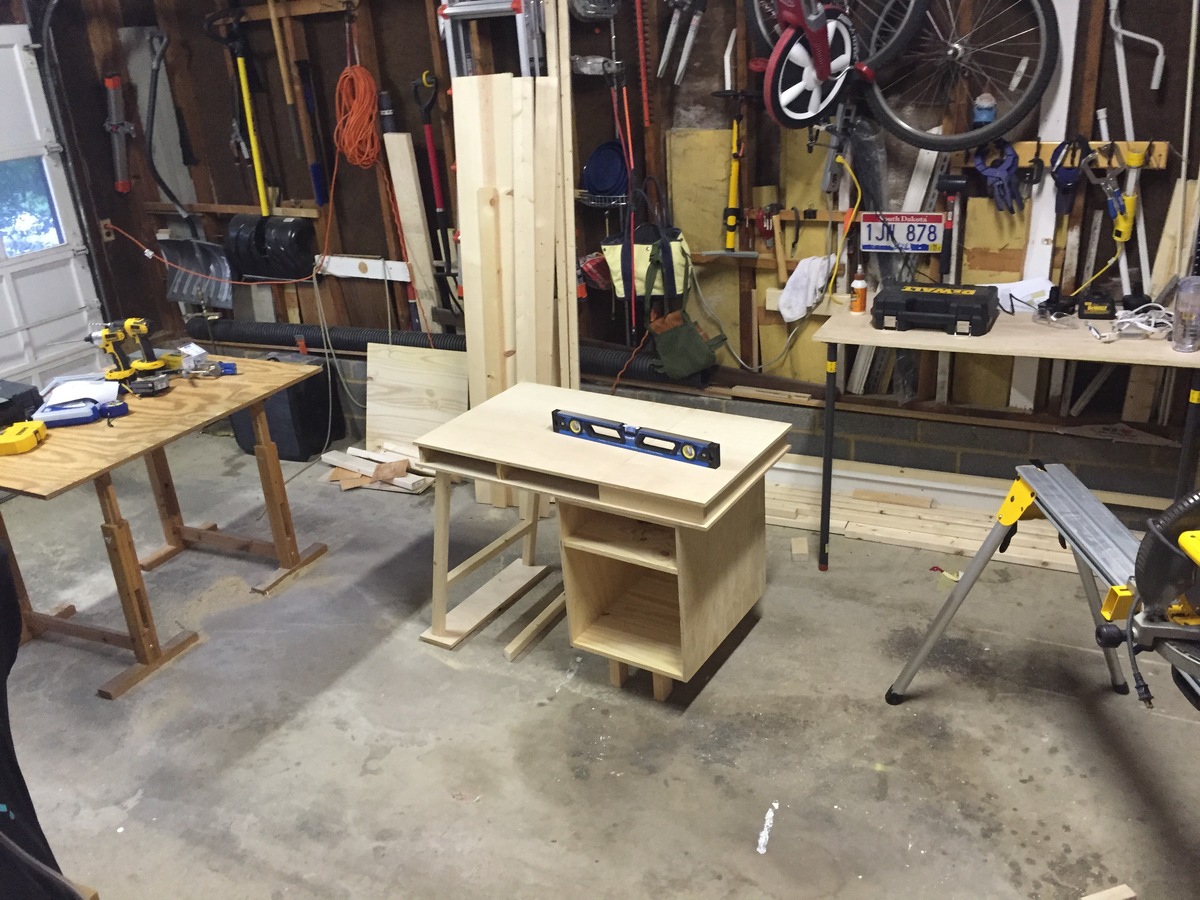
Built from Plan(s)
Estimated Time Investment
Week Long Project (20 Hours or More)
Recommended Skill Level
Intermediate
Bench Cubby with Drawer
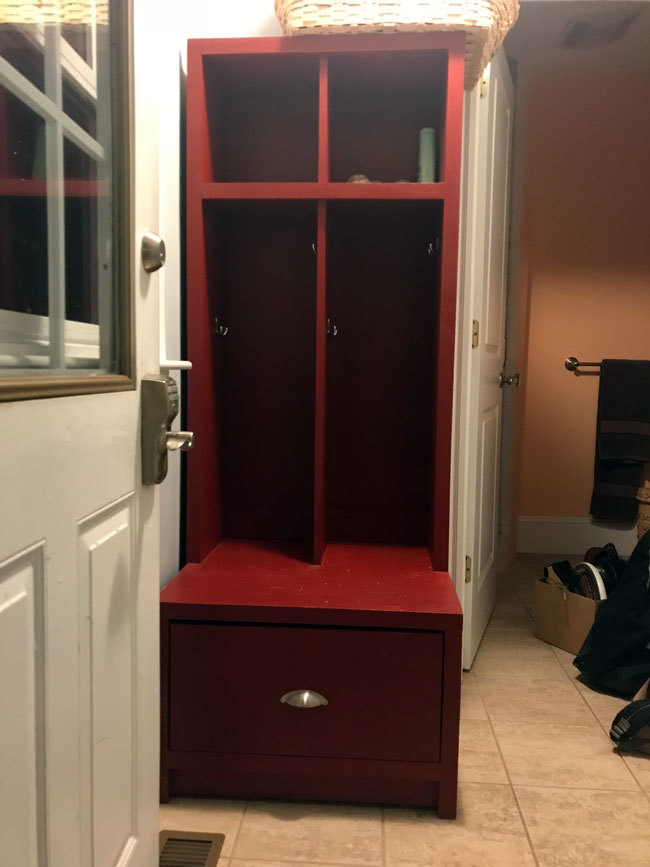
Entry Cubby-First Project
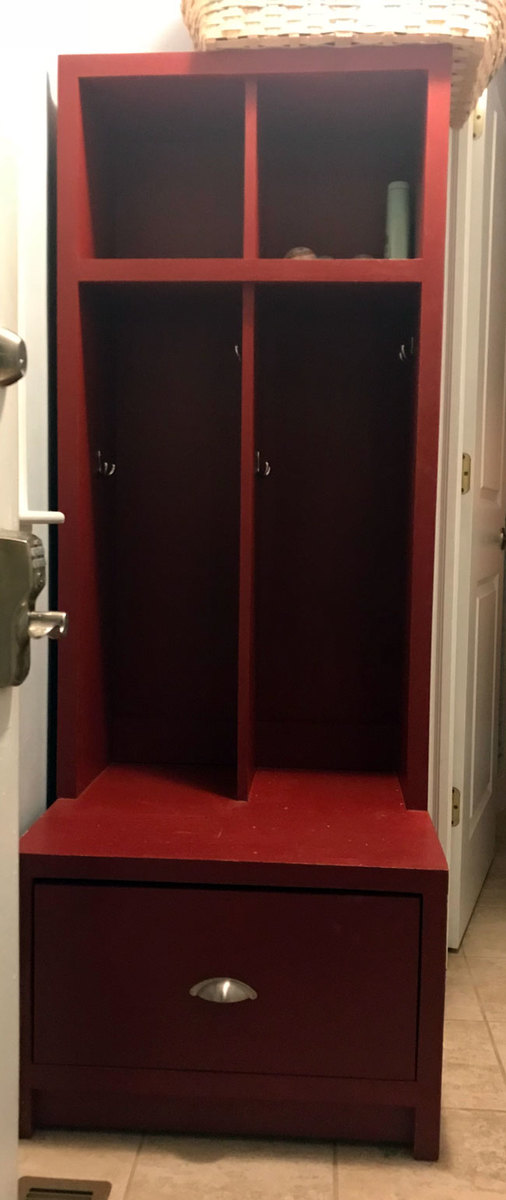

Built from Plan(s)
Estimated Cost
$70
Estimated Time Investment
Day Project (6-9 Hours)
Finish Used
Primed and 3 cioats of paint
Recommended Skill Level
Beginner
Happy Mother's day
My sons and I decided to tackle a project for mom this year, and the farmhouse coffee table was a great project. Tweaked the design slightly with offset full length cross pieces and a distressed paint finish on the base. Great plans, fun project with the kids, and mom loved it!
Comments
Narrow Modifed End Table
I wanted a table like Ana's narrow cottage table, except I just wanted an open shelf instead of a drawer for a basket.
Here is my version modified to fit my needs. Thanks to Ana, of course. :)
Built from Plan(s)
Estimated Time Investment
An Hour or Two (0-2 Hours)
Finish Used
Undecided...
Step by step and cut list on my blog.
http://thequaintcottage.blogspot.com/2011/07/diy-simple-end-table-for-small-spaces.html
Step by step and cut list on my blog.
http://thequaintcottage.blogspot.com/2011/07/diy-simple-end-table-for-small-spaces.html
Recommended Skill Level
Beginner
Outdoor Dining Table
We started with the bench as a weekend project. After counter-sinking and filling all those screw holes we borrowed a Kreg jr and took onothe table project. However we ended up countersinking the top boards for the table as well; it was easier for us to visualize the spacing between boards and make sure everything was as square and level as we could make it... We used behr paint and primer in one in a satin finish and opted for a punchy green to brighten up our courtyard.
We plan to build another bench since it will tuck in nicely under the table when not in use, and we can pull the table out and use the bench when we need more seating.
We love our new outdoor furniture!! Thanks Ana!
Estimated Cost
$150
Estimated Time Investment
Week Long Project (20 Hours or More)
Finish Used
behr outdoor paint and primer in one
Recommended Skill Level
Beginner
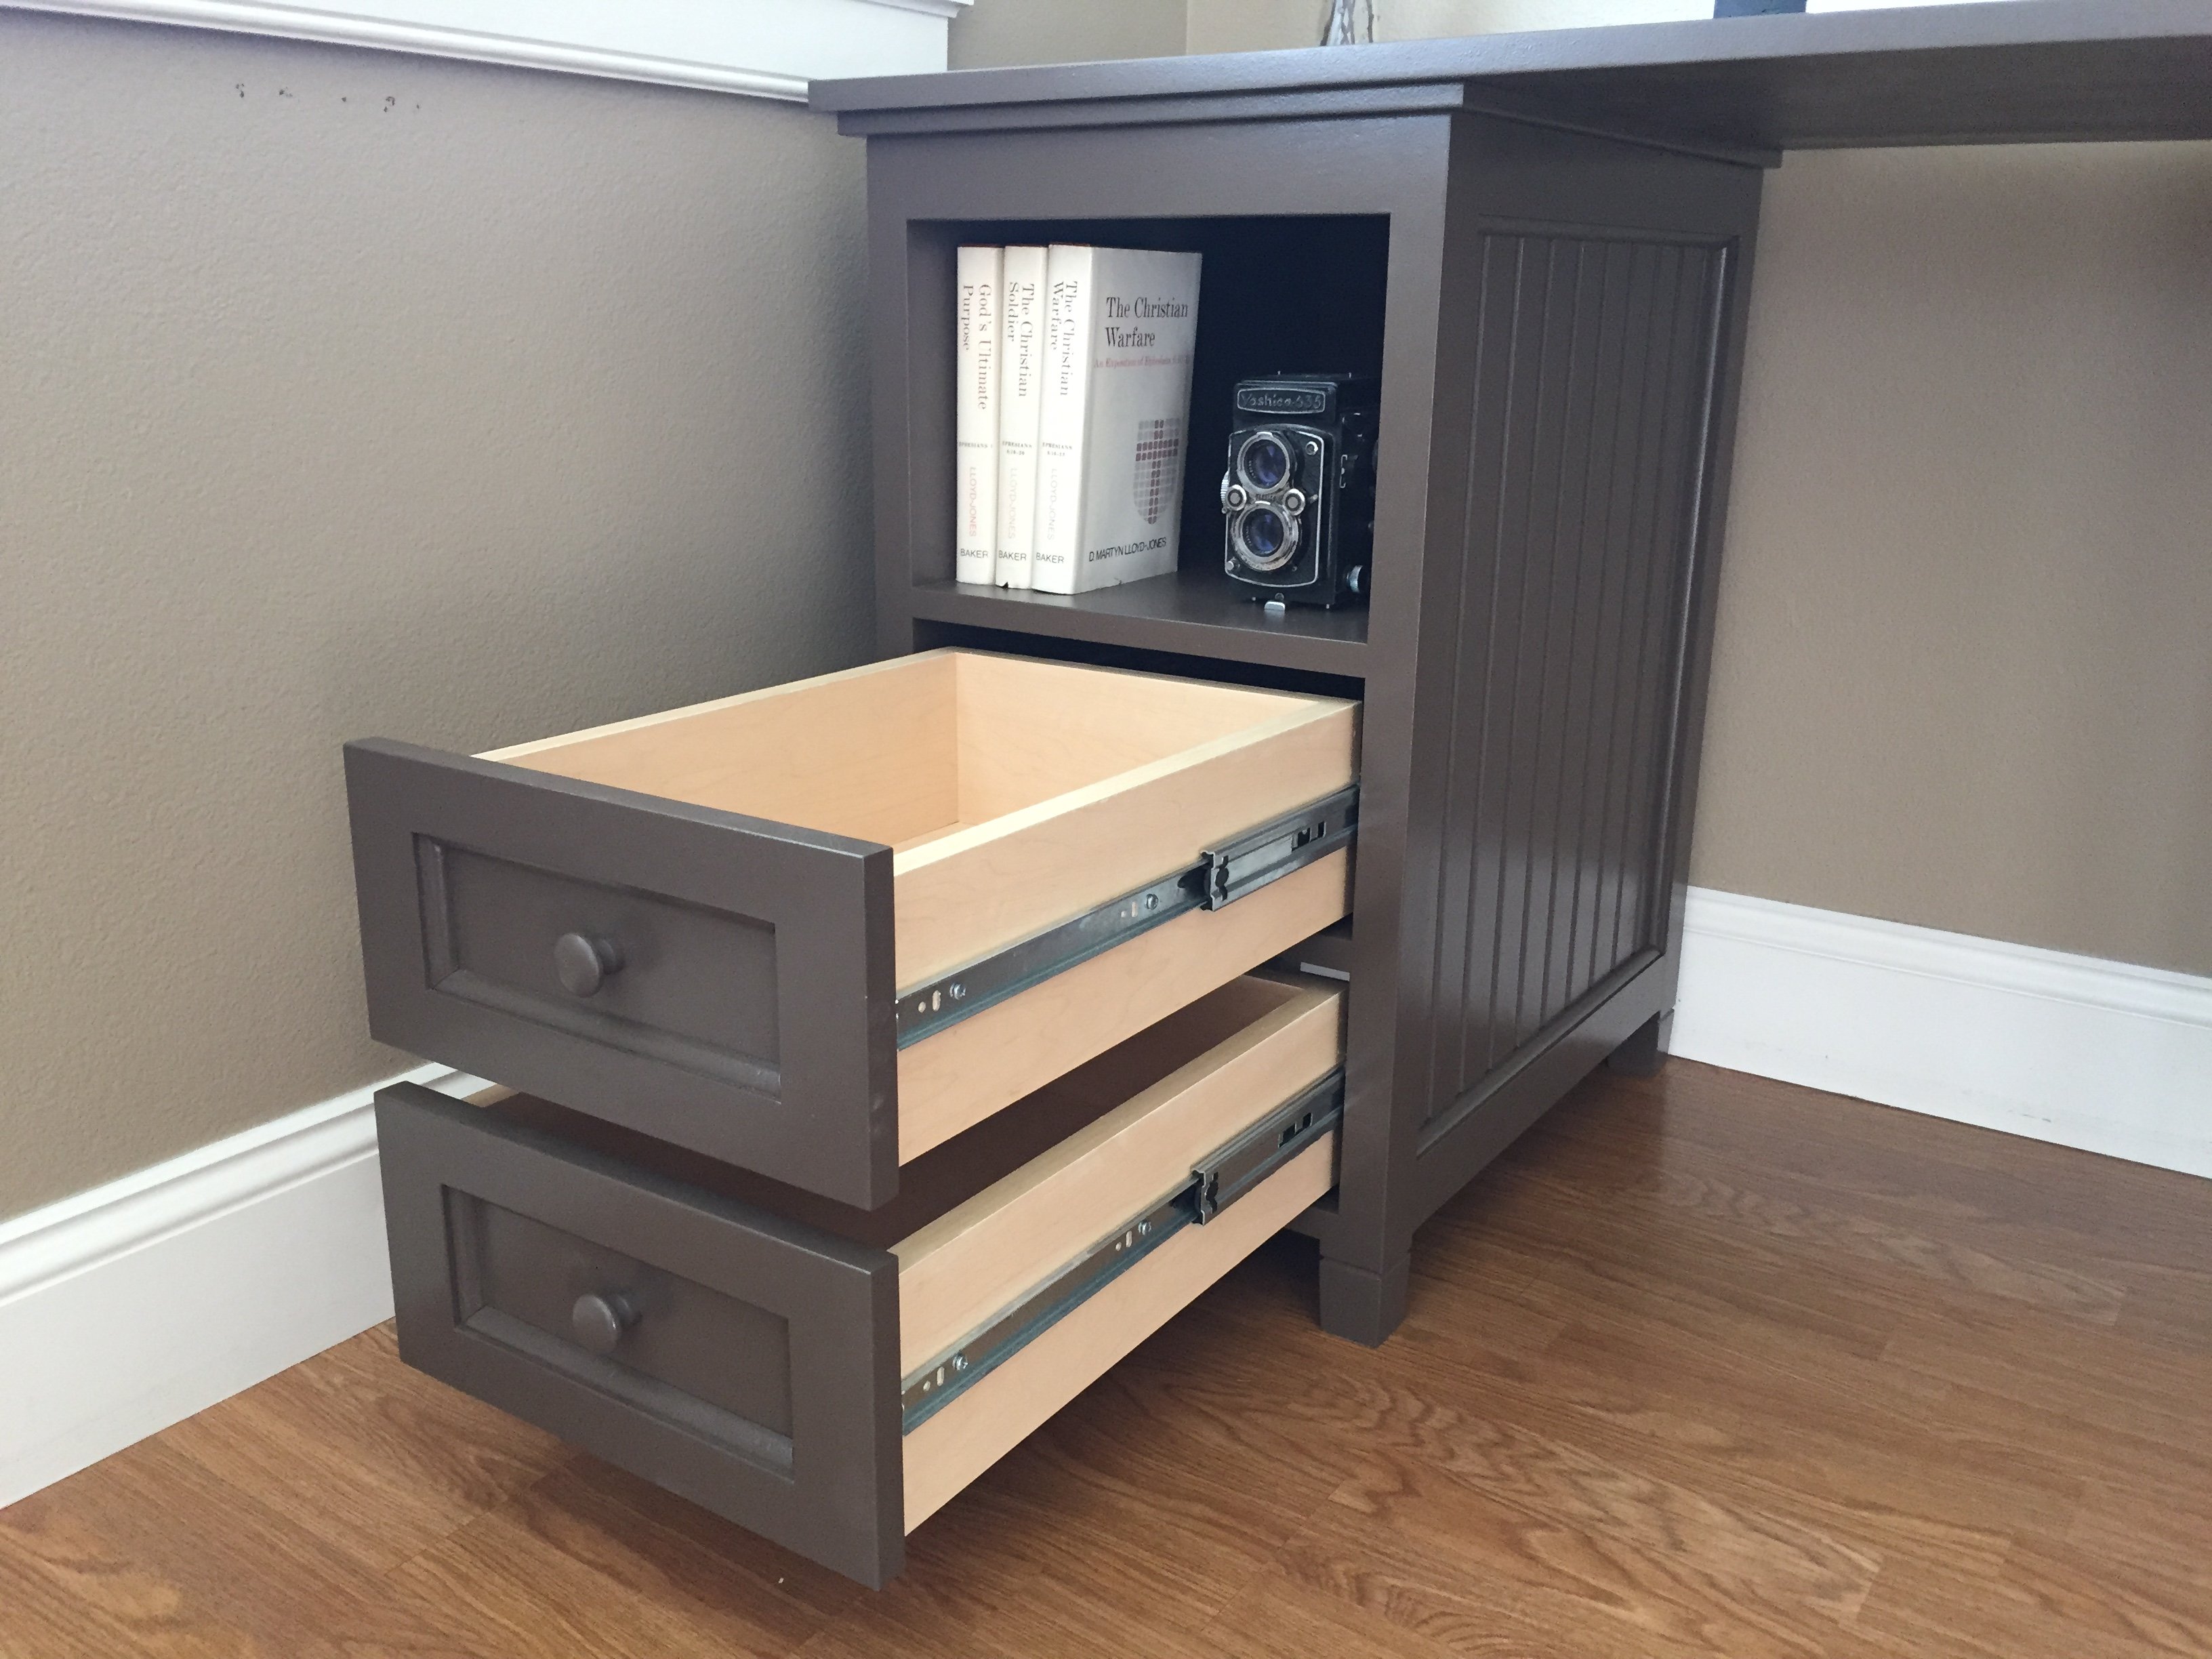
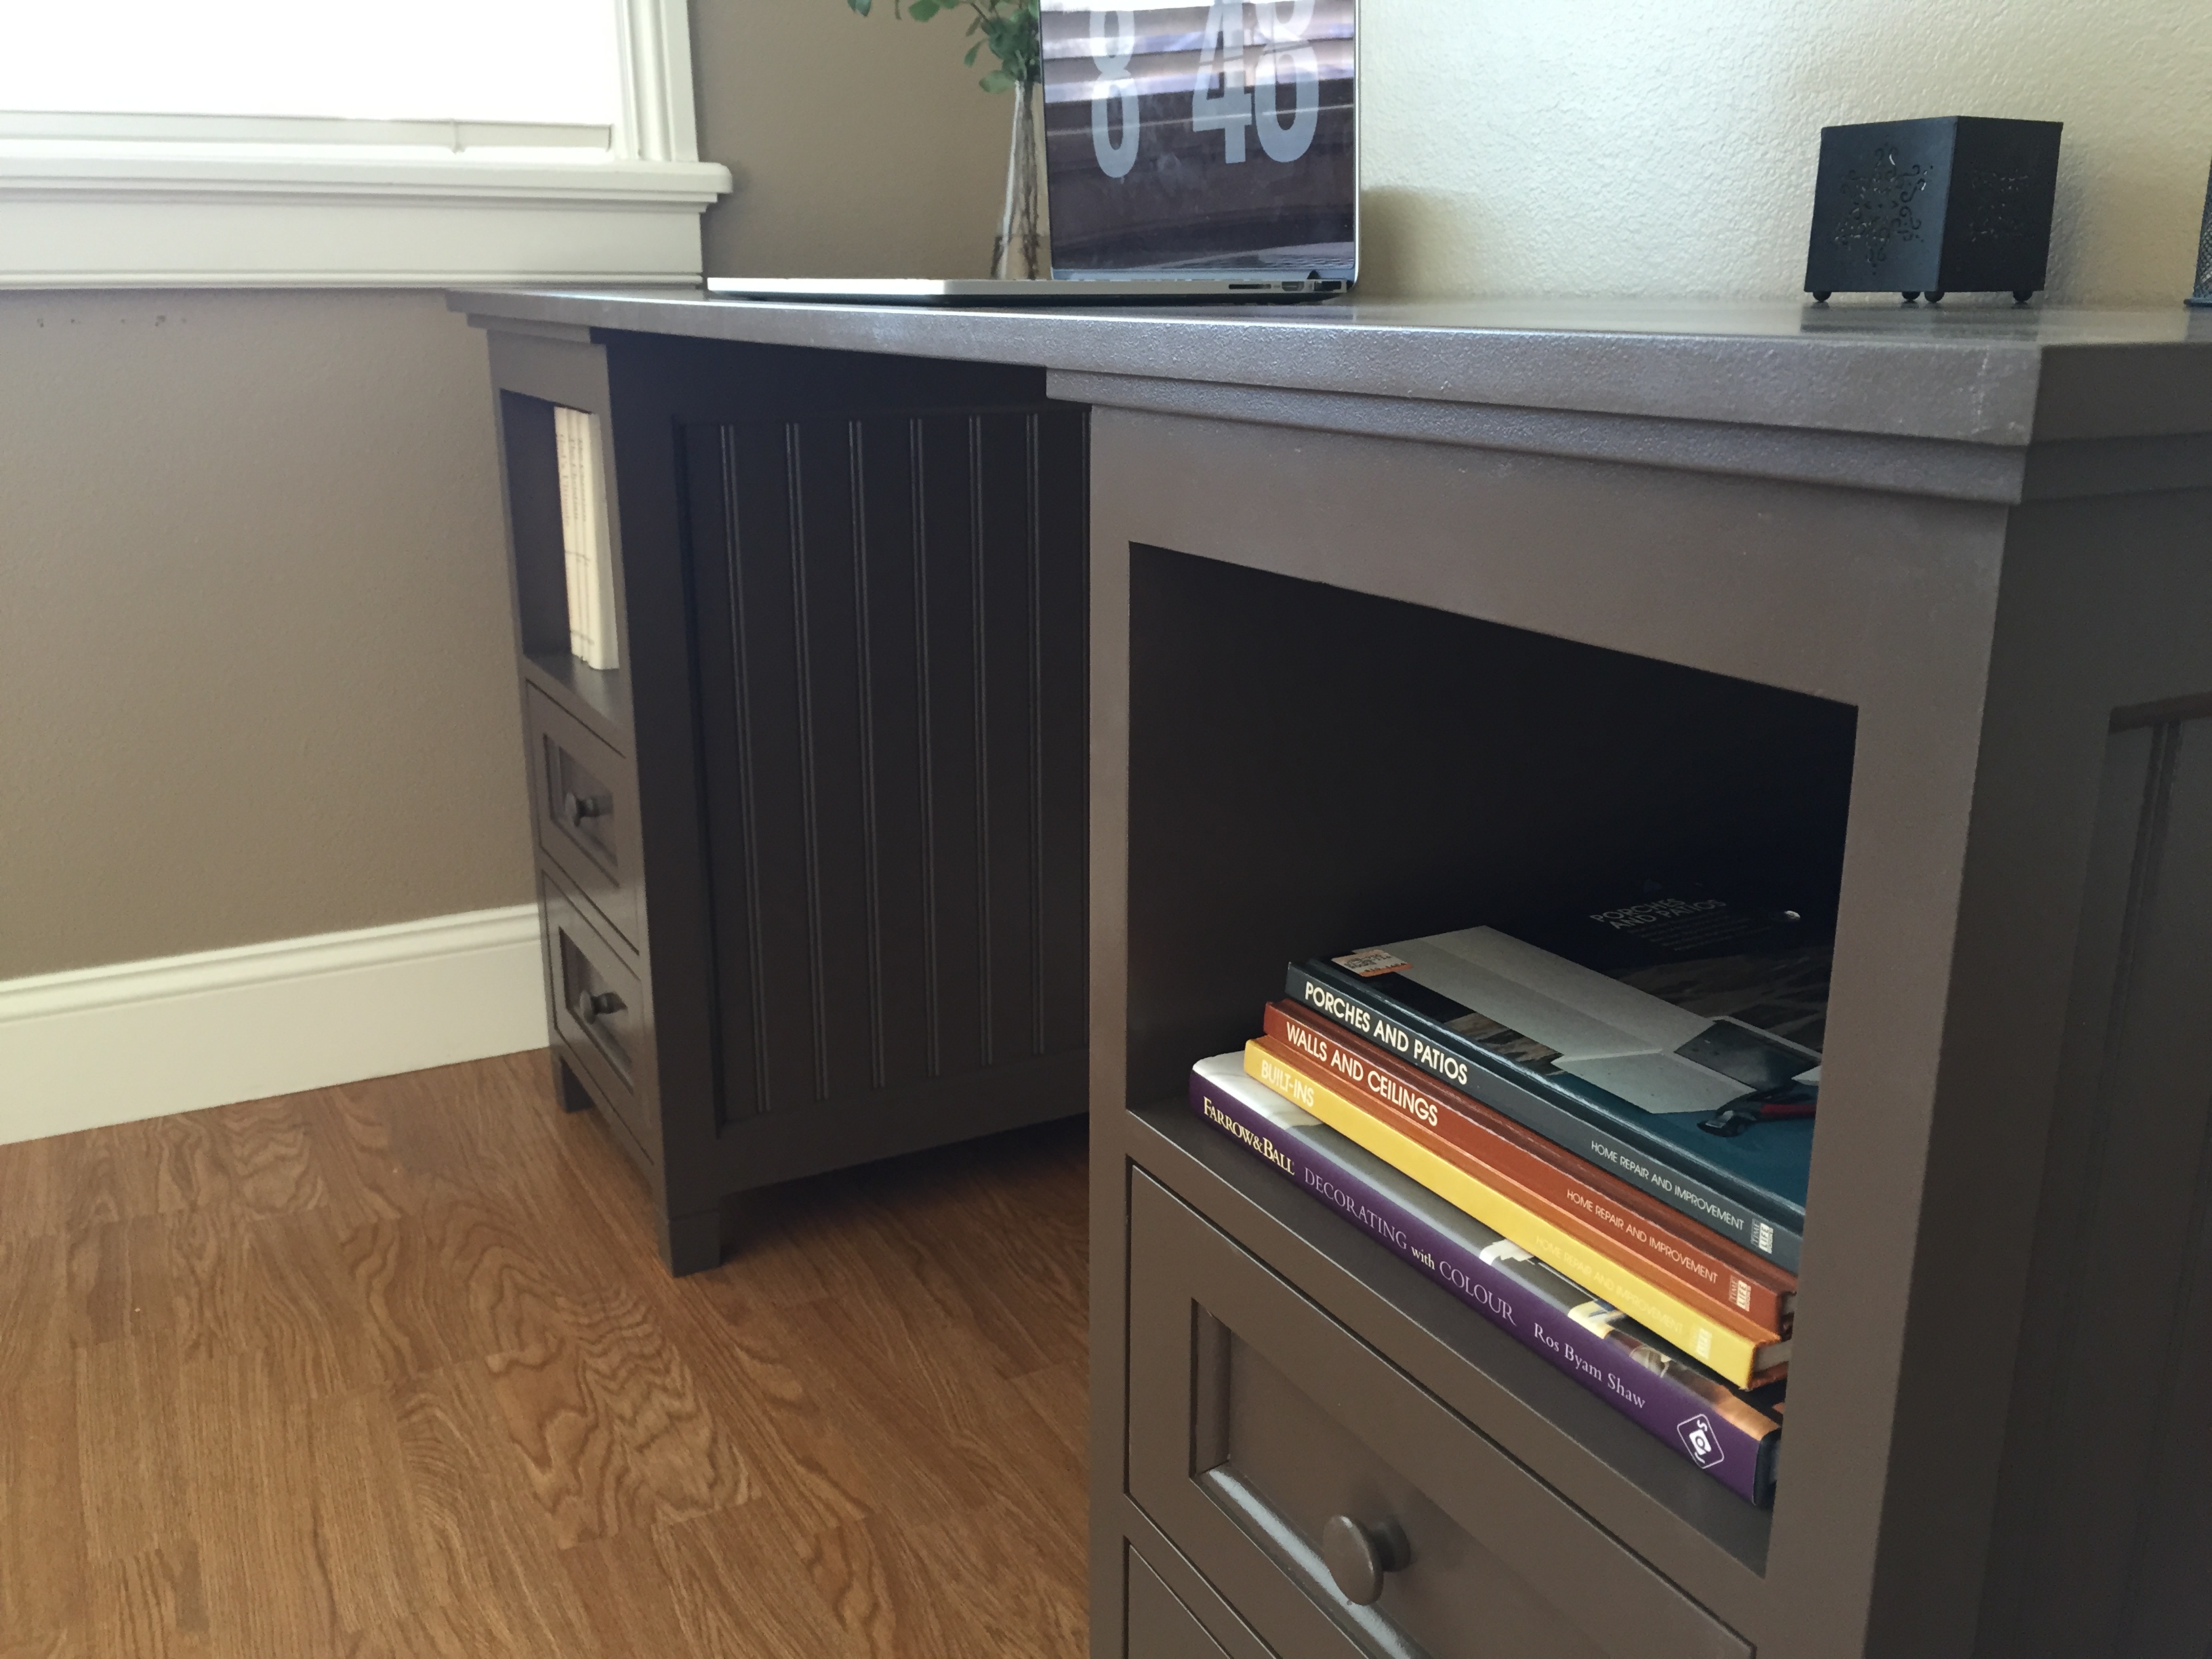
Bead board desk
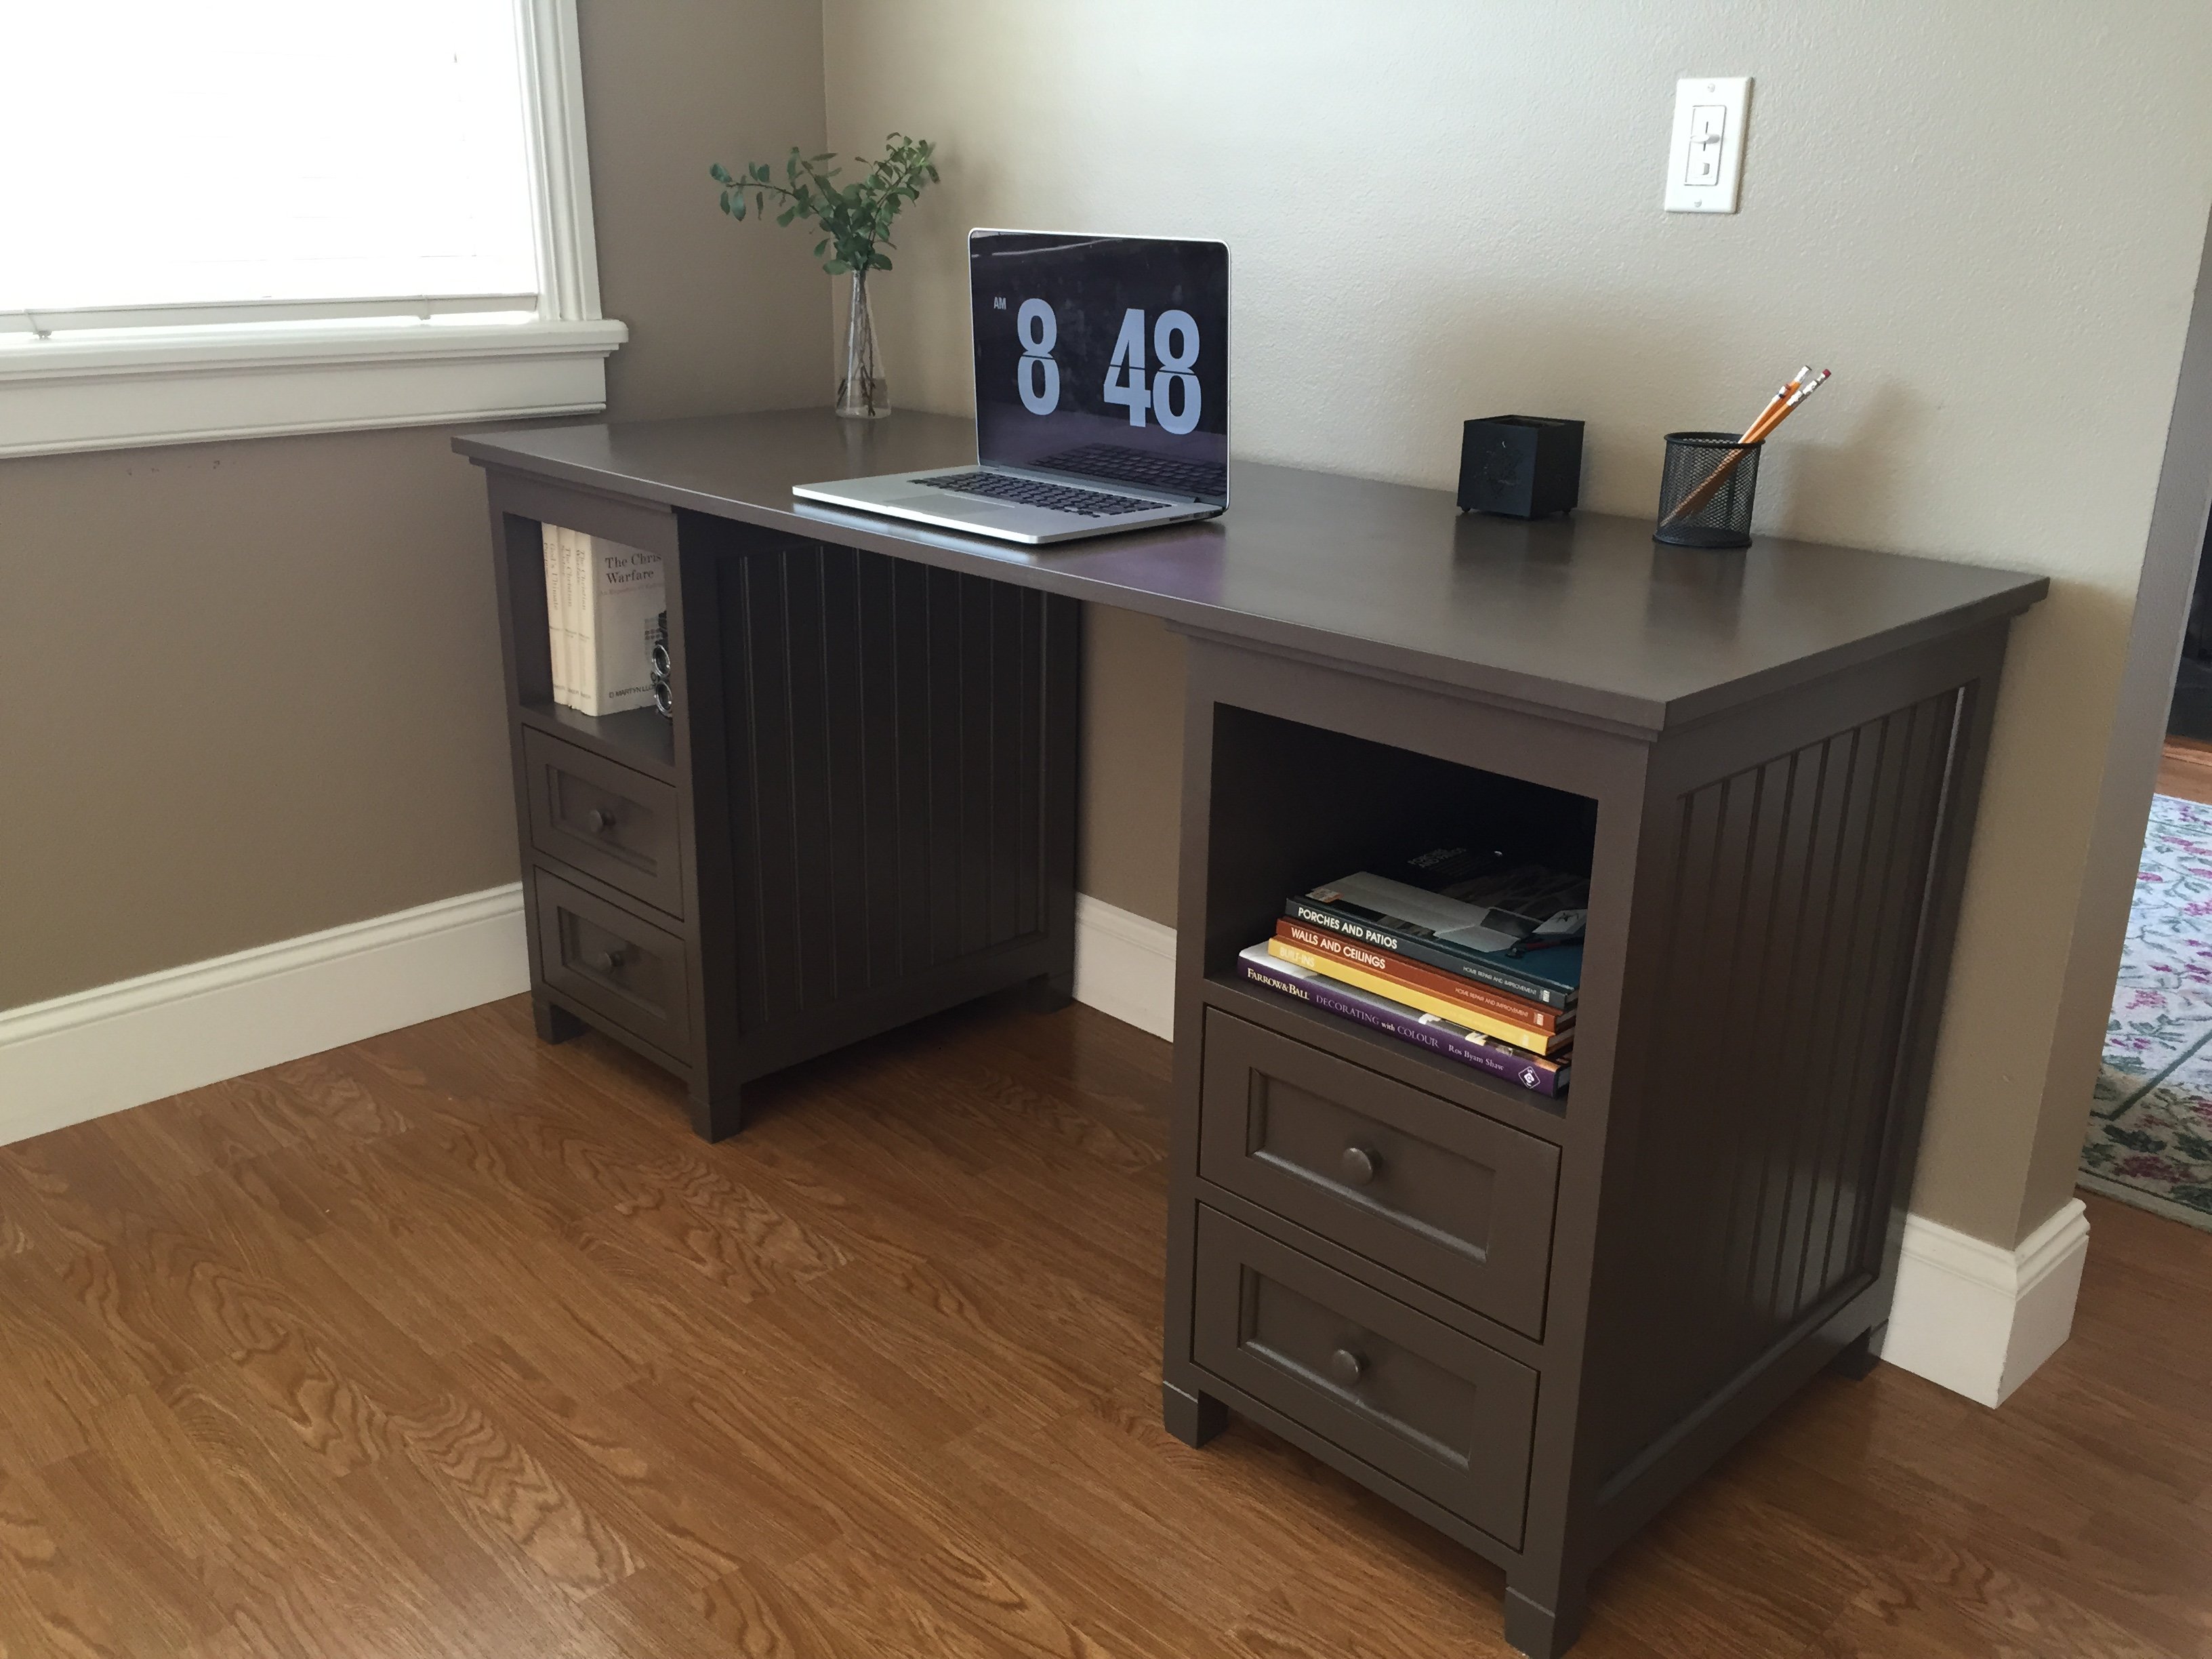
Here is a desk I recently built. It is a Pottery Barn piece. It features full extension drawers slides and simulated maple melamine drawer interiors.
Estimated Time Investment
Weekend Project (10-20 Hours)
Finish Used
Primer and paint
Recommended Skill Level
Intermediate
Blanket ladder
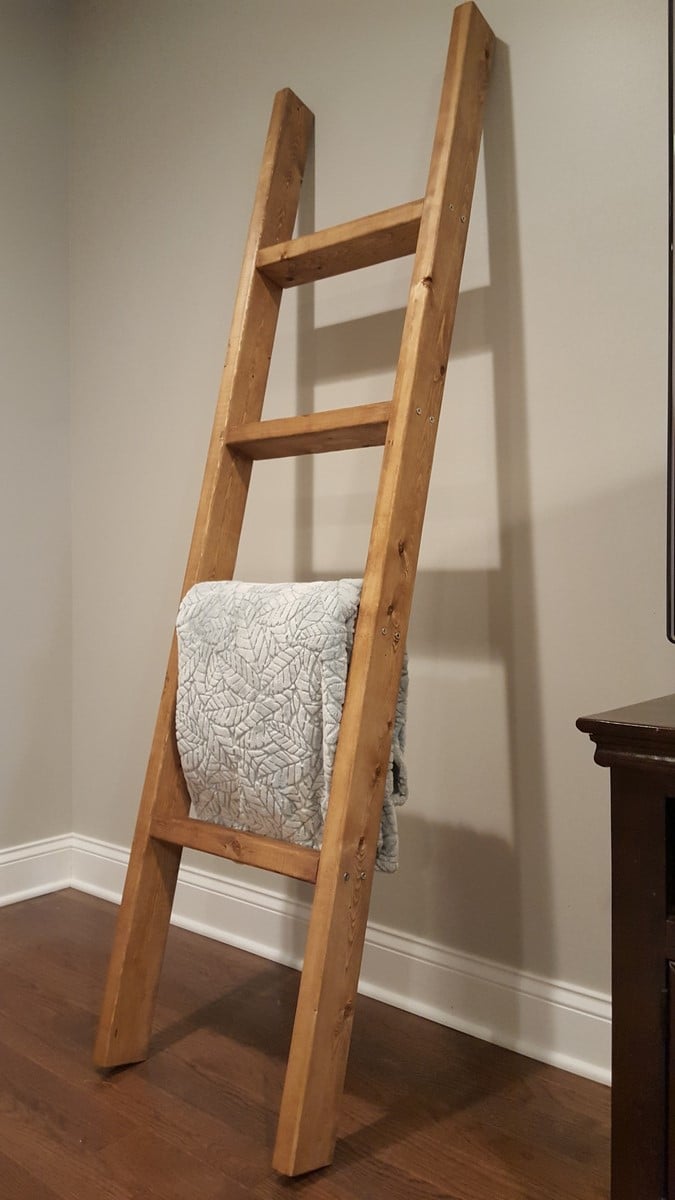
Very easy to cut/assemble and very pleased with the result! It took about an hour to cut the boards and screw then together. Then another hour to same/pretreat/stain. Love it!

Built from Plan(s)
Estimated Cost
$10 not including stain (I already had)
Estimated Time Investment
Afternoon Project (3-6 Hours)
Finish Used
Minwax Early American
Recommended Skill Level
Starter Project
Cedar Privacy Planter and Raised Garden Beds!
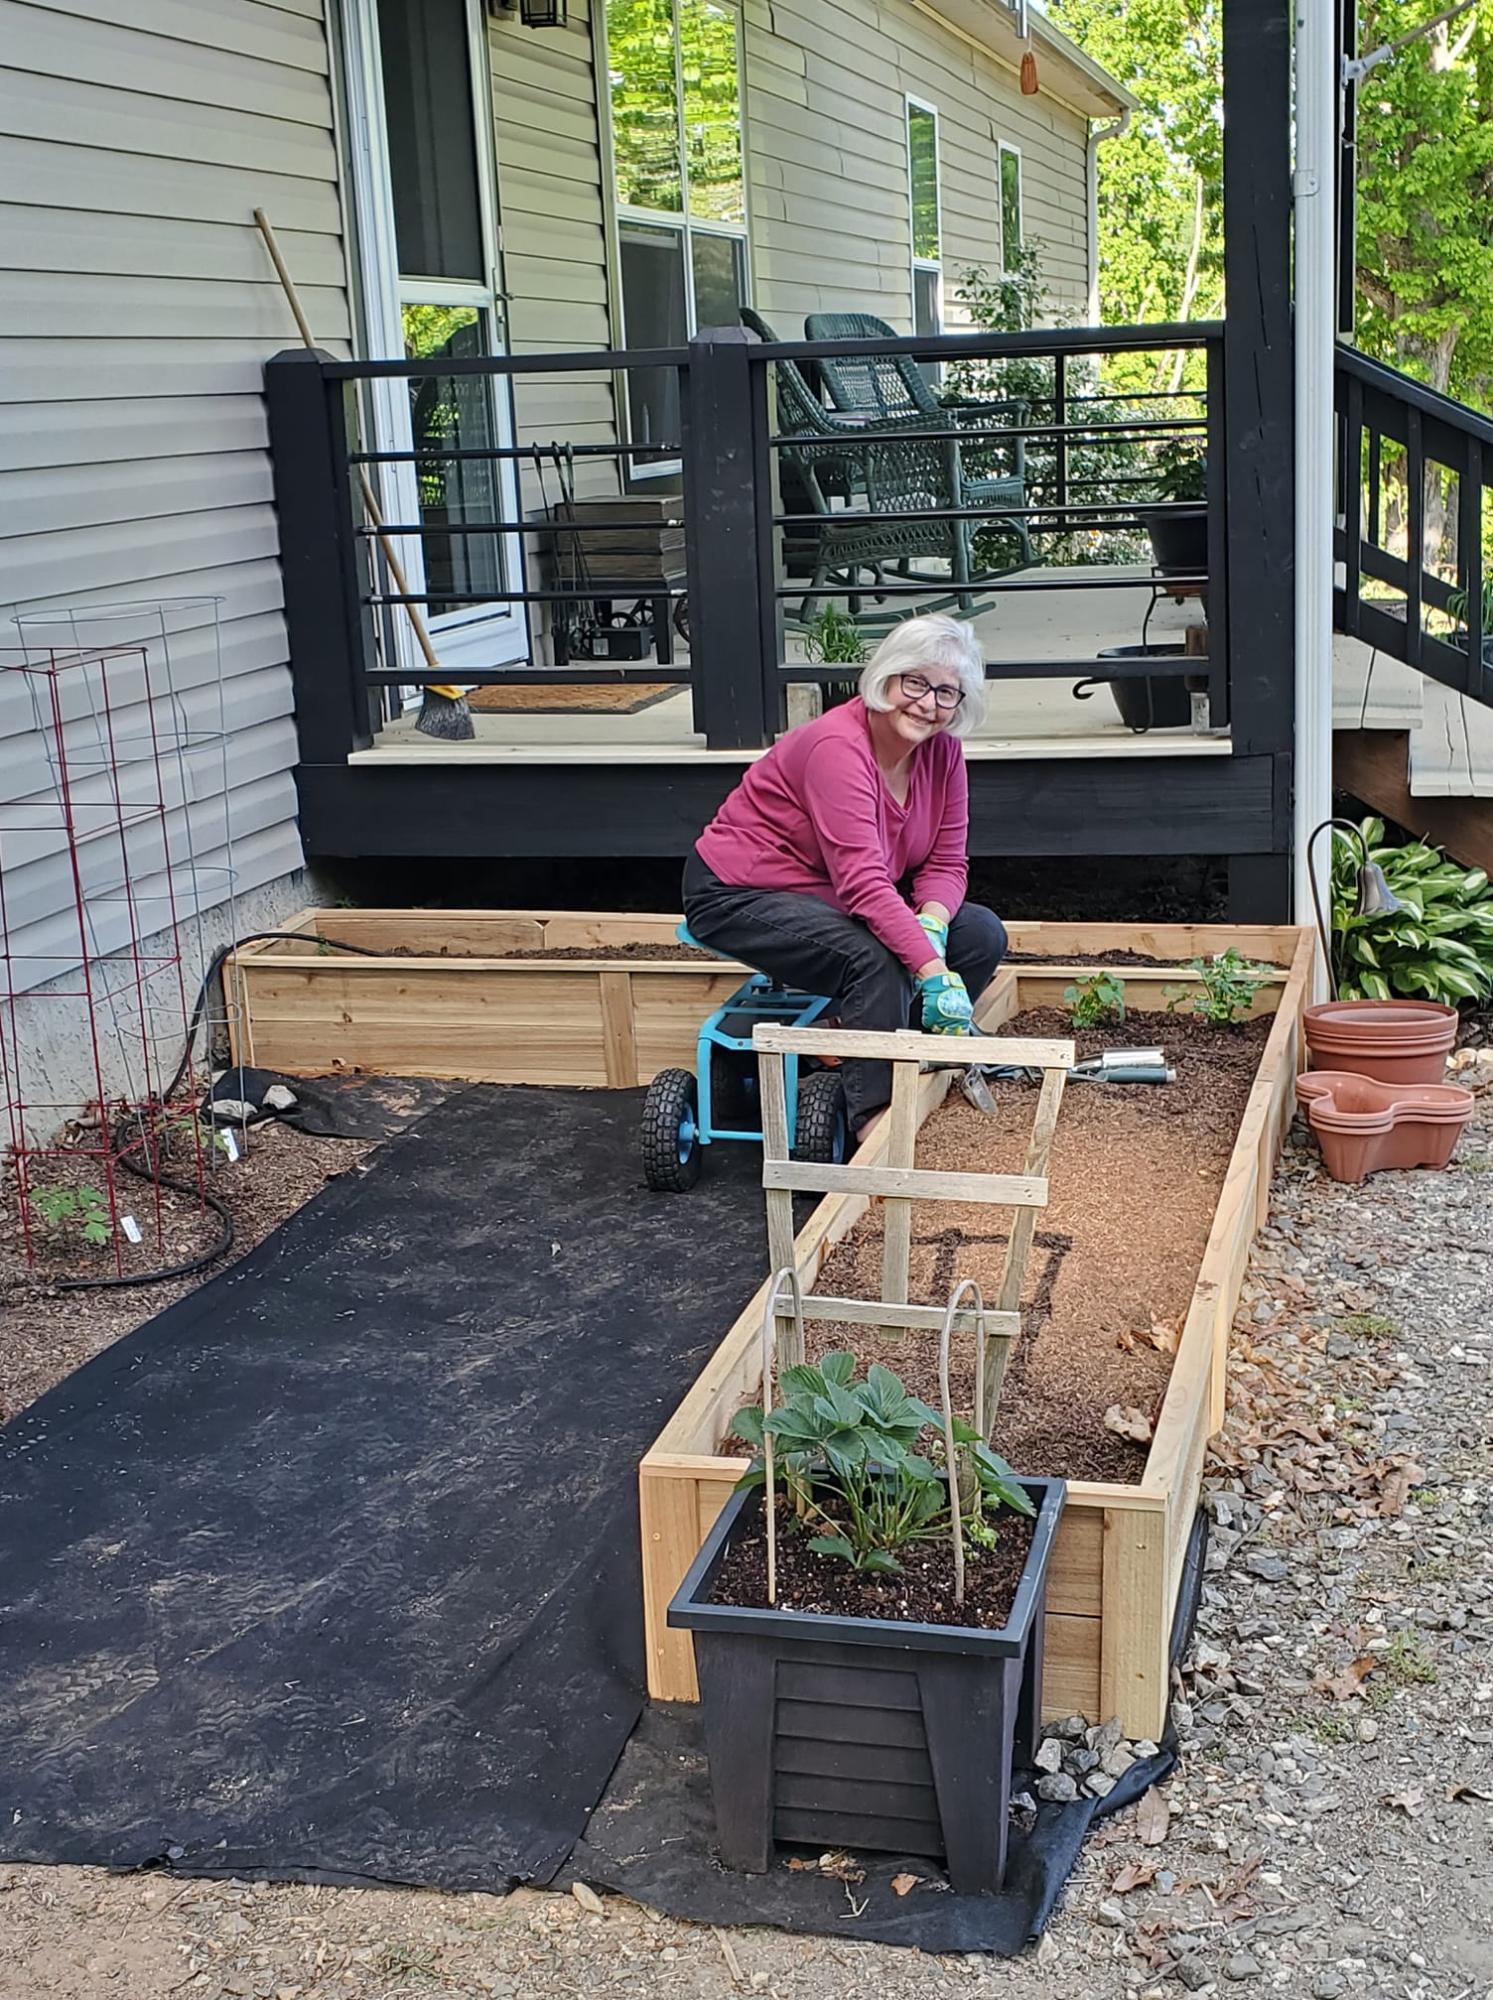
We bought 40 pickets and built the privacy planter and these 2 beds with 2 pickets left over. Might need a planter box on the front porch ![]()
By Terri!
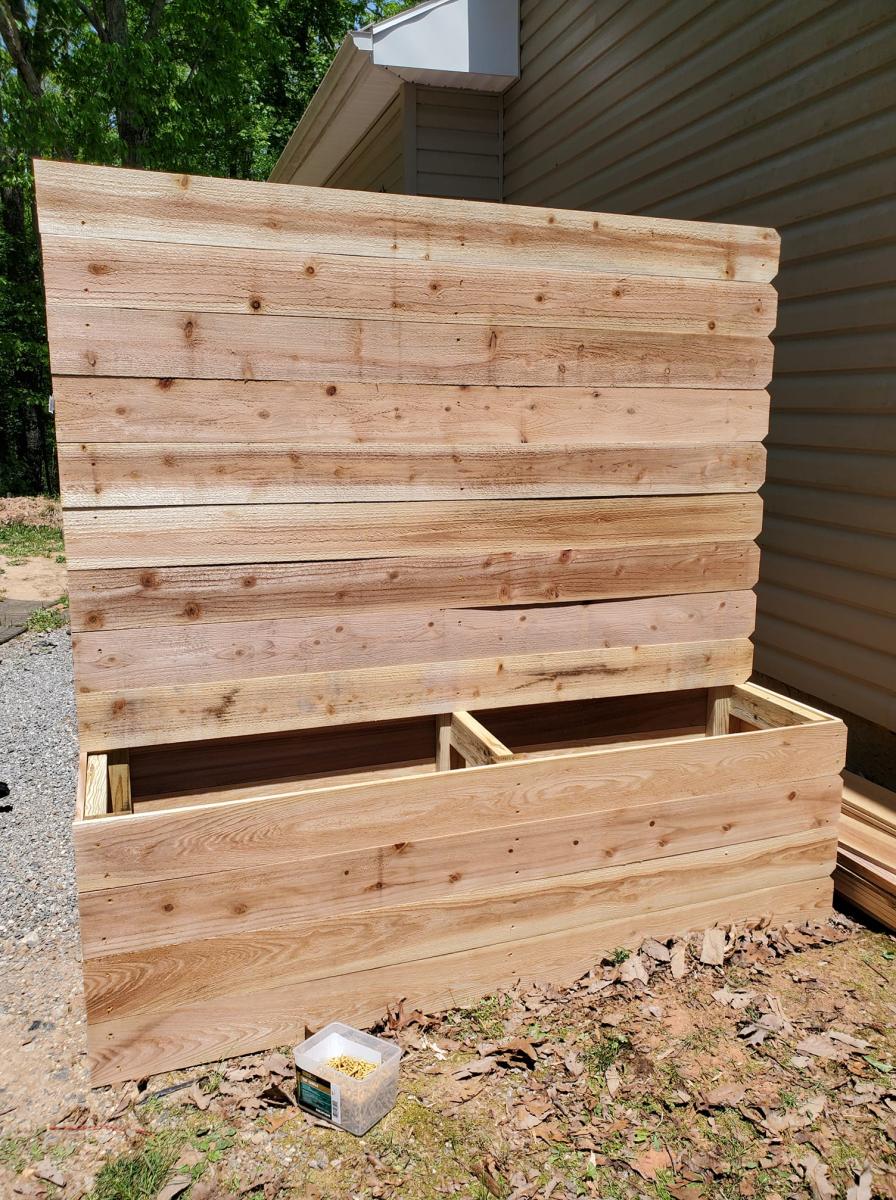
Built from Plan(s)
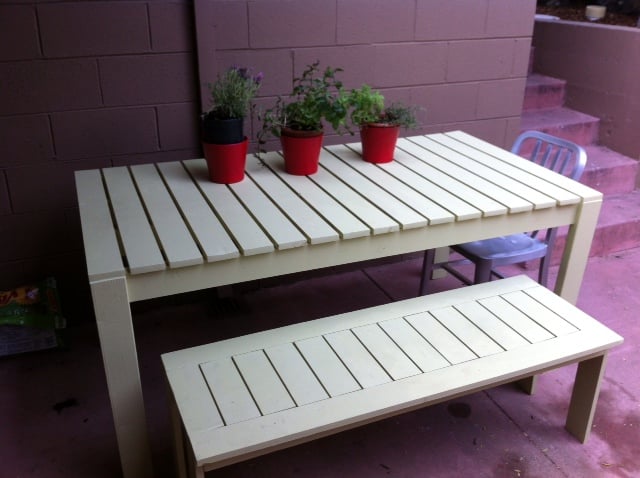
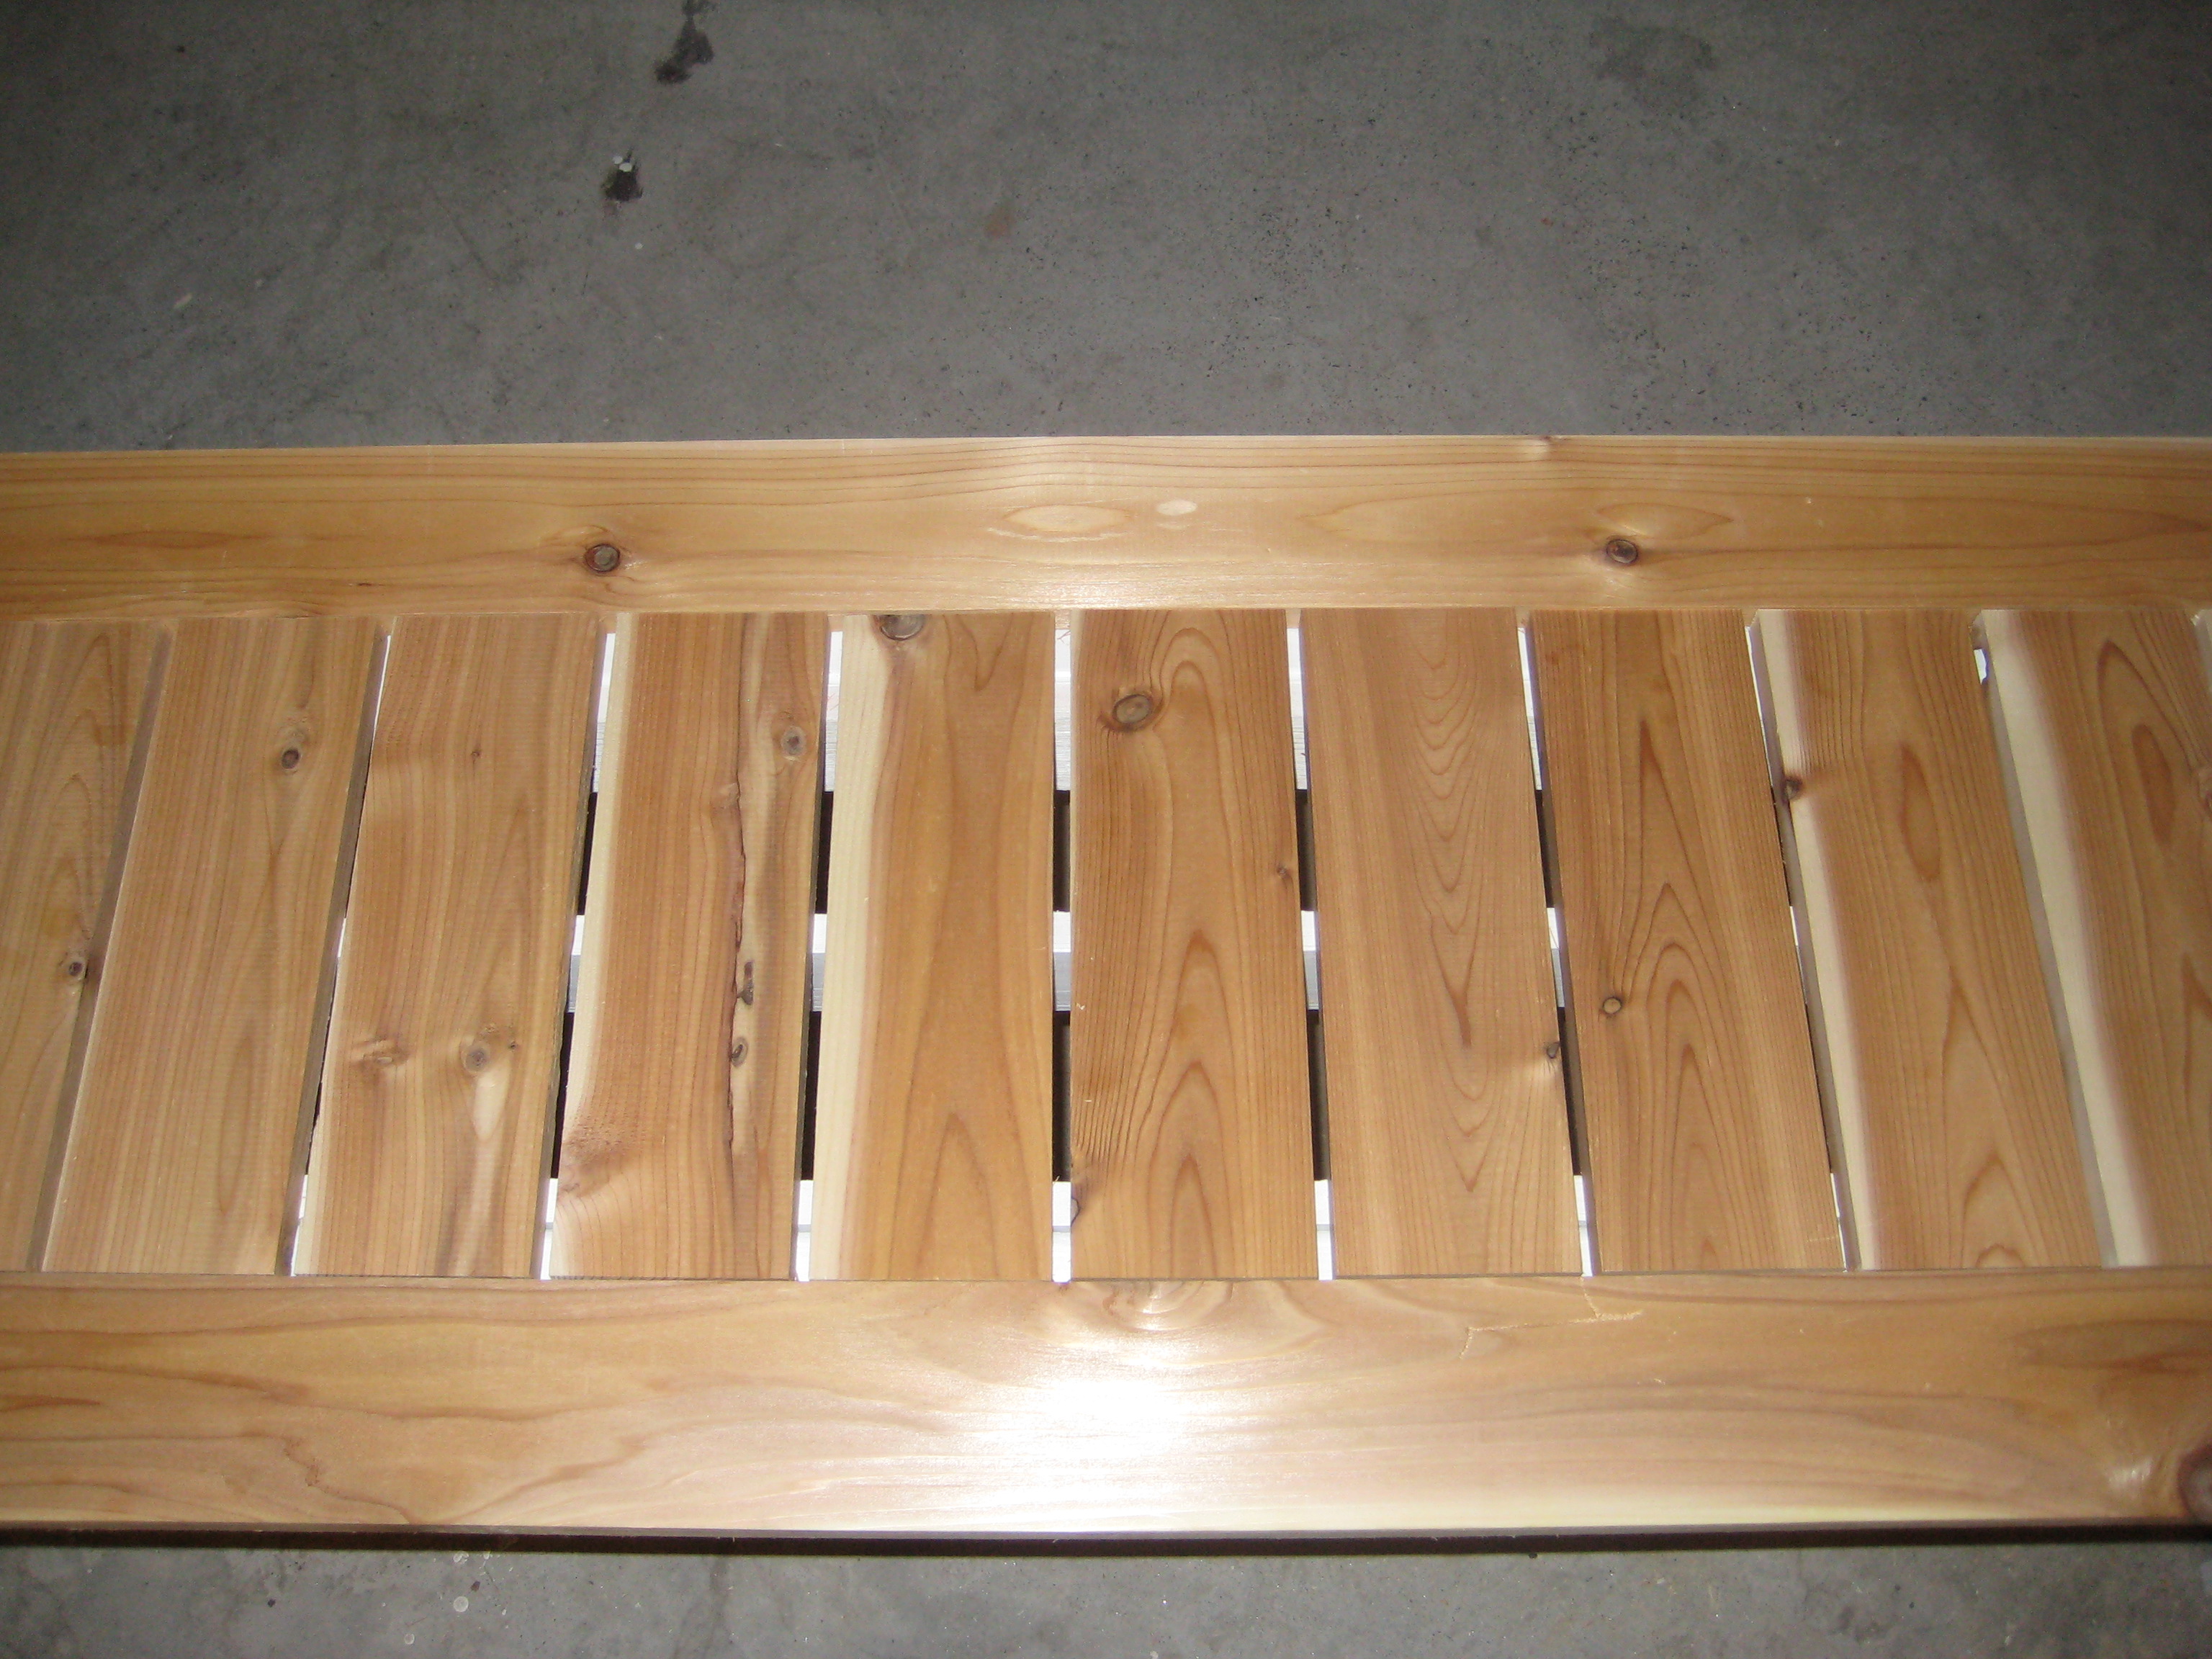
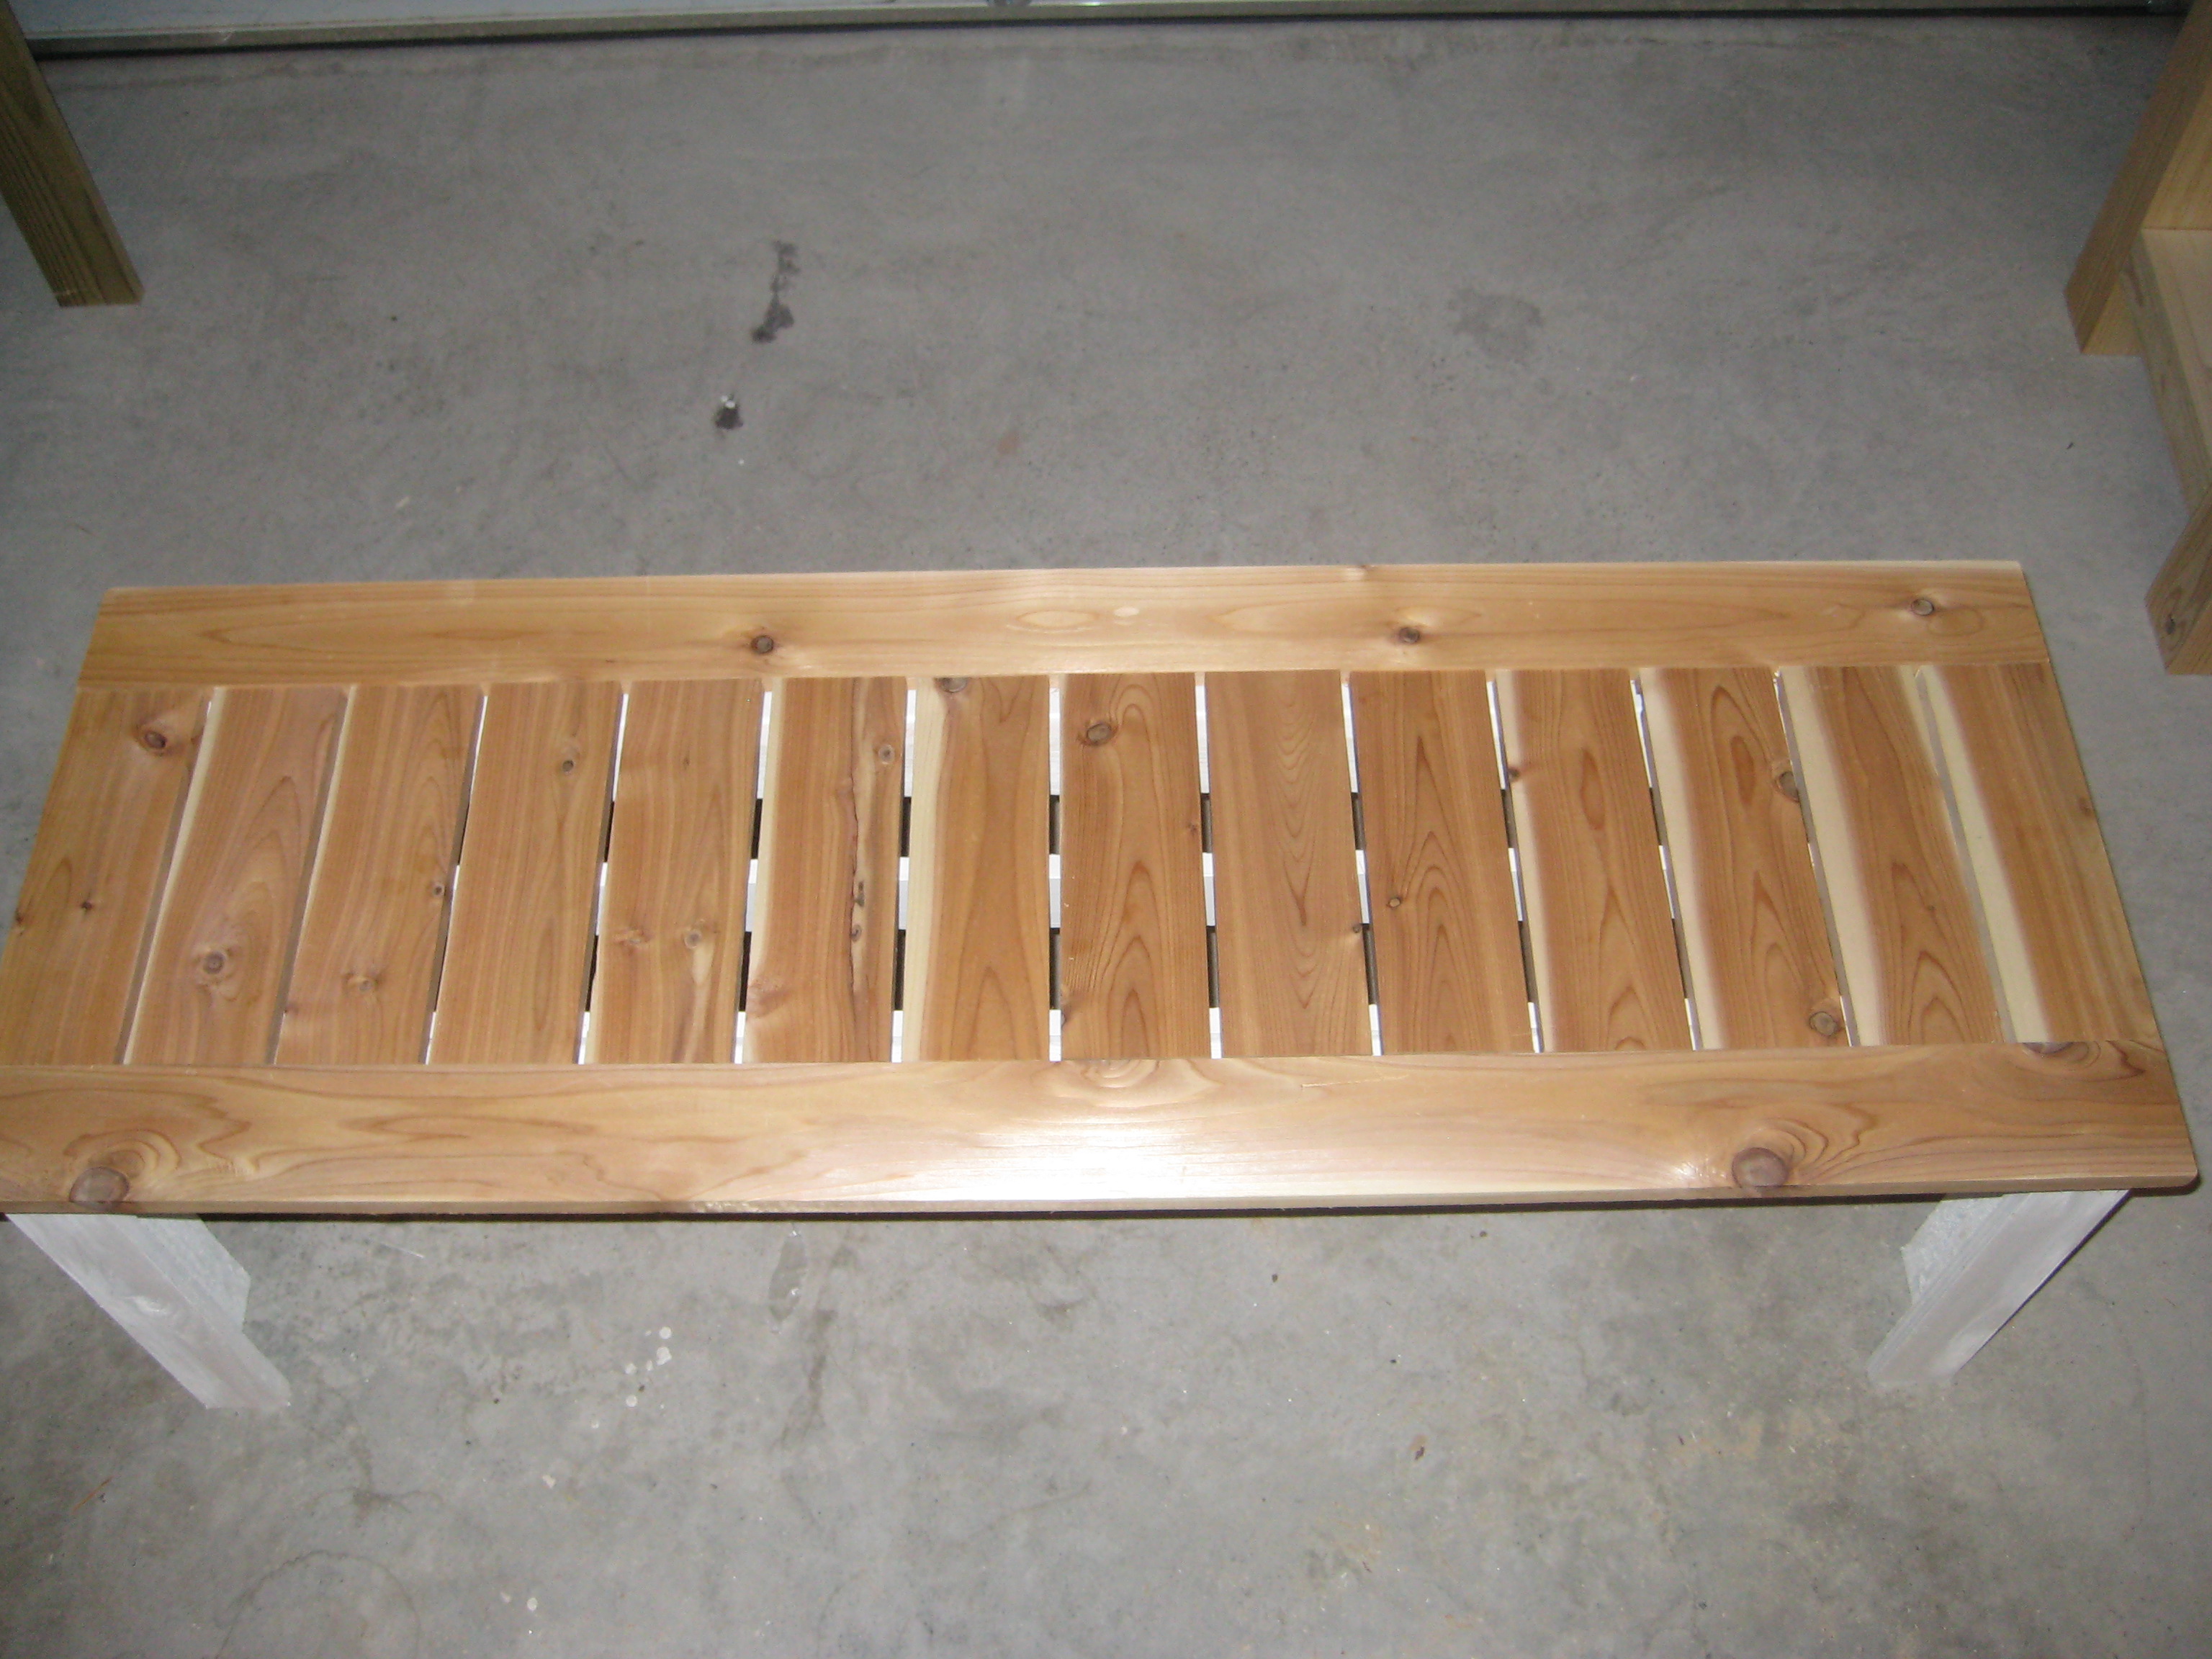
Simple Outdoor Bench with Cedar Slats
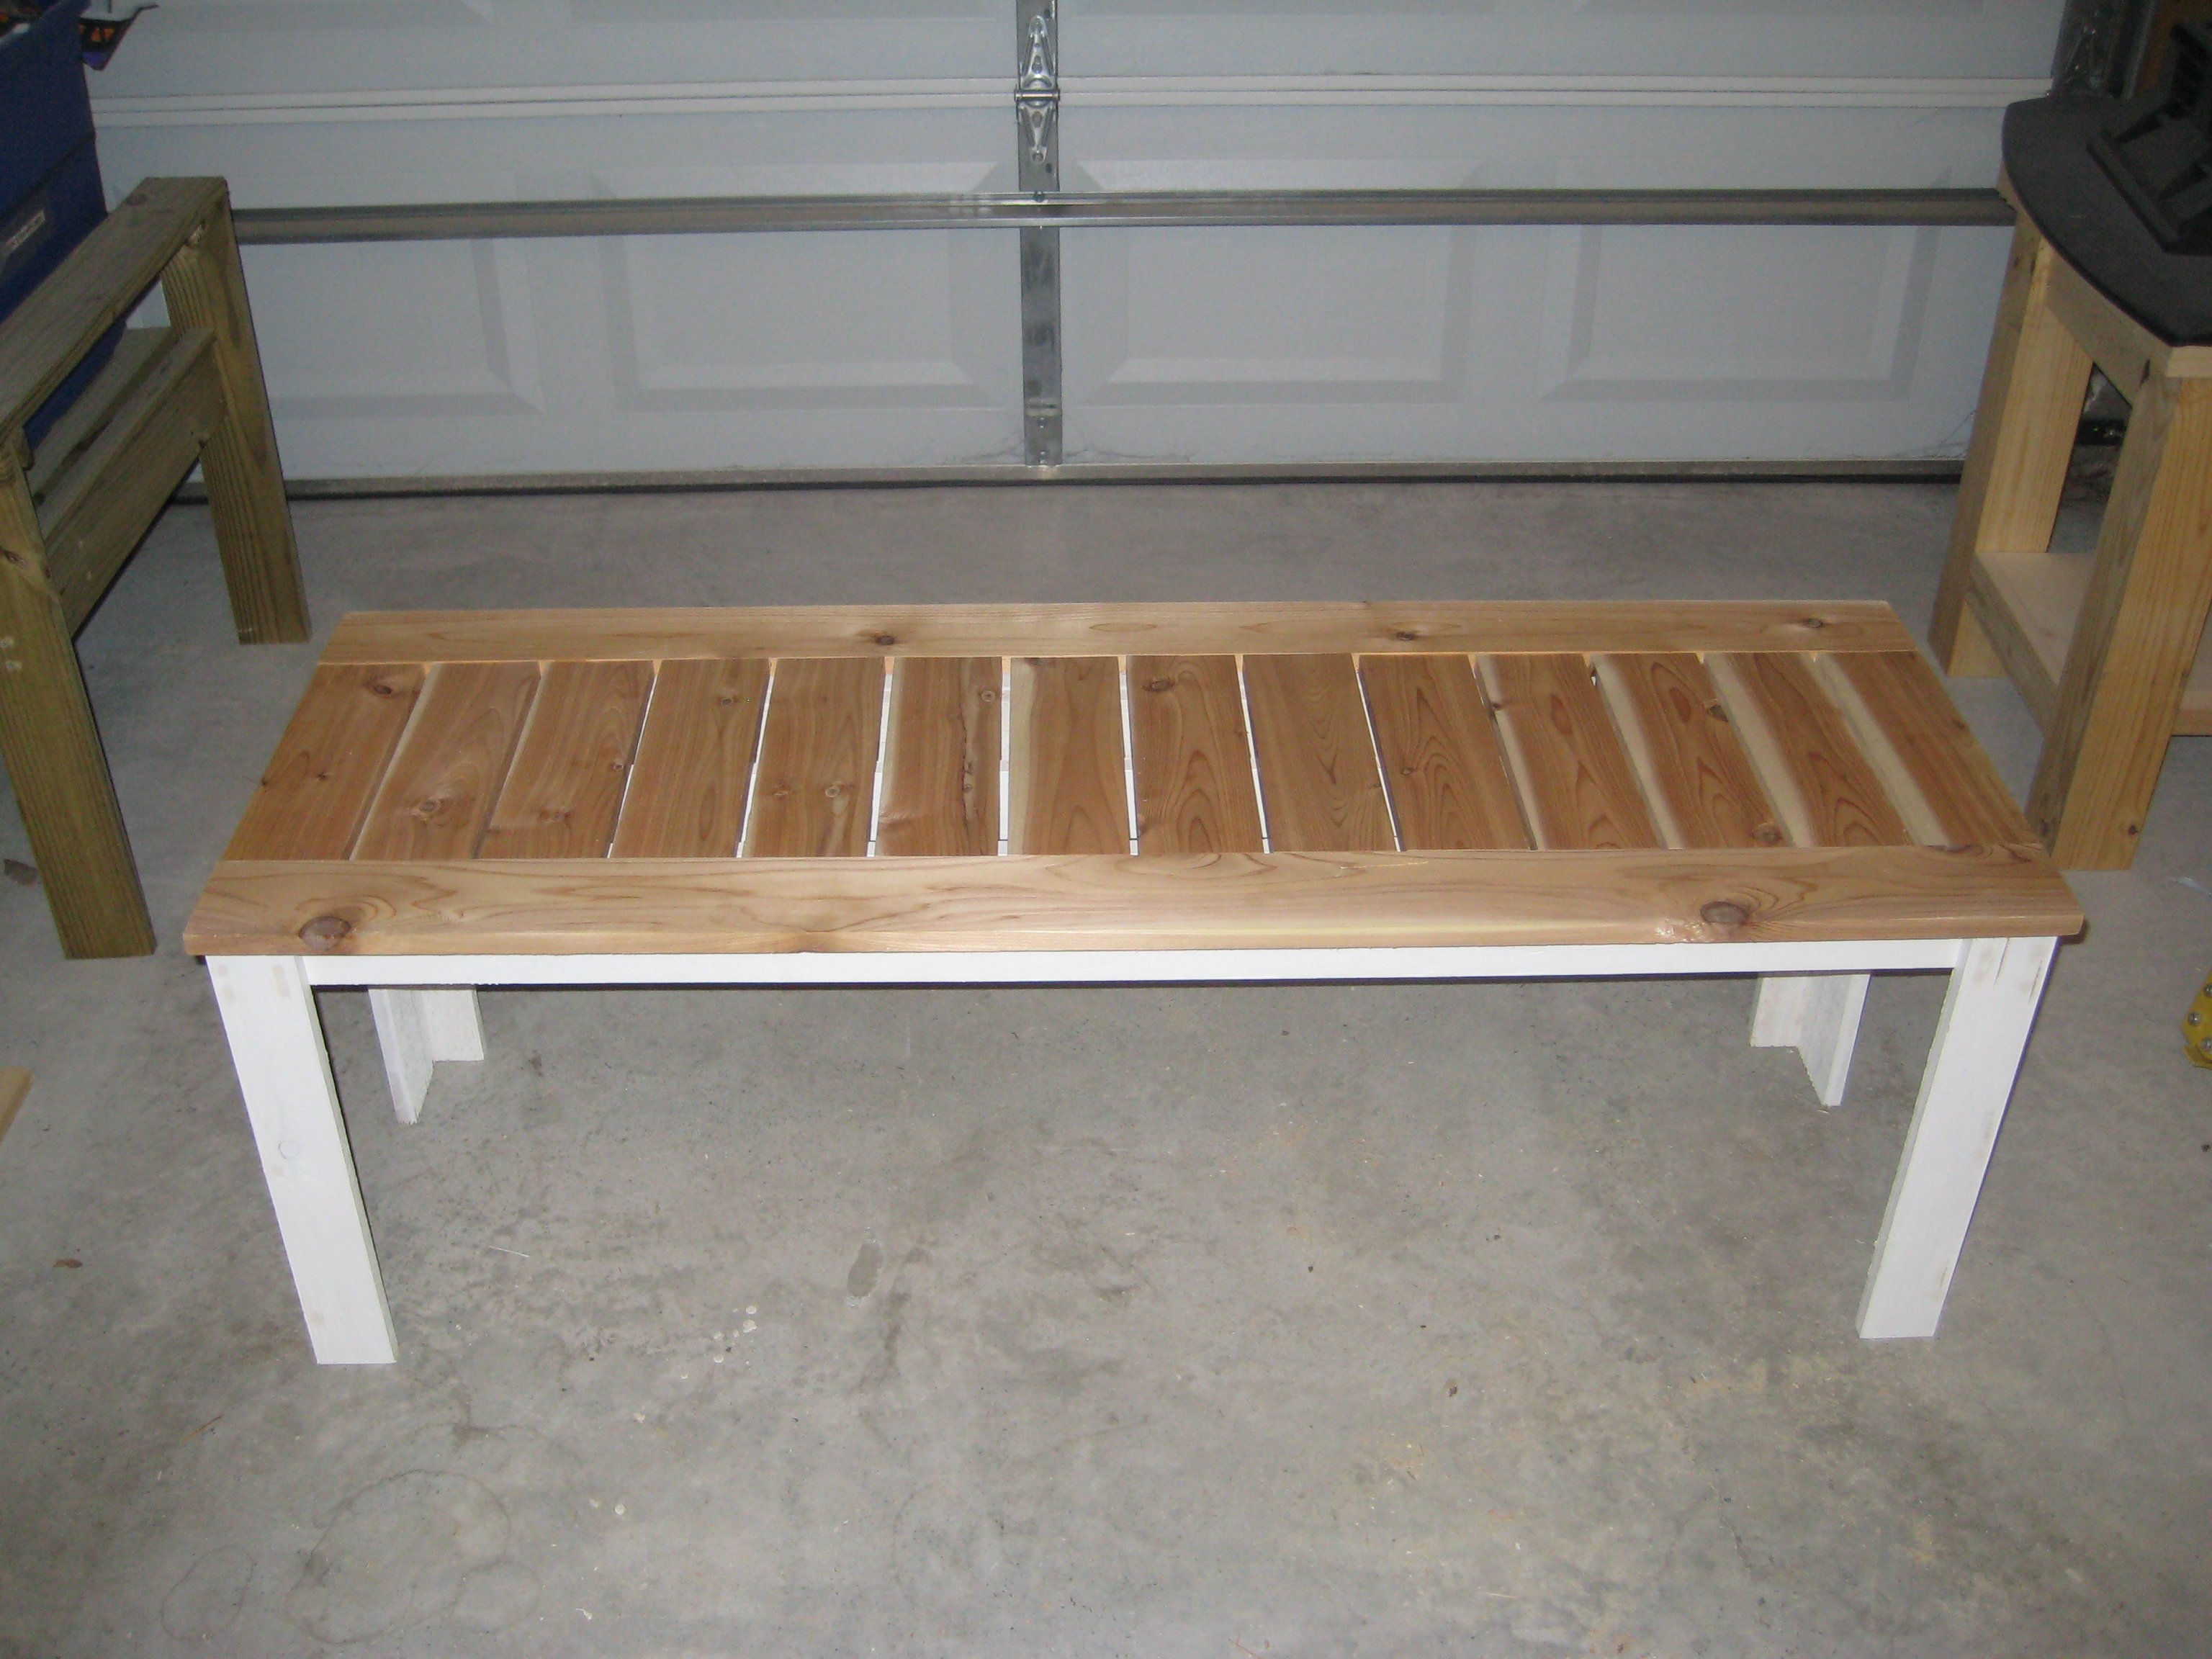
I am close to completing an outdoor set with only the table to go. My parents are going to love this at their new house they are building!! I found the cedar 1x4's at home depot for about six dollars a piece. I painted the base a basic semi-gloss white before I built the bench. It's so much easier to paint first and build later. I have a few more touch ups but I am happy with it. I used the Kreg Jig Jr to screw in underneath($40), which made this project and every project I've done so far that much easier.
Estimated Time Investment
Day Project (6-9 Hours)
Finish Used
Semi-gloss white exterior.
Recommended Skill Level
Beginner
Comments
Tue, 07/26/2011 - 15:28
top question
Looks great! Love the two toned wood look. I wondered whether you added an extra support in the middle... sort of seems like there's one at least in the last picture. Also did you build the top completely separate so it was one piece? Sorry for all the questions. I really want to make this bench for a friend and I would like it to look better than the last outdoor table I made with my kreg jig. Thanks

Tue, 07/26/2011 - 16:42
Thanks! The bench had a
Thanks! The bench had a little flexibility when I sat in the middle of the bench. I added the extra support in the middle which made no difference at all. It turns out that cedar is a naturally light and flexible wood. If I had it to do over again I would use treated pine for the white base and keep the top cedar. The 1x4 cedar from home depot I used is actually .625 x 3.3875 not .75 x 3.5. So as you can imagine, it threw off the whole slat configuration. Best thing to do is use 28 or so .25 inch spacers to place in between the 14 or so slats on level ground. Once you space the slats like you want, then you can maneuver the frame freely until its even on both sides. Once it looks even on both sides start screwing kreg screws at one end and continue until the last one is done. FYI - I highly recommend drilling the pocket holes first before building the frame in Step 1. Hope that helps!!
Tue, 07/26/2011 - 17:05
Almost forgot. I did add
Almost forgot. I did add 2x2's in between the blue and green boards on each side of the frame to add more support. The middle board I added as you can see in the last picture did nothing structurally speaking.
Fri, 08/05/2011 - 10:11
just one more question
Thanks for the tips. I finished cutting all the wood and am going to start putting it together tonight... After reading through the comments I think I'll join the 14 slats together with the side 52 1/4 boards before attaching it to the frame. Did you use an extra 1x3 for the second leg board?