
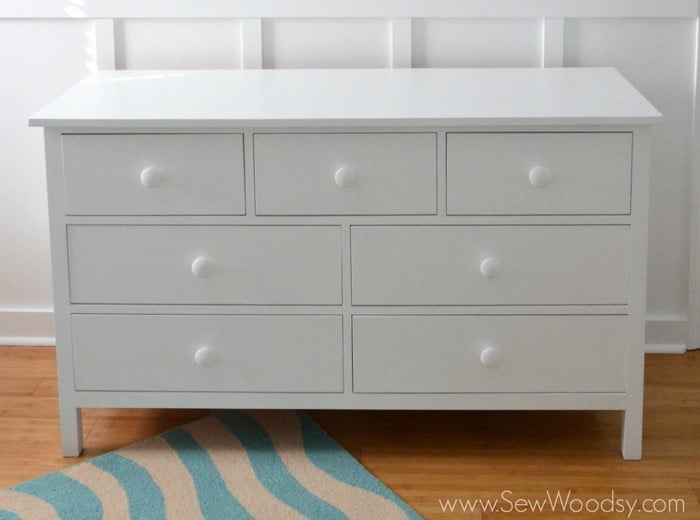

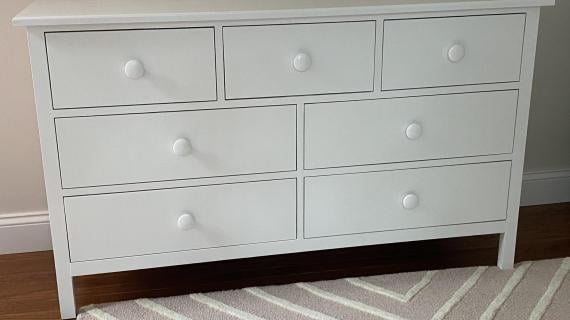
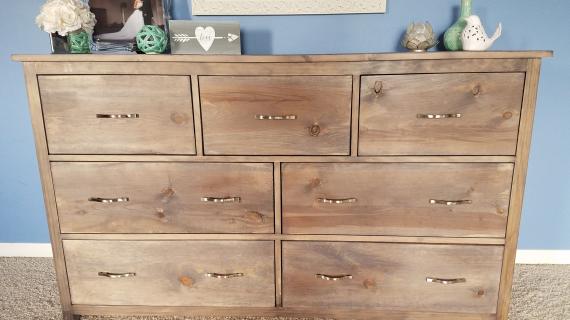
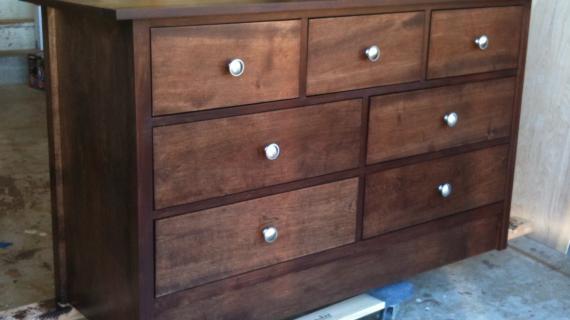
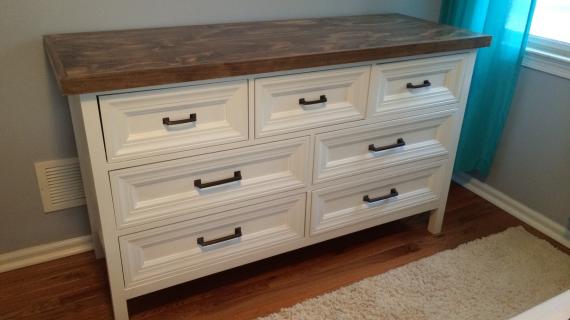
This is a great dresser, with seven drawers to organize it all. Simple styling goes with just about any decor style. Our free DIY plans include step by step instructions, with diagrams and lots of reader submitted photos from Ana-White.com
I love how simple this dresser is, but with so much storage!

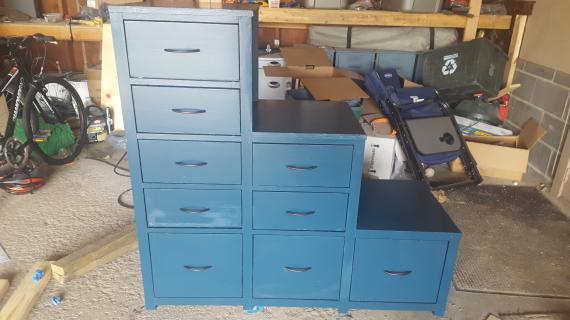
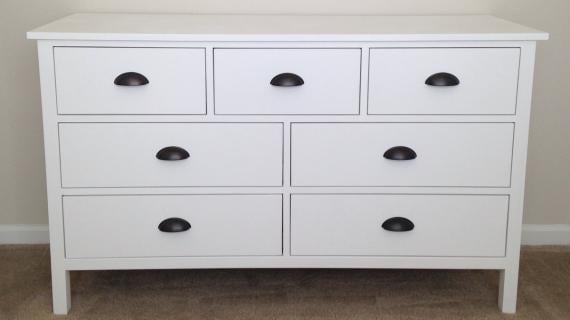
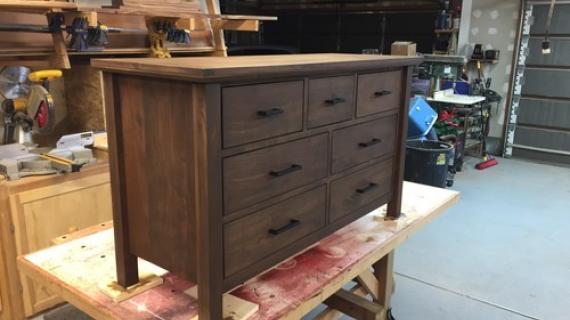
More Photos and Build Post
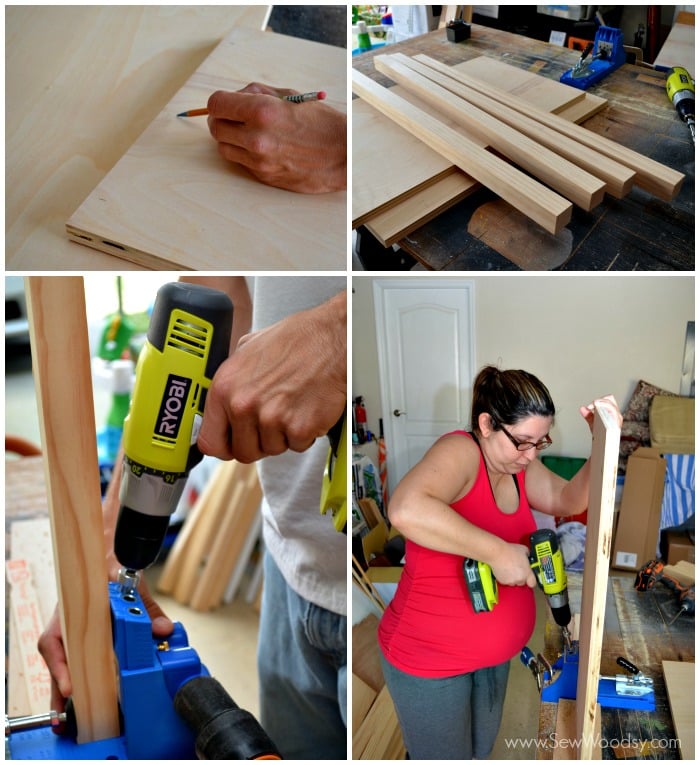
This dresser plan was created in collaboration with Sew Woodsy - Katie and John did an awesome job sharing their whole building process with LOTS of photos and building tips, so take a second to check out their building post!
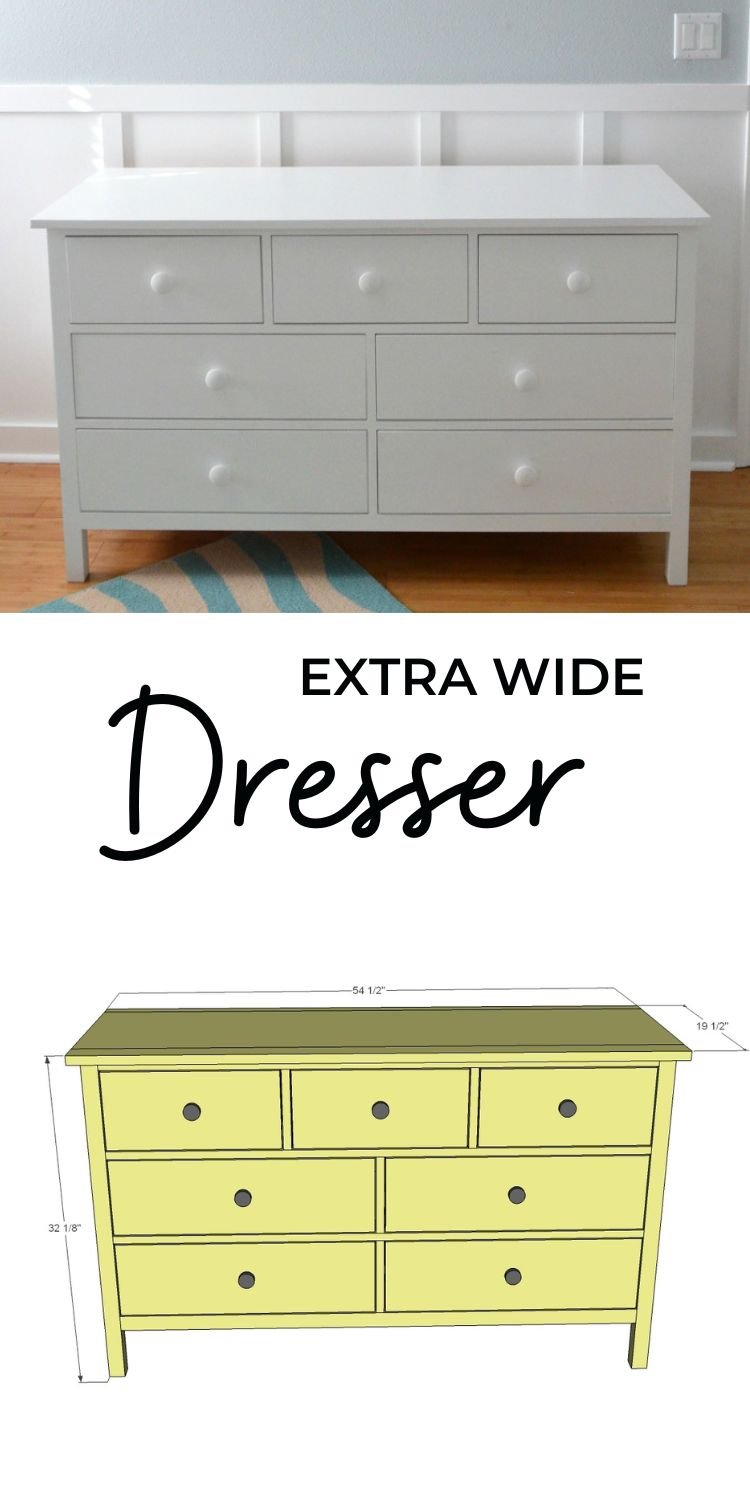
Pin For Later!
Preparation
- 1 - sheet of 3/4” plywood, ripped into strips 15-1/2” wide (you’ll only use up about 1/2 of this plywood, but the 15-1/2” wide strips can be used for a variety of other projects or as shelving)
- 3 - 2x2 @ 8 feet long
- 4 - 1x2 @ 10 feet long
- 1 - 1x3 @ 10 feet long
- 6 - 1x6 @ 8 feet long
- 2 - 1x8 @ 8 feet long (IMPORTANT: Plan assumes 1x8s are 7-1/4” wide)
- 1 - sheet 1/4” plywood for back
- 7 - 16” euro drawer slides
- 7 knobs or handles
- 1-1/4” and 2-1/2” pocket hole screws
- 5/8" and 1-1/4" brad nails
- 2 - 3/4” plywood @ 15-1/2” x 26-1/4” (side panels)
- 4 - 2x2 @ 31-1/4” (legs)
- 2 - 2x2 @ 49-1/2” (back support and bottom support)
- 6 - 1x2 @ 49-1/2” (front and back trim between drawers)
- 8 - 1x3 @ 7-1/2” (front trim between drawers vertically)
- 1 - 2x2 @ 15-1/2” (bottom support) If you used 1x4s on back, this board must be 3/4” longer in length
DRAWERS - CUT TO FIT!!! Plan uses 1x6 for drawer boxes and 1x8 for drawer faces. Drawer sides are 16" long.
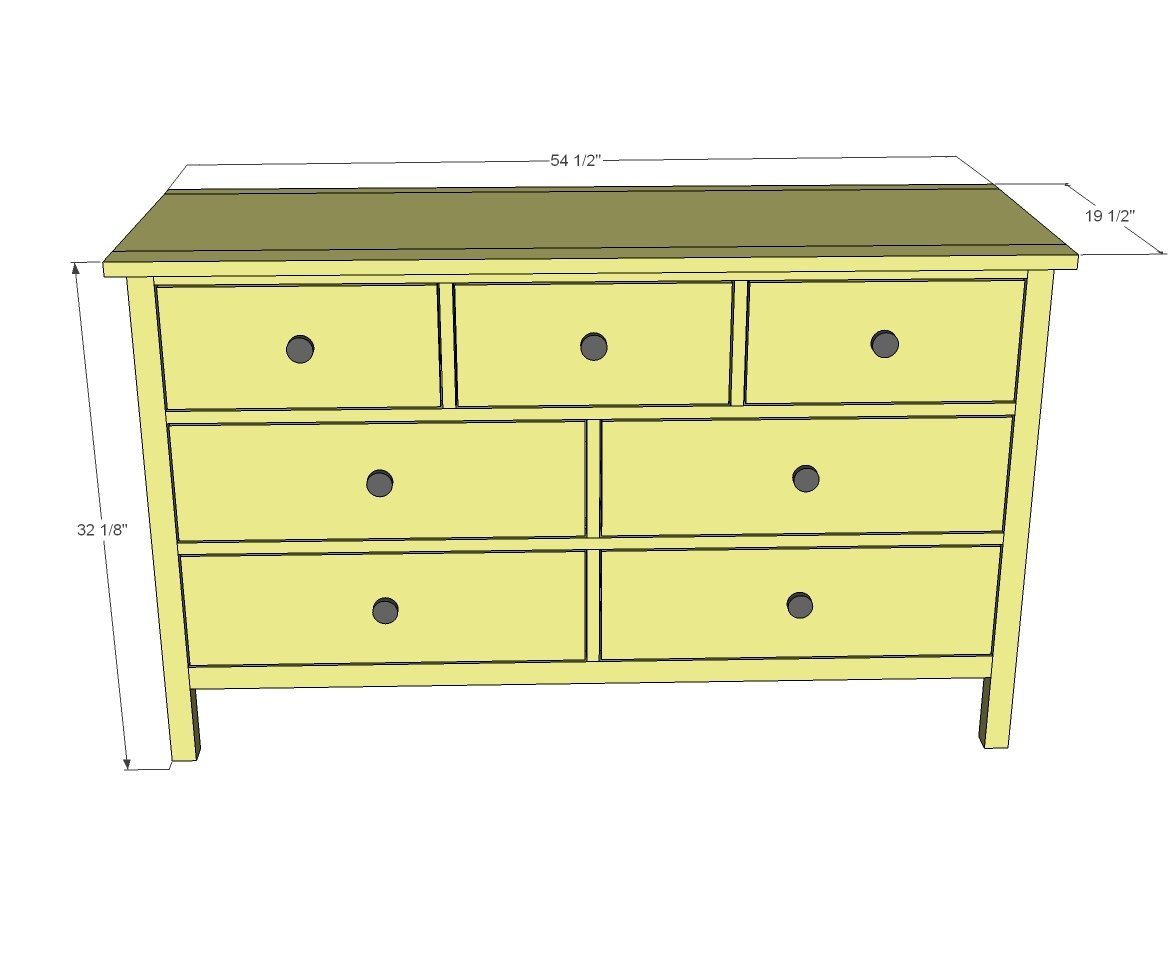
TOP
- 1 - 3/4” plywood @ 15-1/2” x 54-1/2”
- 1 - 1x2 @ 54-1/2”
- 1 - 1x3 @ 54-1/2”
BACK
- 52-1/2” x 26-1/4” - 1/4" plywood


Please read through the entire plan and all comments before beginning this project. It is also advisable to review the Getting Started Section. Take all necessary precautions to build safely and smartly. Work on a clean level surface, free of imperfections or debris. Always use straight boards. Check for square after each step. Always predrill holes before attaching with screws. Use glue with finish nails for a stronger hold. Wipe excess glue off bare wood for stained projects, as dried glue will not take stain. Be safe, have fun, and ask for help if you need it. Good luck!
Instructions
Step 1
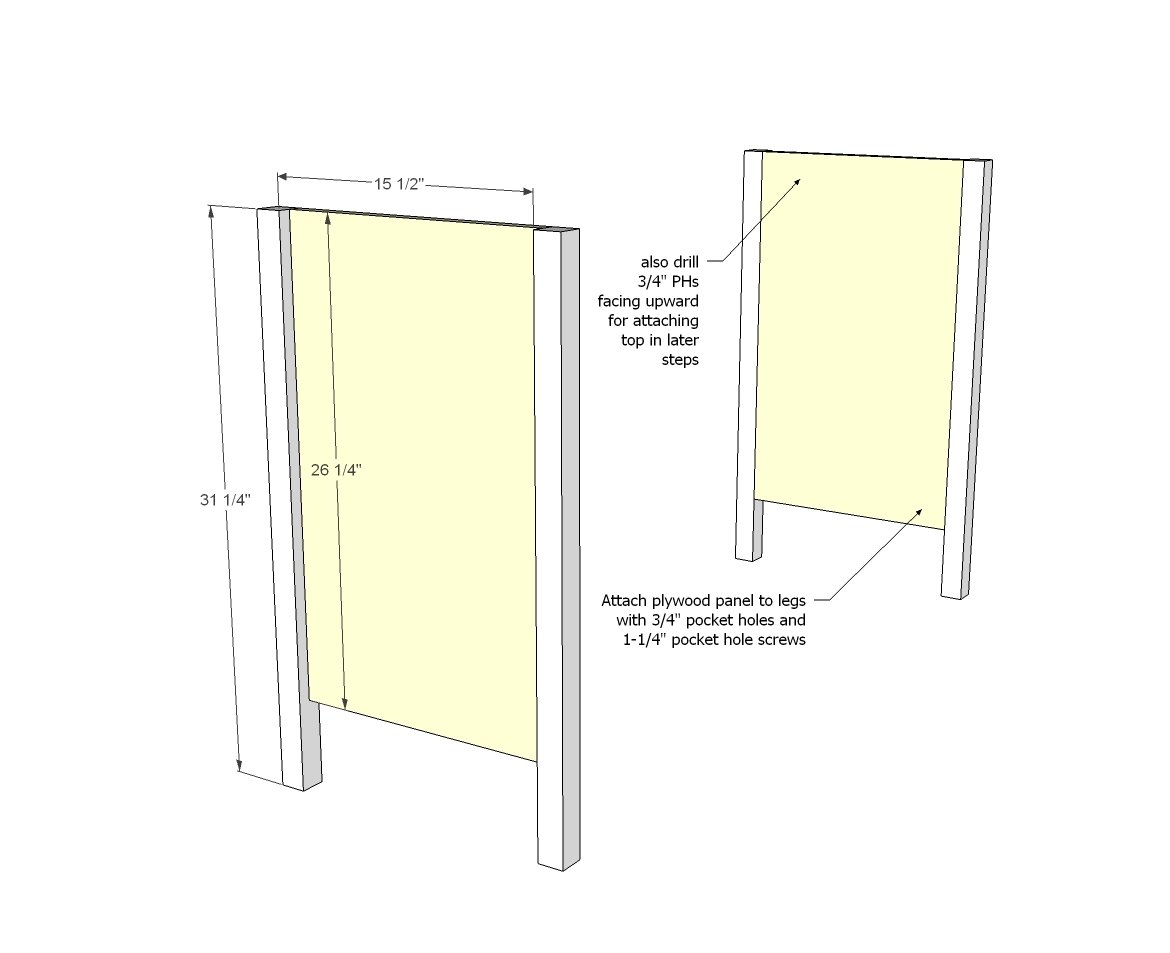
Start by building the two sides. Everything is flush to inside.
Use 3/4" pocket holes, every 8-10" on inside, with 1-1/4" pocket hole screws.
TIP: Also drill 3/4" pocket holes facing upward for attaching the top in later steps.
Step 2
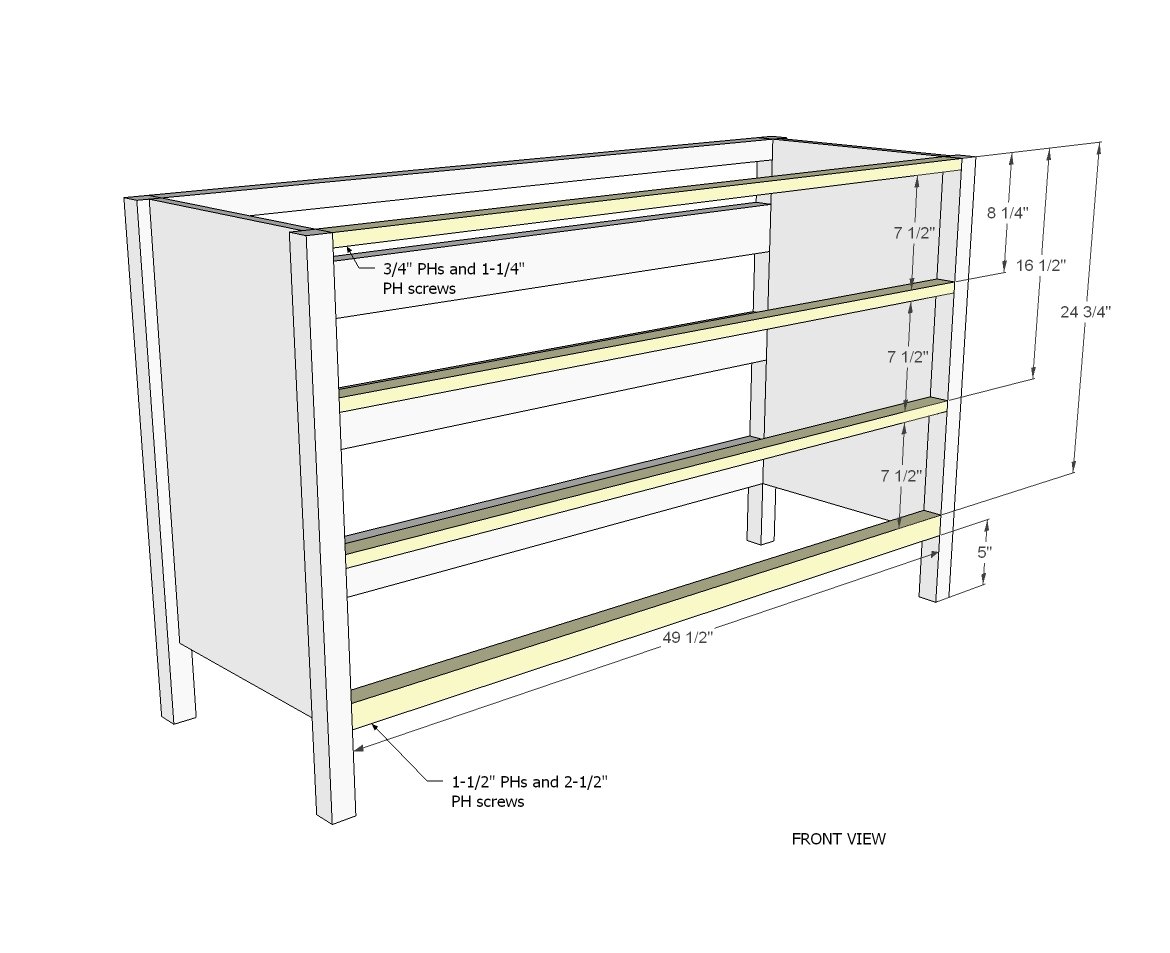
Between the sides, add to both the FRONT AND BACK 1x2s and 2x2s at the bottom.
Do this by first drilling 3/4" pocket holes on each end of the 1x2s, and then attaching to the 2x2 legs. Use glue and 1-1/4" pocket hole screws. Place pocket holes on underside so not visible.
For the bottom 2x2s, use 1-1/2" pocket holes and 2-1/2" pocket hole screws and glue.
Step 3
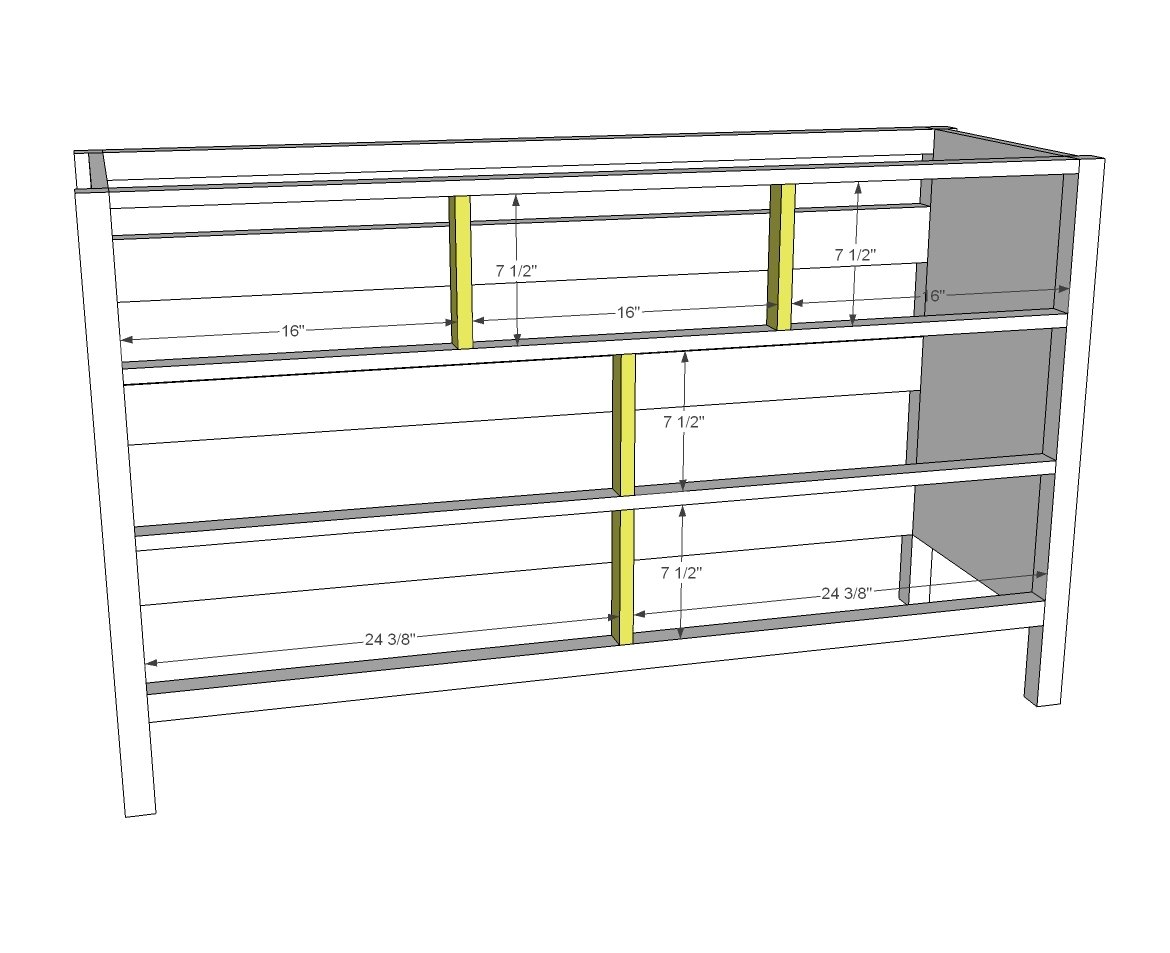
Attach the 1x3 dividers inside the framing, so the 1x3s are flush on the front, but overhang to the inside of the dresser by 1" (to give room for installing drawer slides in later steps).
The 1x3s can be nailed and glued in place. Make sure these are attached exactly as measured, as they will determine the drawer slide placement. Cutting a couple of spacer blocks to help with placement will make it easier, as you have to match the front and back.
Step 4
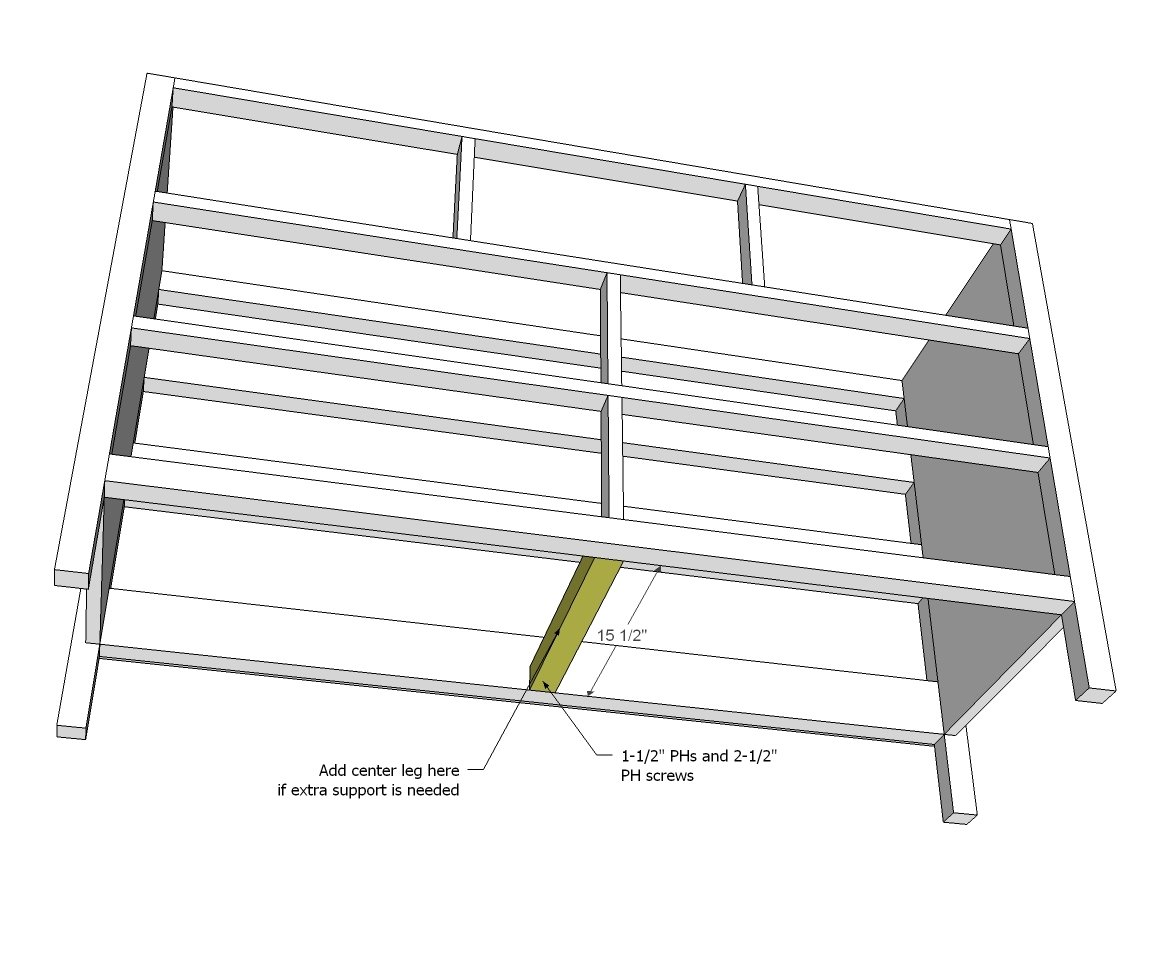
Add the bottom center support.
If you are concerned about the center of your dresser sagging, a fifth "leg" can be brought down from this bottom center support, to take the dresser drawer weight to the ground.
Step 5

Drawers should be built to fit the openings per drawer slide recommendations. Each drawer opening should be measured just to make sure there is no variance between drawers openings.
Drawer boxes should be 1x6 or 1x4. Cut drawer sides to 16". 1/4” plywood is used on bottom with glue, nailed or stapled on with 5/8" brad nails or staples.
Build and install the drawers using this method:
Step 6
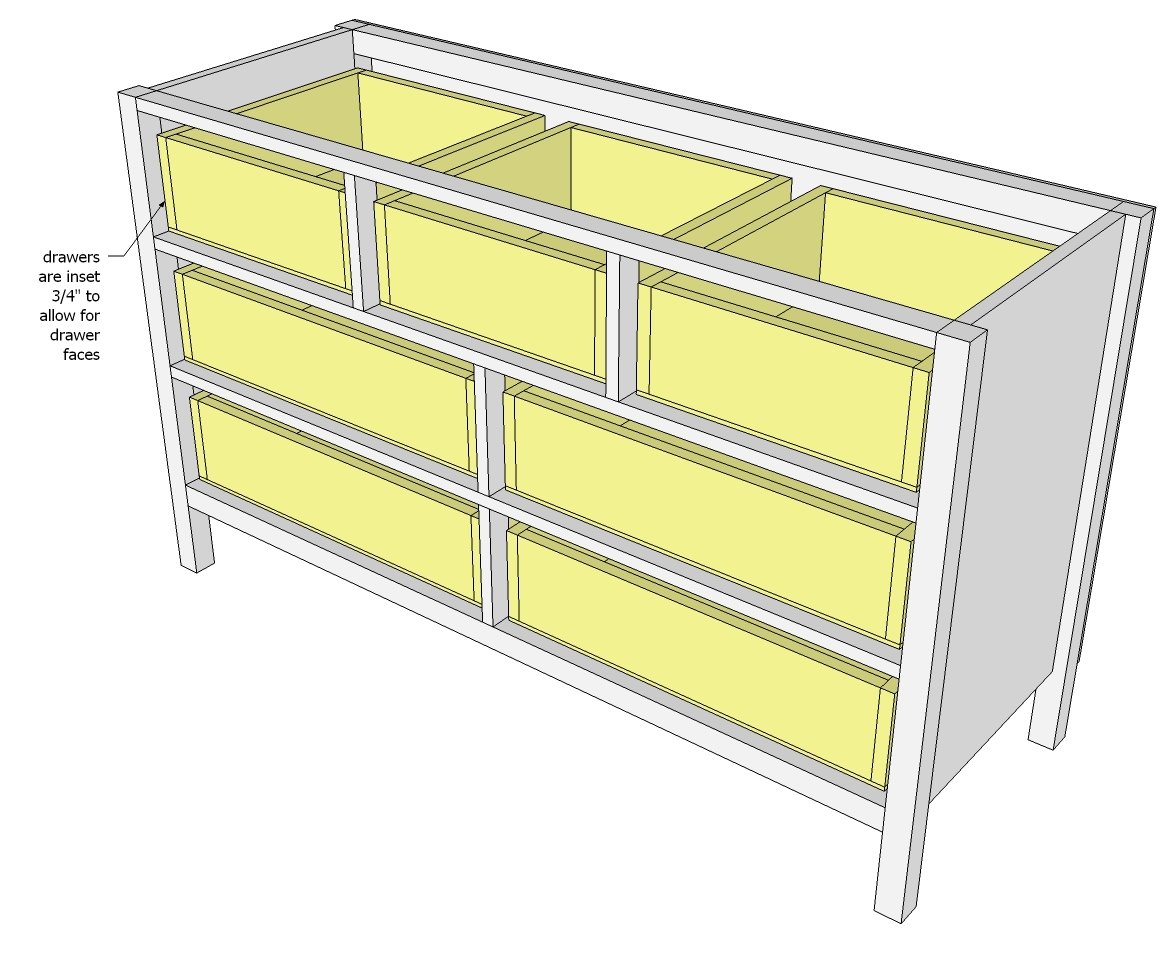
Drawers are installed 3/4” inset to allow for the drawer faces.
Step 7

Cut drawer faces to fit, leave an 1/8” gap on all sides. Attach to drawer boxes with 1-1/4" brad nails and glue. Then further secure from inside with 1-1/4" screws (yes, you can use 1-1/4" pocket hole screws).
TIP: You may wish to install the drawer pulls first.
Step 8
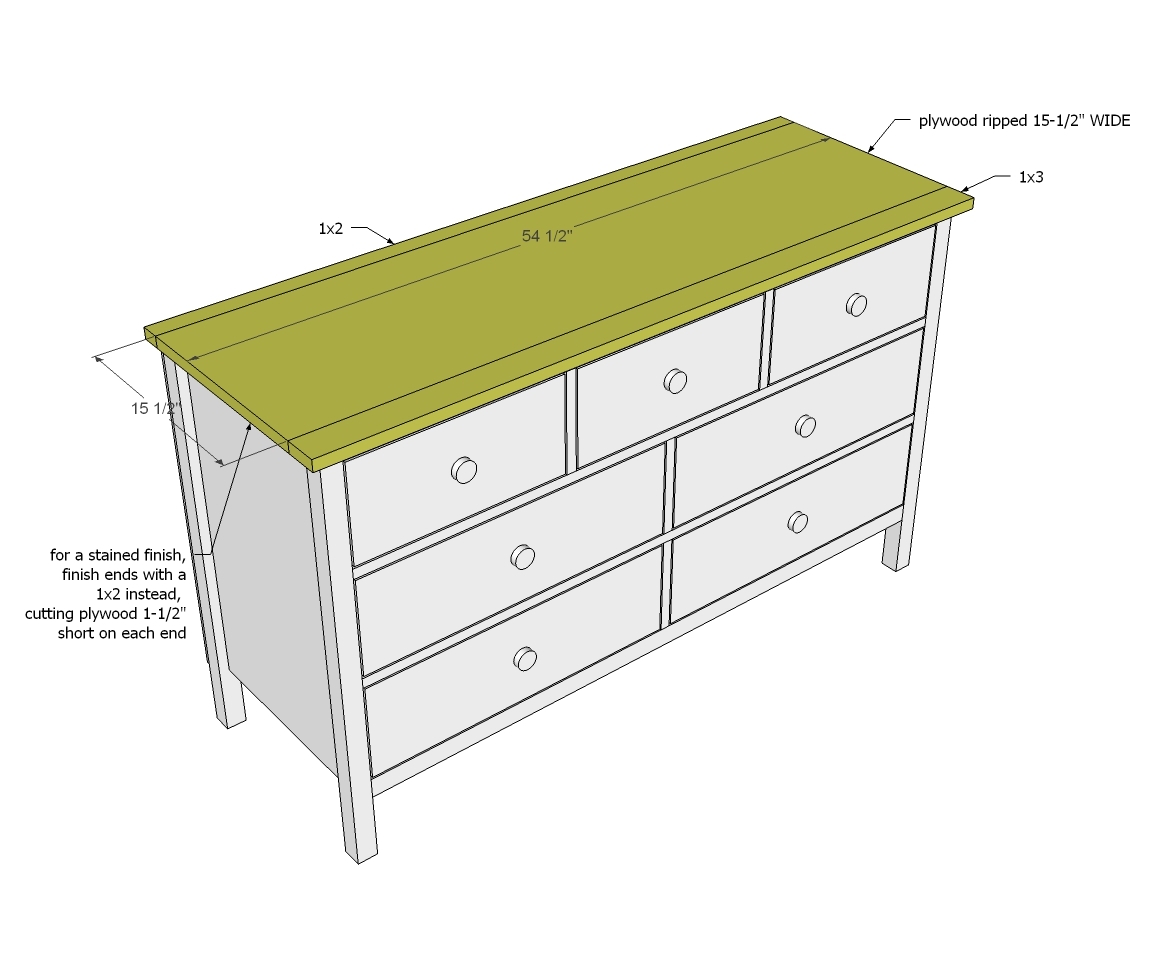
Build top first with 3/4" pocket holes and 1-1/4" pocket hole screws, and then attach to top of dresser. Alternatively, the ends can also be finished by cutting short and adding 1x2s. For a paint finish, the plywood end can filled, sanded and painted.
Step 9
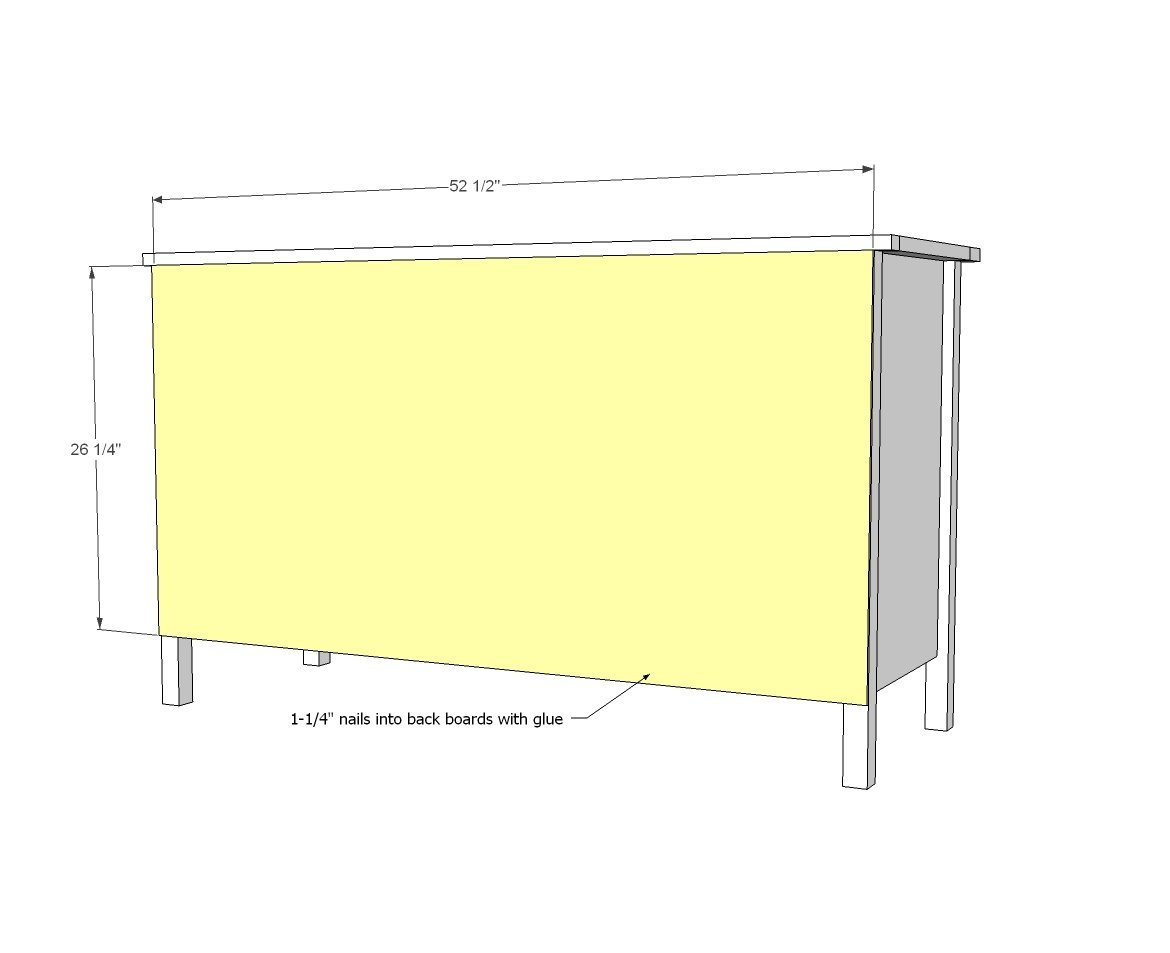
Attach back with glue and 5/8" brad nails.
It is always recommended to apply a test coat on a hidden area or scrap piece to ensure color evenness and adhesion. Use primer or wood conditioner as needed.


Comments
natepeterman
Mon, 01/05/2015 - 12:04
Dresser
We just found out were having a Baby Boy. This will be on my build list in the coming weeks
In reply to Dresser by natepeterman
Ana White
Mon, 01/05/2015 - 12:45
Congratulations!
Congratulations!
Lavenbaby
Fri, 03/13/2015 - 22:35
Dimensions
My husband and I are expecting a baby girl this summer and we want to make this dresser and also use it as a changing table. The only problem is my husband is 6'4 so this is a little short for him. My son's dresser is 58.5"x40"x19.5" and its a good size. How do we adjust all the measurements to make the dresser taller? Thanks!
lawschr
Wed, 04/22/2015 - 10:12
Very nice
I am in the middle of building one of these for my little girls and it's coming together nicely. The only problem I am having is the shopping list for the 1x2 boards doesn't give enough for the project!!! Instead of 2-1x2 @ 6ft at least 4 boards will be needed. I can't wait until it is complete.
ehart3000
Wed, 05/13/2015 - 11:26
Great Dresser Project
This is a great plan and I'm just about finished with mine (which I've modified a little) and am staining instead of painting. I've detailed all my steps for this if you want to have a look - http://www.edhart.me/2015/05/how-to-build-a-kendal-extra-wide-dresser/
ScottBuilds
Tue, 06/02/2015 - 19:21
Going to Build this Next
Really nice looking piece. Brand new baby showing up late July, so I've got to start on this soon. Looks like a fairly straight forward build. I'm just wondering if anyone has thoughts on the following:
* How strong is this? I haven't actually gone to Pottery Barn, but the online description of their product looks like it's also just plywood. I'm wondering specifically about using drawer slides on the face frames and how much weight can be handled. I suppose if I use Oak, which is fairly strong for the frame, that would be tough; though a bit more expensive than pine or similar.
* Does anyone assemble drawers after actually installing the sliders? I know that regardless of plans, it's always smart to do the drawers last just in case something is off by 1/32" or something, but I recently saw where someone actually put the sliders in and then measured for the drawers. Anyone do this? I'm going to use a dovetail jig to build the drawers, so don't want to screw them up.
* Anyone try building with a kickplate all the way to the floor? (Idea is no vacuuming, no hassle, no dog losing tennis balls underneath, etc.) I think it might look like garbage, though I guess I could try it first.
Thanks for any time!
ScottBuilds
Fri, 07/17/2015 - 10:13
Just finished mine!
Hi,
Alright... so ignore my questions in last post. I just went and built it!
I posted it in project brags, but I'm not sure how that works and I don't see it. Maybe needs to be approved? Anyway, my experience doing this is here.
This is a great project and I really apprecaite these plans having been here. No way I would have attempted this from my own designs.
Moorman4
Sat, 02/06/2016 - 17:47
Do you have plans for the regular dresser that's a little smalle
My daughter has a small room and the extra wide is too big.
In reply to Do you have plans for the regular dresser that's a little smalle by Moorman4
Ana White
Mon, 02/08/2016 - 14:30
How about this option?http:/
How about this option?
http://www.ana-white.com/2012/01/plans/small-dresser-open-bottom-shelf-…
Ettel4
Sun, 09/12/2021 - 15:11
Modified Kendal dresser
I made a 5 drawer dresser using these plans and helpful steps and plans! I had to modify because the dresser was replacing an existing broken one, and it was in a 34.5 x 27in cubby space. I just don’t know how to post and “brag” on this site! 😂
chach2667
Sat, 03/19/2022 - 03:48
Alternate top ideas
I'm very interested in making this dresser, but I have a question about the top. Has anyone used glued boards (1x8) instead of plywood? I'd prefer a stained top without the 1x2 edges and just curious how it turned out.