

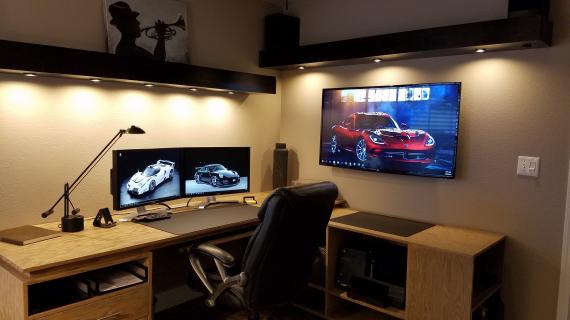
This free simple step by step Do It Yourself Project Plan shows you how to use PureBond Formaldehyde Free plywood to create a desktop system.

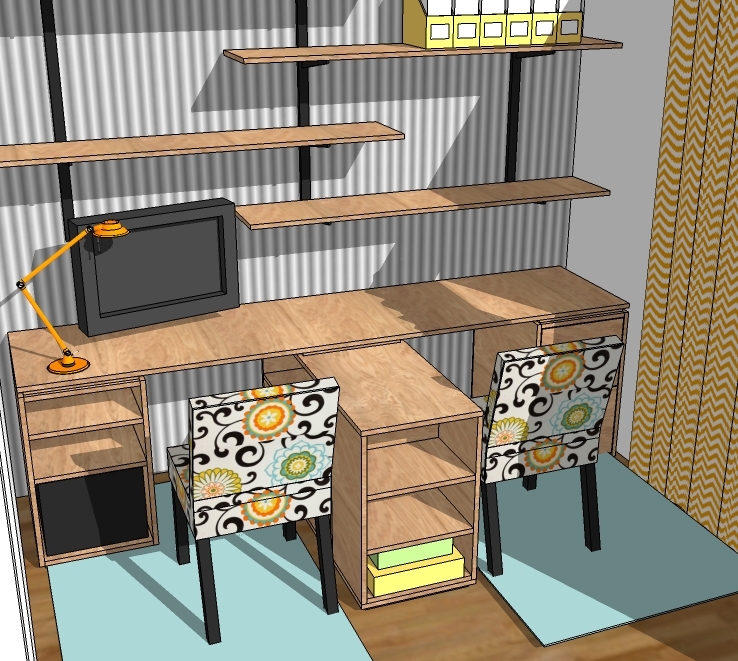
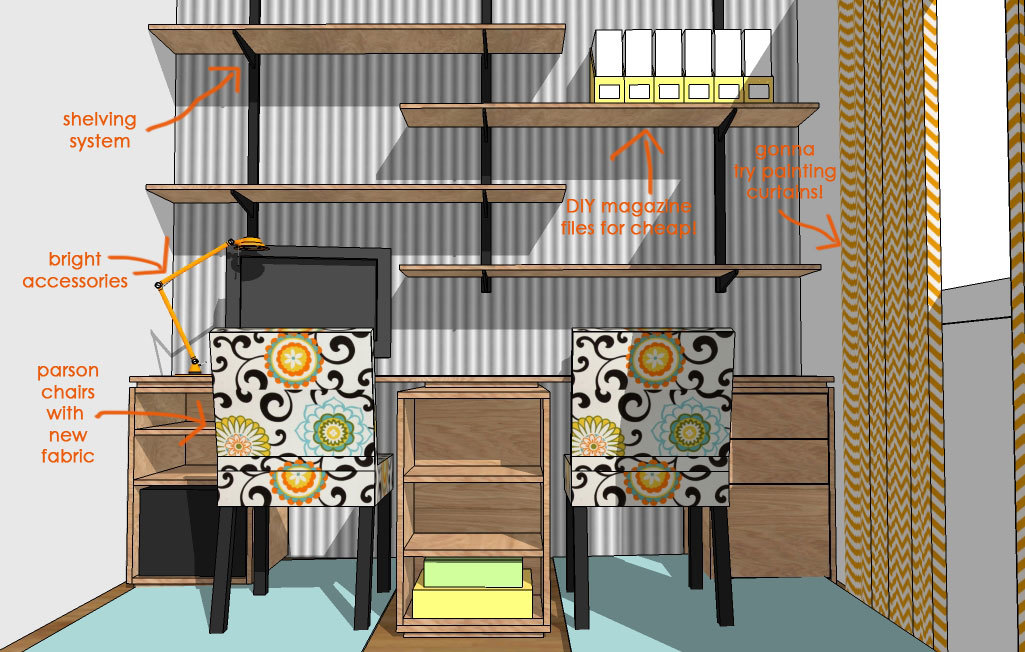
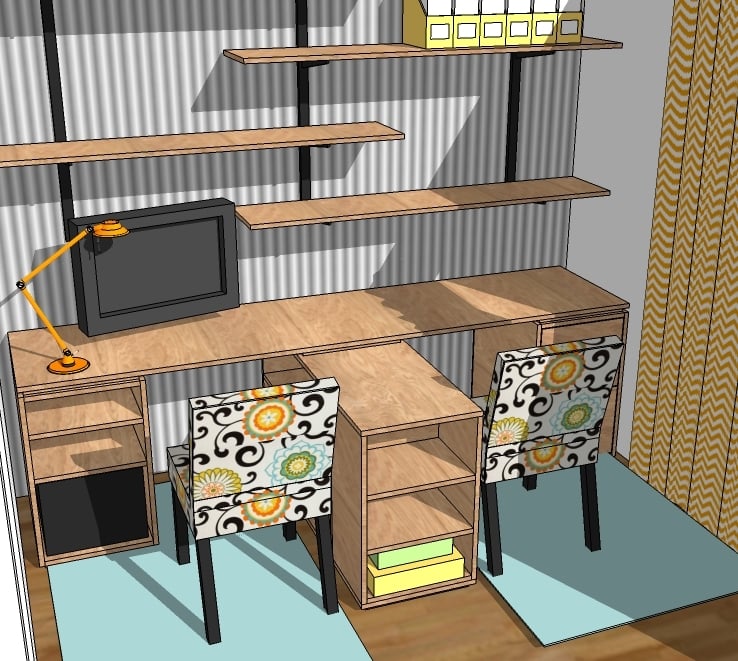
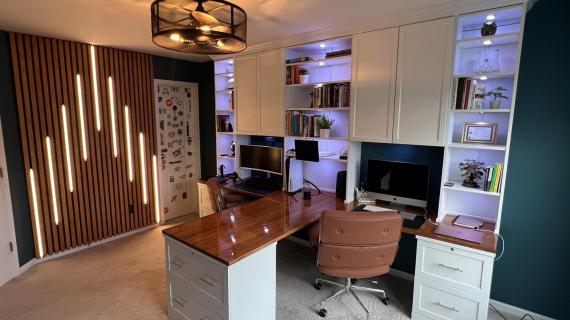
I've been feeling lately like the room I spend most of my time in is needing to get more colorful and inspiring.
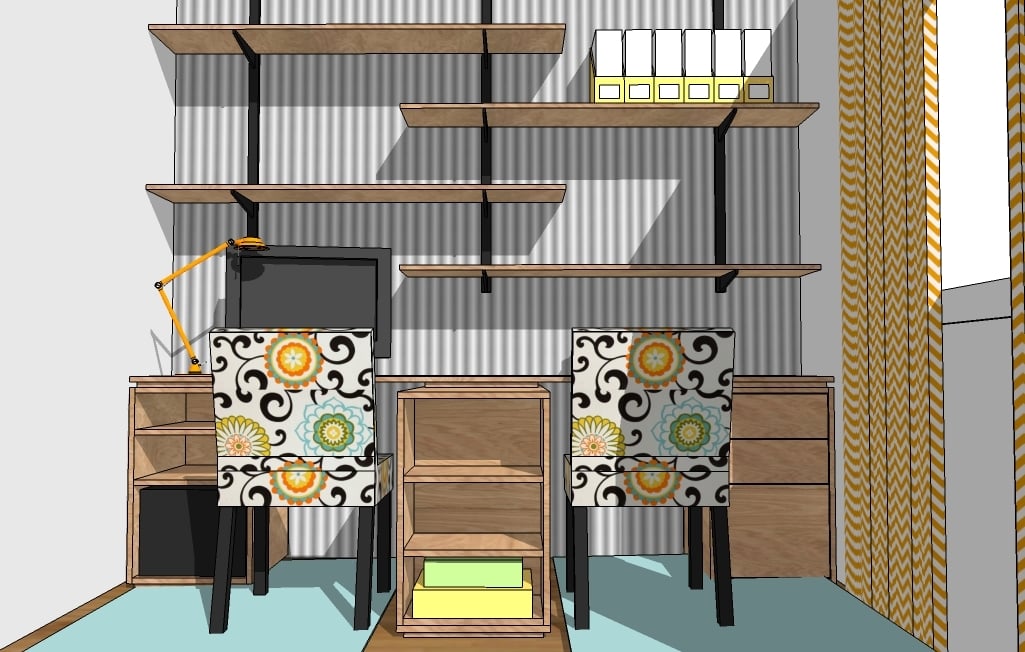
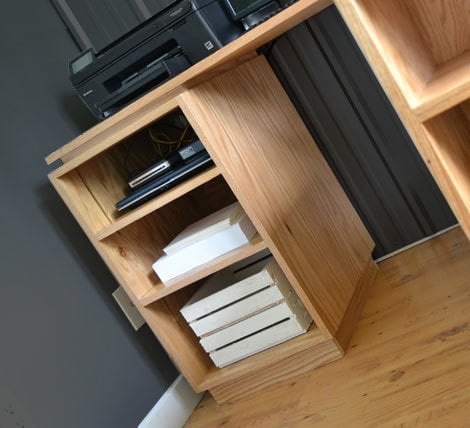
Not My Prison
Open Base

Drawer Base
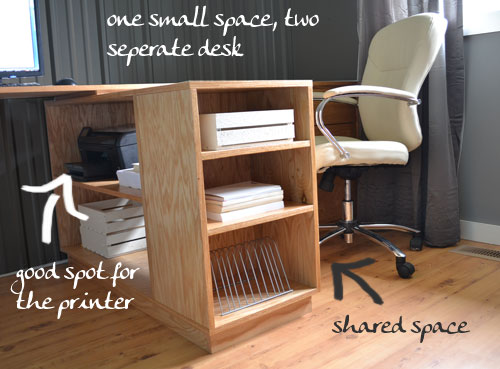
Office Divider

Most Major Components Built!

I am very grateful to have been supplied with PureBond Plywood in Red Oak for this project. Thank you Columbia Forrest Products for your generosity and making beautiful plywood that is made responsibly and better for our indoor air quality.
Preparation
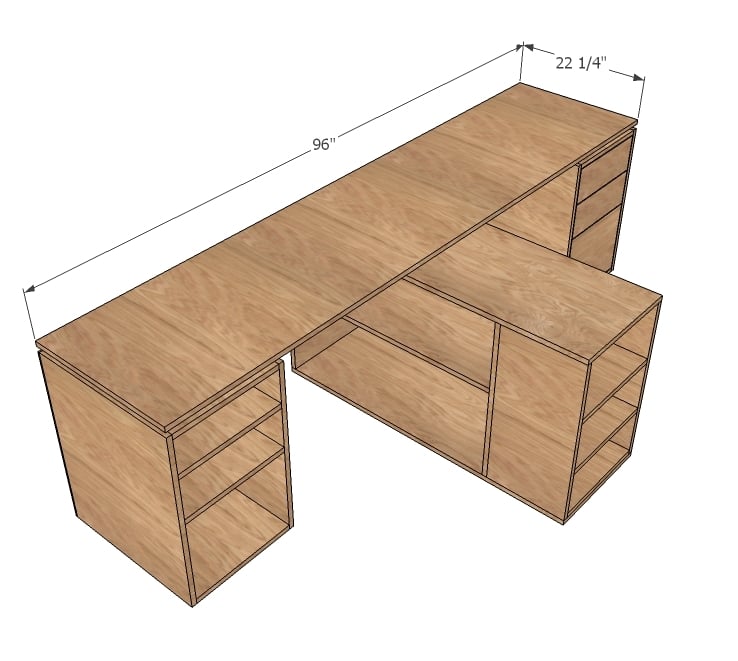
1 - sheet of PureBond Formaldehyde Free Plywood cut into a strip 8 feet long and 22 1/4" wide 1 - 1x2 - 8 feet long in a matching wood veneer
1 - 1x2 - 10 feet long in a matching wood veneer 3/4" Edge Banding roll (25') in a matching veneer
1 - 3/4" PureBond Plywood @ 22 1/4" x 96" (Desktop)
6 - 1x2 @ 17 1/2"
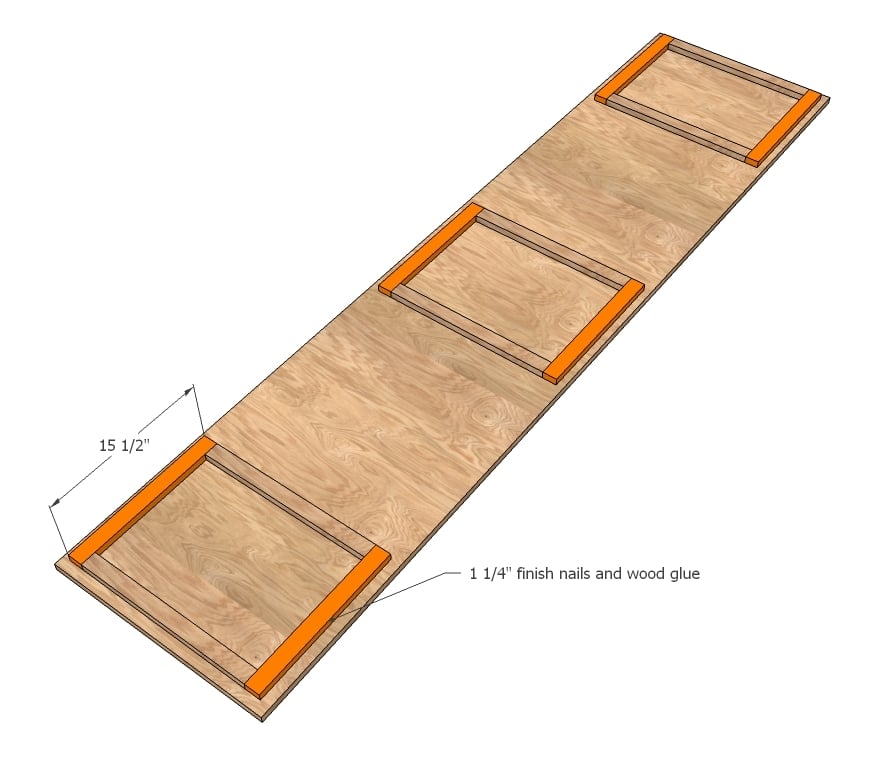
6 - 1x2 @ 15 1/2"


Please read through the entire plan and all comments before beginning this project. It is also advisable to review the Getting Started Section. Take all necessary precautions to build safely and smartly. Work on a clean level surface, free of imperfections or debris. Always use straight boards. Check for square after each step. Always predrill holes before attaching with screws. Use glue with finish nails for a stronger hold. Wipe excess glue off bare wood for stained projects, as dried glue will not take stain. Be safe, have fun, and ask for help if you need it. Good luck!
Instructions
Step 1
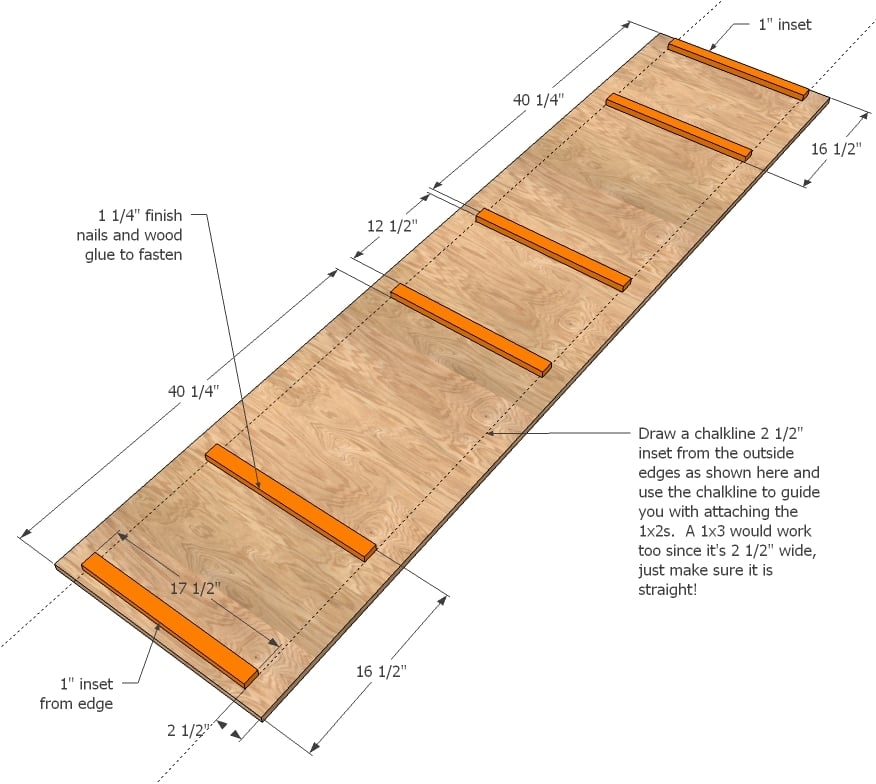
The most confusing part for me was trying to figure out where the spacers go. And trust me - you want the spacers. It gives the desktop a more finished look and creates a more profound height difference from the bookshelf desktop to the full desktop.
So take a 1x3 or use a chalkline and draw lines as shown in diagram along edges. Use these lines to guide you. Measure and mark the placement of the first boards as shown above.
Use 1 1/4" finish nails and wood glue to attach carefully.
Step 2
Now things get easy! Just finish the boxes as shown here.
Apply edge banding to the front and sides (or all four sides) with an iron and trim edges off, followed by a quick sanding to finish plywood edges.
Step 3

When placed correctly, the top of the desktop will line up with the outsides of your bases. Screw to enable easy assembly/disassembly through the 1x2 spacers.
It is always recommended to apply a test coat on a hidden area or scrap piece to ensure color evenness and adhesion. Use primer or wood conditioner as needed.


Comments
rtc (not verified)
Fri, 09/16/2011 - 12:04
Hi Ana, I live in AK too and
Hi Ana,
I live in AK too and was wondering where you got the plywood? Did you have to special order it? Is it much more terribly expensive than ordinary plywood?
In reply to Hi Ana, I live in AK too and by rtc (not verified)
Ana White
Fri, 09/16/2011 - 13:28
Hi RTC, I feel your pain! It
Hi RTC, I feel your pain! It took months for me to get this plywood up here :( the kind people at PureBond had it shipped to me.
I suggest bugging your local Home Depot to carry PureBond plywood. If enough of us bug them, they might hear us!
Lady Goats
Fri, 09/16/2011 - 12:29
Here's my order...
Ok, Ana... I want 4 yards of the fabric that you upholstered your chairs in STAT! Seriously!? I LOVE that! The whole room looks amazing! And I can't wait to see the finished room compared to the SU plan. Love it!
In reply to Here's my order... by Lady Goats
Ana White
Fri, 09/16/2011 - 13:33
Hi Gina, the fabric is from
Hi Gina, the fabric is from the Waverly Modern Essentials Collection, available at Joanns and Fabric.com. Thank you!
Guest (not verified)
Fri, 09/16/2011 - 13:23
My home office needs a makeover really bad
This is a great use of space and YOU make it look so easy. Thanks Ana for Creative ideas and Simple plans.
Supermom77 (not verified)
Sun, 09/18/2011 - 20:51
color
What color would you paint the wall behind this desk unit if it is made of cherry? Any suggestions would be great.
Sharenda (not verified)
Mon, 09/19/2011 - 05:23
I love your designs
I really wish had your power tools :) I love looking at all you designs
Guest (not verified)
Mon, 10/03/2011 - 06:12
That shelving unit is
That shelving unit is awesome, will that be a future plan?
nicholaix
Wed, 11/20/2013 - 12:53
perfect!
My two boys are going to get this for a craft/homework/ Lego center. The divider bookshelf should keep them from killing each other....maybe......
Rumblebee5161
Wed, 01/27/2016 - 12:15
Plywood Availability
I noticed in your post that you used the Red Oak PureBond plywood. Were you able to get this in a full 4X8 sheet? I'm looking to build this desk and Home Depot only carries the 4X8 sheets in Maple and Birch veneers. Will those work? I see I can get 2X8 pieces of the Red Oak, which should work given the cut list, but it is quite a bit more expensive for these smaller project panels. If I were going to go with the larger panels does it make a difference in quality/durabilitiy between Maple or Birch, or is it more of a aesthetic decision? I'm fairly new to wood working and this is by far the biggest project I've tackled yet so i want to make sure I get good materials. Love the site BTW! I think my wife wants me to build everything on here!