
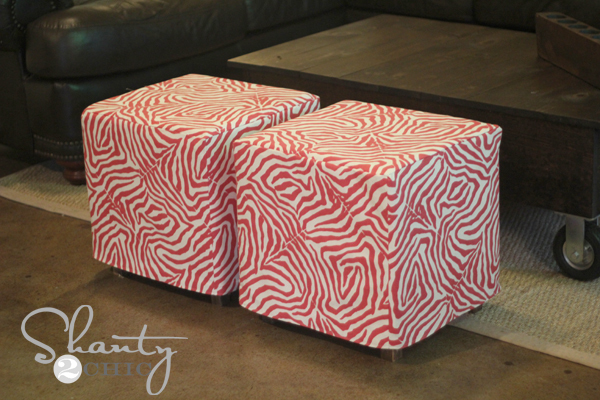

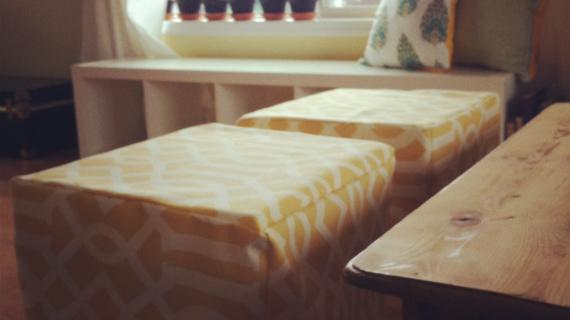
How to build a simple upholstered ottoman cube for less than $20. Pick your own fabric, make your own color!
Need a little extra soft seating in your living room? Kids need some comfy light chairs to sit at their desks? Or just want to add some beautiful fabrics to your space?
You MUST build these little guys!
I partnered up again with Shanty2Chic:
I built them for under $20 a piece. I made both during the babies 2 hour nap time yesterday... Woohoo! I love them... they are super cute and my kids like climbing on them too.
Make sure you go over to Shanty2Chic and check out LOTS more photos and get more details on building this project.
And of course, the full plans are right here! Just see below!
PS - The slipcover tutorial is live here.
PSS - If you like this graphic, I've posted a easy tutorial on how I make these right here!
Preparation
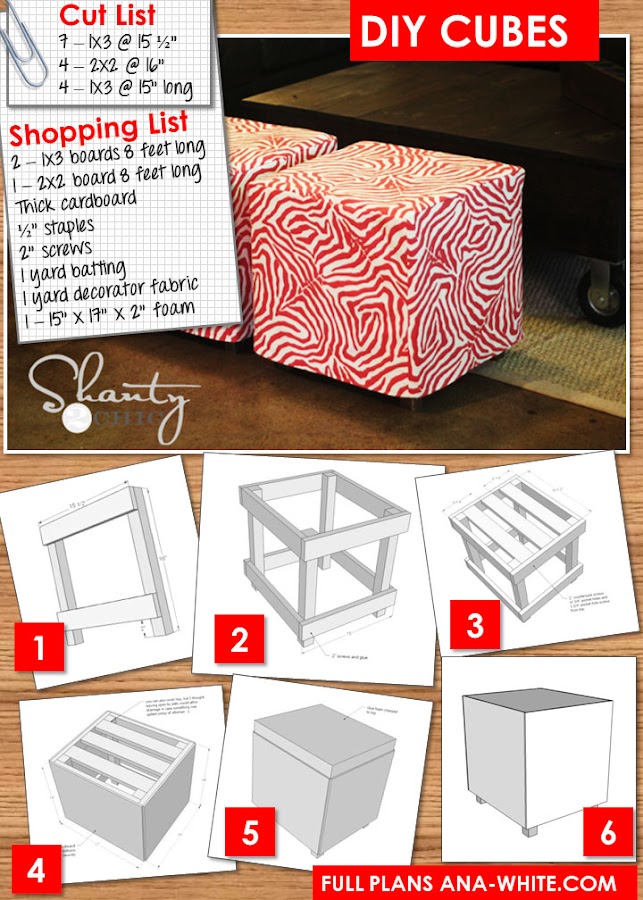
2 – 1x3 boards 8 feet long
1 – 2x2 board 8 feet long
Thick cardboard
½” staples
2” screws
1 yard batting
1 yard decorator fabric
1 – 15” x 17” x 2” foam
7 – 1x3 @ 15 ½”
4 – 2x2 @ 16”
4 – 1x3 @ 15” long


Please read through the entire plan and all comments before beginning this project. It is also advisable to review the Getting Started Section. Take all necessary precautions to build safely and smartly. Work on a clean level surface, free of imperfections or debris. Always use straight boards. Check for square after each step. Always predrill holes before attaching with screws. Use glue with finish nails for a stronger hold. Wipe excess glue off bare wood for stained projects, as dried glue will not take stain. Be safe, have fun, and ask for help if you need it. Good luck!
Instructions
Step 1
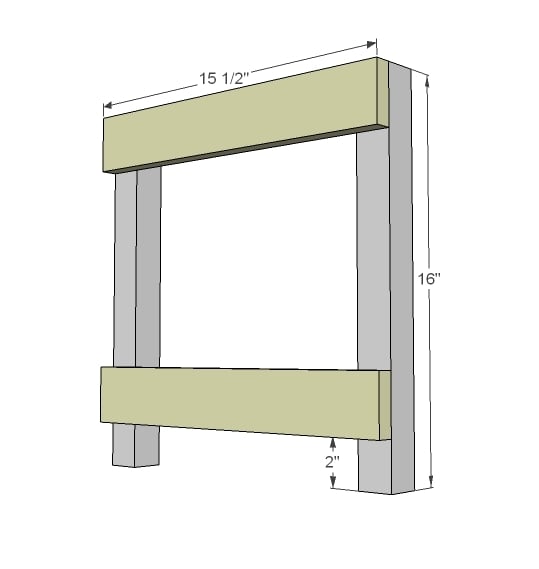
Build two side frames as shown above.
Step 2
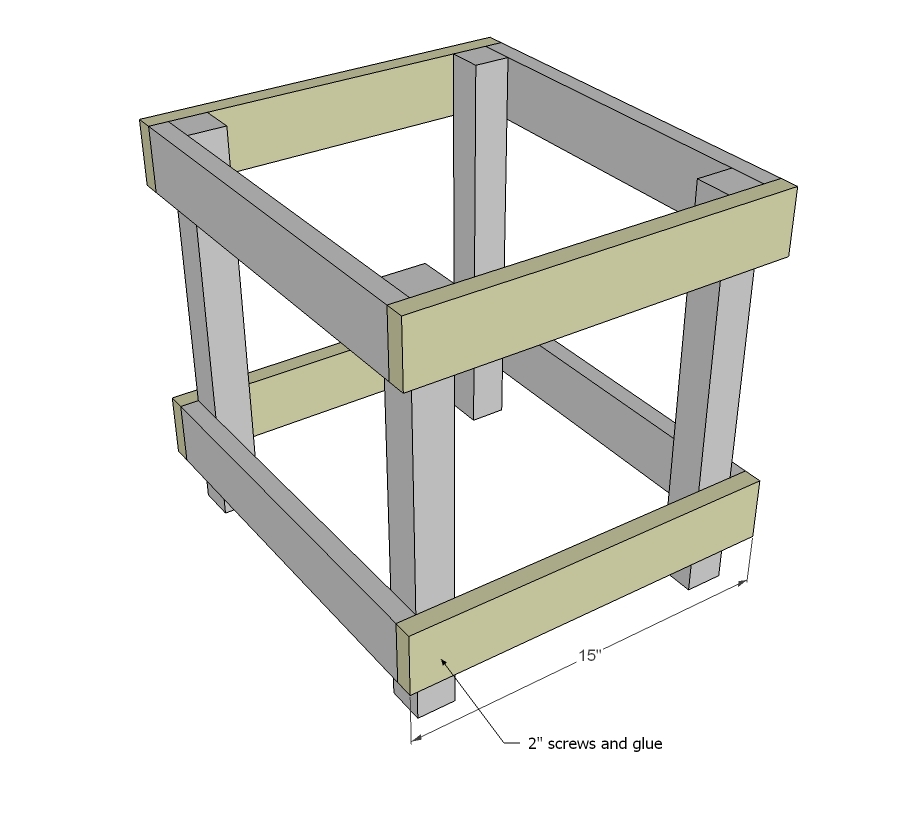
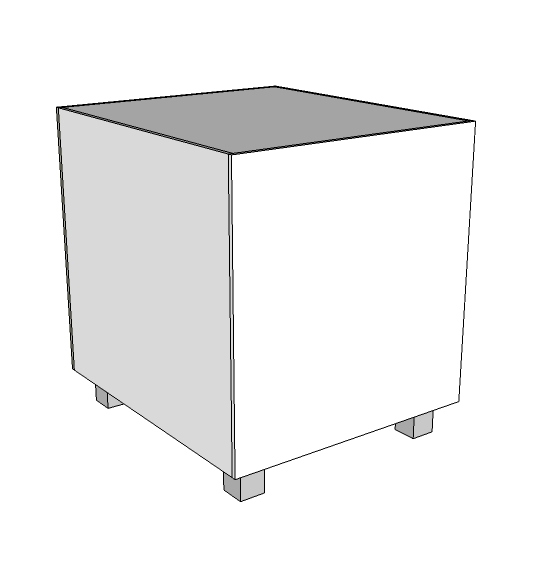
Then join together to make a cube.
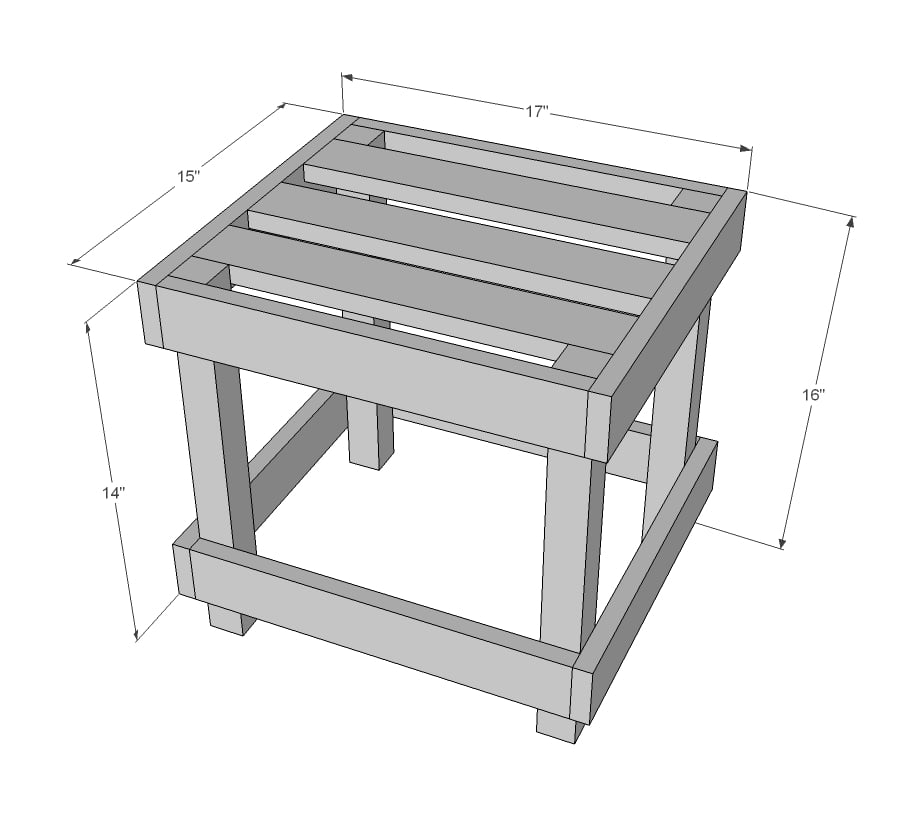
Step 3
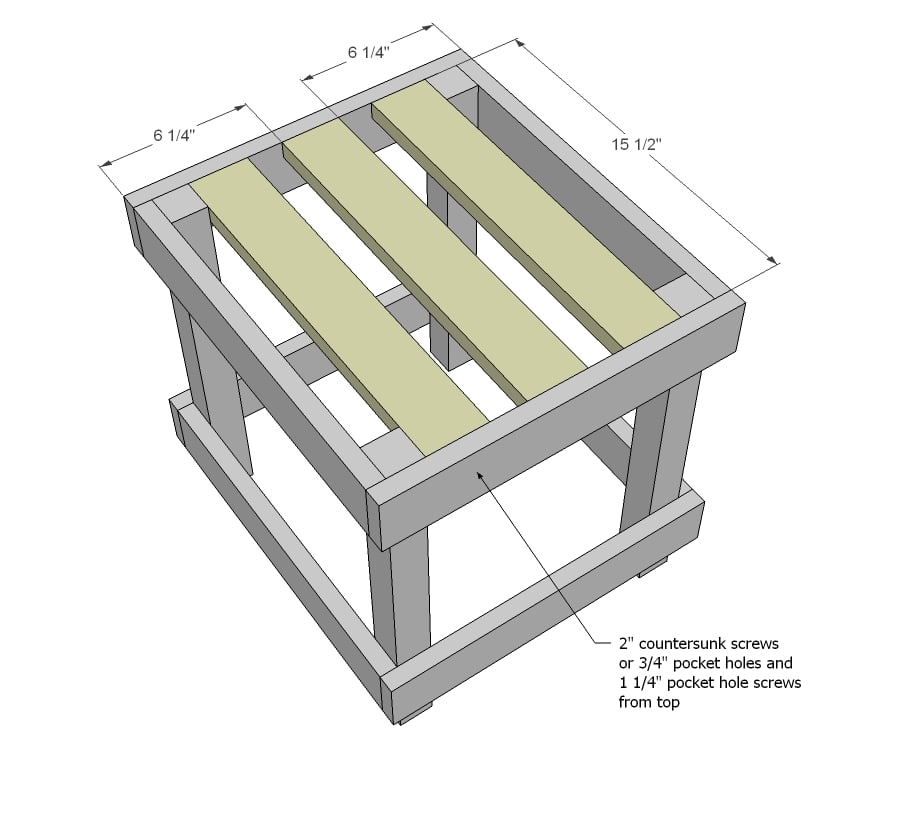
Add some top slats. I used the top slats instead of a solid top just incase you had a spill :)
Step 4
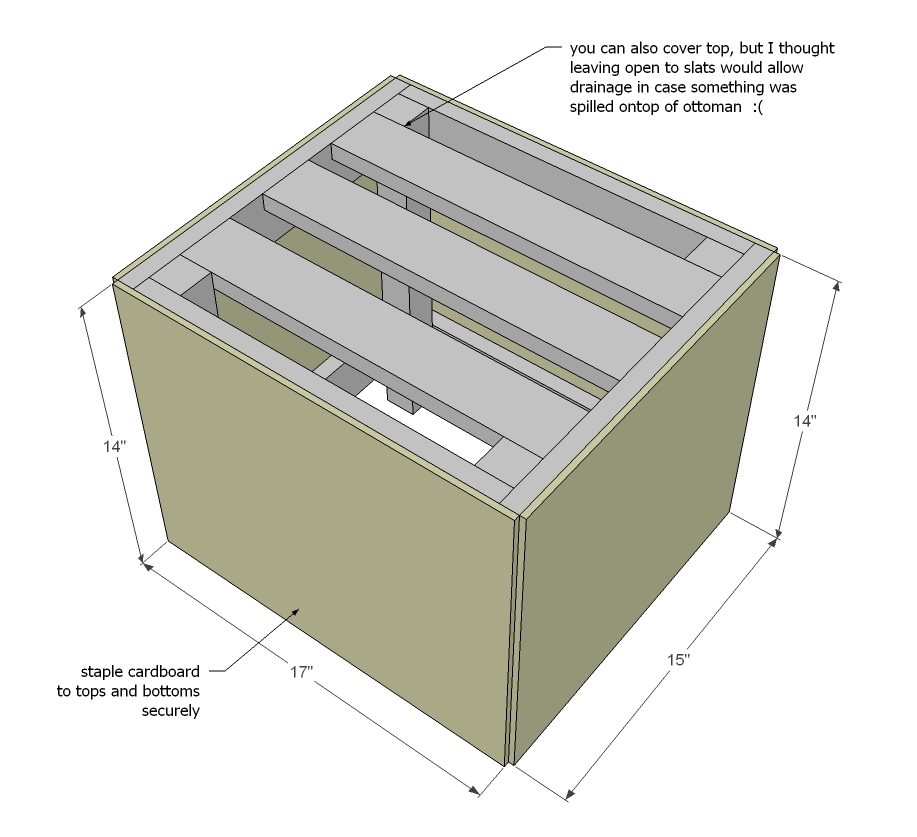
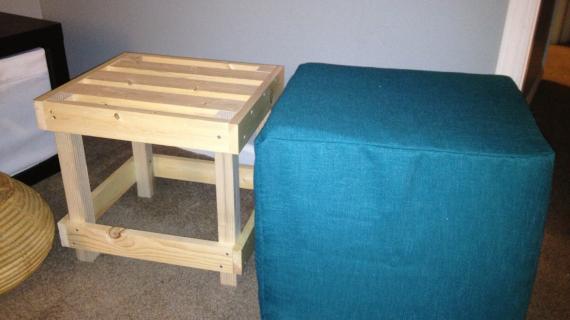
Now cover the sides in thick cardboard or 1/4" plywood.
Step 5
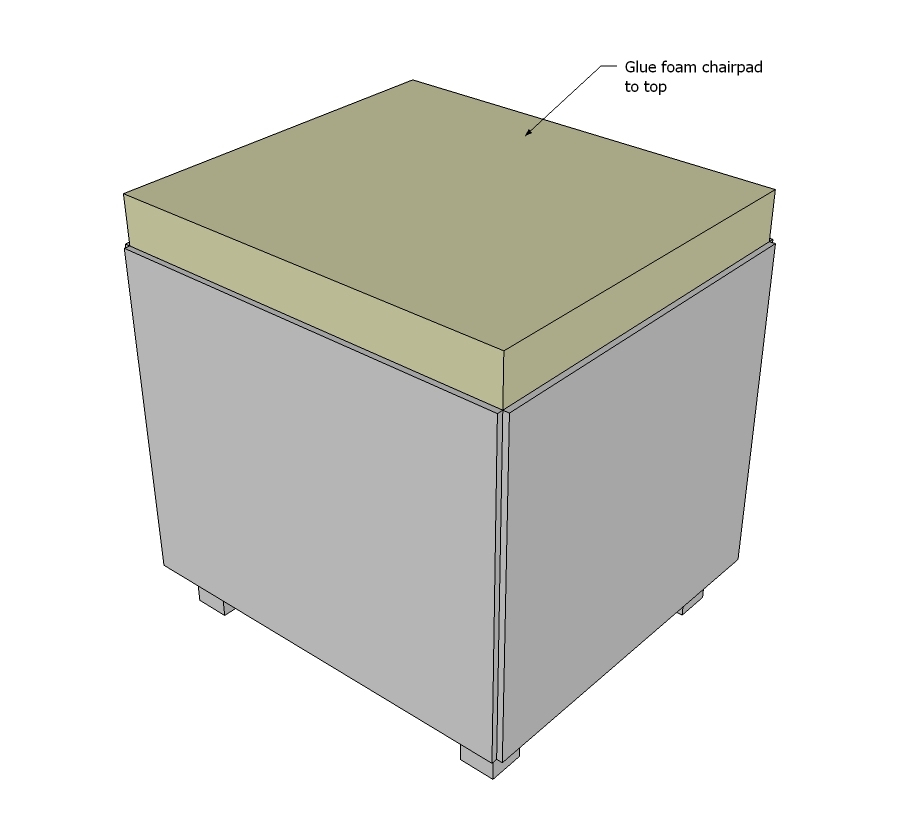
Step 6
And sew a slipcover. To smooth out edges, you can cover the ottoman in batting before adding the slipcover.
It is always recommended to apply a test coat on a hidden area or scrap piece to ensure color evenness and adhesion. Use primer or wood conditioner as needed.

Comments
Guest (not verified)
Tue, 03/20/2012 - 12:00
Question
Can you use these as storage for toys as well?
Aisha_ (not verified)
Tue, 03/20/2012 - 12:16
I love how deceptively simple
I love how deceptively simple this is and even more so how you can really use anything you want for the legs since only a small part of them will be seen. Great plan and love the way you made those graphics of the plans. The site really has a classy feel with those small touches :)
Cindy from Indiana (not verified)
Tue, 03/20/2012 - 12:19
I love this project!
I love this project! It looks easy to build and really attractive, too!
bhoppy
Tue, 03/20/2012 - 12:25
cute
Those are adorable!!! Is it weird that I have 4 different kinds of power saws but couldn't sew a straight line if my life depended on it?
5 tator tots (not verified)
Wed, 03/21/2012 - 08:05
Too funny
I was planning my shopping trip for supplies right up until the "sew a slipcover" step. The saddest part is both my mother and grandmother earned money as seamstresses. Why didn't I bother to learn?!
Petra (not verified)
Mon, 05/28/2012 - 20:52
Solution is simple...
Get a staple gun. Works great on things like this! (and a hot glue gun to cover up visible staples with trim)
dmcarwin
Tue, 03/20/2012 - 13:21
Awesome!
So great! These are so fun! Thanks!
Guest (not verified)
Tue, 03/20/2012 - 13:26
cute
i have some leftover scrap wood. i could build those and it wouldnt take long plus it adds color and more seating to the room
Jennifer Austin (not verified)
Tue, 03/20/2012 - 17:37
Thank you!
This is so adorable! I honestly never thought I could build something, but now I am going to start with these in my boys' rooms, and then hopefully look through your plans for a country kitchen table and benches.
redhead_61
Thu, 03/22/2012 - 17:05
Casters
These would be awesome with some casters on the bottom for easy rolling and maneuvering. Especially if you need them under office desk.
Jaque (not verified)
Fri, 03/23/2012 - 11:01
I love this
Ive been looking at these at the store but didnt want to pay that much for something the kids will most likely destroy, we just moved to a bigger house and thinking ill make a few for the play room and maybe a few for the family room for extra seating when needed!! Thanks for figuring out!
Jenelle (not verified)
Sat, 03/24/2012 - 11:15
Love these stools! They were
Love these stools! They were fun to make and I found using a fabric black and white shower curtain from Marshall's for the fabric made them stain resistant and even less expensive. I lined the insides with black felt and covered the top piece so they could hold games and toys. Great size and fun to make!
Milca (not verified)
Mon, 06/04/2012 - 19:19
Want to make these and decorate them as dices for my lil bro
It'll be such an awesome present for his bday. And there's plenty of scraps in the basement from renos to do it from pretty much free woohoo! Thanks for posting the plans, saves me hours from trying to figure out how to build the box so it can handle the beating of a 19 yo and his friends :)
TQB
Fri, 12/12/2014 - 22:16
Dimensions
I know this is an old post, but it is making the rounds on pinterest....
These look great, but it seems there might be a problem with either the drawings or the dimensions. Your first schematic shows a 15x17" top, but your subsequent figures call it out as 15 1/2". Same goes for the lower 1x3's. Just wondering what's going on with this since your cut list calls for 15.5" 1x3's but from the overall drawing there is no dimension that requires this size.
Not sure which drawing has the error, but I hope you can understand my confusion. Could you clear this up? Thanks in advance!