

Build a nesting box with free plans from Ana-White.com
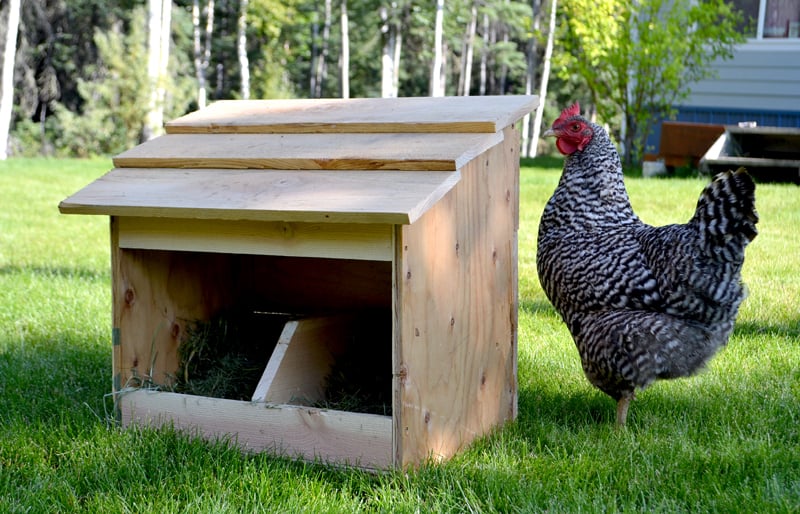
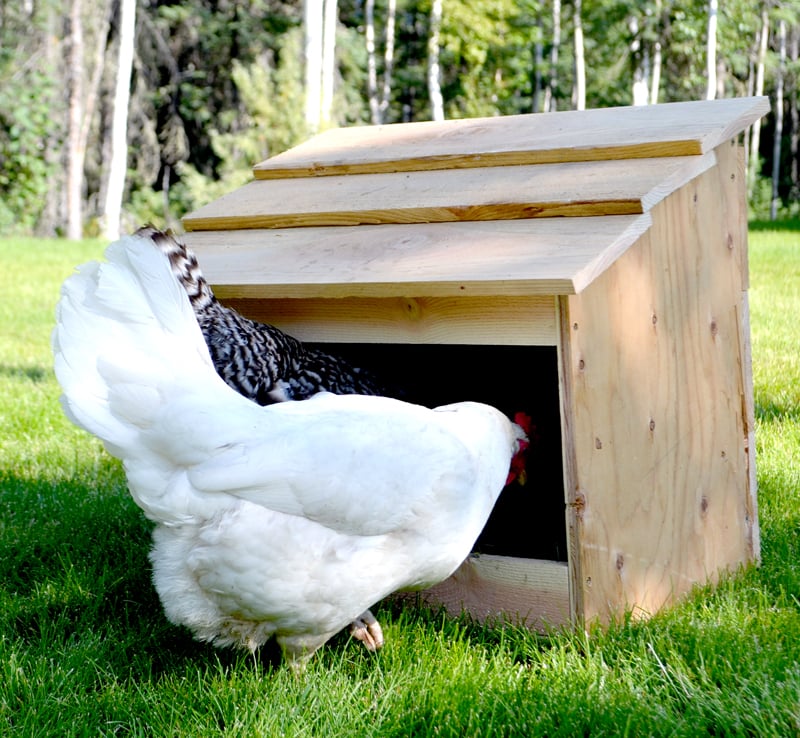
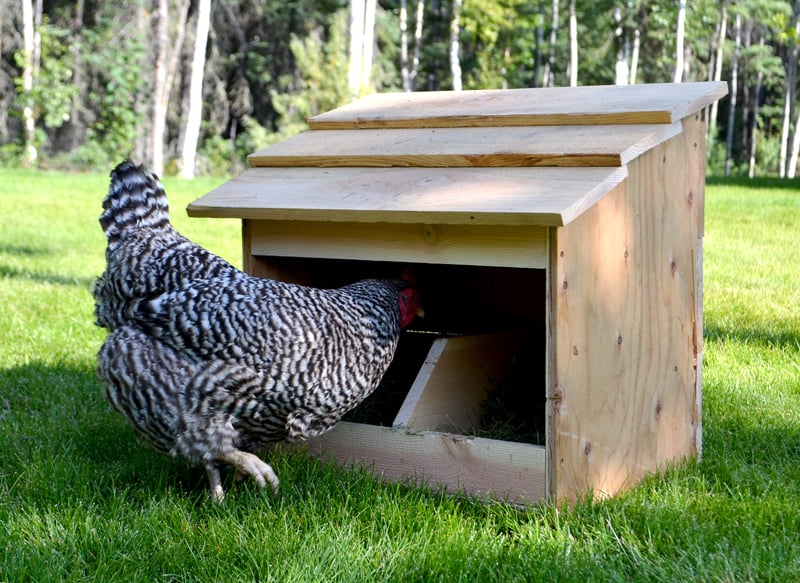
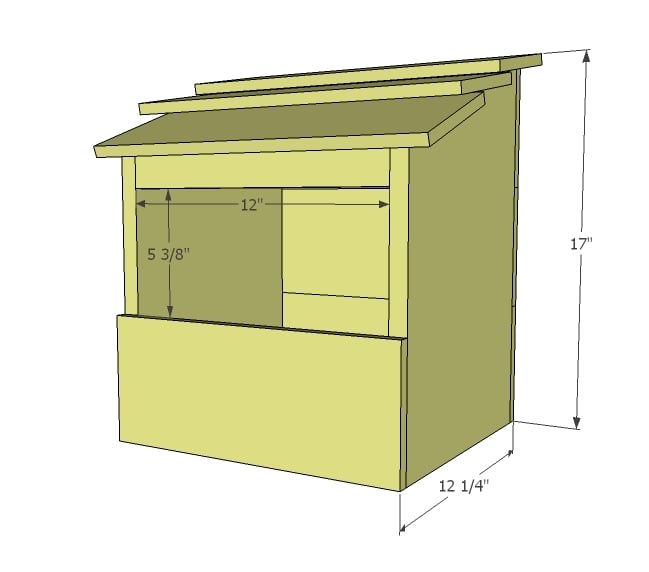
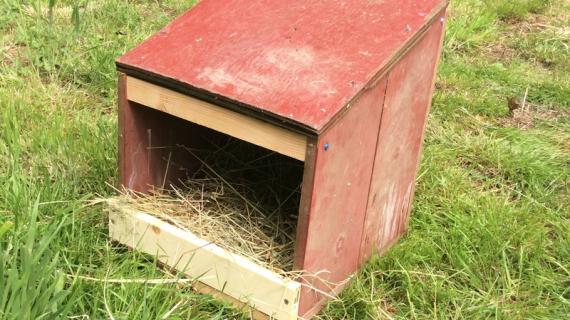
This nesting box can be set out in the yard or in a larger coop or run for nesting. It features a roof for water drainage. Our chickens loved this nesting box and took right to using it.
Free step by step plans from Ana-White.com


Why We Built this Nesting Box
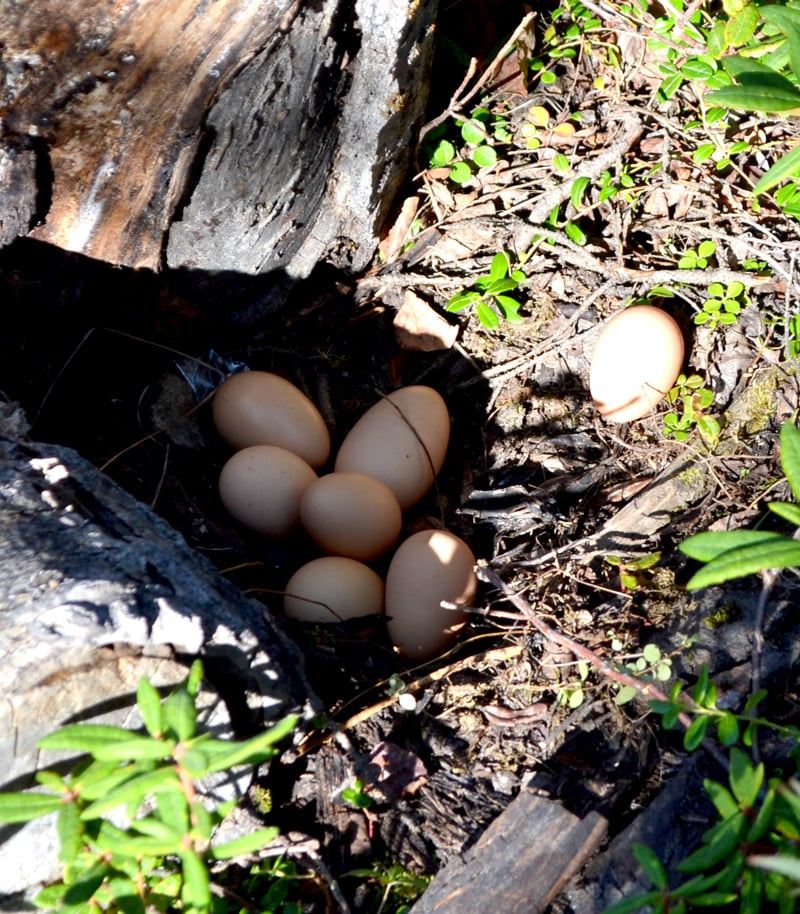
Our chicken are free ranging in our yard, and I discovered this -
I decided to build a free range nexting box that they could use independant of the coop.
it? 
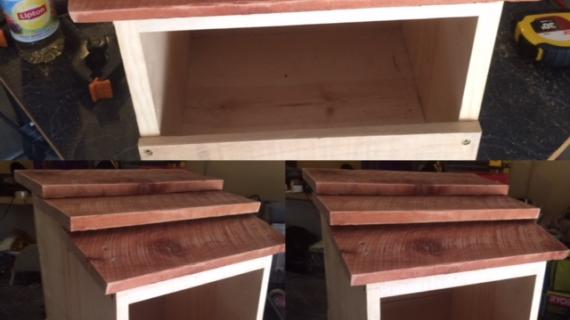
 Hmmmmm .... looks nice and clean and cozy ....

Preparation
- 1 - 1x12 @ 4 feet long
- 2 - 72" long cedar fence pickets
- 1 - 1x2 @ 2 feet long
- 2" self tapping exterior wood screws
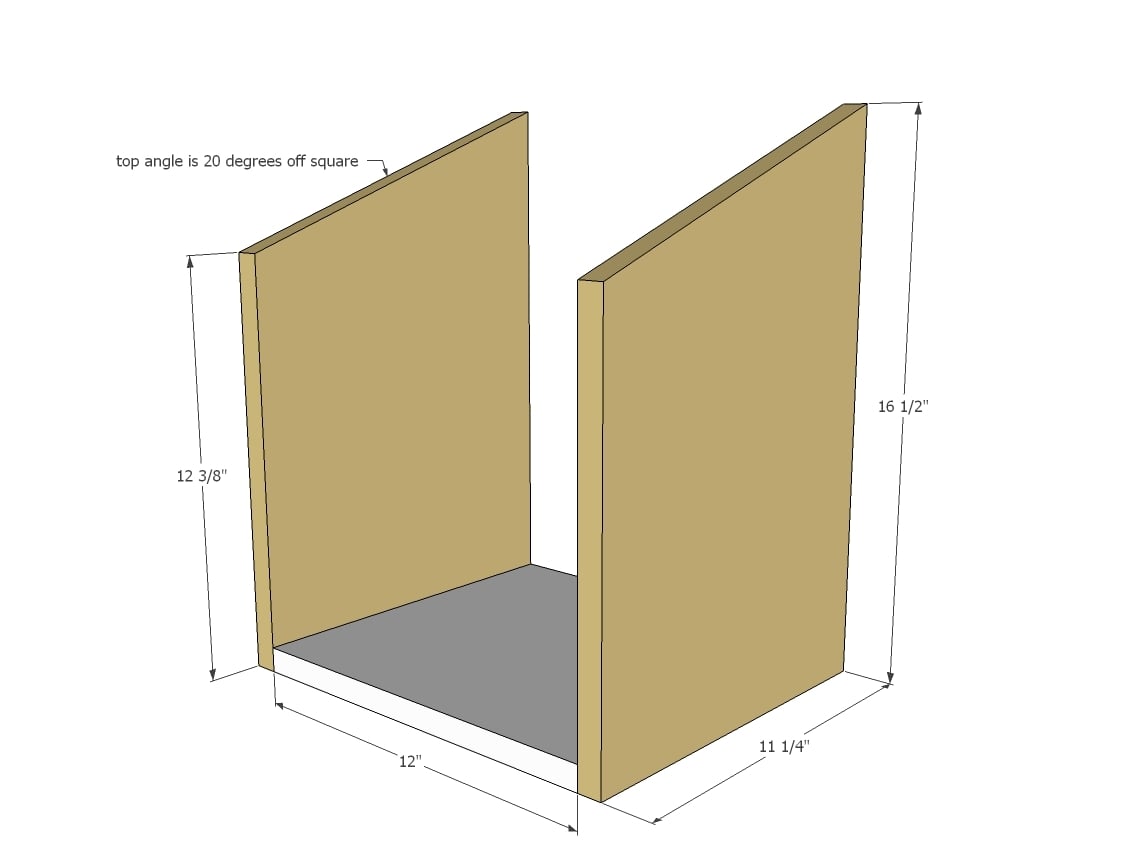
- 2 - 1x12 @ 16 1/2" (longest point measurement, one end cut at 20 degrees off square)
- 1 - 1x12 @ 12"
- 2 - 1x2 @ 12"
- 4 - 5 1/2" wide cedar fence pickets @ 13 1/2" long
- 3 - 5 1/2" wide cedar fence pickets @ 15 1/2" long


Please read through the entire plan and all comments before beginning this project. It is also advisable to review the Getting Started Section. Take all necessary precautions to build safely and smartly. Work on a clean level surface, free of imperfections or debris. Always use straight boards. Check for square after each step. Always predrill holes before attaching with screws. Use glue with finish nails for a stronger hold. Wipe excess glue off bare wood for stained projects, as dried glue will not take stain. Be safe, have fun, and ask for help if you need it. Good luck!
Instructions
Step 1
I put this nesting box together with just 2" screws and a countersink bit. NOTE: You can always raise the floor up too.
Step 2
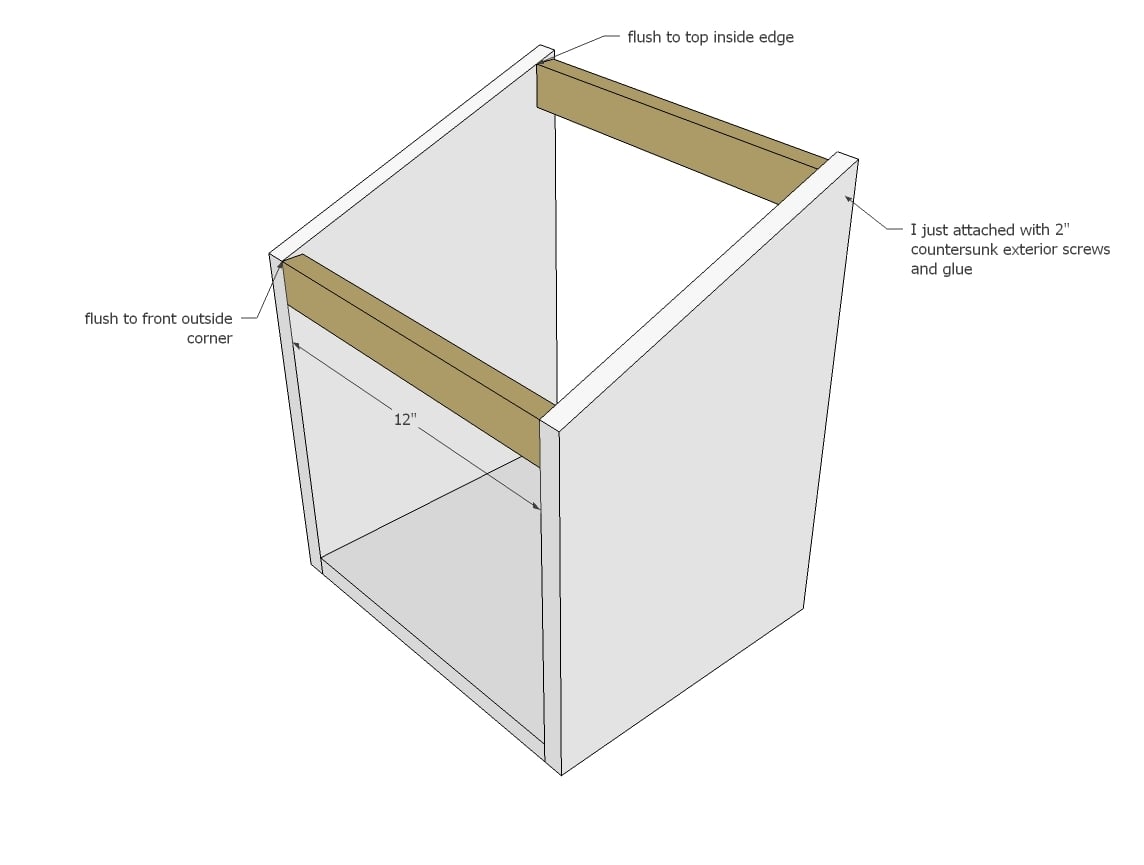
Add the top supports.
Step 3
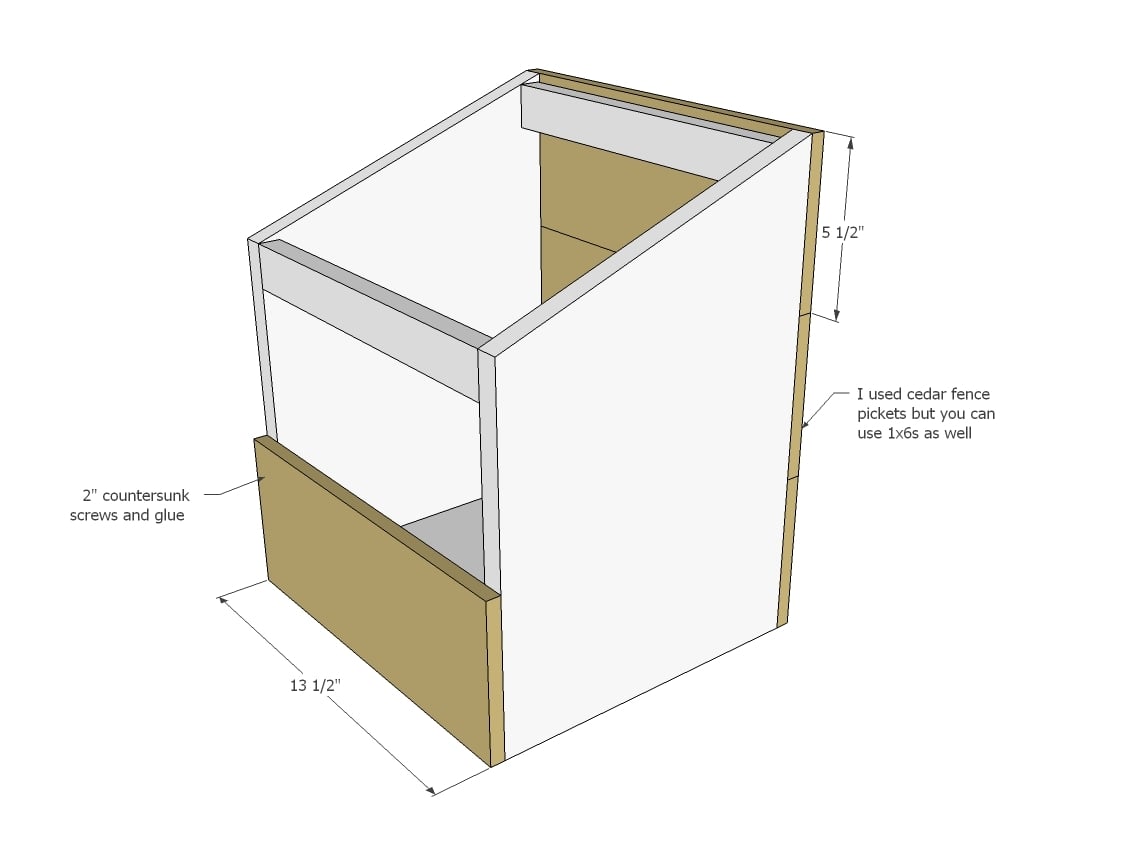
Now just add the cedar fence pickets to back and front.
On mine, I actually just used a scrap 1x4 for the front, but because you will have cedar fence picket scraps, I used those in the plans.
Step 4

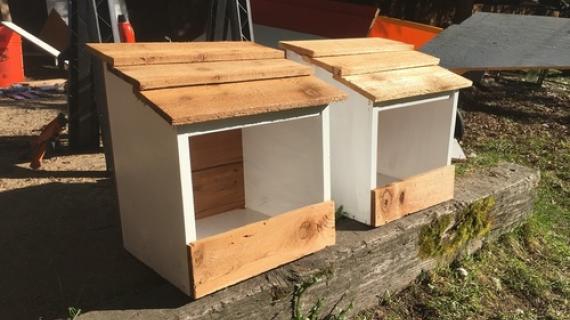
And then just dry fit the roof boards on top. When you are happy, start at the bottom and work your way to the top. Easy peasy!
It is always recommended to apply a test coat on a hidden area or scrap piece to ensure color evenness and adhesion. Use primer or wood conditioner as needed.

Comments
kristen
Wed, 09/05/2012 - 17:51
Love the nesting box!
I would love to get chickens, but I'm really afraid the hawks, fox, raccoons, and coyotes would cause big problems around here. We may try it and see how it goes...great nesting box plan if we do decide to hatch some yellow fluffballs!
Lisa B. (not verified)
Wed, 09/05/2012 - 20:06
I don't do chickens- wish we
I don't do chickens- wish we could have then in our neighborhood! Maybe back to back instead of side by side? That would provide at least some visual privacy! Silencing a chicken in action might not be as easy!
MoeWest (not verified)
Thu, 09/06/2012 - 07:41
chickens
What will you do with the chickens in the winter? Won't it be getting too cold for them pretty soon?
Project Finder (not verified)
Thu, 09/06/2012 - 08:08
Nesting Boxes- Perfect Timing
I was just talking with my daughter yesterday about nesting boxes!
I have a desire to have a few chickens for eggs and we were discussing the need for coop and nesting boxes..I found this in my feeds today! Perfect timing
THANKS!
sdaguinsin
Thu, 09/06/2012 - 08:22
uploading brags
I cannot seem to find any way to upload a brag although I see that thousands of you are able to do it.
ANY ADVICE? I thought I would be able to do it after signing in, but there is no link or tab that alows me to do it.
In reply to uploading brags by sdaguinsin
spiceylg
Fri, 09/07/2012 - 10:53
Brag posts
There are three blue boxes in the left margin. Click on the one that says "give back". The small print underneath says "contribute brag posts and plans".
In reply to Brag posts by spiceylg
sdaguinsin
Fri, 09/07/2012 - 14:42
THANK you! I was looking in
THANK you! I was looking in the wrong places.
Luvliljo (not verified)
Thu, 09/06/2012 - 10:50
Chicken Coop
Love the nesting box but how are you planning on keeping your chickens warm this winter? Are coop plans in the works?
little stuf
Fri, 09/07/2012 - 06:54
Love it!
I love that you were able to pull this off so quickly for the chickens. Ana, your added dialog had me laughing out loud! I had to read it to my four year old and show him the pictures. He also thought it was funny! Thank you for sharing!
Chair
Sat, 09/08/2012 - 20:44
Heating Hens
As long as hens are in an insulated, non-drafty, well-proportioned coop through the winter, they keep themselves warm. I'm not quite as far north as Anna (I'm in central Alberta, Canada) but I know several small-scale hen-keepers in my area who have had no problems with their hens keeping warm in the winter -without ANY source of heat. In fact, it's important to ensure there is ventilation in a coop or the girls can make the coop too warm and too damp from their breath.
*note* if a person wants eggs through the winter, the girls are going to need some kind of light, if I remember correctly, they need 15 hours of day light in order to lay.
I'm working on my own coop right now!
Jillian (not verified)
Sun, 09/09/2012 - 08:47
Chickens
As someone who is completely freaked out by chickens I must tell you that "stripey" is a Bared rock I believe and they happen to be the nicest softest chickens in the world. If she will let you pet her and talk to her you will see how silky her feathers are compared to any other chicken. They are the only ones I have ever liked.
Dan Chasse (not verified)
Mon, 09/10/2012 - 03:25
Nesting Box Roof
I love your nesting box and your site. Your ideas are wonderful and I am always amazed at your creativity and ability to design complex items in a way that most people understand.
As I was looking at the photos of the nest box I noticed that the roof was a little odd. If you add a strip of shingle underneath the lower-most shingle, it will kick-out your first course to match the rest of the roof. I use this technique on the historic buildings I restore and it stops the lower most course from having a "flat" look to it.
Keep up the great work and congratulations on your new book.
Dan
AngelaJ (not verified)
Thu, 09/20/2012 - 23:51
Chicken coop
Fantastic - I work in a hardware store and we have heaps of off cuts from different timbers that are just thrown in the bin! - Will be saving everything I can find now for when we can finally get some chooks....any plans for a coop? - We want to get about 8-10 girls...thanks so much for such a wonderful site!!!!
Anonymous Coward (not verified)
Tue, 11/13/2012 - 04:09
Looking at the hens, and the
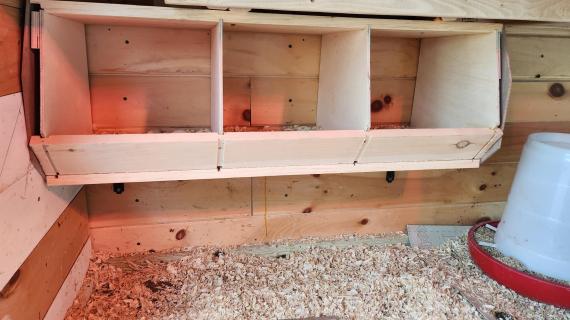
Looking at the hens, and the divided nest box ... the two nest areas were too small for those chickens. They need room to turn around while standing in the middle of the nest area, and they would be bumping the walls with their butts and tripping on the divider.
Measure your hens from breast to butt (that's "one hen length)", and make the nest box between 3/4 to 1.25 hen lengths squared. If you have a mixed flock with some bantam hens, make them a couple of smaller boxes sized to their needs.