

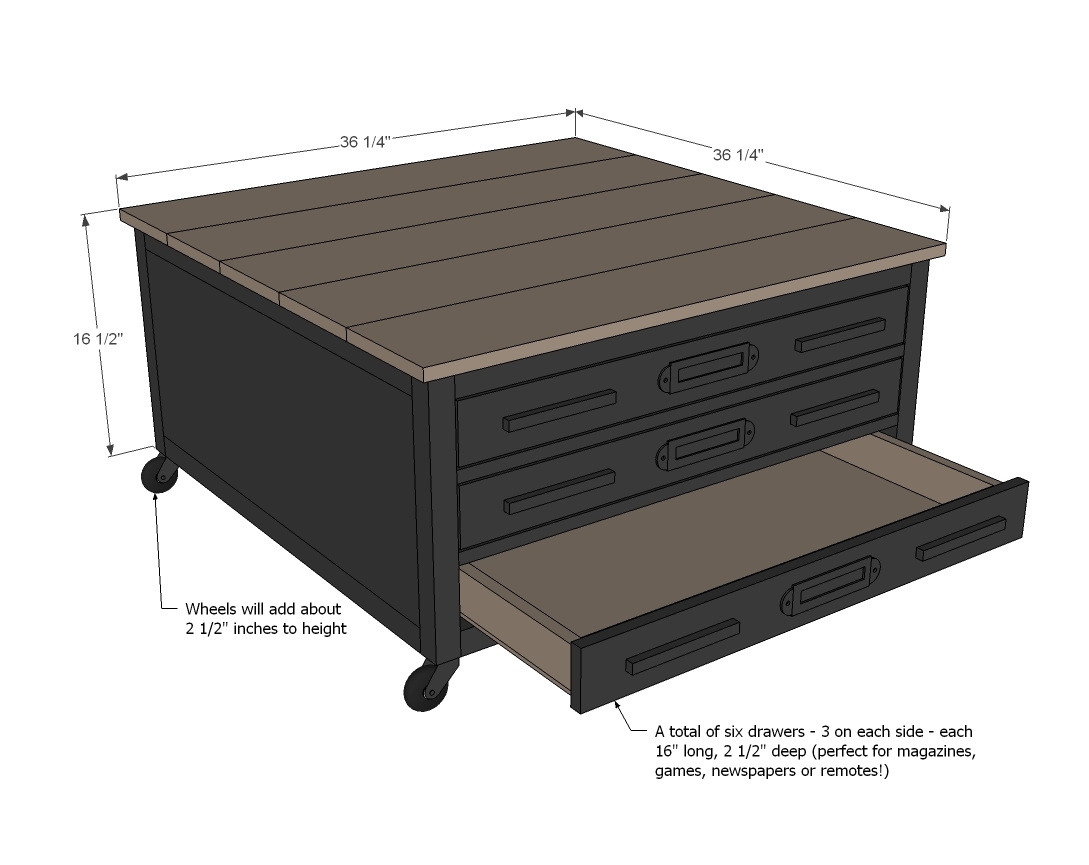
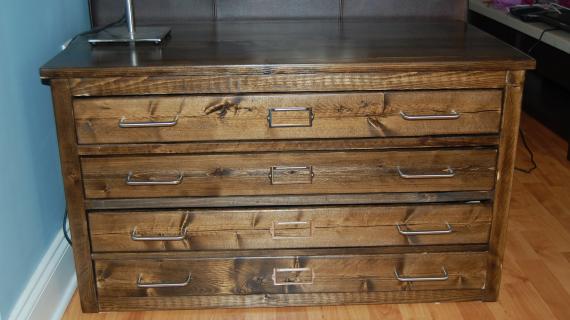
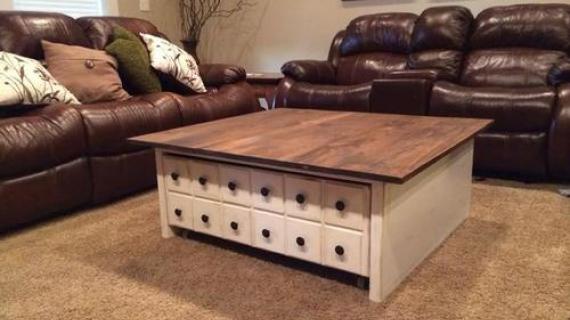
Build your own coffee table, this free woodworking plan for a square coffee table features six wide drawers perfect for sorting small items. Use it as an office with laptop and office accessories, or use it for board games or as a craft center.
The free plans include step by step diagrams, shopping and cut list and video tutorials from Ana-White.com


More Photos and Build Post
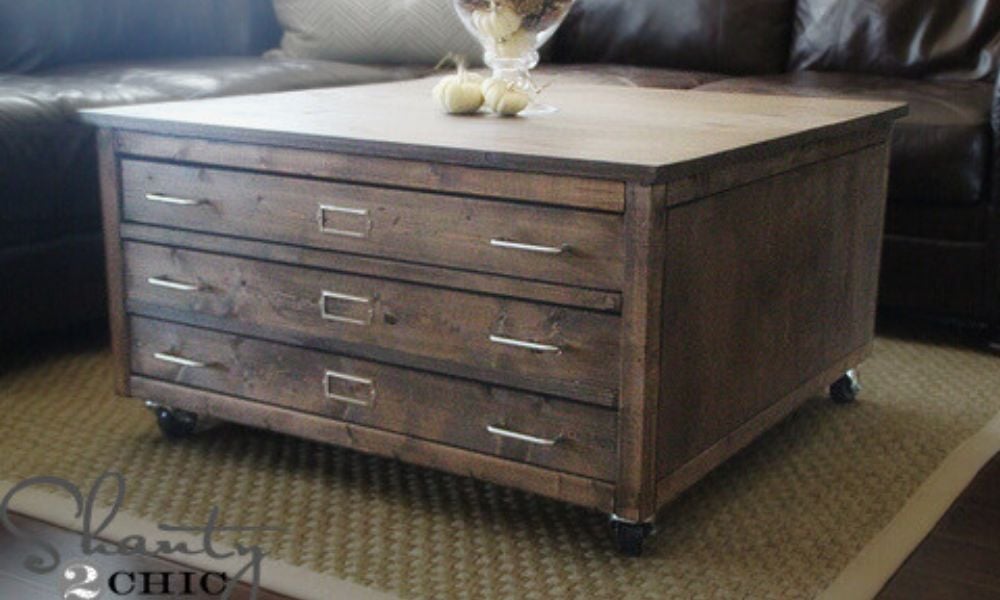
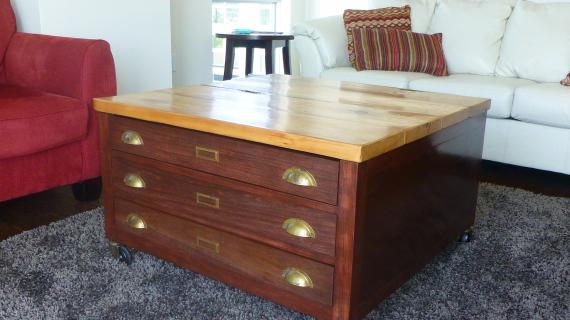
This coffee table was built by Ashley from Shanty2Chic - click here to get more details on this coffee table build and finish.
This amazing six drawer Library Coffee Table that rolls and stores it all! From Ashley: This coffee table is my favorite build to date! The square shape is perfect for my couch, I love the size and the drawers leave tons of storage space! Thank you so much Ana for your awesome, easy-to-follow, plans that saved me over $700!
Get the Look - Build the End Tables Too
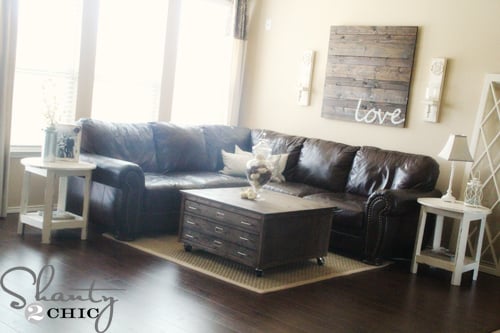
These gorgeous end tables are DIY too. Here are the plans for the end tables shown in the photo.
Preparation
- 4 – Caster wheels
- 3 – 2x2 @ 8 feet long ½ sheet of ¾” plywood
- 2 – 1x2 @ 8 feet long
- 6 – 1x3 @ 8 feet long
- 2 – 1x4 @ 8 feet long
- 1 – 1x8 @ 10 feet long
- 1 – 1x8 @ 8 feet long
- 1 – sheet ¼” plywood for bottoms of drawers
- 6 – white euro style bottom corner mount drawer slides
- Knobs or handles
- 1 ¼” and 2 1/2” pocket hole screws
- 1 ¼” brad nails
- 2” self tapping star bit wood screws for attaching top from underside of 2x2s
- Wood glue
- wood filler
- 120 grit sandpaper
- stain or paint
- 4 – 2x2 @ 12 ¾”
- 4 – 2x2 @ 32”
- 2 – ¾” plywood @ 32” x 12 ¾”
- 4 – 1x3 @ 12-3/4"
- 4 – 2x2 @ 32”
- 4 – 1x2 @ 32” (these MUST be 32” or drawers won’t work out)
DRAWERS – 1” less overall than total width, should be cut to fit
- 12 – 1x3 @ 16”
- 12 – 1x3 @ 29 ½”
- 6 – ¼” plywood 31” x16”
- 6 – 1x4 @ 31 ¾” 5 – 1x8 @ 36 ¼” (top)


Please read through the entire plan and all comments before beginning this project. It is also advisable to review the Getting Started Section. Take all necessary precautions to build safely and smartly. Work on a clean level surface, free of imperfections or debris. Always use straight boards. Check for square after each step. Always predrill holes before attaching with screws. Use glue with finish nails for a stronger hold. Wipe excess glue off bare wood for stained projects, as dried glue will not take stain. Be safe, have fun, and ask for help if you need it. Good luck!
Instructions
Step 1

First build your two ends. These are identical, and all edges are flush to outsides.
Step 2
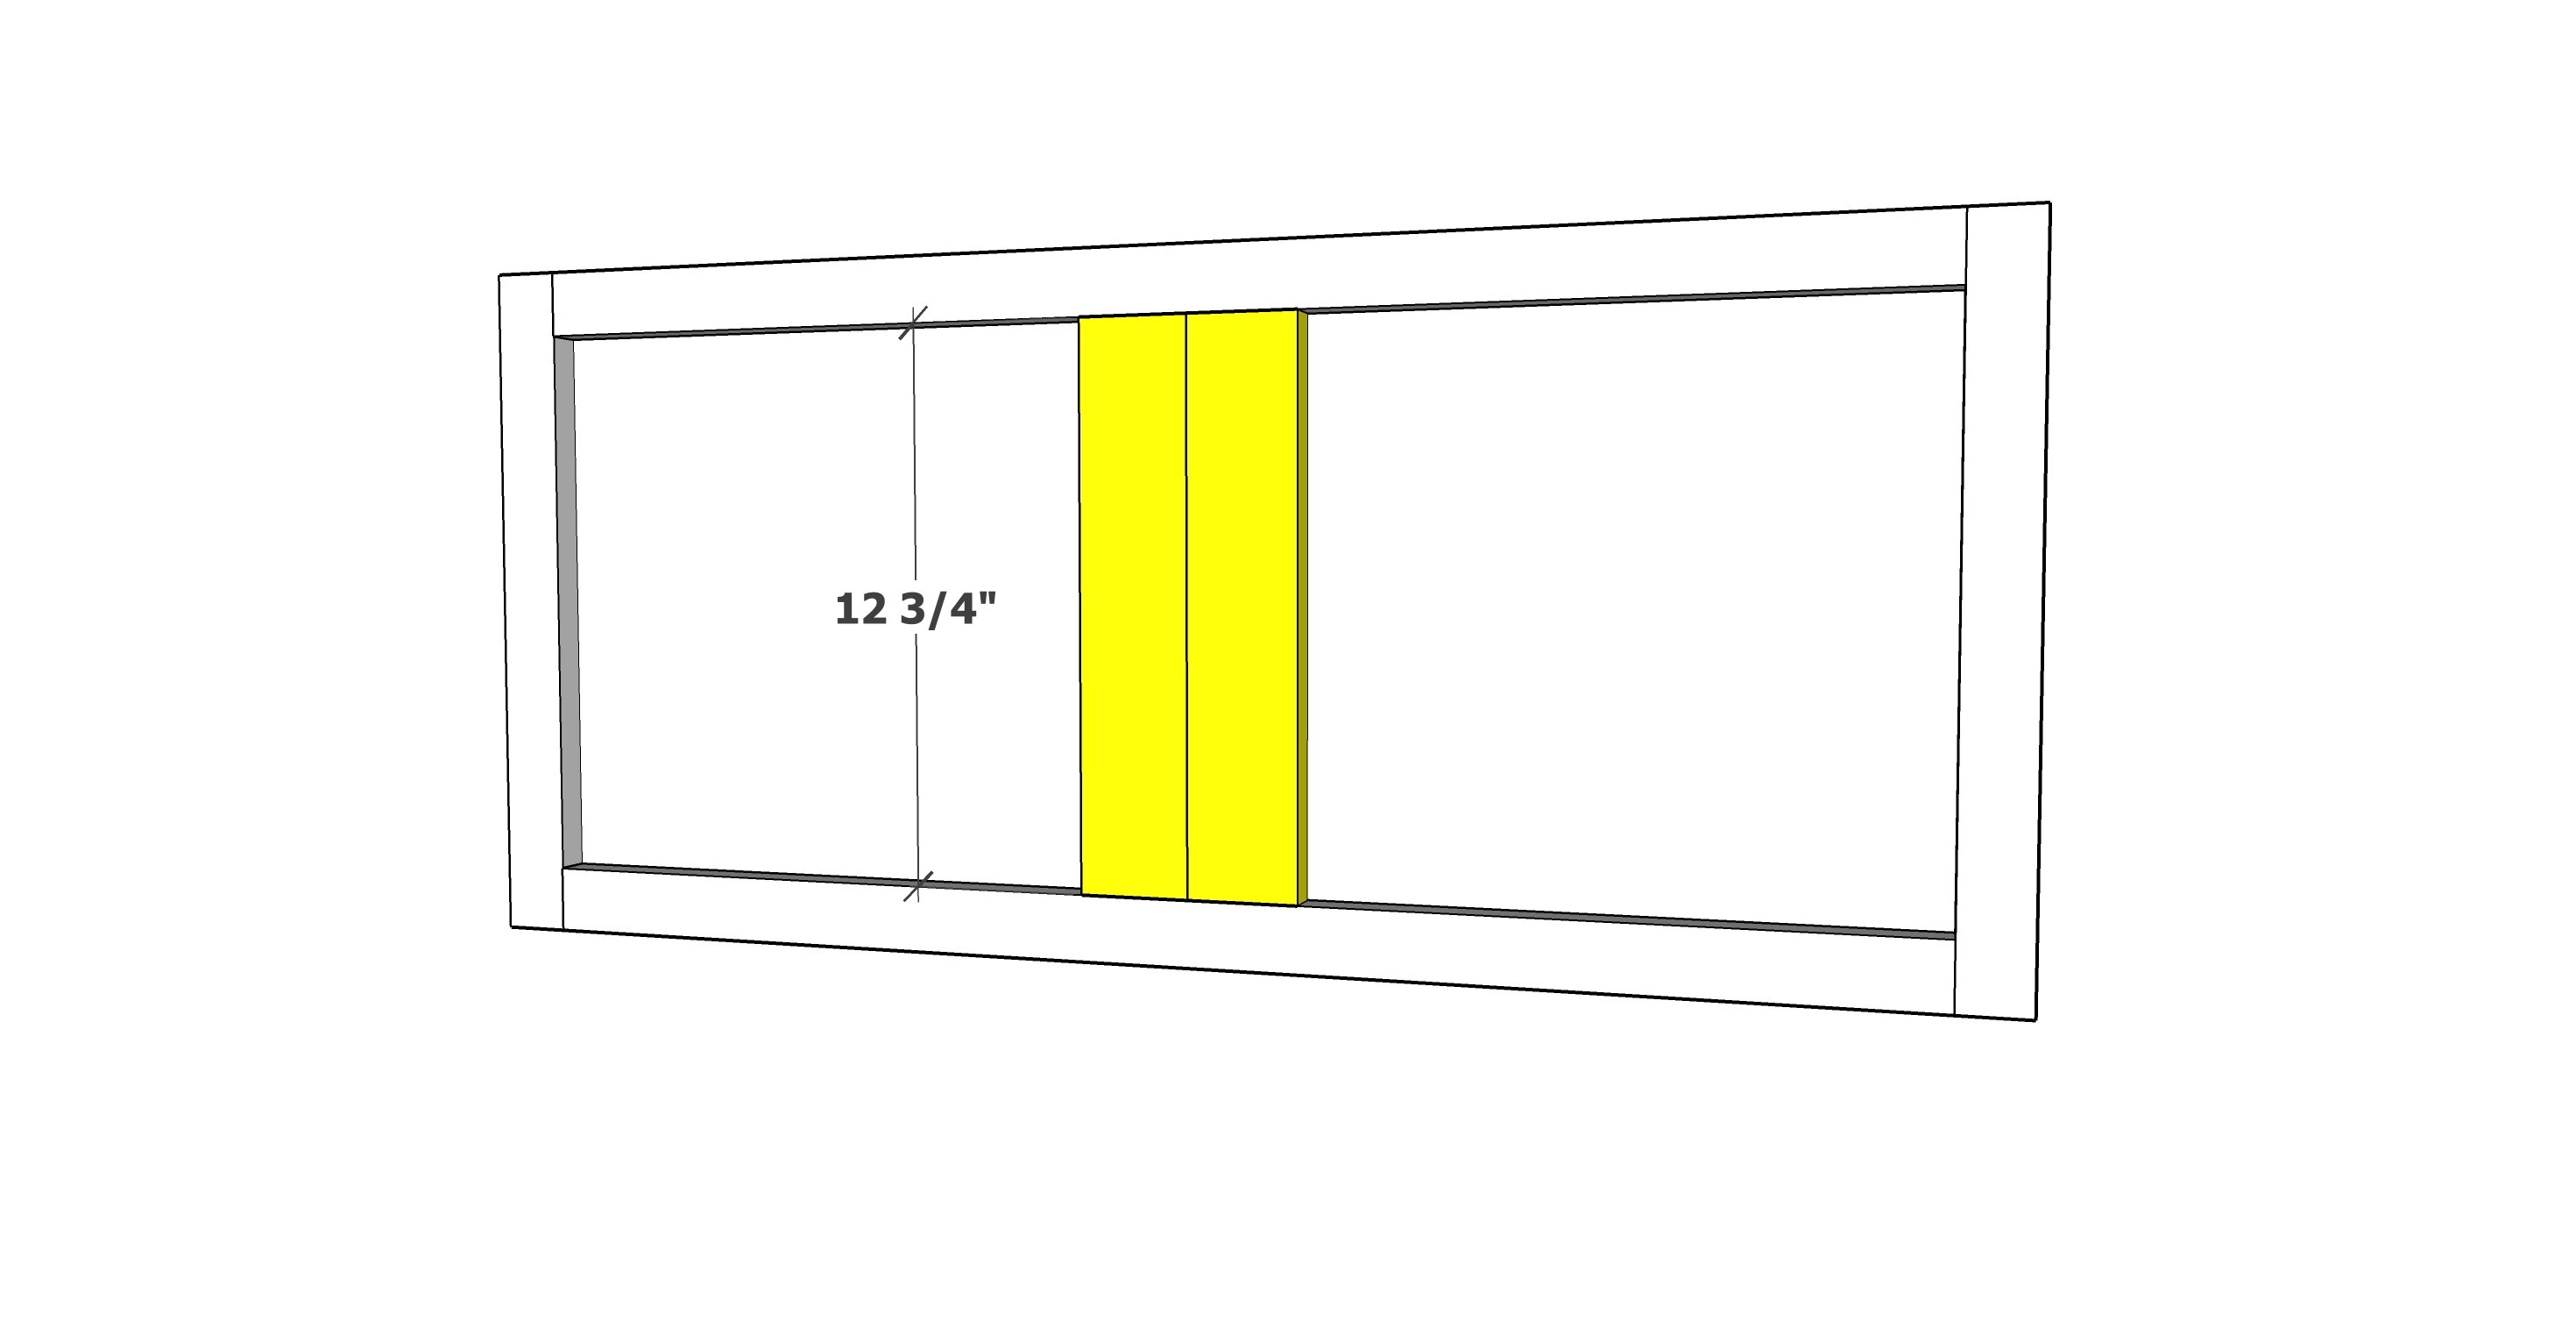
These are for the drawer slides. Place the 1x3 boards so they are positioned where the screw holes in your drawer slides match, considering your drawer slides will be installed 3/4" inset from the outsides of the 2x2 legs. Nail and glue in place with 1-1/4" brad nails.
Step 3
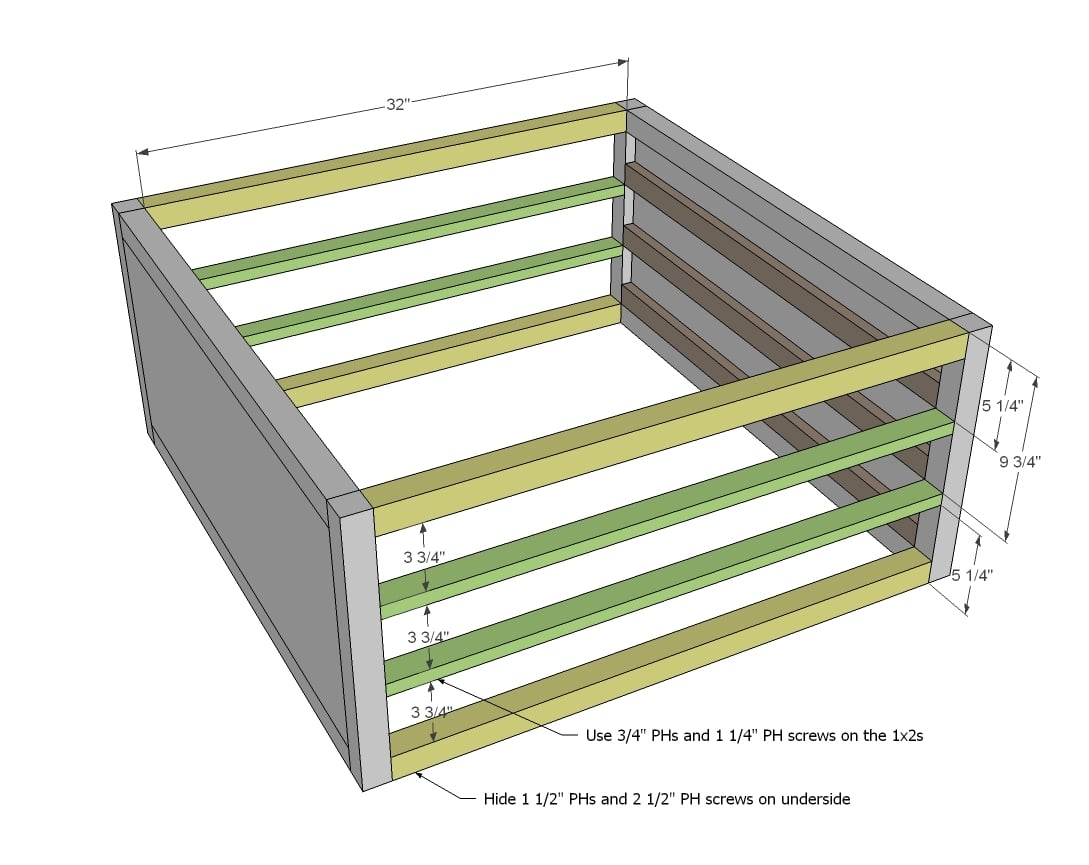
Now the front and back trim. It is very important to space these pieces exactly as shown to keep distance between drawers even. Adjust for square - this is very important.
Step 4

Build your drawer boxes to suit your openings. The drawers must be very square.
Step 5
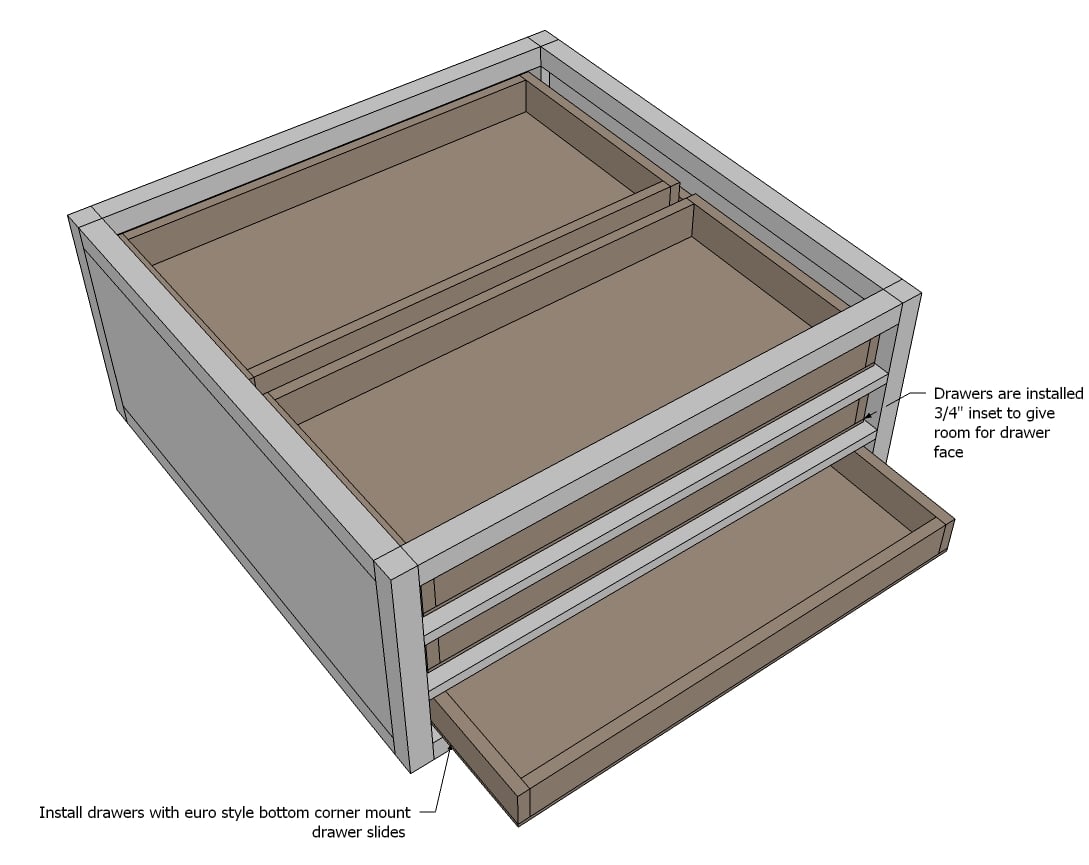
Install the drawer slides. Here is a good video showing all the steps
Step 6
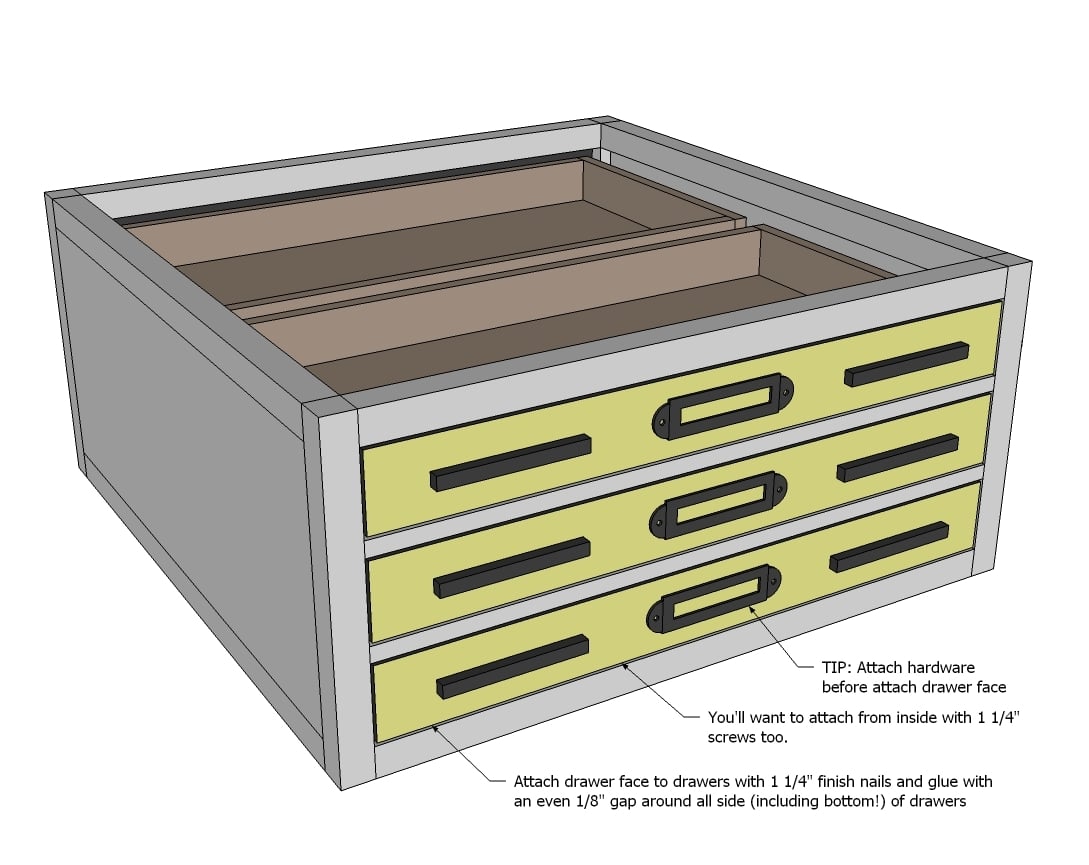
Then attach your drawer faces to the drawer boxes with glue and 1 1/4" finish nails. TIP: attach hardware first! Keep an even 1/8" gap on all sides of the drawer faces.
Step 7
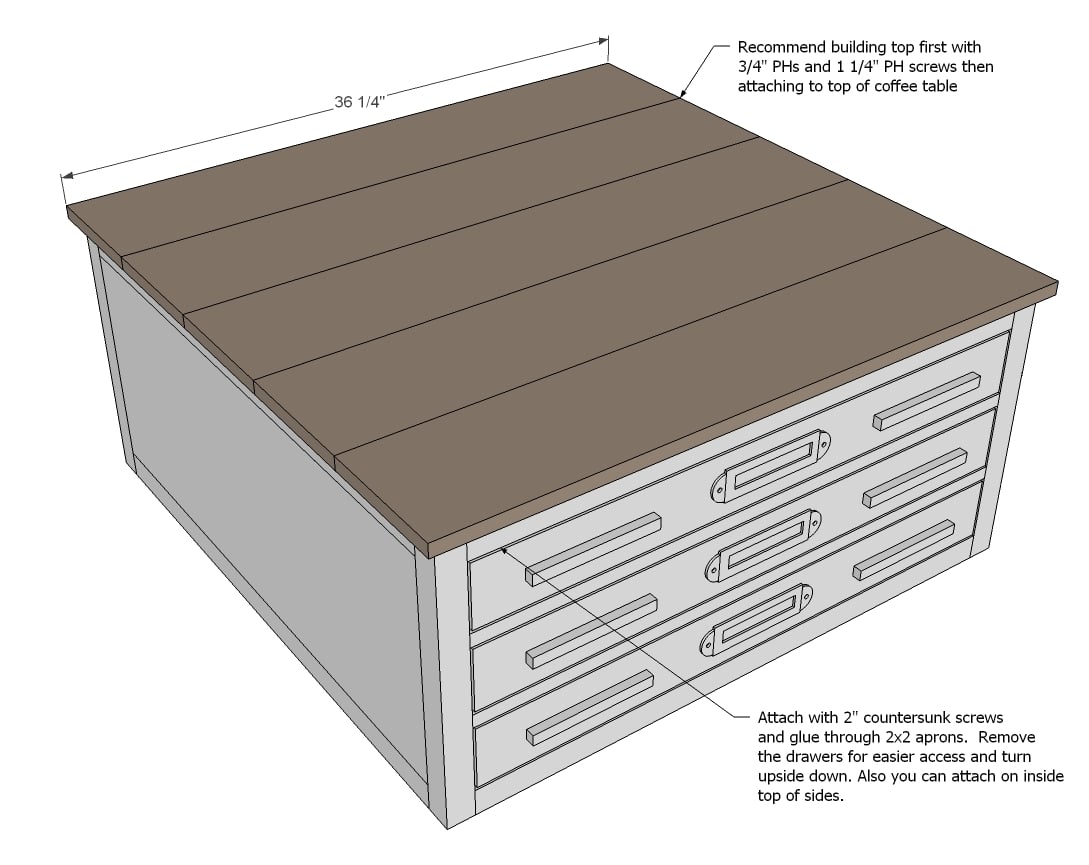
And then the top! You can build top first and then attach - it's up to you.
Step 8

And finally add the caster wheels to the base.
It is always recommended to apply a test coat on a hidden area or scrap piece to ensure color evenness and adhesion. Use primer or wood conditioner as needed.

Comments
Tsu Dho Nimh
Wed, 10/03/2012 - 12:06
Giving away book?
Is that all over, or just the book tour sites on the day of the tour?
They KNOW they'll make it up in lumber sales ... a very smart PR move from them.
daniel (not verified)
Wed, 10/03/2012 - 15:07
Im confused, what keeps the
Im confused, what keeps the drawers from falling?
MichelleC
Wed, 10/03/2012 - 21:08
In step 5 you install the
In step 5 you install the drawer slides which the drawers sit on so they don't fall through...hope that helps!
MichelleC
Wed, 10/03/2012 - 21:18
Beautiful!!!
Two amazing plans within just a few days of eachother (buffet and now this coffee table)?!! Quit it! How am I supposed to focus on all my other projects when such awesome new ones keep coming?!
Jamaunzie
Mon, 10/08/2012 - 19:02
Drawer Slides
I too am cofused with the drawer slides 1X2 and plywood 3/4 inch seems the slides would be flush with no overhang but i have been known not to see the big picture.
gibbsgirl (not verified)
Sat, 10/27/2012 - 11:37
Wood
Did you really just use plywood on the top or did you use something else? Would you recommend anything different that might be more solid?
In reply to Wood by gibbsgirl (not verified)
Juanita_r
Sun, 11/04/2012 - 03:36
1 x 8 for the top
The plan suggests 1 x 8 for the top. at the very bottom of the cut list.
Heather James (not verified)
Sat, 11/03/2012 - 23:21
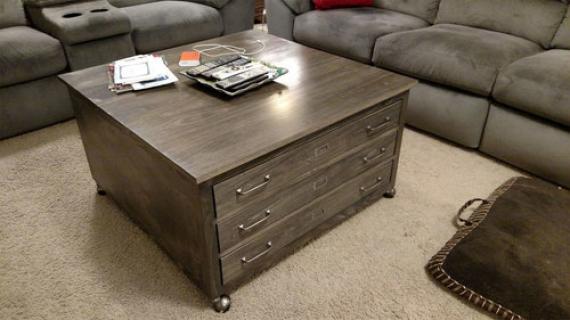
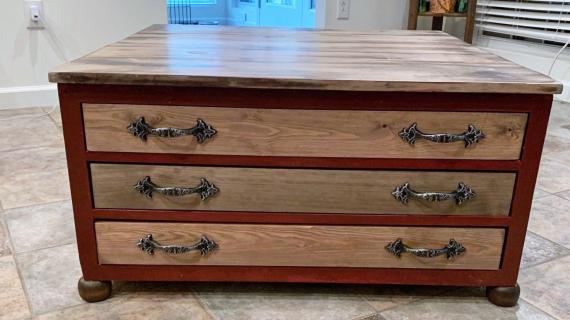
3 drawers, rather than 6
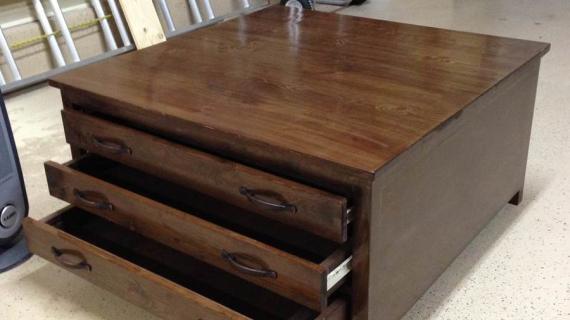
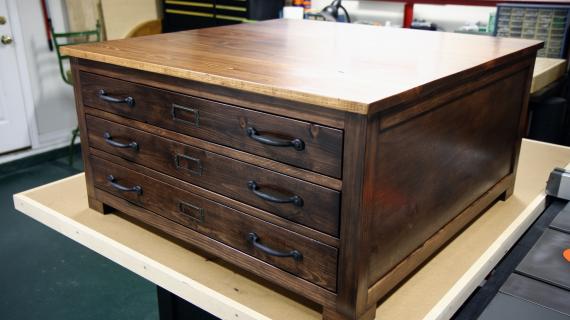
I could seriously see making this table with 3 really large flat drawers, rather than the 6 drawers in the plans. Those drawers would be big enough that you could have a jigsaw puzzle going on one drawer, a small train layout on another, and legos on the third--AND be able to shut the drawers and have all of those "messy" things OUT of sight!
Quartney
Mon, 11/05/2012 - 14:22
error in cut list?
Seems like, instead of 4 - 2x2 @ 12 3/4", it should read 4 - 2x2 @15 3/4" for the end frames.
Cynthia H (not verified)
Sun, 12/30/2012 - 16:10
6 Drawer Library Coffee Table
Love this coffee table! I would also love to see this as a four drawer. Combine the lower 2 drawers on each side to make 2 deep drawers-one to fit extra blankets and in the 2nd I would put my yoga mat and blocks and hand weights in one (I exercise to dvd's in the living room) and then still have the top drawers-one for magazines and the other for remotes and coasters! Would keep everything hidden!
maistook
Tue, 03/26/2013 - 16:43
Supplies & Cut list questions
Awesome piece - thanks so much for sharing. But looking at the plans, it seems like the supplies list and cut list are both off. For example, the plans call for 12 3/4" 2X2 pieces, though the diagram asks for 15 3/4" pieces - not mentioned anywhere in the supplies or cut list. Then it asks for 3 2X2 8 ft pieces. But the diagrams require 8 32" 2X2 pieces and 4 more of the 12 3/4" (or 15 3/4") 2x2s... and if you add up that length, it's longer than 3 8ft 2x2s would give you. Just wanted to figure this out before I ran to the hardware store - or am I just crazy?
Thanks!