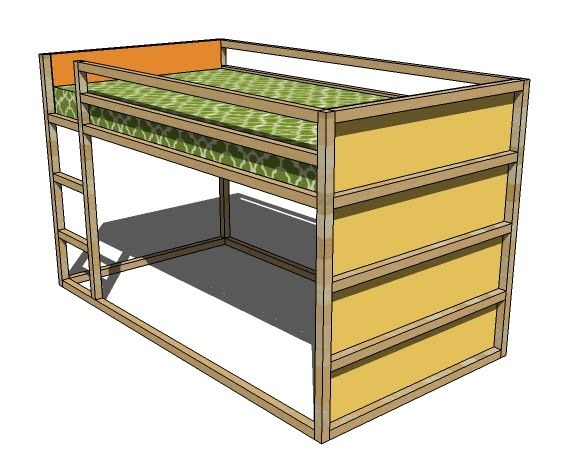
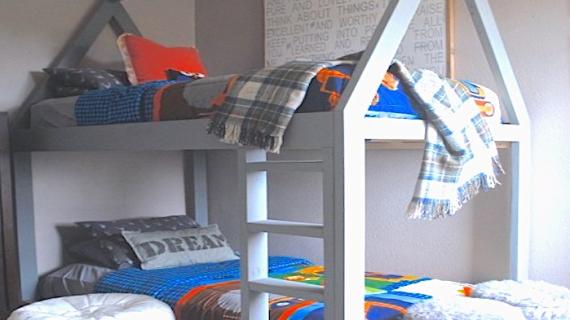
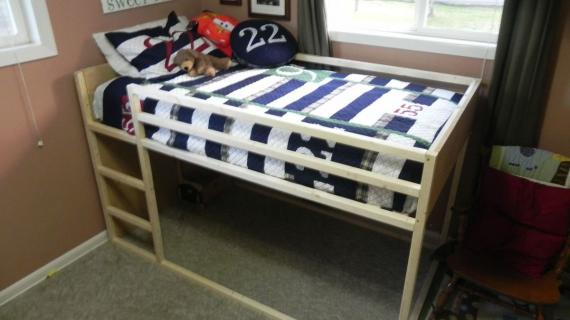
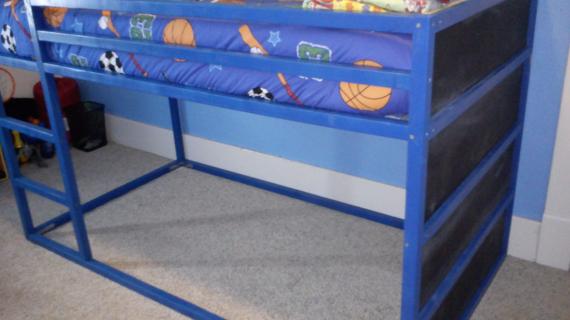
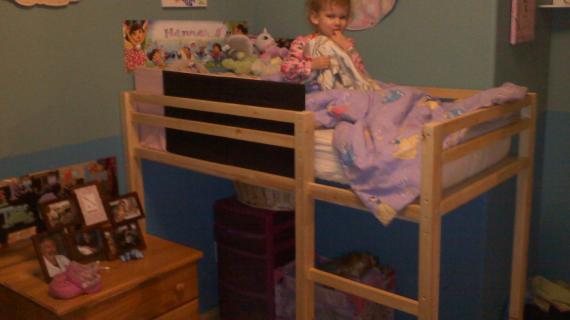
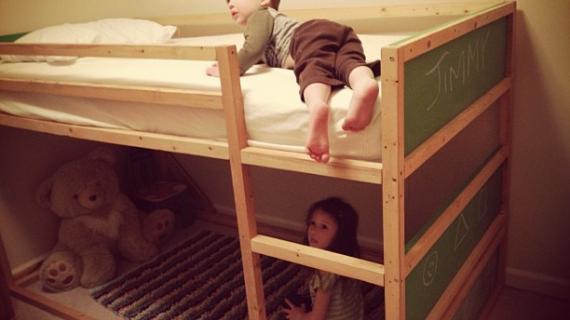
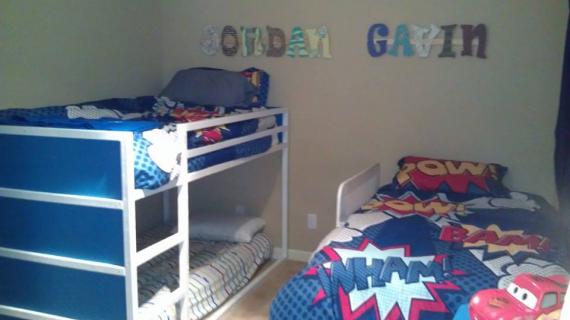
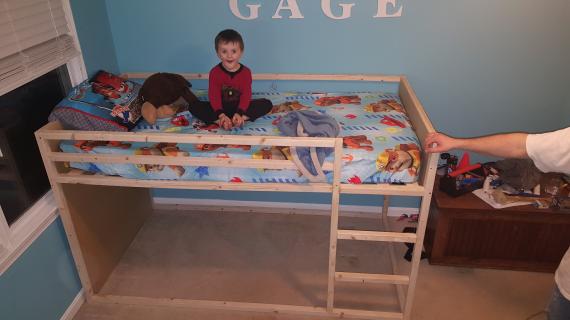
A simple fort bed for creating an elevated children's sleeping space. Can be used upside down.

I have a present for you. Mom to mom, think of it as a Mother's Day Present. Because another amazing Mom gave it to me. It's at the very bottom of this post. And it looks like this:
And it WORKS! That's right, we have a WORKING PRINT button! I tested it out myself, and it is perfect! To find the print button, you must scroll to the very bottom of the plan, right above the comments. You must be on the post page, and not the main page. And no, it's not a third party software or anything like that, it is quite simply, a print button. And please, don't thank me. I can hack furniture, but hacking blogger, hmmmm . . . that takes someone Very Special. Very Very Special.
Jessica from Very Baby was kind enough to give us all a working Print Button. Despite running multiple businesses and being a Mom, Jessica took her time to figure out how to save us all some ink! So if you have a second, you can drop over and visit Jessica at Very Baby
Those are cloth diapers. I've never found myself (should I ever have a second child) looking forward to changing diapers, but these cloth diapers make me forget what diapering is really all about. And here's the real kicker - Jessica sells the PATTERNS to make these diapers (and all the supplies).
Right down to the little tags marking the size and proudly displaying that your cloth diapers were home sewn. I cannot think of a better (and more unique) baby shower gift!
Thanks for the Mother's Day present, Jessica. I love it, probably not as much as I'm going to love my fingerpainted card Grace is "secretly" making me or the pancakes my husband will whip up (even if they are from a box), but the print button is definitely a day maker!
Oh, and one more suprise! Yesterday I felt a little guilty putting up a teen loft bed and not a tot one too. So Grace and I went "shopping" in Google Sketchup and came up with this . . .
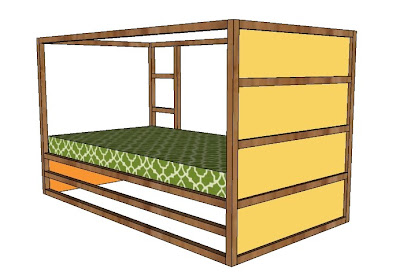
Because they want to hang curtains up and make a fort. Your creativity is your only limitation on this project.
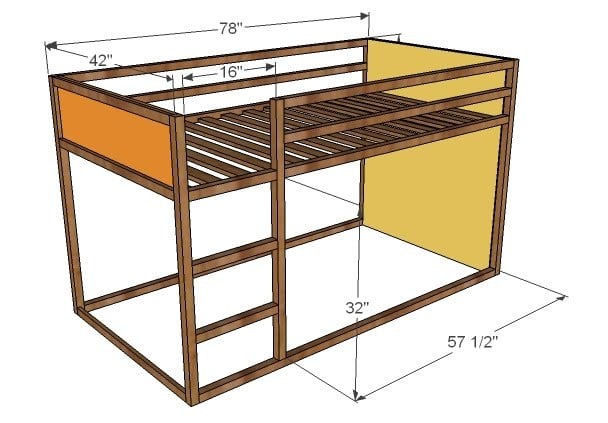
Overall Dimensions are show above. Click on READ MORE below. ________________________________________________________________
1- 4x8 Sheet of 3/4" Particle Board 4 - 1x2 Boards, 8' Long 7 - 1x3 Boards, 8' Long 11 - 2x2 Boards, 8' Long 3" Screws 1 1/4" Screws Wood Glue Finishing Supplies
Saw Measuring Tape Square Level Drill or Screwgun with countersink bits
1 - 3/4" Particle Board @ 39" x 11 1/2" (Open End Panel Board) 1 - 2/4" Particle Board @ 39" x 46" (Closed End Panel) 7 - 1x2 @ 39" (Panel Trim Pieces) 1 - 2x2 @ 39" (Bottom of Open Panel End) 4 - 2x2 @ 46" (Legs) 3 - 2x2 @ 16" (Ladder Rungs) 5 - 2x2 @ 75" (Side Panel Full Length Boards) 3 - 2x2 @ 57 1/2" (Ladder Panel Guardrail Boards) 14 - 1x3 @ 39" (Slats)
Overall Dimensions are shown above. Composition is pine boards and 3/4" sheet goods, particle board would be inexpensive and effective for this application.
Cut all of our boards and finish individually. You should assemble this bed in the room. You can assemble the "panels" as shown in the steps in your garage and move into the room and then assemble the panels. You should always work on a clean level surface and check for square after each step. Be safe, have fun, use good boards, you know the drill. Oh, and predrill your screw holes!
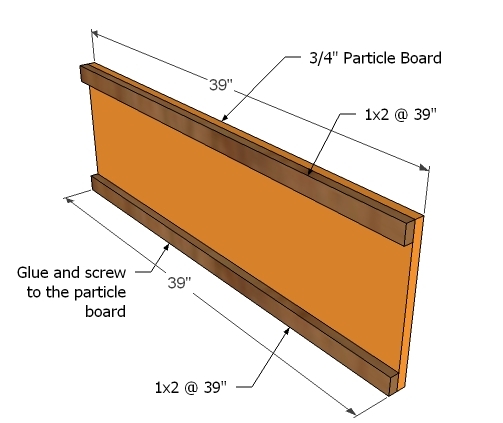
Step 1: Open End Panel { Part 1 } Fasten with glue and screws the 1x2s to the particle board. This can be a permanent joint.
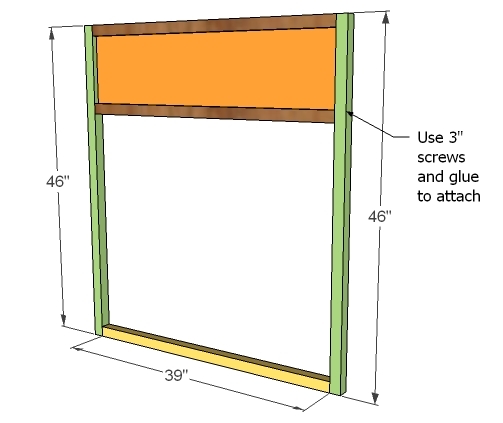
Step 2: Open End Panel { Part 2 } Fasten the legs and the bottom end panel piece to the legs as shown above. Use 3" screws. Predrill your screw holes. Use glue, as this can also be a permanent joint.
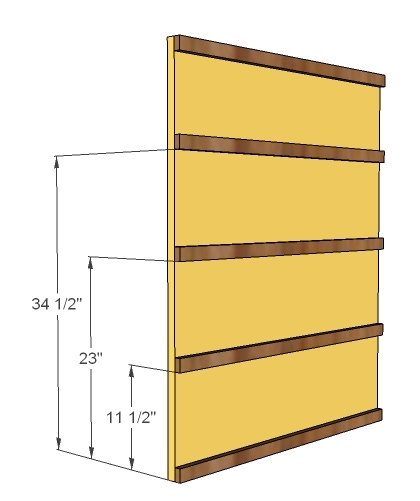
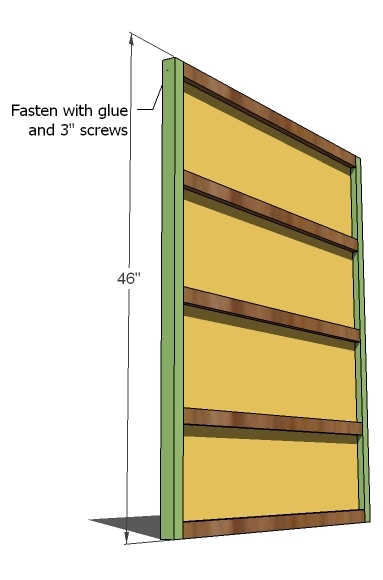
Step 3: Closed End Panel { Part 1 } Build your closed end just like your open end, first by gluing and screwing with 1 1/4" screws the trim boards to the particle board pieces.
Step 4: Closed End Panel { Part 2 } Add the legs with 3" screws and glue. Keep outside edges flush.
Step 5: Ladder Side Panel Construct the ladder side panel as shown above, using glue and 3" screws.
Step 6: Back Rail Boards & Bottom Using 3" screws, attach the back boards as shown above.
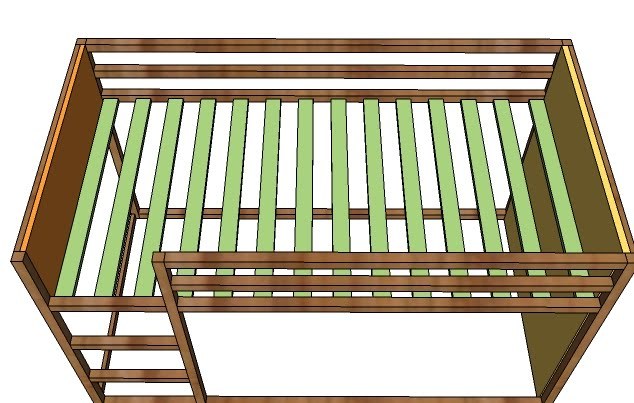
Step 7: Slats With every plan, there is a tricky part. And putting these slats on is going to be your tricky part. OPTION #1: You could screw from the outsides of the sides of the bed into the ends of the slats, but then you have lots of screw heads showing.
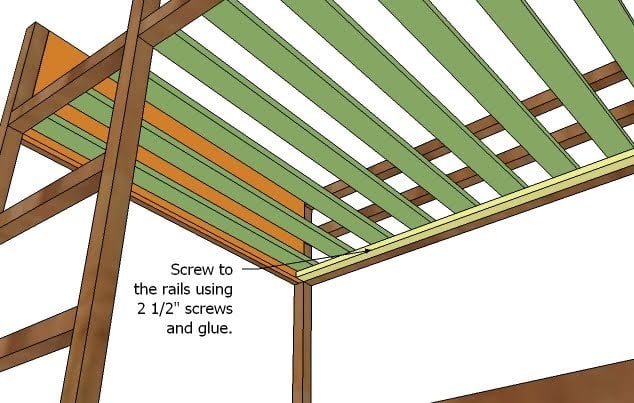
OPTION #2 You could also glue and screw a 1x2 on edge to the rails.
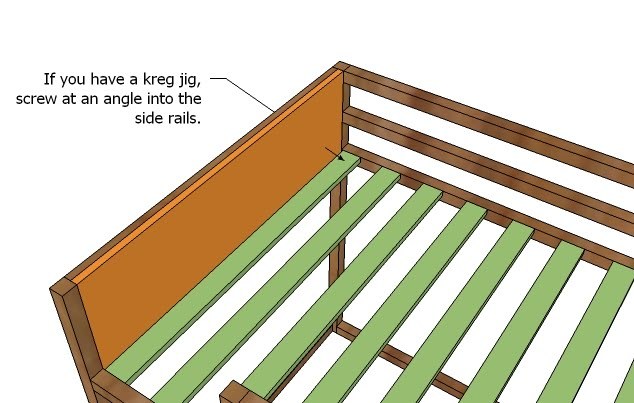
OPTION #3 If you have a Kreg Jig, you could drill pocket holes and fasten to the rails in this manner
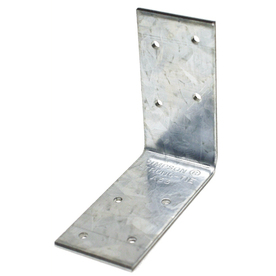
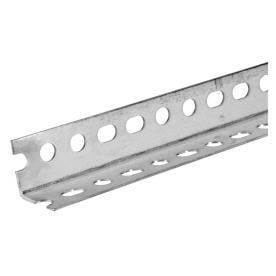
OPTION #4 If you've got teenagers using the bed, steel angle like this piece would both strengthen your rails and fasten your slats to your rails. Simply screw with 1 1/4" screws to the inside of the rails and rest your slats on top. From underneath, use a couple of screws to fasten your slats down.
To make your bed even stronger or to take an "wiggle" out, you can use Simpson Strong tie like the one below at the corners of the legs. In return for providing you with free furniture plans, I request that you add comments on your building experience to assist other building the same projects. Photos of your work is greatly appreciated, please add to our flickr brag board group www.flickr.com/groups/knockoffwood .*** ***All rights reserved. Private use only. Plans from this page are not to be used for commercial purposes or republished without the express written consent of the publisher, Ana White, Knock-Off Wood*** ***While I do strive to produce accurate plans, I cannot guarantee each plan for accuracy. Not every plan that I post have I had the opportunity to build myself. Some plans have not been tested. It is recommended that you draw out the plans and have a clear understanding of how the project will fit together before beginning. I hope that if you do find a flaw in any plans, you will contact me immediately***
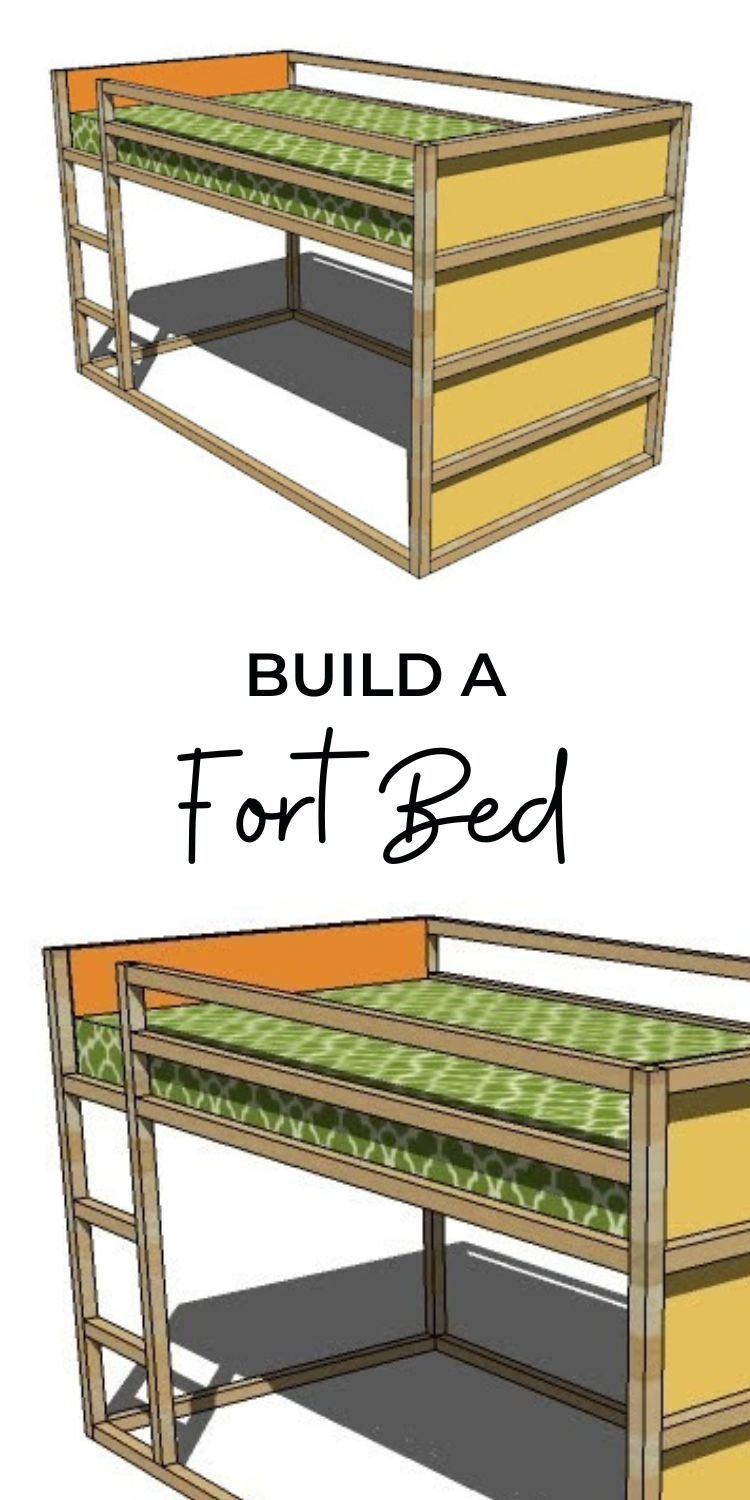
Pin For Later!
Preparation
1- 4×8 Sheet of 3/4″ Particle Board 4 – 1×2 Boards, 8′ Long 7 – 1×3 Boards, 8′ Long 11 – 2×2 Boards, 8′ Long 3″ Screws 1 1/4″ Screws Wood Glue Finishing Supplies
1 – 3/4″ Particle Board @ 39″ x 11 1/2″ (Open End Panel Board) 1 – 2/4″ Particle Board @ 39″ x 46″ (Closed End Panel) 7 – 1×2 @ 39″ (Panel Trim Pieces) 1 – 2×2 @ 39″ (Bottom of Open Panel End) 4 – 2×2 @ 46″ (Legs) 3 – 2×2 @ 16″ (Ladder Rungs) 5 – 2×2 @ 75″ (Side Panel Full Length Boards) 3 – 2×2 @ 57 1/2″ (Ladder Panel Guardrail Boards) 14 – 1×3 @ 39″ (Slats)
Cut all of our boards and finish individually. You should assemble this bed in the room. You can assemble the “panels” as shown in the steps in your garage and move into the room and then assemble the panels. You should always work on a clean level surface and check for square after each step. Be safe, have fun, use good boards, you know the drill. Oh, and predrill your screw holes!
Instructions
Step 1
Step 2
Step 3
Step 7
Step 9
OPTION #3 If you have a Kreg Jig™, you could drill pocket holes and fasten to the rails in this manner
Step 10
OPTION #4 If you’ve got teenagers using the bed, steel angle like this piece would both strengthen your rails and fasten your slats to your rails. Simply screw with 1 1/4″ screws to the inside of the rails and rest your slats on top. From underneath, use a couple of screws to fasten your slats down.










Comments
Jennifer (not verified)
Thu, 05/06/2010 - 22:18
So excited!! I'd been hoping
So excited!! I'd been hoping for more bed plans. We'll be making the fort bed and loft bed as soon as we move into our new house!
Thanks for cranking out such great plans!!!
Chris' Books (not verified)
Thu, 05/06/2010 - 23:48
Ok, this may be a dumb
Ok, this may be a dumb question, but how would you completely assemble the bed then get it through a 36" door?
Melissa (not verified)
Fri, 05/07/2010 - 02:23
First I just have to say
First I just have to say THANK YOU! This is the type of bed I know my son will want within the next year. :-)
Ok, I'm sure if I keep looking (ie staring) at the dimensions I'll see the answer, but I seem to be missing it. How deep is the mattress area on this bed? I looked at this bed at Ikea, but didn't like that I couldn't use a traditional mattress on it (could only be like 5" thick for safety reason?). Is that the case here? If so, I'll need to figure out how to make the bed just a little bit taller to accommodate a "traditional" twin mattress.
Many thanks!!!
Guest (not verified)
Sat, 01/14/2012 - 22:05
Hello, we have the extact
Hello,
we have the extact bed from ikea, and it holds a tradition twin mattress, and still leaves a good amount of space to avoid rolling out. You could even use a pillow top mattress if the child was a bit older and wasnt worried about rolling out.
(I worried the same thing)
Tanja (not verified)
Fri, 05/07/2010 - 02:26
We have just purchased it
We have just purchased it this past weekend!!!!! I've been keeping my eye on all of your bunk beds thinking "she won't do one like this" - AND YOU DID!!! We have 3 little ones (3,4,and 5) and they LOOOOOVE this type of bed!!!
Jensen Clan (not verified)
Fri, 05/07/2010 - 02:47
Thank you for empowering
Thank you for empowering women and people to build their own furniture! I love your website! I have been coveting this bed from IKEA for years and was thrilled to see these new plans. I was wondering if you could post how to build this bed with the option to take it apart? We are a military family that moves frequently which limits building this bed.
Jen (not verified)
Fri, 05/07/2010 - 03:42
I love this bed! I bought one
I love this bed! I bought one about a year ago, but luckily it was off of craigslist and I didn't pay full price. I got a good deal! but thanks so much for the plans...we have a lot of kids, so I'm sure in the next couple of years I'll need another one!
Robyn Fish (not verified)
Fri, 05/07/2010 - 04:37
We bought this bed from IKEA,
We bought this bed from IKEA, too. Had to build it anyway. lol. It was $200 before the mattress, we assembled it IN the room so as not to worry about doors. It fits a regular mattress (though we bought the $60/ 3 part mattress from IKEA).
Out of curiosity, anybody price this one out yet?
Bizzzy-Mommy's… (not verified)
Fri, 05/07/2010 - 04:54
@ Chris' Books, The
@ Chris' Books, The directions say to assemble "panels" in garage then assemble panels in room. :)
was wondering the same thing until I read through the plans!!
Bizzzy-Mommy's… (not verified)
Fri, 05/07/2010 - 04:57
oops...the bed should be
oops...the bed should be built in room with the panels that you have already built in the garage. I hope that makes sense, it made sense to me once I read it in the plans.
Megan (not verified)
Fri, 05/07/2010 - 05:18
now I have to decide between
now I have to decide between this and the loft bed for my little guy! So many choices! (thank you for that!)
Kirsten (not verified)
Fri, 05/07/2010 - 05:24
OK, I know I commented
OK, I know I commented yesterday that the loft bed was what I wanted--and it is, for one kid:)--but THIS was the very bed from IKEA that I wanted to hack for my little boys. I'm wondering if I should just make 2 of these, now! And I LOVE the chalkboard idea!!!
Kristen (not verified)
Fri, 05/07/2010 - 06:57
I'm trying to figure out what
I'm trying to figure out what mattress as well. A twin? A crib mattress? An ikea mattress?
Greg (not verified)
Fri, 05/07/2010 - 07:23
Great sight, but WOW so many
Great sight, but WOW so many ads. Thank God for Firefox and adblocker or I wouldn't be able to stand it.
Ana White (not verified)
Fri, 05/07/2010 - 08:12
I'm so happy you all love
I'm so happy you all love this plan!
Melissa, the depth of the top part is equal to the 10".
And Greg, I'm sorry the ads bother you. Our sponsors actually pay bills like software, web hosting, and babysitters (but I still work for free). If you would rather have no ads, we can go that route, but I would be forced to charge per plan like most other detailed and quality furniture plans available.
:)
Ana
Greg (not verified)
Fri, 05/07/2010 - 08:49
The ads don't bother me a
The ads don't bother me a bit, as I said I use an ad blocker. The ads show up as blank space. I was just commenting because when I actually went to your website (as opposed to viewing it from a blog reader which also blocks all the ads) your sight had A LOT of blank space. I get the need to supplement your income. But I'm sure you can sympathize with those of us who are inundated by ads all day and sometimes just need a little break.
teamshield (not verified)
Fri, 05/07/2010 - 09:21
Love it Ana. I need more
Love it Ana. I need more kids to accomadate all the beds I want to make :)
thanks for all you do!!!
Becky (not verified)
Fri, 05/07/2010 - 11:52
ahhhhh...why didn't we find
ahhhhh...why didn't we find your site years ago?! oh wait, you only just started. congrats on the success...yours is the only blog that i hear everyone talking about - i mean "everyone", as in people who don't blog. anyhoo - we bought this ikea bed and our 40 lb five year makes it creak and crack and groan just crawling into it. i know it didn't cost "much" - but for half that money i could have built this same bed and it wouldn't be so cheap that it's falling apart and breaking just from normal everyday use. lessons learned. thanks for the plans. and again, congrats.
T. Navis (not verified)
Fri, 05/07/2010 - 12:48
I have been waiting for this
I have been waiting for this soooo long...almost purchased one. And here it is!
Question: Would it be relatively simple to open the other non-ladder side and attach/make a slide of some sort?
Keyes (not verified)
Fri, 05/07/2010 - 13:42
I really love your blog, Ana!
I really love your blog, Ana! I'm almost done with my second project. This one I might actually post pictures of... we'll see. But all my kids need beds so I love you for it. It's just hard to decide which ones to make.
I wonder if Greg's ad blocker is blocking your links to flickr, previous plans, etc. I don't feel like you dedicate very much space to ads at all and I'm glad to see you getting at least a little return for your time.
Jessica (not verified)
Fri, 05/07/2010 - 19:56
Oh! What a nice surprise,
Oh! What a nice surprise, thank you for the shout out and sweet feature!
p.s. When I get home I'll tell you how you can make the ads show up even on browsers using adblockers ;o)
Bri (not verified)
Sat, 05/08/2010 - 09:54
I've actually enjoyed
I've actually enjoyed visiting your sponsors links! lol I just wanted to let you know that I tried the new print button today and it printed a massive 12 pages...OOPS I shouldn't have walked out of the room!! lol I am wondering if there is a way to make it more printer friendly like maybe when it prints only have it print one completed finished picture and then making it optional to print comments or not (I don't want them but someone might) I guess for now I'm back to copy pasting the entire post and editing out what I don't need in Openoffice lol printer ink is just too darn expensive! I LOVE YOUR WORK so use all the adds you need to keep it free!! You could always add a button to donate with paypal...I've printed enough plans that I wouldn't mind donating a few bucks here and there especially since I know how much I'm saving!
Crazy Easton Family (not verified)
Sat, 05/08/2010 - 13:32
OH, I'm with Jensen clan, I
OH, I'm with Jensen clan, I would LOVE to know how to build it so it can be taken apart every 3 years for military moves :)
Ana White (not verified)
Sat, 05/08/2010 - 16:35
UPDATE: I don't know why I
UPDATE: I don't know why I didn't think of this when I was drawing up the plans, but the legs should be attached to the side panels, not the end panels for easier attachment and disassembly. Then the bed could be taken appart into three panels (the closed end, the full side and the ladder side) and the remaining end would consist of a 1x2 and the shorter plywood piece. Then all you would have to do is screw the side panels to the end panels to assemble! You could even keep the slat cleats attached!
shoppingbroke (not verified)
Sun, 05/23/2010 - 08:12
I don't see the end panel on
I don't see the end panel on the cut list. Is it just me? I see the open panel plywood but not the other side.
KaiPing (not verified)
Sun, 06/06/2010 - 12:49
What a great bed! My almost
What a great bed! My almost 5 year old son picked this out and my husband bought the materials and built it all within 24 hours!!! Thank you!!!
We built it for less then $100. Pretty close to $100 though. Granted that we got our lumbar from our small town lumbar yard. So it might be cheaper from big city lumbar stores.
A couple of things that he wanted to let you know. The post to right side of the ladder was missing from the shopping and cutting list.
Then the other one is that he suggested putting vertical 2x2s between the side railings (or bed frame) for more support. The horizontal one does not provide that much strength.
Thank you!!!
Here are some pictures:
http://www.babyhome.com.tw/album.php?op=album1&mid=371317&folderid=3249…
En Jaya (not verified)
Sat, 06/26/2010 - 08:32
Hi, we are building the fort
Hi, we are building the fort bed this weekend and noticed that there was no instructions for the ladder support. We cut one that is 44.5 inches. The plan is otherwise looking great! Thanks so much!
Beth (not verified)
Sun, 06/27/2010 - 18:52
I built the fort bed, in one
I built the fort bed, in one day! My five-year old is delighted. And since these endorphins are not going to let me sleep, right now, I'll share my deliberate modifications and lessons learned from mistakes.
His twin mattress is thick (10 or so inches) so in my plan I added 5 inches to all the vertical pieces. Then I overlooked my penciled notes and cut them as specified in your plan, oops.
My worst goof-up was a classic noob mistake ... forgot to make a detailed cut plan, or at least cut the longest pieces first. What did I do? I grabbed a bundle of 4 2X2s and cut them in half. OOPS. To be able to finish, I decided to omit the safety rail on the wall side and the ladder, since I already had a ladder I could use.
There were other mods:
I made the bed 1" narrower, to be able to use the MDF I had on hand, and that worked fine.
I beefed up (overbuilt!) the mattress support using angle iron (6 ft length was about $10 each, no need to cut it down), corner L-braces, and an extra 2x2 under each angle iron to give the mattress platform more rigidity along its length. I also screwed it to a wall stud so it's solid, with no wiggles.
For bed slats, I used 11 1x4s instead of 14 1x3s ... because they were on sale.
With the safety rails too low for our tall mattress, I improvised with a mesh-and-aluminum rail we had in the garage until I can get a lower mattress.
The hardware that permits it to be disassembled is a threaded insert and a hex socket connecting bolt with a large, flat head. Using metal-on-metal fasteners makes it strong, and lets you tighten things back up if they begin to get wobbly. I bought 16 bolts and inserts for the long horizontal pieces where they meet the ends.
My price: Right at $100 even with the modifications and special hardware. I did not have to buy the MDF (would have been about $35) and I purchased the lumber, angle iron, and fasteners from Lowe's.
I'll post pics soon of the finished bed and my modifications ... after I patch and paint the wall and install a collector's shelf and reading lamp.
Thank you for giving me the inspiration to go for it. Endorphins, I tell you! Wooooo!
Hopeful Mama! (not verified)
Tue, 07/27/2010 - 20:53
Love this!! Just wondering if
Love this!! Just wondering if a mattress would fit on the floor underneath ... curious because I have two small boys and a baby on the way and we want to do bunk beds, but are worried about height, as my oldest isnt quite 5.. so THIS tot loft would be PERFECT, especially since the little guy (2 yrs!) sleeps on the floor (on a mattress LOL!) anyway ...
Bernie (not verified)
Fri, 07/30/2010 - 00:55
Love this bed and thanks for
Love this bed and thanks for the plans. You are missing the right side post of the ladder in the cut list. Also, your measurements are off. In one picture you have the measurement between the bottom 57 1/2" Ladder Panel Guardrail Board and the 39"Bottom of Open Panel End to be 33" and then in a second picture it is 32". This created some difficulty when building, but we corrected it.
http://3.bp.blogspot.com/_LodZ9etRvTw/S-O1zDK9GTI/AAAAAAAAG0w/k0S1WS0Q4…
http://4.bp.blogspot.com/_LodZ9etRvTw/S-Ov8CEafdI/AAAAAAAAG0A/KFyM4nrvc…
You should probably also include the the amount of inches between the bottom rail and the bottom support in this pic:
http://2.bp.blogspot.com/_LodZ9etRvTw/S-O4RqMCVqI/AAAAAAAAG1A/Z_wG3lnSa…
Again, thanks for the plans. My boys love the bed and can't wait to get started on the farmhouse bed for me and my wife.
Keri Ann (not verified)
Sat, 08/14/2010 - 10:50
Ana, We made this bed last
Ana,
We made this bed last night, it cost us about $175 for a FULL modification, we made it with pine and metal L brackets and self sinking deck screws. We also added 1x3 to the bottom of the slats and side supports with another 2" to accomidate for the thick mattress and a decorative 1x3 on the top of the header and footer. I love it! Our extra toddler matterss fits in the bottom for our 3 year old to spend the night or doubles as a couch with the help of old crib bumper that I modified. I just havent decided to either laquer or paint navy blue.....our other furniture in the room is pine as well.... Thanks. I look forward to building more!!!! (this is our first KOW build!) Will post brag photo!
Sandra (not verified)
Sat, 08/14/2010 - 18:20
Keri Ann - I was wondering if
Keri Ann - I was wondering if you could post your FULL size modifications to this bed. My husband and I were just looking at this plan wishing it was full size. Thanks!
Greg (not verified)
Fri, 01/21/2011 - 12:58
I made one of these for my
I made one of these for my son, and had a blast building it, too! Our son's room has a 6-1/2 foot ceiling and slopes even lower over his bed, so when my wife saw your plan for a mini loft bed and saw that it fit the space, she was very excited.
Now, your "rules" say that the "price" of using your plans is to tell you how they turned out, so here goes:
First, there is a piece missing from your cut list (*GASP*). The missing piece is the inner leg of the ladder, which is 2 x 2 @ 44-1/2". Luckily, I had some trellis pieces that were 2x2, and once painted it looked just like the other pieces.
There is also a tricky point in the assembly, where that same inner ladder leg meets the platform for the bed. There are two pieces of wood to be attached at the same height on opposite sides, the top ladder rung and the front crossbeam of the platform. These can't be screwed together without committing a "Sin of Carpentry", i.e., driving the screws at an angle and hope it'll be okay :-). Again luckily, I've been squirrelling away spare Ikea bits for years, so I have lots of 3/4" pegs. I drilled a 3/4" hole through the inner leg, drilled a hole into the end of the two cross pieces, glued in the pegs, and attached them that way.
FYI, we painted the panels white with magnetic primer (instant magnet boards!), and the rods red. The color scheme combined with the visible screw heads looks somewhat a fire engine with rivets all over.
During construction, I pre-drilled a few holes in the wrong places; I hid the extra holes by screwing in more 1-1/4" screws.
Another thing I noticed was that, the completed bed had 4" to 6" of sway in the head-to-foot direction, enough that I didn't think the loft was safe to sleep in without cross braces. With a red-and-white bed to work with, I purchased shelf brackets, about 8 inches deep, metal, and already painted white. Couldn't ask for more, especially because the color matched.
Our son loves it! He prefers sleeping on a mattress "inside" the loft, in other words, on the floor. We had two twin mattresses from a trundle bed we've had since *I* slept in it as a little kid, so with the smaller (33" wide) mattress in the 39" loft, we filled in the gap with a body pillow, several stuffed animals, and a life-sized stuffed emperor penguin ... but that's a different story!
Fort bed – Ful… (not verified)
Tue, 01/25/2011 - 10:42
[...] in Brag Blog Put on
[...] in Brag Blog Put on my TO-DO List Save as PDF Print this PostShare/Bookmark Builder: Keri Experience Level: Intermediate Builder Estimated Cost: 250 Estimated Time Investment: weekend From Plan: http://ana-white.com/2010/05/furniture-plans-fort-bed.html [...]
Guest (not verified)
Wed, 04/27/2011 - 17:57
Toddler size
What would you say would be a good size to make this as a toddler bed? This would be my first project lol so I dont want to mess it up!
Kirk Lorange (not verified)
Mon, 02/20/2012 - 19:33
My version of this bed
Thanks for inspiring me to build this bed. My 4 year old daughter was promised one from IKEA but after finding this page and doing my sums, I realized I could buy all the materials PLUS the power tools need for less that the cost of the IKEA model.
I used a 'cross halving joint' where the top rung seems to meet the mattress support. IKEA use a metal pin affair, I notice someone else here screwed at an angle, but the cross halving joint is the best, I reckon. The mattress support beam is one piece, the ladder upright is one piece. Simply cut away half of each piece where they cross over and bob's your uncle. I used glue and a couple of screws to secure it.
I also used panels for the sides rather than rails. My daughter wanted it like the IKEA bed, so I routed out grooves in my 2X2s and slid the panels in during assembly. It all worked out well, you just need to be very accurate in measuring everything. I had never used a router before and I practiced on some extra bits of timber.
I left one panel out of the end and added a shelf so my daughter could play shop or café. It also took away from the boxiness and claustrophobic vibe that I felt before I did that. I had already installed all four, so I had to cut and rip it out with my router and bare hands, but I'm glad I did.
Finally, I added two diagonal braces, one to the end and one to the side. It was quite wobbly before I did that but it's solid as a rock now. My wife and daughter will put some curtains inside and it will all be hidden.
The slats sit on wood rails, only about 3/4 of an inch thick, which I glued and screwed on. I then screwed the slats onto the rails, so it's all very solid.
All the screws are countersunk, the holes filled with wood putty and we painted it all white.
Click the link below for a picture, I only just finished it so it hasn't been decorated yet. We bought a hood from IKEA and we'll attach it as soon as the paint is completely dry.
http://www.kirklorange.com/pics/bed.jpg
Cheers and thanks again inspiring me to become a woodworker!
Kirk Lorange
CharityW0314
Sun, 08/17/2014 - 12:13
Well....... That kind of sucks!
I bought this exact bed from IKEA! Two in fact! Talk about a lot money spent! We got one for our then 7 ear old son and 3 year old daughter! I could saved a lot of money if I built them myself! 1st piece of advice is assemble in the room as they are big and heavy! Secondly we went to Lowe's to the swing set section and bought the rubber heavy duty handles you attach to swin sets (can be spray painted) we added one on each side of the top front of the ladder, and also one on the very top of the edge of head board near the ladder. This was to insure that the kids could safely get up and down it as there is not much area to grab on too! We also store bought bed side, slip under mattress safety rail to ensure no accident roll outs as sides are not to high with mattress. They work great! Just few tips we have picked up so far! A final thought though my kids have wanted the under side of theirs closed off to make a hide out area. I'm trying to decide between a solid maybe painted/decorated plywood piece with opening for "door" or some kind of rod/curtain enclosure. Would love to hear anyone's advice/suggestions!
chrisdean
Thu, 09/17/2015 - 03:39
Simpson Joint
I am not seeing which simpson joint you recommend using. Please advice :)
KireneF
Sat, 07/20/2019 - 19:45
My version with an enclosed hidden area underneath
I am so glad that I found these plans. I had seen the bed made from IKEA cabinets that provided a hidden space underneath the bed. Unfortunately, my daughter has a small bedroom, and the IKEA cabinet bed idea doesn't work well with a twin size bed. That's when I found this plan. I modified it to include a headboard and enclosed the bottom, using 1x6 boards to create shelving. The result is this:
The cabinet on the left opens to a crawl through to a hidden area under the bed. My daughter says it turned out even better than she imagined! Thank you for the inspiration. Reading through your detailed plans and the comments made me think I could take on this project despite being a novice who has never built anything before.
tarajones2210
Thu, 03/25/2021 - 12:10
So confused.
So I’ve been staring at this bed for days trying to figure this out. On the shopping list it says 3/4 inch particle board but on the cut list it says to cut the 3/4 inch for the open end and 2/4 inch particle board for the closed. Do you mean 3/4 inch for the closed end too or is there something I don’t know about particle board? Also in the cut list I couldn’t find the leg that holds the ladder rungs that are shorter than the 4 main ones. Is that just an unspoken thing or am I crazy?