
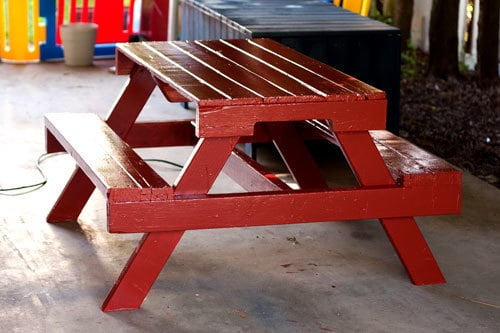

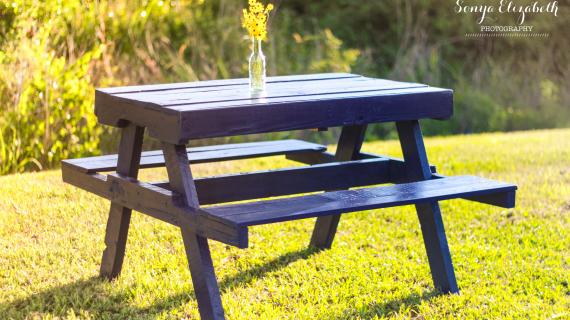
How to make a kid's picnic table from a pallet. Recycle what would have been trash into a very useable and cute table.
 Have you ever been at the point in your life when there is no extra money? When you need something positive, some growth in your life, but you are saving (or just barely breaking even)? Don't let that get in the way of your ability to be creative. When Janae first shared this pallet picnic table on our Facebook Fan Page, I was equally impressed with how cute the table was AND her ability to be creative without spending much money.

Here is from Janae:
I thought about taking pictures as I was going, but I was trying to work with my son's nap schedule and didn't have extra time. Okay, who else can understand where Janae is coming from? Not just a tight budget, but no time?
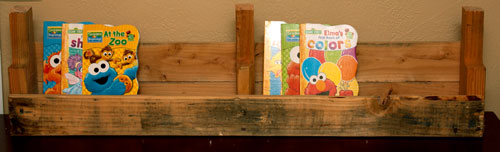
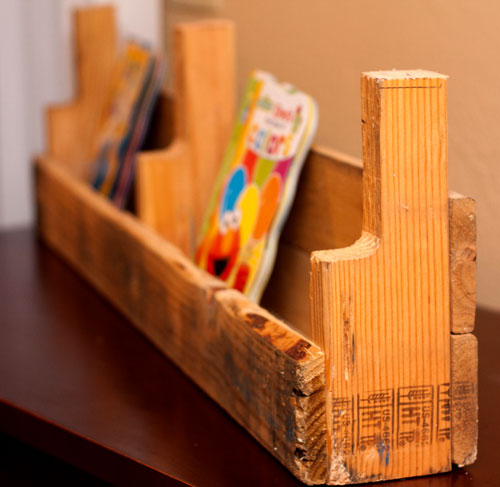
I found a few pallets for free on craigslist. I really recommend using ones that haven't been rebuilt several time. The more it's rebuilt and repaired the harder it is to take it apart. Luckily I had one beautiful pallet that came apart with ease. The only problem was by the time I decided to make a picnic table out of it I had already made a pallet shelf.
So anyway, I made this picnic table out of 2/3rds of a pallet, some scrap 2x4s I found, and one or two new 2x4s stud length. (At $2 a stick, that's $4 out of pocket)
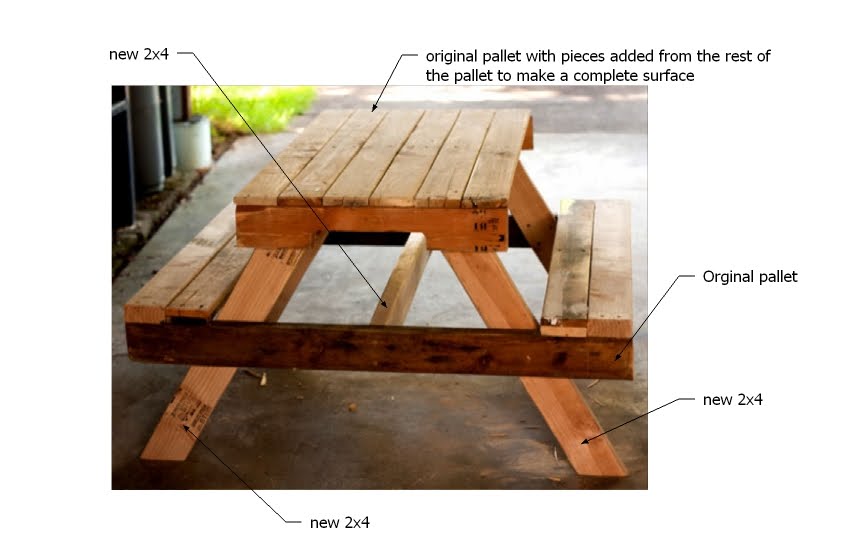
The table top is 40" long x 21.25" wide. I'm sure it will vary by pallet, but I made sure the pallet notch was centered (this is where I came up with 21.25"). I left the center pallet 2x4. I didn't want to bother removing it, and I felt like it gave the 1x4s more support.
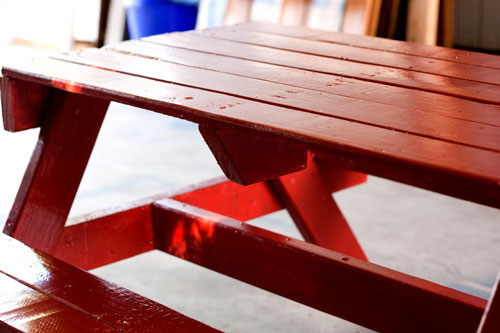
I just cut it at a 30 degree angle to keep it from digging into the kids lap. I think after I cut the 2x4s there were still 3 1x4s still attached, and I just filled the gaps with 3 more (pallet boards)
For the seats, a pallet frame would work, but I had two scrap pieces of 2x4s. I got tired of tearing apart the bad pallets with tons of nails. The 2x4s are 45.5" long. The seats are about 7" wide. For each seat I used a 2x4 and two 1x4s double up. The 1x4s were from pallets. The 2x4 was new, but I could've used 1x4s if I wanted to tear apart the pallet more.

I used the same measurements as the big kid's picnic table for the legs. Bigger Kids Picnic Table Plans are here.

I would have just sealed it, but that would have cost money. I used left over primer and house paint. It was the perfect color. Anyone could make this with one pallet and a couple extra 2x4s.
And if you would like to see a video one of our Facebook Fans L Scott shared on constructing a pallet picnic table, you can go here.


With a little sweat and a lot of determination, there are no limits to your creativity. Money need not be a deal breaker in your design dreams. Hope Janae has inspired you as much as she has inspired me!

Comments
Speckled Egg (not verified)
Wed, 06/30/2010 - 01:06
Inspirational for sure!
Inspirational for sure! Thanks for sharing XX
slmpetersen (not verified)
Wed, 06/30/2010 - 01:52
I want one! I would love to
I want one! I would love to have a picnic table like that in big people size...a project that will wait until we buy our next house. Great projects!
angie (not verified)
Wed, 06/30/2010 - 01:57
I love that leaning bookshelf
I love that leaning bookshelf are there plans for that?
Shannon U. (not verified)
Wed, 06/30/2010 - 02:40
My husband works with OSHA
My husband works with OSHA standards and wanted me to tell everyone to MAKE SURE your pallet does NOT have a stamp on it that contains the letters MB in the series. That means it's been treated with Methylbromine which has been shown to outgas and cause illness in even small amounts. (These usually come from overseas.)
SORRY to be a Debbie-downer....he thinks most of them are probably ok. I just want my fellow Knock-off peeps to be safe!
GREAT projects, by the way!
Nancy (not verified)
Wed, 06/30/2010 - 04:29
@ Shannon, thanks for the
@ Shannon, thanks for the tip! I never heard of that.
I love the inspiration of reusing the pallets.
@ Anna, would you consider making a category on the right side for free-pallets only? It seems like there could be a few pieces to add to that "collection".
Carrie K (not verified)
Wed, 06/30/2010 - 10:29
WOW! Love this!
WOW! Love this!
lyndyjo (not verified)
Wed, 06/30/2010 - 11:46
I've been eying some pallets
I've been eying some pallets down the street that seem to have been there a while. We just moved into a new house with a much bigger deck and our patio furniture looks so small. It would be great to have a table for the kids to eat at. Maybe I'll slip down there in the dead of night and make off with a pallet or two...or just ask the neighbors if they are up for grabs.
I second the love on the leaning bookshelf. Very cool!
Three Easy Way… (not verified)
Mon, 08/30/2010 - 07:51
[...] For additional
[...] For additional information and pictures visit Ana White’s post here. [...]
Erie (not verified)
Thu, 09/02/2010 - 10:38
This spring we started out
This spring we started out with more or less the same design, for our pallet picnic table, but we ended up with a totally different design. We didn't like the idea of dismantling the pallets we found, because they were too nice and sturdy to strip apart. We ended up cutting them up a bit, and stacking the parts to create our table.
See the result here: http://eriestuff.blogspot.com/2010/05/pallet-picknick-table.html
Summer has end… (not verified)
Wed, 09/08/2010 - 11:07
[...] is a picnic table being
[...] is a picnic table being [...]
amanda trihey (not verified)
Thu, 09/23/2010 - 14:07
I am soooooo stoked to do
I am soooooo stoked to do this!! Been thinking about it all day, and I just got the approval from my husband LOL.. He told me which saws I "Could" and "couldnt" use without him watching, (worried about the baby and about me cutting my finger off) can you believe it!! LOL, but this is a start.
First im doing the picnic table, I am going to have him help me shorten it to a two seater, then im doing the rolling toybox and then Im gonna make the toybox without cutting the boards and make a trundle for under our crib!!! I am so excited.
Thanks for your hard work on this website!!
Jaime (not verified)
Mon, 11/29/2010 - 06:43
Here's my version of the
Here's my version of the pallet picnic table:
http://thatsmyletter.blogspot.com/2010/11/p-is-for-picnic.html
Thanks again Ana for great plans.
scott (not verified)
Thu, 12/02/2010 - 09:39
I have broken down pallets
I have broken down pallets with a sawzall and a blade for cutting metal. I didn't cut the wood but cut between the slats and just cut the nails. It was impossible to try to pry apart the ones I had.
Woodzee (not verified)
Sun, 09/04/2011 - 21:16
Very Cute
I have been looking for something like this because we need an outdoor meeting table for 4 people with laptops. Awesome thanks, will be getting this started tomorrow.
lorembolo (not verified)
Thu, 08/09/2012 - 05:58
This is just awesome. Thanks
This is just awesome.
Thanks for sharing.
Keep up the good work.