
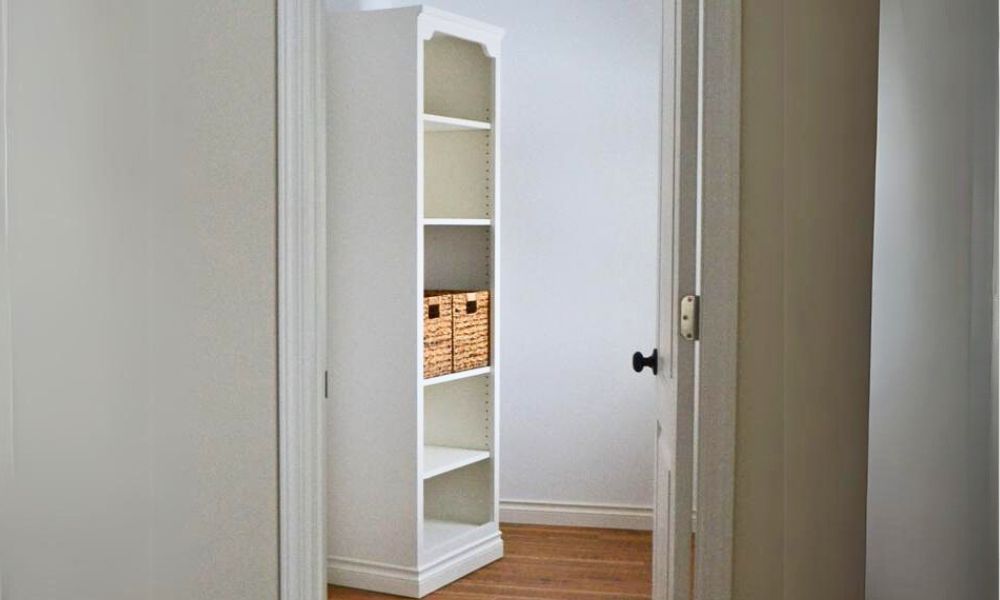

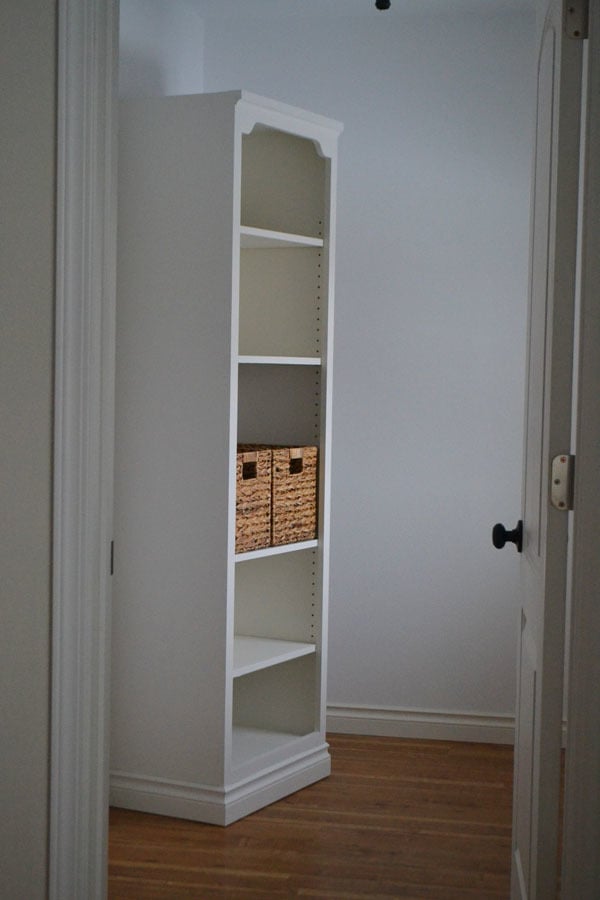
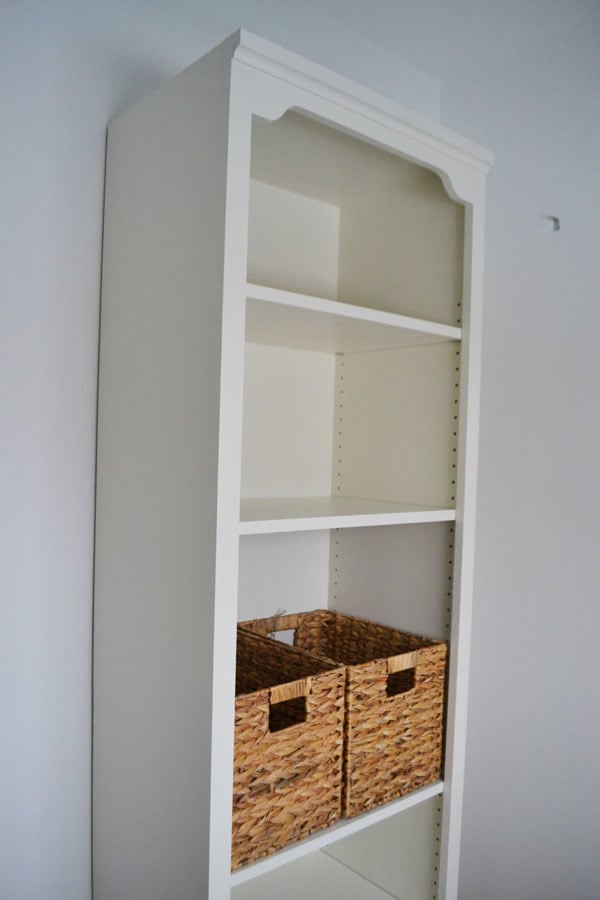
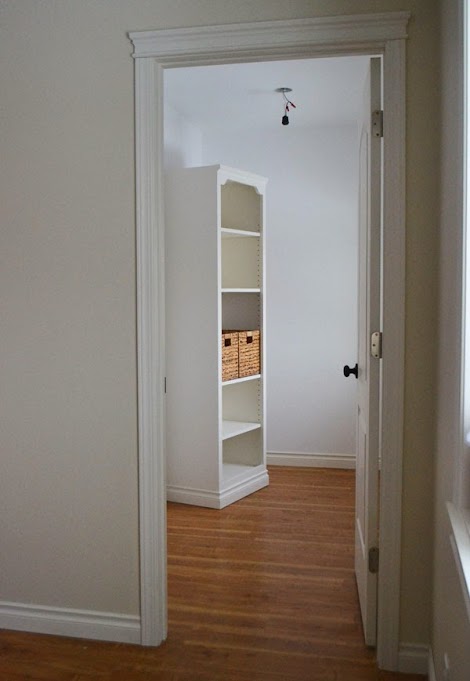
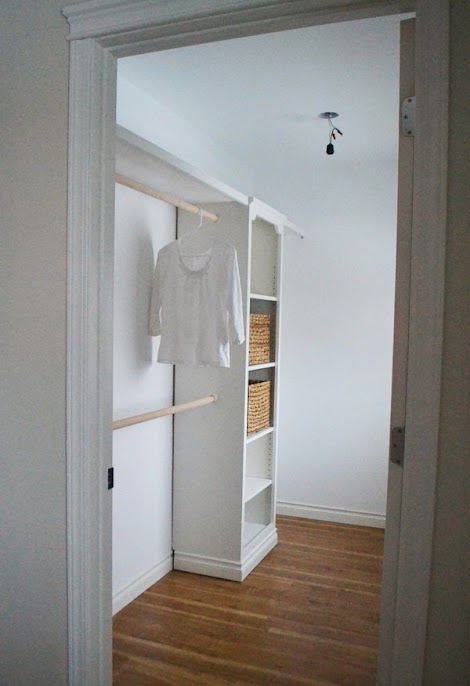
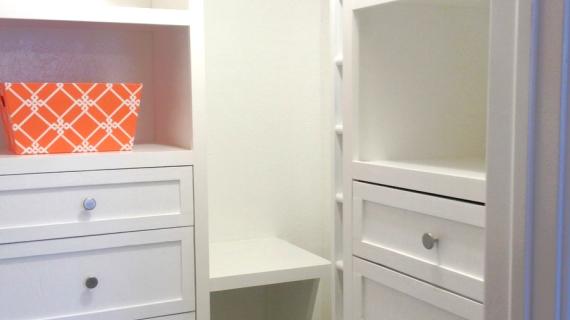
This beautiful closet tower is like a piece of furniture in the closet. Simply add closet rods to complete the closet. We love that this tower sits on the floor for easy installation. Free step by step plans from Ana-White.com
How I Built this Closet Tower
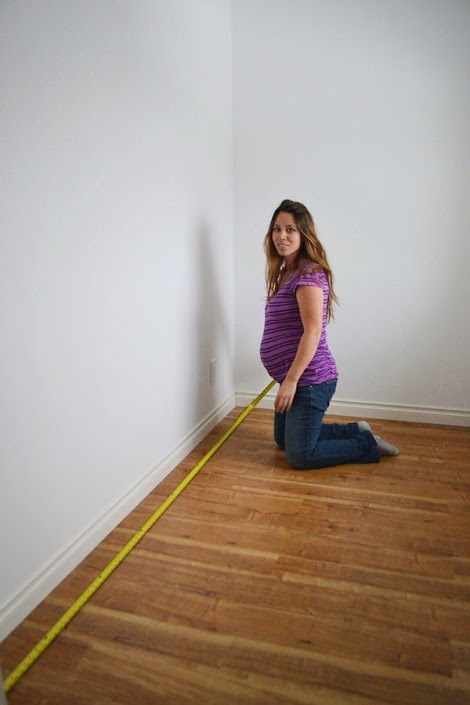
First, I measured the closet.

Then I sketched out a basic closet design.

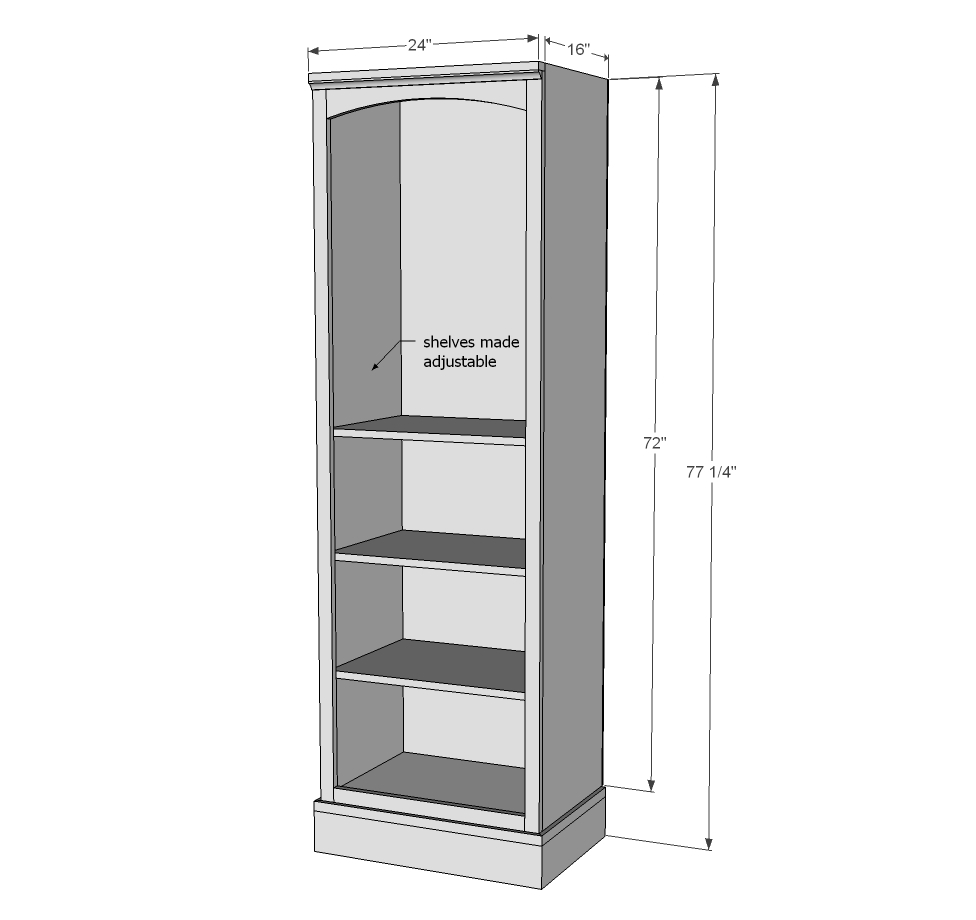
I decided to build a tower as the main structure of the shelving. The plans for this tower are below.
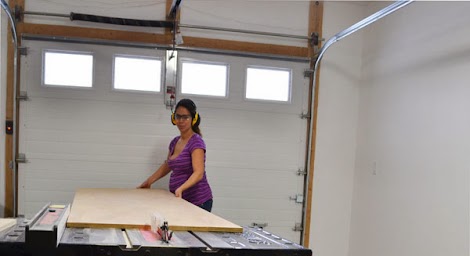
I ripped 3/4" plywood down into strips 15-3/4" wide on the table saw.
Then I cross cut the ripped pieces to get the cuts I needed.
Once all the pieces were cut, I used my Kreg Jig to build the basic box and face frame,

I then added trim to the carcass with a 1-1/4" brad nailer.

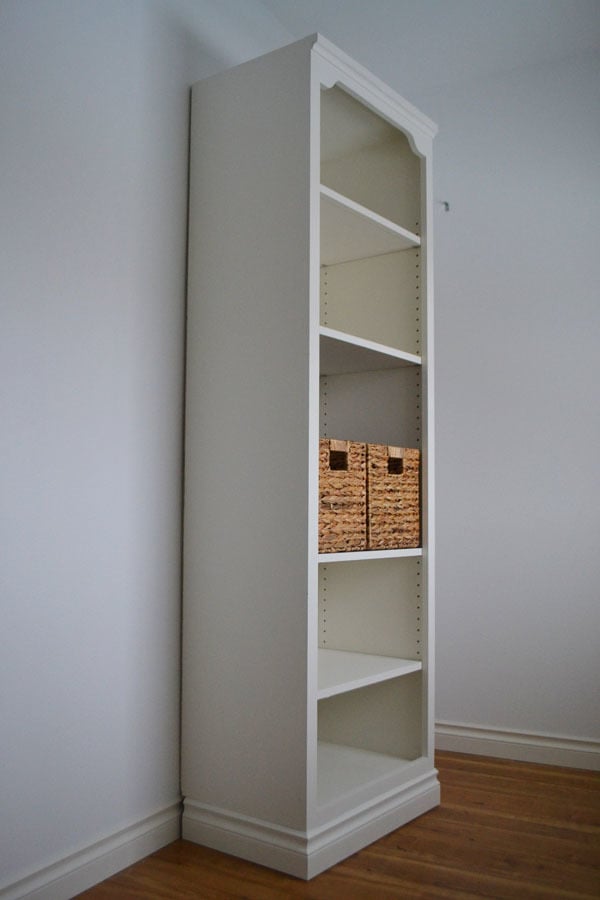
Here's the basic carcass done.
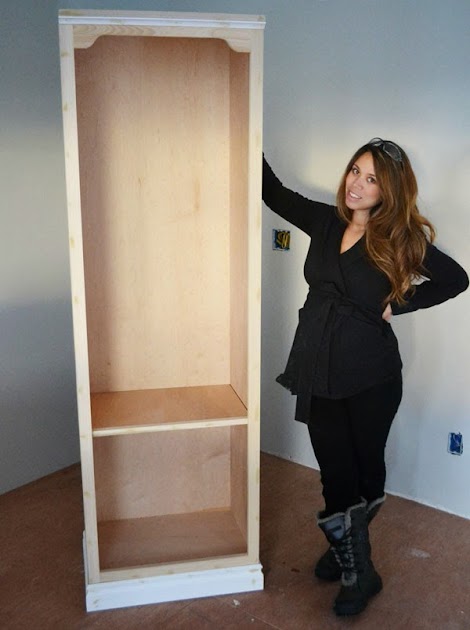
For finishing, I applied wood filler and then sanded everything with medium grit sandpaper.


And she's ready for paint!

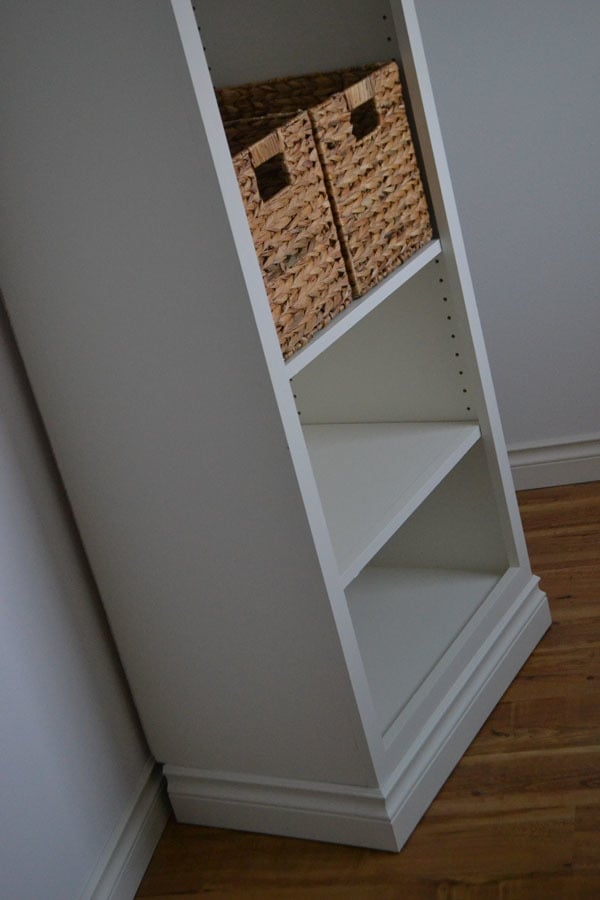
After painting, I drilled shelf pin holes and installed shelves.


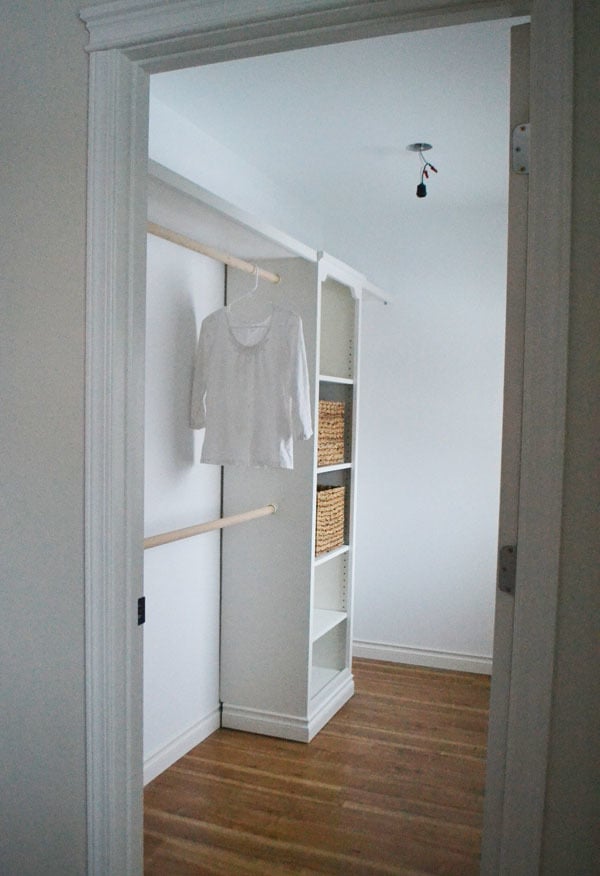
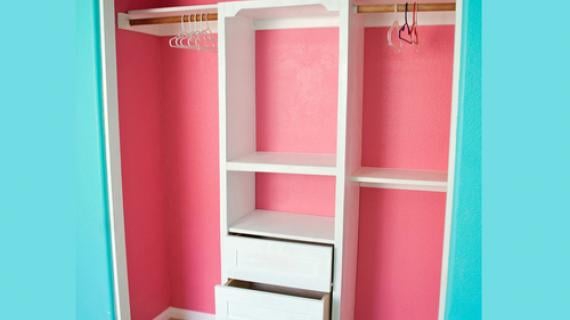
Adding Rods and Shelves
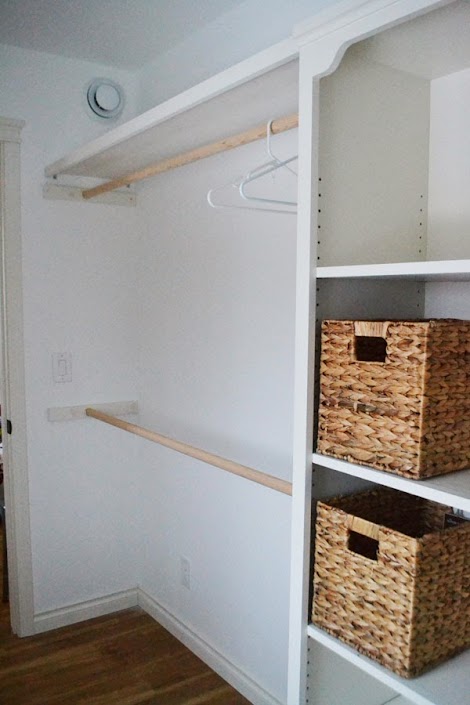
On either side of the tower, I wanted to add some shelving and hanging rods.

After placing the tower in it's final home and securing to the wall, I measured the length of shelving I'd need and cut it and painted it. I drill 3/4" pocket holes on the ends and used it to attach to the tower at the top.

On the open end I used L brackets.
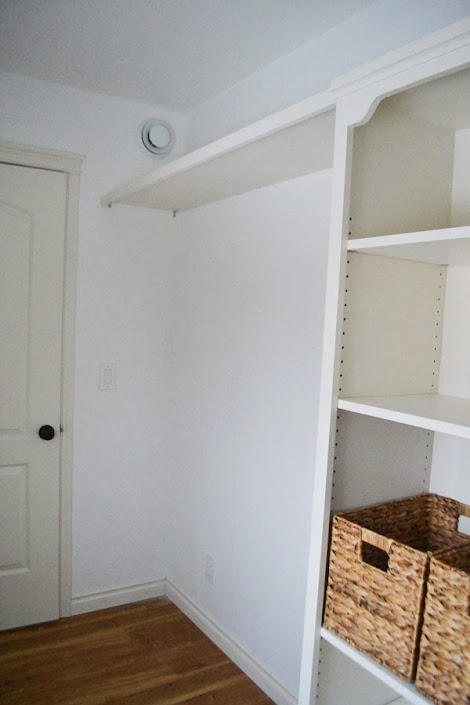
On all the studs in the walls, I attached the shelf using L brackets underneath.

Because the front edges of the shelves are raw plywood, I added trim to make it look nicer, and also add some strength to the shelf.

I just nailed on with 1-1/4" brad nails.

Here's the shelves done, don't they look nice?

Now for the closet rods -
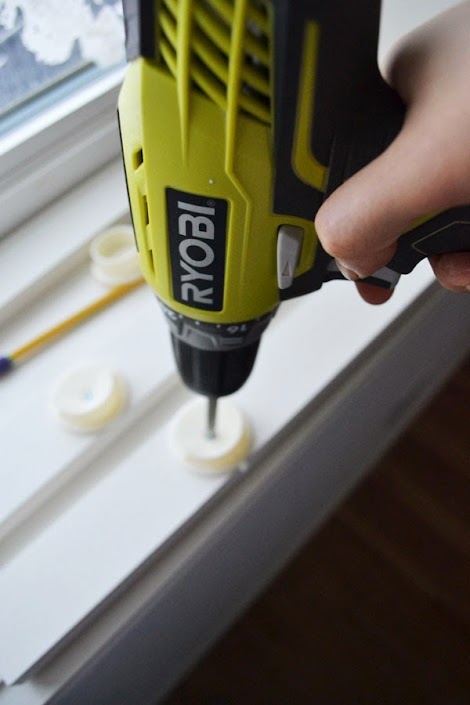
These pole sockets were about $1 a set, so I opted to use them. It's just a matter of finding where you want the closet rod to be centered, and attaching - here I attached the pole sockets first to wall cleats,

And then attached the wall cleats to studs in the wall.
The opposite cleat is just attached directly to the tower,

And then I cut the closet rods to fit and hung them in place.
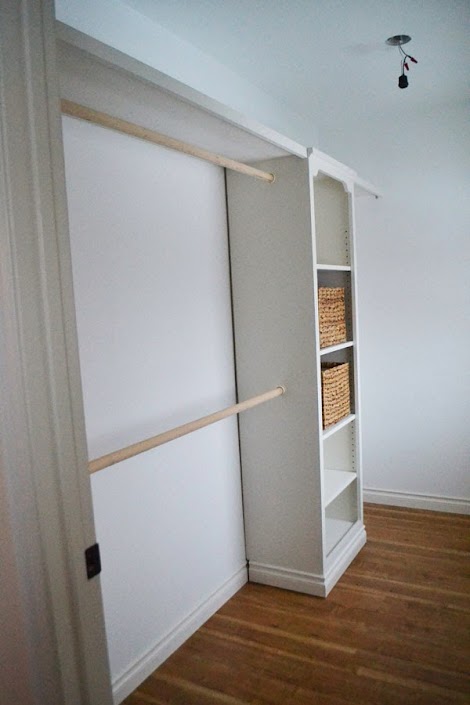
On the far side, I only left a couple feet for hanging longer dresses.

Preparation
- 1 - full sheet 3/4" plywood cut into three strips 15-3/4" wide and 8 feet long (you'll need more for additional shelving - this will only cover the tower)
- 1 - full sheet of 1/4" plywood (you won't need this if you do fixed shelves, but if all of your shelves are adjustable like mine, you will need the back for support)
- 2 - 1x2 @ 8 feet long (I used poplar)
- 1 - 1x4 @ 2 feet long (I used pine for my header)
- 1 - 2x2 @ 8 feet long
- 1 - 3/4" x 3/4" inside corner moudling for trimming out header (optional)
- about 6 feet of base moulding
- 1-1/4" pocket hole screws (recommended) or 2" self tapping wood screws
- 1-1/4" brad nails for attaching face frame
- 3/4" nails for attaching back
- wood glue
- Shelf pins
- Plywood Edge banding and an iron
MAIN CARCASS
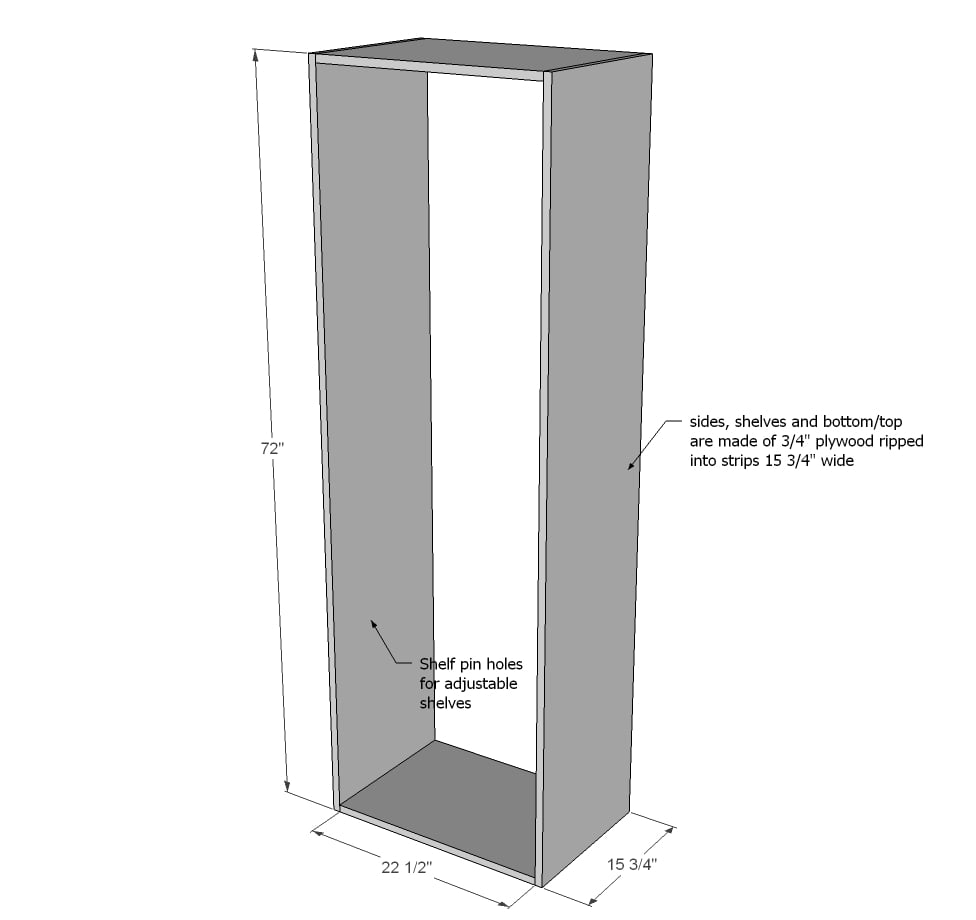
- 2 - 3/4" plywood @ 15 3/4" x 72" (sides)
- 6 - 3/4" plywood @ 15-3/4" x 22-1/2" (Shelves**, top and bottom)
- 1 - 1/4" plywood @ 24" x 72" (back)
FACE FRAME
- 1 - 1x2 @ 24"
- 2 - 1x2 @ 71 1/4"
- 1 - 1x2 @ 21"
- 1 - 1x4 @ 21"
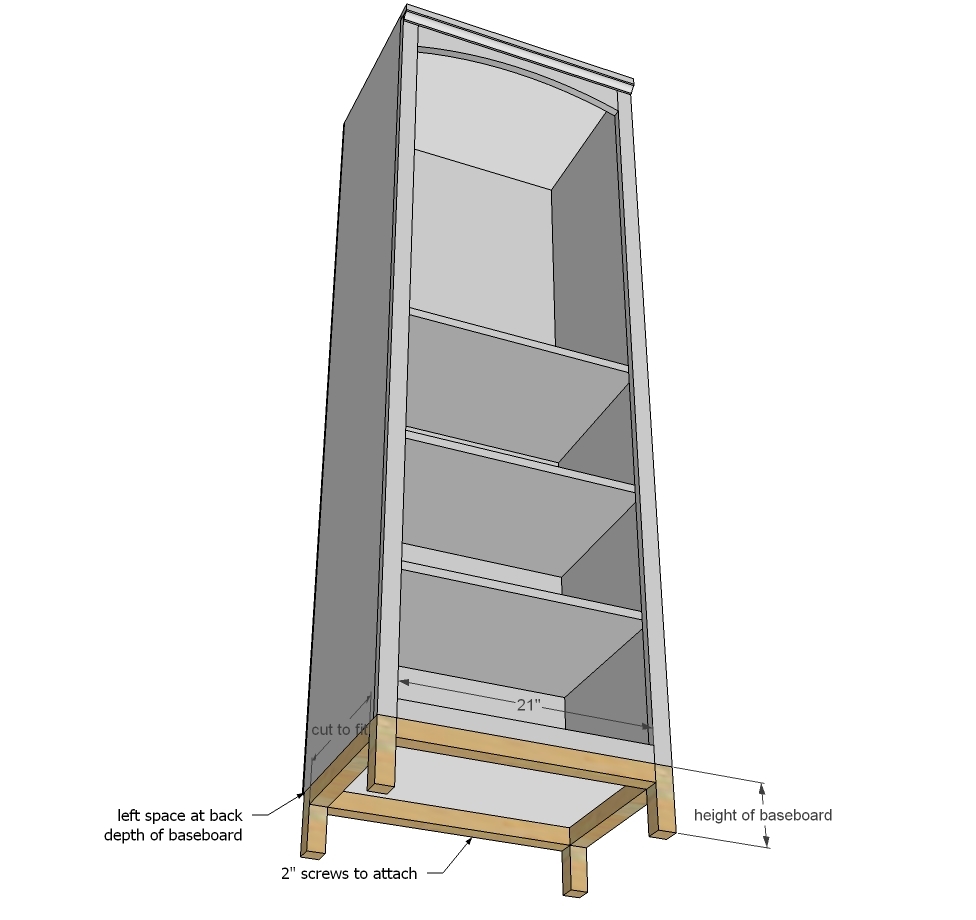
BASE - Optional
- 4 - 2x2 @ height of baseboard
- 2 - 2x2 @ 21"
- 2 - 2x2 @ outside depth of tower MINUS baseboard depth baseboard trim cut to fit
**For shelves that are adjustable with shelf pins (as mine are) you may need to trim the shelves down by 1/4" in width and depth to allow for edge banding and shelf pin spacing)


Please read through the entire plan and all comments before beginning this project. It is also advisable to review the Getting Started Section. Take all necessary precautions to build safely and smartly. Work on a clean level surface, free of imperfections or debris. Always use straight boards. Check for square after each step. Always predrill holes before attaching with screws. Use glue with finish nails for a stronger hold. Wipe excess glue off bare wood for stained projects, as dried glue will not take stain. Be safe, have fun, and ask for help if you need it. Good luck!
Instructions
Step 1
Start by building the basic box - I used my Kreg Jig with 3/4" pocket holes and 1-1/4" pocket hole screws, placing pocket holes on the outsides (top and bottom of top and bottom).
Step 2

I used a shelf pin jig to drill shelf pin holes for adjustable shelves. If you do this, you will need to trim your shelves down so they fit the shelf pins (for my shelf pins this ended up being 1/4" in overall width) and also trimmed off 1/4" to allow for edge banding and easy shelf placement from the overall depth of the shelf.
For fixed shelves, the shelves can be placed at any height. You will still need to do something to finish off the front plywood edges. For a painted finish, you can apply wood filler to the front plywood edge, sand, and paint. For a stained finish, edge banding is recommended (although I've seen lots of stained plywood edges on modern furniture an it's really works too!). Another option is to integrate 1x2s into the face frame that will cover the front plywood edges.
Step 3
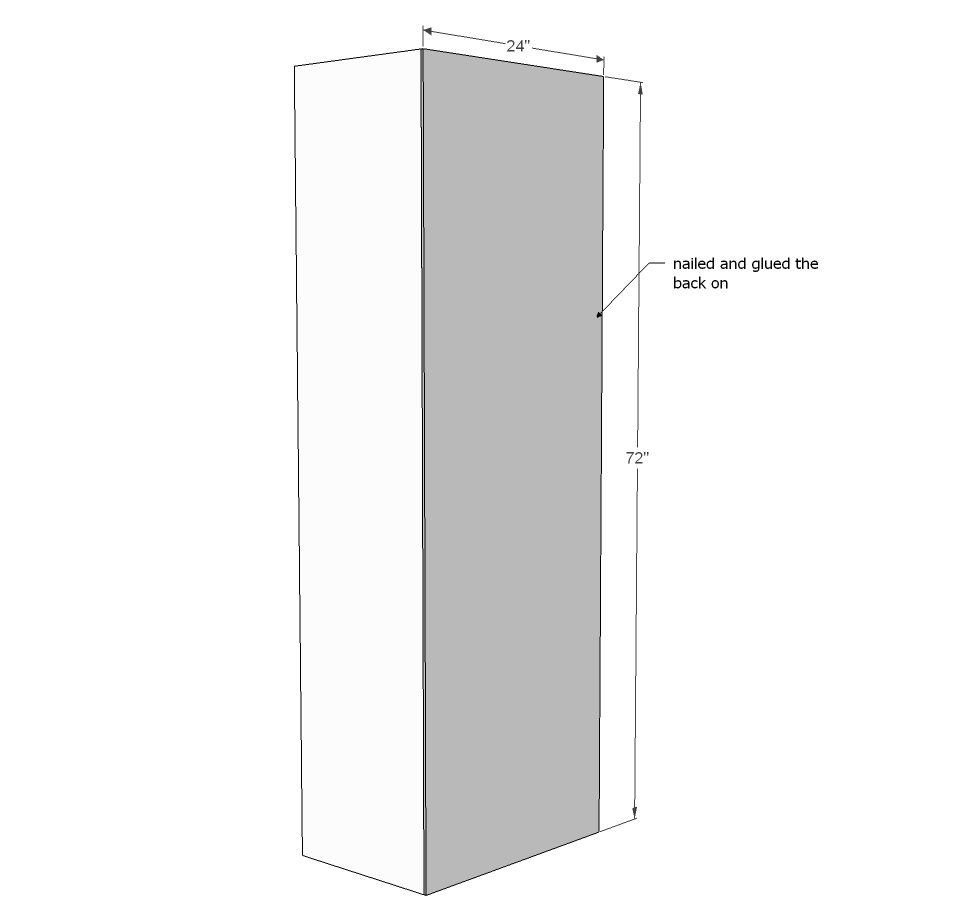
If you don't do fixed shelves, you will need a back to keep the tower from splaying out in the center. I attached my back with nails and glue.
Step 4

The face frame really helps make the front look nice and finish out the front plywood edges. I built my face frame first with pocket holes, and then attached the whole thing to the front of the tower with glue and finish nails.
Step 5
Step 6
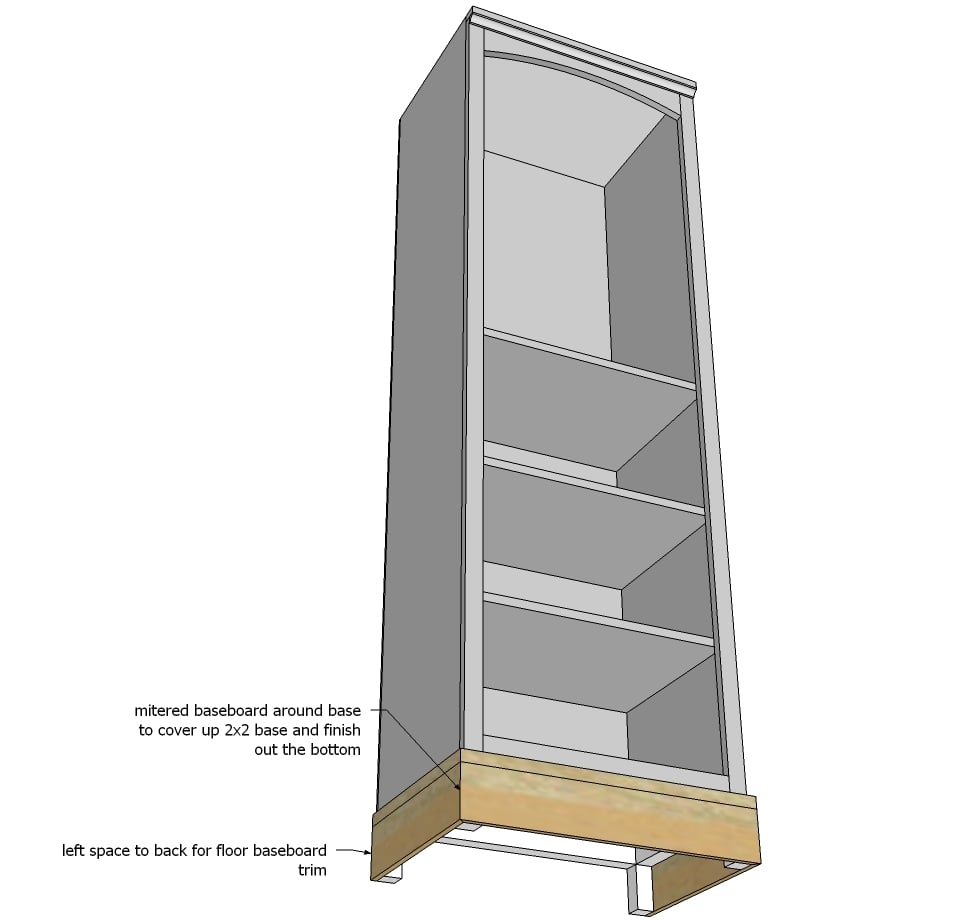
Then I trimmed out the base of the tower in matching baseboard to the closet baseboard, mitering corners and using a finish nailer and glue to attach to the 2x2 base.
I also added the 3/4" x 3/4" inside corner moudling to the top header and cut the top header out with a jigsaw to add detail - but this is all just for decoration - not sturctural.
It is always recommended to apply a test coat on a hidden area or scrap piece to ensure color evenness and adhesion. Use primer or wood conditioner as needed.


Comments
Lady Goats
Tue, 11/19/2013 - 12:55
It's beautiful!
I would totally understand you taking a break between houses (uh, I take a break between cuts), but I'm giddy that you didn't. I love this! Thanks for sharing!
ibjames
Tue, 02/04/2014 - 15:52
45degree cuts for trim
is there a good way to measure for this? I can never get my trim to line up nicely
ibjames
Tue, 02/04/2014 - 15:52
45degree cuts for trim
is there a good way to measure for this? I can never get my trim to line up nicely