


DIY Kid's art center plans from ana-white.com

Hi everyone! Happy Friday!!
And happy Handmade Holidays!!!

Christmas is just 8 weeks out! But Jaime from That's My Letter and I are already thinking of awesome things that you we can help you make for your kids this year, without breaking the bank. Not to mention giving a gift that is unique, locally made, and made with love.
You can check out all of our previous Handmade Holiday posts right here.
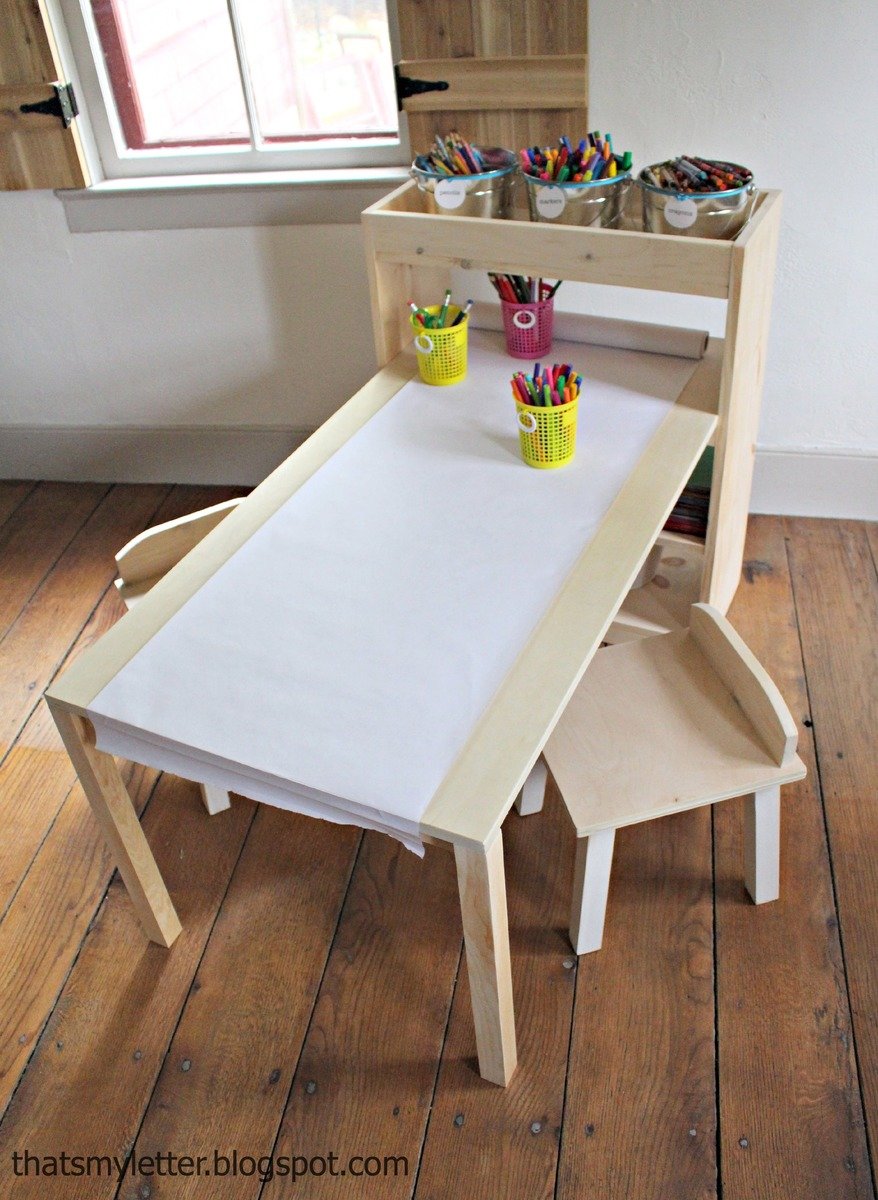
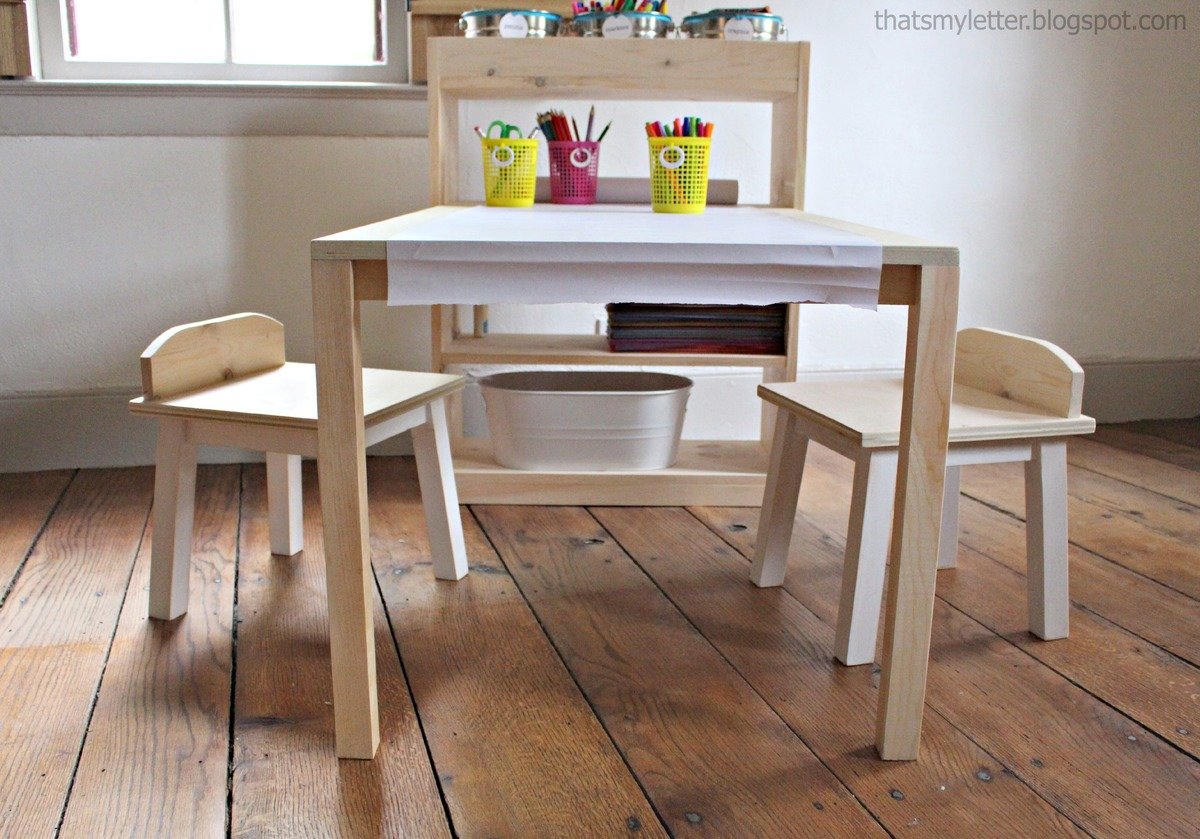
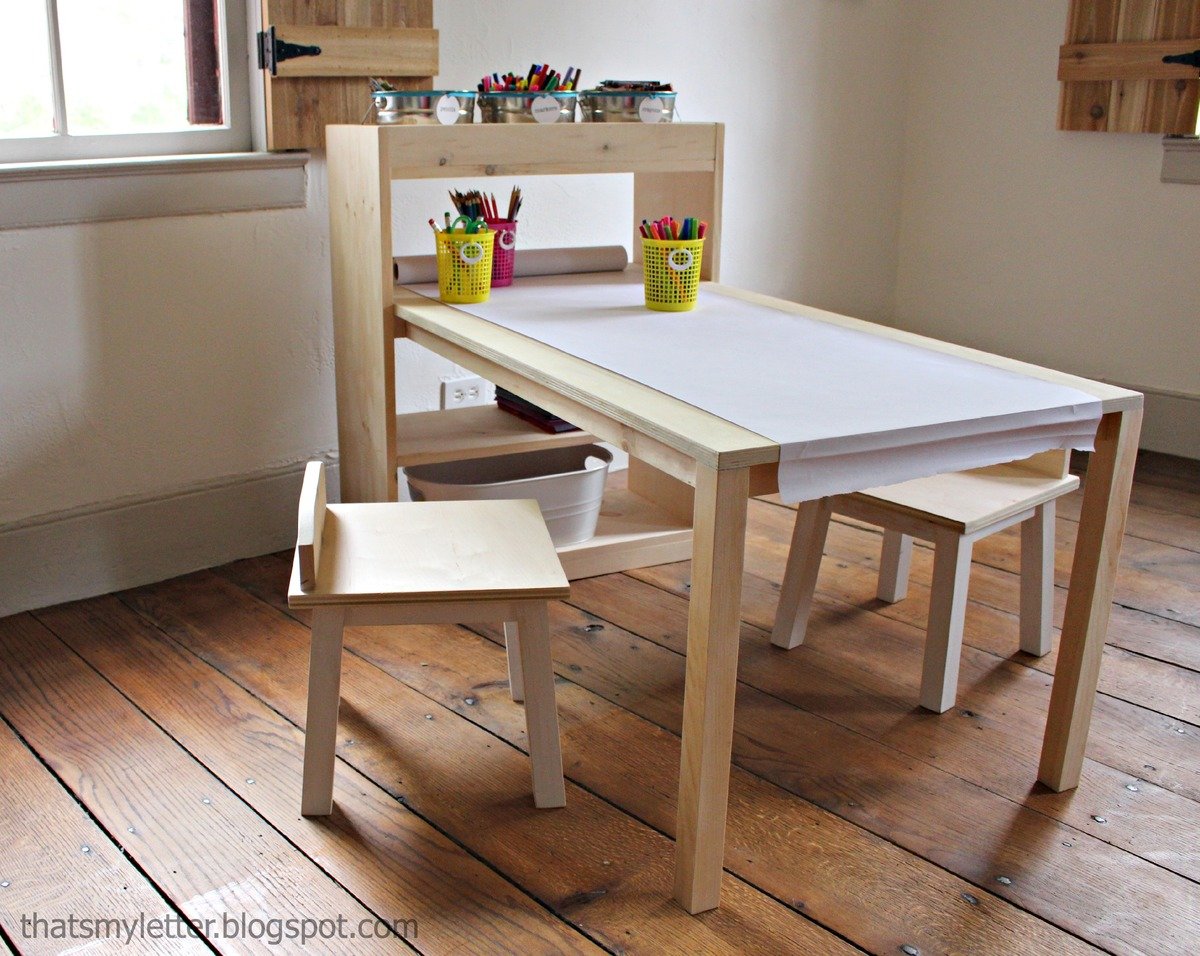
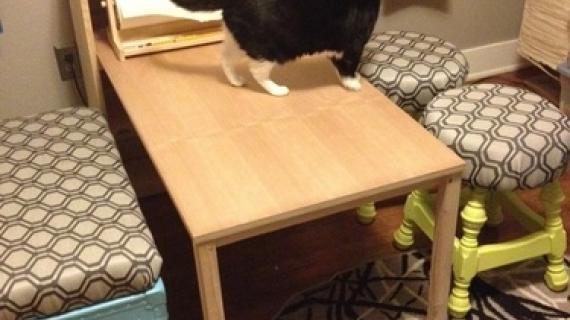
Whether your kids love legos or coloring or crafts, Jaime and I wanted to add a play table that included storage for easy access to toys and craft supplies, and also easy clean-up for Mom's sanity. Not that sorting legos with a baby trying to eat them would drive you crazy, would it?
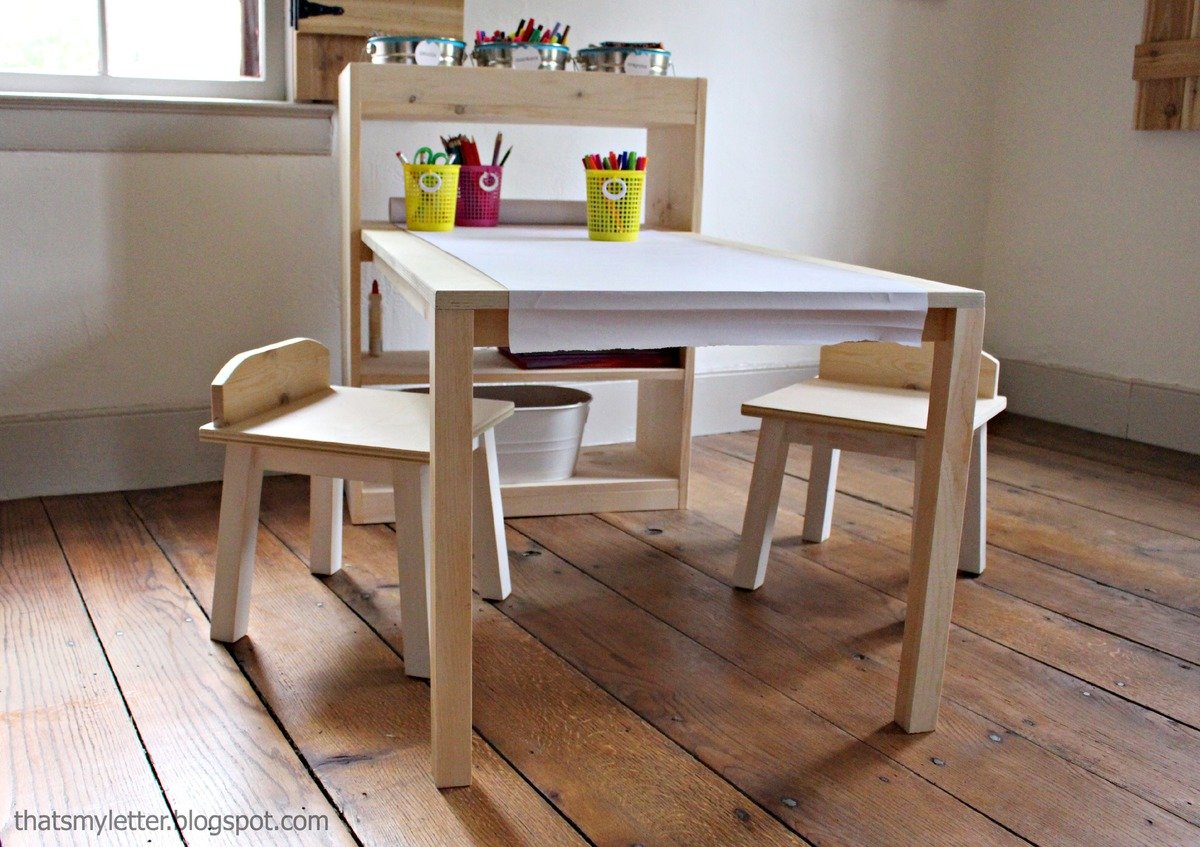
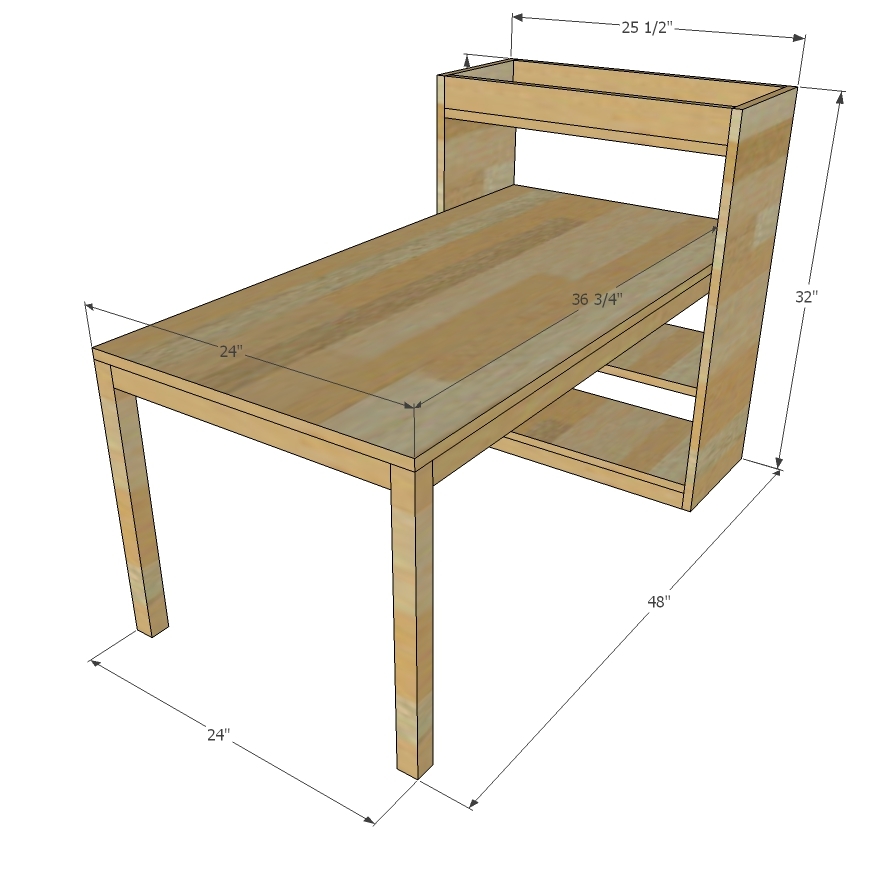
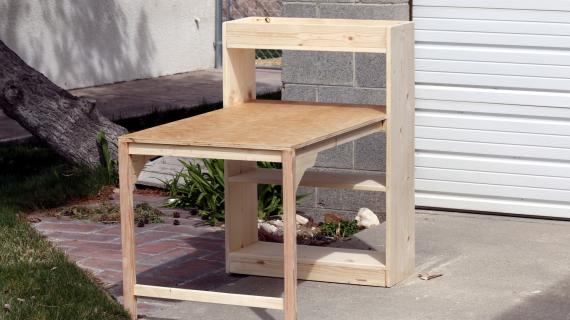
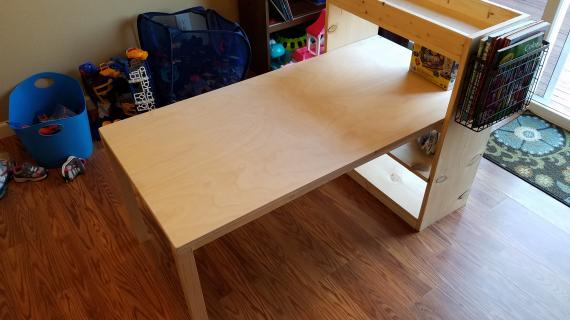
Every home and every family is different, but Jaime and I both loved the idea of having a bookshelf next to the play table for easy storage. So we created a tabletop that is integrated into the bookshelf.

We designed the project around a single quarter panel (24x48 inches) as the tabletop (available at most hardware stores off the shelf) to make cutting easier. This fits three kiddos nicely.
We'll also be sharing plans for those cut DIY chairs later this week, so check back for those!!!
Well, you better get building, my elf friends! So here's what to do:
- Go visit Jaime from That's My Letter here for lot more photos including construction photos and tips/tricks
- Check out the plans below and cut list/shopping list
- Build and enjoy and please share when you are done!
XO Ana + Family
Preparation
12 feet of 1x12 boards
4 feet of 1x3 boards
2 - 1x2 @ 8 feet long
1 - 2x2 @ 4 feet long
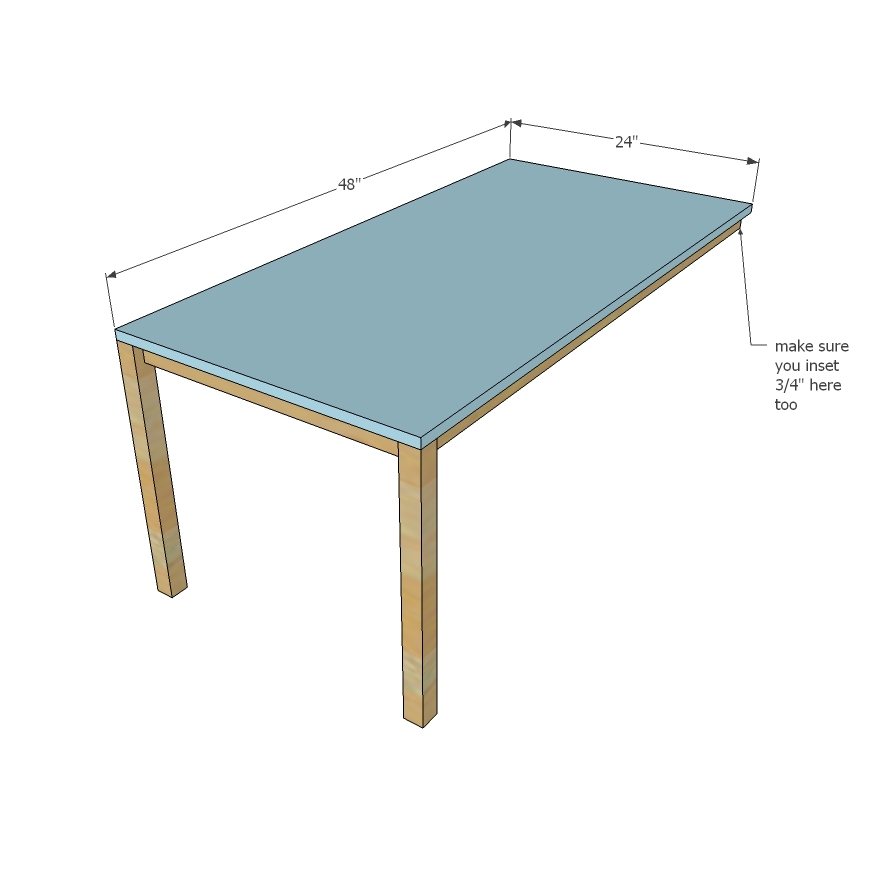
1 - 3/4" plywood or project panel 48" x 24" (available off the shelf)
BOOKSHELF
2 - 1x12 @ 32" (Sides)
2 - 1x3 @ 24" (Top)
2 - 1x2 @ 24" (Bottoms)
3 - 1x12 @ 24" (Shelves)
2 - 1x2 @ 11-1/4" (Cleats)
TABLE
2 - 2x2 @ 20-1/4" (Legs)
2 - 1x2 @ 46-1/2" (Side Aprons)
1 - 1x2 @ 21" (Front Apron)
1 - 3/4" plywood or other tabletop @ 24" x 48" (tabletop)


Please read through the entire plan and all comments before beginning this project. It is also advisable to review the Getting Started Section. Take all necessary precautions to build safely and smartly. Work on a clean level surface, free of imperfections or debris. Always use straight boards. Check for square after each step. Always predrill holes before attaching with screws. Use glue with finish nails for a stronger hold. Wipe excess glue off bare wood for stained projects, as dried glue will not take stain. Be safe, have fun, and ask for help if you need it. Good luck!
Instructions
Step 1
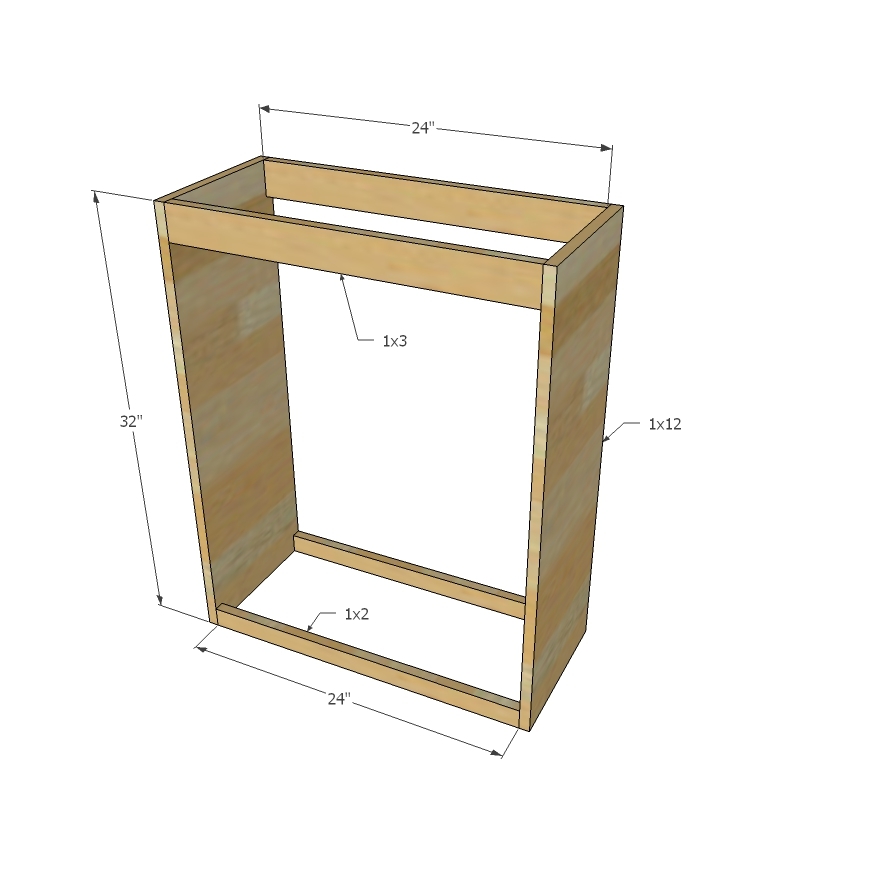
Attach bottom and top boards to the two side 1x12s. 3/4" pocket holes and 1-1/4" pocket hole screws and glue are preferred but you could also attach with 2" countersunk screws from outsides of 1x12s with glue.
Step 2
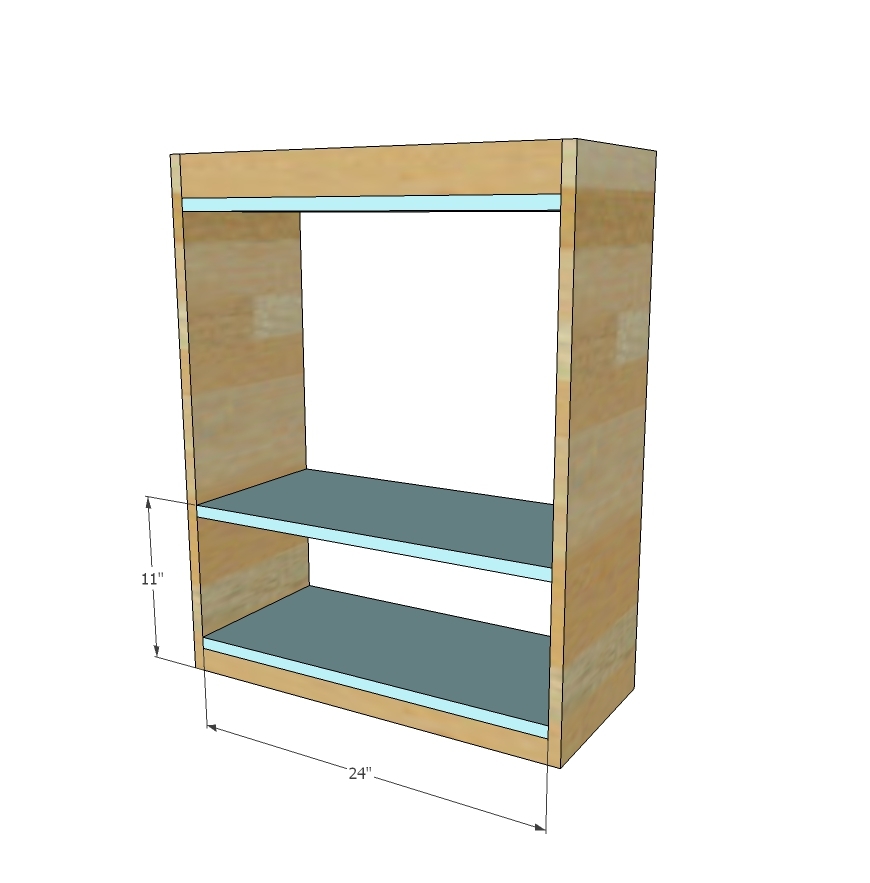
Attach shelves next, with the top and bottom shelves on top/bottom of boards from step 1. Recommend attaching first with pocket holes, than glue and nailing into the 1x2s/1x3s.
Step 3
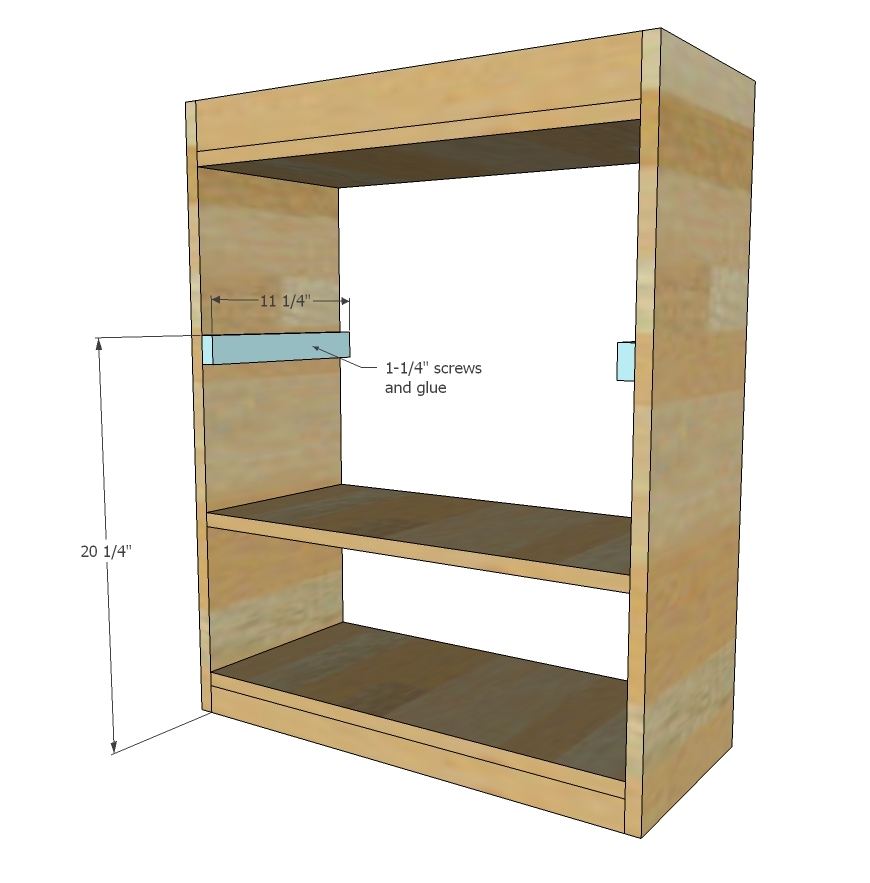
Attach cleats to inside of bookshelf with 1-1/4" screws or nails and glue.
This completes the bookshelf.
Step 4
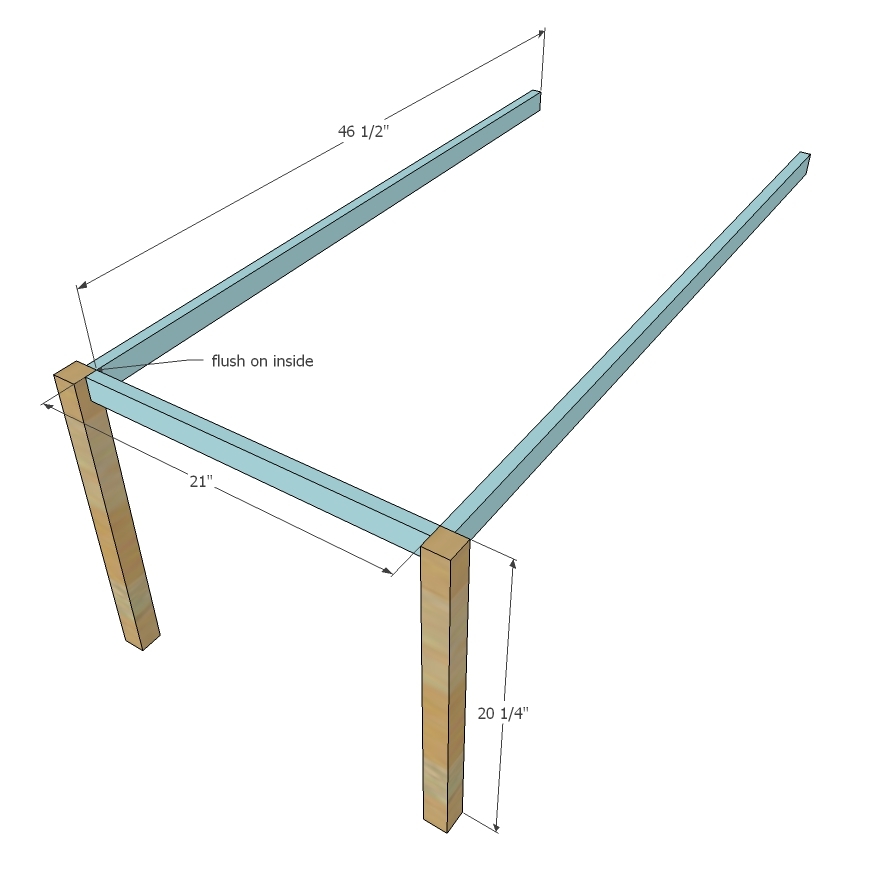
Now, the table. Drill 3/4" pocket holes on ends of end apron, and one end of side aprons. Attach to legs, flush to inside, with 1-1/4" pocket hole screws and glue.
TIP: Also drill 3/4" pocket holes facing upward in aprons for attaching tabletop in next step.
Step 5
Step 6
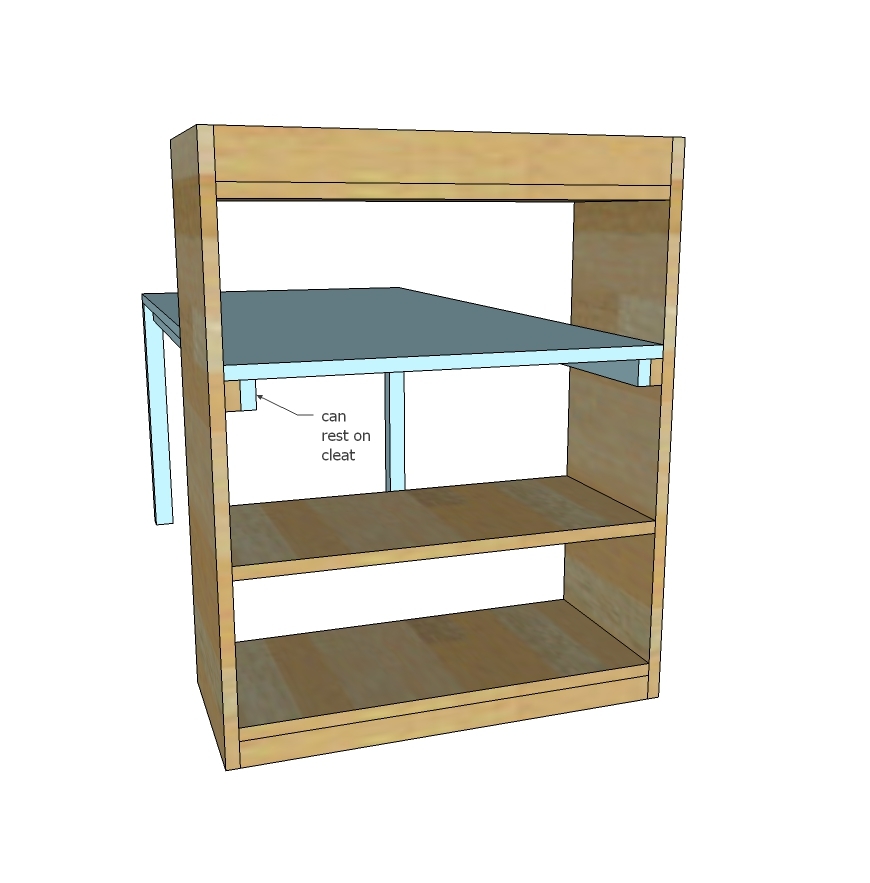
Table then can just rest on the cleats. You can also secure table aprons to cleats with screws.
It is always recommended to apply a test coat on a hidden area or scrap piece to ensure color evenness and adhesion. Use primer or wood conditioner as needed.


Comments
NorthstarMom
Mon, 10/27/2014 - 18:17
Fantastic plan
Love this! Now to find the space in our house for it. Our 4 year old would absolutely be in heaven with this table.
SouthernYankee09
Sat, 11/08/2014 - 06:50
When are you going to post
When are you going to post the deminsions for the stools? I have already completed the table. Can you please post the stool plans today? I need to know what cut list is. Thanks so much! Your plans are great!
In reply to When are you going to post by SouthernYankee09
Ana White
Sun, 11/09/2014 - 10:37
Thank you! I will get you
Thank you! I will get you these plans tomorrow - appreciate the reminder!
Ana White
Mon, 11/10/2014 - 12:31
Stool Plans
Hi Thanks for your patience the stools plans are posted! http://ana-white.com/node/13400
thunderbirdbat
Mon, 11/10/2014 - 21:13
Suggested addition to plan
I suggest adding a dowel using a closet rod flange system for holding the roll of paper. I made a similar table when my kids were little with a chalk board tabletop and a cover so that they could use chalks when the cover was removed. I used this method to place a roll of paper just under the one end of the table. This allowed the kids to pull the paper onto the table without the paper roll falling off the table and rolling across the floor.
danni
Thu, 02/05/2015 - 17:29
height of this table
Hi! My husband is building this for my 8yr old niece, is this tall enough for an 8-10 year old? Kinda would like her to get a couple years use out of it?
Travis
Tue, 03/17/2020 - 07:18
This was a very fun project,…
This was a very fun project, thank you!