


Diy wood baby gym plans
Well this is it folks!!!
The final Handmade Holiday Plan for 2014!!!

Just in case for some crazy reason you have no idea what we are talking about, my friend Jaime from That's My Letter teamed up this year to bring you a new holiday gift plan each Friday for 12 weeks!
Please take a second to thank Jaime for her amazing work this year!!!
Here's a few of my favorites!

That Wagon.

Those Cars.
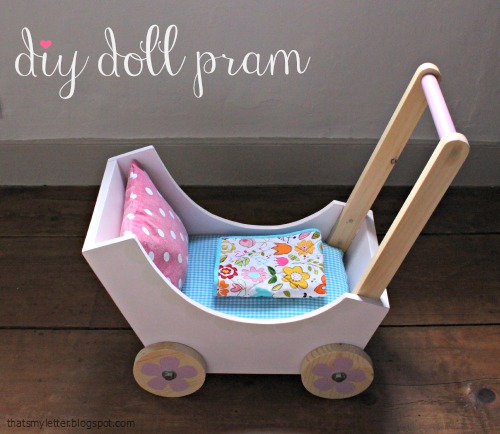
This Pram.
Who am I kidding .... Every single project from this year was my favorite!!!
Which ones were your favorites?
You can check out all the plans here and Jaime's building posts here. Do it now!!!
And here's the final (and possilby my most favorite ever!) Handmade Holiday project for 2014!

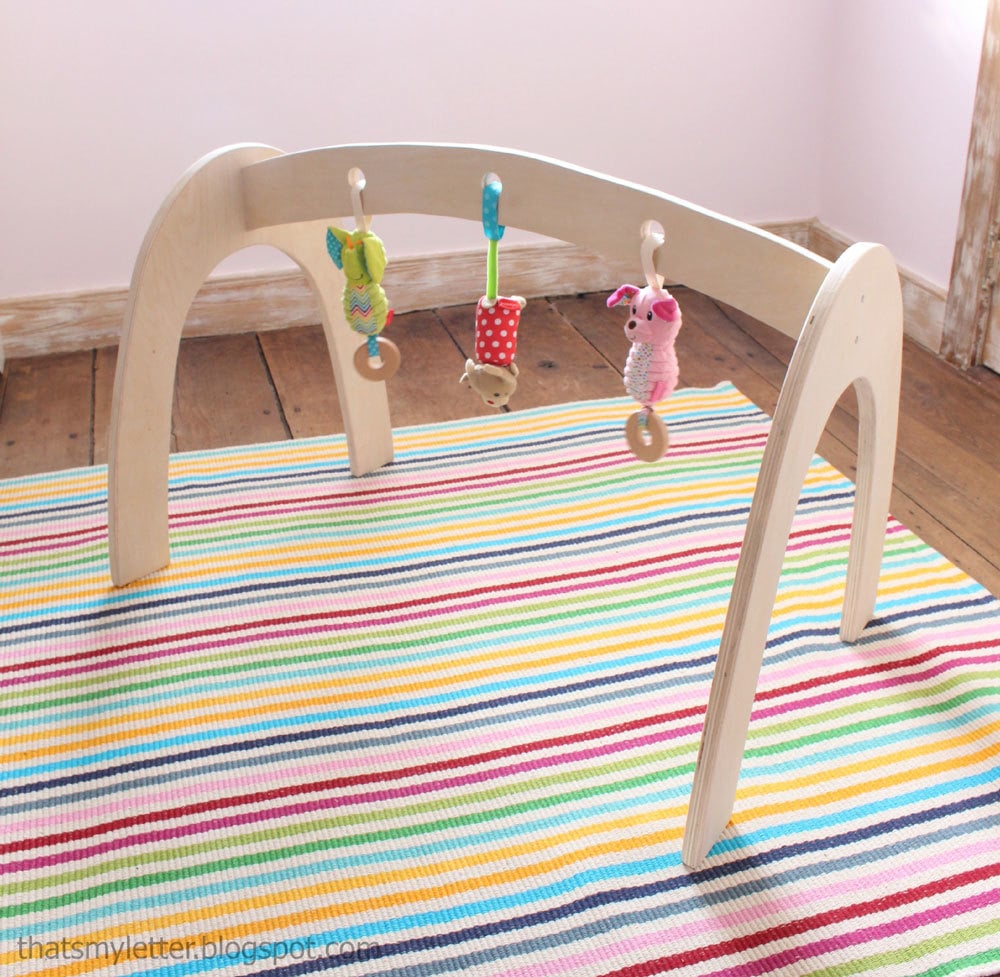
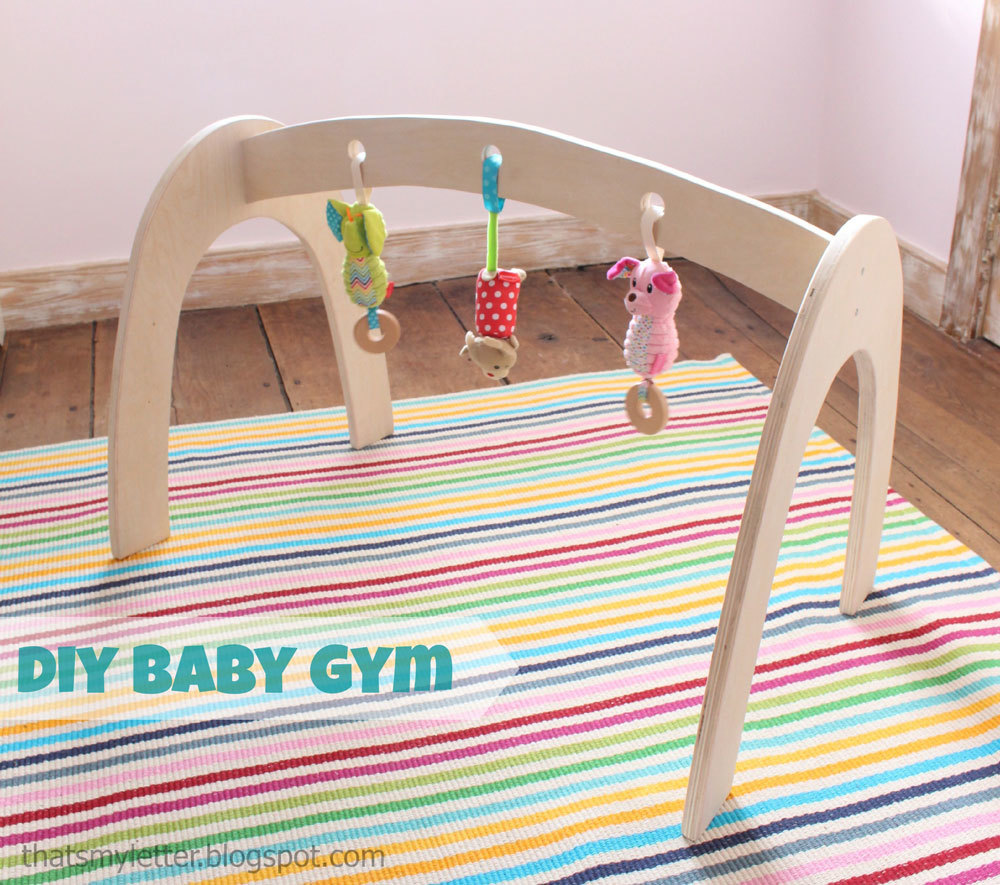
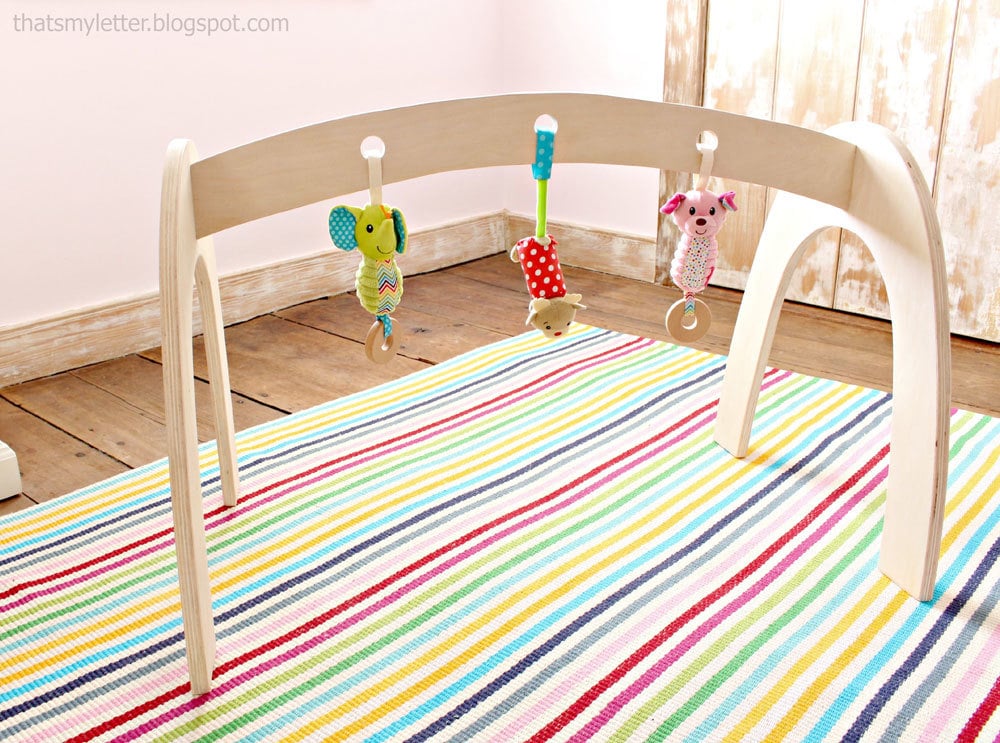
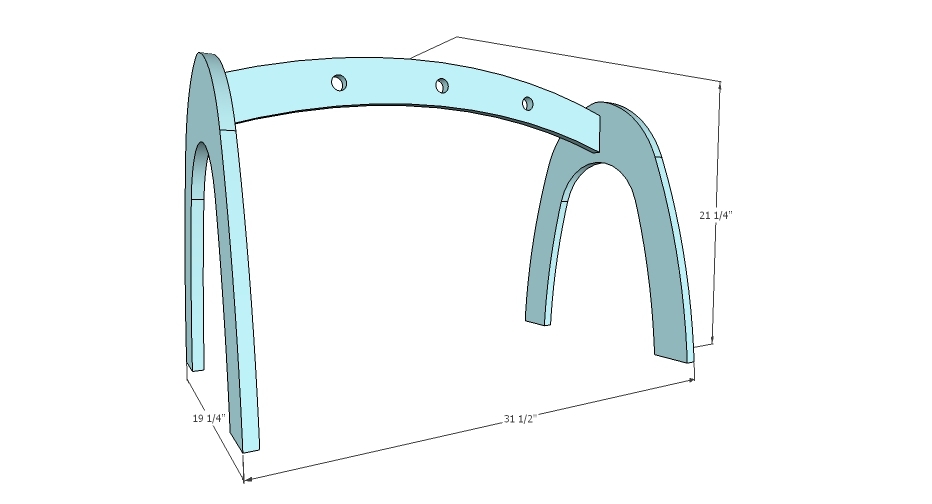
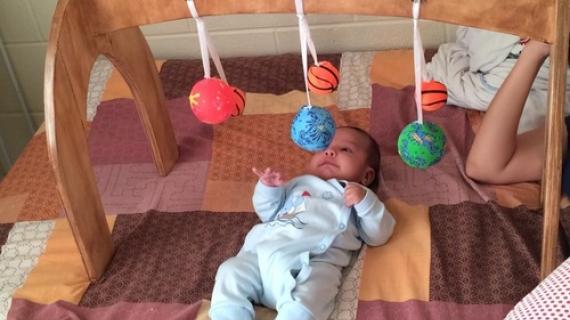
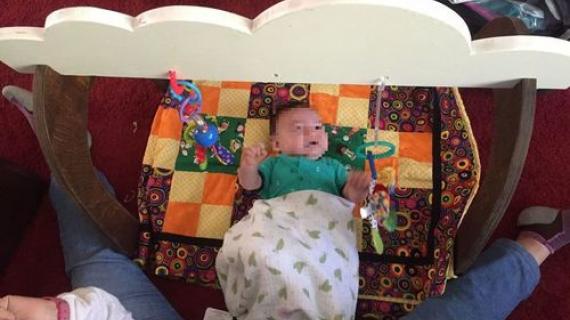
Could it be??? A baby gym beautiful enough for your living room???
Jaime spent about $20 on plywood for this project - get lots more details and photos here. You'll want to make this one!
And of course the plans follow - check them out below!
Happy Holidays!
Ana
PS - I'll be looking for brags and tags (I'm #anawhite or @knockoffwood and Jaime is @thatsmyletter) after Christmas morning! Please share your projects!
Preparation
1 - 24" x 48" 3/4" thick plywood 3 baby toys 4 - 2" wood screws


Please read through the entire plan and all comments before beginning this project. It is also advisable to review the Getting Started Section. Take all necessary precautions to build safely and smartly. Work on a clean level surface, free of imperfections or debris. Always use straight boards. Check for square after each step. Always predrill holes before attaching with screws. Use glue with finish nails for a stronger hold. Wipe excess glue off bare wood for stained projects, as dried glue will not take stain. Be safe, have fun, and ask for help if you need it. Good luck!
Instructions
Step 1
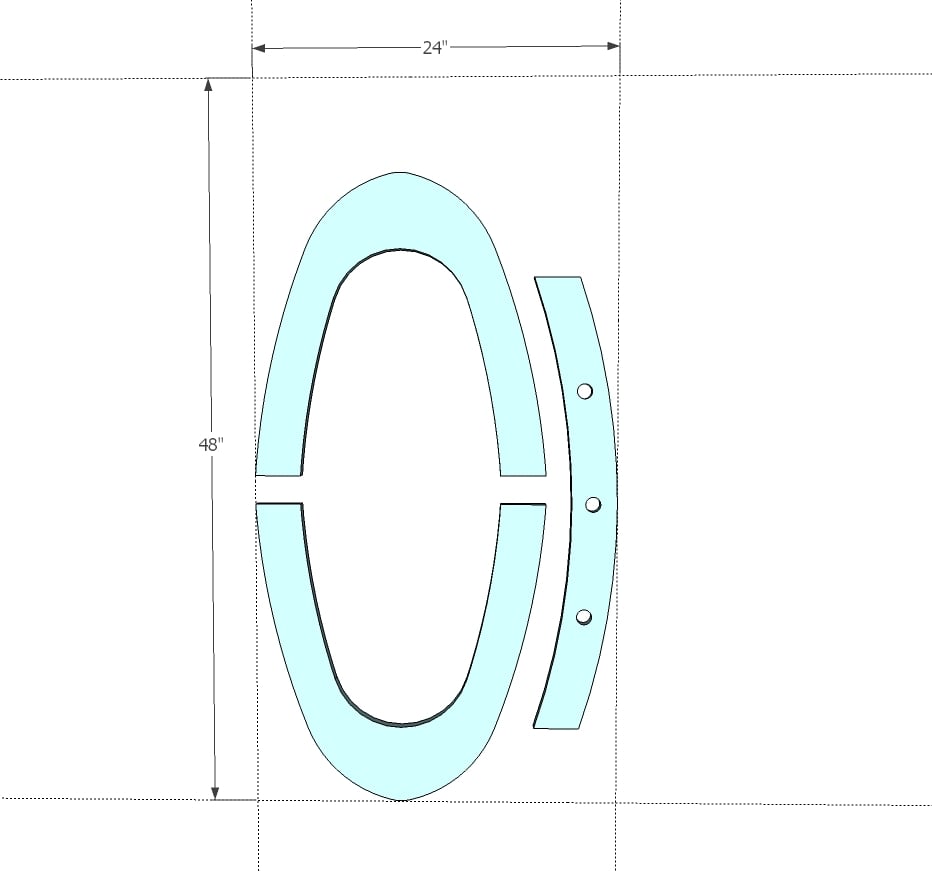
To get all the cuts on the plywood you will need to lay them out like this. Take care when cutting.
Step 2
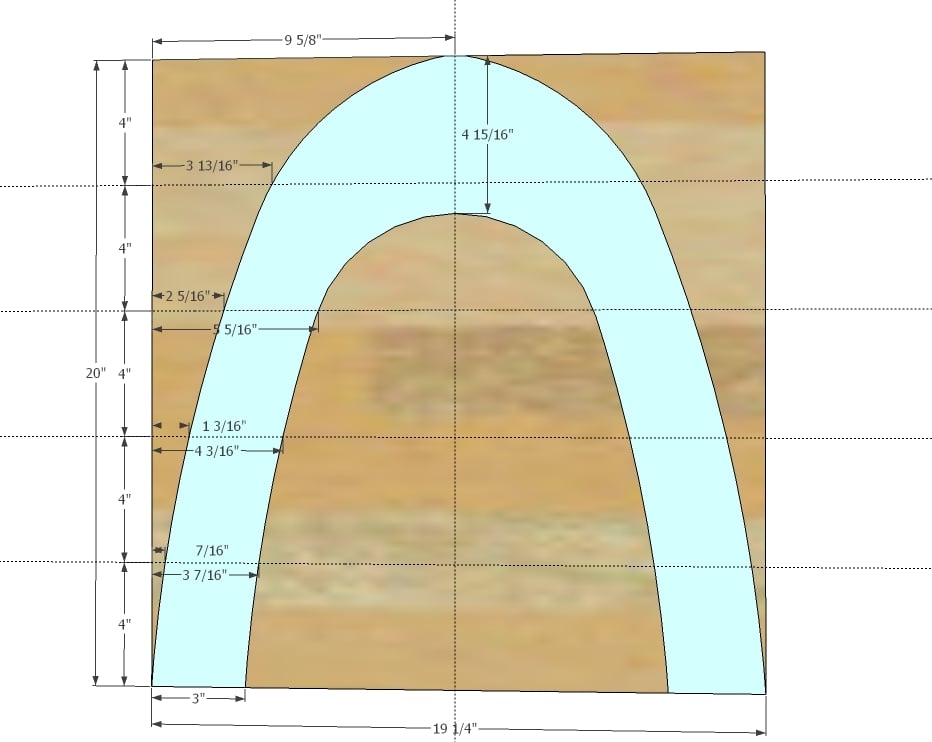
Layout the arch cuts and carefully cut out with a jigsaw. Use a scrolling blade. Once you have one cut use it as a pattern for cutting the second. Clamp the two cut pieces together and sand the edges smooth and even.
Step 3
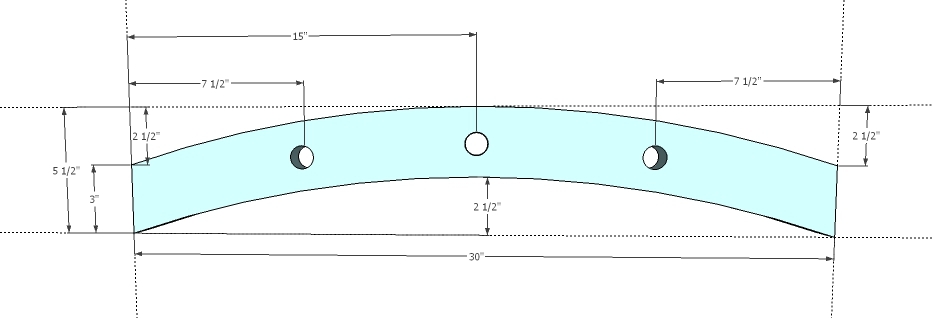
Then layout the final piece and cut out with a jigsaw. Sand well.
Step 4
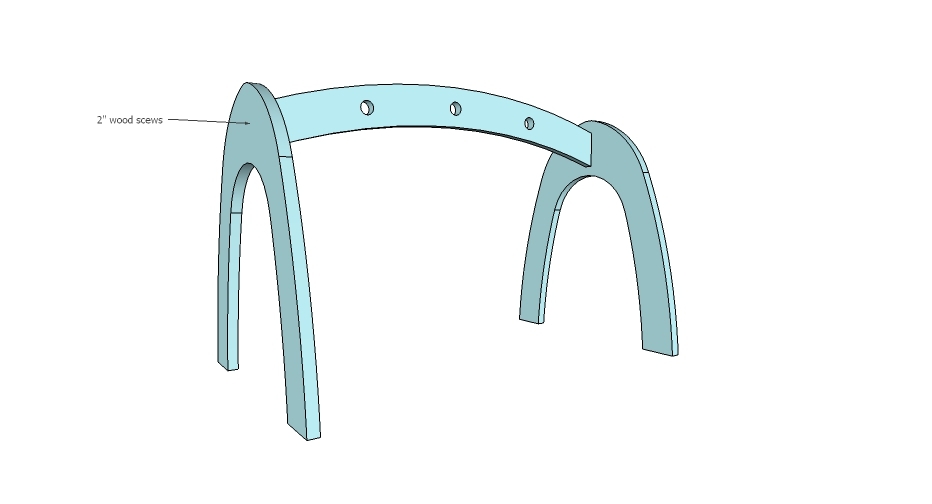
Attach the center piece to the two outside pieces with 2" screws.
It is always recommended to apply a test coat on a hidden area or scrap piece to ensure color evenness and adhesion. Use primer or wood conditioner as needed.

Comments
handmadewithash
Fri, 12/19/2014 - 17:35
This is perfect! I have a
This is perfect! I have a friend expecting a little one next year. What a cool gift this would make. Thanks for the plans!