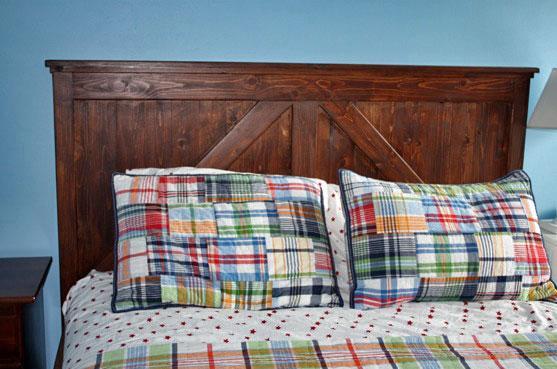
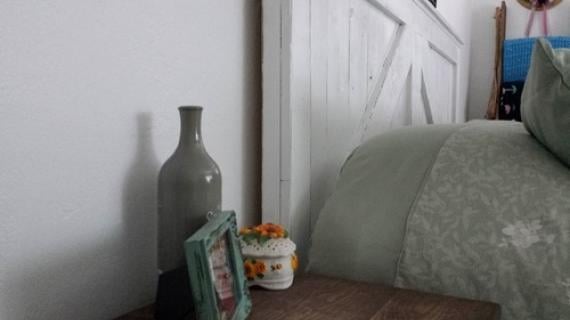
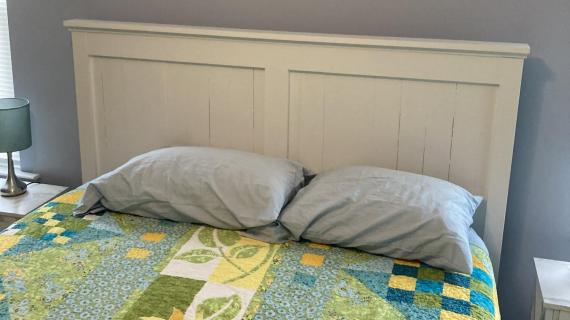
A rustic headboard that looks like an old barn door.
A while back I posted plans for the Brookstone Bed in a twin size.

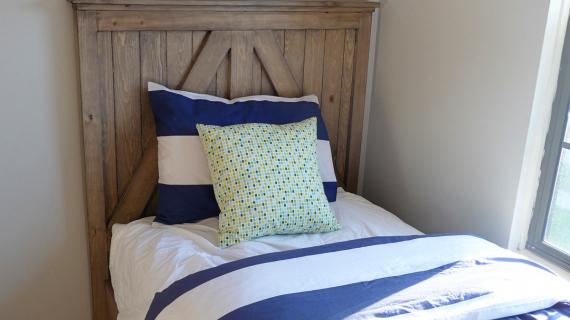
Photo from Devin
So many of you asked for different sized plans, but time just flies by, and before I knew it, months had passed and still, I hadn't found the time to publish more plans in the collection.
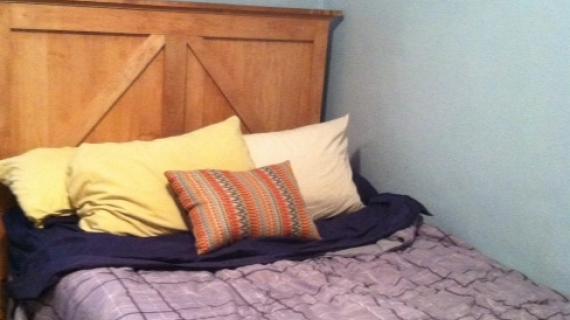
But after seeing these stunning photos from The Picky Apple, I knew I HAD to prioritize adding at least the queen size.
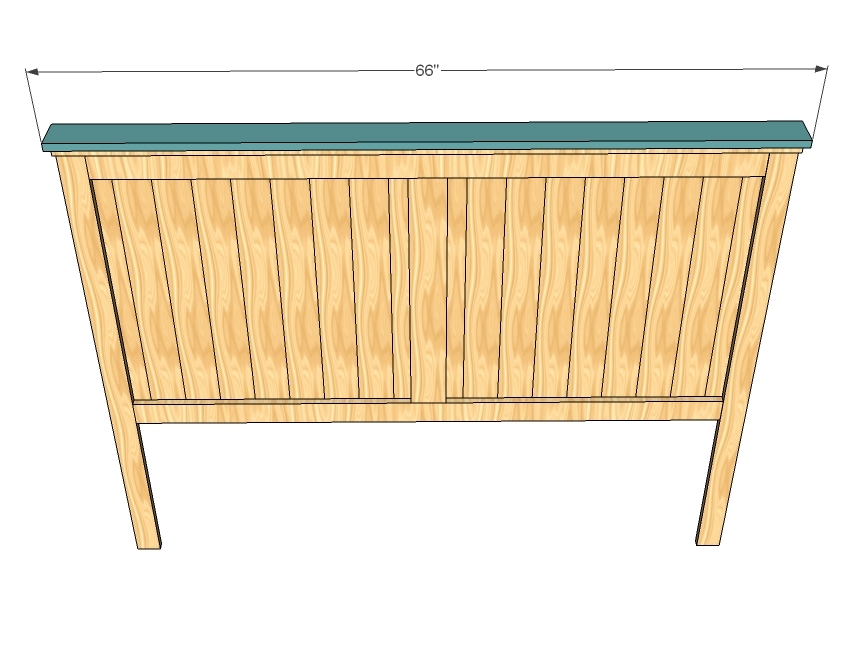
We'll start with the headboard. Isn't it beautiful? For lots more photos and details about the finish, make sure you visit The Picky Apple. You can also see all the plans in the Brookstone Collection here.
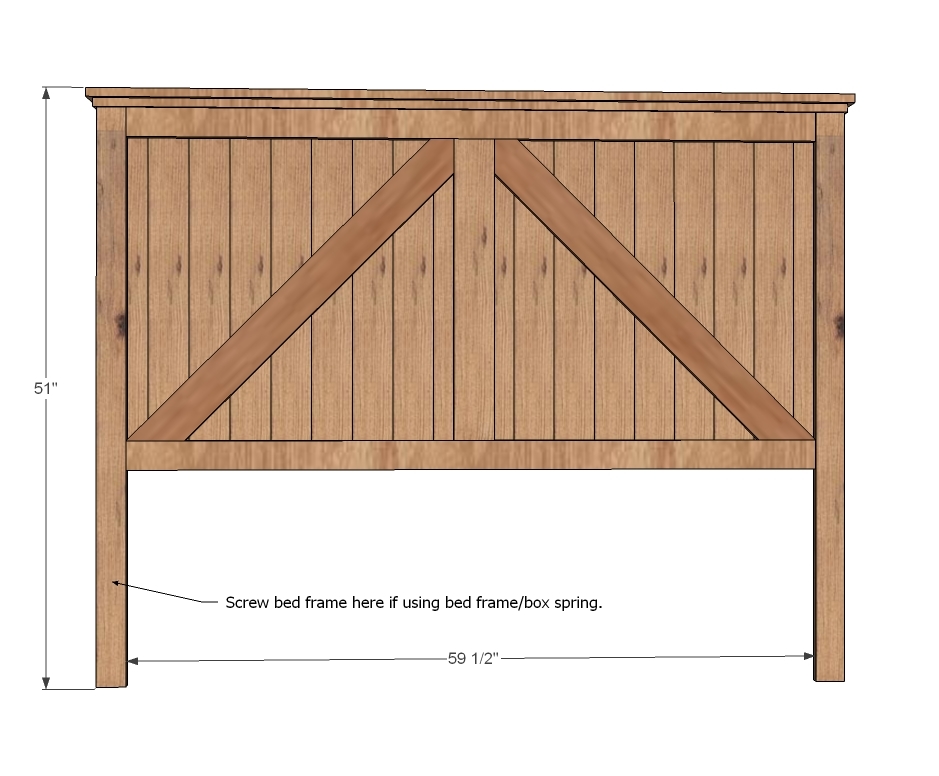
Preparation
8 1×4, 8’ Long
2 1x2s, 8’ Length
3 1×3, 8’ Length
1 1/4” Finish Nails
2” Finish Na
18- 1×4 @ 31” Panel Boards
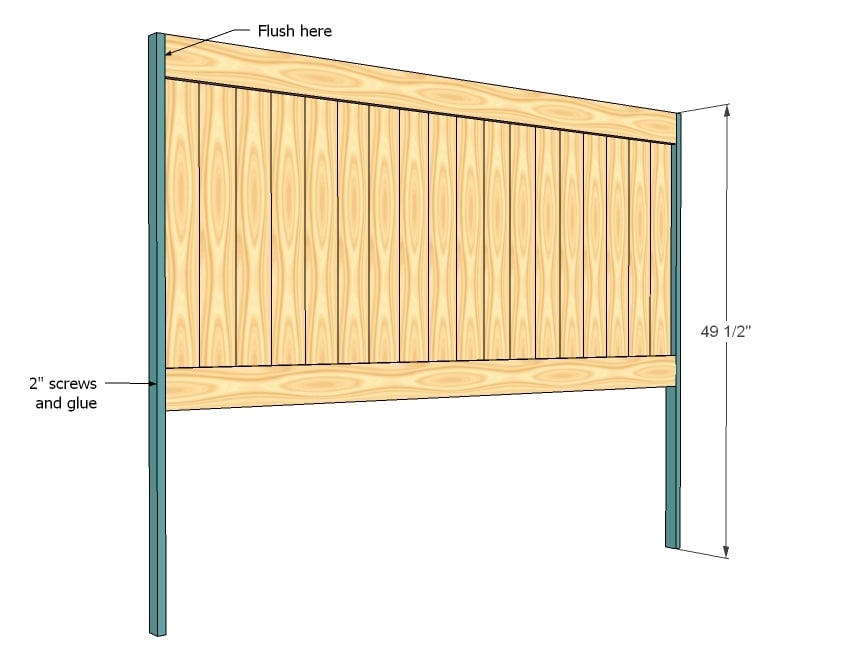
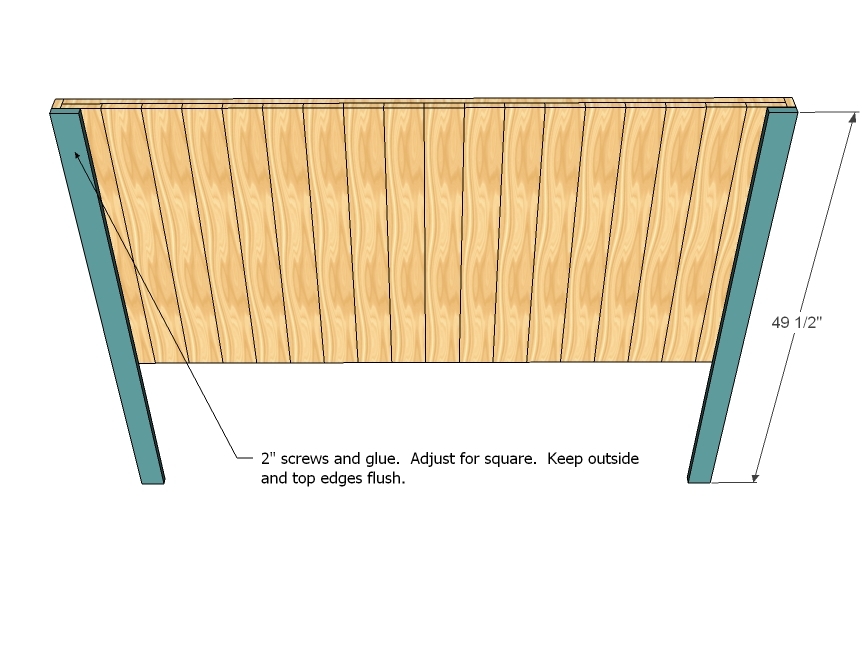
2 – 1×2 @ 49 1/2 “ Side Legs
2 – 1×3 @ 49 1/2” Front Legs
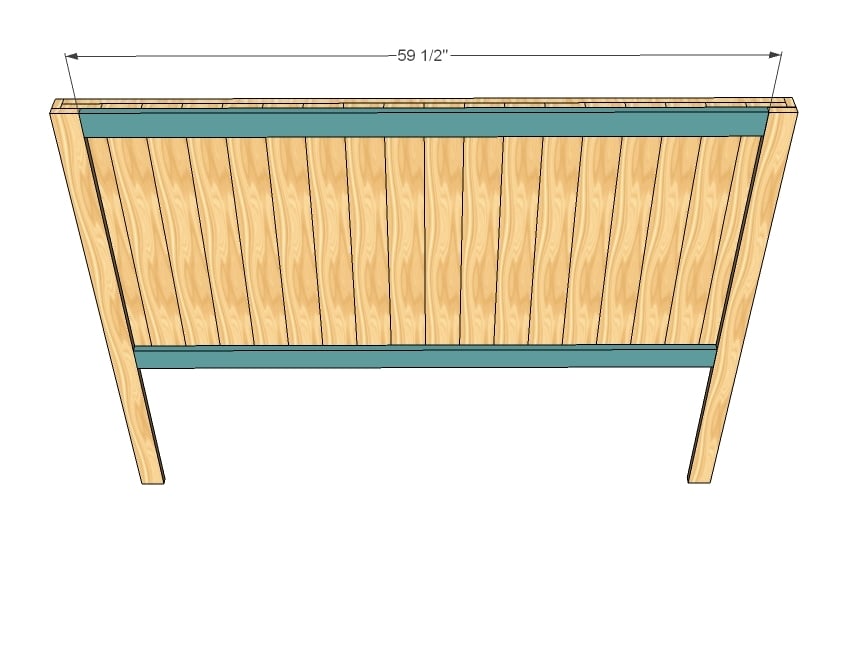
2 – 1×3 @ 38 1/2” Back Supports
2 – 1×4 @ 38 1/2” Front Trim
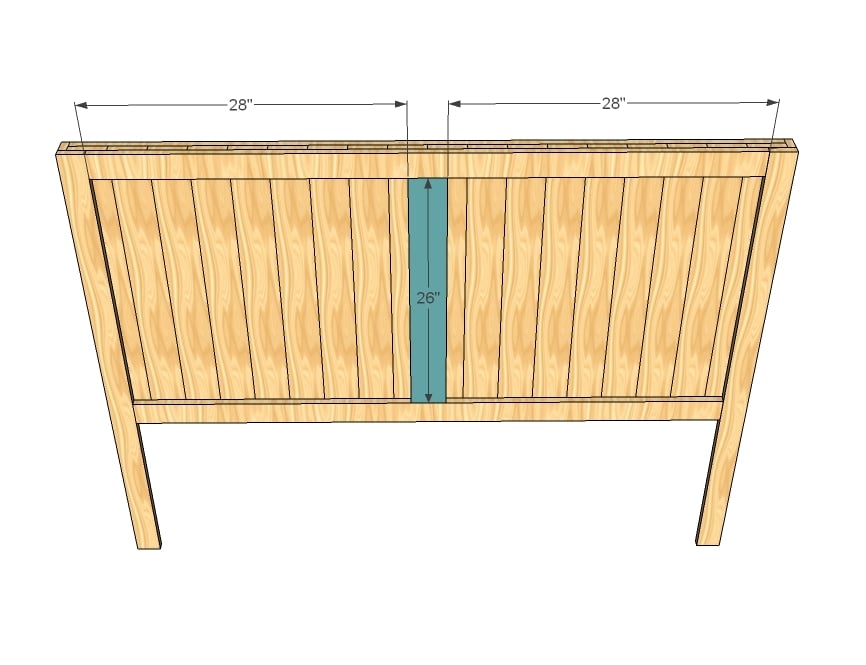
1 – 1×4 @ 26” Center Trim
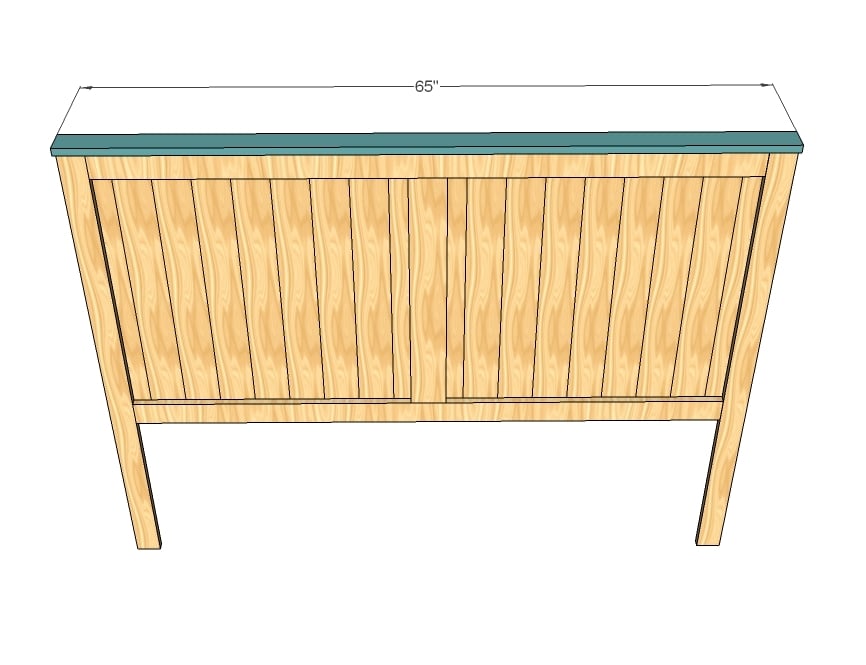
1 – 1×3 @ 44” Top Trim
1 – 1×4 @ 45” Top Trim
2 – 1×4 @ 30” Ends cut at 30 degrees off square, parallel, see last step
Instructions
Step 1
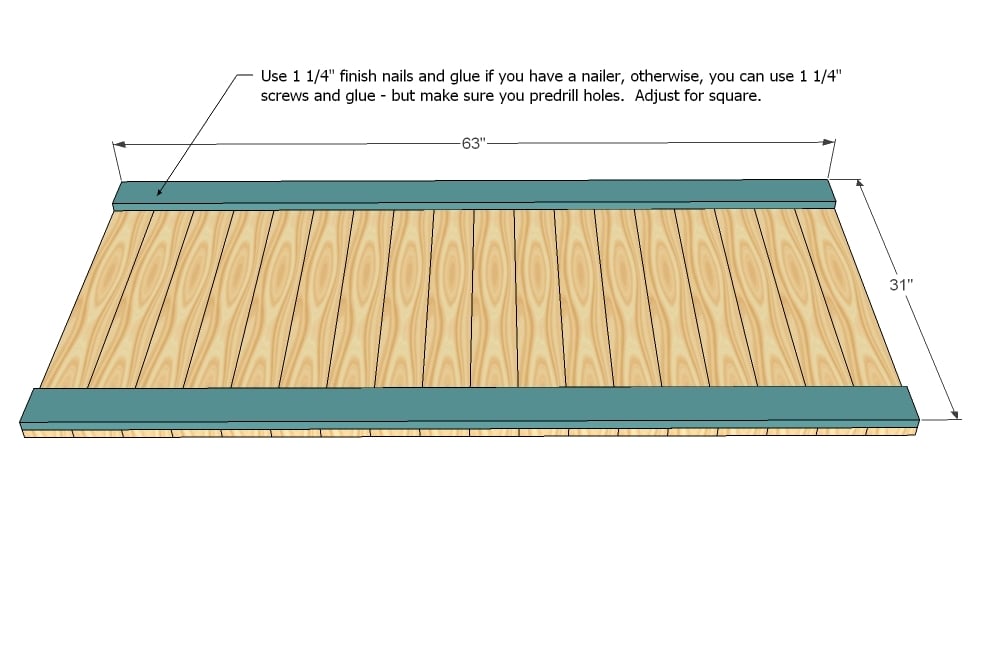
Headboard Panel
Start by lining all the 1×4 panel boards up, rotating the grain so the bark side is up, then down. Adjust for square. Then if you have a nailer, glue and nail the top and bottom trim in place. Otherwise, screw from the back to hide your screw holes. Shown above back side up, so you would just screw through the trim into the back side of the panel boards.
Step 3
Step 4
Step 8
Cross Supports
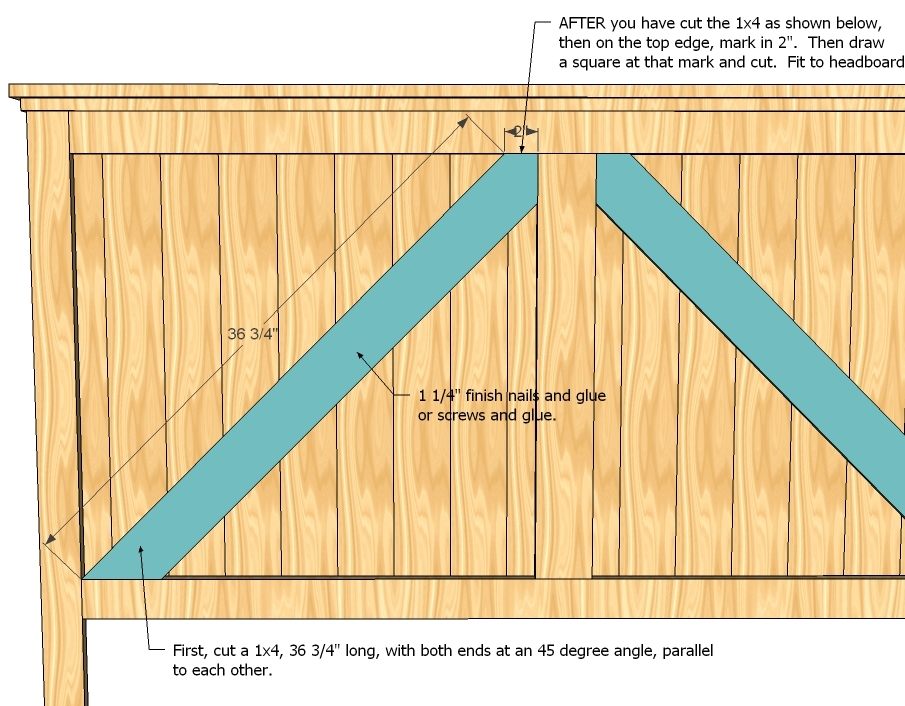
Start by cutting 2 1x4s 36 3/4″ long, with both ends cut at 45 degrees off square, parallel to each other. Then on the top end, measure in 2″ and mark a line square with the top edge (see above diagram). Cut this line. Attach the cross supports to the headboard with 1 1/4″ finish nails and glue, nailing into all of the panel boards.



Comments
Marie (not verified)
Wed, 11/17/2010 - 21:24
I love this! We need this in
I love this! We need this in king size :)
Cara (not verified)
Thu, 11/18/2010 - 03:30
Ana, Thank you SO MUCH for
Ana,
Thank you SO MUCH for featuring my son's bed today, and for the blog shout out. As I mentioned in my blog post, this was my husband's first building project, and I'm not quite sure how he managed to convert your twin plan to a queen on his own, but he did. How awesome that you've shared plans for a queen headboard now!! Looking forward to seeing the plans for the queen so we can compare!
Thanks again for the amazing inspiration for this bed in the first place. We never could have built this without you! And now that we've (okay, HE's) started building things, we can't stop! I've already got a list of things I want my hubby to build: bookshelves, toy storage cabinets, media console, and more! :)
Devon (not verified)
Thu, 11/18/2010 - 04:51
This is absolutely beautiful!
This is absolutely beautiful!
The Picky Apple (not verified)
Thu, 11/18/2010 - 05:12
Thanks very much for the
Thanks very much for the plans and the feature! We're very pleased with the results -- we'll surely be back when we're planning future projects.
BTW, you can read about our build experience here: http://www.thepickyapple.com/blog/2010/11/16/brookstone-bed-and-headboa…
All the best,
The Picky Apple
Stephanie (not verified)
Thu, 11/18/2010 - 06:56
Yes yes yes!!! Thank you for
Yes yes yes!!! Thank you for posting this! I had determined to do the Farmhouse bed for my husband and I, but when you posted the Brookstone bed, I fell in love! I'm so glad you're posting this bed in queen size, it's soooo beautiful.
Nan Tovar (not verified)
Thu, 11/18/2010 - 08:05
Wow, that is gorgeous! Do
Wow, that is gorgeous! Do you think I could make that work with the bed my hubs built for us?
It's a platform bed, with no headboard, might jazz it up a bit. Sorry, Ana, he built it before I found your website :( So that explains the squeaks :)
Ana White (not verified)
Thu, 11/18/2010 - 08:34
Thank you thank you for
Thank you thank you for sharing your amazing photo and inspiring todays post. I saw your bed on Facebook and fell in love. The entire room is just so beautiful! Thank you again, and I just can't wait to see more projects from you!
Stephanie S (not verified)
Thu, 11/18/2010 - 09:46
I love this!! Are the plans
I love this!! Are the plans for the storage part of the bed coming out in a queen??
sofia soriano (not verified)
Wed, 11/24/2010 - 16:04
nice headboard ,would love to
nice headboard ,would love to have plans for a full bed for my teen thanks
Piera Romeo (not verified)
Sat, 11/27/2010 - 05:46
Hi there. First of all i love
Hi there. First of all i love your website!! I haven't started any projects yet but i will very soon. I love this bed and want to make the headboard in a queen size. But I noticed that the cut list has all measurements for a twin size!!! PLEASE HELP!!!! Is there somewhere esle on the website that has the shopping list and cutting list I need for a queen size????
Anybody out there know where I can find this?
Thank you and happy building!!!
Judith Ann Edens (not verified)
Sun, 11/28/2010 - 18:53
I am going to make the bed
I am going to make the bed for my 9 year old who is looking over my shoulder saying "Now that's cool!" We will make it together as we homeschool and this will be something we can build form his own for real work bench.
I would need the help though of the size for the base. Only rough if neccessary as I can figure it out once I know how long high and wide it must be..
Next my 2 daughters are wanting to look at all the neat things they can help make.
Thanks for doing all the ground work you do I know how much time you must be putting in for us. Thanks Keep it up. Judy
Judith Ann Edens (not verified)
Sun, 11/28/2010 - 18:55
What more I need to do I do
What more I need to do I do not understand. I am new to using this kind of input. Judy
Kristina Southworth (not verified)
Sat, 12/04/2010 - 12:06
I absolutely love this bed!!
I absolutely love this bed!! I would be so delighted to see the plans for a King!
Debi (not verified)
Sun, 12/26/2010 - 06:58
Any chance you'll make
Any chance you'll make king-size plans available for this or the platform bed? I love your work, and your work ethic!
Kristi Hosterman (not verified)
Tue, 12/28/2010 - 10:06
I loved this bed! Hubby and I
I loved this bed! Hubby and I have been trying to decide on the right bed for our room. The mattresses sitting on a metal frame is boring us to death. Can you post the storage bed plans in queen size? Thanks!!
Sarah (not verified)
Tue, 01/11/2011 - 13:21
What a completely awesome
What a completely awesome bed!! I'm keeping my hopes up that measurements for the storage part of the bed in queen might be posted too. My husband agreed that we could make this bed as a project together, only I was thinking the twin size for our daughter and he was thinking queen size for us!
Leah (not verified)
Tue, 01/11/2011 - 14:29
This bed looks aweesome, but
This bed looks aweesome, but you only have the headboard plans =(. I looked all over the bed section and could not find plans for a queen sized in this style. Would you mind adding them?
Ric (not verified)
Sat, 01/15/2011 - 00:34
You have great plans. The
You have great plans. The furniture looks easy to build. I noticed the cut list to be incorrect. The back supports have to be cut to 63" not 38 1/2". The front supports have to be cut to 59 1/2". The 1x3 top trim has be cut to 65" and the 1x4 top trim has be cut to 66". The diagrams show the correct dimensions. Don't mean to be critical, just want to help anyone building this. I purchased 2 - 1x2x6, 5 - 1x3x6,
3 - 1x4x6, and 7 - 1x4x8. I precut the lumber to the diagram dimensions and this went together quickly. My wife loves it. Thank You
ChristyIreland (not verified)
Wed, 02/16/2011 - 12:30
Where's the rest of the bed?
Where's the rest of the bed?
Guest (not verified)
Sat, 03/03/2012 - 18:31
Queen size
Can you please do the queen size plans. Thank you!
danielleklug
Fri, 03/09/2012 - 12:54
Any tips on how to get that
Any tips on how to get that finish?
NJS Design Company
Fri, 03/18/2016 - 08:09
maybe
It looks like it might be a dark "mahogany" type stain, it has some red in there for sure. It could also be a gel stain, it looks to have covered really well especially for pine, and those cover really well.
Court_neynickel (not verified)
Tue, 09/18/2012 - 14:24
twin?
Okay, now I can't find the plans for a twin!! Am I crazy!?
Court_neynickel (not verified)
Tue, 09/18/2012 - 14:25
Now I can't find the twin
Now I can't find the twin plan! Am I crazy??
Louisa+3 (not verified)
Sun, 09/23/2012 - 15:07
Any chance of getting a plan
Any chance of getting a plan for a king?
I love this bed and it would be perfect if only it was a king :(
nicholasrad98
Fri, 10/16/2015 - 08:44
Type of wood?
I'm planning on building this sometime. Would it be alright to use SPF lumber? I know it's not high quality for woodworking but I don't want to sink too much money into this project. My only concern is that it will look ok after staining it.
Thanks
Ana White Admin
Sat, 10/17/2015 - 11:17
Wood
Yes, most of the headboards shown are spruce, pine or fur. This type of wood actually is preferred for it's rustic beauty, ease of working with, and low cost.
Tabatron
Thu, 03/17/2016 - 20:43
I'm confused
I used the shopping list, then made the cut list. I am trying to figure out how the front trim pieces are coming no where near the right size, along with the cross cut pieces. Says to cut at 30" but then in the steps it says 36" I hope I didn't just waste a bunch of wood :( help!
HeatM1ser
Thu, 04/07/2016 - 03:52
Please help...
I know this is probably a simple answer for most of you, but this is my first project and I'm making it for a full-sized bed and not a queen. Could someone help with what the cut list dimensions would be for a full sized bed instead of the queen that this tutorial is for? I just dont want to screw up because I only have 1 chance to make this with my budget ...thanks!
HeatM1ser
Sun, 04/17/2016 - 23:02
Ana White= all about money and not about helping others
Wow! SO I guess I learned that Ana White isn't into helping people develop their "inner carpenter" and is only about making money..I asked for some simple help nearly 2 weeks ago and have yet to get any response...this website is for profit purposes only...smh
ShyAnne
Mon, 04/18/2016 - 05:15
This is a website with
This is a website with hundreds of plans and probably thousands of users. She also seems to have her own tv show, as well as a family to take care of. So its no surprise to me that she doesnt answer each question personally. Measure the dimensions of your bed, and change the length of the plans. A queen bed is typically 60x80, but a full is 54x74. So go over the steps and write out the adjustments. Make little pictures to help you to make sure everything is right.
Rick K
Mon, 04/18/2016 - 19:49
Keep calm and pick another project
Your ask is not simple or you could do it yourself. It takes an immense amount of work to make a cutlist for a different bed size.
sjaustin
Tue, 04/19/2016 - 08:00
How much did you pay?
How much did you pay for these plans? And you're mad because you haven't gotten the new plans you wanted personally modified for free? This site has tons of amazing plans FOR FREE, and no, you won't get all of your questions answered instantaneously, but you can get some help, and you're certainly getting a lot more than you're paying for. That said, although these plans are great for novices, they're not appropriate for total beginners who don't know how to calculate dimensions. Even if you have the exact cut list, you may need to make changes on the fly due to things like variations in board widths, and if you don't have the ability to do that then you're going to make a huge mess. If you really want to do this project then find someone to help you in person.
BrooklynTeach
Mon, 04/18/2016 - 09:55
Measurements
1) Measure the mattress, figure it out. You can also use the Internet to find a multitude of measurements for full-size beds. If you don't have enough experience to figure this out, you should not be building this on your own. You need assistance. You will waste materials and then be angry about it.
2) Get over yourself. I doubt that not replying to your question says so much about her, but your response certainly says a lot about you.
ChaseBoyd
Sun, 09/17/2017 - 10:56
Floating??
If i wanted to make this a floating headboard, what would you reccomend as the best/easiest method of doing so?? Thanks in advance anybody.