
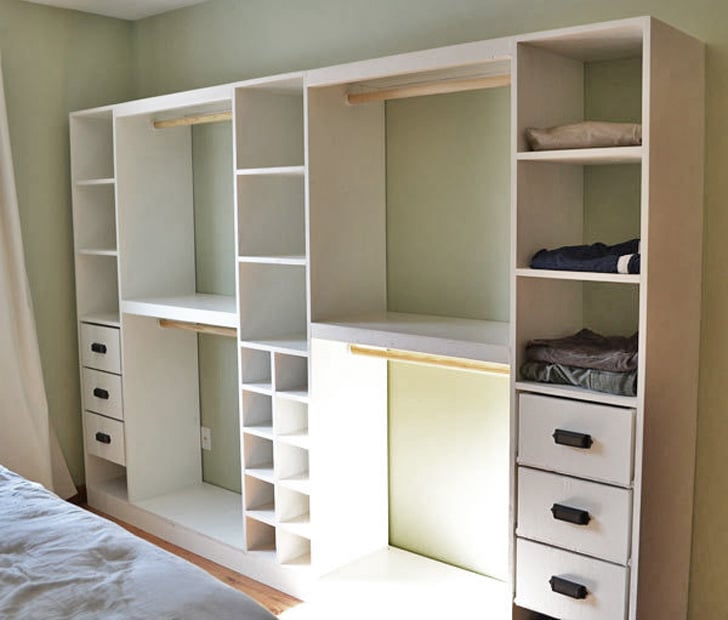

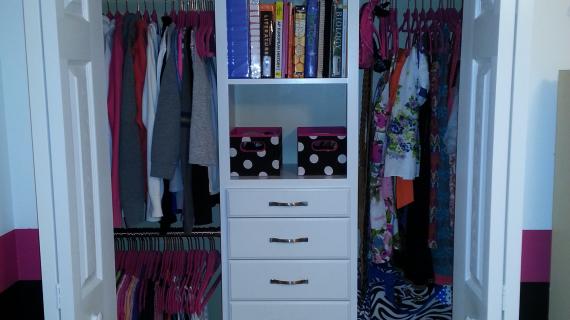
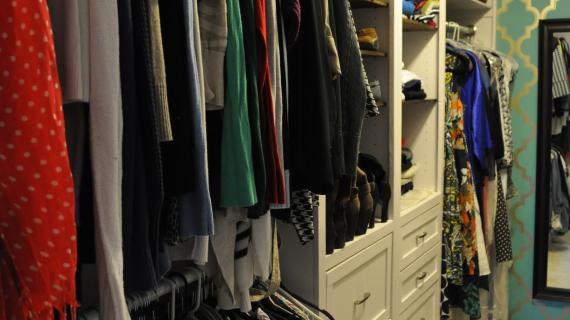
Build your own master closet system. This sturdy, freestanding closet can be customized to suit your space and needs. Free step by step plans from Ana-White.com
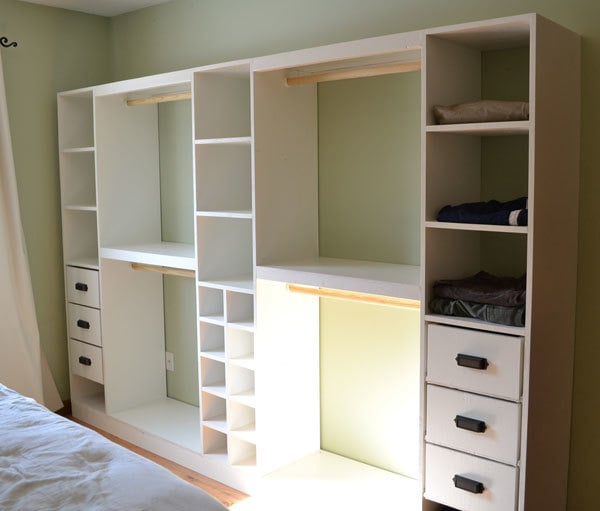

Do you need more closet space? In our first house, the master closet was only four feet wide. So I gave the entire closet to my husband and built my own master closet system!
Preparation
- 4x8 sheet of 3/4" cabinet grade plywood (1 sheet per tower plus an additional sheet for shelving) OR 3/4" thick melamine or particle board shelving like this (about three 8 foot long shelves per tower)
- IF using the melamine strips, you'll need 1x3s for the top shelf supports, one 1x3 per opening, IF using the plywood sheets, there will be an extra scrap about 2-1/2" wide, you can use this scrap for the supports
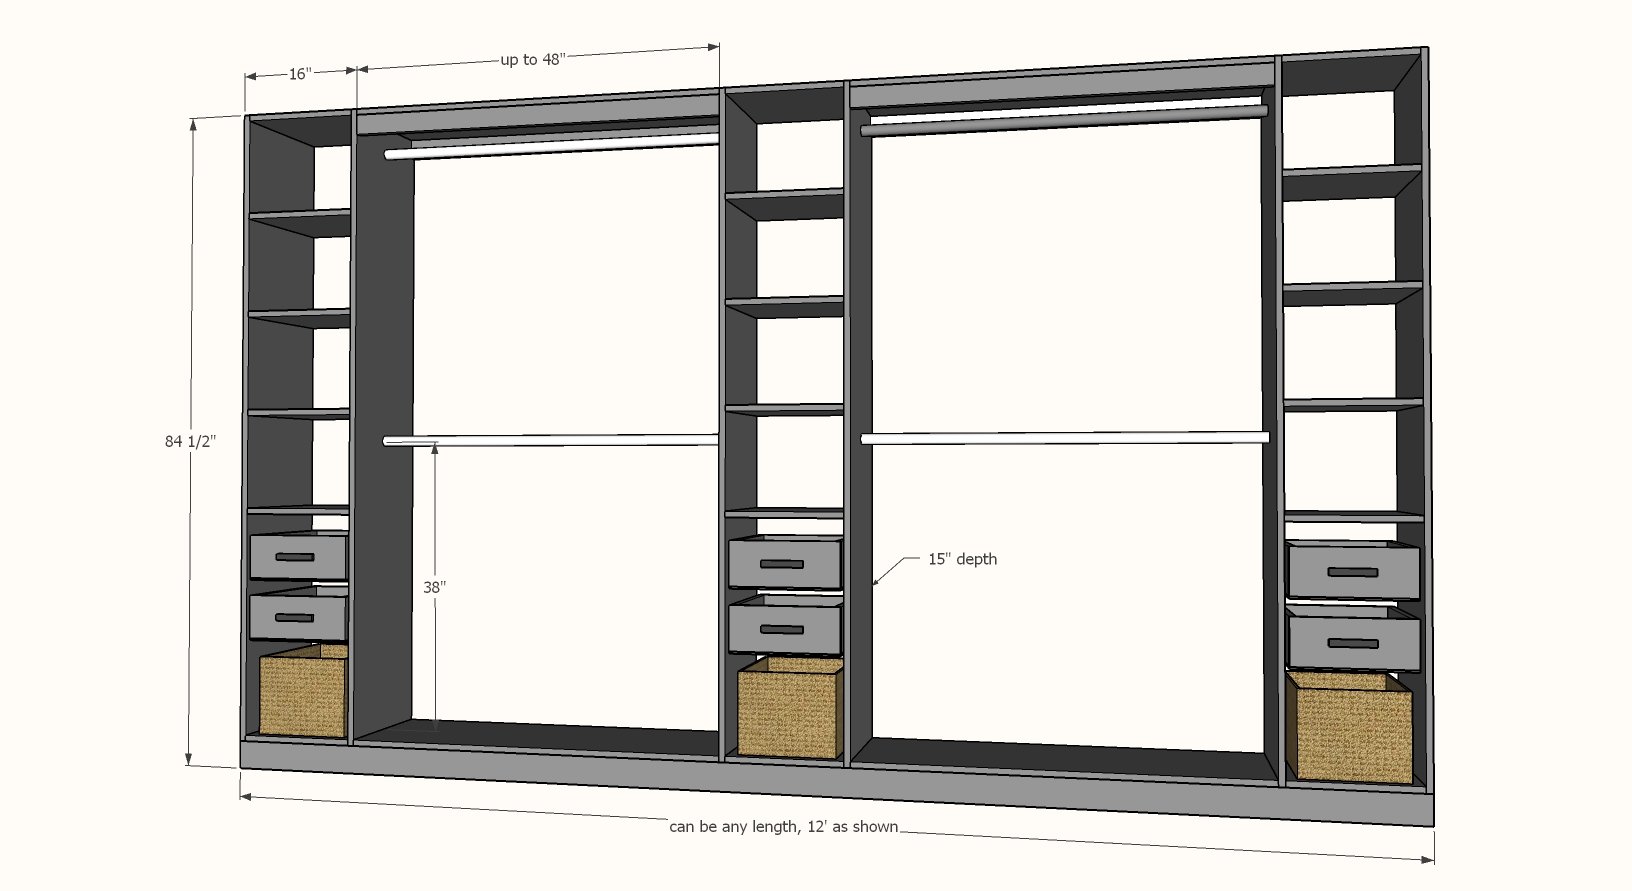
- 2 - 2x4s (use 2x6s if your base moulding is over 3-1/2" tall) in the entire length of the closet run (as shown in diagram this is 12' long) PLUS 24" for the ends of the base
- 5 feet of 1x6 or 1x8 boards (width of board determines drawer box depth) PER drawer
- 1 set of 14" euro style drawer slides PER drawer
- Closet rod sockets (one set per each run of closet rod)
- Wood closet rods (max run is about 48" without additional support)
- 1-1/4" Kreg Pocket Hole Screws OR 2" self tapping construction screws (#7 or #8)
- 1-1/4" and 3/4" brad nails (can use screws if you don't have a brad nailer)
- 2-3/4" self tapping wood screws (#8 or #9) - you'll just need 8 for building the base but these are good to keep around for a variety of uses and projects, and can also be used to anchor the closet to the wall
- Wood glue
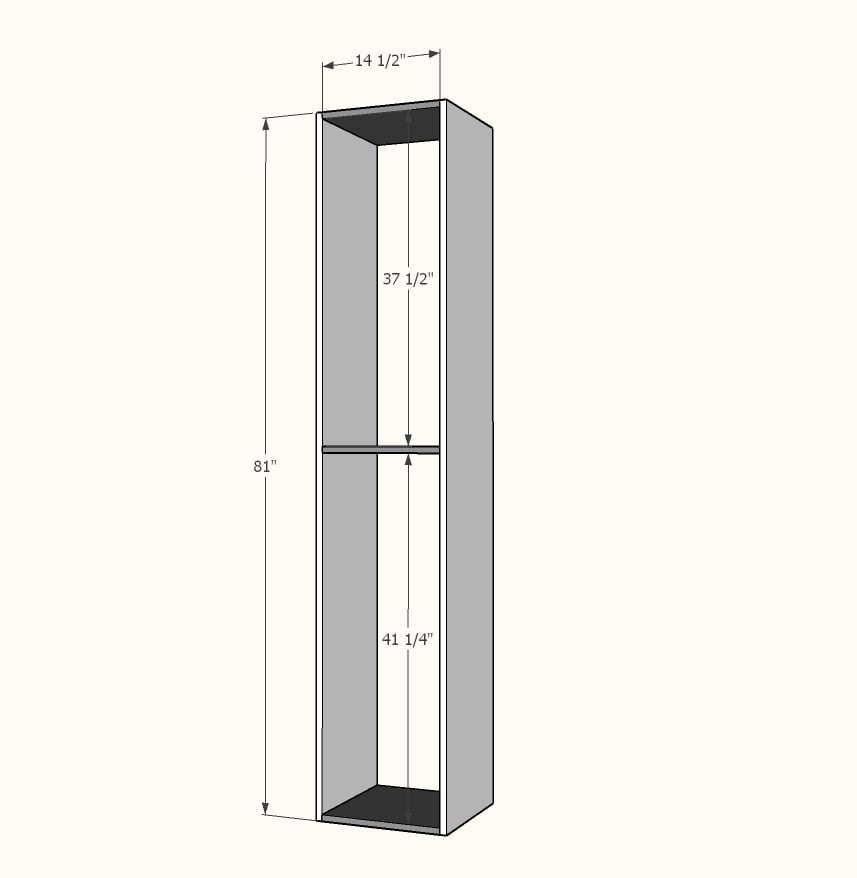
- 2 - 3/4" plywood @ 15" x 81" OR melamine shelf board @ 81" - sides of tower
- 3 - 3/4" plywood @ 15" x 14-1/2" OR melamine shelf board @ 14-1/2" - fixed shelves
- Additional shelves are 3/4" plywood @ 15" x 14-1/2" OR melamine shelf board @ 14-1/2" - additional shelves
Cut list per ONE drawer
- 4 - 1x6 or 1x8 @ 13-1/2"
- 1 - 1/4" plywood @ 13-1/2" x 15"
Cut list for base
- 2 - 2x4 or 2x6 for taller baseboards @ overall length of closet
- 2 - 2x4 or 2x6 for taller baseboards @ 10"
Cuts for Shelves in Between Towers
- 3/4" plywood 15" wide, cut to fit in between the towers on installation
- 1x3 or scrap plywood cut to fit in between the towers on installation
- Rip plywood sheets into three pieces, 8 feet long x 15" wide. If you don't have a table saw or other rip guide, you can have your hardware store do this on their track saw - just make sure the rips are exactly the same. Request to have the saw set and the plywood run through the saw horizontally for consistency.
- Save the remaining scrap piece to use as supports
- Cut the ripped pieces of plywood on a sliding miter saw (may need to flip and cut both sides) or use a circular saw and a square to make square cuts. Sacrificial styrofoam panels under the plywood for support will make cutting much easier.


Instructions
Step 1
Attach the two side boards to the shelf boards. You can use 3/4" pocket holes and 1-1/4" pocket hole screws, or 2" self tapping wood screws, or 1-1/4" brad nails and wood glue.
It is important that the center shelf is fixed to keep the closet structural good.
Step 2
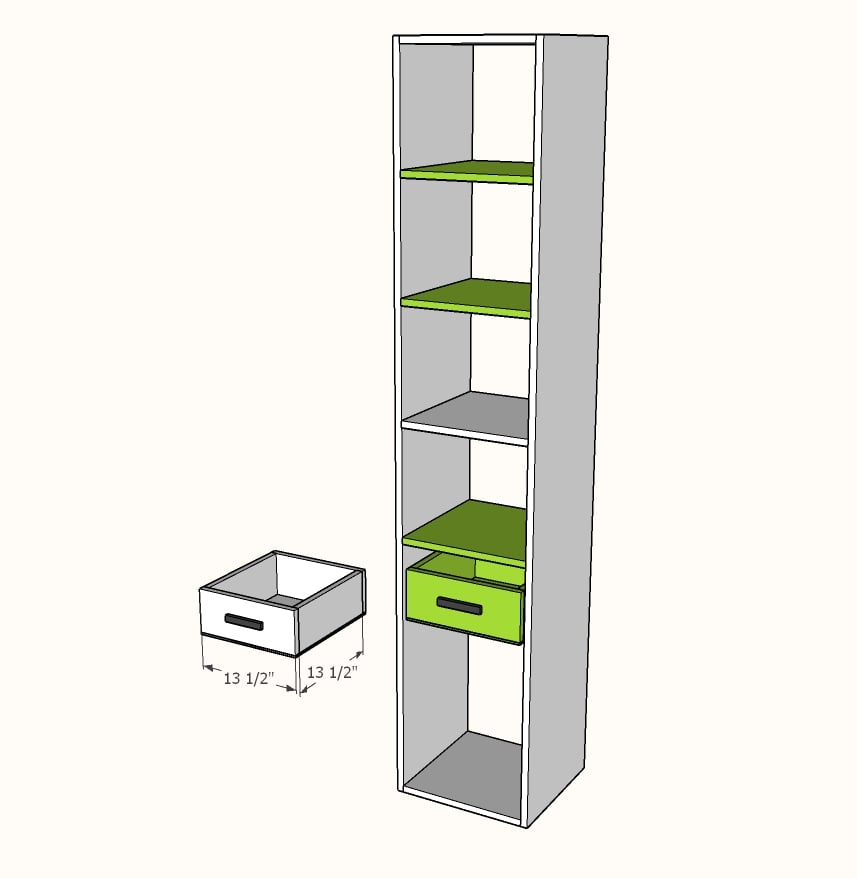
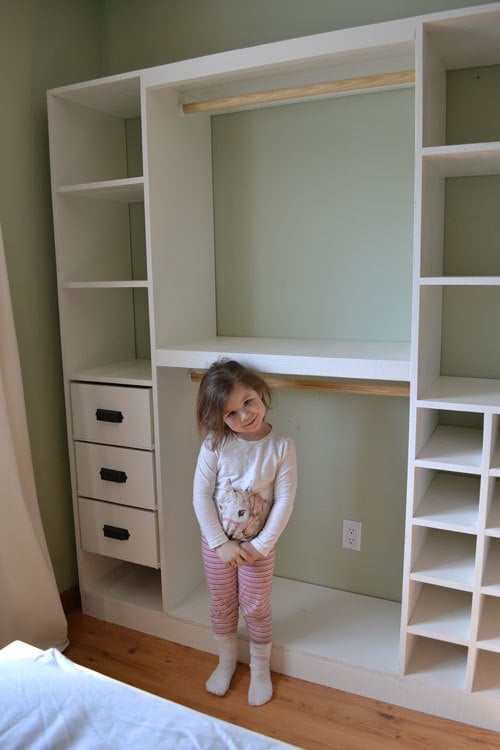
Add additional shelves as desired. As shown, there is a 12" space between the shelves.
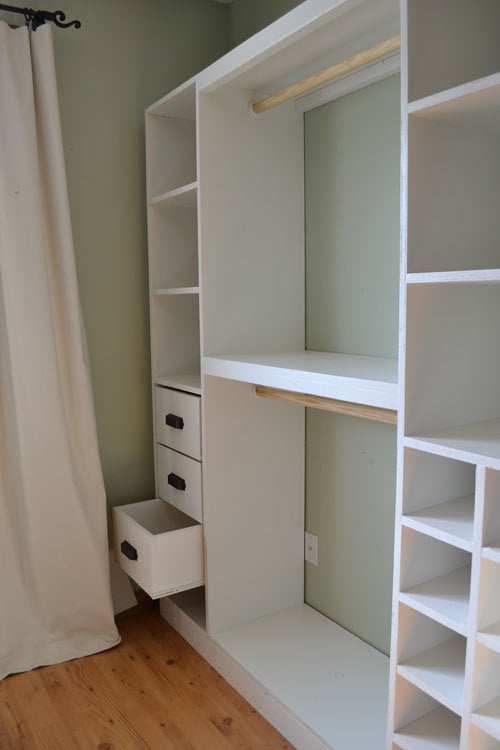
For the drawer boxes, build the box first using the same fastener as you used for building the tower.
Attach bottom 1/4" plywood with 3/4" brad nails and glue.
Install the drawer boxes using the drawer slides.
TIP: You may wish to finish the towers at this point.
Step 3
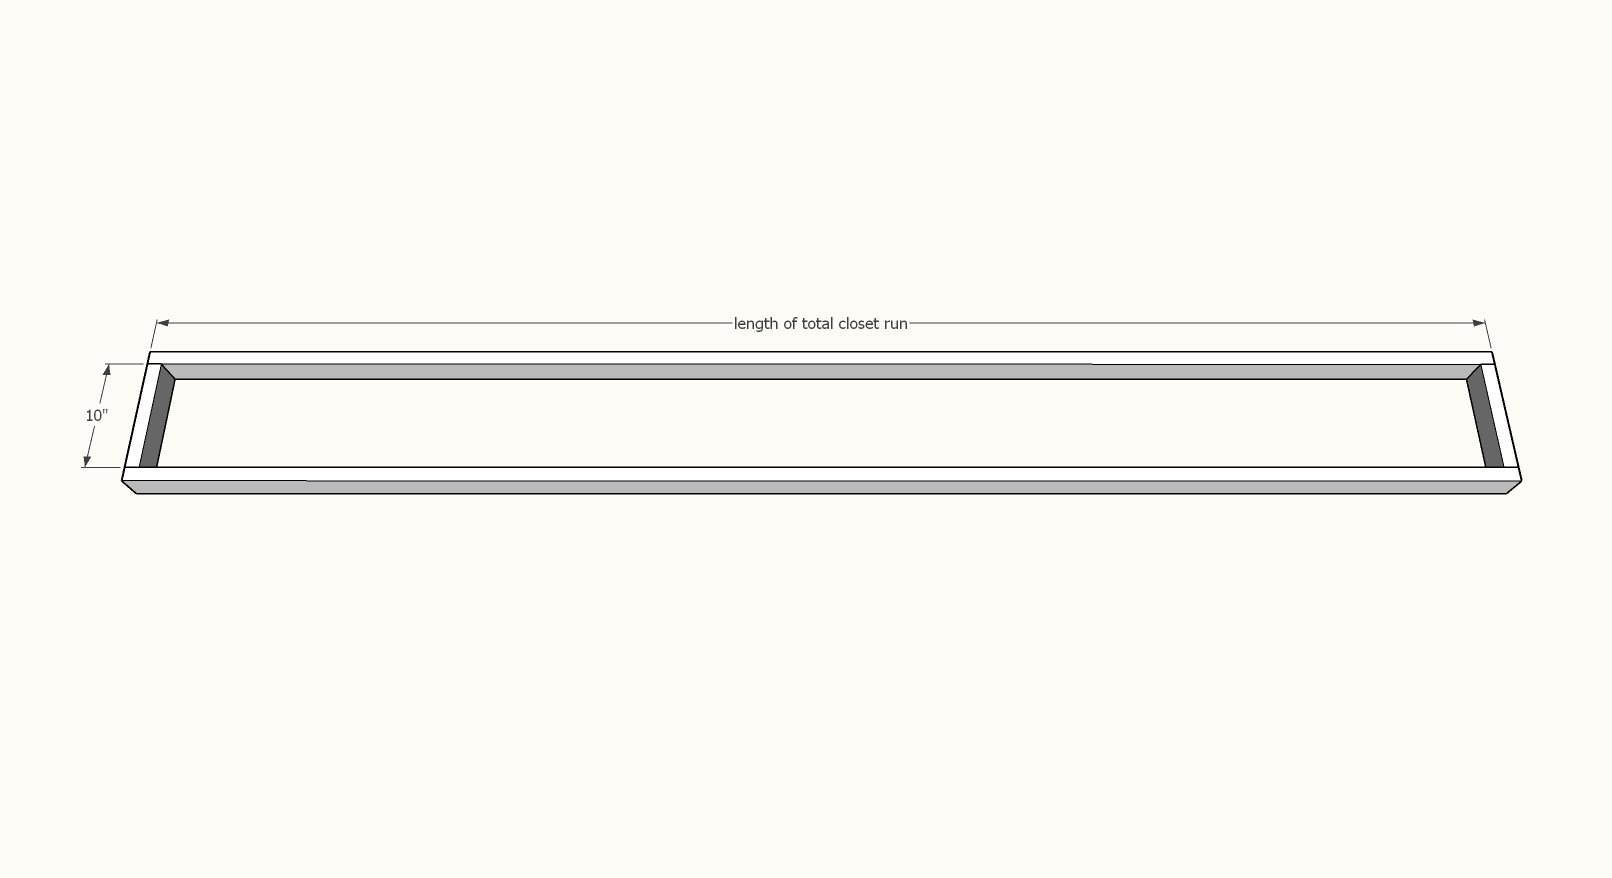
Cut two 2x4s to the entire desired length of your closet.
Attach with the 2-3/4" screws to the 10" long 2x4s.
NOTE: I recommend building the base slightly smaller front to back so that the closet can sit above your base moulding. If you have taller base moulding, consider using a 2x6 for the base frame to bring your closet up above the base moulding.
TIP: You may wish to finish the base at this point.
Step 4
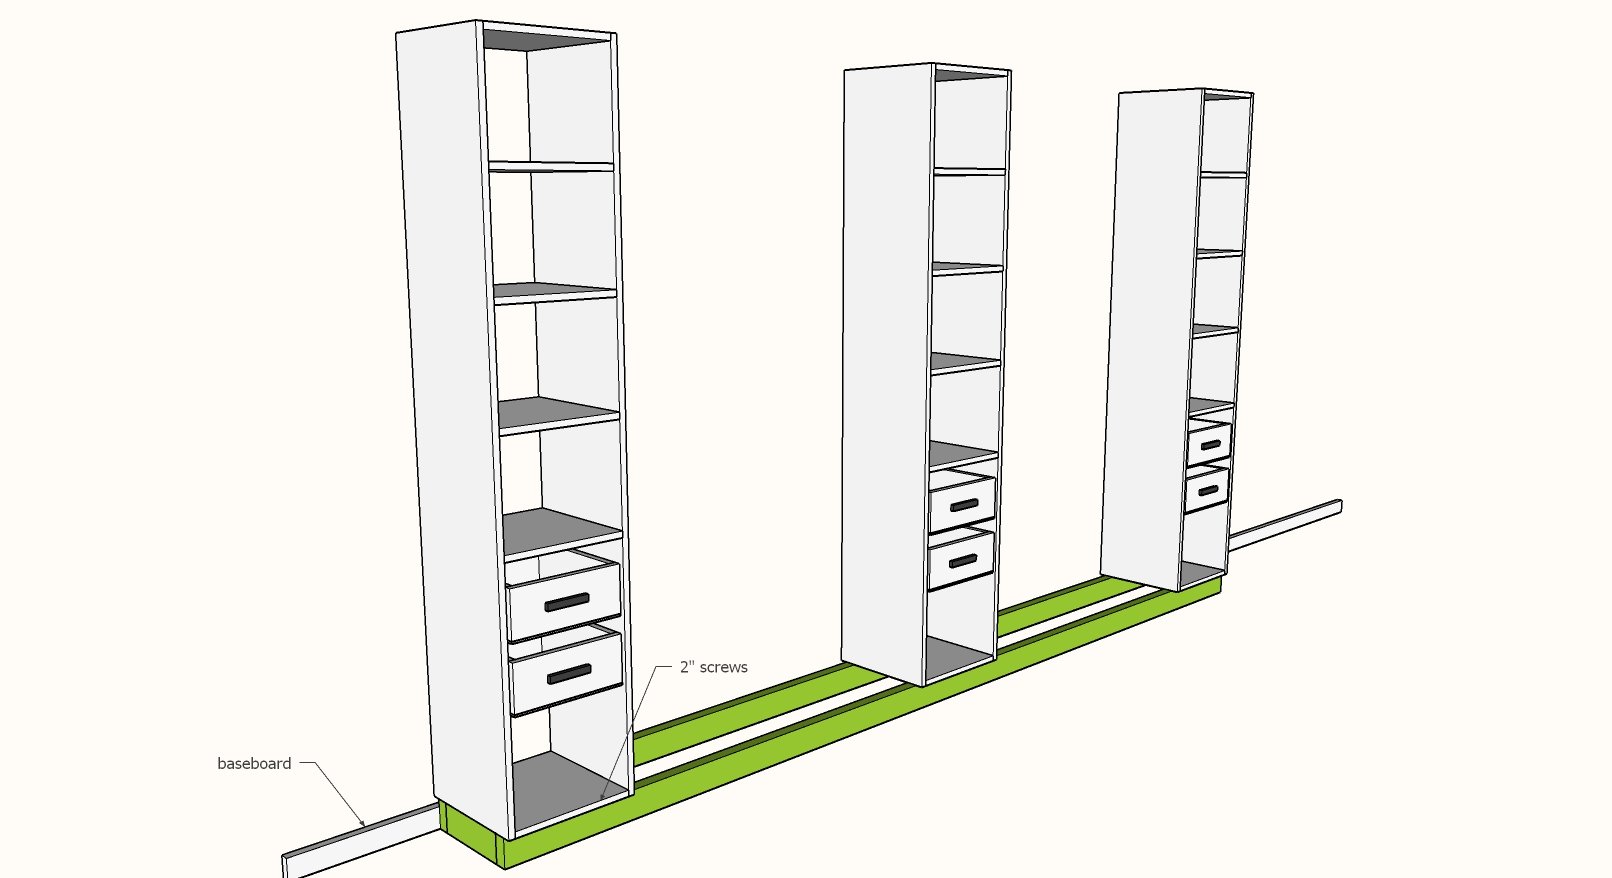
Place base in installation location.
Place the towers on the base, so the towers are flush to the back wall.
Screw towers to the bases.
Step 5
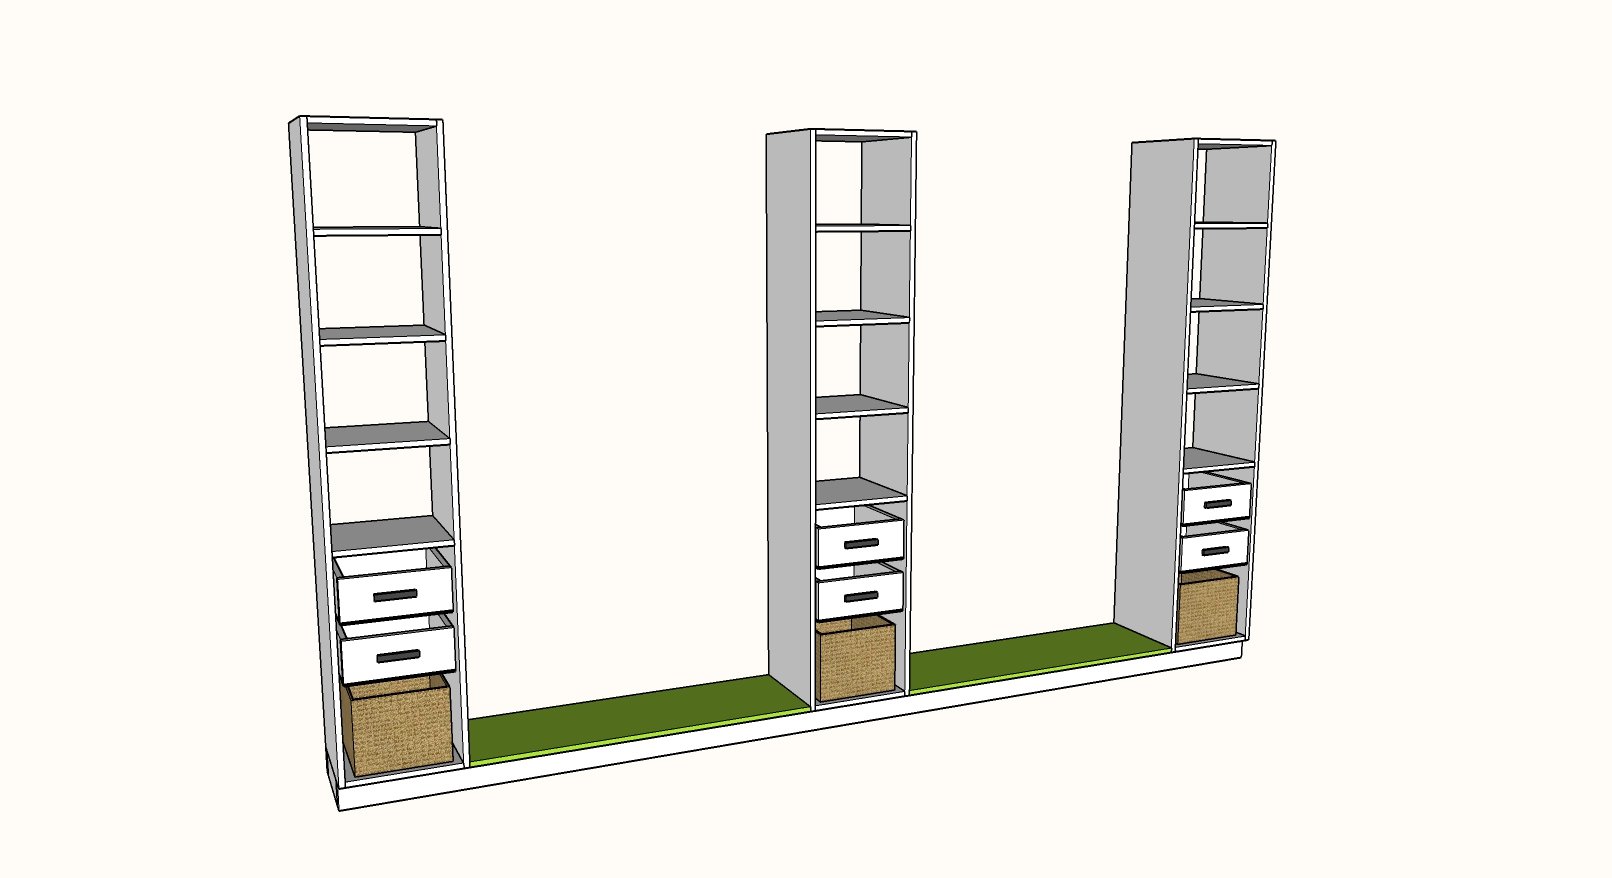
Cut plywood to fit in between towers.
TIP: You may wish to finish the shelves prior to installation.
Attach plywood shelves to fit on the bases.
Step 6
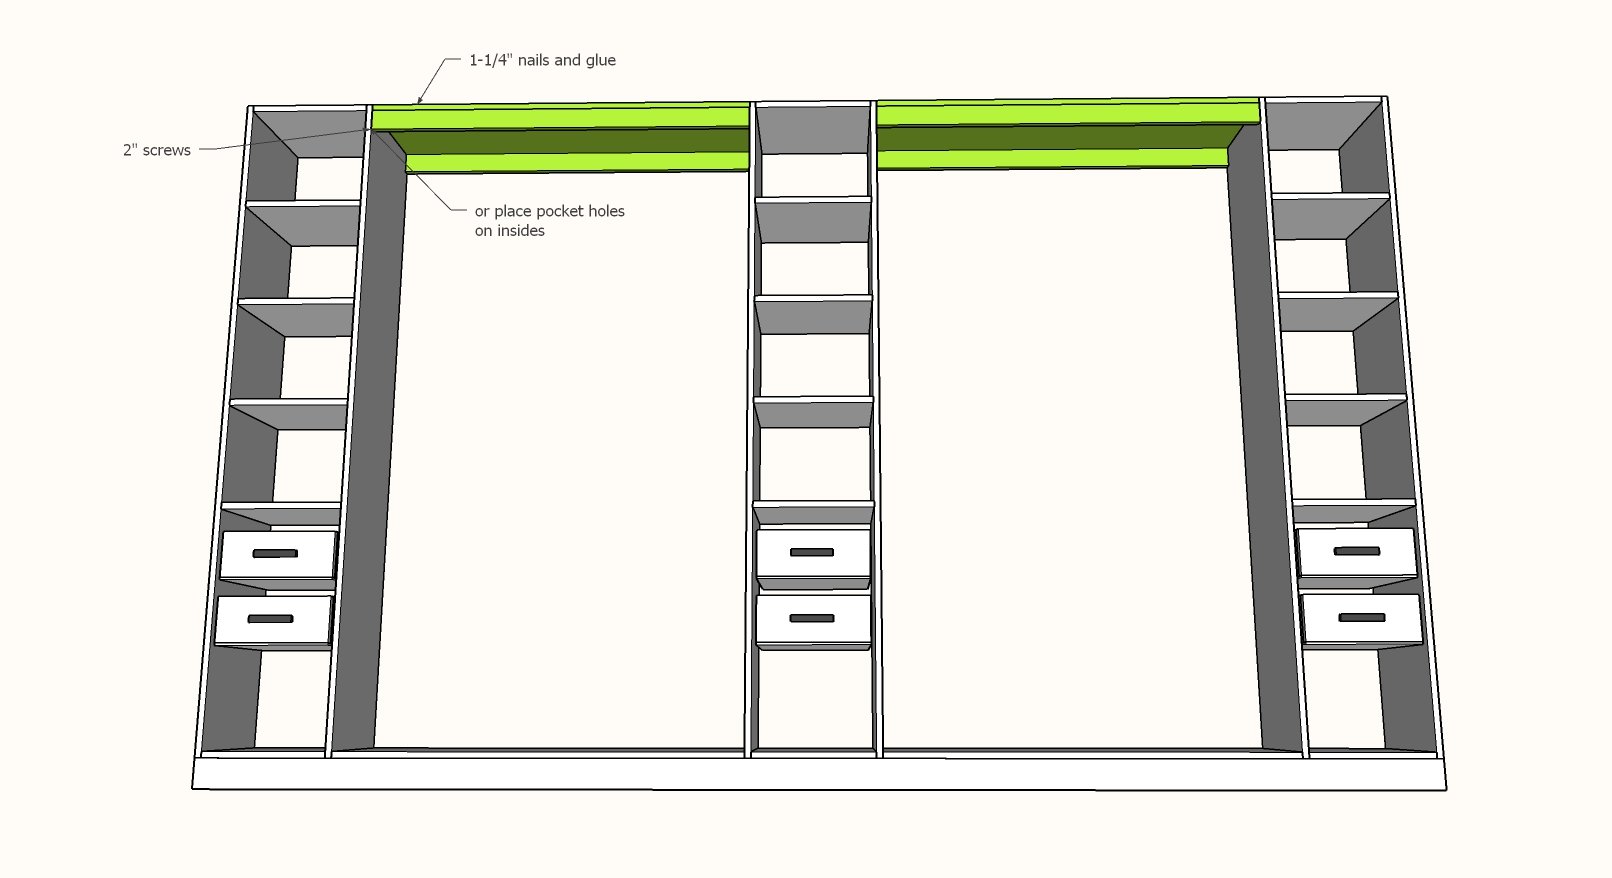
Cut the top shelf boards to width. Cut the supports from plywood or 1x3s.
NOTE: If using pocket holes in the supports drill pocket holes before attaching.
Attach shelf to the supports with glue and 1-1/4" brad nails.
Attach the top shelves to the towers.
Step 7

Install closet rods between towers.
For stained finish: it is recommend to use edge banding on the front of the plywood edges to finish.


Comments
Indy69
Sun, 08/21/2016 - 02:01
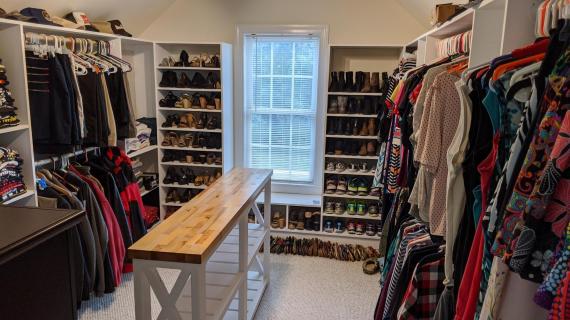
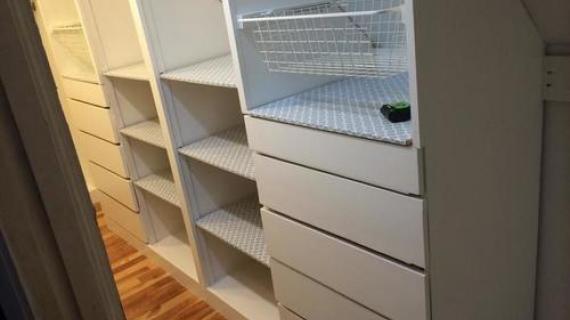
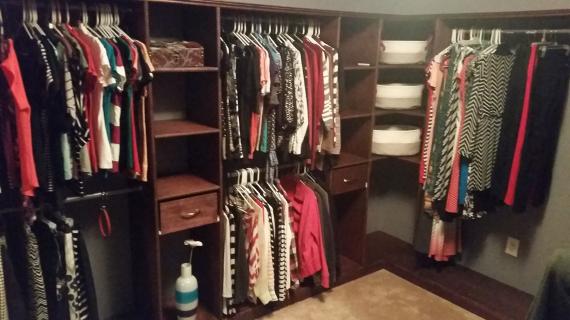
This is my closet using these plans as a starting place
Here are some photos of my closet. I used these plans as a starting place. If you look, you will see I essentially built three units, one for each wall, and attached them using "bridges". I added drawers with soft glide closing slides for the rich feel. On the main hanging rods, the ones they sell in your local hardware box store and quite expensive (about $30 for an 8' length), so I bought chainlink fence bars, which cost $10 for a 10' length, and took some 0000 steel wool to them, and then polished them. They look like chrome. For the corners, I could not find anywhere what I wanted, which was a rod that would mimic the shelf above it, which is two 45 degree turns. So, I bought a 10' length of 1" electric conduit, and cut it in half and then put two 45 degree bends in each piece. I did this right in the store with their conduit bender and it took all of like 10 minutes. Then, when I got them home, I simply cut off the ends to the exact size needed in each corner. I used a "U" socket on each end, and a hanging loop in the middle. Both corners cost me less than $20. The drawer glides were on Amazon, and were $120 for 15 pairs of soft-close glides with the brackets (Get the bracets, as they are not that expensive, and will make installing these glides much much easier.
Another money saving thing I did was the double doors. The store does not stock double doors, and they must be special ordered, at a cost of almost $275, and would take 4-6 weeks to get. So instead, i bought two 24" single pre-hing interior doors, and removed the frame on each one where the door would latch. I removed both headers as well, and used one of the side for the top. I used a spring loaded ball socket for the less used door, and installed the indent plate for the ball socket where the latch would have gone if used as a side frame for the doorknob (I hope that made sense). Basically, I put two 24" pre-hung doors together to make one double door. It cost me $130 and a couple hours labor, to make a very nice double door.
I used sanded birch plywood, all connected with Kreg-Jig screws and wood glue, stained with Minwax Jacobean, and used a satin clear on the main portion and semi-gloss on the drawer fronts for that "rich" look. The entire closet cost me between $800 - $1,000, with everything, including the plywood, 1x2's, screws, stain, clear, drawer glides, handles, and misc.
I would not have known where to begin without the help on this site, and once I got going, I was able to modify and improvise along the way to fit my needs. Thanks.
abyars111
Mon, 08/06/2018 - 07:36
edges
I guess the cabinet grade plywood edges are pretty smooth and don't need edge banding? I've never worked with it. I know using BC sanded plywood I'd have to band the edges to make them acceptable to some folks.
M@cher1e
Sat, 12/08/2018 - 01:37
My Next
Awesome..
dinahheald77
Wed, 01/08/2020 - 14:47
I have been looking for a…
I have been looking for a room divider for my kids. Do you think this would do well on shaggy carpet? We live in an apartment and my kids share a room. This looks like it might work, with some modifications. What do you think?
yancy
Wed, 01/08/2020 - 15:46
Estimated cost?
Love it! Do you have an estimated cost for materials on this one? We are giving it serious consideration and are very new to all this!
Nicole1
Mon, 05/18/2020 - 23:22
Can I use this plan as a room divider closet?
Hi Ana,
Can I use this plan as a room divider closet, like the one you built in your daughters room?
Thanks
wwwanaw
Mon, 08/23/2021 - 07:37
Why are the closets so narrow that a hanger won't fit?
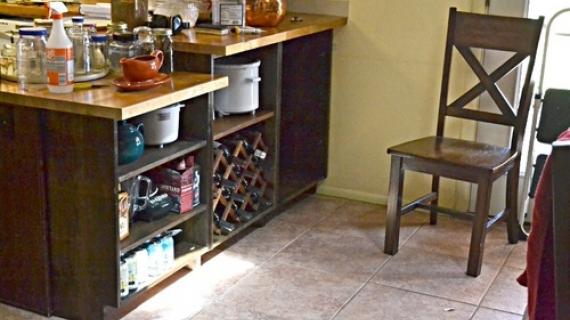
Thanks for the ideas, I got sick of ordering expensive junk from the more well known companies online, so I bought a simple Kreg Pocket Hole Jig and educated myself, and for 80% less than the crap you can buy online I made my own custom closet, pantry and fridge cabinet :)
I have one simple questions ( I noticed other closets are the same from Ana White) why are the closets so narrow? I think for a shirt or jacket to hang you need at least 20 inches not 15, the hanger will hit the back wall. I've just been perplexed over this odd size of 15.5" The only benefit is you can rip a 4x8 plywood board in 3 pieces at 16" each, other than that I can't see why?
Thanks again