
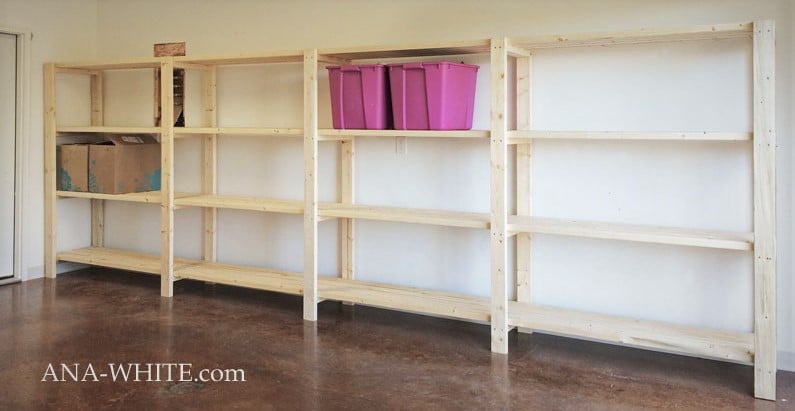

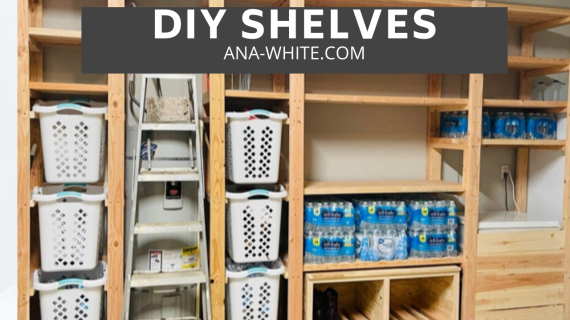
Free plans to build freestanding garage shelving using only 2x4s. Easy and inexpensive, but sturdy and functional. Includes video tutorial from ana-white.com
Freestanding Garage Shelving Features
- BEGINNER FRIENDLY: Very easy to build using just 2x4 boards
- YOUR SIZE: Easy to customize in size to fit your space
- NO HOLES IN THE WALL: Freestanding, so will work with concrete, brick, metal walls or for rental units
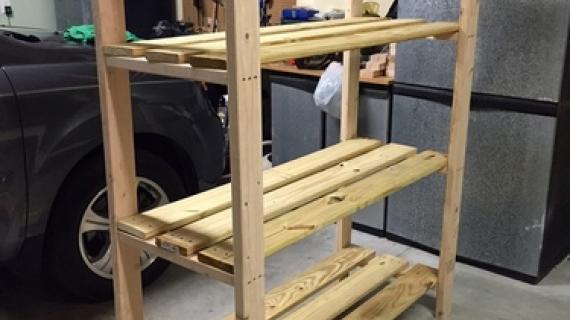
- THIN SHELVES: Because the shelves are only 1-1/2" thick, this creates more space vertically
- YOUR NEEDS: Customize shelving placement as needed or to add workbench or garage media center
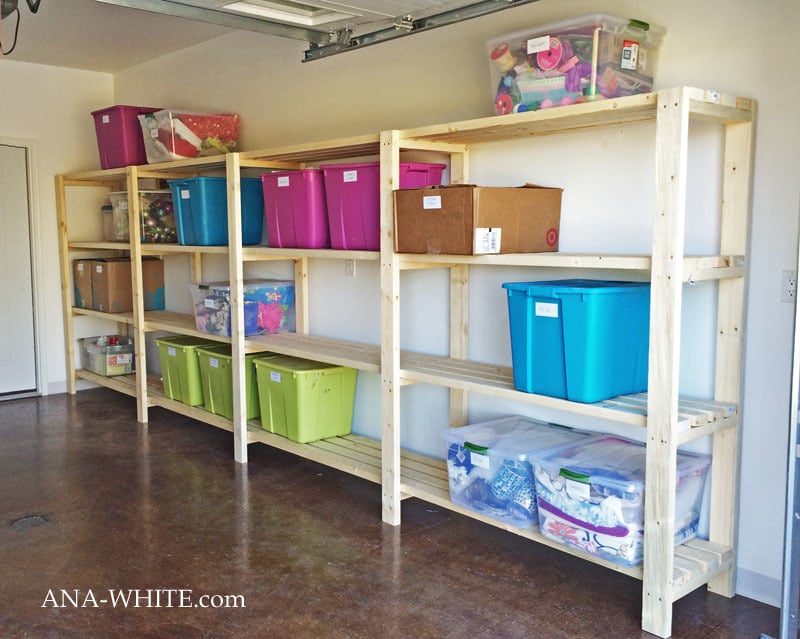
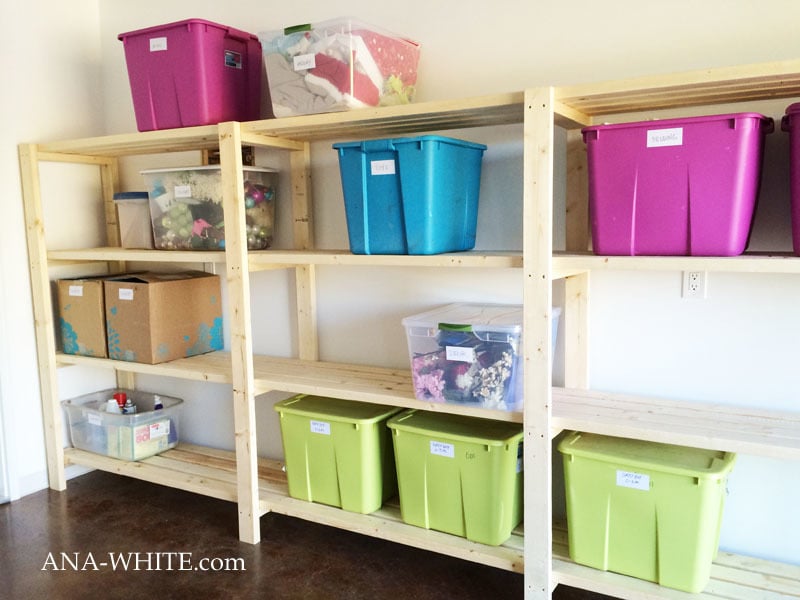
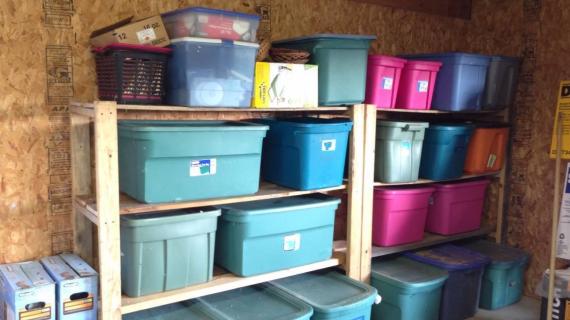
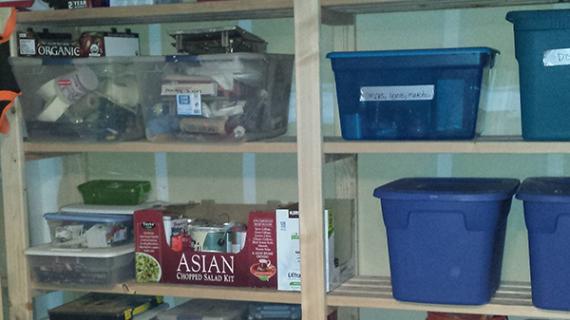
- FITS TOTES: Designed to fit totes and boxes
- MOVEABLE AND REUSEABLE: Easy to take apart and reuse the 2x4s
Customization Ideas for Freestanding Garage Shelving
Utility Workaround: Built around water heater and with roll out shoe bench.
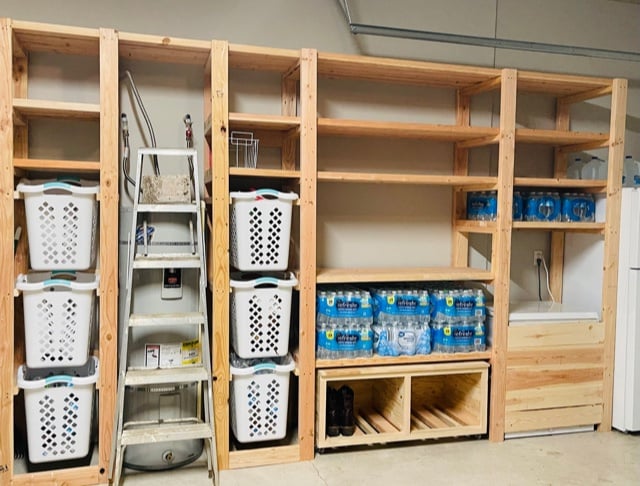
Click for more photos and details
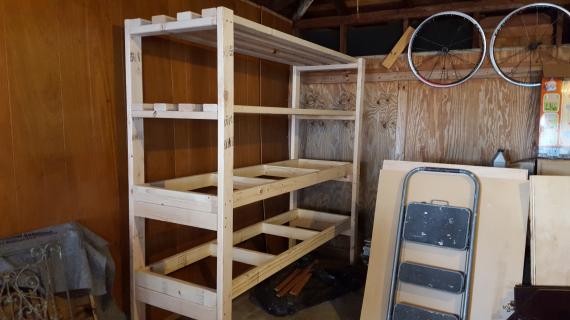
Around the Door: Shorter end to fit around garage door:
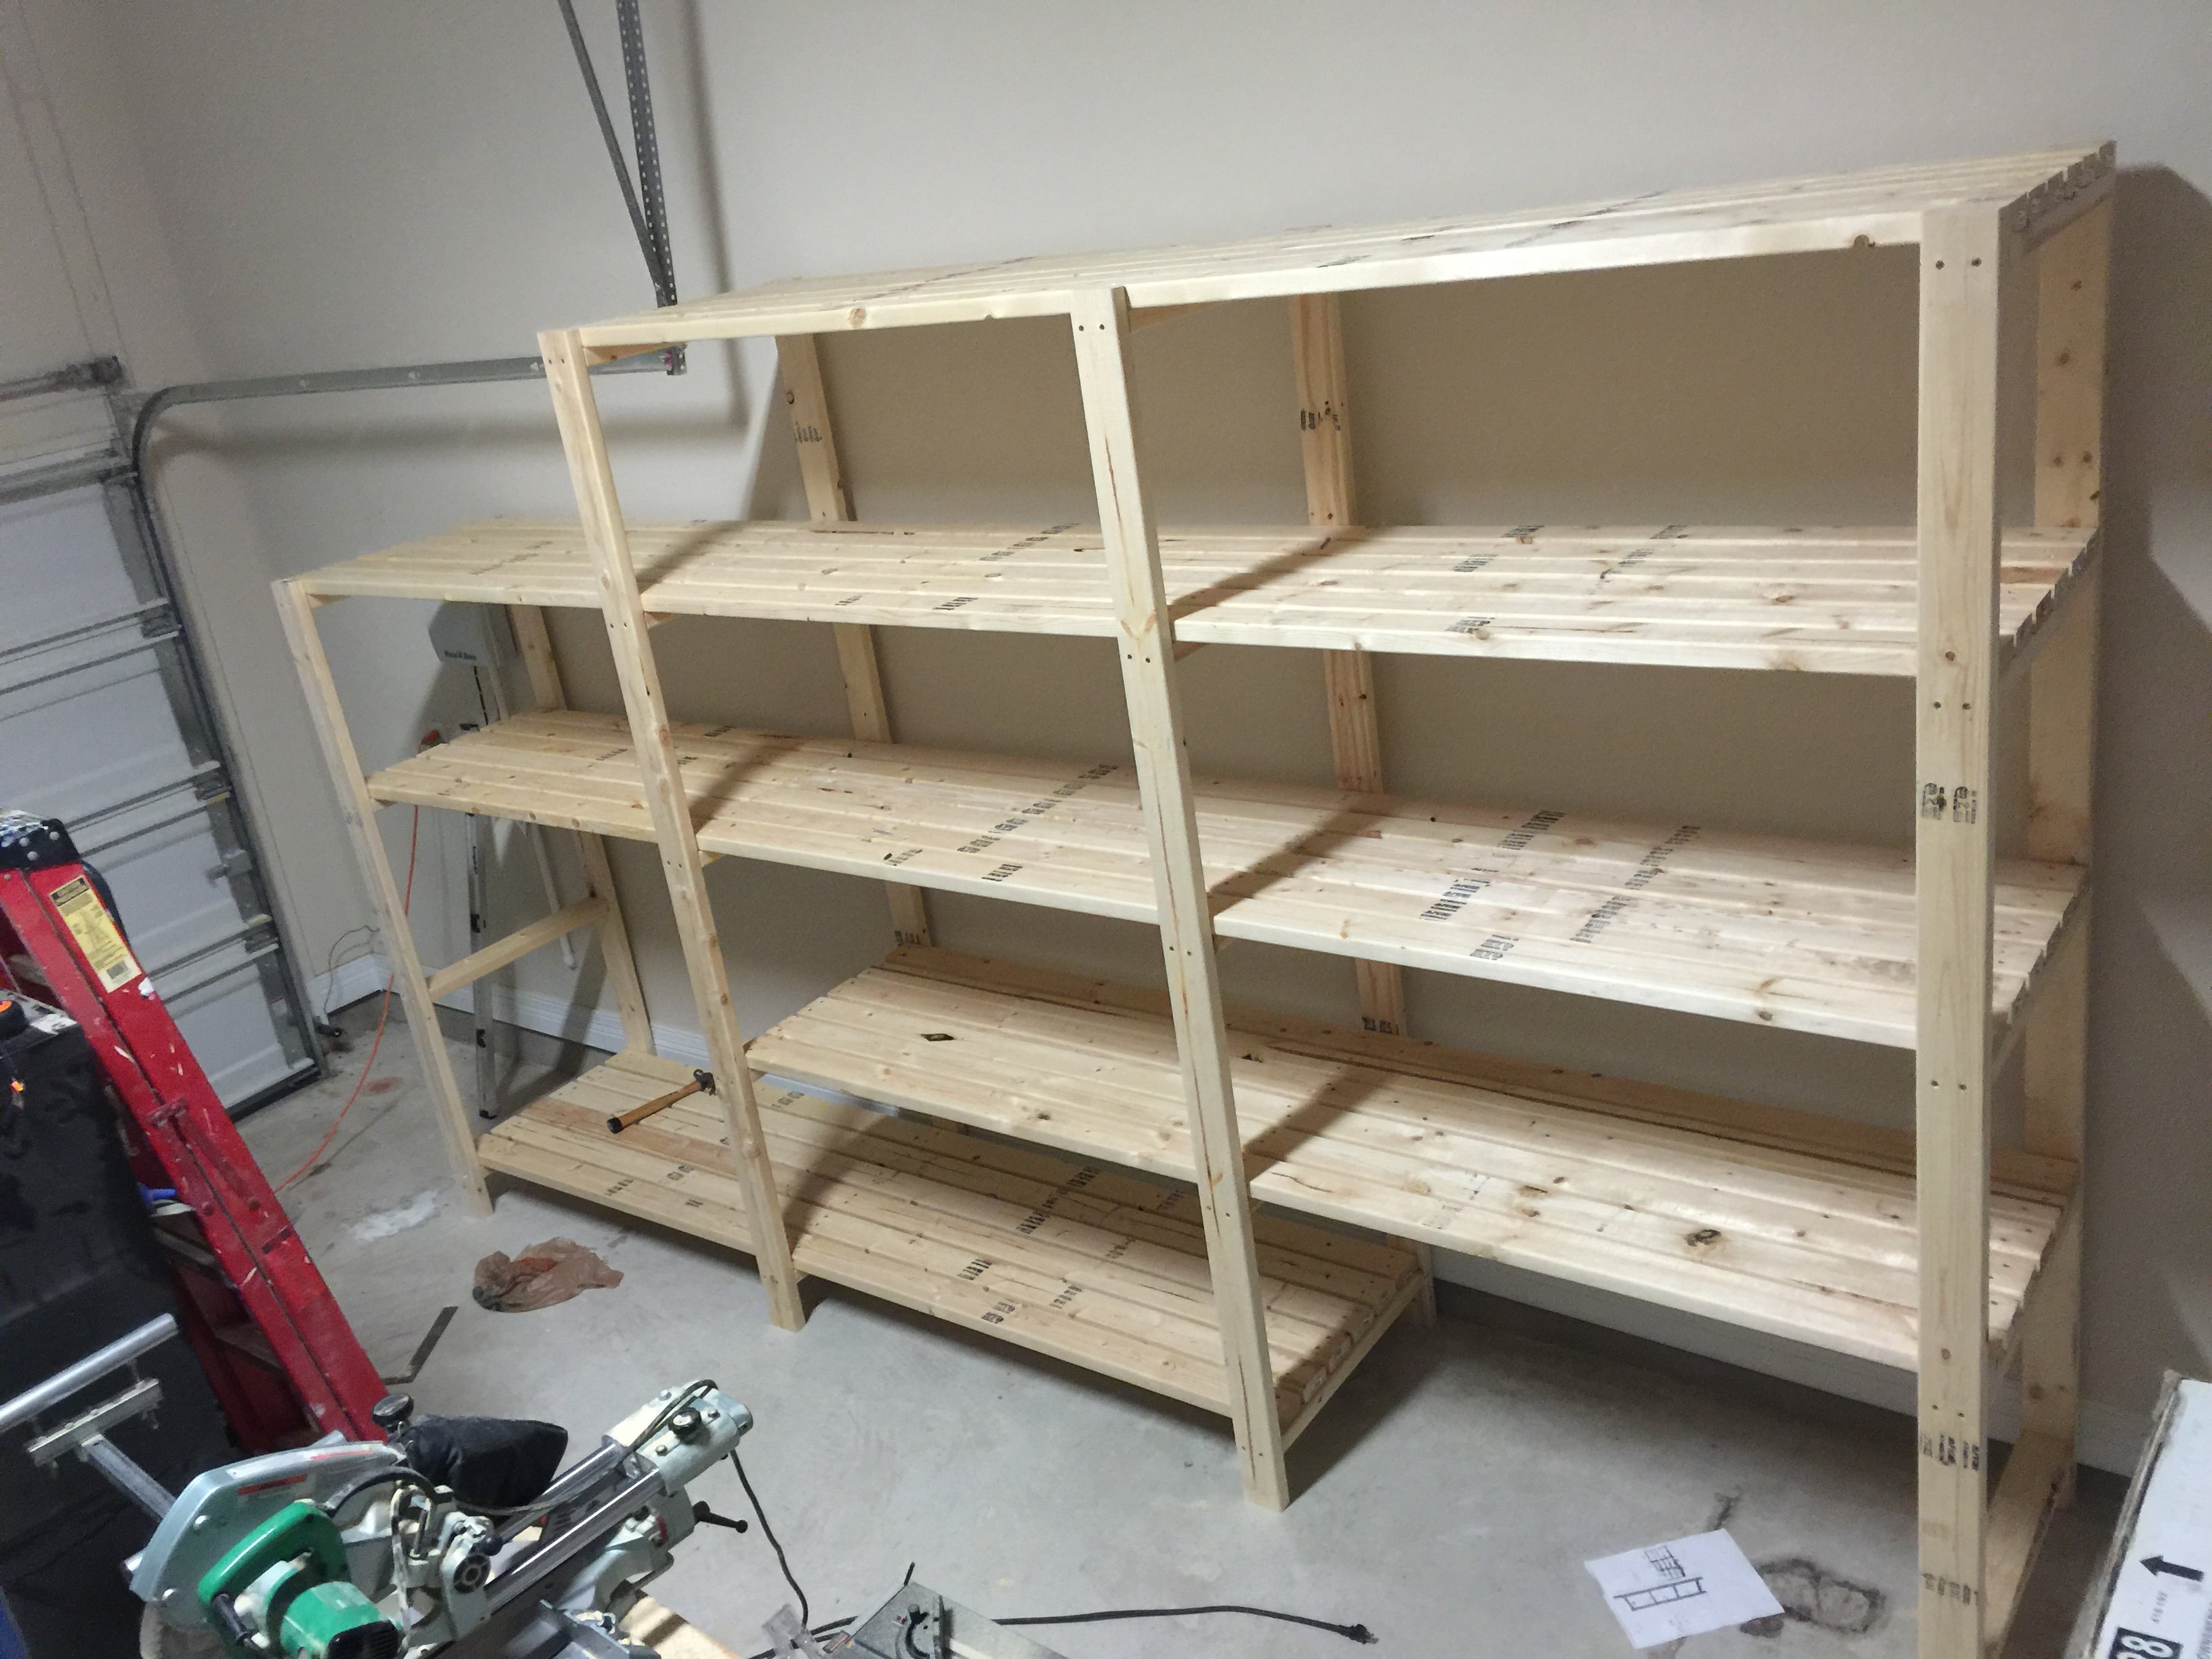
Click for more photos and details
Face Lift: This user added a barn door to the front
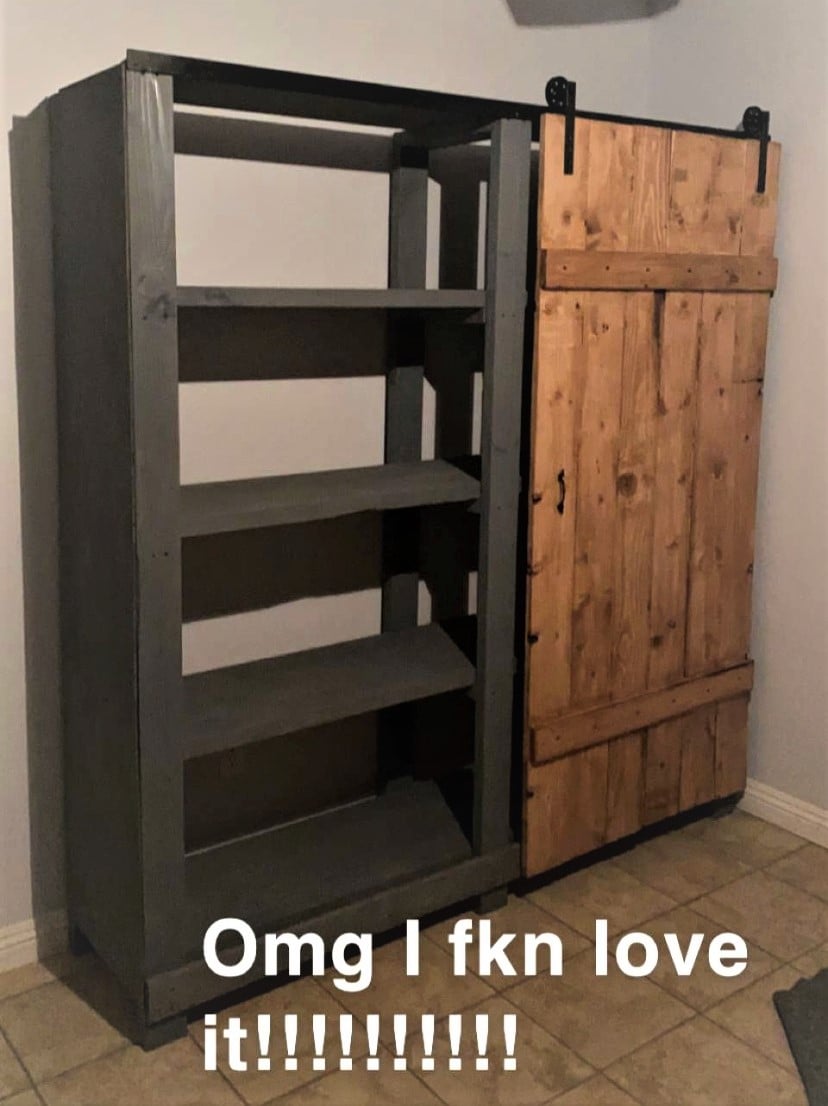
Click for more photos and details
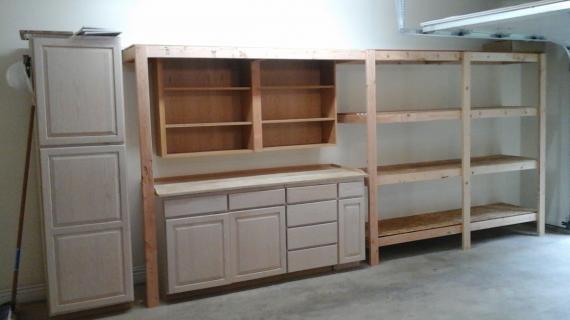
Work Around: A built in workbench in the center, could also be used for a TV
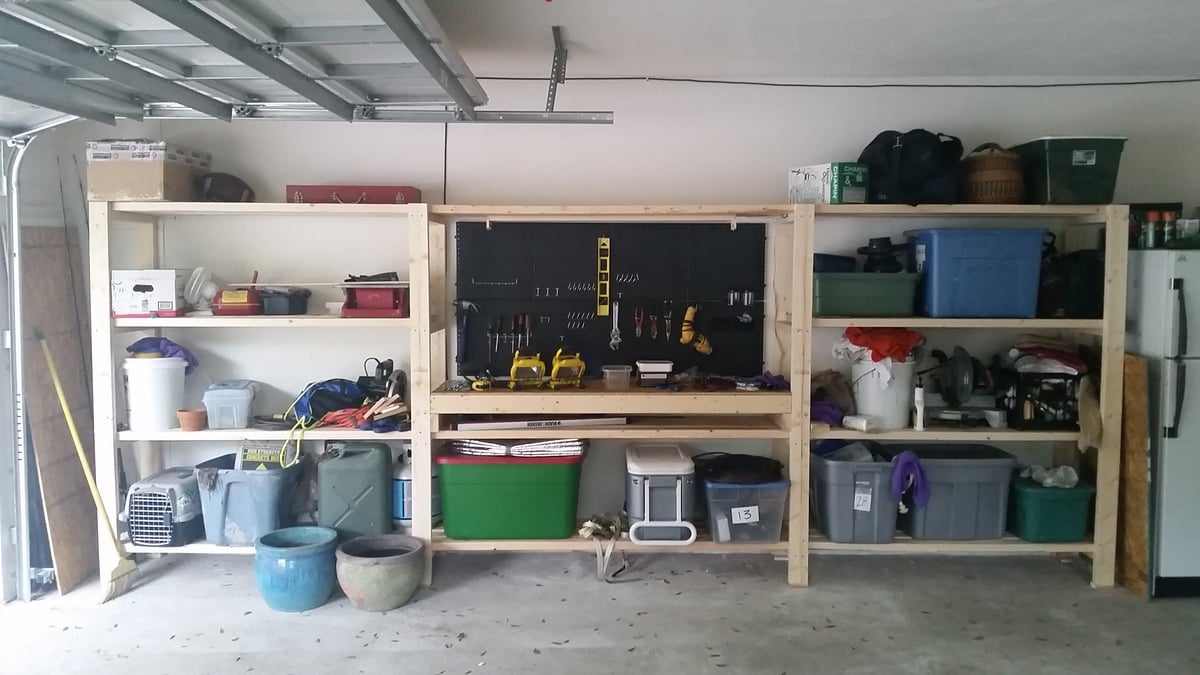
Click for more photos and details
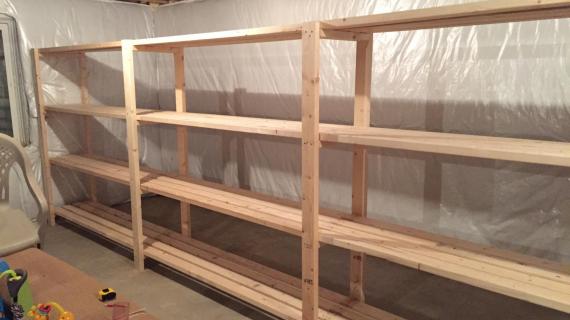
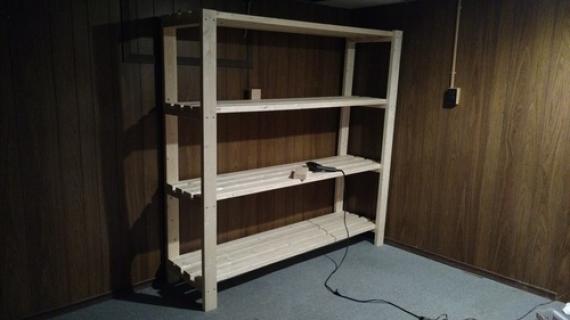
Concrete Basement Wall: Not required to be attached to the wall
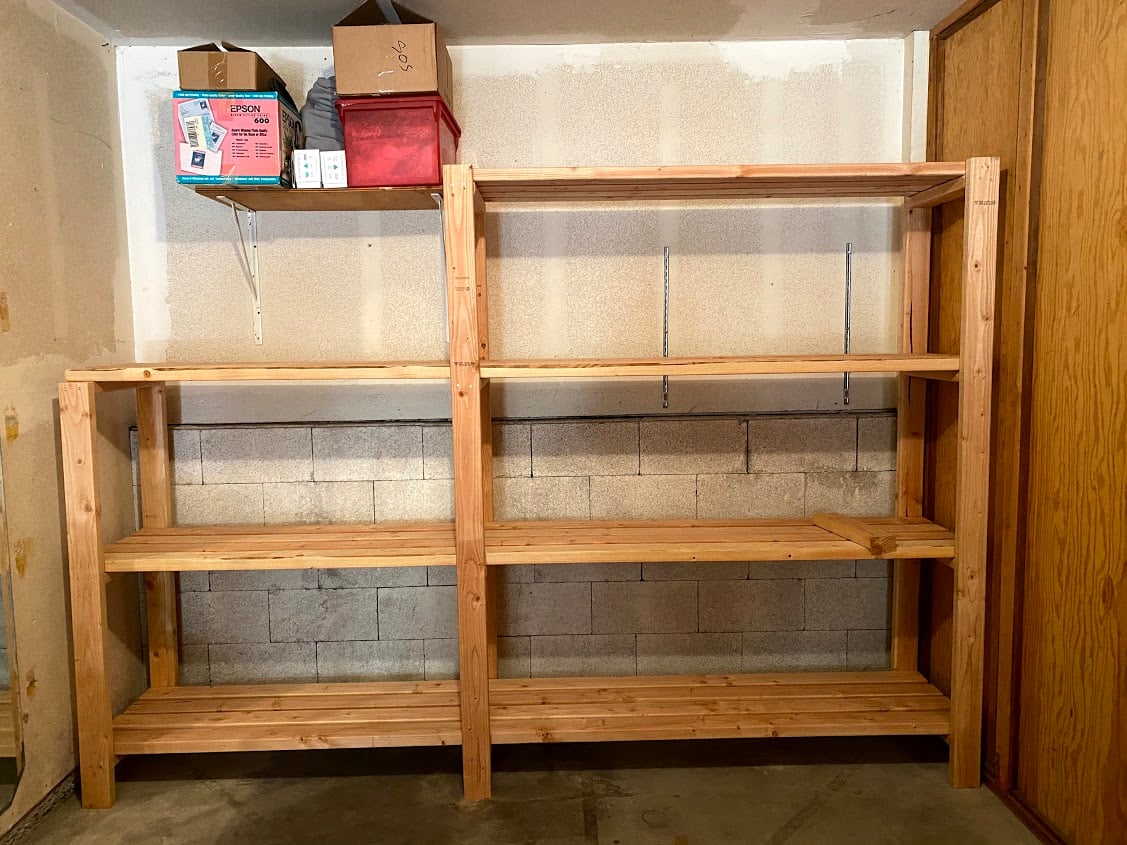
Click for more photos and details
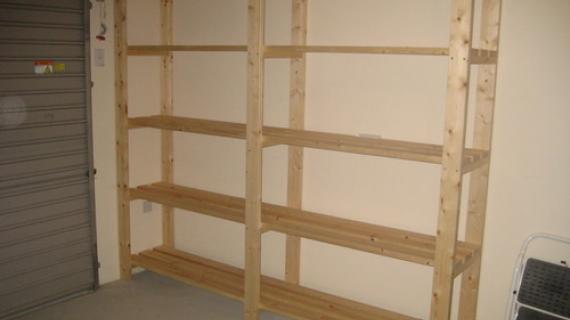
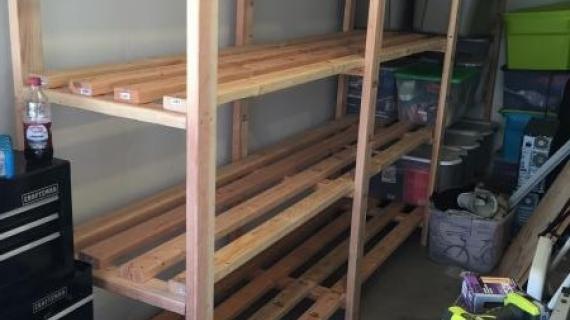
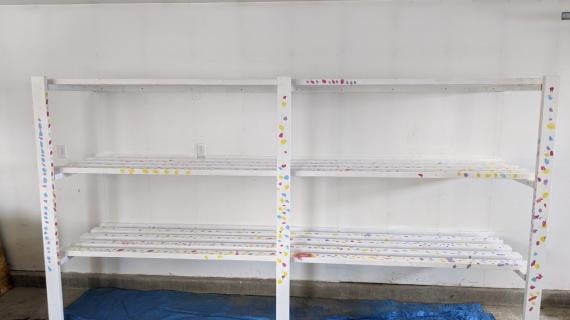
Finished: The shelving is solid wood, so you can paint or stain it easily
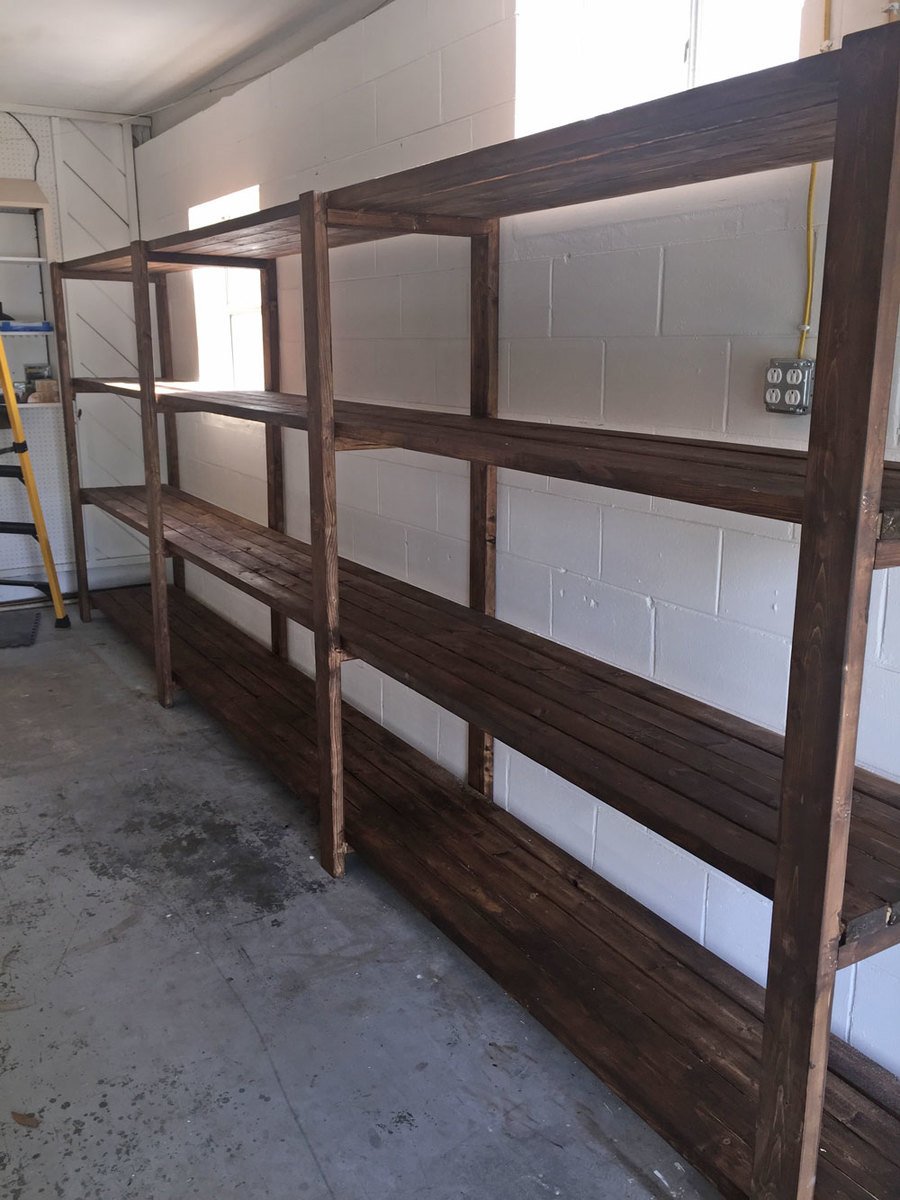
Click here for more details and photos
Video Tutorial
Here is a very quick video of building this garage shelving:
Project Notes
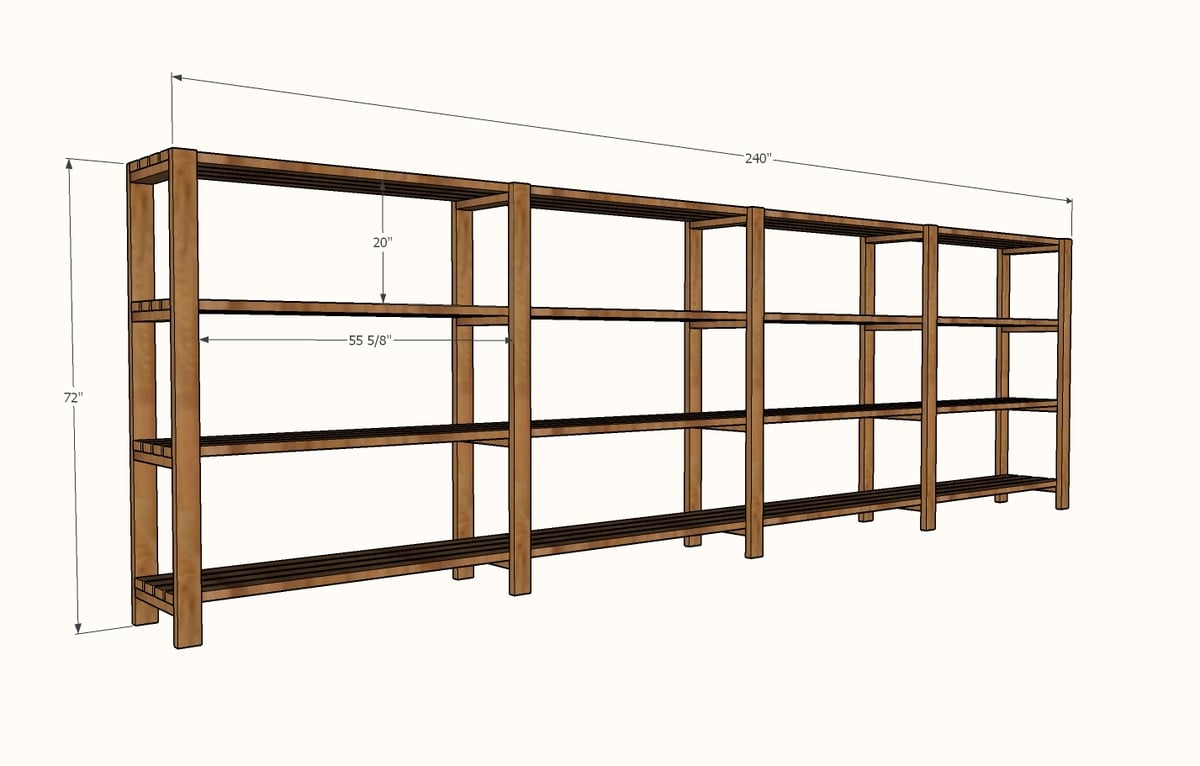
- You can make your shelving as long or short as you want.
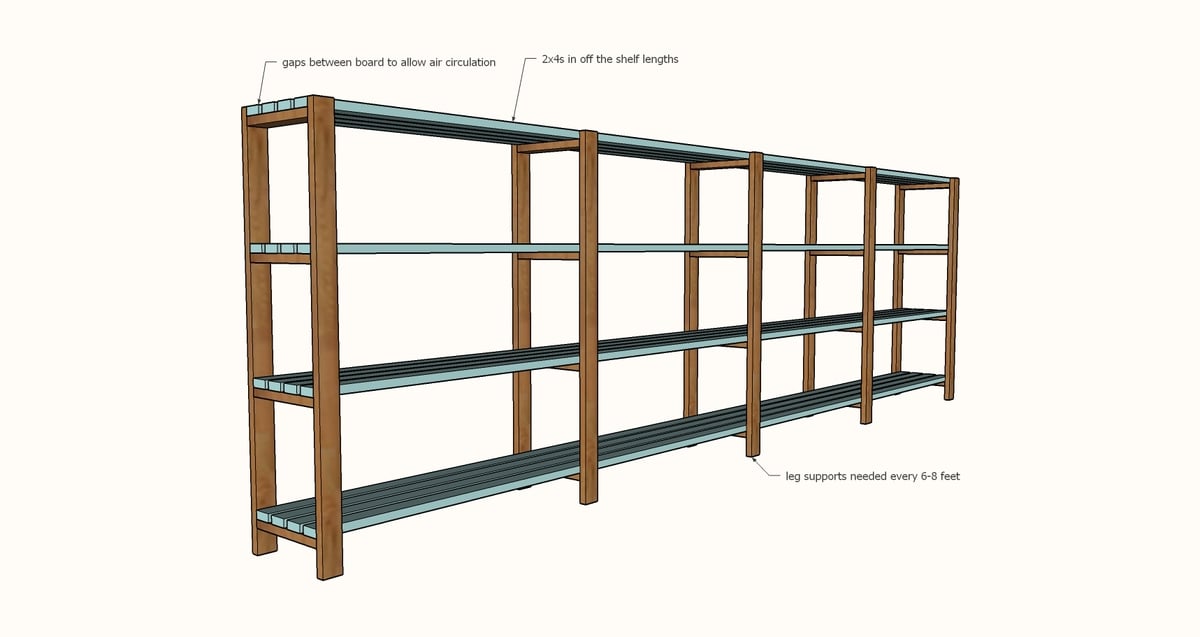
- The span between leg sets can be altered. Mine are about 5' apart, and it's plenty strong. According to the Sagulator you can put about 200 pounds on a six foot long shelf, made of 2x4 boards - but do test. For heavy objects, like bulk food or water, make the span less.
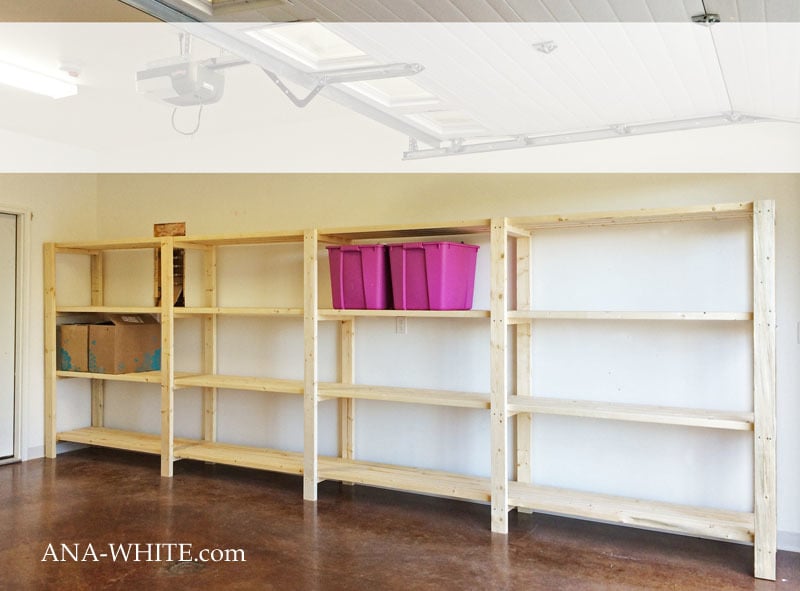
- You can go taller with the shelving, but do consider forward tipping - you will want to attach to the wall.
- You can add more shelves, at any height. And the shelves can be partial or full length
- I recommend you secure to the wall to prevent forward tipping or racking
Pin For Later!
![DIY Garage Shelves [Freestanding]](/sites/default/files/inline-images/7_19.jpg)
Preparation
- 2 - 10' long 2x4s PER Leg Support (I had 5 leg supports, so I bought 10)
- 4 - 2x4 - length of shelf PER SHELF (I bought 16 2x4 @ 20' long because I had 4 shelves, 20' long each)
- 2-1/2" self tapping wood screws (star bit don't strip), two per leg/per shelf board
- Additional screws for anchoring to wall to prevent forward tipping or racking
PER LEG SUPPORT
2 - 2x4 @ 72"
4 - 2x4 @ 17"


Please read through the entire plan and all comments before beginning this project. It is also advisable to review the Getting Started Section. Take all necessary precautions to build safely and smartly. Work on a clean level surface, free of imperfections or debris. Always use straight boards. Check for square after each step. Always predrill holes before attaching with screws. Use glue with finish nails for a stronger hold. Wipe excess glue off bare wood for stained projects, as dried glue will not take stain. Be safe, have fun, and ask for help if you need it. Good luck!
Instructions
Step 1
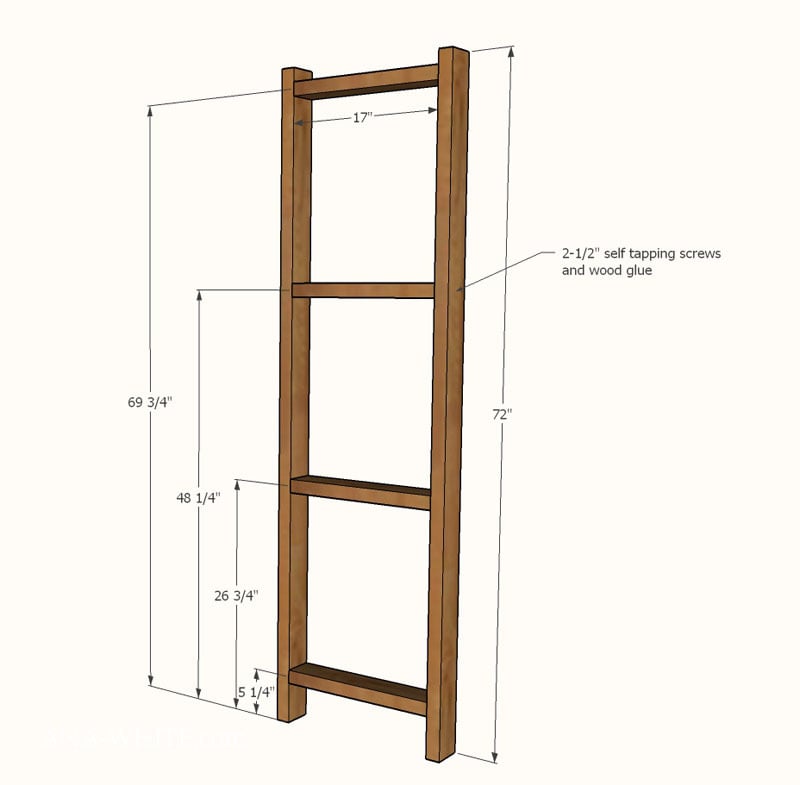
Mark out placement of shelf supports on each of the legs. Attach legs to shelf supports with 2-1/2" self tapping screws and glue.
Step 2
Mark out on 4 of the shelf boards the placement of the leg supports. Attach 2 to top shelf and 2 to bottom shelf with screws. I attached the outer boards first, flush to the inside of the leg boards. This will create the basic shape of your shelving unit.
Adjust for square. Then add remaining shelf boards and screw down.
Attach securely to wall to prevent forward tipping or racking.
It is always recommended to apply a test coat on a hidden area or scrap piece to ensure color evenness and adhesion. Use primer or wood conditioner as needed.


Comments
Camp Grandma
Fri, 09/12/2014 - 07:57
Thank you again Ana!
I came to your site looking for plans like this and poof there they were, right when I needed them. My closets in the house require some serious decluttering and these shelves are just perfect. The same thing happened with another plan, the plan came out the very day I needed it. Love the new site btw.
TaylorMade1205
Fri, 09/12/2014 - 08:49
I am so excited
WOW Ana!!! I am so excited about these plans that I had a dream about them last night. My garage is desparate for organization with all the things I'm building from your site and here you are offering me an alternative to the stacks and stacks of stuff piling up in the garage. It will be a duanting task to clean it up, but these plans have me more motivated than ever. I'm going to build an entire wall on one side which of course I will have to determine the full board length and a smallerish one on the other so I will have wall-to-wall shelving for all my many items. Also a good excuse to throw out stuff that's been there for years.
Excited to start!
kmatt55
Sat, 09/20/2014 - 18:14
All that storage for $170 is a steal!
All that storage for $170 is a steal!
payne.kj
Tue, 09/23/2014 - 11:06
wall
Hi, new to all of this. How did you securely attach the selves to the wall?
jad4188
Tue, 12/01/2020 - 11:24
Did you ever get a response…
Did you ever get a response on how this was attached to the wall?
LisaDee
Fri, 09/26/2014 - 18:49
Thank you! Thank you! Thank you!
I've been refurbishing my home and have one room that I've kept my tools and materials in. That will be the last room to be done. It was a mess! These shelves are perfect! They're temporary for this room, but once I build my small shed, they'll be resized for that. This was easy peezy! Fast too! My son helped me and didn't think we could get it done by the time he had to leave. Ha! 3 hours, 2 shelving units. One is 5 feet long and the other 7. Did I mention it only took us 3 hours?!
Angie Overton
Sun, 10/26/2014 - 15:57
GREAT PLANS! Thanks!
Yesterday afternoon my daughter and I built some shelves from these plans. We had to make due with what we had so we used rescued lumber. I look forward to making another set.
This was an easy project that just me and my 14 year old were able to complete in one afternoon. The plans were easy to follow and it was a great bonding time for us as well. Thank you for the plans.
edapina
Wed, 11/26/2014 - 07:08
Just what I was looking for!
I have been living in my new home for the last 13 months and I still had a big mess in my garage from the move (can any one relate to this?). So it was time to put some plan into action to organize it before I was kicked out of the house ;-) and looking around for simple but sturdy solutions to build I stumbled upon this website and its wonderful array of plans for all skill levels so I went ahead bought the wood and started building and I couldn't be any happier with the results I got. Thanks Ana for taking the time to creating and maintaining this website for all of us newbie woodworkers and also big thanks to the community for their participation!
jgravitas
Fri, 12/05/2014 - 13:05
No pocket holes?
Ana, I know from reading some of your other plans that you're a big fan of the Kreg jig and pocket hole screws (as am I). Is there a reason you decided NOT to use them here?
literaphile
Fri, 12/05/2014 - 15:39
Just a guess, but probably
Just a guess, but probably because this is a utilitarian design and the looks don't matter much. The main benefit of pocket holes is to hide joints so that furniture looks more polished and "professional", but that's not really a concern here.
sunilg7
Fri, 03/27/2015 - 16:21
osb board for shleving
i made similar one in my garage, i used osb board for shelving
sparkling
Sun, 04/12/2015 - 16:21
Garage Shelving and Organization
I can't wait to get started on this project and clean up all the junk in the garage. Thank you so much for the video and plans.
payne.kj
Tue, 06/02/2015 - 10:32
20' 2x4s
I can't wait to build about 4 sets of these things! I just need to figure out how to get 20' long boards home from Home Depot in my Minivan!
payne.kj
Tue, 06/16/2015 - 05:16
basement floor
It seems my basement floor is a bit uneven, I'm assuming to allow for draining purposes.. How would you adjust these shelves to account for that?
char993
Sun, 09/06/2015 - 21:31
Awesome
Just the plans I was looking. Made such an approvement to my garage
vdotmatrix
Wed, 11/11/2015 - 10:43
LAdder Shelf Results
I made these shelves for the top of my work bench to keep from going insane,,,,they are 57" tall with shelves every 14", 8 feet long and 16" deep. I had to loose 2-18" deep shelves to accomodate my drill press.
Cloud1979
Sun, 01/31/2016 - 21:34
Wow
So I never built anything like this before and you made it look so easy so I went out and got the wood.. I had all the tools except a table saw instead I used two donkeys and laid the board on top to cut with the circular saw. My garage is weird, I have a door and I could only got 15 feet and 6 inches so I got the 10 foot wood and the 16 foot wood and well it looks pretty good thanks for the amazing plans next thing i plan to make is shelfs for the pantry area in the house I hope you have plans for those.
KimWilson
Sun, 05/01/2016 - 14:40
Attaching to walls
How did you attach them to the walls? Is this something I should consider when I'm building the shelves? Maybe attach a 2x4 to the backside of the 2nd to top shelf at a 90 degree angle so it can be screwed into the wall studs?
KimWilson
Sun, 05/01/2016 - 14:51
Board to attach to wall
How did you attach your shelves to the wall?
Should I attach another 2x4 to the wall side of the 2nd shelf down at a 90 degree angle on each end of the unit so I can attach the unit to the wall studs>
Links2
Mon, 05/09/2016 - 12:09
Board to wall attachment
The good part about this shelving unit is that the 2x4 studs (the uprights) lay flat up against the wall. As long as a couple ot hem land over wall studs you can just drill a screw threw the uprights into the wall stud. If you are able to locate wall studs you can lay out the 2x4 uprights to land over them.
Links2
Mon, 05/09/2016 - 12:06
Shelving
I just downloaded the plans for this shelving project. One thing I have noticed in most, if not all, garages is the floors are sloped either toward the middle where there is a floor drain, or they are sloped downwards toward the over head door. You make no mention of this or how to measure and cut for the slopes. If compensation isn't made for those slopes then the shelving unit will not look level, because they will not be level. Do you have advice on that?
sgrams04
Tue, 07/12/2016 - 05:03
Idea for Sloped Floor
You can buy 1.5" adjustable furniture "feet" from Home Depot - around $4 for a pack of four. Drill 11/32" pilot, tap in the plastic ring, then install and adjust the feet (clockwise to shorten, counterclockwise to lengthen). Once you get it level, anchor your shelves to the wall as the feet alone may not provide enough stability.
sgrams04
Fri, 07/08/2016 - 06:48
Actual Depth?
Can anyone provide me the actual depth once the shelf is completed INCLUDING where the 2x4 leg supports jut out? I only have 17.5" to work with (we have a small one car garage). I know 2x4's don't equate to exactly 2x4, so I'm seeing if I need to modify these plans or not. I need as much of that 17.5" as I can get!
Thanks in advance.
JANETA
Mon, 12/19/2016 - 13:15
bins for 2 x 4 shelves
Can someone please tell me what size bins work best with the plans as they are presented? The totes look big and don't waste space.
Luis colon
Sun, 01/01/2017 - 09:29
Puma Garage Organizer
Last week I took this project and came up really good.
Luis colon
Sun, 01/01/2017 - 09:34
Sorry here I attaching the Pic
miner1964
Thu, 01/19/2017 - 20:45
Plans
Your plans rock, as they show materials list and cut list
dbarthel
Tue, 09/05/2017 - 23:16
Suggestion for improving shelves
One issue with this design is that the weight of the shelves is completely supported by the screws of the uprights. To solve this just double up the upright 2x4s by adding another behind to go between the shelves. One to support the first shelf from the floor. Another to support the second shelf from the first. Etc.
tennety
Mon, 01/01/2018 - 16:52
Can you share a picture?
Would you be able to share a picture? It will help to understand your improvement.
Thank you!
wiley5007
Wed, 09/05/2018 - 04:57
8ft span?
Would an 8' span require a middle leg support or would one on each end be enough?
In reply to 8ft span? by wiley5007
Brian Famous
Wed, 09/05/2018 - 05:49
Support for an 8' span
The amount of support you need for an 8' span, and more particularly if you'll need a center support, will depend greatly on how much weight you plan to put on the shelf.
By itself, a 2x4 laid on it's long side will support it's own weight without sag. It will even support additional weight. Turn it on it's short side (with the crown up) and the amount of weight it can support goes up dramatically because you go from 1.5" of wood to 3.5" of wood supporting the vertical load.
Assuming your 2x4s are made from Eastern White Pine, and you set them on end, each 2x4 can hold approximately 80lbs per foot over an 8 ft span. Compare that to if you lay them on their side, where you'd only get about 15lbs per foot.
Remember also that if you're laying them on their end you'll also use a few more of them. If you use 6 total and your loads are evenly distributed across all 6 boards, you should be able to support a total of an estimated 480lbs per foot of shelf. Though I would be extremely hesitant to suggest putting even close to that much weight on the shelves and now you would be over taxing the risers supporting the shelves...
I guess the short answer to your question is you should be fine with an 8' span and no middle support as long as you're not overloading the shelves.
Iacosta
Fri, 06/05/2020 - 19:48
2x8 instead of 2x4
do you think this same plan but with 2x8s instead of 2x4s on the shelves will work as good as it is now?
Thanks!
Tsu Dho Nimh
Wed, 09/05/2018 - 08:56
https://www.woodbin.com/calcs
https://www.woodbin.com/calcs/sagulator/
Go to this site and enter the variables. It will tell you if you need support or not.
clarehannah
Thu, 06/20/2019 - 19:52
Maybe I’m missing it, but is…
Maybe I’m missing it, but is there a way to print off the instructions and materials list? I have a really hard time doing projects like this on the phone with the ads popping up and the need to scroll. Is there a way to find a pdf version? I really wanna try to build this :)
sukumarj
Tue, 02/11/2020 - 05:23
Thanks Ana for posting this…
Thanks Ana for posting this project.
This was my first project and I spent less than $180 to get this done.
It was very easy.
Thank you!!
Iacosta
Sun, 05/31/2020 - 05:39
2x8 instead of 2x4
Thanks for sharing. I'm about to tackle this next week but I was wondering, can I substitute the 2x4s of the shelving for 2x8? I would maintain the leg supports exactly as you use in this plan.
Thanks!
pappamike
Tue, 09/14/2021 - 06:40
Simple to make and easy to modify
I have made several of these for my garage. Two of them are exactly these dimensions for the sides of the garage, but in the back of one side, i made a set that were double deep to allow for the Christmas boxes and more stuff. It worked like a champ. Also, on one set of shelves, where I knew there would be greater load, I put scrap pieces of 2x4 underneath each of the support ladder joints with glue and screws.
Nav Zum
Sat, 01/22/2022 - 06:18
This is so informative!
This is so informative!