

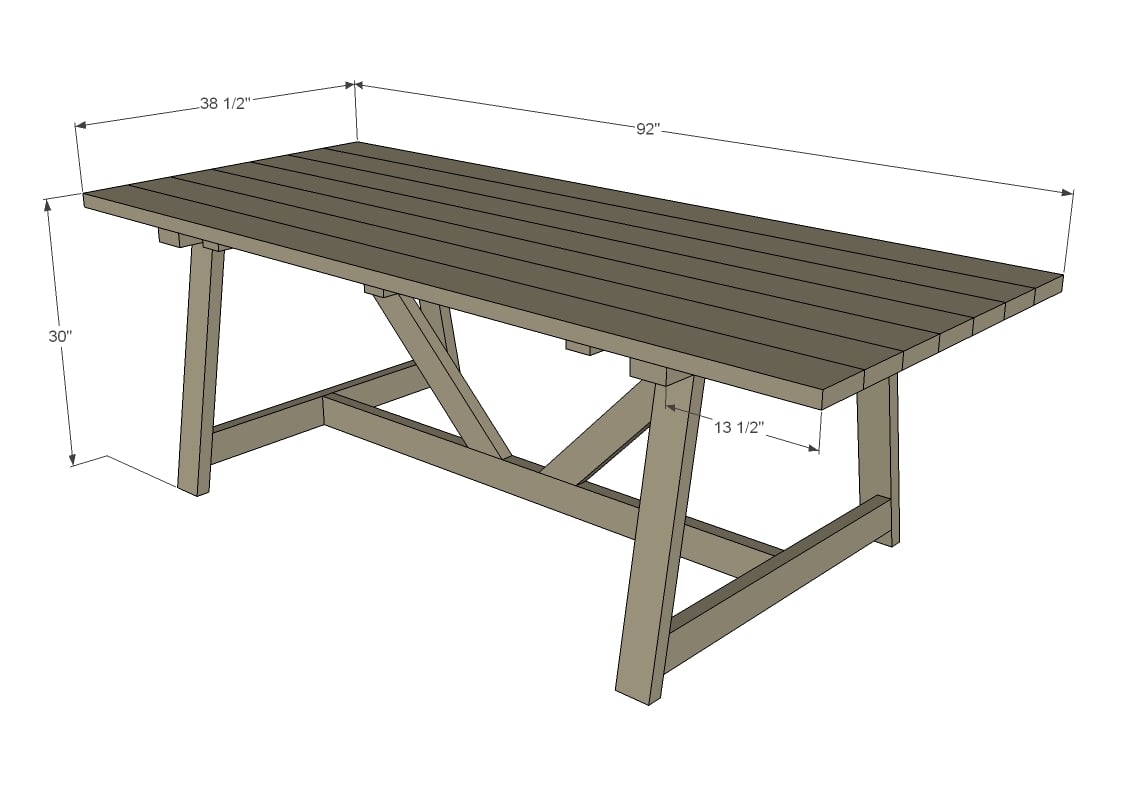
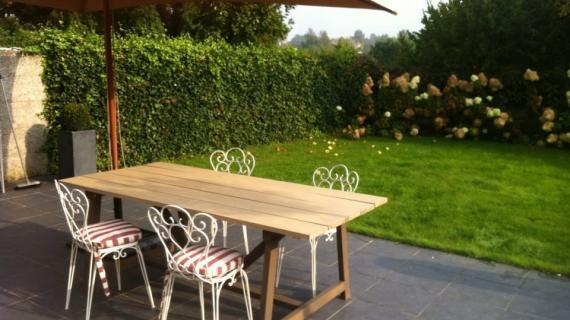
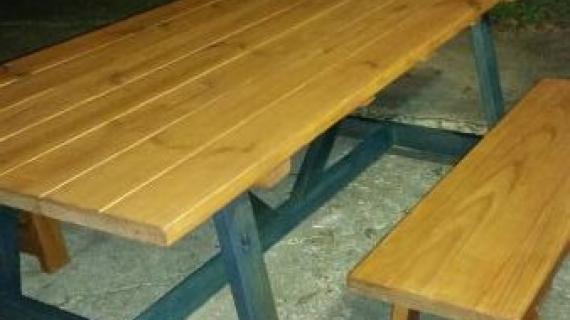
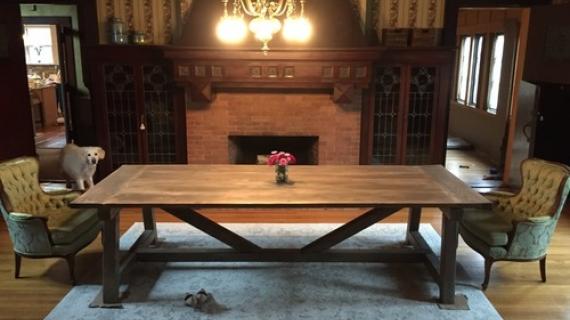
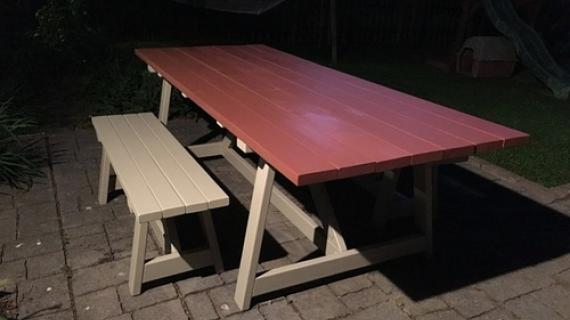
This indoor or outdoor farm table has beautiful truss styling and a solid wood construction. You'll love the step by step plans. Average cost to build is $100.
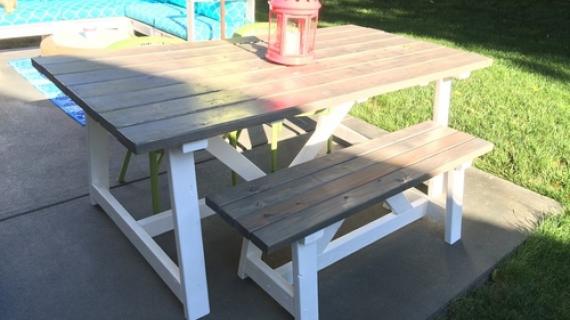
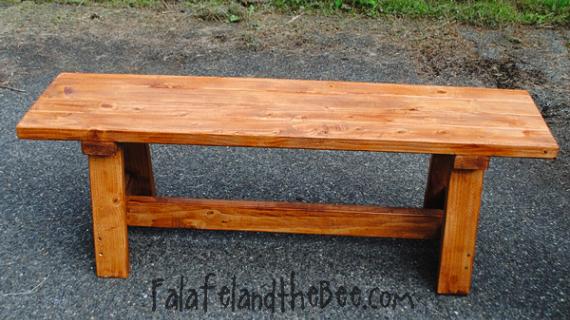
You can also build matching benches.
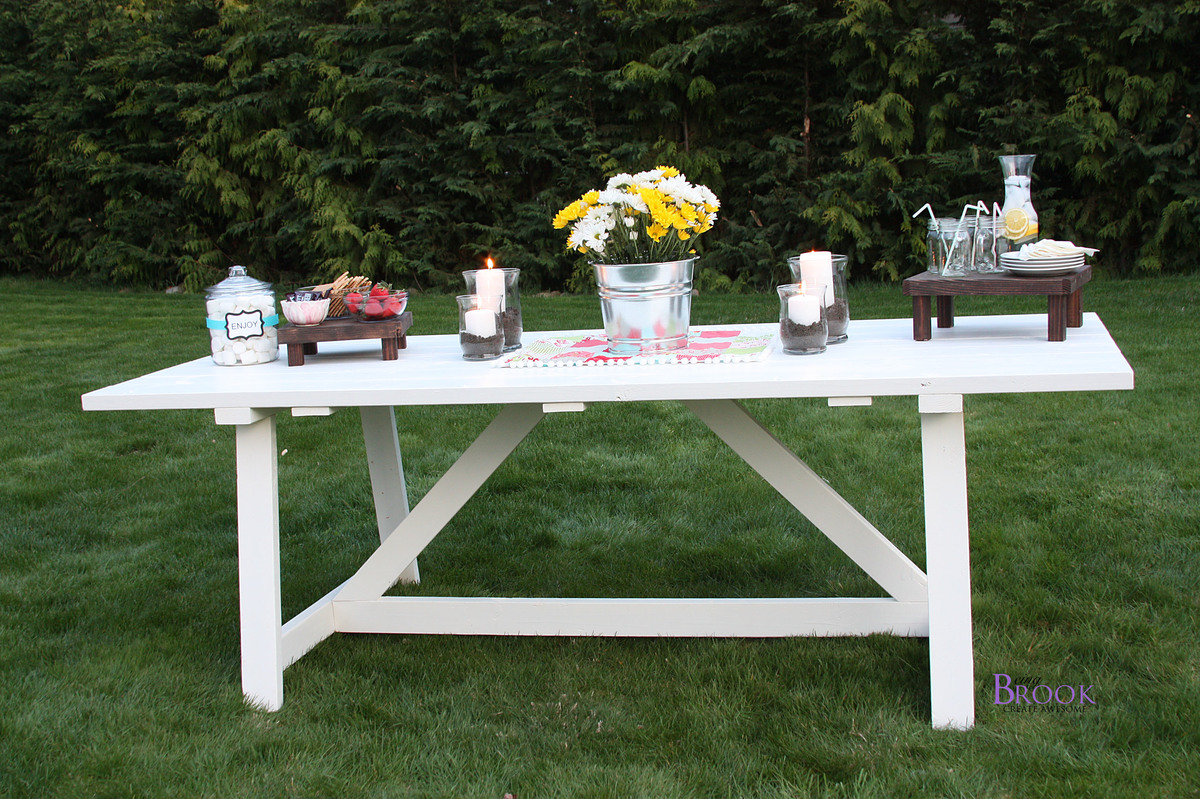

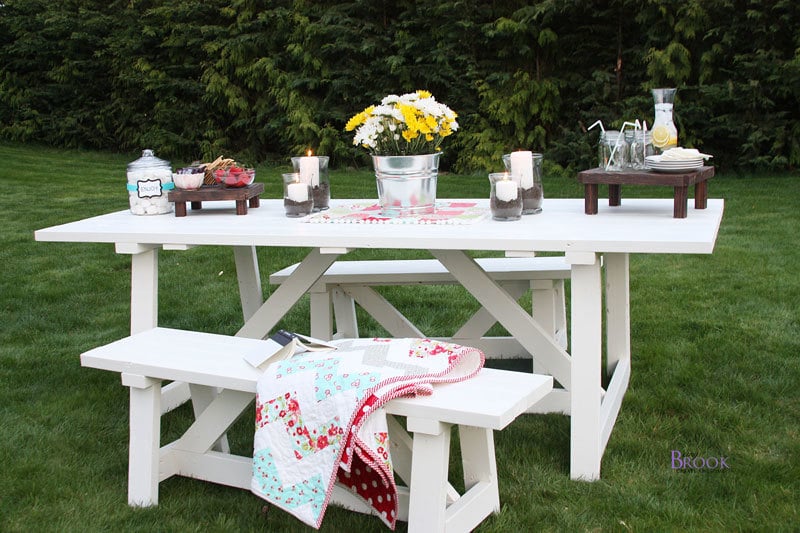
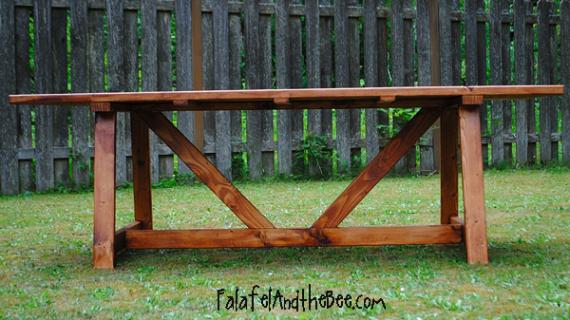
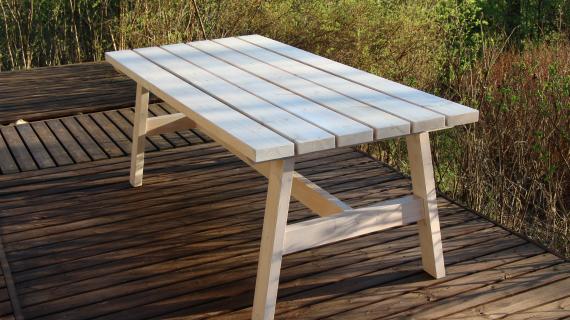
We love the simple styling of this truss style table. It's perfect for indoors or out.
For this table, we used 2x4s for the legs instead of 4x4s. This makes the project easier to build and less expensive. This table was built for about $100.

This table and bench set was built by Being Brook. Make sure you stop over and visit Brook for lots more photos and tips.
- The matching bench plans are available here.
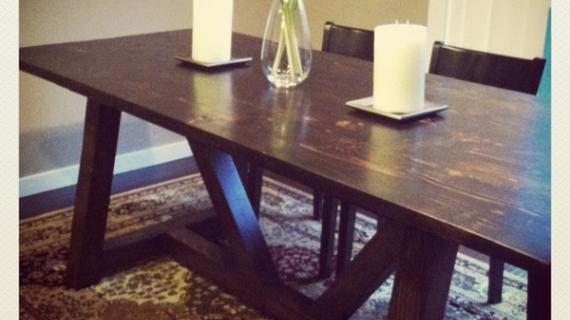
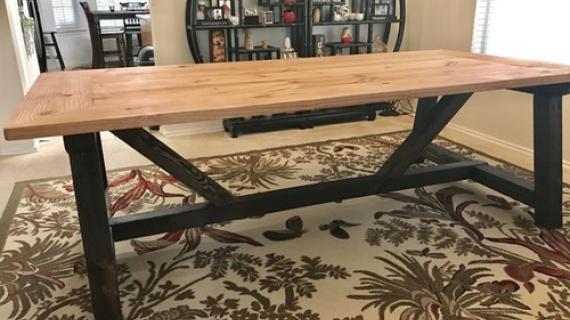
- We also have a 4x4 leg version with similar styling, you can find plans here.
Pin For Later!

Preparation
5 – 2x4 @ 8 feet long
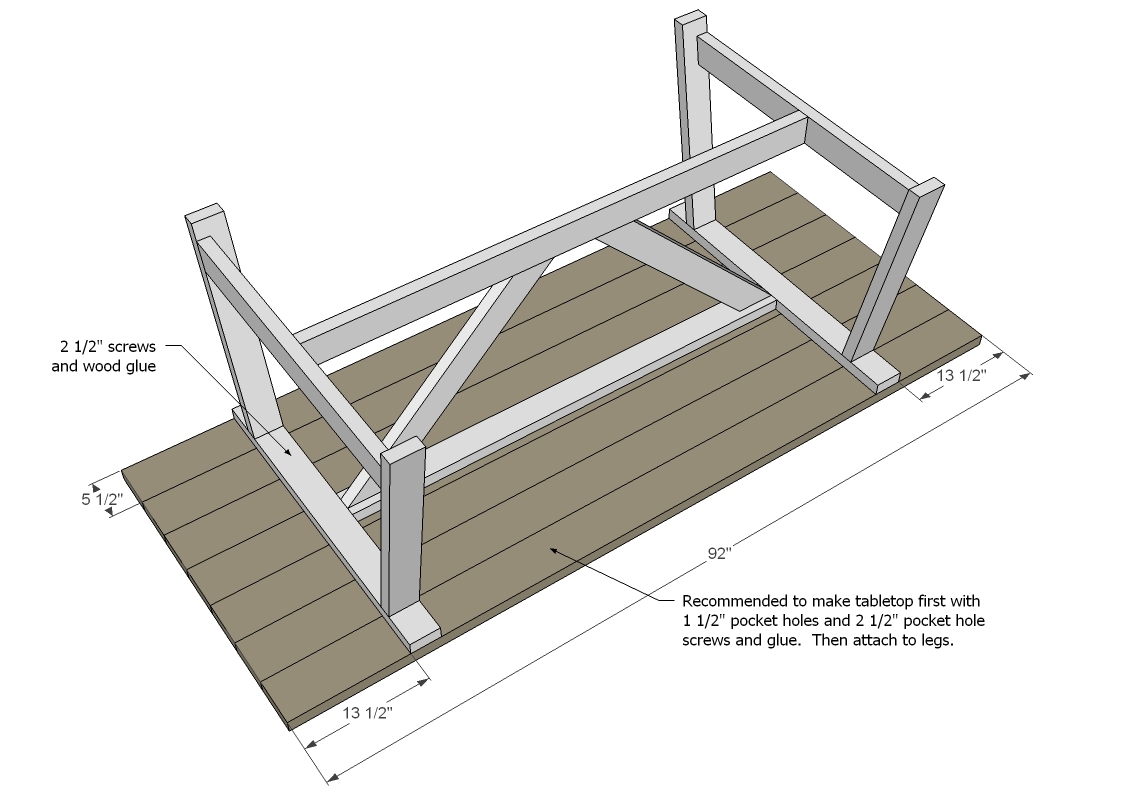
7 – 2x6 @ stud length (92 5/8” long)
2 – 1x3 8 feet long
2 ½” self tapping wood screws
2” self tapping wood screws
Wood glue
Finishing supplies
- 2 – 2x4 @ 38 1/2"
- 4 – 2x4 @ 27 3/8” – both ends beveled at 10 degrees off square, ends are parallel
- 2 – 2x4 @ 36 ¼” – long point to long point, ends NOT parallel, cut at 10 degrees off square
- 1 – 2x4 @ 62”
- 1 – 2x4 @ 58”
- 2 – 2x4 @ 30 3/8” - both ends cut at 45 degrees off square, ends ARE parallel to each other
- 7 – 2x6 @ 92” long
- 6 – 1x3 @ 17 1/2"


Instructions
Step 1

Build two ends as shown above, exactly the same.
Step 2
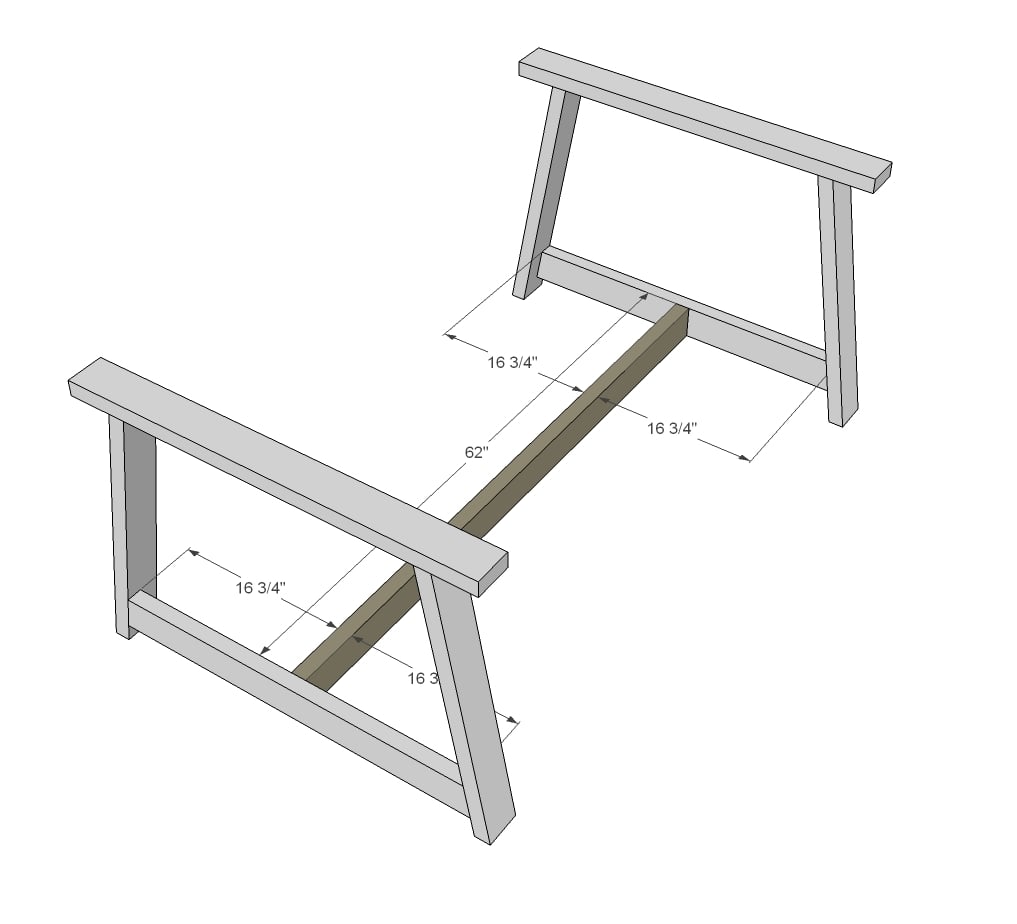
The add stretcher.
Step 3
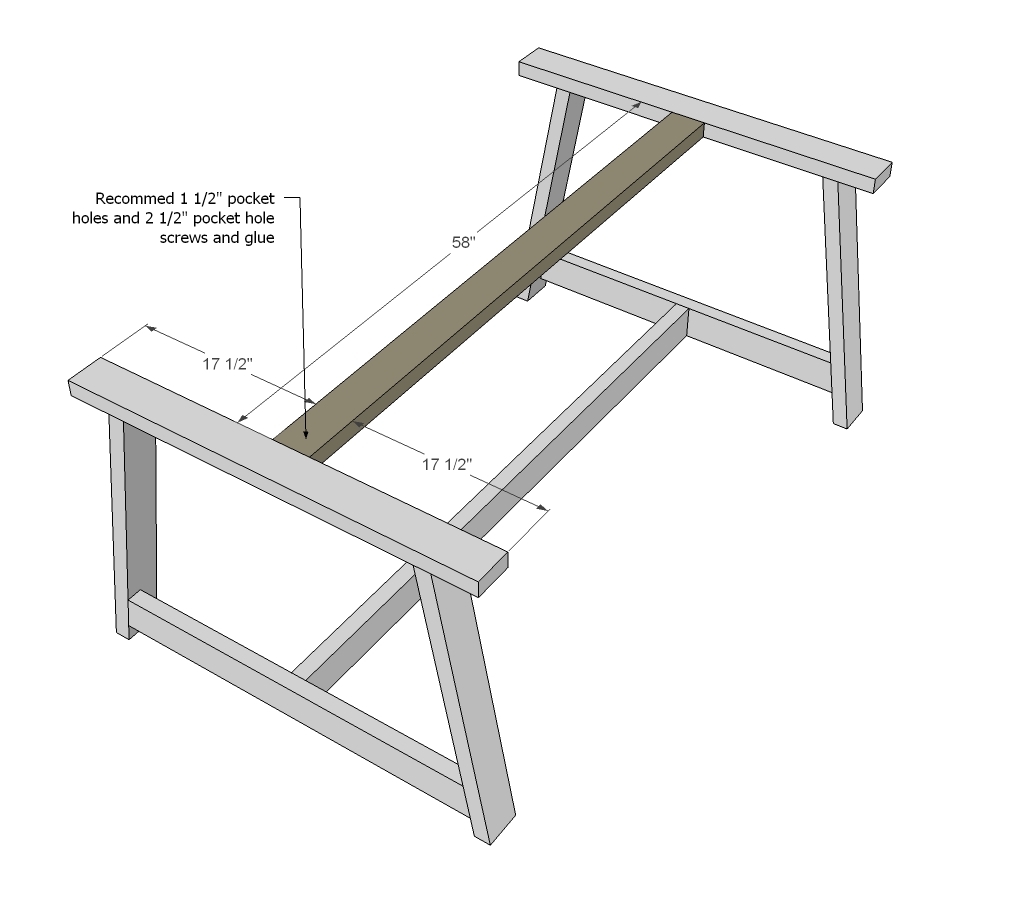
Followed by center support.
Step 4
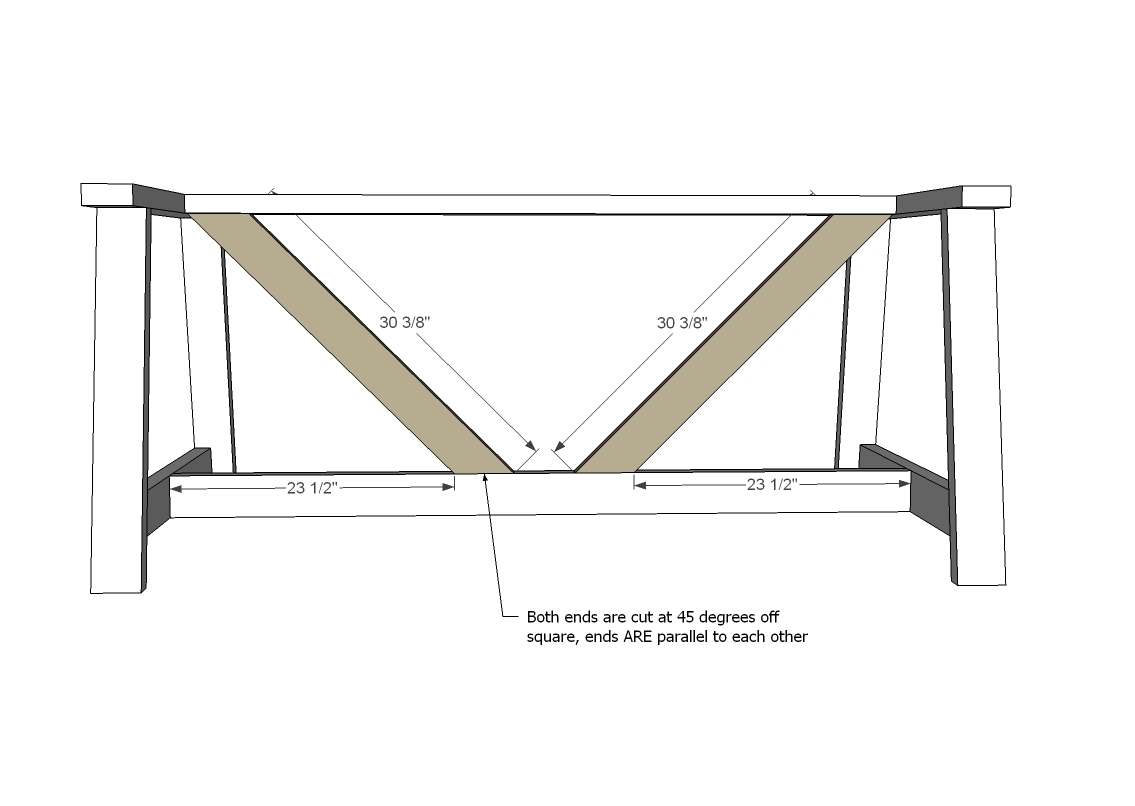
And then the cross supports.
Step 5
Step 6
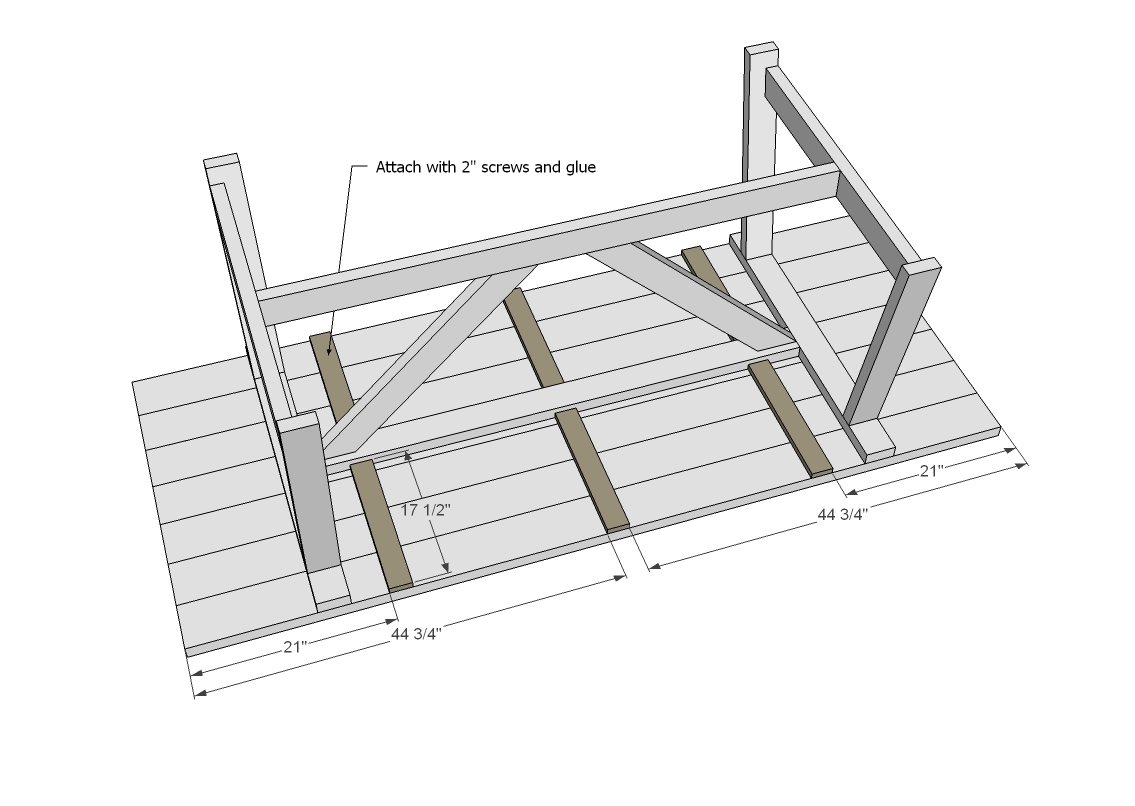
And then add these for keeping the boards straight and a little extra character.
It is always recommended to apply a test coat on a hidden area or scrap piece to ensure color evenness and adhesion. Use primer or wood conditioner as needed.


Comments
whitney_smith
Tue, 04/24/2012 - 13:36
Wow!
I was just thinking we needed some pretty new table plans to drool over! Good job ladies.
Darin Molnar (not verified)
Tue, 04/24/2012 - 15:51
PDFs
Why even bother with PDF plans if they never work? Good lord!
broncofan23 (not verified)
Wed, 04/25/2012 - 05:06
PDFS
Darin,
There's no need to make such snide comment. If you don't like this site then don't use it. And if you're too much of a moron to figure out how to make your own PDF's then you deserve all the trouble you have.
Cherica (not verified)
Wed, 04/25/2012 - 12:33
You're upset that the PDF link doesn't work. Seriously??!!
With all that Ana does at no cost to any of us and you want complain about the PDF link not working? It's not like there aren't multiple options for obtaining the plans. If you must complain, find something more critical to complain about!
In reply to PDFs by Darin Molnar (not verified)
tracysmith
Wed, 04/25/2012 - 14:33
I can understand your
I can understand your frustration as many of the PDF links do not work and it's not fair to say that you are a moron because you don't know how to convert it to a PDF, not everyone knows how to do that. However, because it IS a free site and Ana IS amazing for giving us this knowledge base and teaches us new skill sets for nothing, maybe you could overlook the PDF links not working as I have and just enjoy what IS there? Just sayin'
To everyone else, lets be a little more tolerant. Not everyone knows how to do things like convert to PDF's. I don't, but I bet if I gave it a try I could figure it out. Let's not be critical if you want others to be the same way. Again, Just sayin' :-)
In reply to PDFs by Darin Molnar (not verified)
claydowling
Wed, 04/25/2012 - 17:39
Solution
Right click. Choose "Save Link As" Click OK or Save, whatever your browser presents. Problem solved.
Please be nice. Ana is being nice, and it's best to repay kindness with kindness.
In reply to PDFs by Darin Molnar (not verified)
jvcuenca
Sun, 07/03/2016 - 21:54
to convert to pdf
You can use your mouse to convert the web page to pdf. RIght click and then select convert to adobe pdf. Then save it your desktop.
donna
Tue, 04/24/2012 - 17:48
Benches
This table is beautiful I would love plans for the benches :-)
Little miss builder
Wed, 04/25/2012 - 04:44
Benches
Love this table!
Heather Palmer (not verified)
Thu, 04/26/2012 - 11:50
Love this!!!! I might like
Love this!!!! I might like the quilt just a tad more though!!!
tannisg
Sat, 04/28/2012 - 12:40
I'm with you!
Its gorgeous - my favorite color combos... One of these days I will learn to quilt...
Dona (not verified)
Thu, 04/26/2012 - 12:04
I want to build this for a friend.....
I think it's very elegant. Love the white finish.
scorridori
Thu, 04/26/2012 - 19:21
So gorgeous!
Has anybody tried making something like this out of composite decking material? As much as I love working with wood, because we are south facing & in such a dry climate, everything that we've made of wood cracks & splinters within a few years no matter how well we seal it! My only concern would be the food safety of the material. Any thoughts? Love, love, love this site!
Darin Molnar (not verified)
Fri, 04/27/2012 - 11:02
TCPDF ERROR: [Image] Unable
TCPDF ERROR: [Image] Unable to get image: file:///home/anawhite/public_html/dev/acquia-drupal-1.2.33/sites/default/files/3154809046_1335297445.jpg?1335296087
tannisg
Sat, 04/28/2012 - 12:42
Would it work to angle the legs in more?
I'm thinking this might be a great table for my kitchen!
We're going to put in a banquette (thank you Ana for not only giving me the name so I could find pics online, but proving they don't look like tacky restaurant booths!) and I don't think our current table will allow for sliding into it (legs at the corners)
this one looks like it would leave ample room at the ends but I wonder if I could move the support legs in a little for even more leg room?
Joe Haynes (not verified)
Sat, 05/05/2012 - 16:17
Bench Plans
Can you please post a link or photos of the bench plans?
tannisg
Mon, 05/07/2012 - 09:18
bench plans are on here
here you go:
http://ana-white.com/2012/04/plans/providence-bench
Karen Silver (not verified)
Mon, 05/14/2012 - 09:41
LOVE!
This is such a good looking and simple table - I am so excited to build this for our outdoor space! LOVE IT!
Russell Dominique (not verified)
Fri, 06/08/2012 - 13:16
Table top construction and how to PDF
I was searching for picnic table plans and didn't like anything I was seeing until I found this. It is just what I was looking for, only better than I could have ever envisioned. I hope to build this soon.
In step 5 it is recommended to put the table top together first with pocket hole fastening but it is also recommended to leave a gap between the boards for outdoor use. Is there a way to do that with the pocket hole fastening method or should I use another method to put the table top together? I thought of screwing wood strips across the boards to hold them together (with spacers between the boards) just outside of where the legs fasten similar to the ones added in step 6. Any suggestions?
Also for those who want to write a PDF file I have a method I have used for years. Search for, download and install the free program called CutePDF. Then whenever you want to save to PDF just select the print friendly version of the project if available and select print. When you get the printer dialog select CutePDF as your printer and you will be asked where to save and then you can save the page or pages as a PDF.
PA PA B
Mon, 06/11/2012 - 18:48
Plans versus picture
Has anyone noticed the table braces are reversed in the picture versus the plan? This drove me nuts for a few minutes. This is my second prividence table and I love it. Also, I think the price is more like $150.00 not the $100.00 . This could be the location
VH2012 (not verified)
Sat, 12/29/2012 - 17:38
Question on Table top
Hi, Ana you are amazing and I love your site and thank you so much for offering so much to us. I have a silly question for this project. How is the table top 2x6s @ 92 inches attached to eachother to form the top. Thanks for any help on this.
BigSarg
Mon, 02/17/2014 - 13:11
Wood
maybe I missed it but what type of wood do you use on this? I am new to this but trying a few of these out. Want to make sure I use the right wood.
rizingstar187
Mon, 06/30/2014 - 21:58
need to make it smaller
Did anyone have to shrink down their plans? I would like my table to be about 6 ft. Does anyone have measurements for that size?
xmarcheeba
Thu, 07/31/2014 - 11:31
Chairs
Are there plans for chairs that match this table/bench combo? I only want to make the one bench and have four chairs in the other places. I'm planning on making a modified version of this table. 6' long instead and 2x6's for the table top. This is a beautiful table and I can't wait to get started on it. I'll be using Annie Sloan's chalk paint for the base and the dark wax over the whole thing, leaving the wood grain on top. :)
James Groover
Tue, 08/12/2014 - 22:39
Love the design!
Kind of wish I had the Sketchup version of it, so I got really bored today and yesterday and got busy and made my own version for my files, Helps me build stuff when I can tear something apart in 3D and put it together again, makes the work that much easier.
Thanks for the great article and the ideas you present.
leahsheltonpri…
Tue, 02/23/2016 - 07:29
Modify plaN
Can this table be modified to longer and more narrow?
wiley5007
Mon, 02/19/2018 - 05:24
Size
I realize this post is from a few years ago but figured I'd try. I'm wanting to make this table 60" instead of 92", how would that change the dimensions of the center supports? Thank you!