
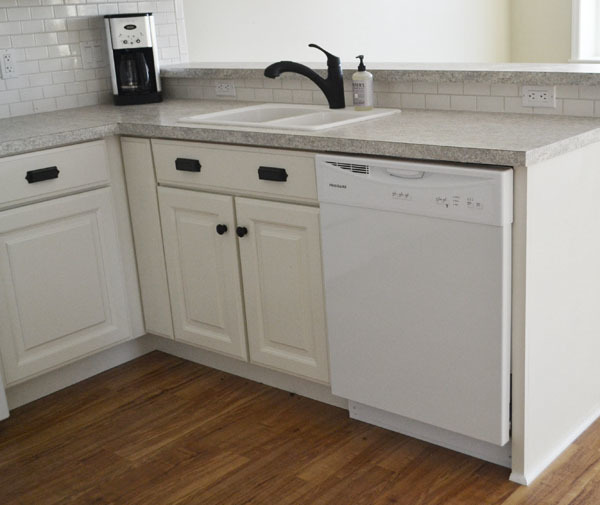

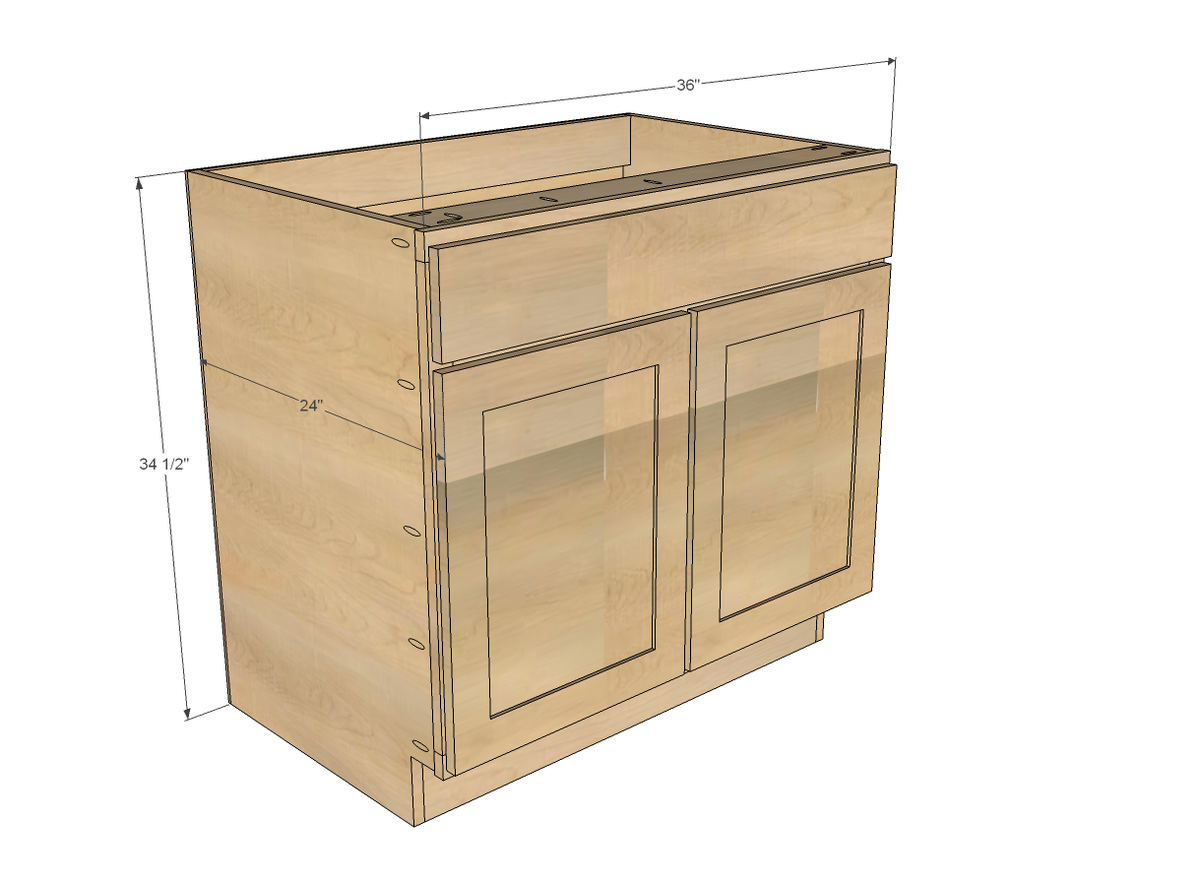
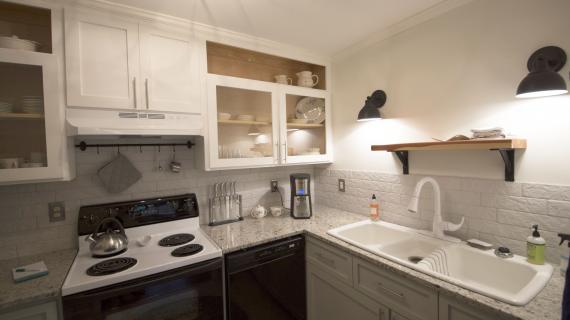
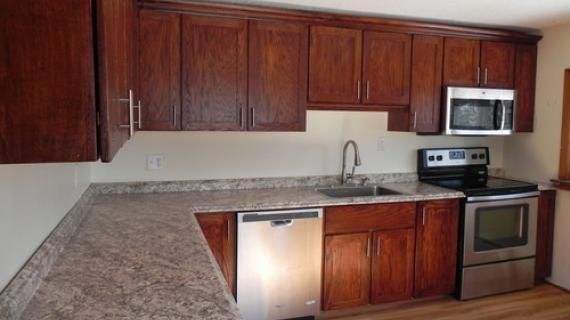
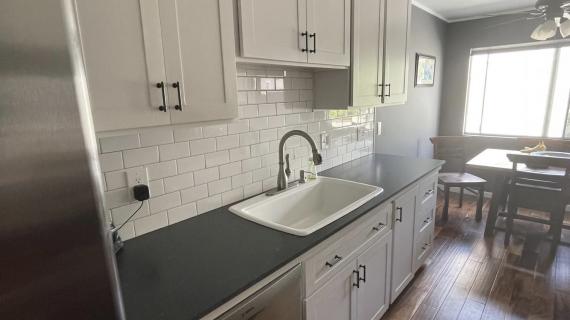
Build your own kitchen from scratch! Free plans by ana-white.com for a standard 36" sink base cabinet
Preparation
3/4" plywood ripped into strips 22 1/4" long (for sides and shelves)
3/4" plywood scrap from ripping sides and shelves (for top supports)
3/4" plywood ripped into strips 5" long (for base supports - we used cheaper plywood here)
1x2s for face frames
1x3 for center stile
1/4" plywood (for backs)
1-1/4" pocket hole screws
3/4" finish nails
For our cabinets, we used (special order about $70 a sheet for 3/4") and poplar boards for the face frames. The cabinet doors were ordered from Cabinet Now.
CARCASS
2 - 3/4" plywood @ 22-1/4" x 34-1/2" (side panels)
1 - 3/4" plywood @ 22-1/4" x 34" (bottom shelf)
2 - 3/4" plywood @ 5" x 34" (bottom supports)
2 - 3/4" plywood @ 3-1/2" (can vary) x 34" (top supports)
1 - 1/4" plywood @ 32" x 35-1/2" (back)
FACE FRAME
2 - 1x2 @ 27"
2 - 1x2 @ 36"
1 - 1x2 @ 33"
1 - 1x3 @ 21"
SHELVES - optional (unlikely for sink base)
3/4" plywood @ 22" x 27-3/4" (measure and adjust to fit shelf pins/edge banding)
DOOR/DRAWER FACE for FULL OVERLAY (1-1/4")
5 1/2" x 35-1/2" (drawer face) - can be taller
2 - 22-1/2" x 17-1/2" (door)


Please read through the entire plan and all comments before beginning this project. It is also advisable to review the Getting Started Section. Take all necessary precautions to build safely and smartly. Work on a clean level surface, free of imperfections or debris. Always use straight boards. Check for square after each step. Always predrill holes before attaching with screws. Use glue with finish nails for a stronger hold. Wipe excess glue off bare wood for stained projects, as dried glue will not take stain. Be safe, have fun, and ask for help if you need it. Good luck!
Instructions
Step 1
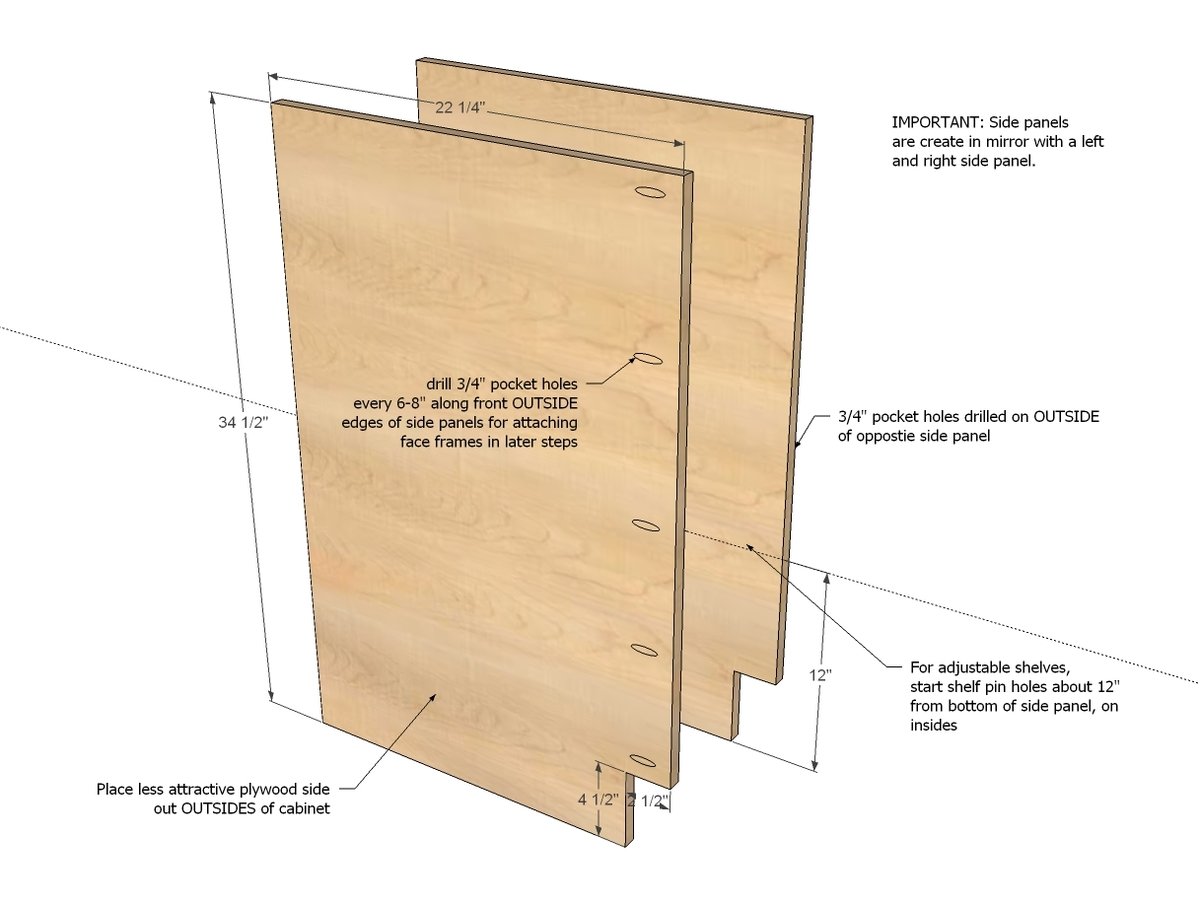
Start by creating your two side panels in mirror.
Step 2
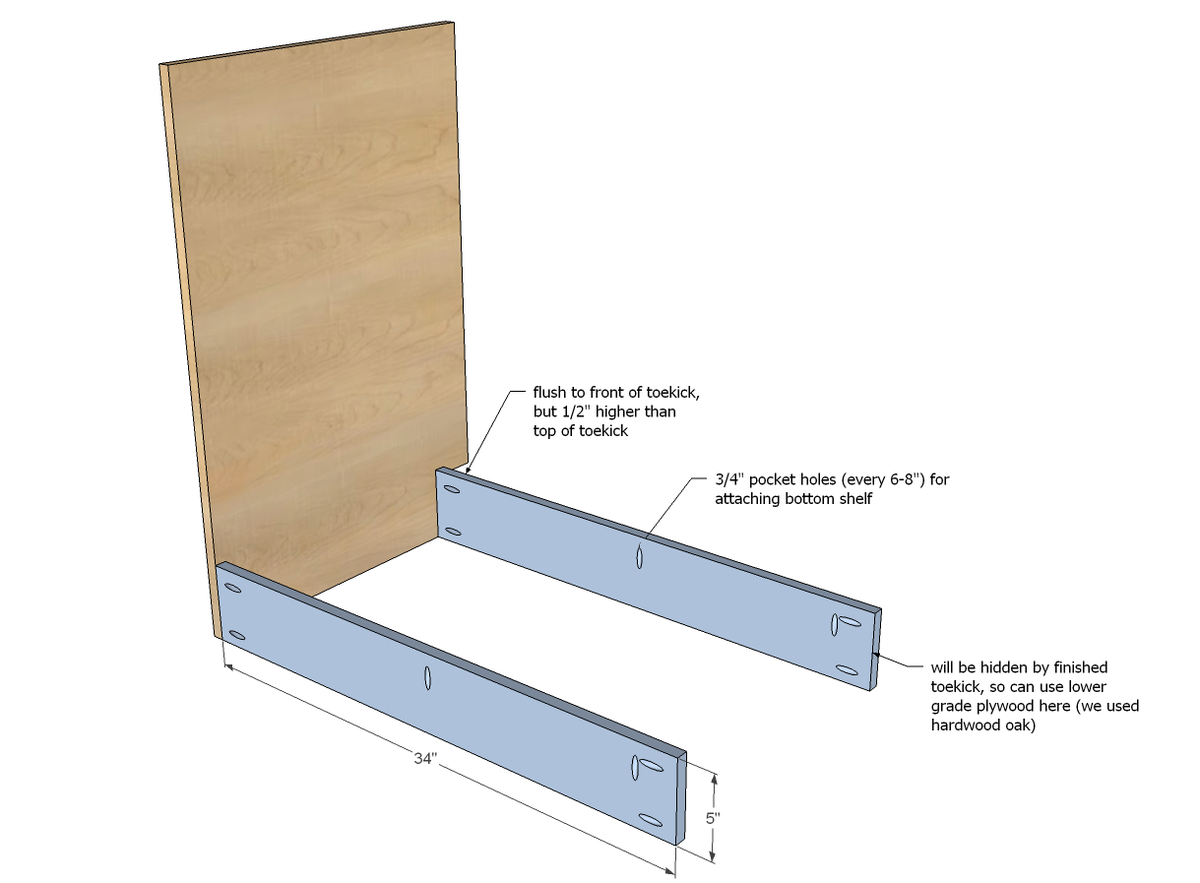
Attach the two bottom supports to the two side panels.
Step 3
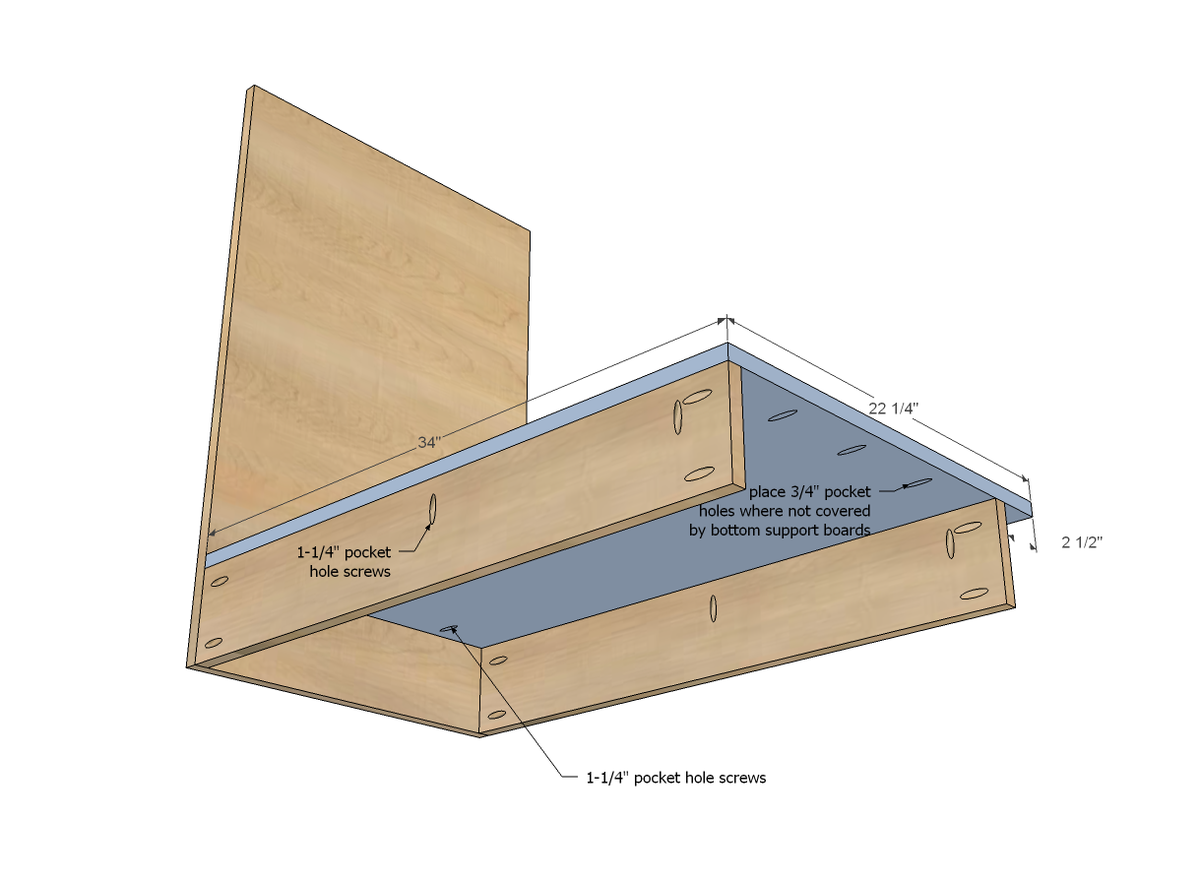
Attach bottom shelf to two bottom supports and side panel.
Step 4
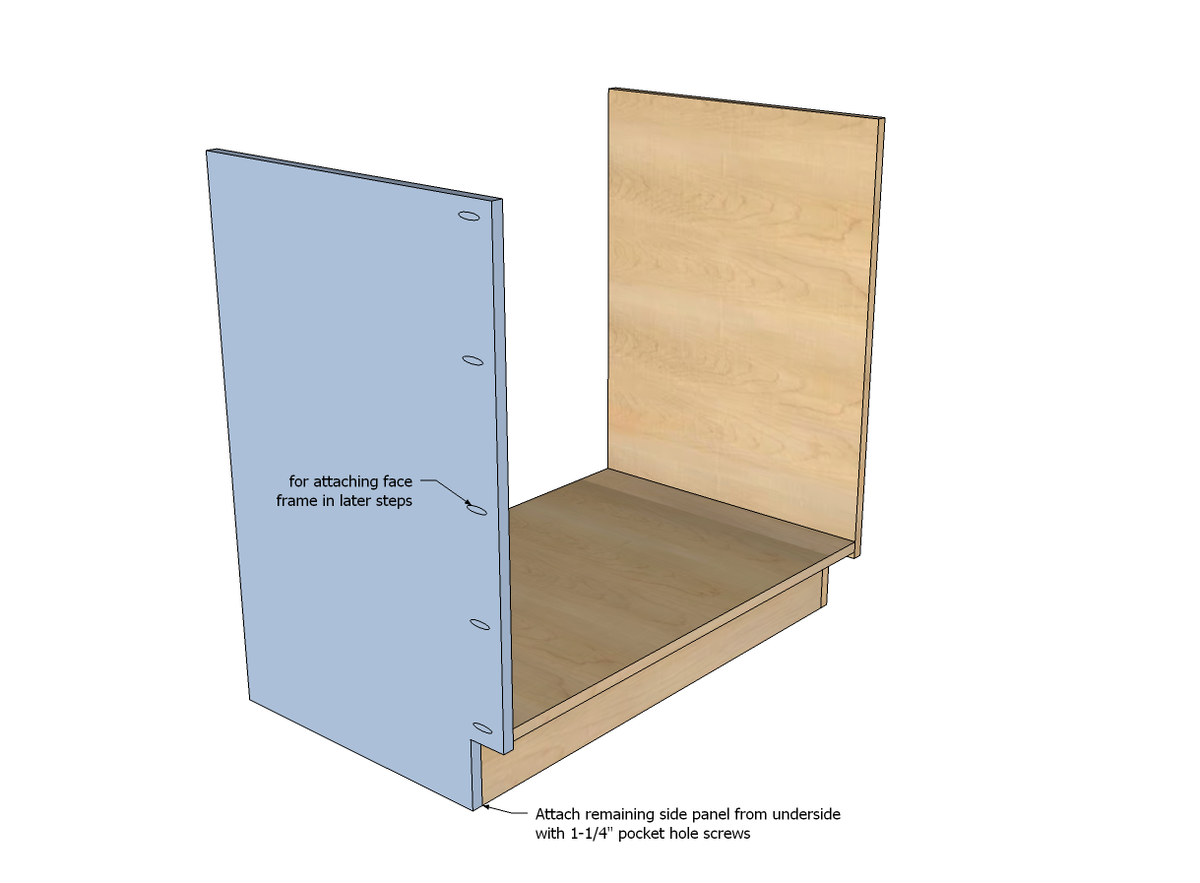
Attach remaining side panel to the base.
Step 5
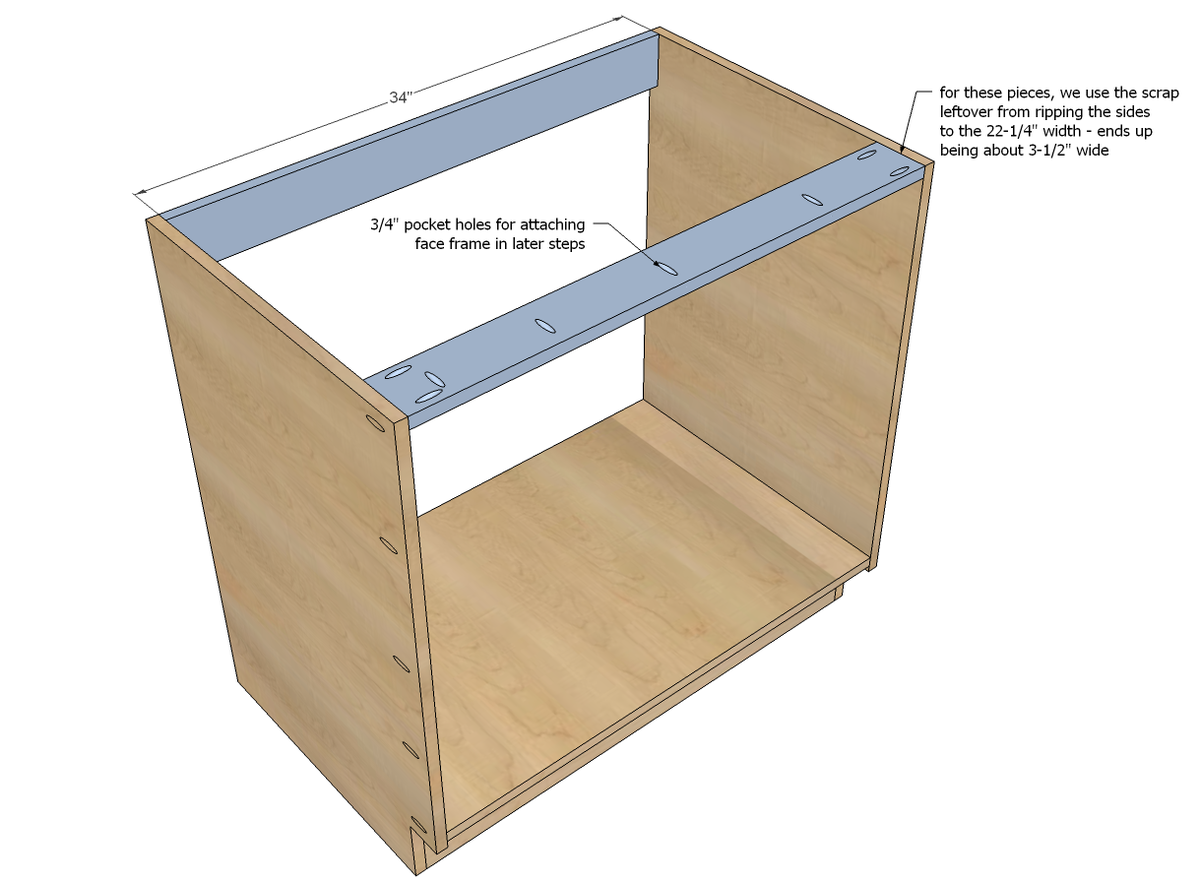
Step 6
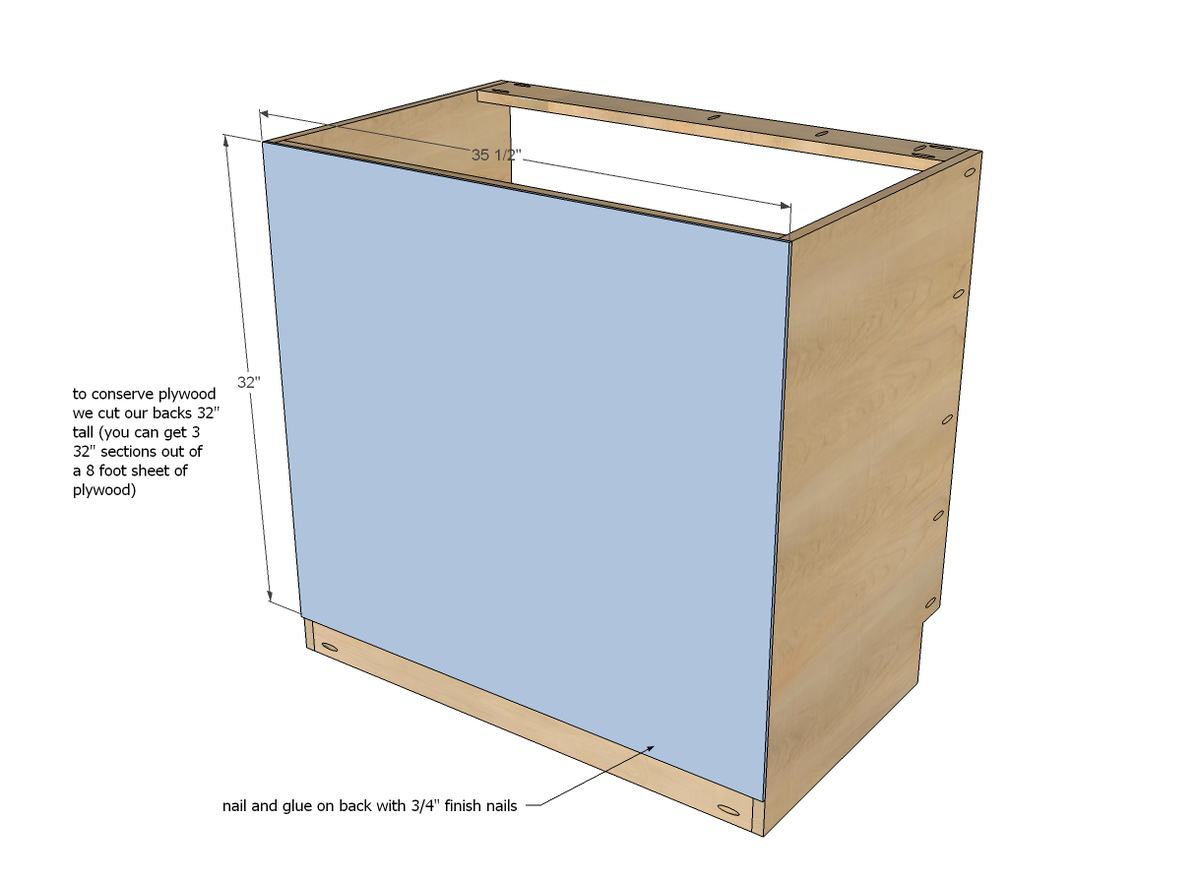
Attach back with 3/4" finish nails and glue - back could be optional on a sink base to allow for plumbing, but you should still add some 1/4" plywood to the back at the top and bottom to bring the cabinet out 1/4" to match other cabinets with backs.
Step 7
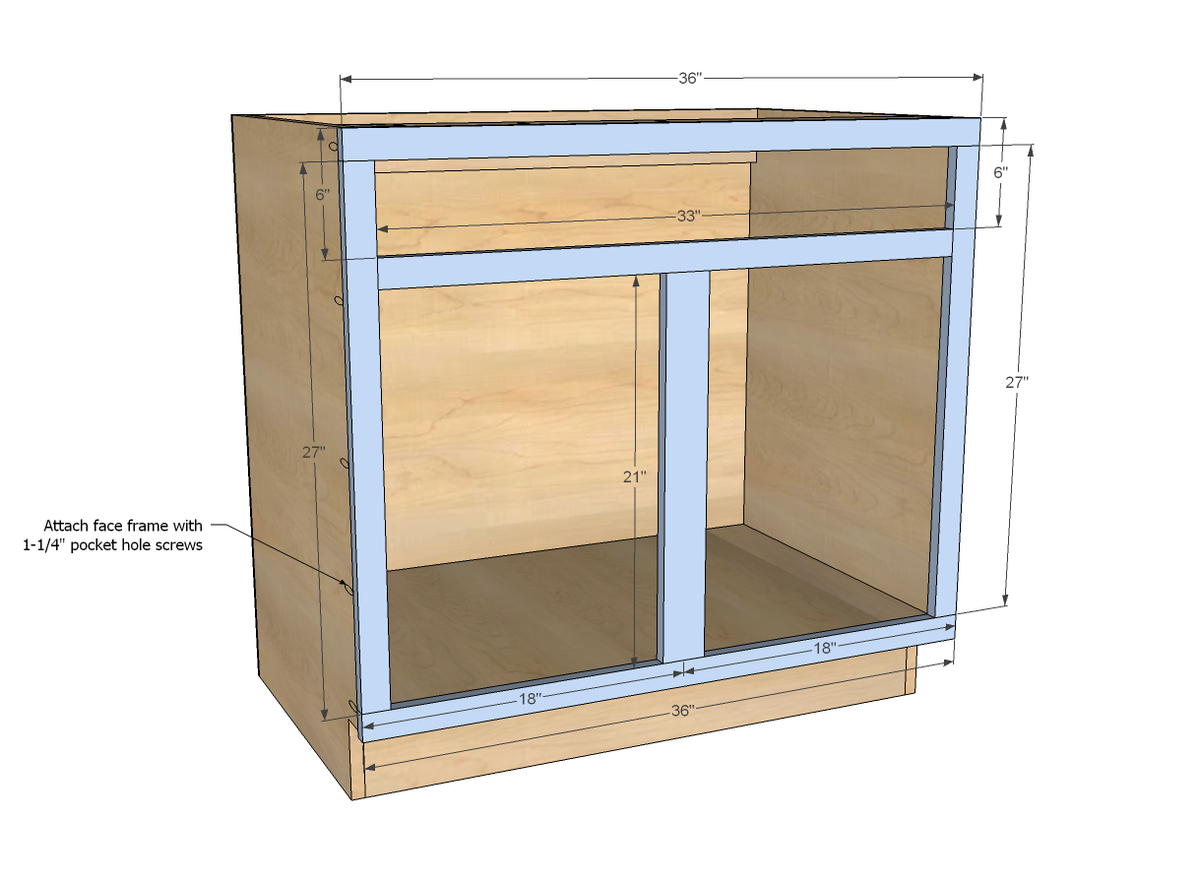
Build your face frame separately, and then attach the completed face frame to the front of your kitchen cabinet. Sides over extend by 1/4" on each side, top is flush, bottom is flush on sides, with bottom shelf 1/2" set up.
Step 8
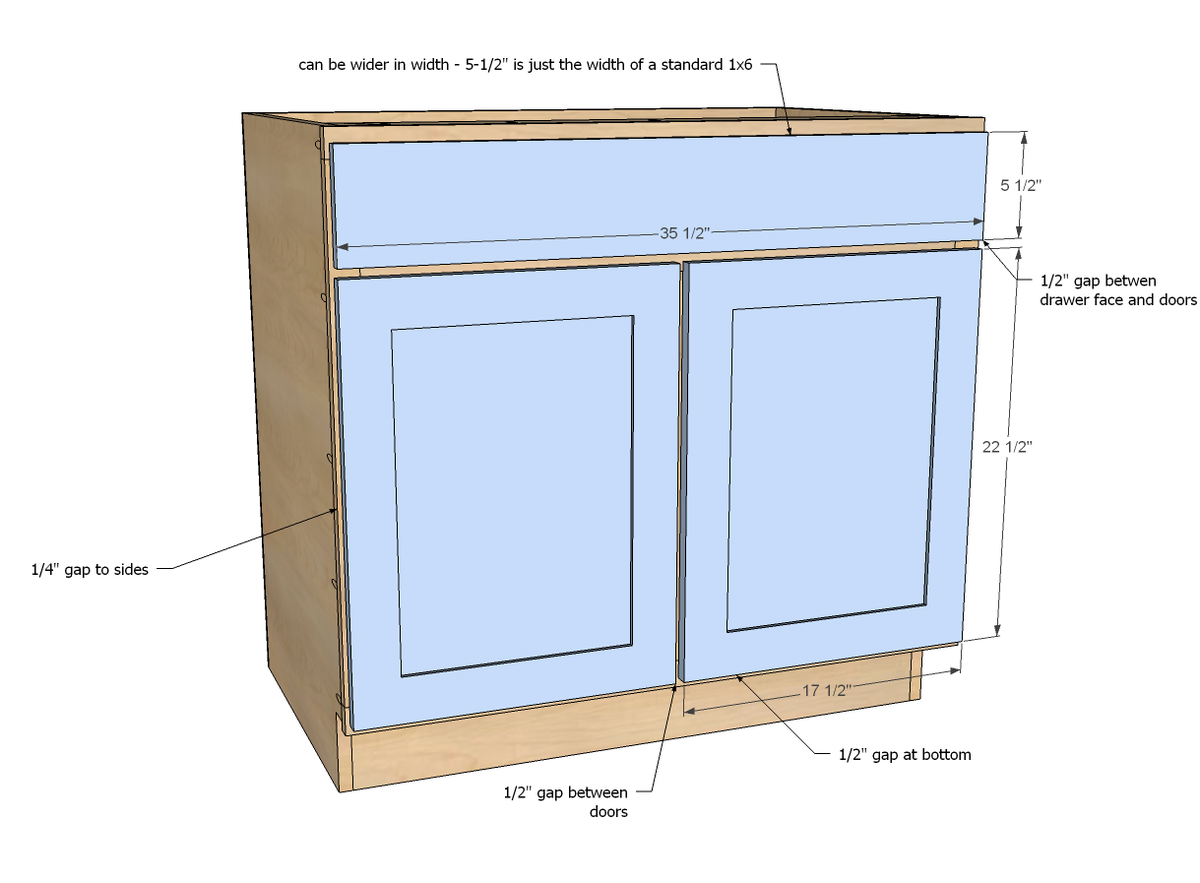
We used full overlay doors attached with concealed euro hinges, 1-1/4" overlay for face frame doors. Doors were ordered from Cabinet Now (not sponsored - just great product).
It is always recommended to apply a test coat on a hidden area or scrap piece to ensure color evenness and adhesion. Use primer or wood conditioner as needed.

Comments
thomatuttle
Sat, 01/18/2014 - 10:05
do you have any plans for a
do you have any plans for a sink base that will fit an apron front sink? i'm thinking about redoing my kitchen and doing the cabinetry myself, but i really want an apron front sink.
DecorSanity
Mon, 01/20/2014 - 07:34
Great Video!
Super clear instructions and easy to understand, awesome. The RAM is a natural!
jimmyvi
Mon, 01/27/2014 - 05:26
This looks fabulous and it
This looks fabulous and it really seems as if it could be really easy. I hope that there are some brag posts to go along with it soon because it would be cool to see how other found the building process.
tbotello
Tue, 01/21/2014 - 05:52
Shaker Door Plans?
Ana, it seems like I remember some time ago that you had a post on making shaker doors but I can't seem to find that post. Is there anyway you can provide that link? Your series on building the momplex kitchen has inspired me to build our cabinets for our house we just broke ground on and I'd even like to tackle building the doors as well. Thank you!
In reply to Shaker Door Plans? by tbotello
JoanneS
Tue, 01/21/2014 - 10:16
Easy Frame and Panel Door Plan
Hi tbotello,
This is one of the plans recently posted for frame and panel doors that were used on the bathroom vanity. I have this in my to-do list :)
http://ana-white.com/2013/09/plans/easy-frame-and-panel-doors
claydowling
Tue, 01/21/2014 - 07:30
Great Video
I hope everybody thinking about kitchen remodeling will see this video, to see exactly how easy it is to build your own kitchen cabinets. Ana and the RAM are showing how to build your cabinets out of lighter, stronger materials than an pre-made cabinet will be built from. Great stuff, and might be instrumental in convincing my own wife that this is the way to go, since she hates the kitchen layout and I hate the low-quality cabinets the builder used.
foundinhim
Sun, 02/23/2014 - 14:01
Type of Plywood
Thank you so much for the plans and the video. If the cabinet base is covered on all sides with adjacent cabinets and a counter top, is there a compelling reason to purchase the nicer, birch (?) plywood or can cheaper plywood be used?
foundinhim
Sun, 02/23/2014 - 14:01
Type of Plywood
Thank you so much for the plans and the video. If the cabinet base is covered on all sides with adjacent cabinets and a counter top, is there a compelling reason to purchase the nicer, birch (?) plywood or can cheaper plywood be used?
Neb1990
Mon, 07/14/2014 - 12:42
Awesome plans!
My wife and I just completed building an 8 foot base cabinet using these plans. We had the cabinet together and up in one day's time. Since the sides and back of ours can't be seen, we just used plywood. We did build a pine countertop for it and we plan on building the front frame and doors out of pine next weekend. These plans are awesome to go by!
JohnRR
Wed, 12/02/2015 - 08:15
Site is awesome, but...
I will give you $50 for a member's site with no ads. Or at least please remove the autoplay-video ads.
The constant audio downloading is really annoying, especially if I have three or four of your pages open simultaneously. Chevy/star wars/taco recipes all at once....ugh!
bkbbjones95
Wed, 07/10/2019 - 09:18
Farmhouse Kitchen Sink Plan
We too would like to see the altered plan for a farmhouse sink.
BoysGigi
Fri, 02/12/2021 - 10:17
ADA type sink base
How would I modify this for use with a wheelchair?
hammerchisel
Mon, 03/29/2021 - 13:01
Wrong sizes on face frame
I made this cabinet - I think the dimensions on the face frame are wrong. The 33” inch piece should be 32” and the 21” inch piece should be 20”.