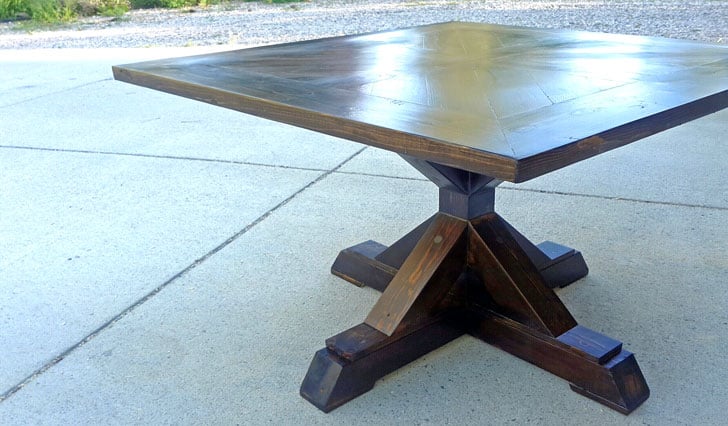
Build your own farmhouse style pedestal table with our free step by step plans for under $100 in materials.
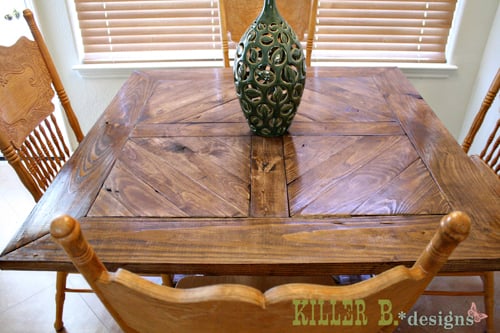
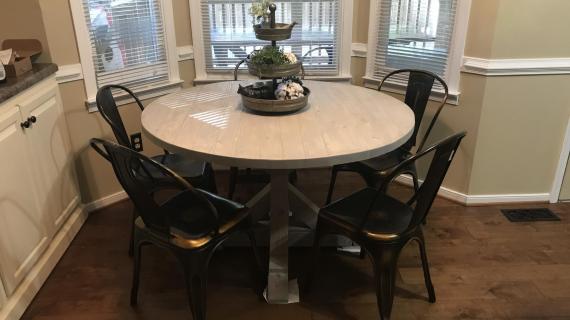
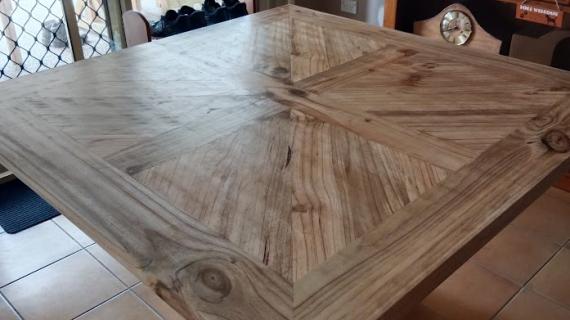
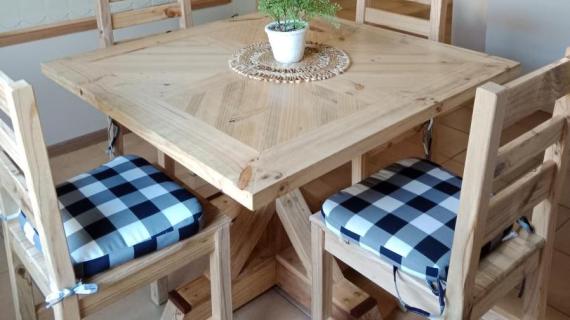
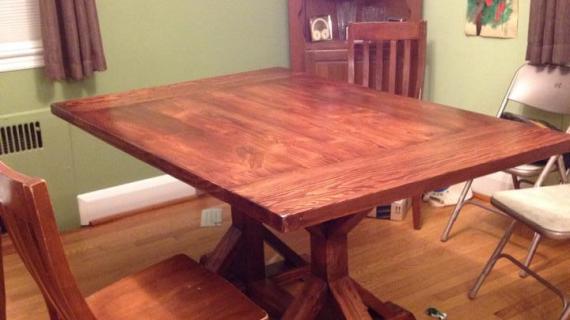
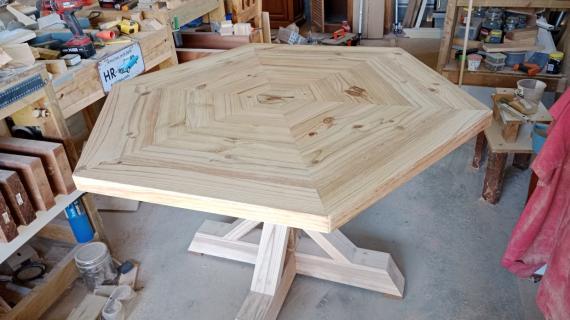
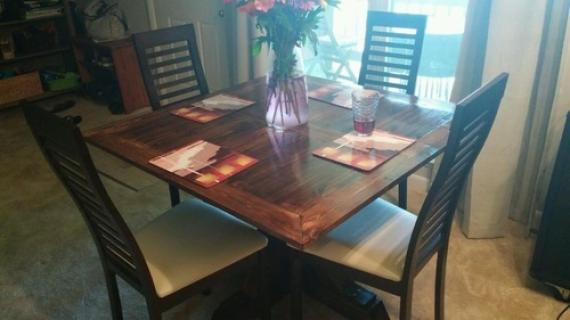
This table features a farmhouse style 4x4 base, with a planked wood top. You can easily cut the top into a circle, or keep it square. We love this table in a breakfast nook, or as a family dining table.
Pin For Later!

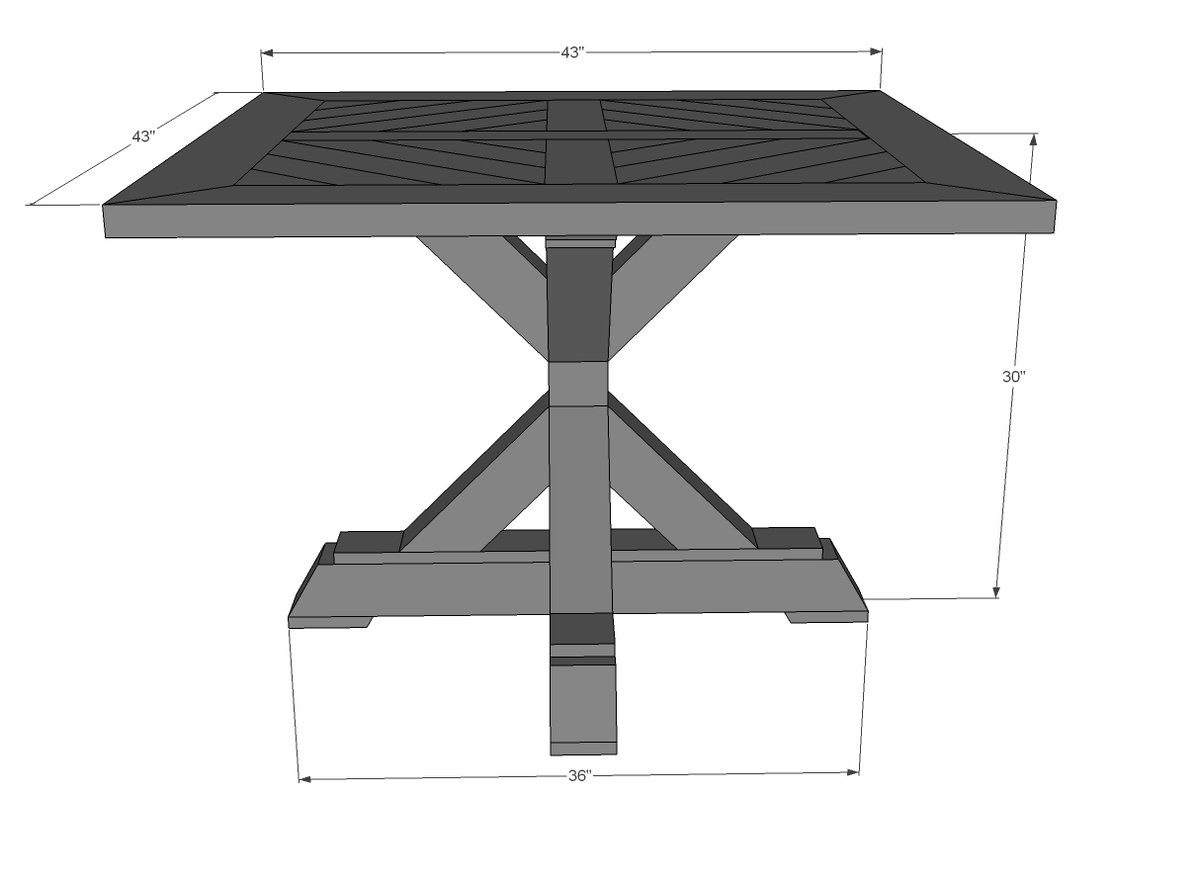
Preparation
- 5 - 1x4 @ 8 feet long
- 2 - 4x4 @ 8 feet long
- 2 - 2x4 @ 8 feet long
- 2 - 2x6 @ 8 feet long (for framing out top)
- 1 1/4” and 2 1/2” pocket hole screws
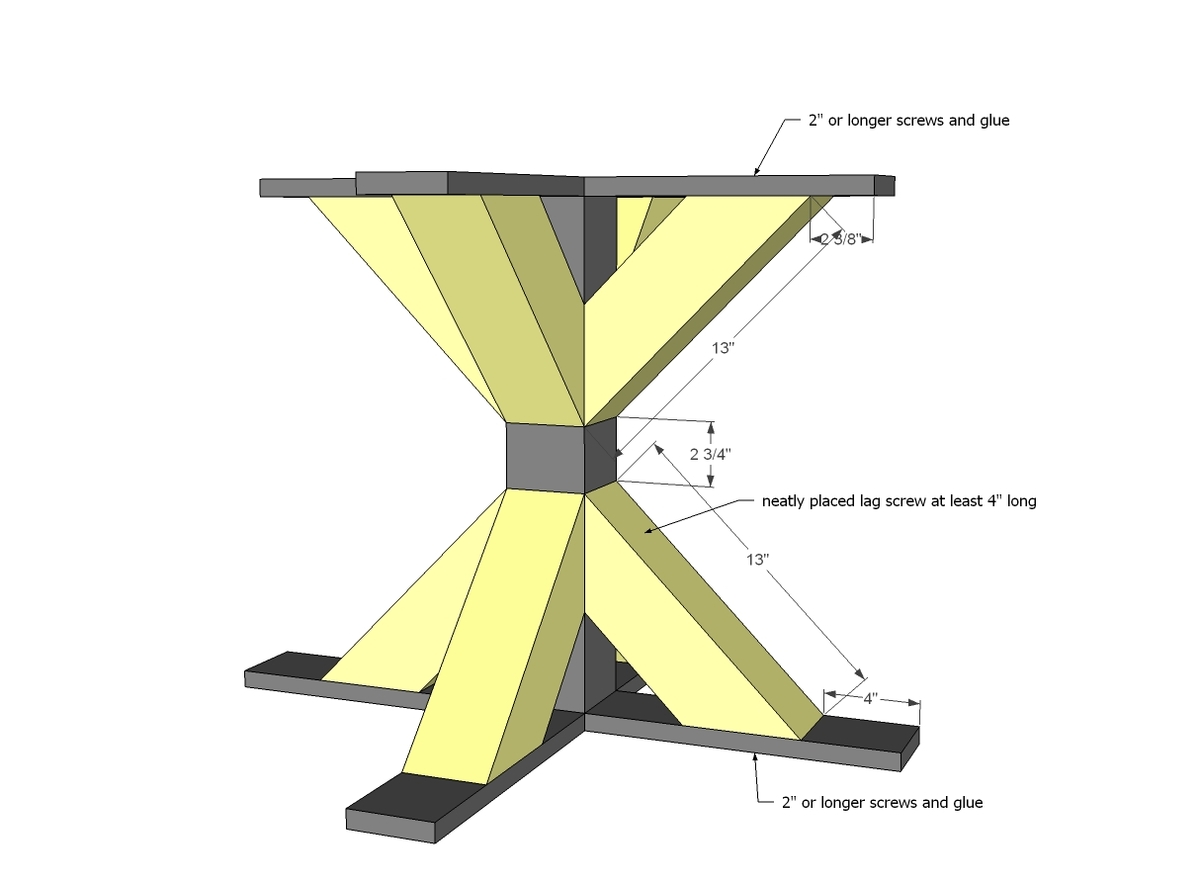
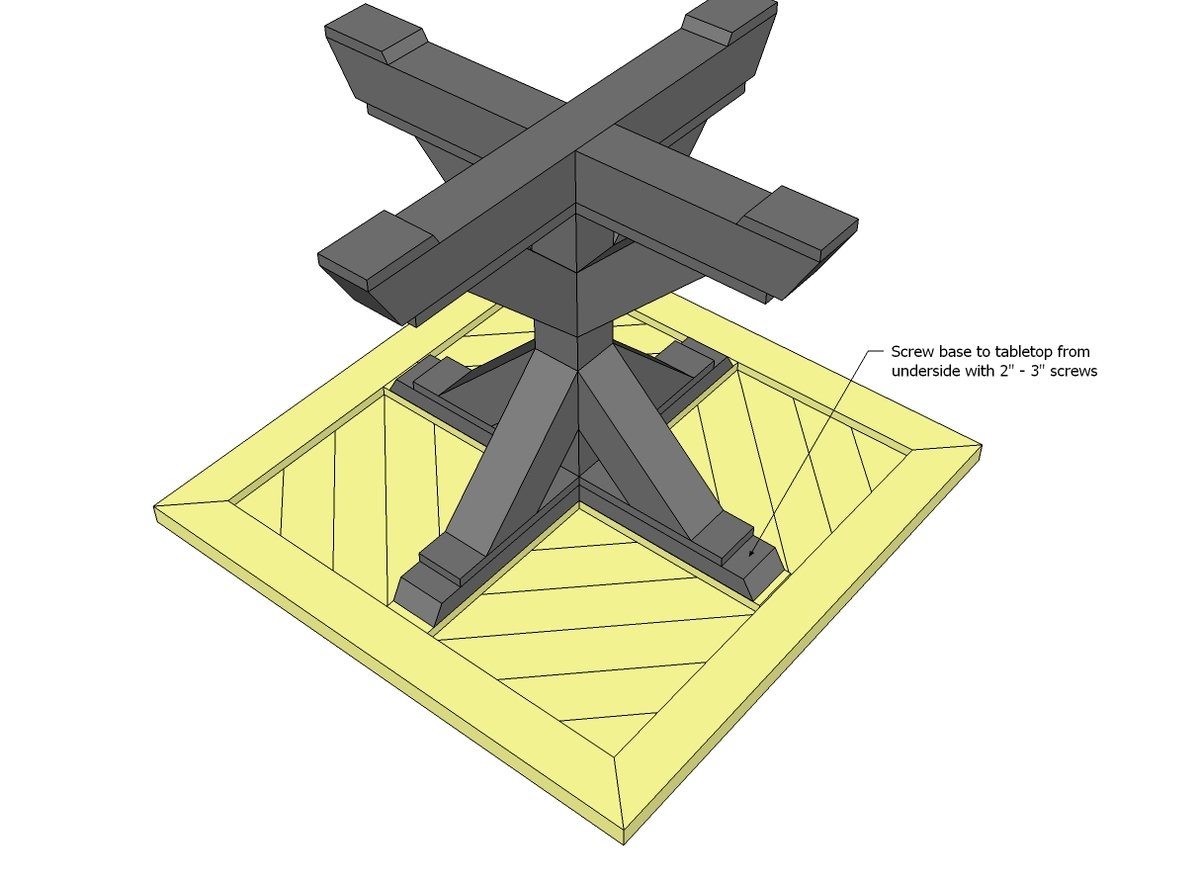
- 4” or longer lag screws
- 2” or longer wood screws
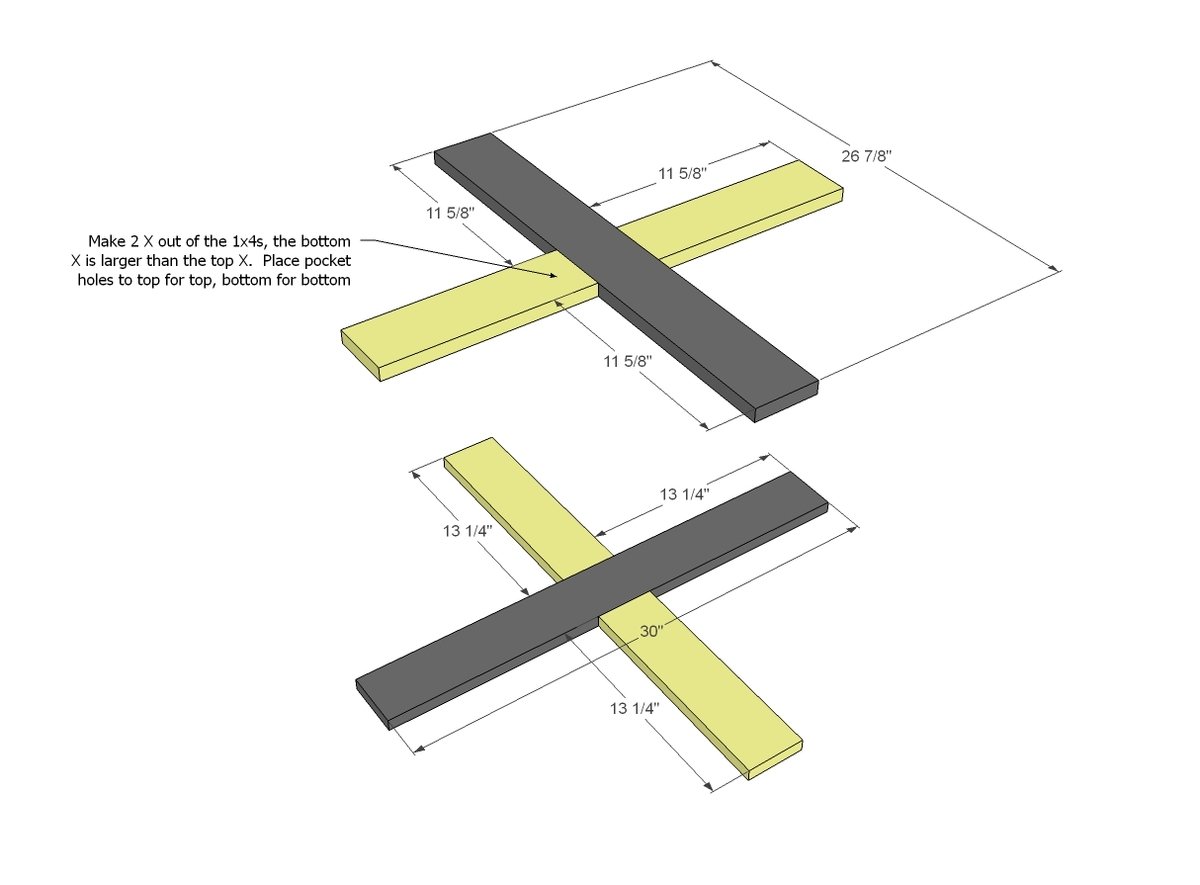
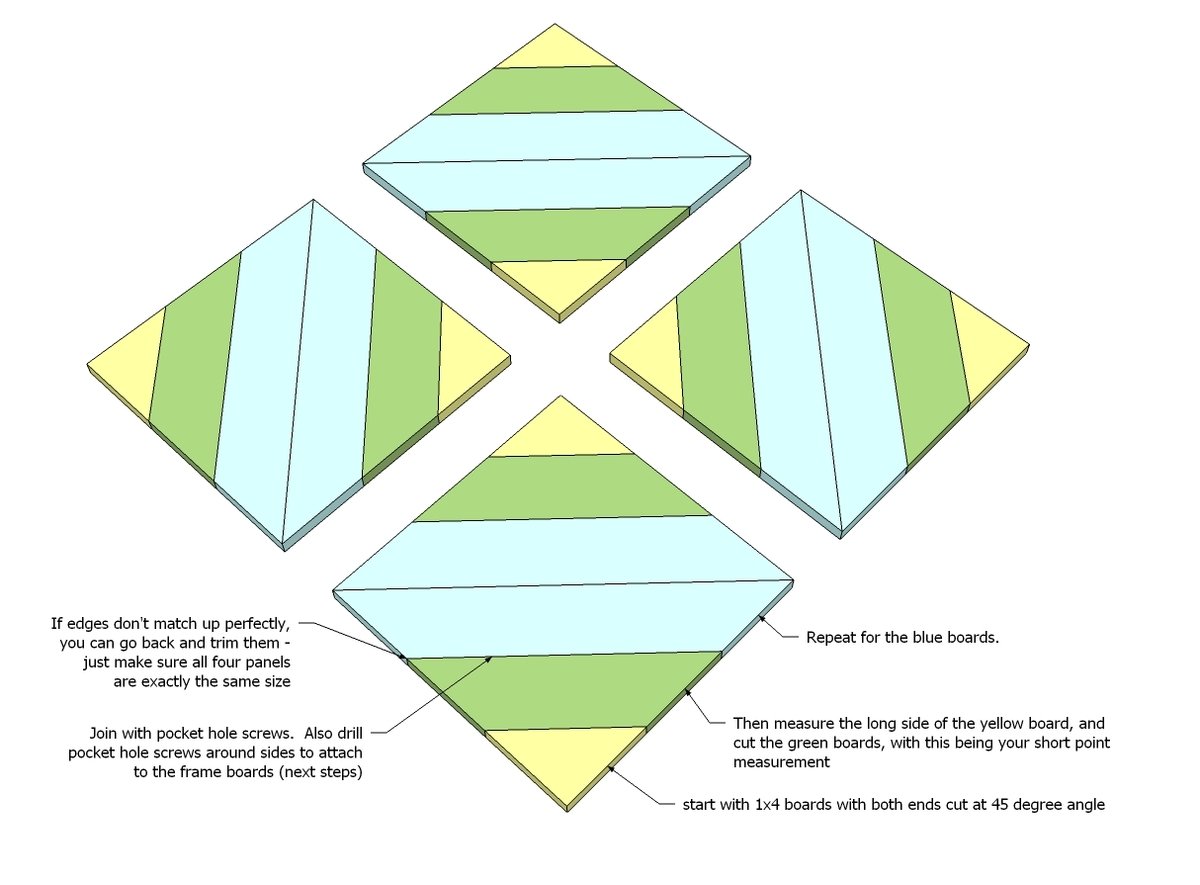
- 2 - 1x4 @ 11 5/8”
- 1 - 1x4 @ 26 7/8”
- 2 - 1x4 @ 13 1/4”
- 1 - 1x4 @ 30”
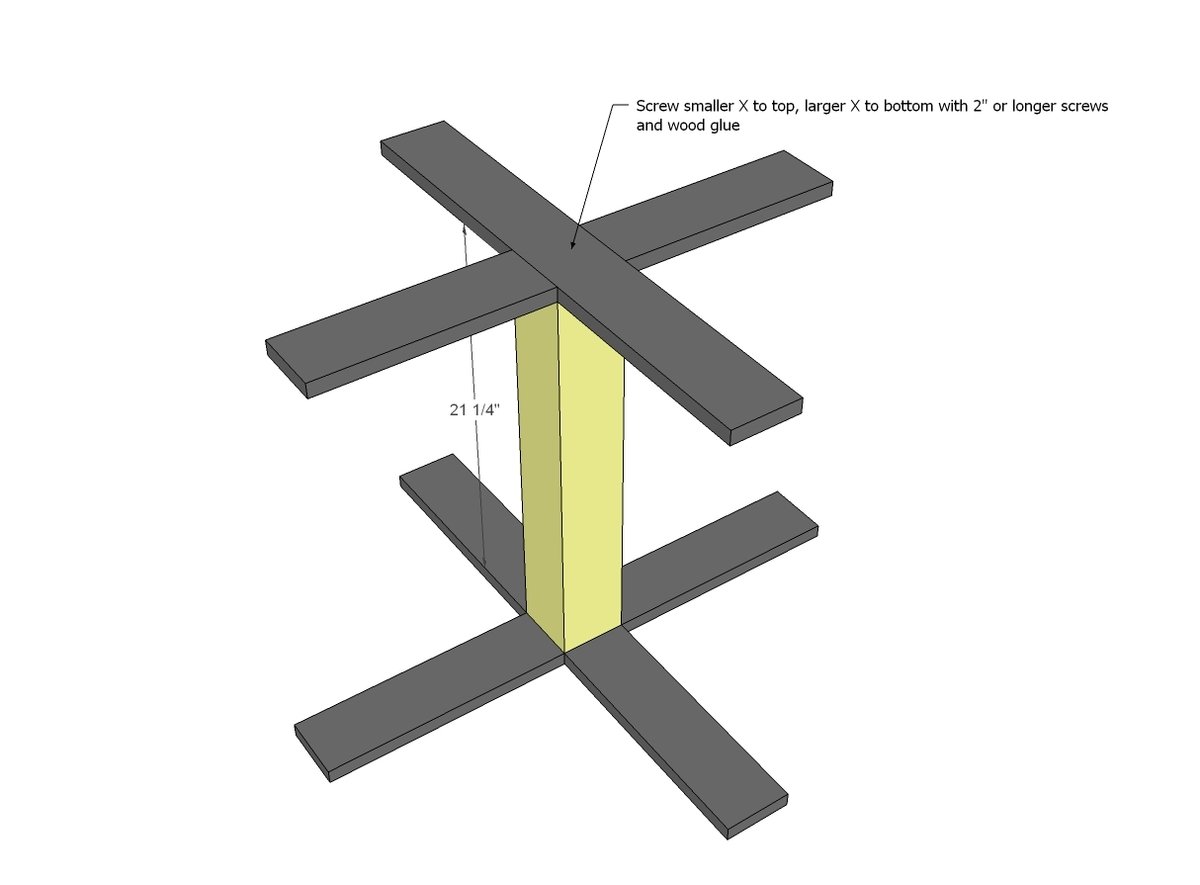
- 1 - 4x4 @ 21 1/4”
- 8 - 4x4 @ 13” (longest point measurement, both ends cut at 45 degrees off square not parallel)
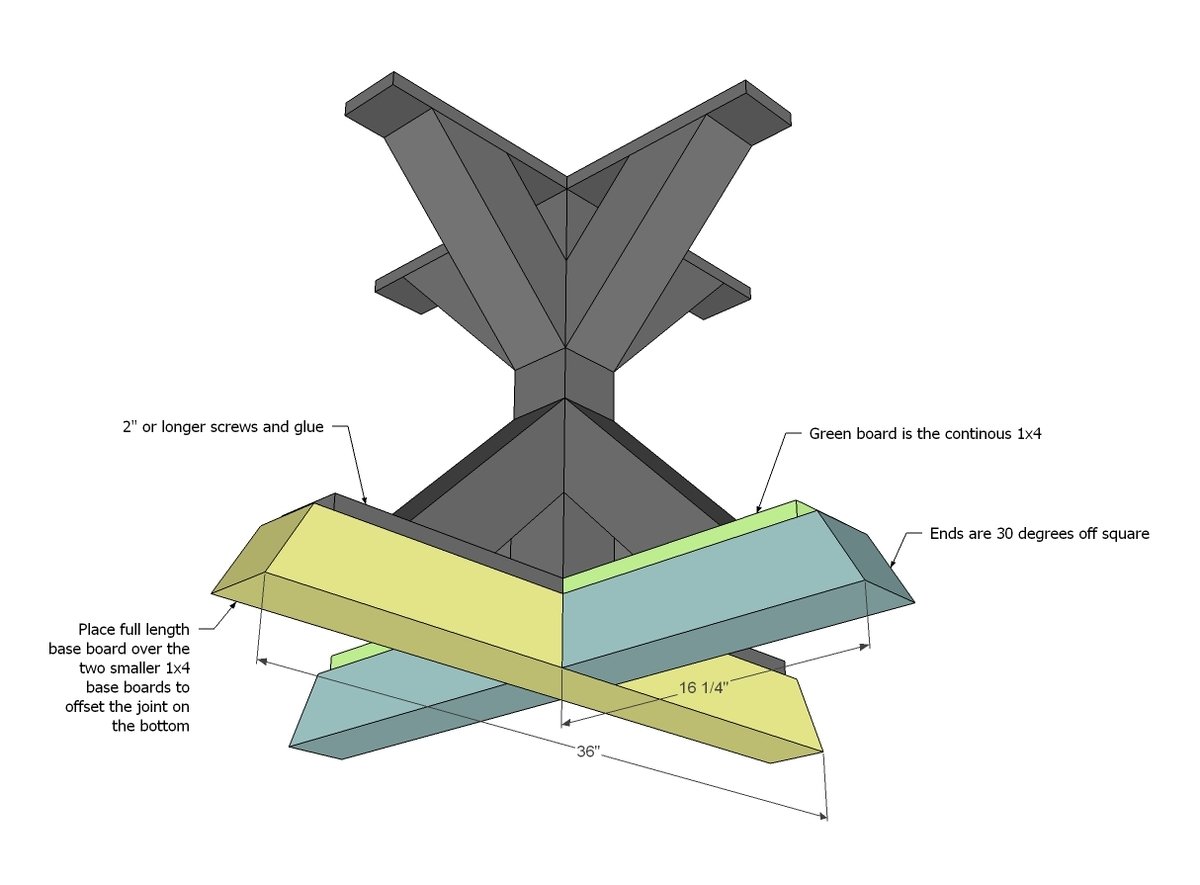
- 1 - 4x4 @ 36” (longest point measurement, both ends cut at 30 degrees off square not parallel)
- 2 - 4x4 @ 16 1/4” (longest point measurement, one end cut at 30 degrees off)
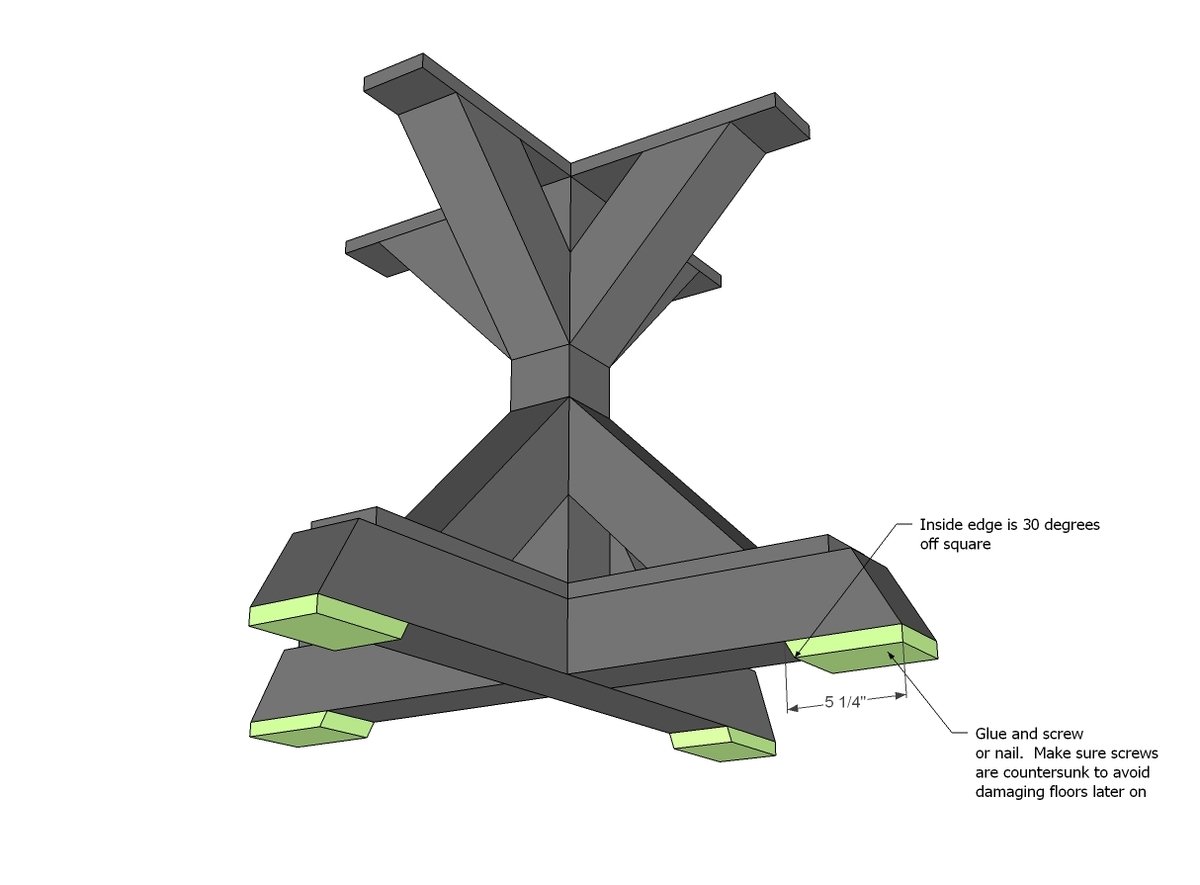
- 4 - 1x4 @ 5 1/4” (one end cut at 30 degrees off square, longest point measurement)
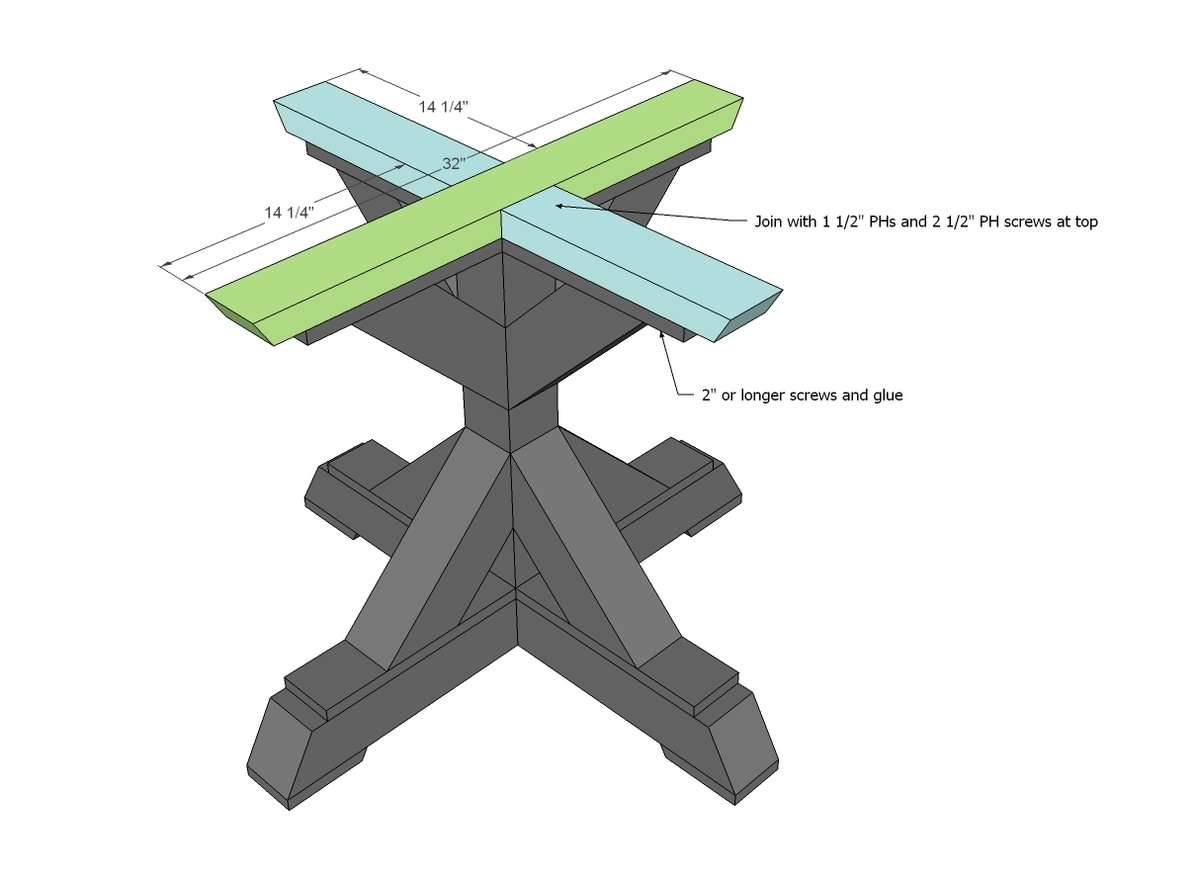
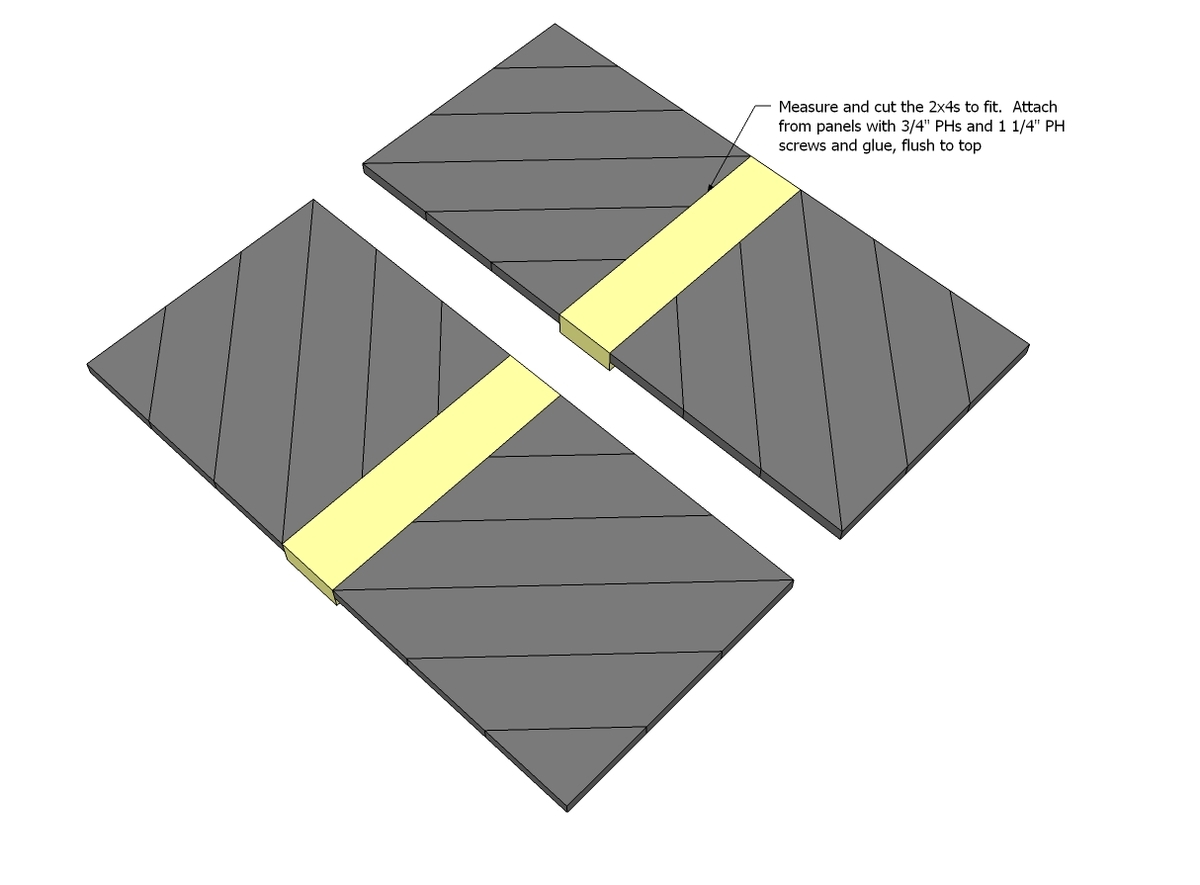
- 2 - 2x4 @ 14 1/4” (one end cut at 30 degrees off square, longest point measurement)
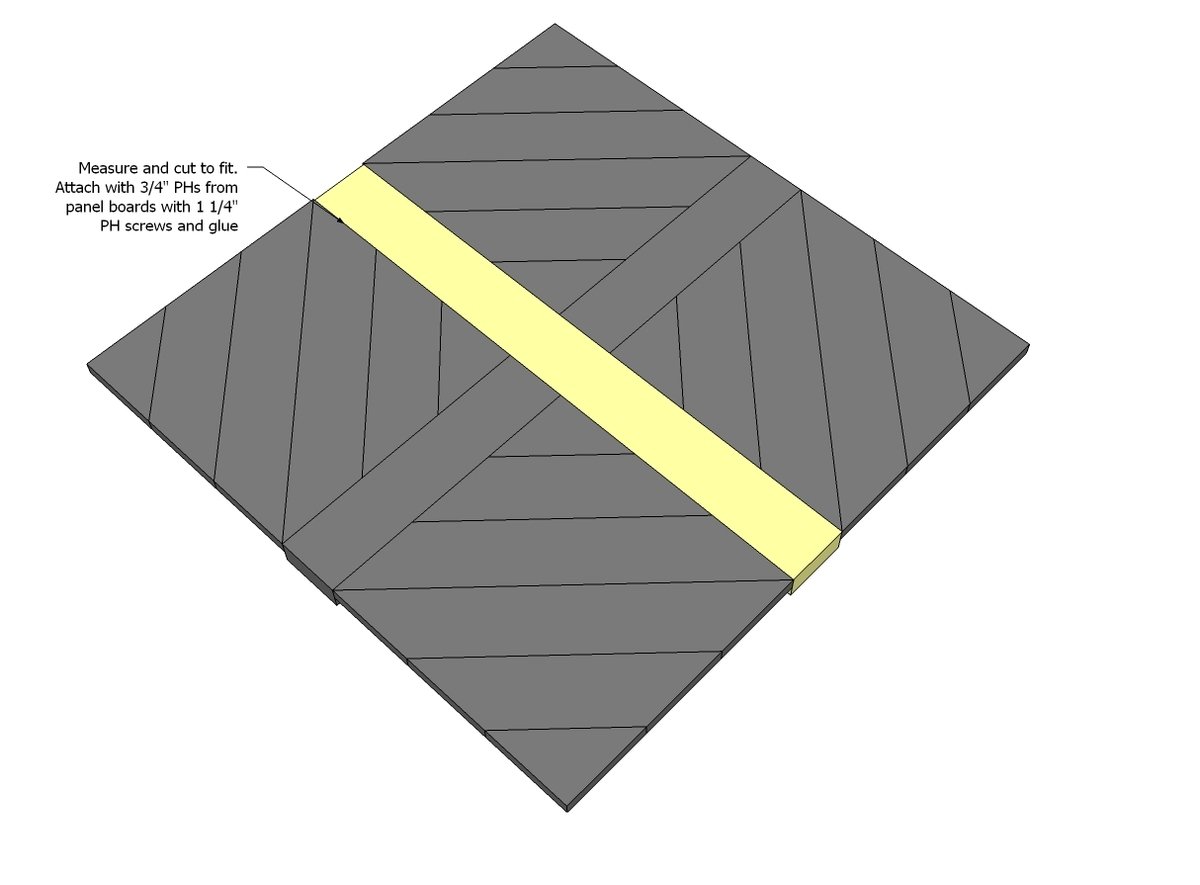
- 1 - 2x4 @ 32” (both ends cut at 30 degrees off square, longest point measurement, ends NOT parallel)
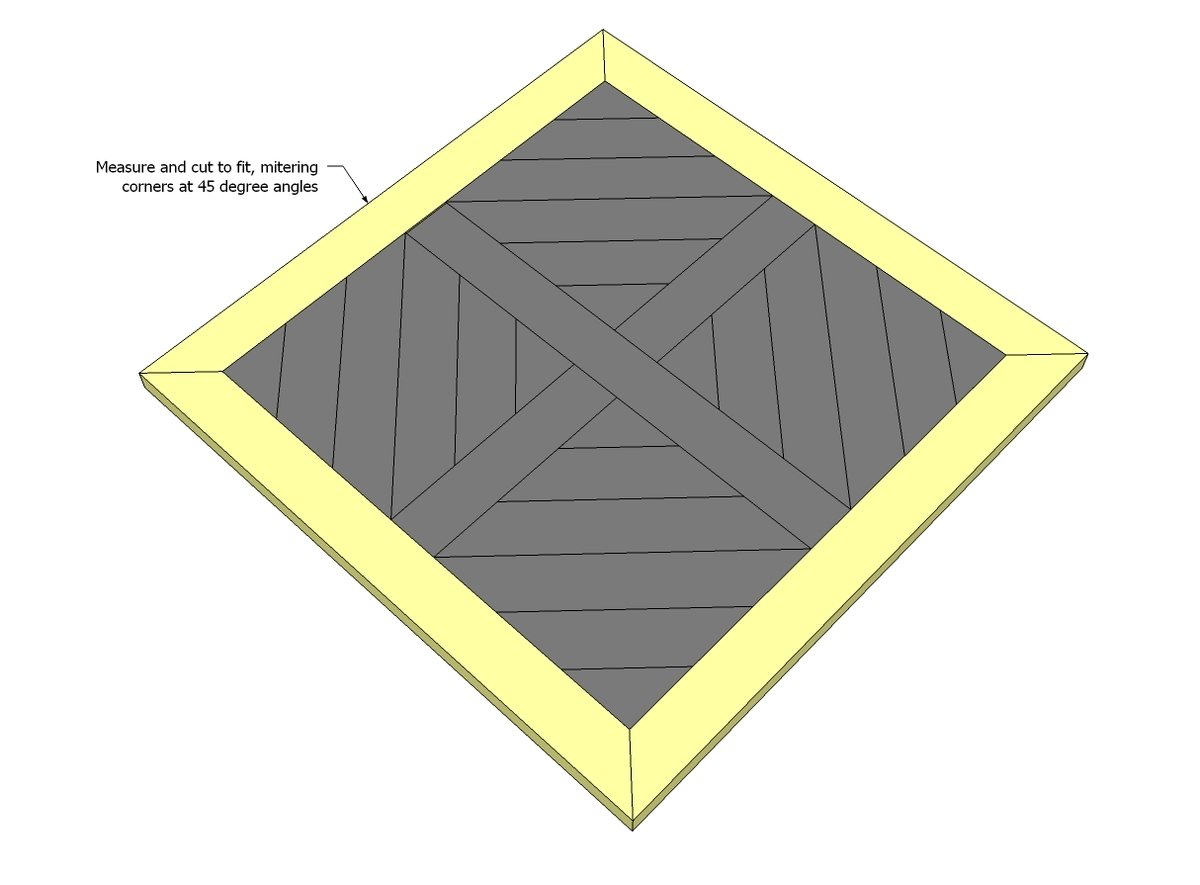
- TOP is cut to fit
Please read through the entire plan and all comments before beginning this project. It is also advisable to review the Getting Started Section. Take all necessary precautions to build safely and smartly. Work on a clean level surface, free of imperfections or debris. Always use straight boards. Check for square after each step. Always predrill holes before attaching with screws. Use glue with finish nails for a stronger hold. Wipe excess glue off bare wood for stained projects, as dried glue will not take stain. Be safe, have fun, and ask for help if you need it. Good luck!
Instructions
Step 2
Step 4
Step 5
Step 7
It is always recommended to apply a test coat on a hidden area or scrap piece to ensure color evenness and adhesion. Use primer or wood conditioner as needed.





Comments
stefanietolbert
Fri, 07/12/2013 - 21:24
Love this design!! Do you
Love this design!! Do you think it would be possible for it to be turned into a hexagon shape? We have been looking for a smaller table that would be good for 4 people on a regular basis but occasionally fit 6. I know round tables would be hard to manage on a DIY project, but a hexagon seems doable, although I'm definitely not skilled enough to know if I'm wrong. :D
kosborn
Thu, 09/26/2013 - 16:14
Love This Design~!!
I am in need of a table that is 4 X 6 but Love this style, would it be possible to twerk it a little bit to make it work? If so could you help me on details...My nook seating is 4 X 6, or would I be able to make this 5 X 5 and have it work out?
Jamaunzie
Sat, 10/19/2013 - 15:57
Measurements off ??
Not sure I was going to down size this for a night stand and I think the Measurements on the cross pices for the top are off now its been awhile since I have had to work with fractions but I come up with 26 3/4 for length not 26 7/8
ewagner
Fri, 01/24/2014 - 07:43
Sketchup
Do you have a sketchup file available for this? I'd like to modify the top to seat two around each edge.
pluto032004
Mon, 01/27/2014 - 20:53
bigger
I made my top 60x60. Just added 17" to hers. With material I added 2' to all boards.
In reply to bigger by pluto032004
MSteed7931
Sat, 01/27/2018 - 10:58
Bigger
Hello
Did you alter the pedestal to hold the larger top?
Thanks
Melanie
In reply to Bigger by MSteed7931
MSteed7931
Sat, 01/27/2018 - 11:03
Bigger
Found the link for info on your changes. Table looks great!
evan
Thu, 06/19/2014 - 22:39
5'x5' table with detachable legs
Do you have any plans or recommendations for a 5 foot square table with removable legs?
ClaireNecessary
Mon, 08/04/2014 - 09:01
Cannot find 4X4's
Love this table so much! I am a newbie, so forgive me if this is a no-brainer....I cannot seem to find 4X4's that are pine or whitewood anywhere. The only ones are for fence posts and not the prettiest- they are also cedar and cost $26. Am I missing something? I have checked every lumber yard and big box store that I know (Atlanta).
Thanks!
jgbreeden
Mon, 08/04/2014 - 10:57
Look for Fir construction grade
I haven't seen 4x4's in pine, but they should be common in the construction grade lumber, which is all Douglas Fir on the west coast. They are sanded better than fence posts, and should be around $10.
smalls
Mon, 12/29/2014 - 10:25
Love This Base! Can You Adjust for New Size?
I absolutely LOVE this table base. We made a 60 inch x 60 inch square table top and I'd really love to use this base design. Do we need to increase the size to accommodate our size top? If so, can you provide some guidance here? Thank you!
stepdiva
Mon, 01/26/2015 - 13:19
Love this as well!
i would love to know if i need to increase the size of base for a 60" table top as well. i am wanting to make a round table top though. anyone have any answers for me!!??
Ana White Admin
Tue, 01/27/2015 - 11:58
Round
Take a look at this http://ana-white.com/node/13102 read through the "comments" about a 60" round table.
Momma Gladden
Sun, 04/05/2015 - 23:08
Increase base size
So I read all comments and the link you attached Ana to the other round table about bringing the legs out toward the edge and not keeping them in the center for a larger table. I want to use this X base for a 72" round concrete top. How would I adjust the size of the base to accommodate a larger and heavier top? Thank you
CountryDrei
Sun, 06/28/2015 - 05:39
Step 7: Cut To Fit
Hello!
I am creating this table. I'm on step 7 now, and I am quite confused on cut to fit. Is there any advice? Or for those of you who have made the table, could you please write out what dimensions you had for your table top?
Thank you!
PigzFly
Mon, 12/07/2015 - 21:37
Would love plans to increase size to fit 54" glass top!
I would also like to increase the size of this base to accommodate a 54" - 60" glass top. Does anyone have any ideas or links? This would be my 1st project, so I'm not quite sure how to make the modifications myself.
ScottyOR
Mon, 10/31/2016 - 06:02
Base 4X4s?
HELP! I see no mention as to how to attach the short 4X4s to the continuous 4X4 at the base. I'm using pocket holes for this type of joint with the 1-by and 2-by lumber. How is this done best for strength and minimal gaps? Thanks!
In reply to Base 4X4s? by ScottyOR
swisher43
Thu, 09/07/2017 - 06:49
Lag bolts
counter sink lag bolts from the bottom...
Bvarner83
Mon, 12/05/2016 - 09:32
Easy and BEAUTIFUL table!
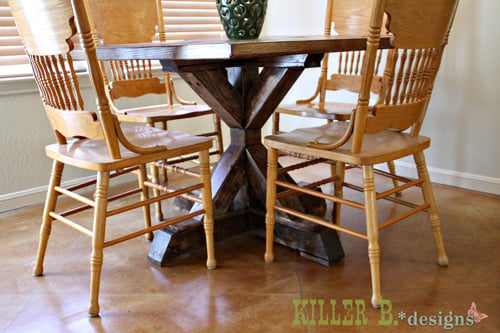
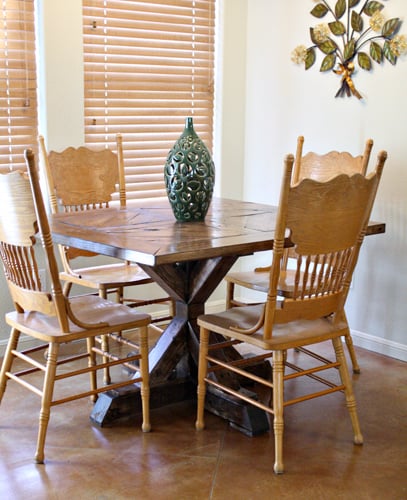
I would say that I am a quick learner and I'm not afraid of tools or trying new things, this table was just the project for me. I built one for my parents who are opening a restaurant in our small town and it's a late 1800's style building so they have remodeled it to bring out all the old architecture and wanted new tables but nothing modern. These tables were perfect! After building one, they decided to have me build 14 more! Yes, it was an undertaking but so worth it. The tables are gorgeous and we have gotten tons of compliments on them. Thank you so much for sharing these plans.
Pmeverden
Sat, 03/04/2017 - 14:03
Counter height round table
I would like to make a 36" round table but counter height. Would I be able to make it the same but add inches on the height to make it counter height?
julietup
Fri, 04/23/2021 - 19:50
Did you ever make the…
Did you ever make the counter height table? Would love to see the finished piece, and any adjustments you made to the base to accommodate the height change.
jmp1518
Sat, 03/04/2017 - 20:35
Love the table but having a design problem
So I began making a table a month or so ago. I tailored it a bit to use a farmhouse table top. However, now that I am almost done with the table, I am having a “wiggling” issue. This table only has one main point of weight bearing. A 4×4 in the center of the table with angled beams branching off of it. I am wondering if there is a way to stop this wiggling from happening without deconstructing the entire table or ruining the design of it. I attached pictures of the underneath in order to show you how it is attached to the table and a video to show how it moves. Right now I have it attached on all four corners with a hex bolt and on the underside of the table, there are insert nuts. Any help would be greatly appreciated as I am very desperate at this point.
Video - Copy whole link: https://www.flickr.com/photos/80258781@N03/shares/7f5zyM
In reply to Love the table but having a design problem by jmp1518
swisher43
Thu, 09/07/2017 - 06:47
Stronger hardware
the 4x4s at the angles are your supports to prevent that wobble. Hard to tell for sure from the video, but it looks like you haven't attached those with strong enough hardware.
If you haven't fixed it yet, I suggest getting 5" lag bolts and attaching 2 per 4x4(2 at the top of each support and counter sink 2 from the bottom onto the base). That should strengthen your supports and stop the wobble.
Kurt
Sat, 03/03/2018 - 10:09
Wood shopping list
We love this table design and bought everything to make it. While cutting the wood I realized that there is not enough 4x4 wood in the shopping list. The 2 4x4x8 only give 192" of wood but the cut list is 193 3/4". I recommend getting 1 4x4x10 instead. Other than having to buy more wood, we loved building this table and how it looks in our kitchen!
Emily Taylor
Tue, 01/21/2020 - 09:38
Replace with Rectangular Top
Hi Ana!(and all others!)
I am getting ready to embark on a DIY dining table journey, it's a small area so I'm wondering if I could use this pedestal base and turn it 45 degrees so that the X supports point to the corners and use a 36" x 54" top. Since it's a smaller table I would love to use a single pedestal base like this but I'm worried about the structural integrity. Would it be prone to tipping, or would a base this sturdy suffice?
Please let me know if anyone has any suggestions, ideas or experience with this, thanks so much!
hitthetwit
Mon, 05/04/2020 - 19:07
What did you end up deciding…
What did you end up deciding? I'm looking for a pedestal design for a rectangular table too.