
Easy to build farmhouse style nightstand with free plans by ANA-WHITE.com
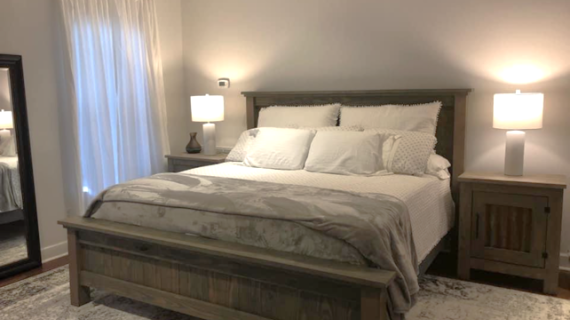
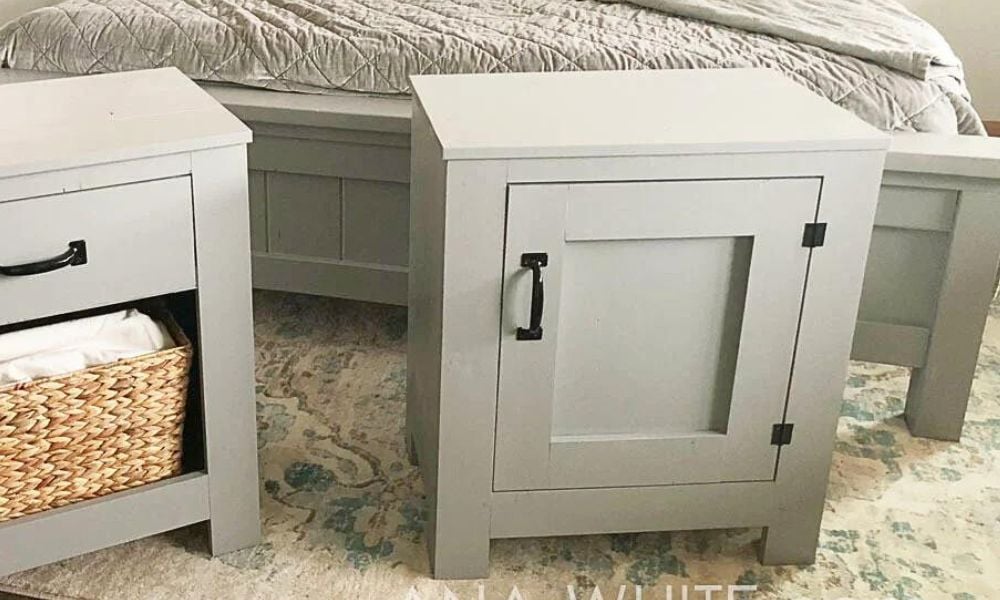
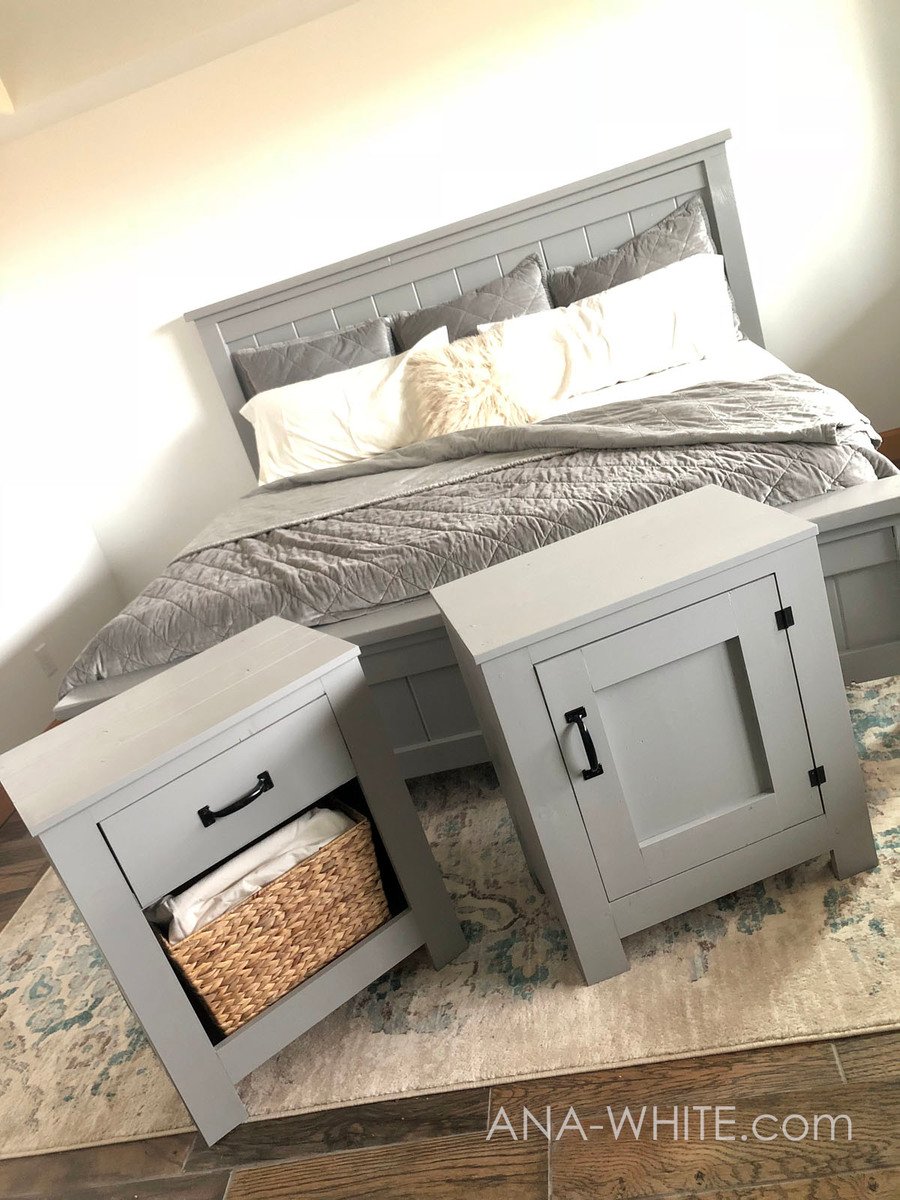
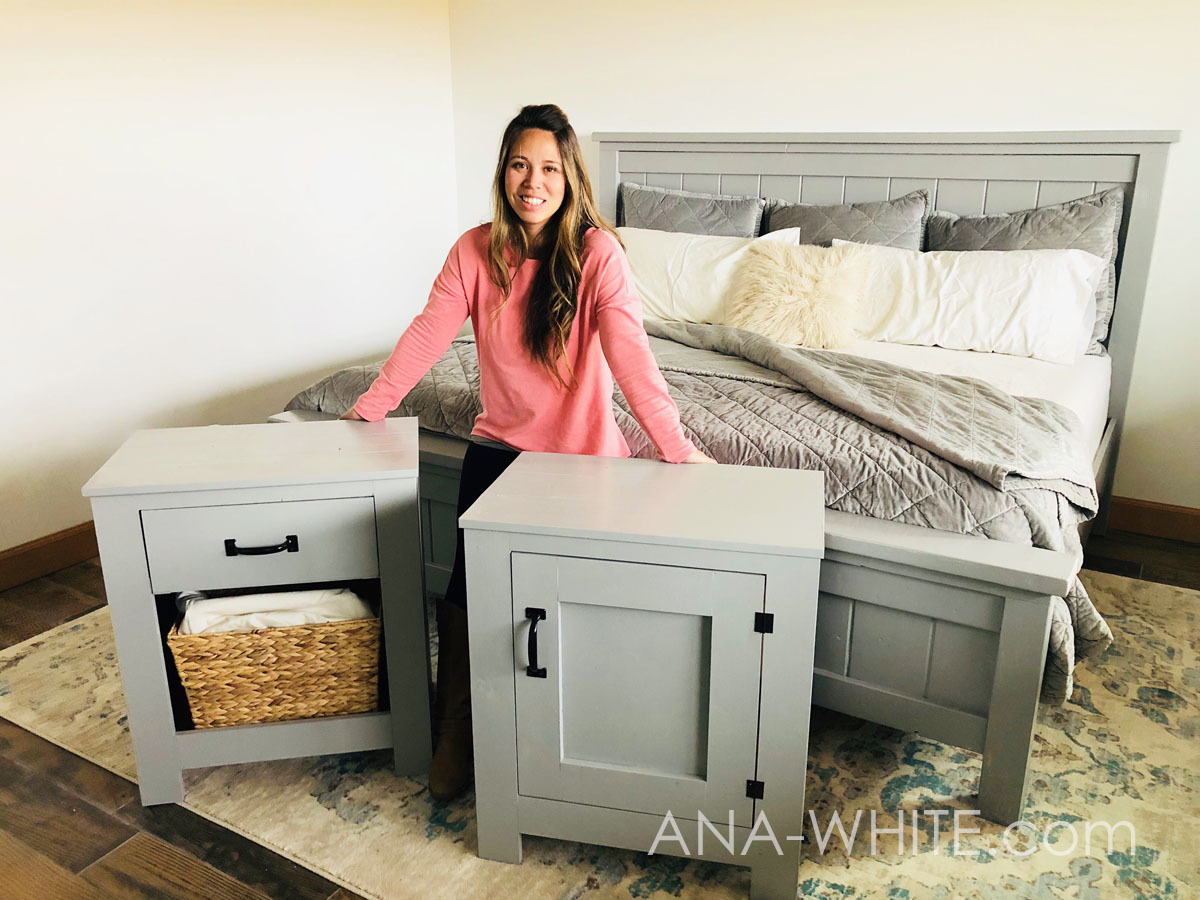
Build your own nightstands! This beautiful, extra large nightstand features a roomy interior and large top. I've had these nightstands for many years now, and they are still looking great and functioning awesome!
Related Plans: Cabinet Style Nightstand with Drawer and Open Shelf

Are you looking for a beautiful bedroom furniture set that is sturdy and stylish- but won't break the bank?
For a few hundred bucks, I DIYed this set for our guest room!

The farmhouse bed I built ten years ago for about $100 (plans here) - it's made new again with a fresh coat of paint. We have a bigger room for it now, so I thought new nightstands that are oversized to match the Farmhouse Bed would complete the set.
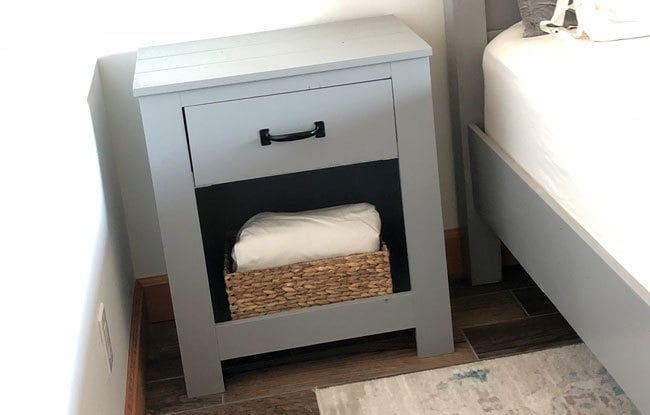
Last week I built and shared the plans for this cabinet style farmhouse nightstand with drawer and open shelf.
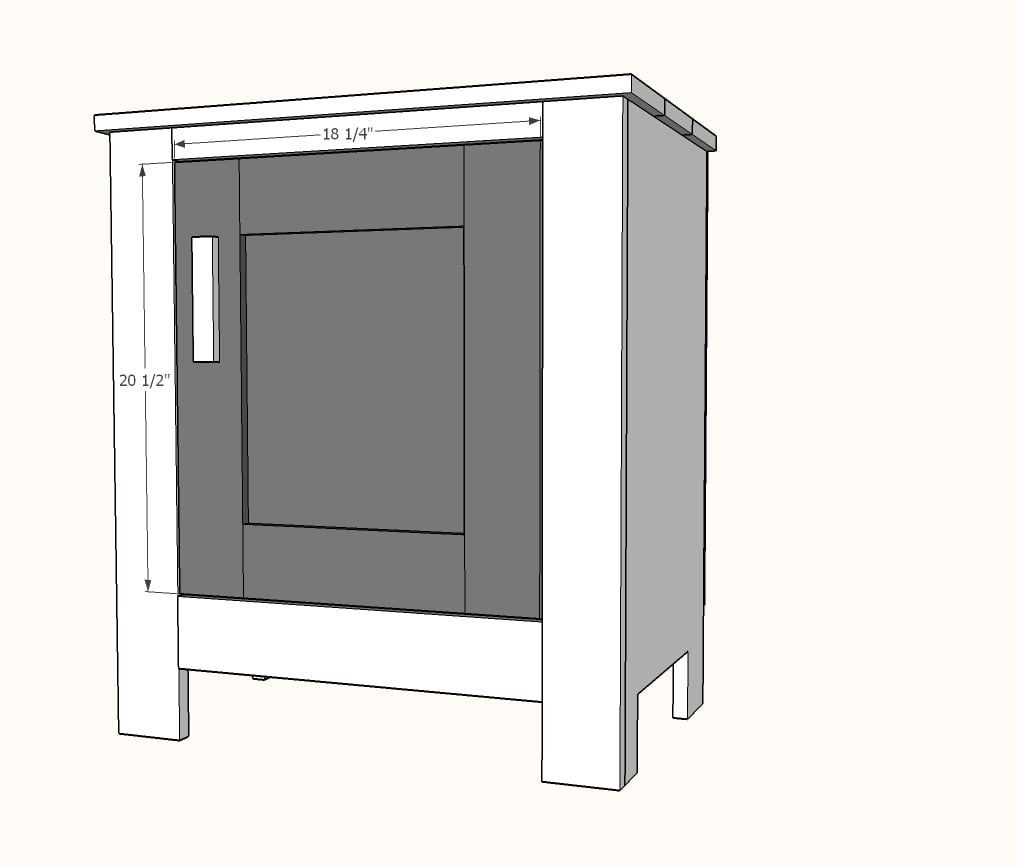
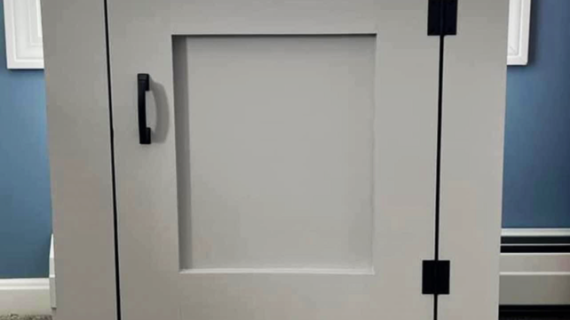
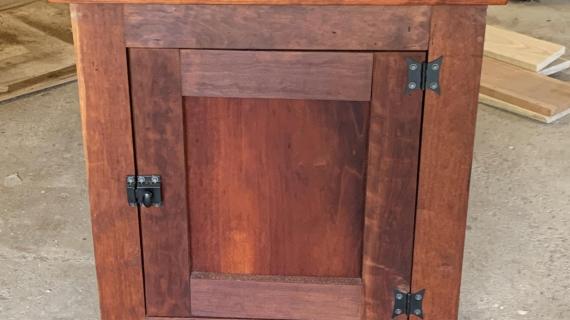
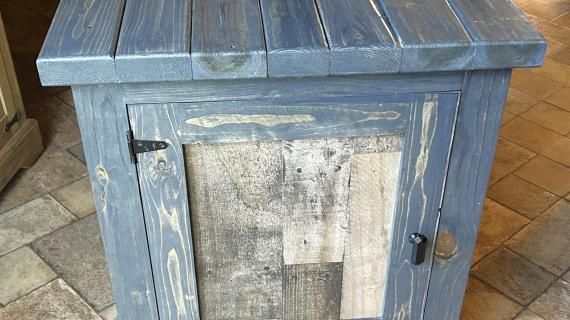
This week I tackled a second nightstand, same size, but with a door instead.
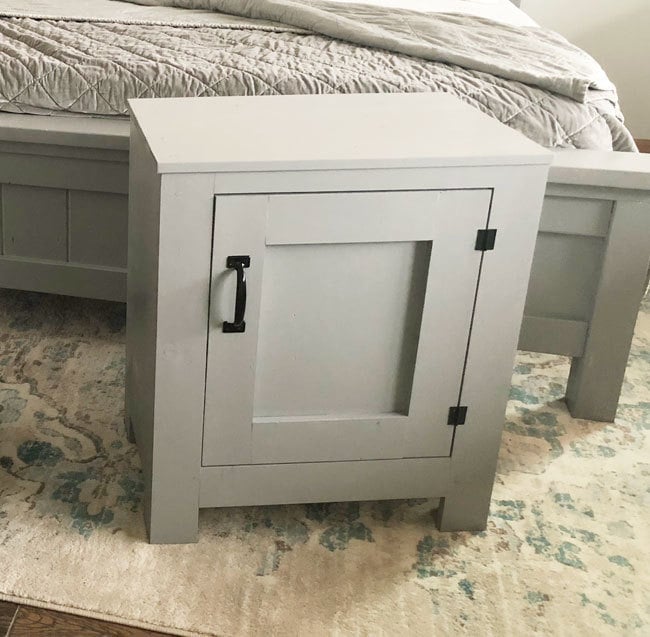
The door is easier to build than the drawer, and conceals all the contents of the nightstand. I envsion it as a mini linen closet for our guest room.
We featured this build in our latest video "Working Spouses"
And I'm excited to share the plans with you below.
Please do share a photo (or two) if you build and tag me #anawhite so I can see it - and of course, we always appreciate it when people take the time to upload brag posts.
Thanks for reading, enjoy the plans!
Ana
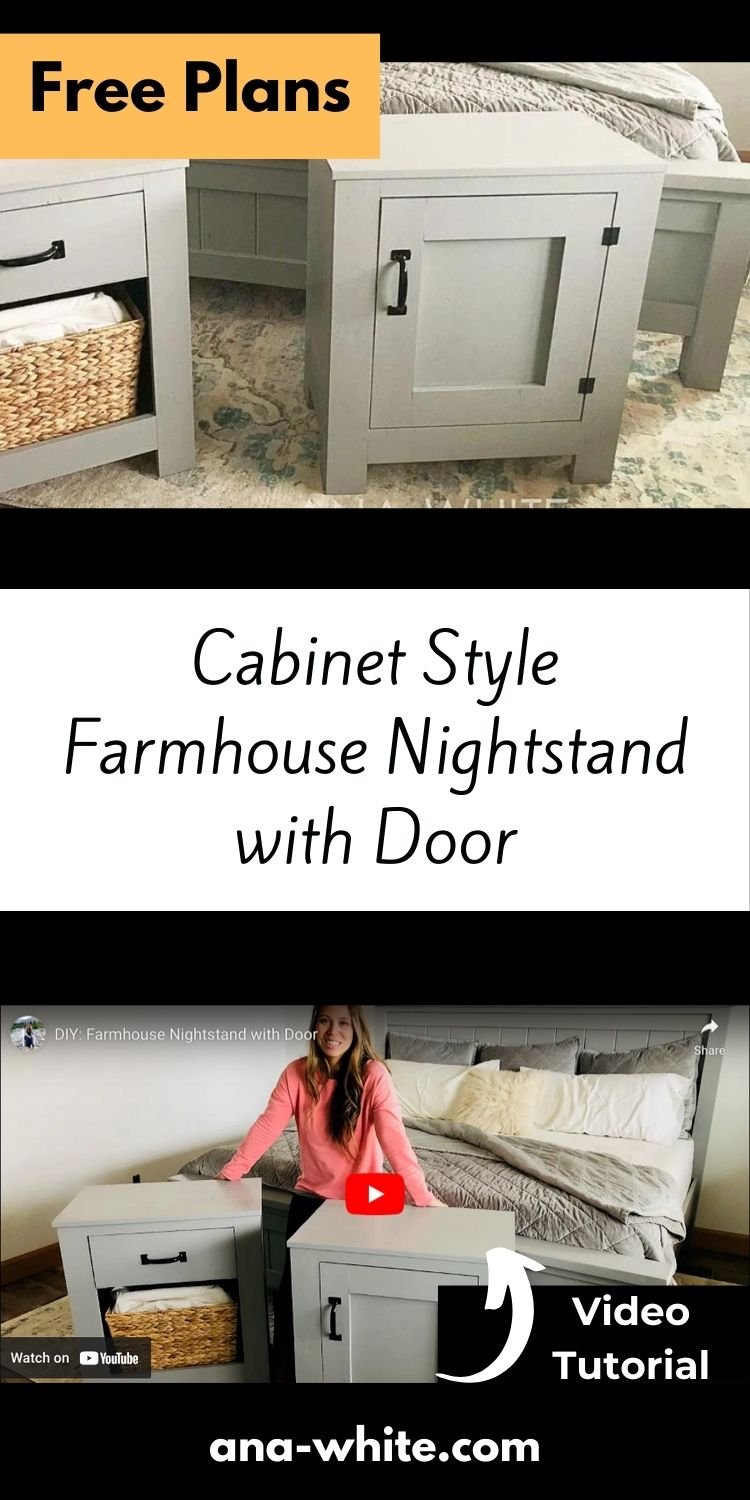
Pin For Later!
Preparation
- 48" x 48" piece of 3/4" thick plywood - I used paint grade birch
- 24" x 48" piece of 1/4" thick plywood
- 2 - 1x4 @ 8 feet long
- 1 - 1x2 @ 4 feet long
- 1 - 1x6 @ 8 feet long
- Set of hinges
- Knob or handle
- Magnetic clasp or hasp
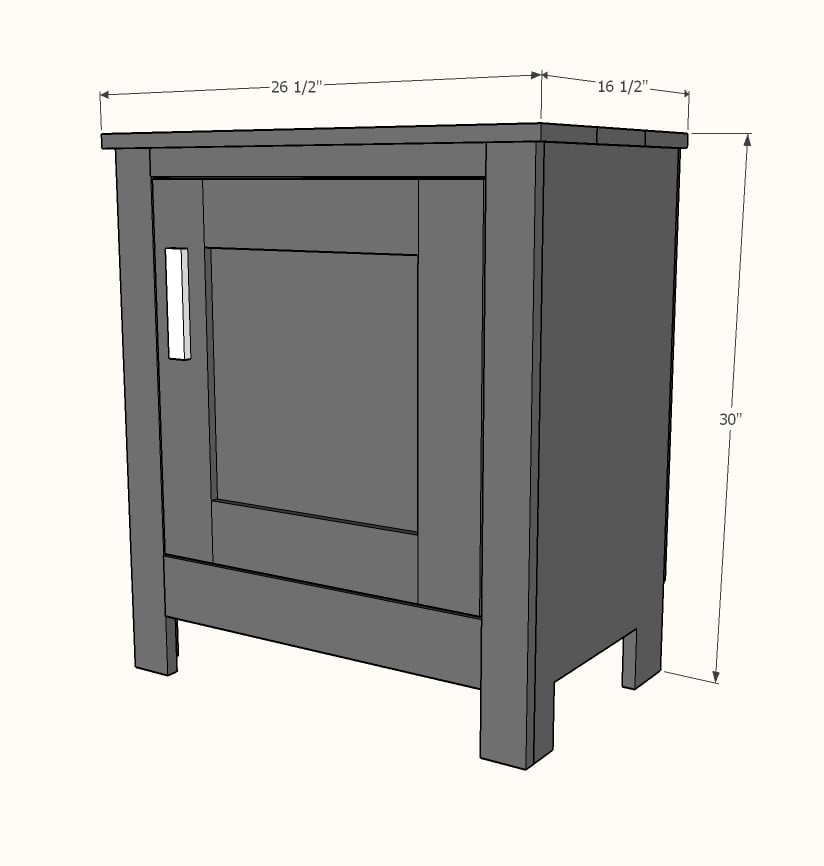
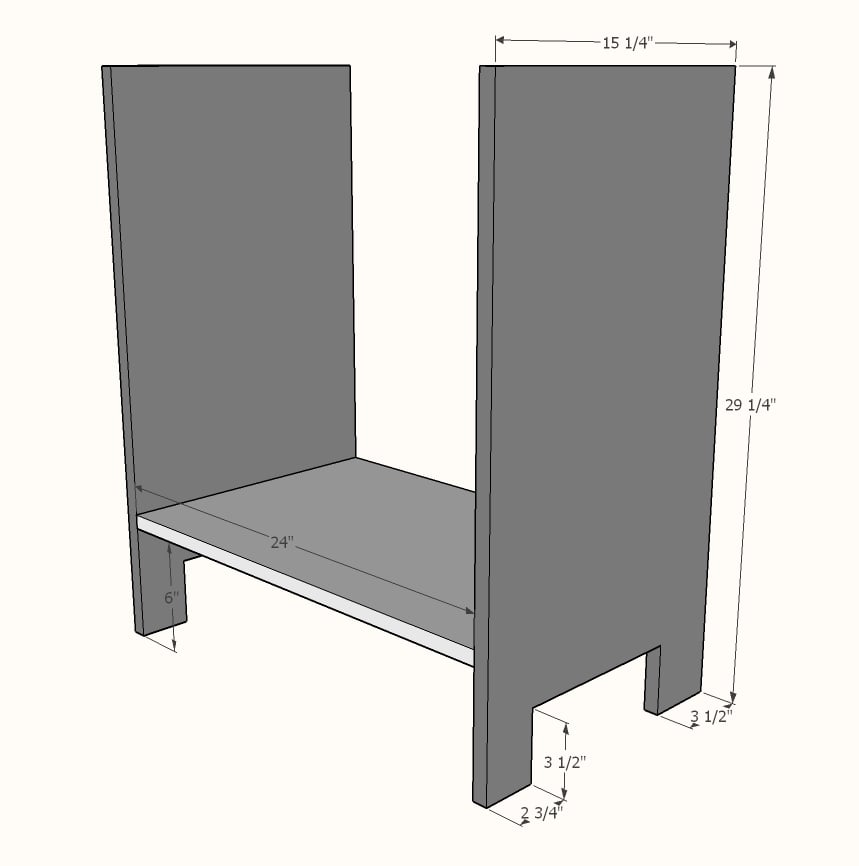
- 2 - 3/4" plywood @ 15-1/4" x 29-1/4" - Sides
- 1 - 3/4" plywood @ 15-1/4" x 24" - Bottom
- 2 - 1x4 @ 29-1/4" - Face Frame Legs
- 1 - 1x4 @ 18-1/2" - Face Frame Bottom
- 1 - 1x2 @ 18-1/2" - Face Frame Top
- 2 - 1x2 @ 24" - Back Supports
- 1 - 1/4" plywood @ 25-1/2" x 24" - Back
- 3 - 1x6 @ 26-1/2" - Top
- 2 - 1x4 @ ~20-1/2" - Door Frame Stiles - measure and cut to fit
- 2 - 1x4 @ ~11-1/4" - Door Frame Rails - measure and cut to fit
- 1 - 1/4" plywood @ 13" x 15" - measure and cut to fit, about 1" larger than frame opening


Instructions
Step 1
Cut sides and bottom from 3/4" plywood.
Use a jigsaw to cut out sides to look like legs.
Drill three 3/4" pocket holes on ends of bottom shelf. Attach to sides with 1-1/4" pocket hole screws.
Step 2
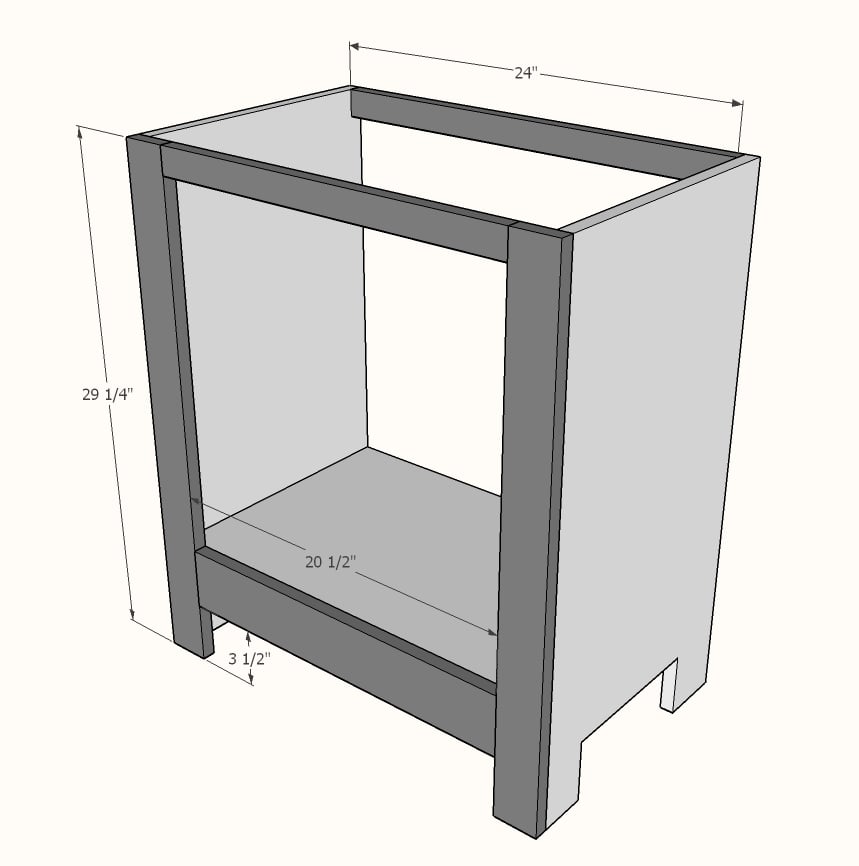
Cut all 1x boards on miter saw. Build face frame with 3/4" pocket holes and 1-1/4" pocket hole screws first. Attach face frame to plywood with 1-1/4" brad nails and wood glue.
Note top and bottom board length should be 18-1/2”
Drill 3/4" pocket holes on ends of 1x2 back support. Attach at top back corner with 1-1/4" pocket hole screws and glue.
Step 3
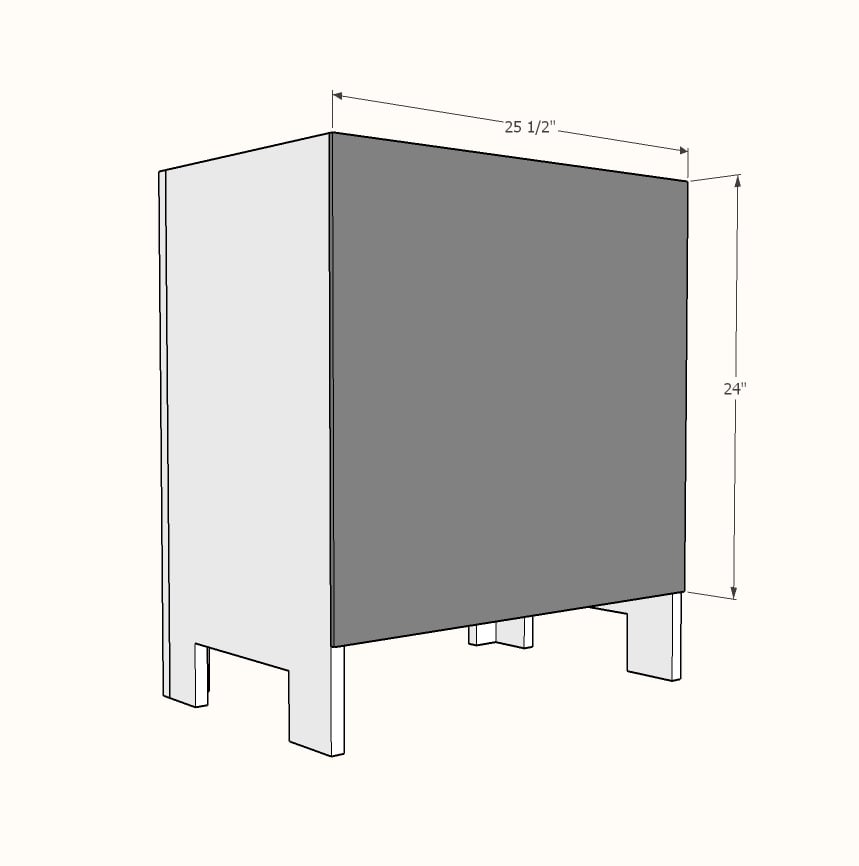
Cut back plywood with circular saw or table saw. Nail on with 3/4" brads and wood glue.
Step 4
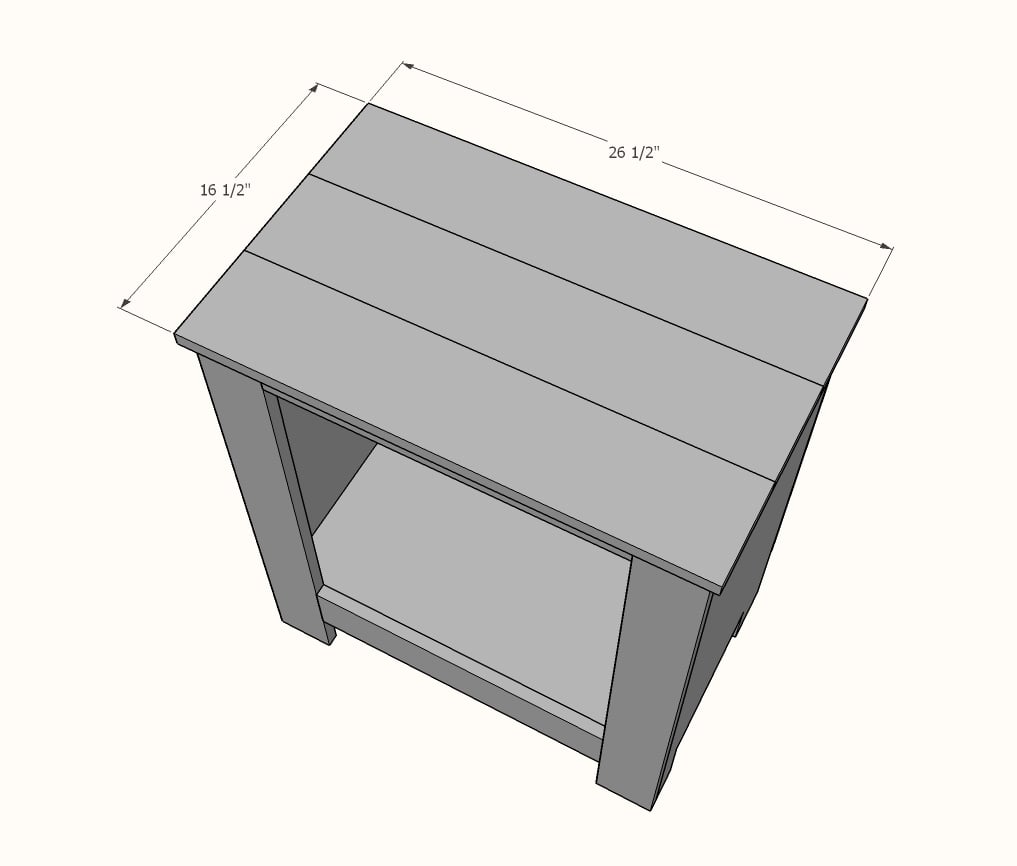
Build top with 1x6s pocket holed together at edges. Attach to top with 1-1/4" brad nails and wood glue.
Step 5