
Free plans to build your own chicken coop from Ana White. This plan is designed around two sheets of tin roofing, that do not need to be cut. The coop is constructed in panels, then the panels are put together to create the coop, and the tin sheets lap on top.
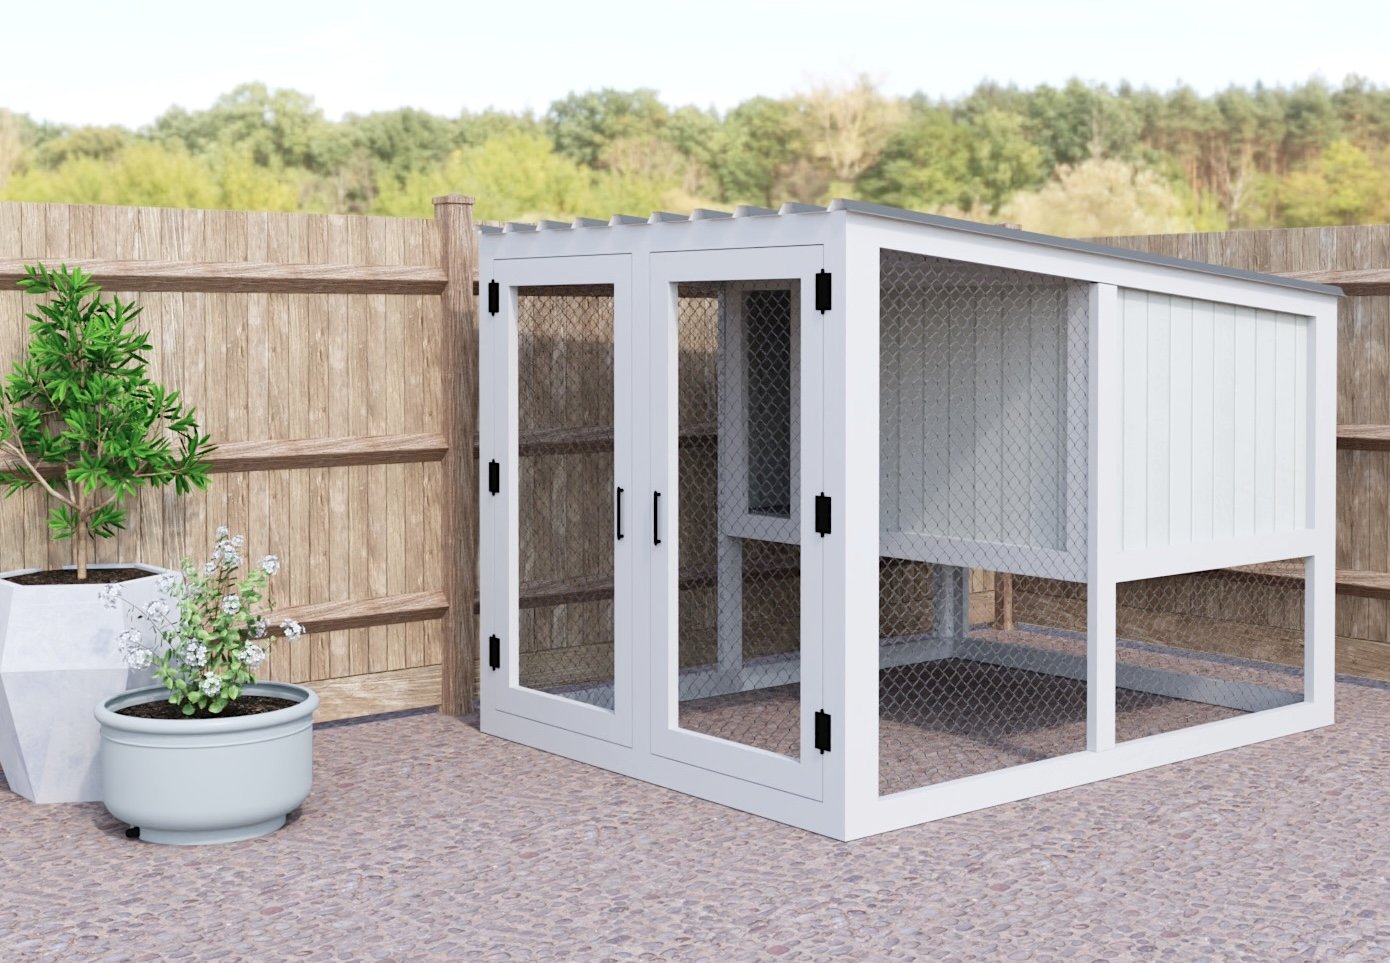
This chicken coop features a fully covered area with a built in run and coop. The enclosed coop size is about 24 square feet. The open run area is an additional 48 square feet. Double doors on the front make clean up easy. The enclosed coop area features double doors for accessing a nesting box, water and food trays.
This plan features a build video, step by step diagrams, shopping and cut lists, and reader submitted photos.
Image Note: This is a plan rendering
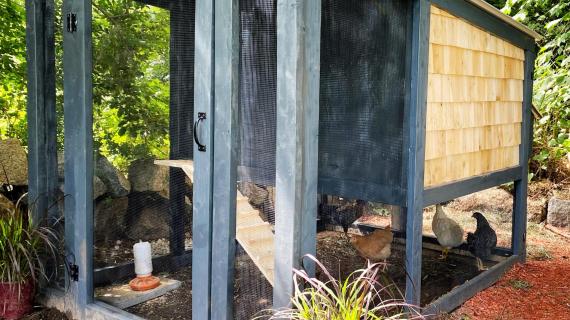
I built a single wide chicken coop with the concept of one sheet of tin for the roofing a while back.
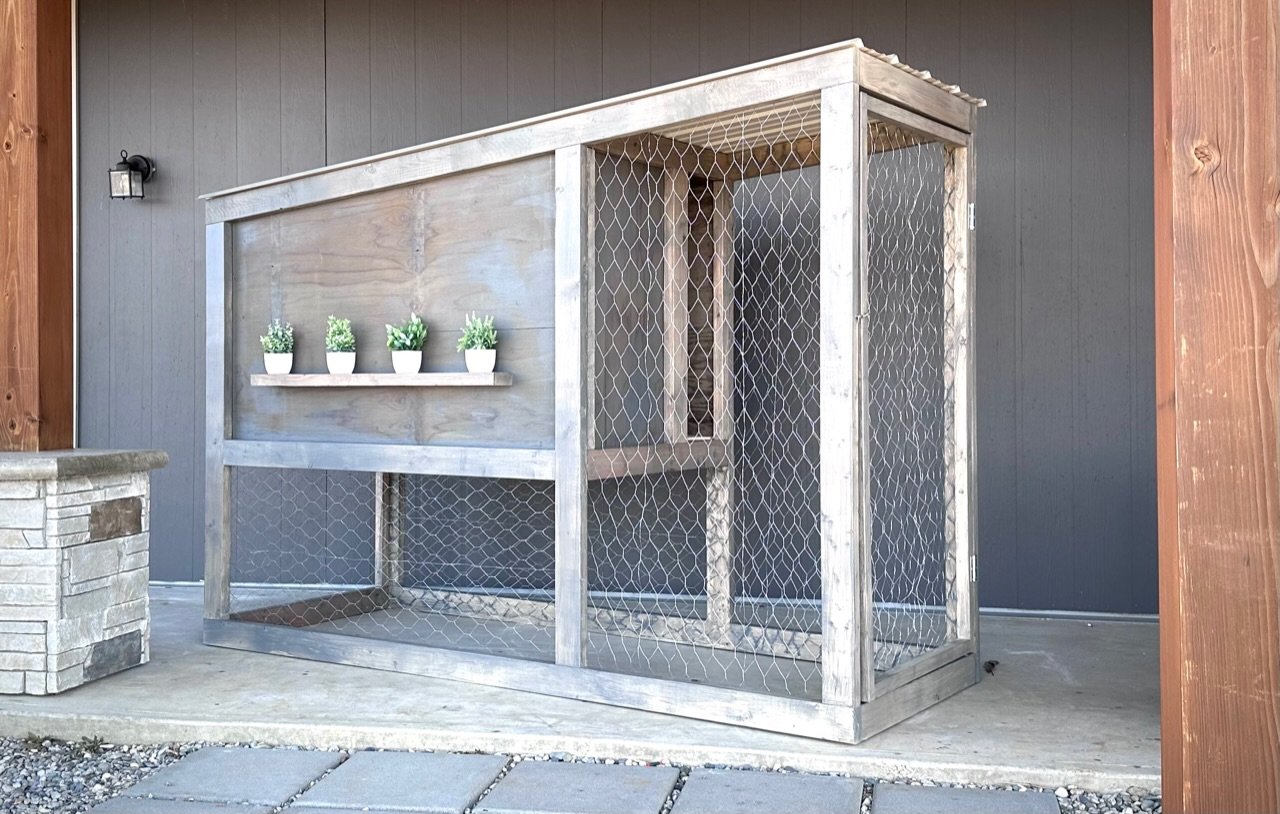
We've been using it and it has worked out well, but I had always wanted to go back and do a "double wide" version using two sheets of tin for the roof.
This coop is great in that it covers the run and coop. Chickens love to be under things, so space under the enclosed coop adds room. We love the big doors to easy clean the coop, and the enclosed coop part is at a good height to rake out and keep clean.
Video of Building the Single Wide Coop
This coop follows much of the same building practices as the single wide coop. Please watch this video to see how this coop is put together.
Free Plans to Build This a Modern Chicken Coop with Run
We are glad to be able to provide the free plans for the double wide version. Please share a photo if you build, we love seeing your work!
Pin For Later!


Preparation
- About 30 2x4 @ 8 feet long
- 2 sheets of 1/2" thick t1-11 siding panels
- 1 sheet of CDX plywood, 1/2" thick - for the floor of the coop
- 1-3/4" star bit exterior screws (about 100)
- 2-1/2" star bit exterior screws (about 100)
- 2-1/2" pocket hole screws (about 100)
- 2 - 36" x 96" coverage metal roofing panels
- roofing screws to match the roofing panels, 1-3/4" length (about 50)
- 16' of 48" wide poultry fencing
- 16' of 24" wide poultry fencing
- staples for attaching poultry fencing
- wire snips for cutting poultry fencing
- 10 - exterior hinges
- 4 - exterior pulls
- Gate latches or catches for keeping doors closed
Side Walls
- 2 - 2x4 @ 91-1/2" - long point to short point measurement, both ends cut at 5 degrees off square, ends ARE parallel
- 2 - 2x4 @ 91-1/8"
- 2 - 2x4 @ 53-1/4" - long point measurement, one end cut at 5 degrees off square
- 2 - 2x4 @ 57-3/8" - long point measurement, one end cut at 5 degrees off square
- 2 - 2x4 @ 61" - long point measurement, one end cut at 5 degrees off square
- 2 - 2x4 @ 43-1/4"
- 2 - t1-11 panels @ 48" wide x 40-1/8" (long point) and 35-7/8" (short point) - cut panels in mirror
Back Wall
- 2 - 2x4 @ 72"
- 2 - 2x4 @ 52-7/8"
- 1 - 2x4 @ 65"
- 1 - 2x4 @ 28-7/8"
Front Wall
- 2 - 2x4 @ 72"
- 3 - 2x4 @ 61"
Inner Wall
- 2 - 2x4 @ 69"
- 3 - 2x4 @ 33-1/4"
- 1 - t1-11 siding panel @ 48" x 40-1/4"
Additional Framing
- 4 - 2x4 @ about 68" - measure and cut to fit, framing inside the enclosed coop area
- 1 - 2x4 @ 69" - framing to support roof panels
- 1/2" plywood floor panel should be measured and cut to fit, about 48" x 69"
Back Doors - Measure and cut to fit, these measurements are estimates
- 4 - 2x4 @ 28-5/8"
- 4 - 2x4 @ 23-1/2"
- 2 - t1-11 siding panels at about 26" x 26"
Front Doors - Measure and cut to fit, these measurements are estimates
- 4 - 2x4 @ 60-3/4"
- 4 - 2x4 @ 23-1/2"


This chicken coop is an advanced plan and should be constructed with knowledge of general building practices.
The coop is covered and will shed water, but the bottom 2x4s need to be protected or use treated lumber. The coop should sit up off the ground to avoid the bottom 2x4s rotting out. Set up on pavers or a gravel base that drains.
Instructions
Step 1

Cut and layout the two side walls, so the walls are in mirror.
Mark pocket hole locations.
Drill 1-1/2" pocket holes, two per joint, at all joints.
Attach together with 2-1/2" exterior pocket hole screws.
Step 2

Cut the t1-11 siding panels to fit on the inside of the coop so the finished side is facing outward.
Screw down with 1-3/4" exterior screws.
Repeat for second side wall, so the two side walls are mirror of each other.
Add the fencing to the open areas, using the 48" wide fencing. Trim off excess.
Step 3

Build the back wall panel using 1-1/2" pocket holes and 2-1/2" pocket hole screws.
TIP: Stain or paint before adding the fencing.
Add the 24" wide fencing to the bottom.
Step 4

Build the front wall panel with 1-1/2" pocket holes and 2-1/2" pocket hole screws.
Step 5

Attach the four panels together in the final location. Attach at corners with 2-1/2" self tapping screws.
Adjust the chicken coop frame for square.
Step 6

Build the inner wall framing as shown using 1-1/2" pocket holes and 2-1/2" pocket hole screws and glue.
Step 7

Add the t1-11 siding piece with 1-3/4" screws, so it is flush to the side and top.
Step 8

Fit the inner wall inside the coop and attach with 2-1/2" screws.
Step 9

Measure and cut 2x4s to fit inside the coop to support the floor and roof.
These can be added with screws from outside or pocket hole screws.
The roof framing should match the plane of the side walls, so it is easy to attach the roofing panels to in later steps.
Step 10

Measure and cut the floor plywood, install and screw down. The floor plywood will help with the structure of the coop.
Step 11

Measure the doors and cut, so the doors overall are 1/4" smaller than the opening for a final 1/8" gap on all four sides when installed.
Consider the plywood floor when attaching the t1-11 panels to the back side of the doors.
Install the door with hinges and latches.
Step 12

Repeat for the front doors, but add poultry fencing to the open frames.
Step 13

Place the roofing panels on top and center so even overhangs on all four sides.
Screw the roofing panels to the four walls and the roof framing 2x4s.