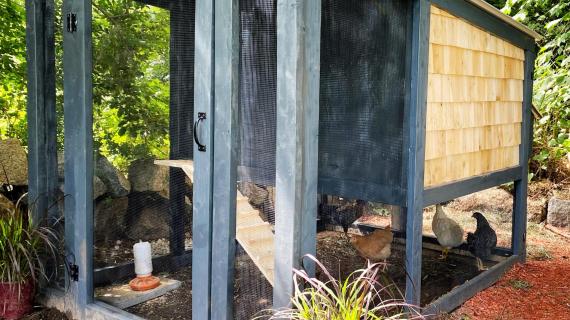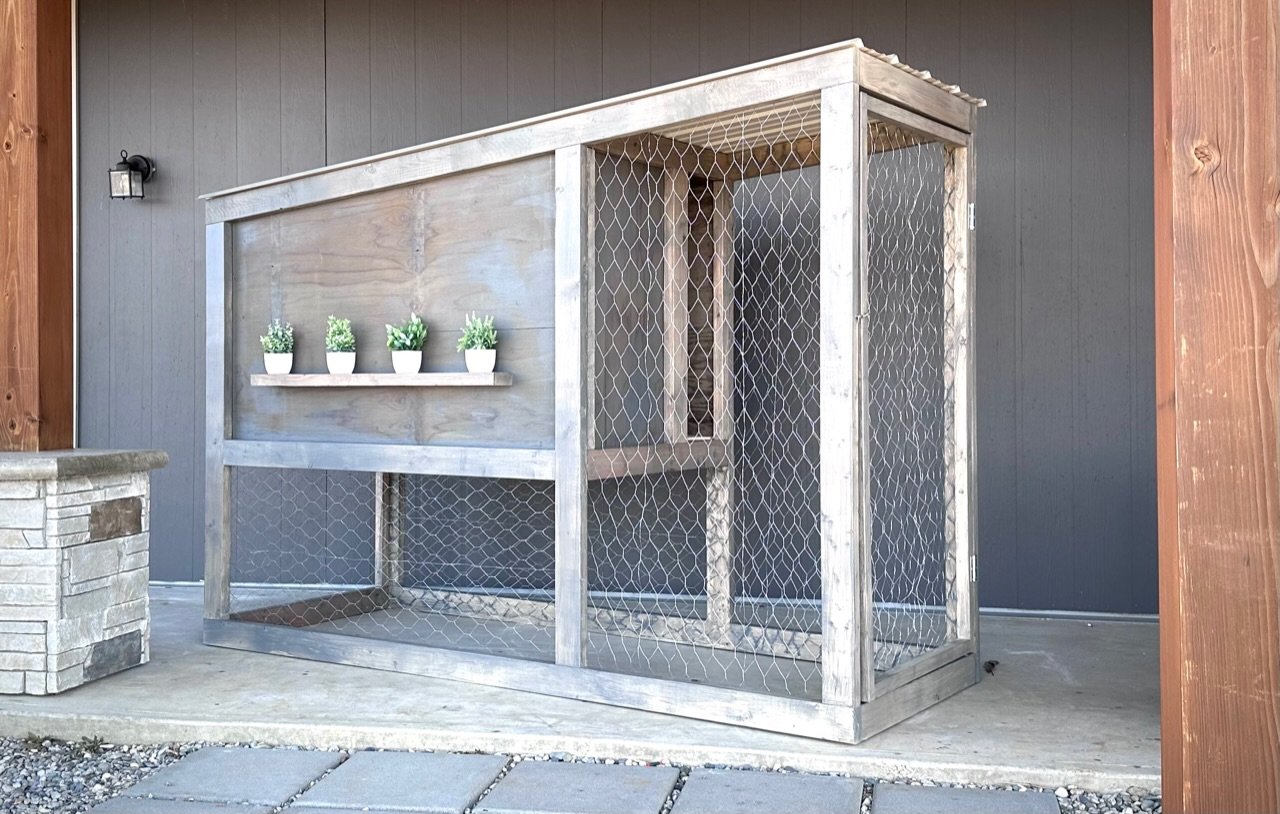

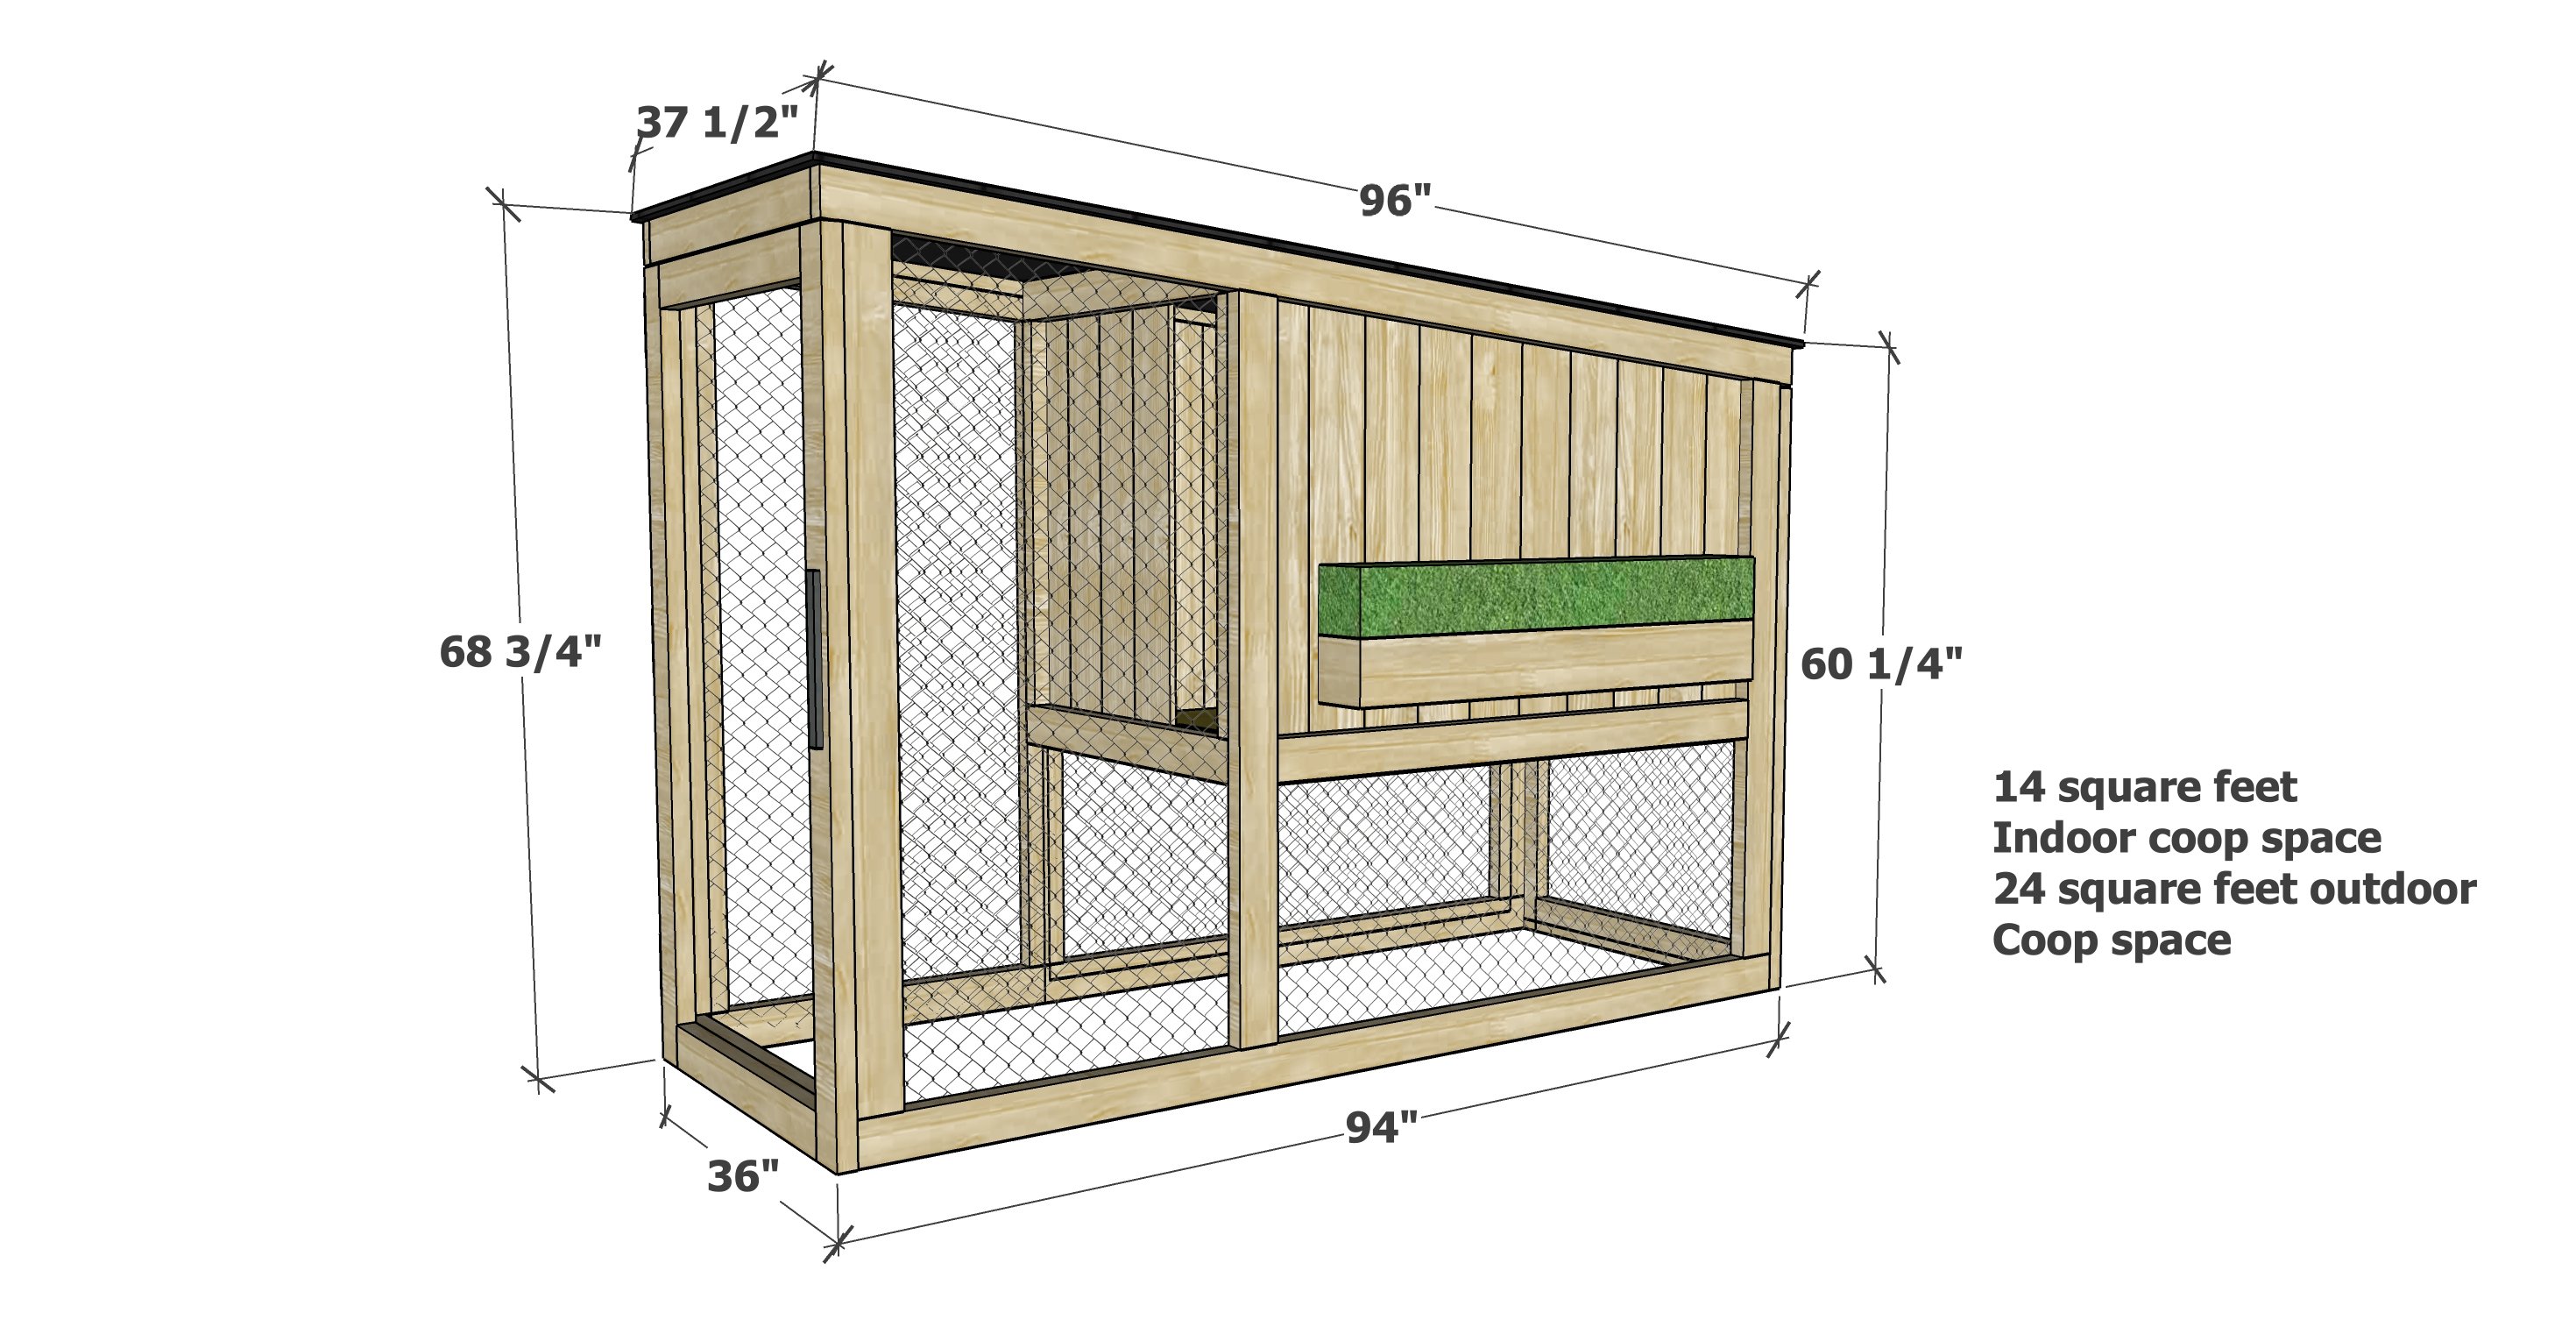
Build your own chicken coop! This modern style chicken coop is narrow in footprint to fit most anywhere, and looks great in urban to country backyards.
This chicken coop fits 2-4 chickens, and has a built in egg box and run. It's easy to clean and feed and water. The coop is fully covered to stay dry, with options for shade and sun.
This is a free, diy chicken coop plan - complete with step by step diagrams, shopping and cut lists and build video from Ana-White.com
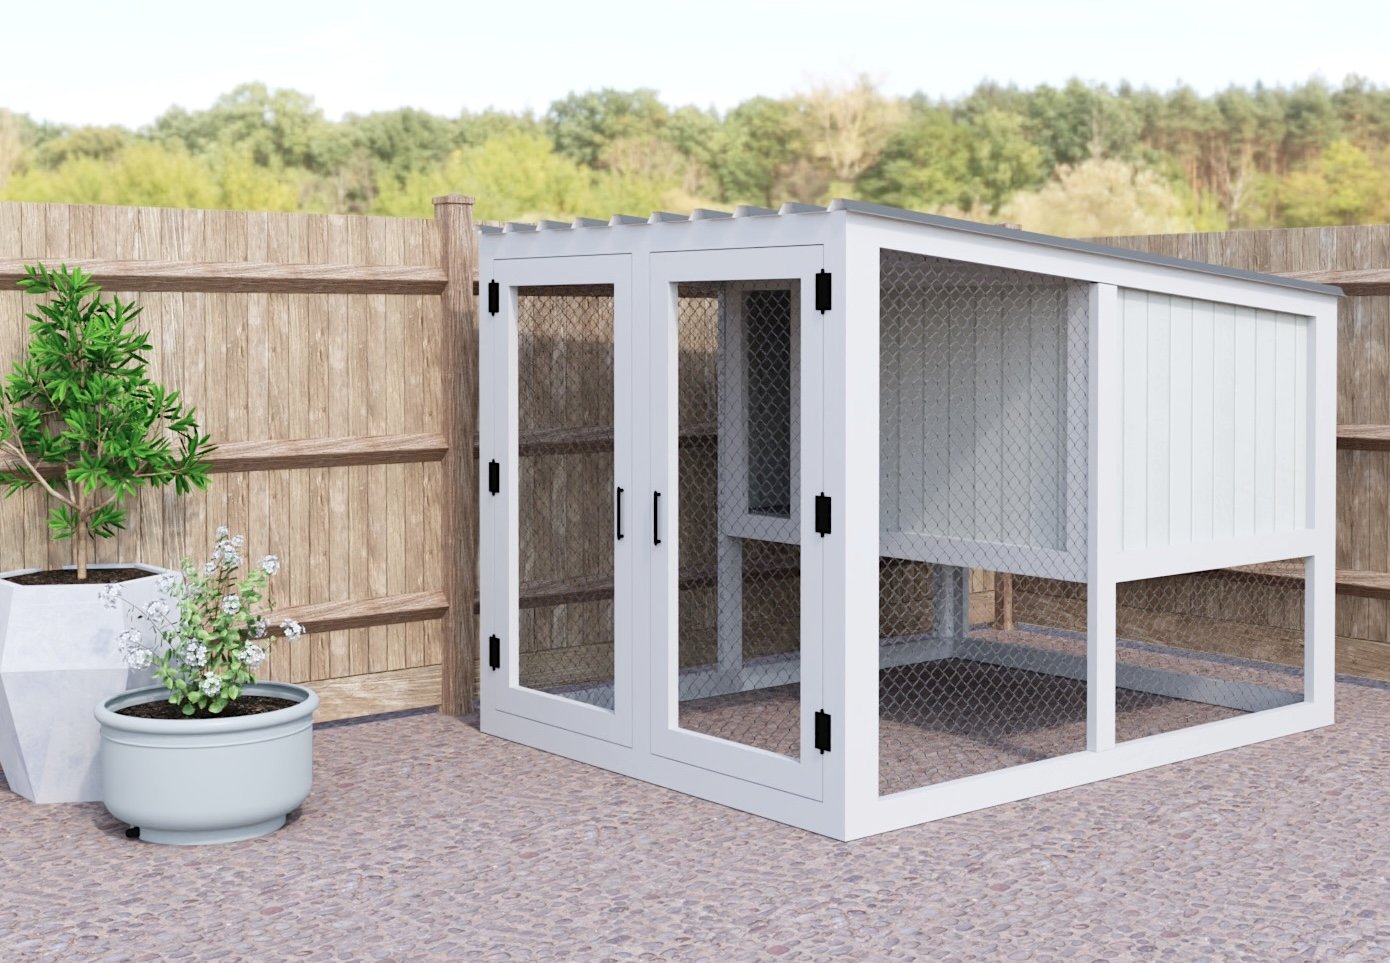
See Also: Double Wide Chicken Coop Plans
We loved this plan so much, we had to make a double wide version! The free plans are here.
Single Wide Modern Chicken Coop Plans
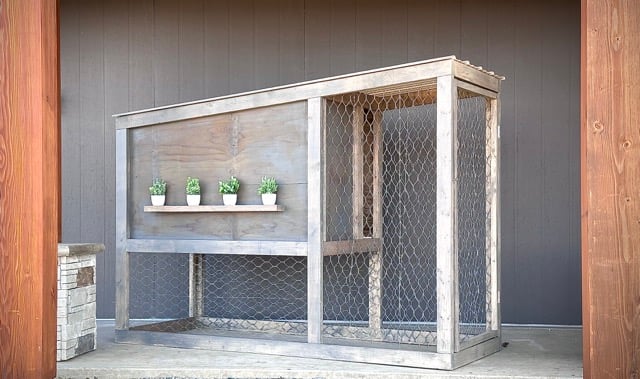
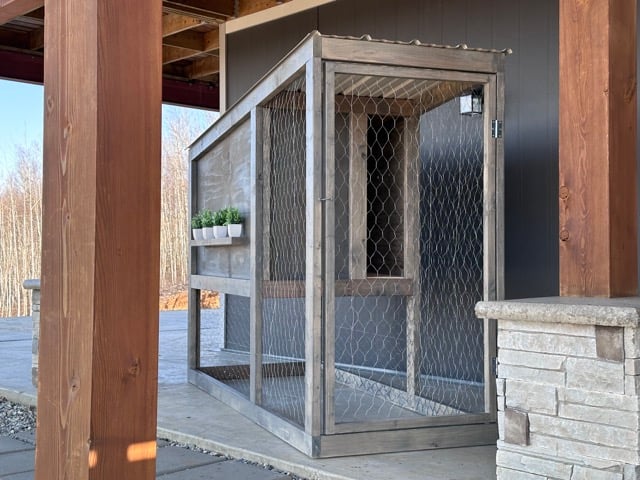
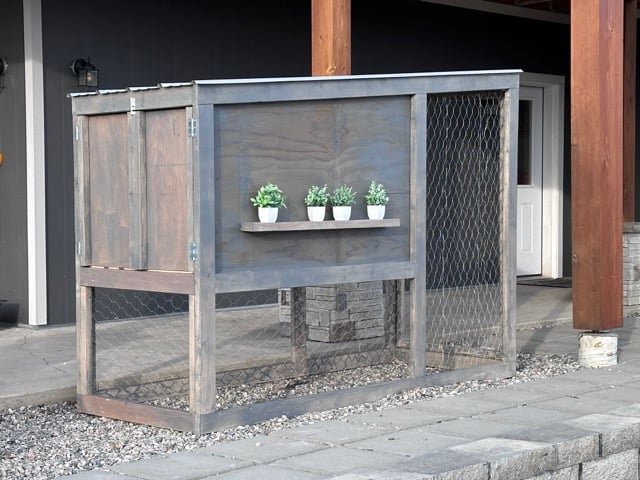

Small Modern Chicken Coop Features
- Modern styling
- Narrow profile fits just about anywhere
- Coop, nesting box and run combo
- Removeable floor and nesting box for cleaning
- Easy cleaning - just open the door up and rake out into a tub, and add new bedding
- DIY Friendly - designed for one sheet of tin and simple building techniques
WATCH! DIY Modern Chicken Coop Build Video
FAQ About this Chicken Coop
How do I Insulate? - There are many different ways to insulate. The ceiling can be insulated with foam board (attach with foam board fasteners to keep in place) The floor can be insulated with a thick layer of straw. Walls can be insulated with reflective insulation rolls, cardboard stapled on, or foam board - but may need 1/4" plywood overtop to prevent chickens from pecking at. Doors can be covered in blankets for the winter. Avoid an airtight seal, allow the coop to breathe to prevent dense, moist air from building up inside the coop.
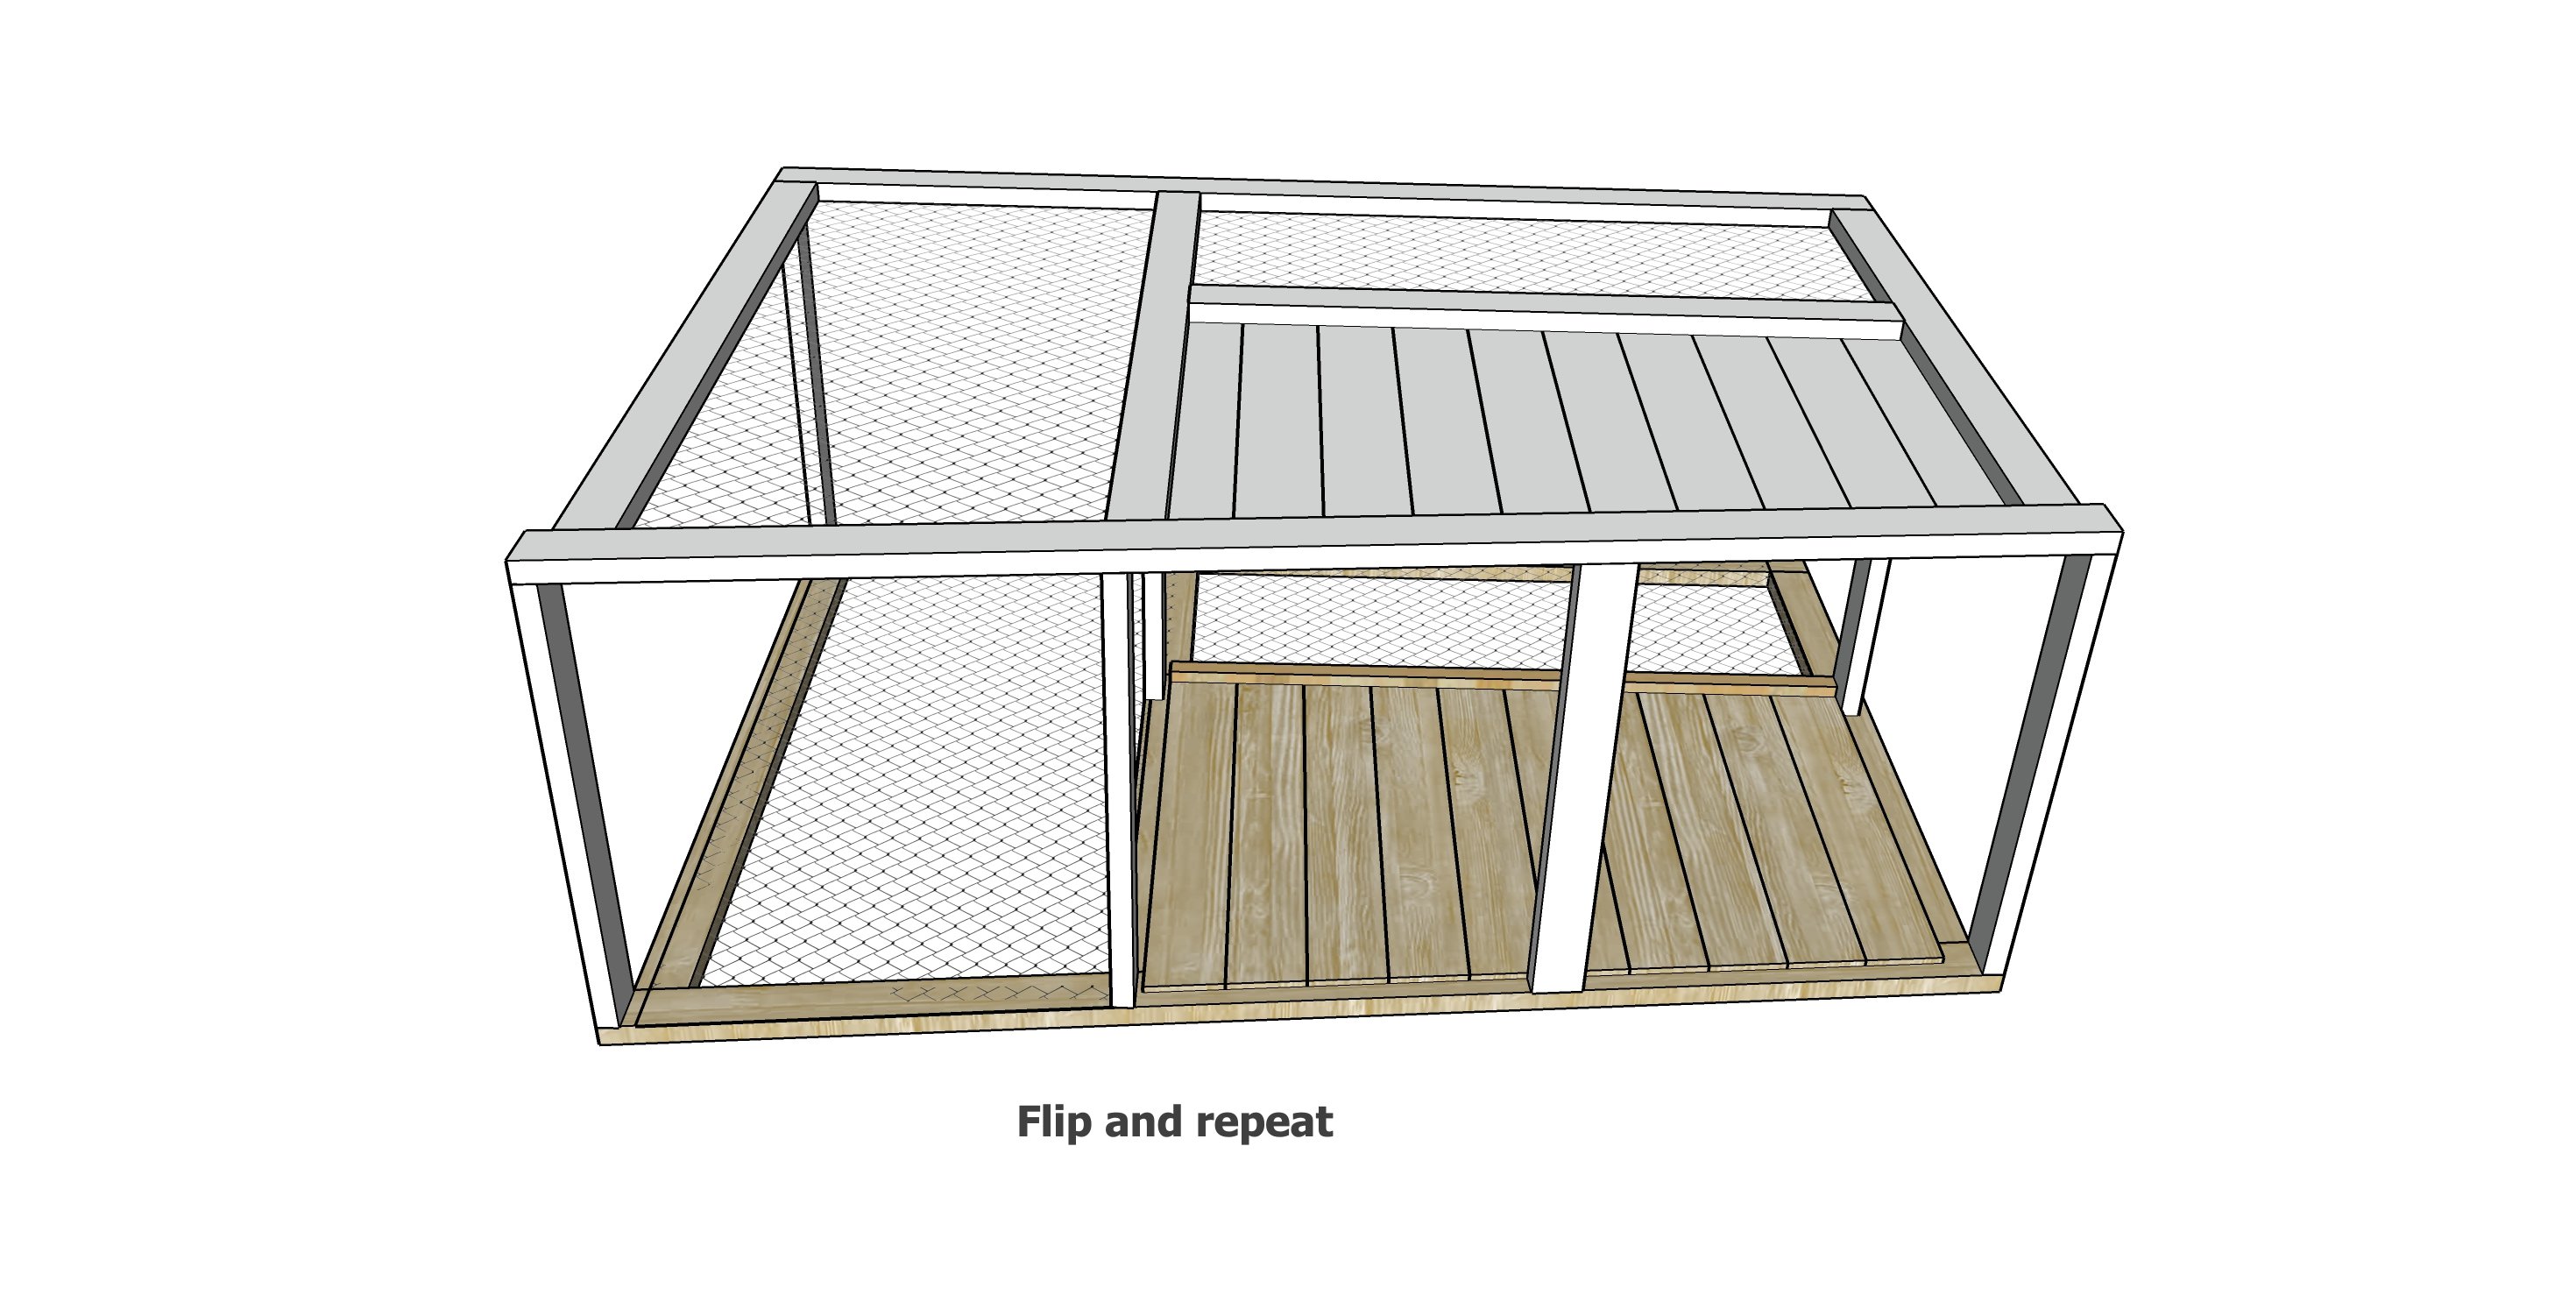
Can I make double wide? Yes, you could easily add 36" to the width to create a double sized coop and use two sheets of tin on the top. I would love to create a plan if there is enough interest.
Is this heavy? Yes, it is heavy. My husband and I were able to move it, but it was not an easy task. I would suggest a couple more hands to help move it. Consider prefabbing up the panels and doors, then assembling the pieces at the final placement of the chicken coop.
Will it blow away in the wind? If you live in a high wind area, don't orientate it broadside to the prevailing wind direction. Also, staking down would help. It is sturdy and I would be surprised to see it blow over.
What type of wood should I use? Douglas fir for the 2x4s is a good choice, a good balance between cost and longevity. Douglas fir can last almost as long a cedar. Cedar is also a good choice. I don't recommend treated, as the chickens can peck at it and the chemicals may end up in your eggs. Placing the base up on concrete pavers will help with water drainage underneath. Also, a good finish on the bottom of the wood will help with longevity.
Can I convert this chicken coop to a tractor? Yes, adding handles to the ends or wheels on the heavy side (back) will make this more portable.
What finish should I use? I finished the exterior using a water based semitransparent stain. I left the inside unfinished. It may be a good idea to add thick coats of polyurethane to the floor to help clean it.
Pin For Later!

Preparation
- 6 - 2x4 @ 10 feet long
- 8 - 2x4 @ 8 feet long
- 2 - 2x2 @ 8 feet long
- 15 - 5-1/2" wide x 72" long cedar fence pickets
- 1 - 4'x8' sheet of exterior 3/4" plywood
- 1 - sheet of tin, 37-1/2" x 8 feet
- 16 - metal screws
- 20 feet of 36" wide chicken wire or hardware cloth
- 15 feet of 24" wide chicken wire or hardware cloth
- 100 - 2-1/2" exterior pocket hole screws
- 120 - 1-1/4" to 1-3/4" length - self tapping star bit screws
- 20 - 2-1/2" self tapping star bit screws
- staples for attaching chicken wire or hardware cloth
- 2 sets of exterior hinges
- 2 latches
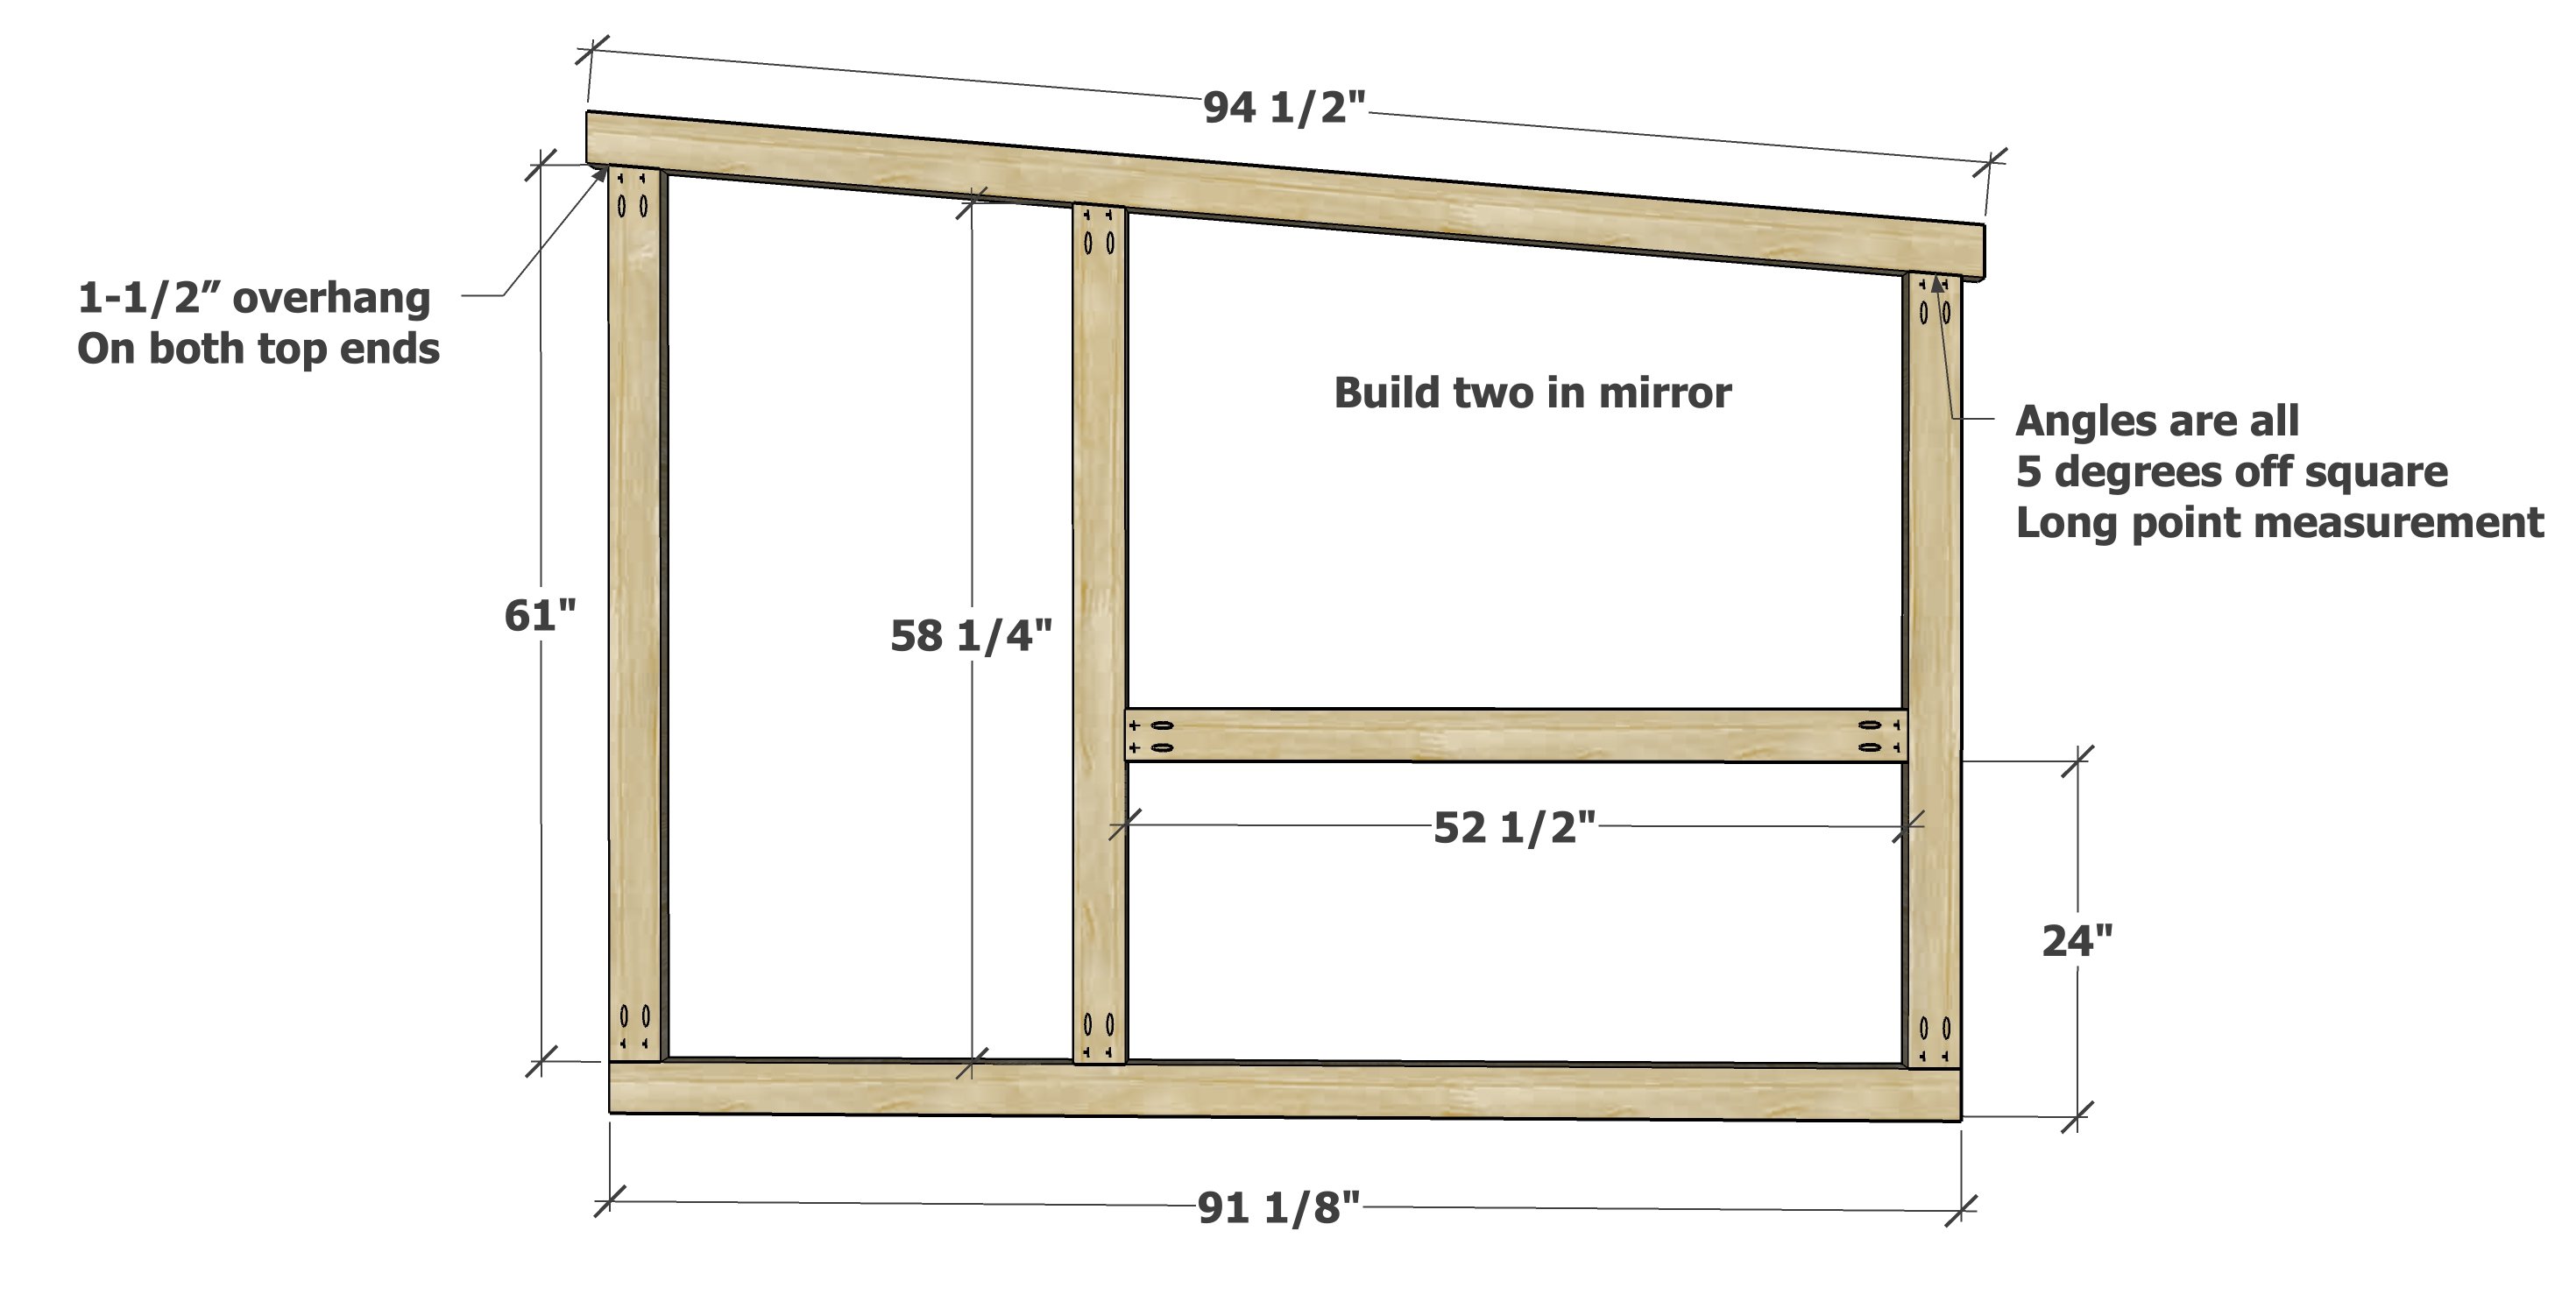
Side Frames
- 2 - 2x4 @ 94-1/2" - both ends cut at 5 degrees off square, ends are parallel, long point to short point measurement
- 2 - 2x4 @ 61" - one end cut at 5 degrees off square, long point measurement*
- 2 - 2x4 @ 58-1/4" - one end cut at 5 degrees off square, long point measurement*
- 2 - 2x4 @ 53-1/4" - one end cut at 5 degrees off square, long point measurement*
- 2 - 2x4 @ 91-1/8"
- 2 - 2x4 @ 52-1/2" *
Middle System
- 7 - 2x4 @ 33"
- 2 - 2x2 @ 55"
- 2 - 2x2 @ 34-1/8"
- 1 - 3/4" plywood @ 32" x 54-1/2" - floor
Doors
- 2 - 2x4 @ 64" *
- 2 - 2x4 @ 56" (shown as 56-3/8", but reduced to allow door swing clearances)*
- 5 - 2x4 @ 29"
Nesting Box
- 1 - 3/4" plywood @ 13" x 31-1/2"
- 3 - 3/4" plywood @ 13" x 6"
- 1 - 1x3 @ 31-1/2"
*Cut from the 10 foot long 2x4s
Cut longest cuts first to maximize materials use
For plywood, rip into strips 32" wide and 13" wide, 8 feet long. Then cut the floor from the 32" wide strip. Cut the nesting box from the 13" wide strip. Scrap strip can be used for front and back of nesting box.


Instructions
Step 1
Layout the two side frame pieces, so they are in mirror.
Mark out all pocket holes.
Drill 1-1/2" pocket holes on ends as shown in diagram.
Attach with 2-1/2" pocket hole screws.
Build the second frame in mirror.
TIP: It was a super paint o paint after adding the chicken wire. I would recommend a quick coat of finish on the insides of the frame before adding chicken wire.
Step 2
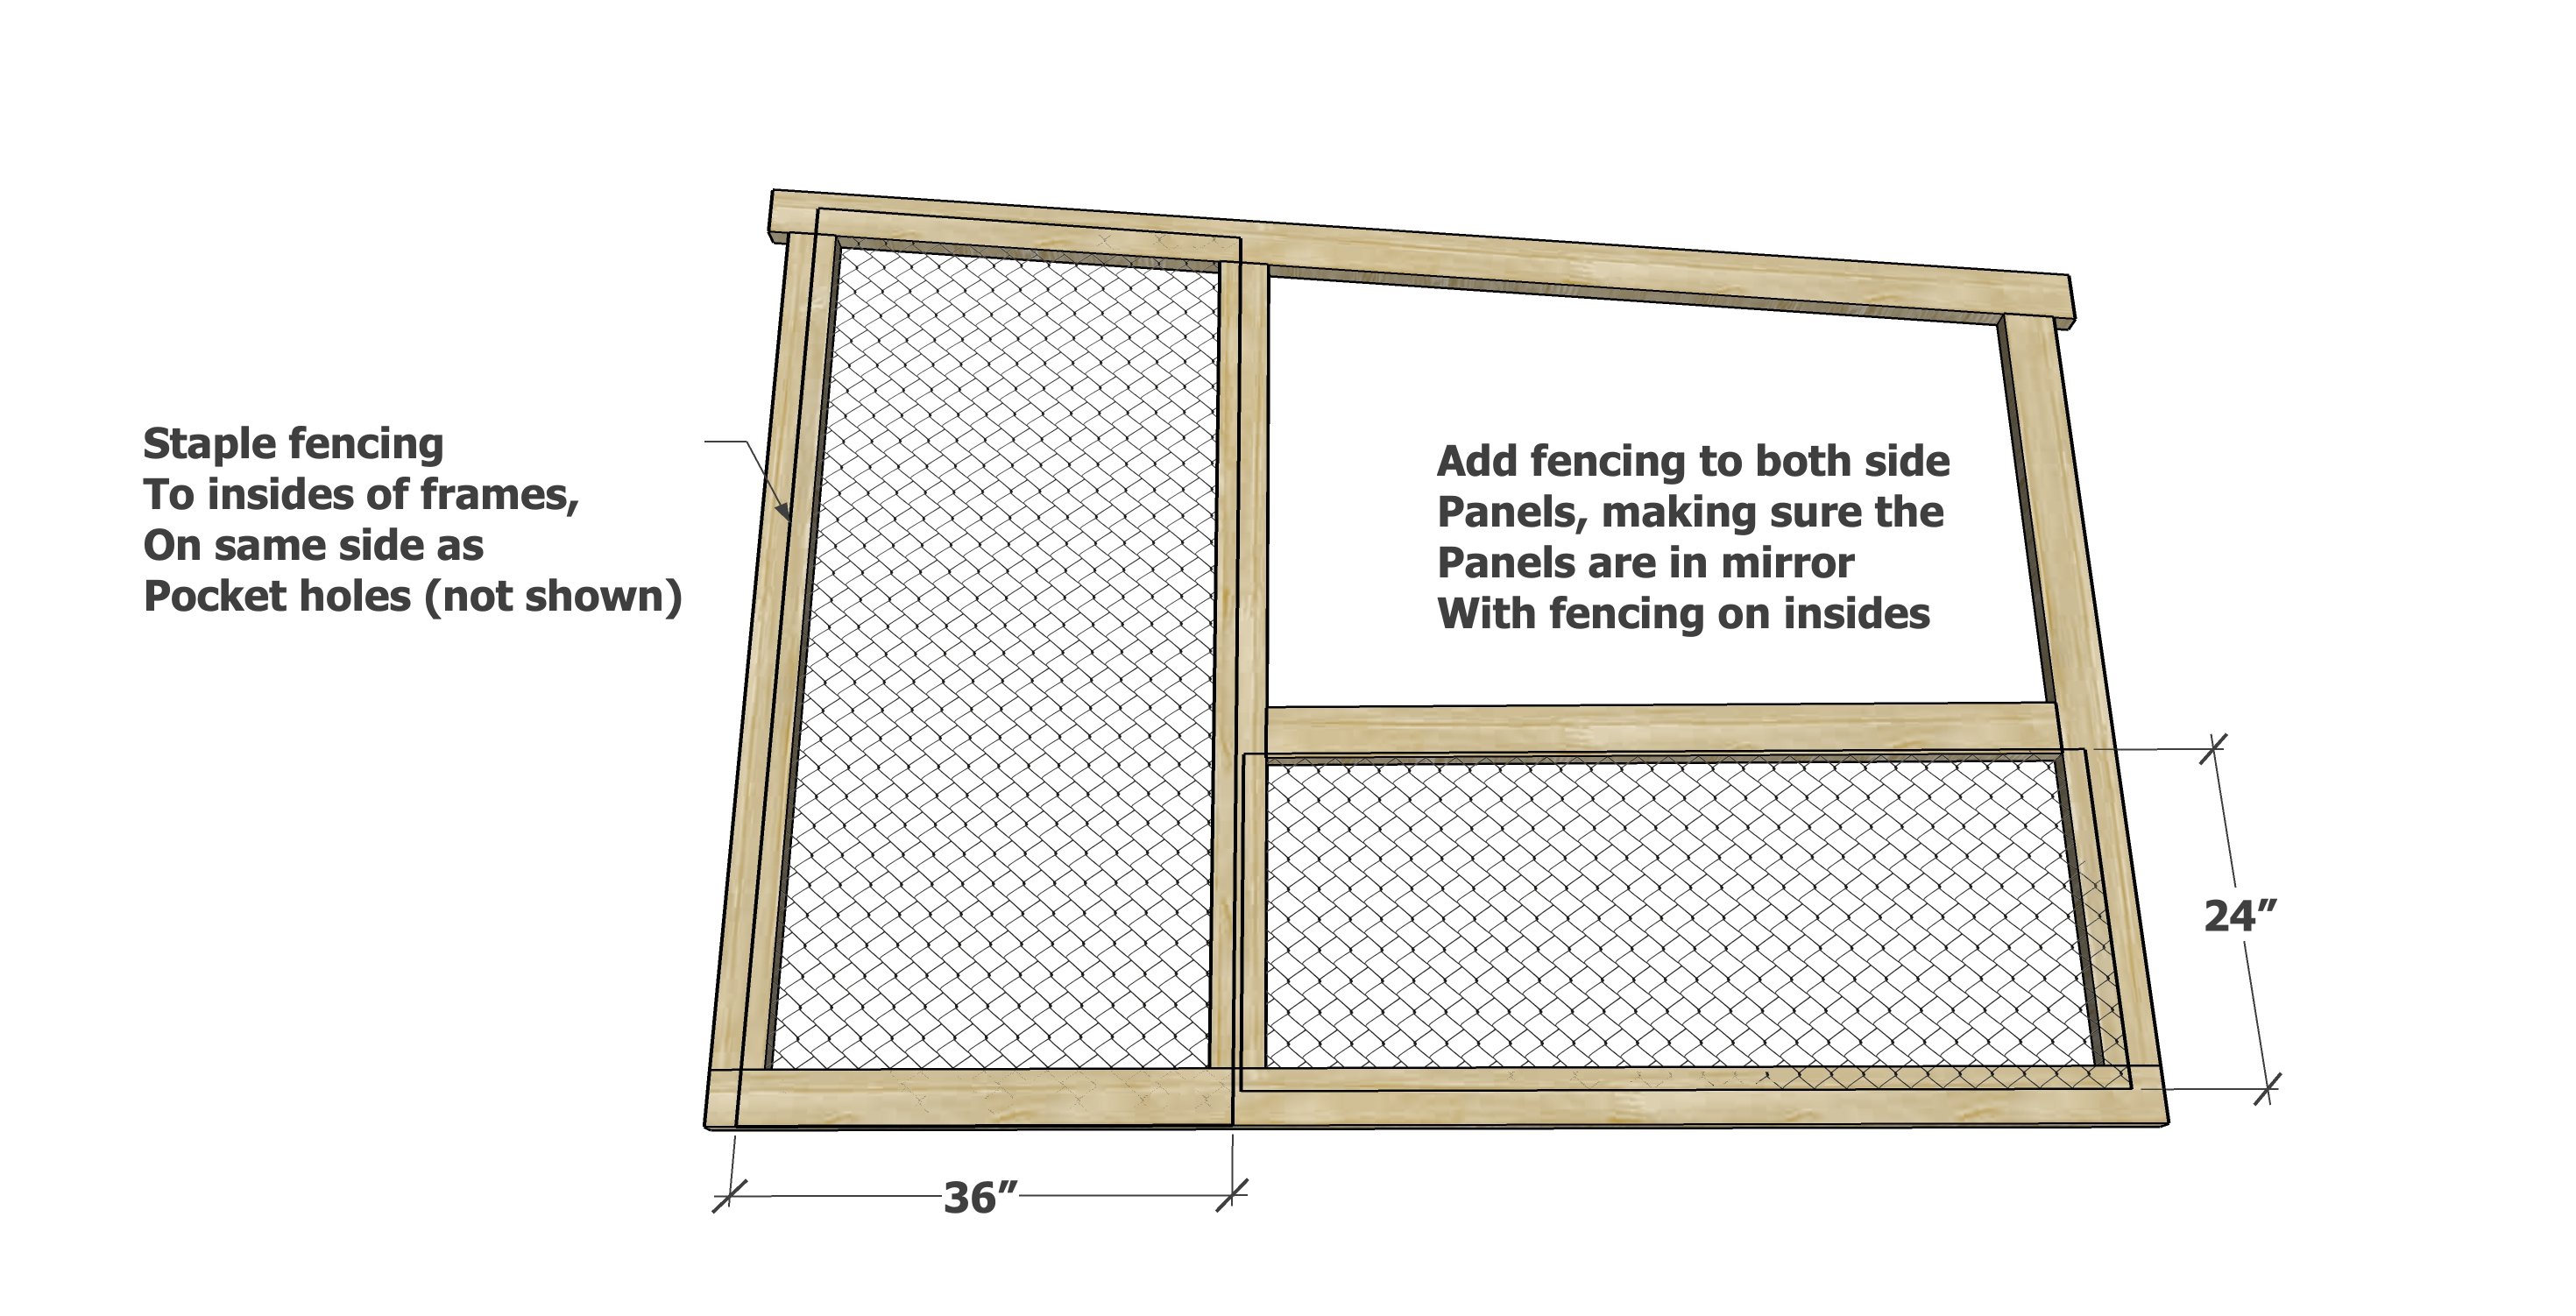
Attach chicken wire or hardware cloth to insides with staples. Trim back if necessary and fold edges over.
Step 3
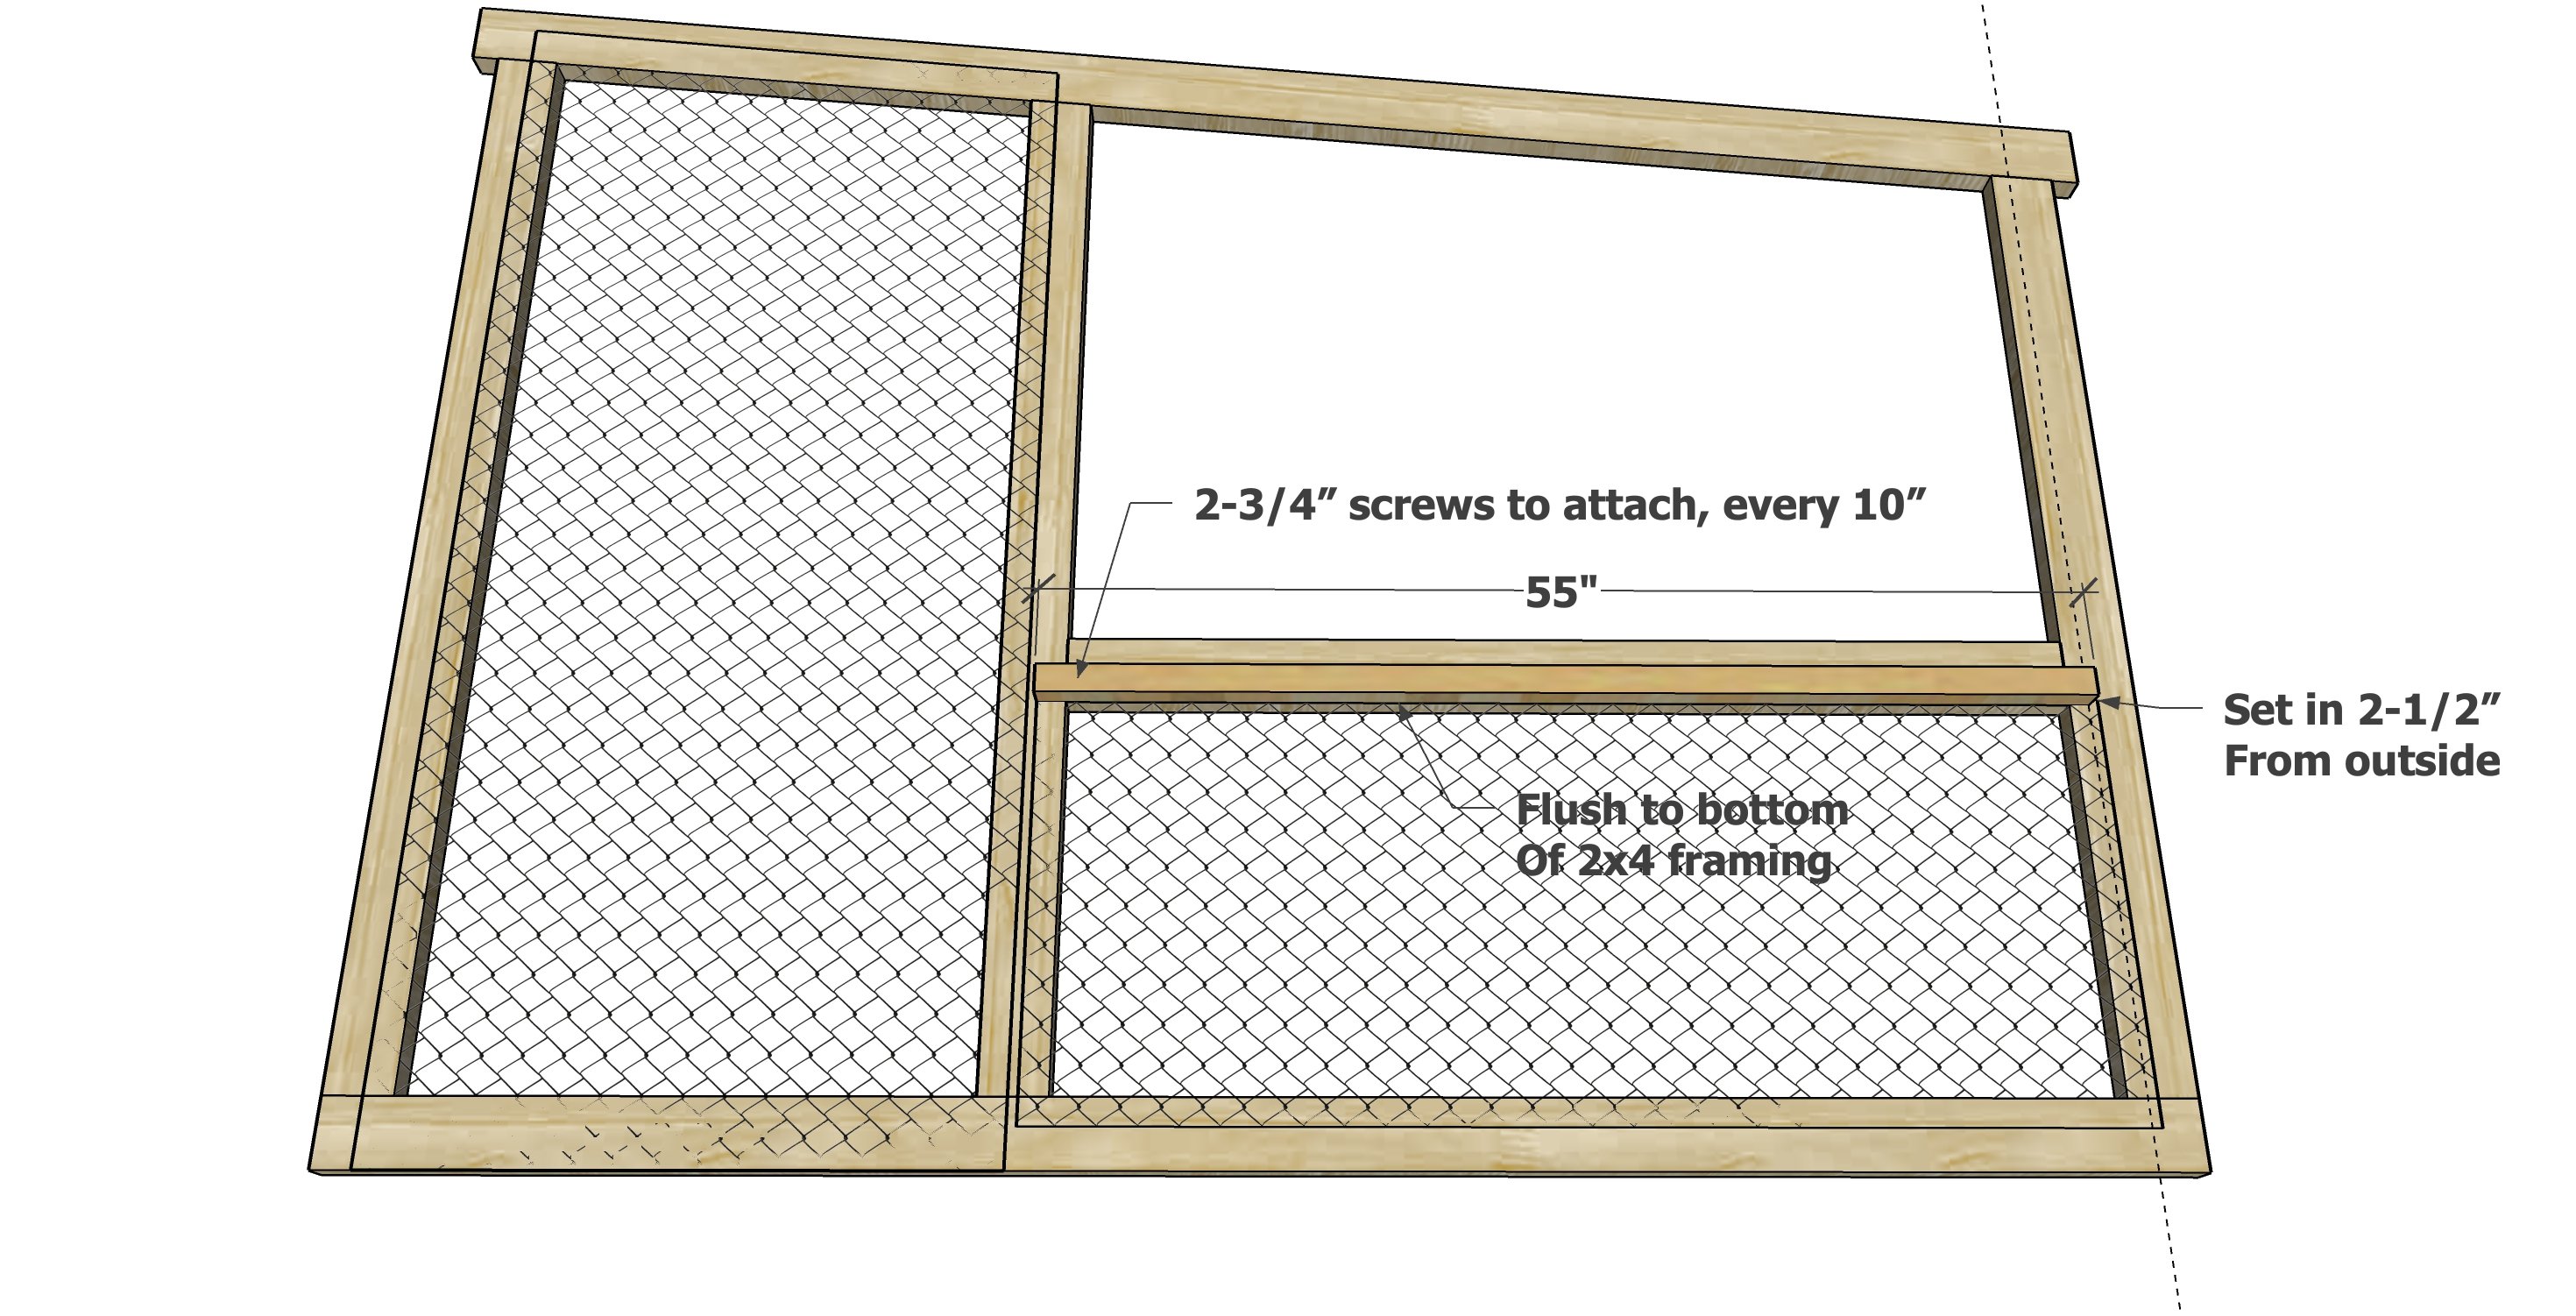
Add the 2x2 floor cleat to the insides of the side frame with the longer screws.
Step 4
In the video I used 1/2" thick exterior plywood instead of cedar fence pickets. This can be done, but there is alot of waste and alot of cutting. If you opt for the plywood instead of the cedar fence pickets, you will need two full sheets.
Cut the first cedar fence picket with the top at 5 degrees, long point measurement, as shown. Attach to inside of the side walls, flush to the top of the 2x2. There should be minimum 1-1/2" space above the cedar fence picket.
Step 5
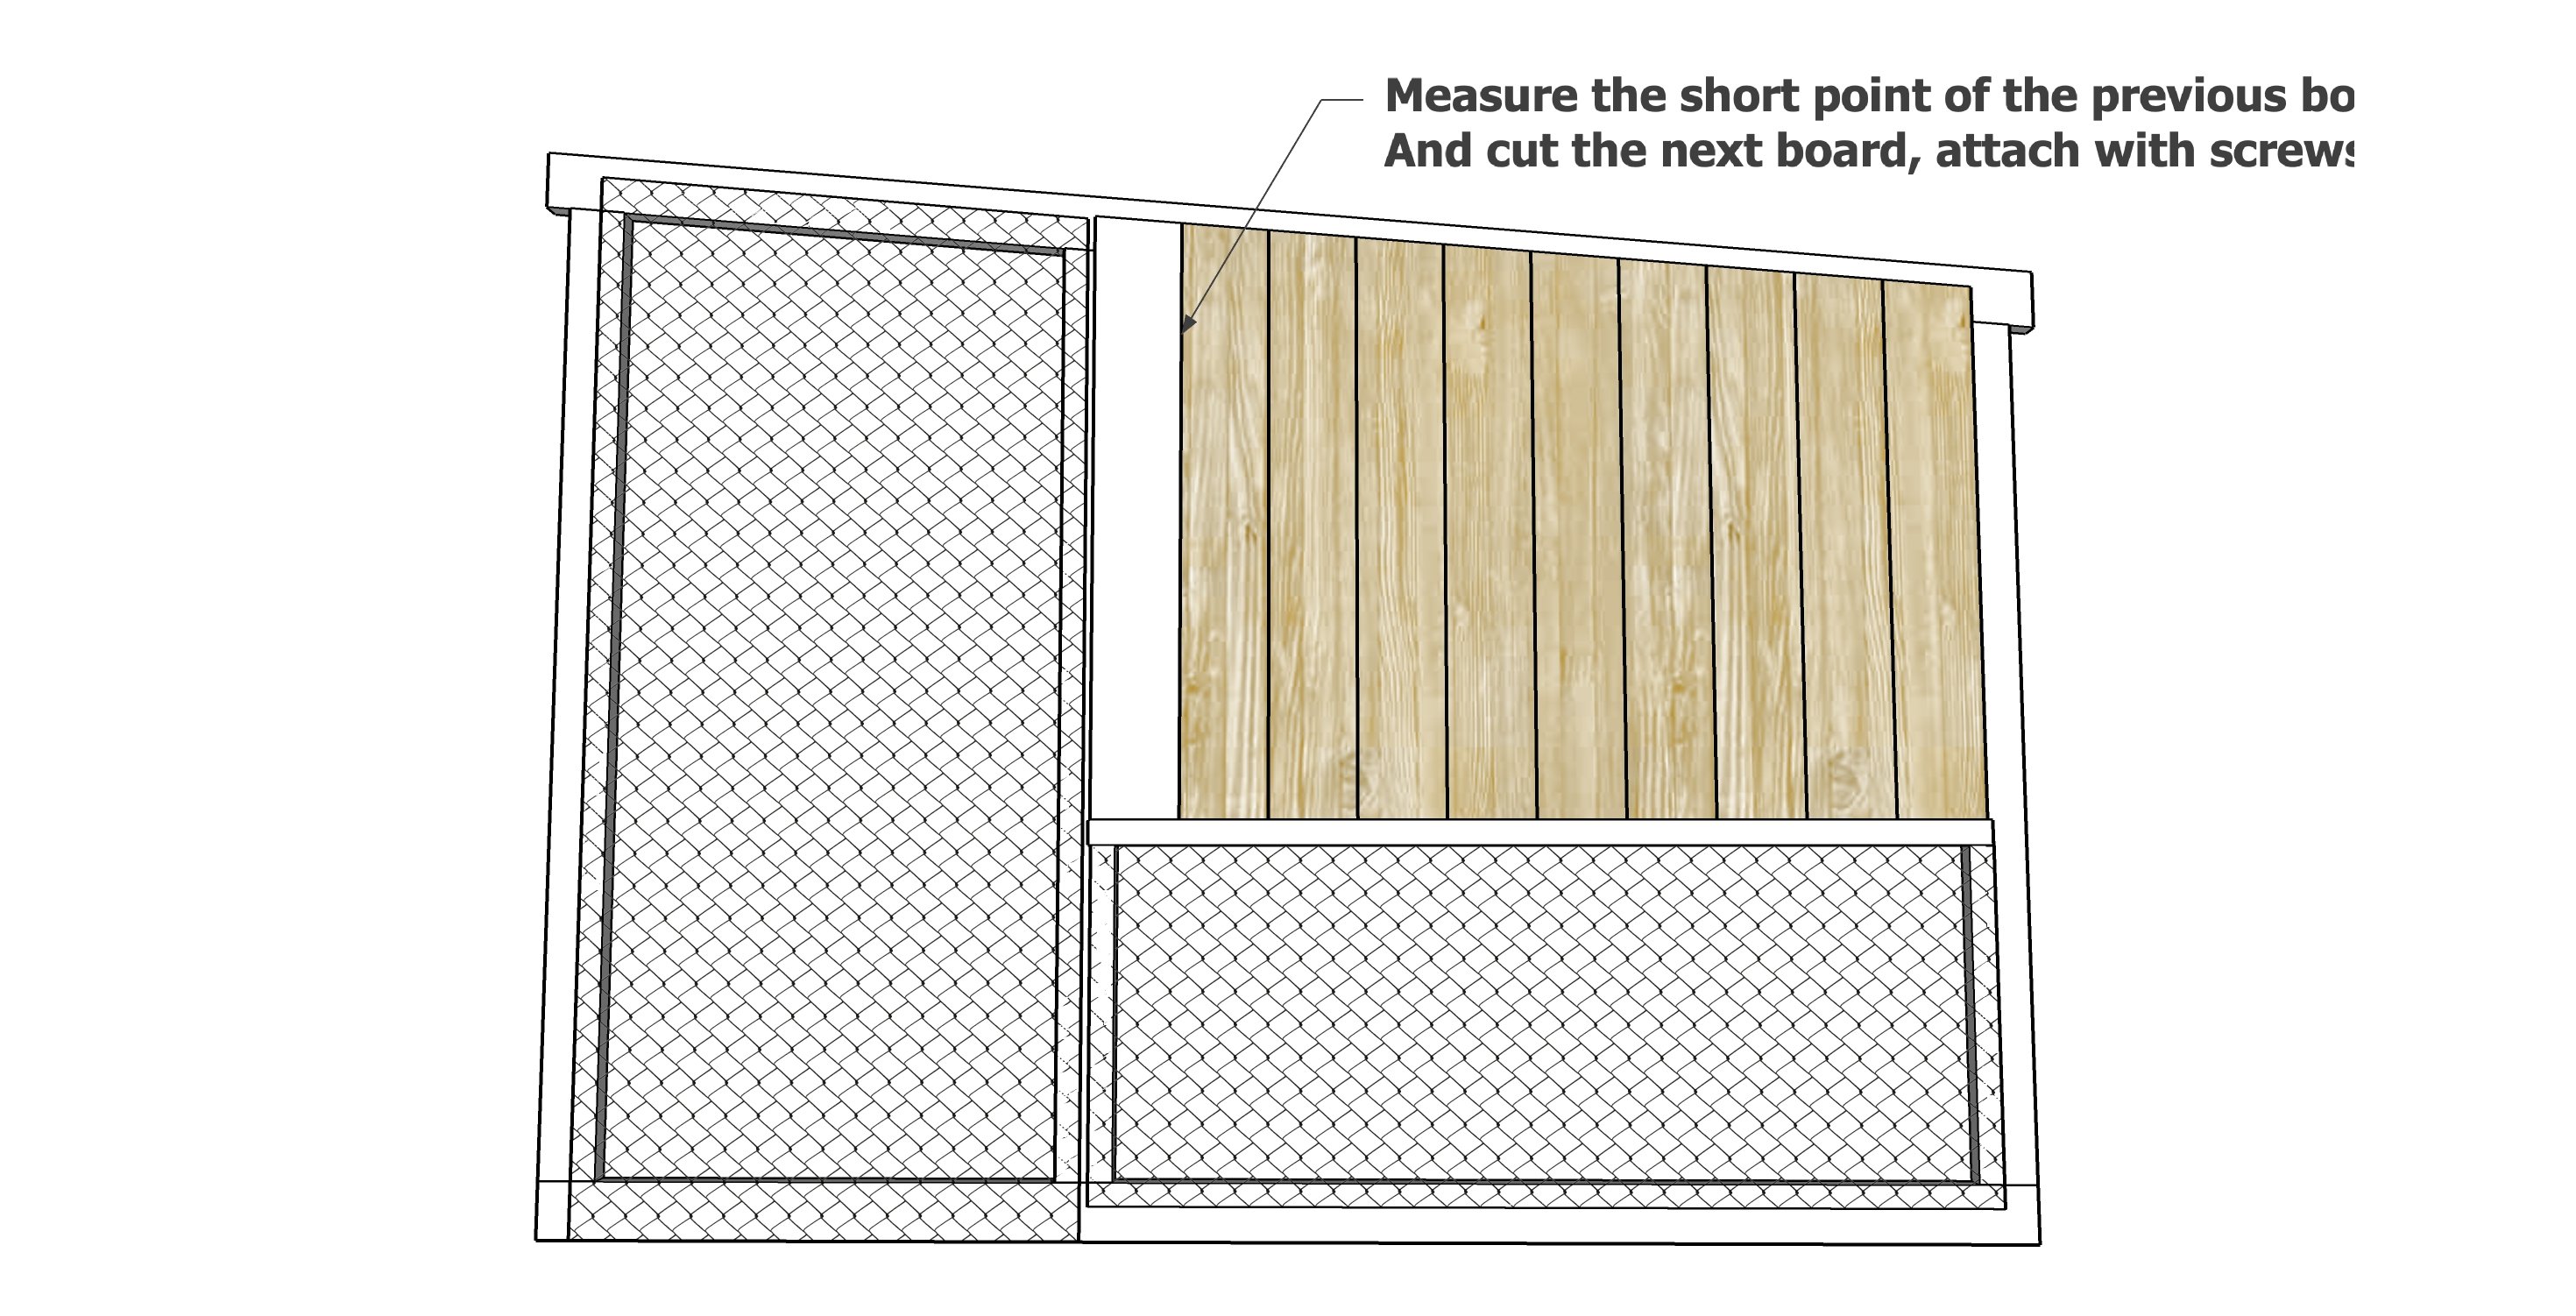
Measure the short point length of the first cedar fence picket and use this measurement to cut the next cedar fence picket. You may need to use a new cedar fence picket for the next cut, but eventually will be able to start using the scrap ends as the cuts get shorter.
Attach with the shorter star bit screws, two screws per joint.
Step 6

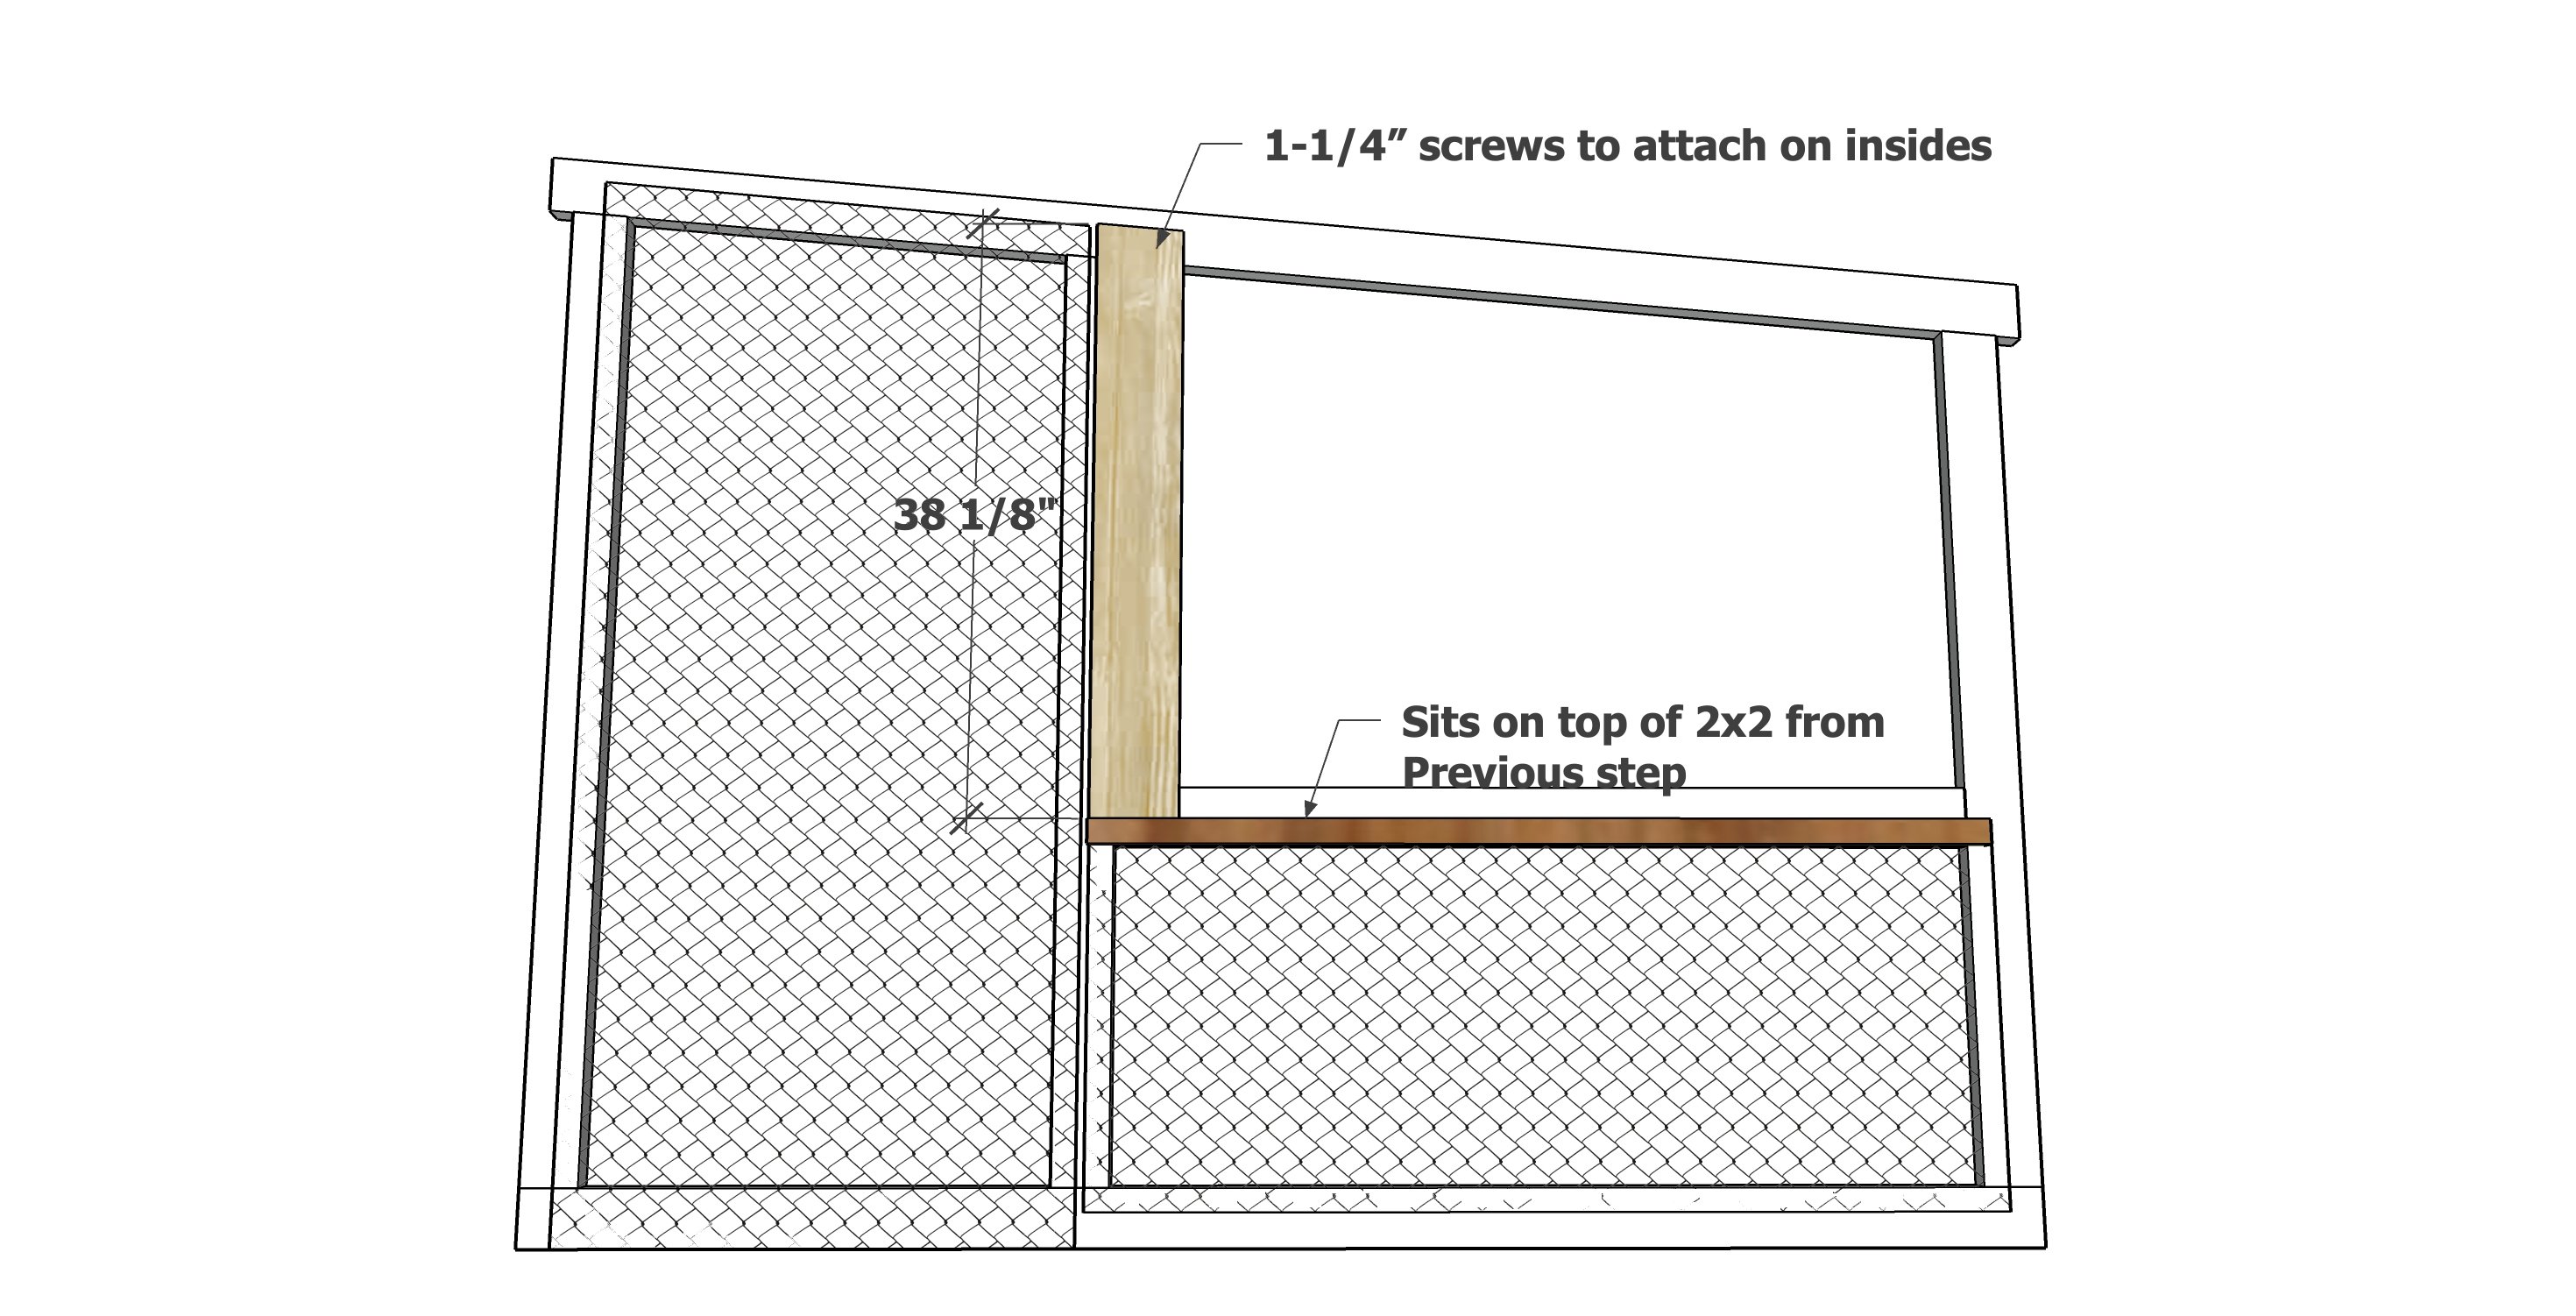
Drill two 1-1/2" pocket holes on each end of the 33" 2x4s. Attach as shown in the diagram.
NOTE: Another 2x4 can be added to the bottom end, I left this off to make cleaning easier but it is shown in the photos.
Step 7
Flip over on to the second side panel and attach with the pocket hole screws.
Step 8
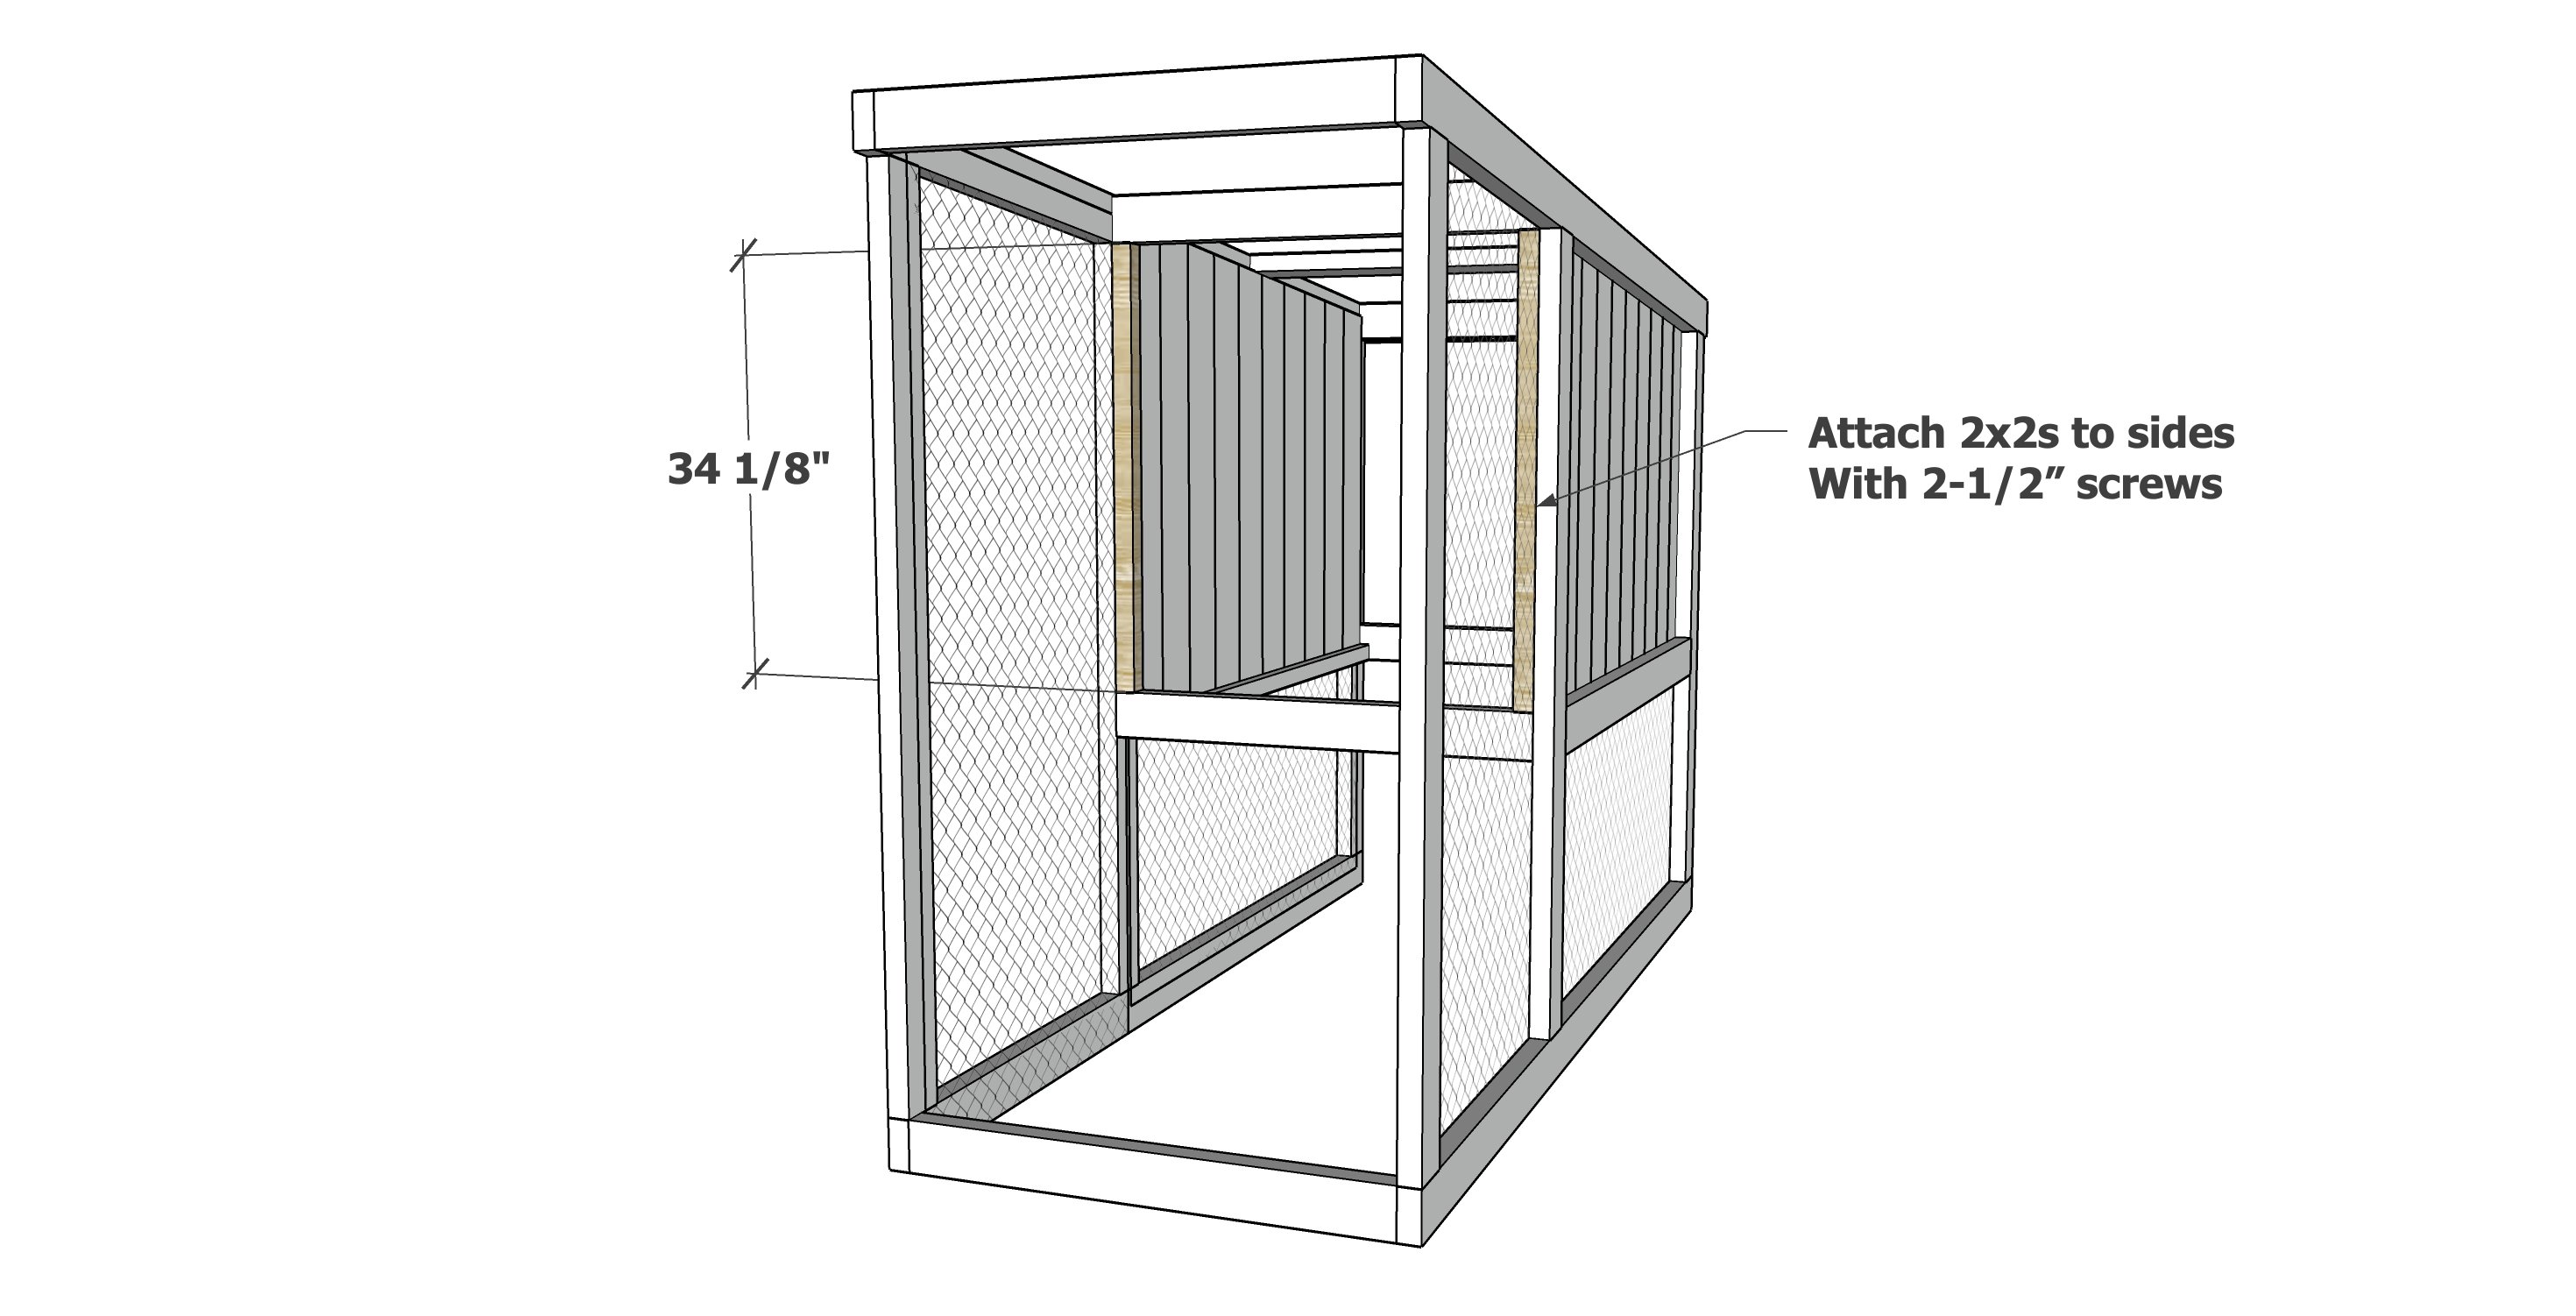
Add the 2x2s to the inside to trim out the interior wall.
Step 9
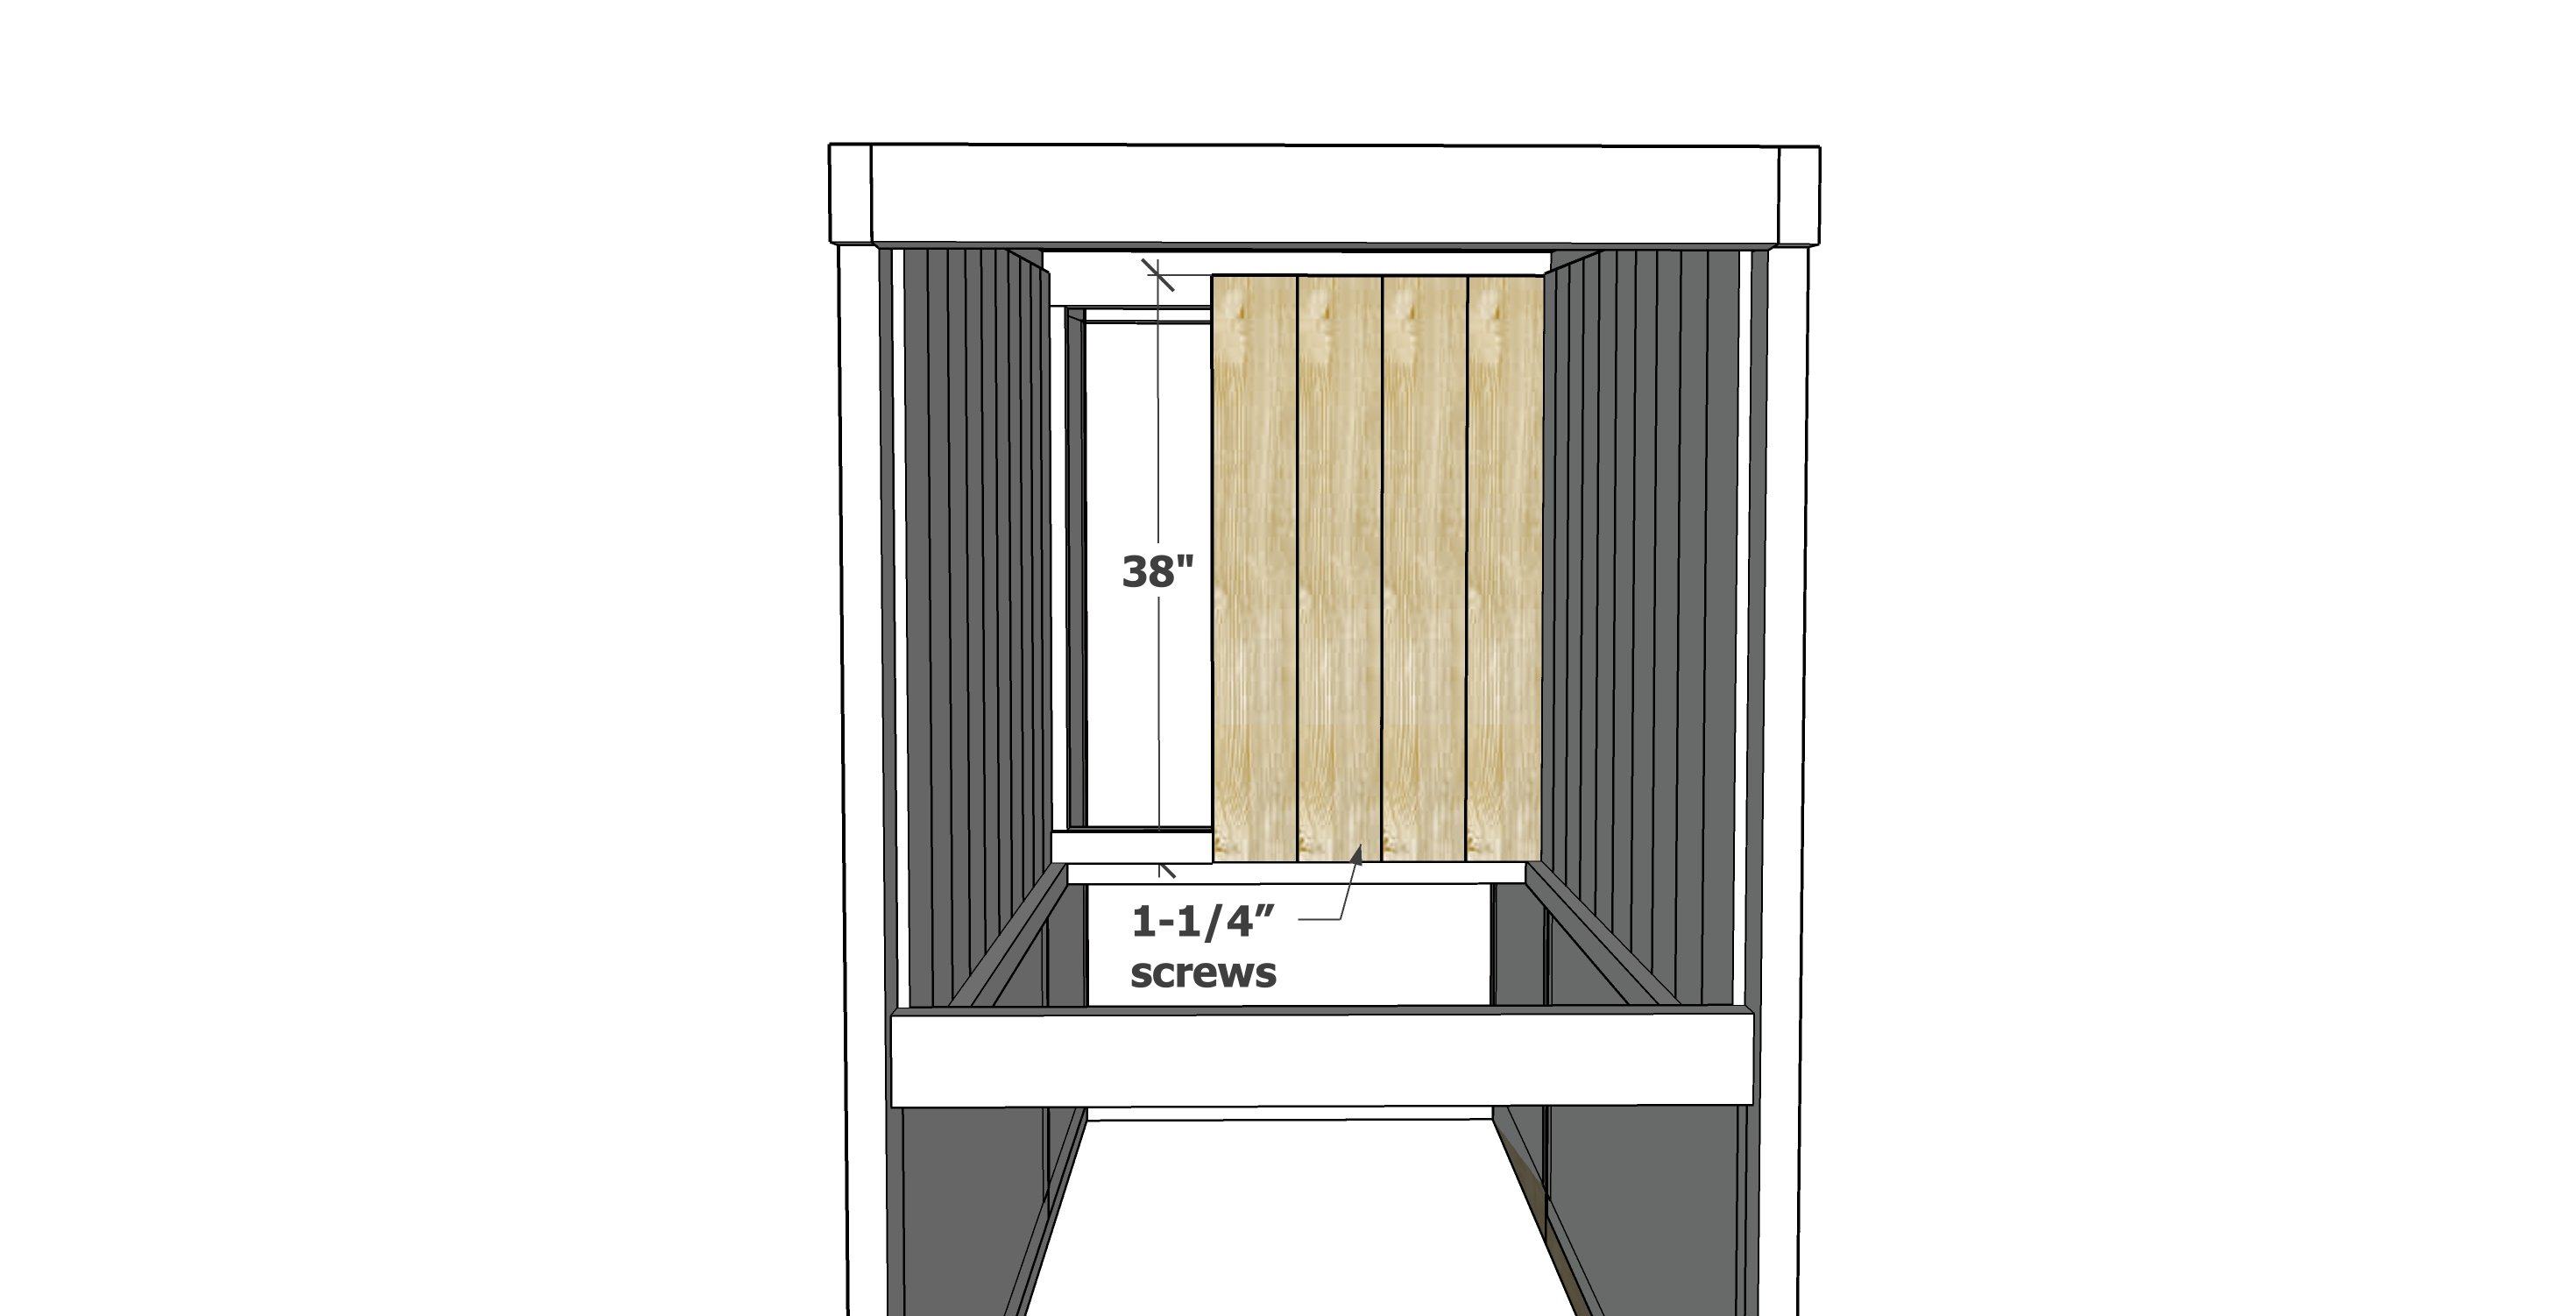
Add the cedar fence pickets to the insides with the short star bit screws. Save the scrap pieces for the door.
This opening acts as both a vent and door. Because it leads into an enclosed run, I did not add a door for cover.
Step 10

Cut the floor and set in place. I did measure and cut the floor to fit, the floor was cut about 1/2" smaller so it would be easy to remove. I did not screw it down, so it can be removed if needed.
NOTE: In the video the floor was able to slide out. I improved the plans by adding the lip on the back to keep bedding from falling out when the door is opened.
Step 11

Build the door frame with 1-1/2" pocket holes and 2-1/2" pocket hole screws. Attach chicken wire to the back. Install to the coop with hinges, use a clasp to lock closed.
Step 12
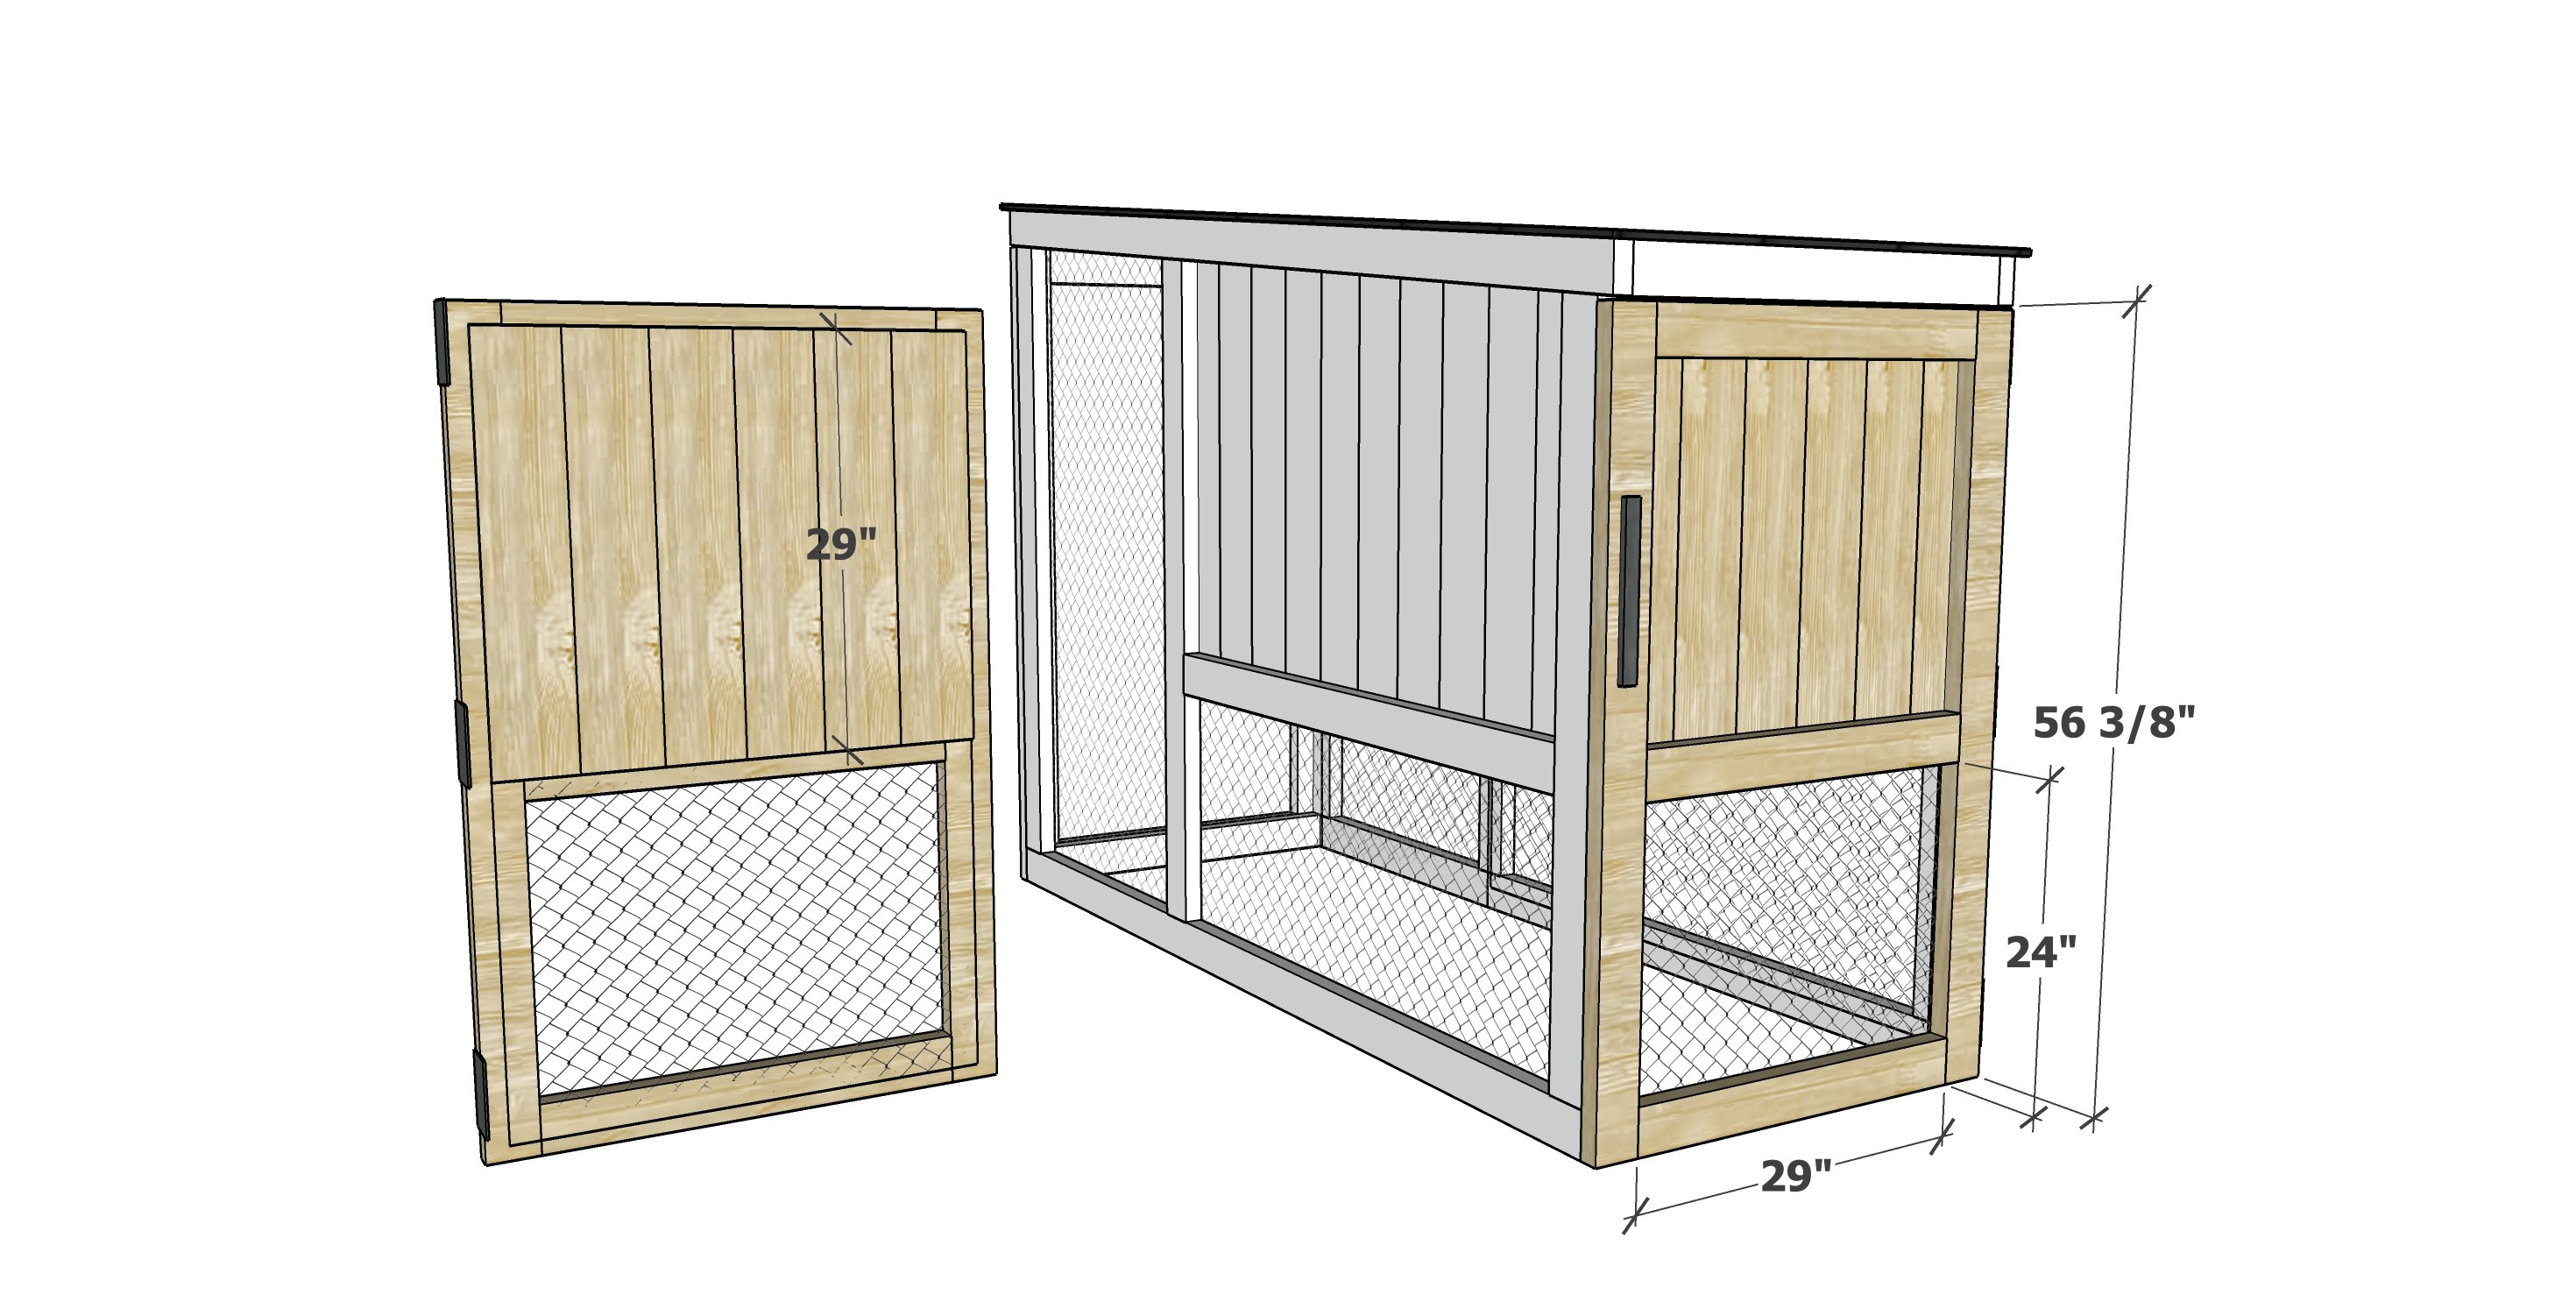
Build the back door, cover the upper portion in cedar fence pickets and the lower portion in chicken wire. Install with hinges and a latch.
NOTE: I did improve the plan with the full door. This helps with cleaning the lower level and is a better built door system.
Step 13
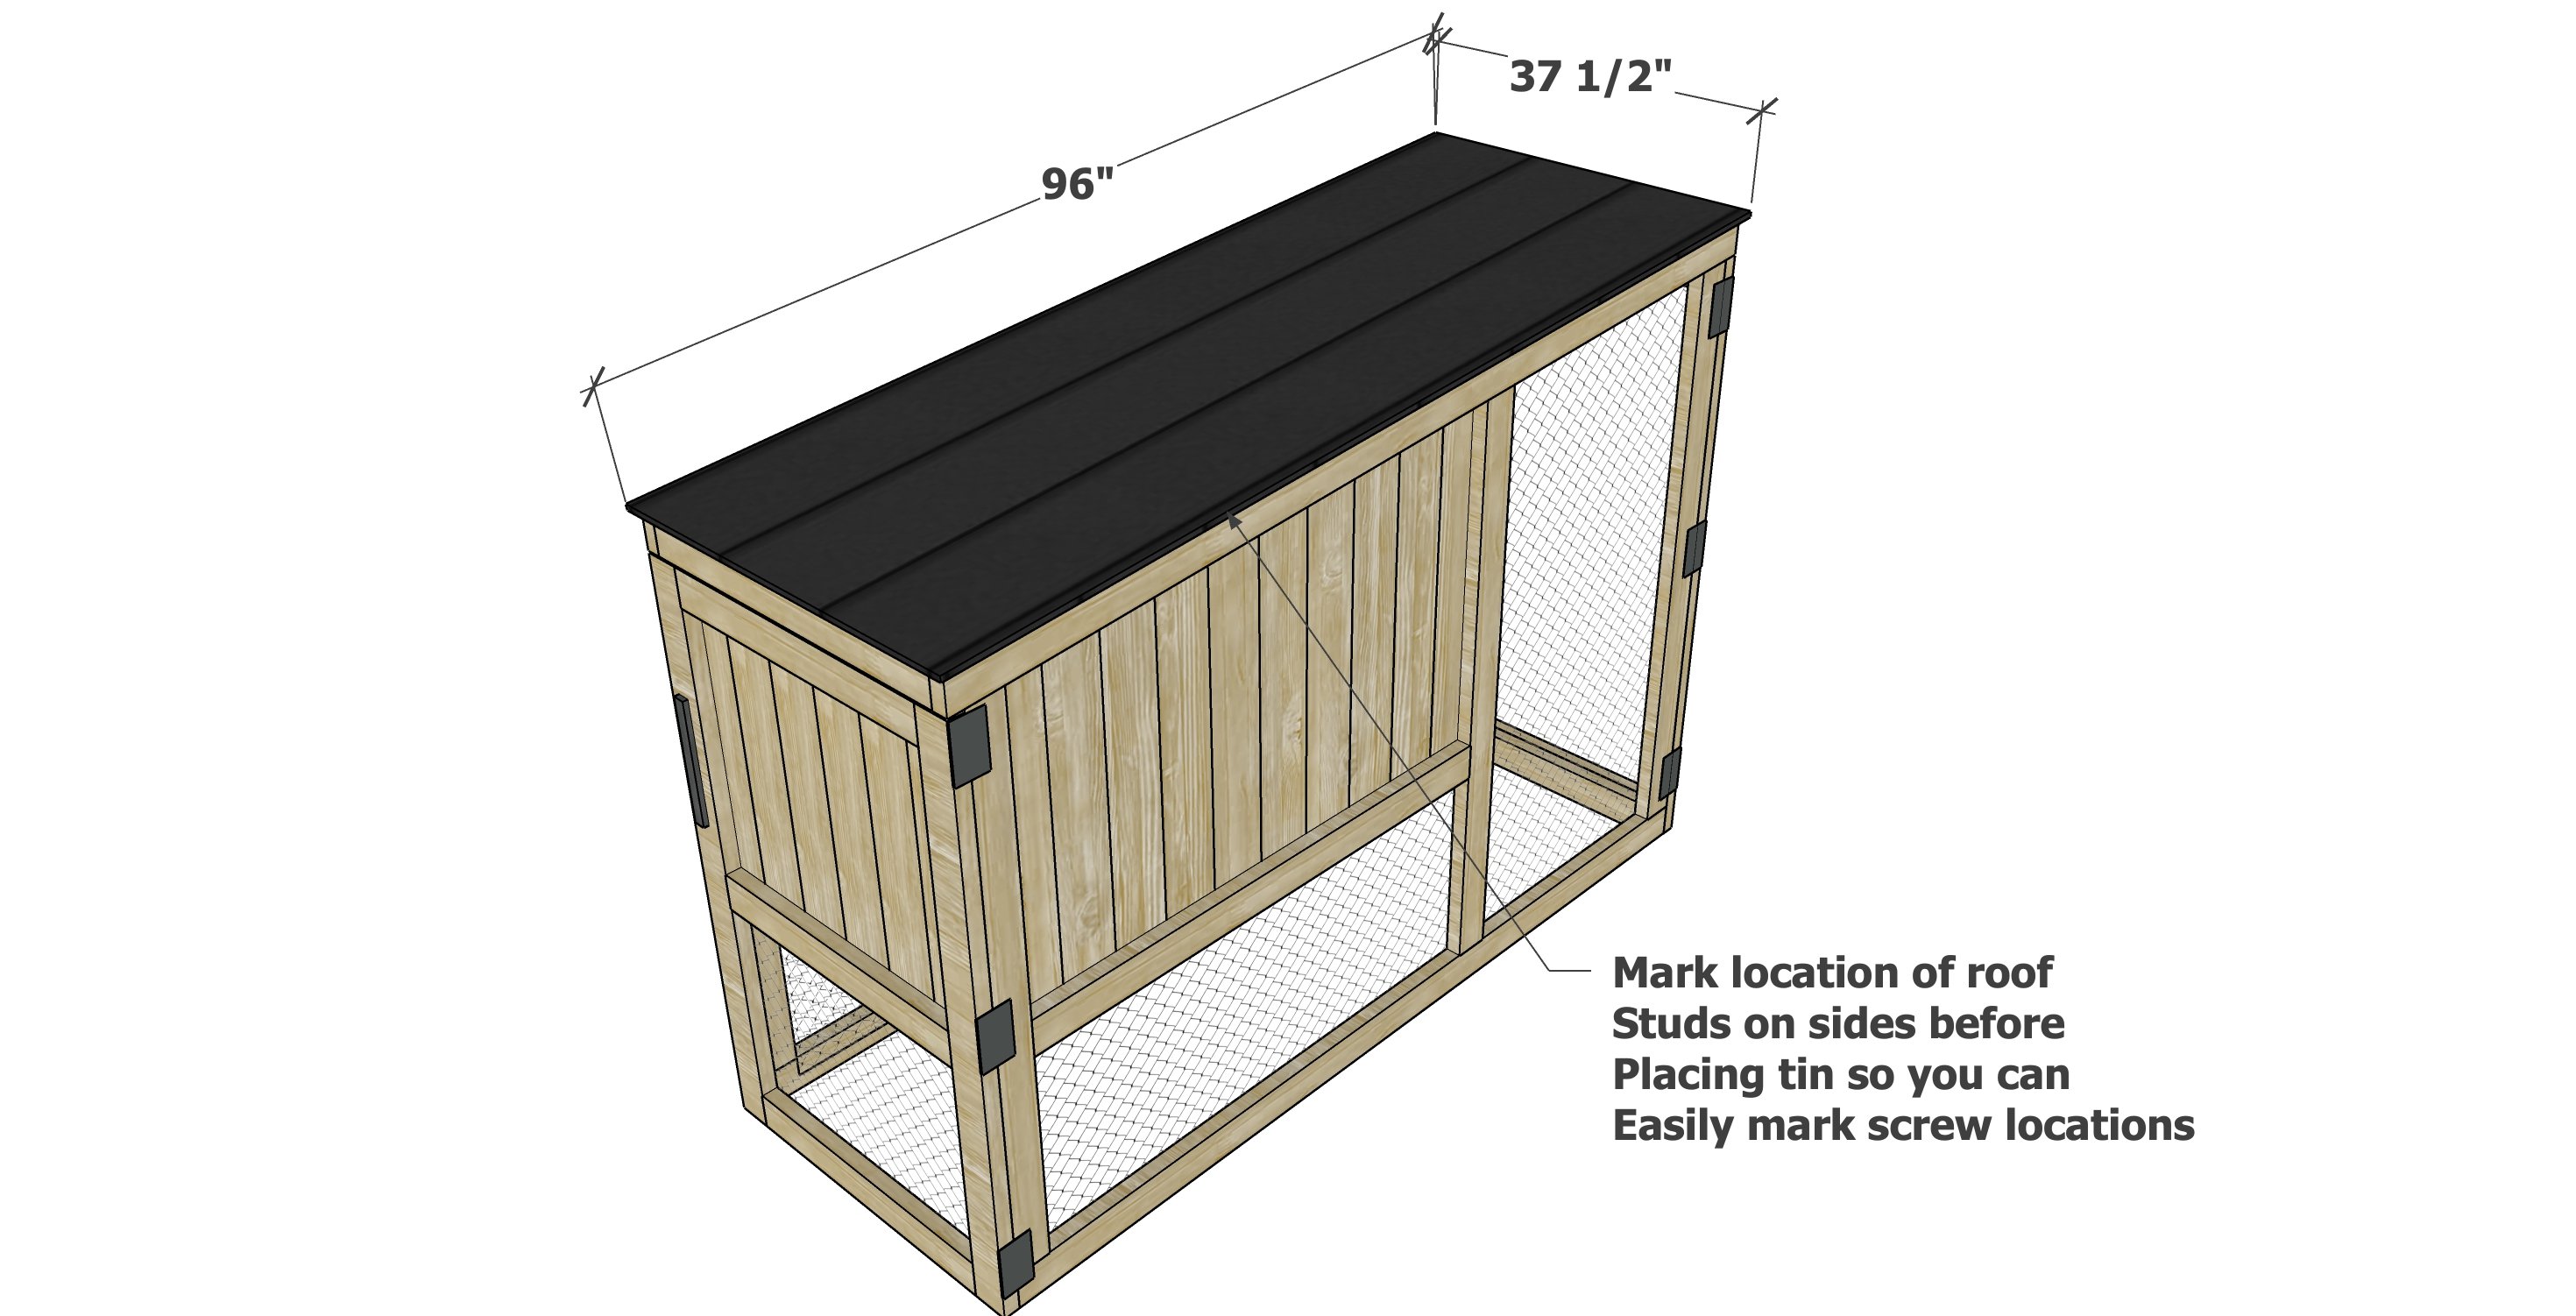
This chicken coop is designed to work with an off the shelf sheet of tin, 8 feet long. Simply slide on top and screw down to the 2x4s in the roof.
Step 14
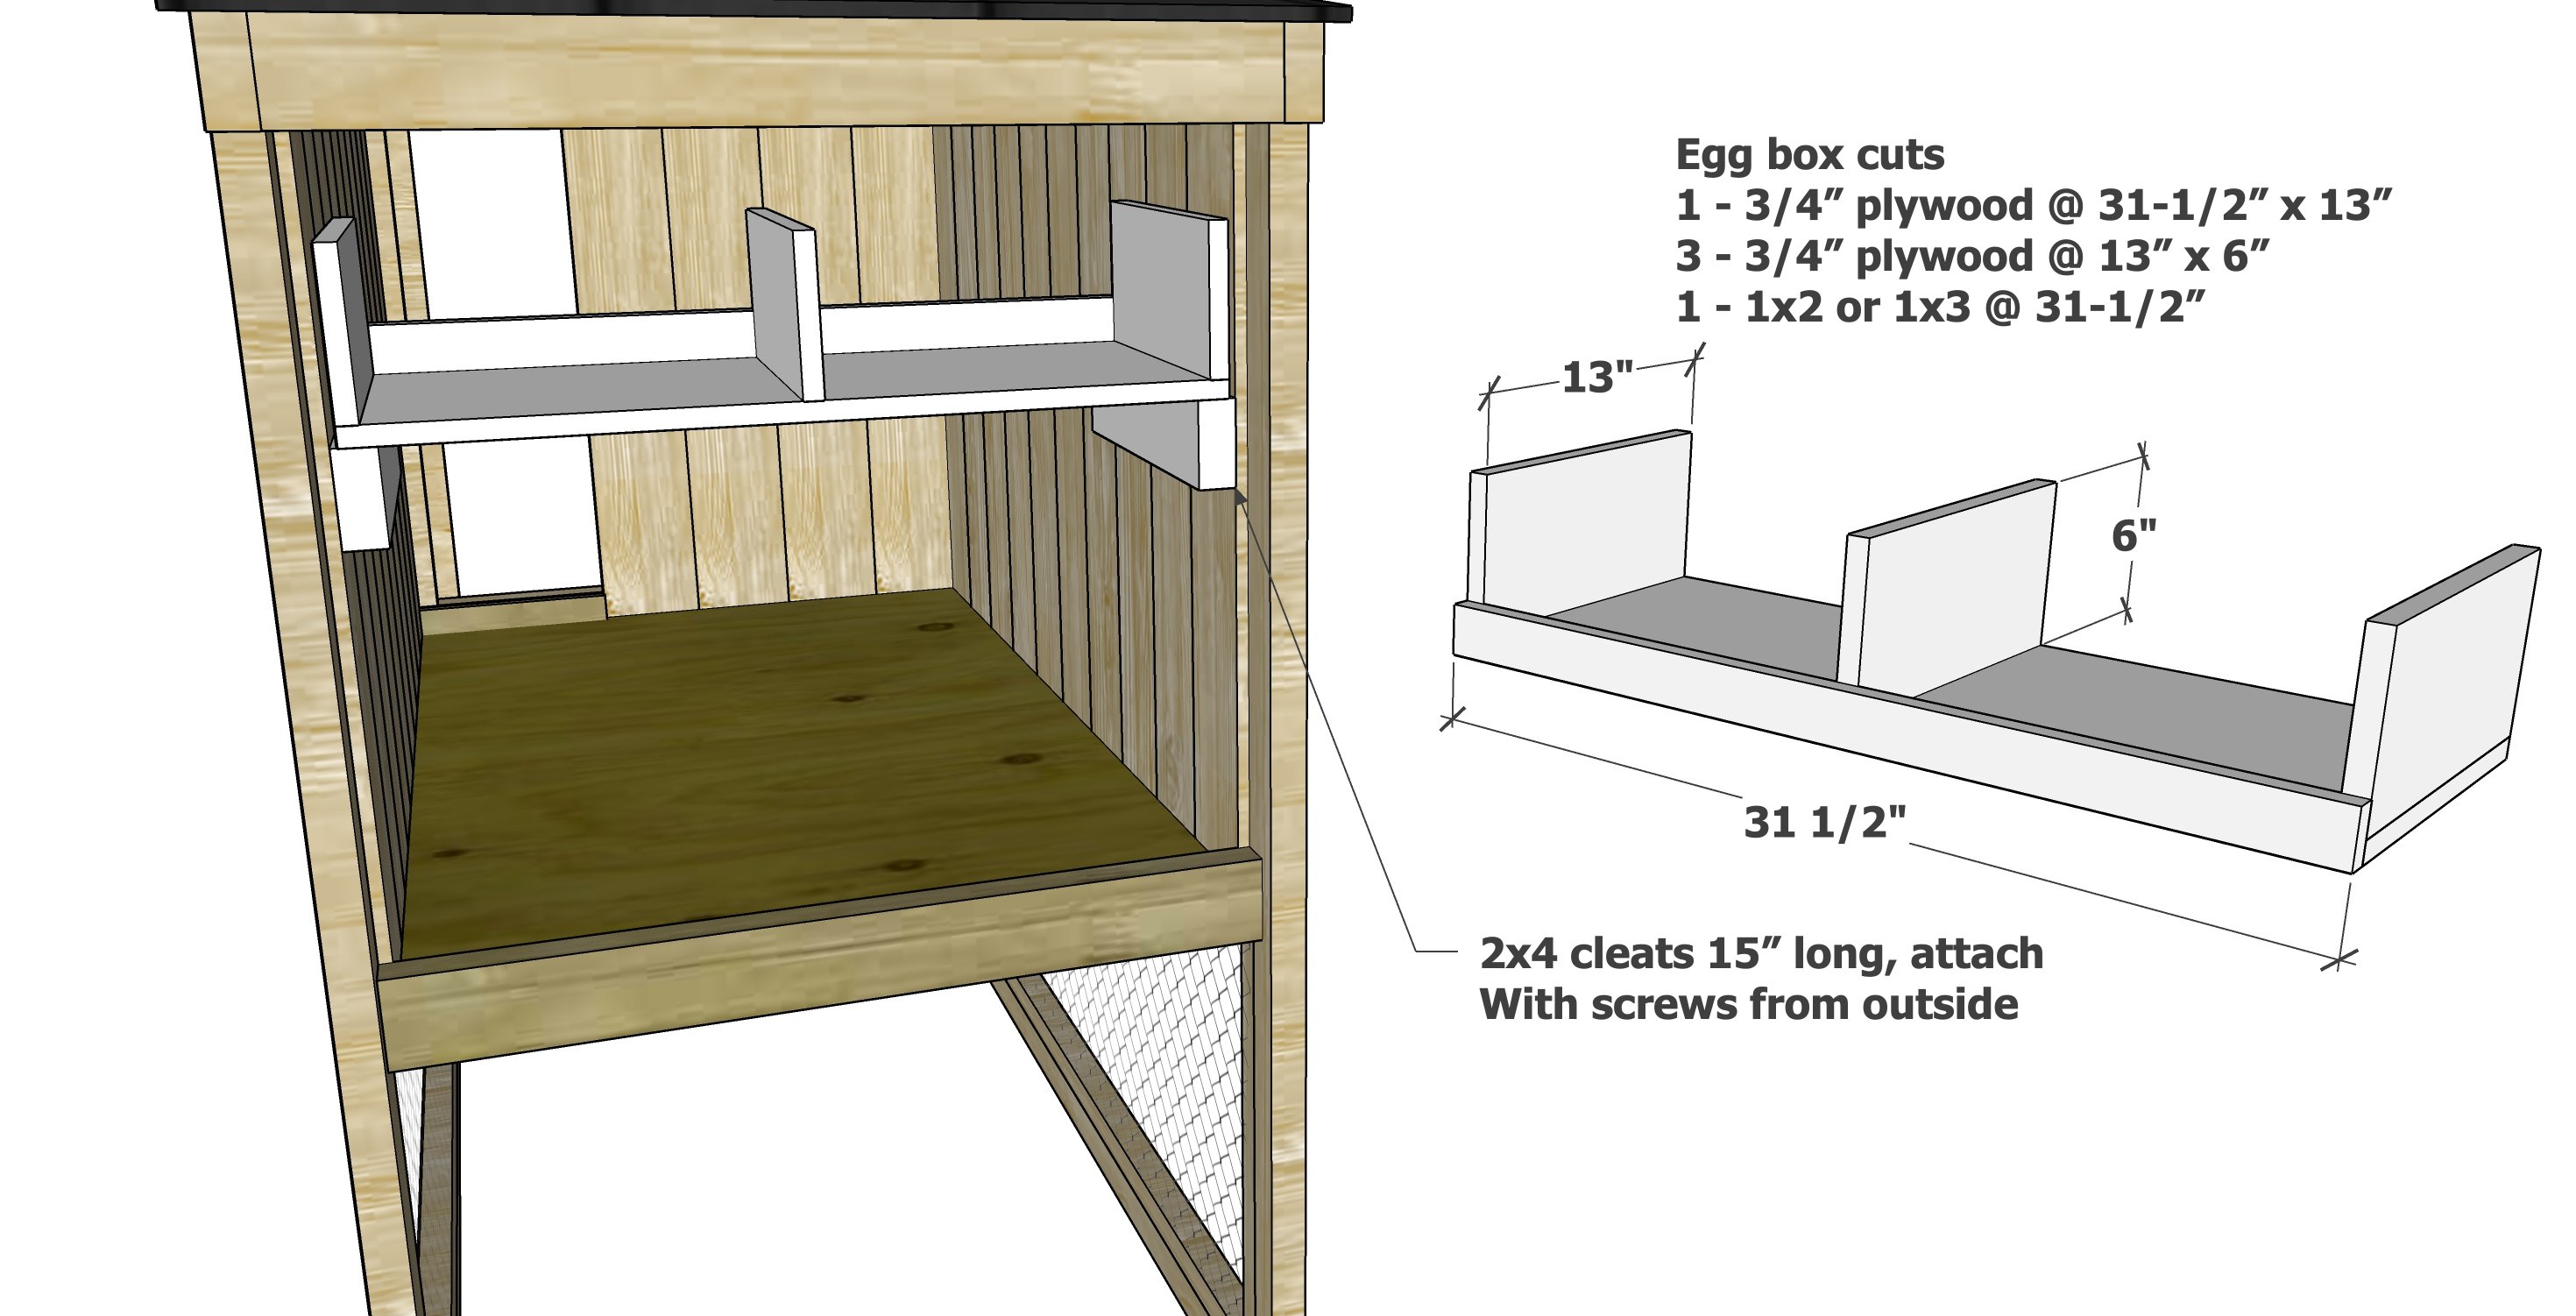
The nesting box can be built using scrap 3/4" plywood. You can assemble with pocket holes or with the 2-1/2" screws.