
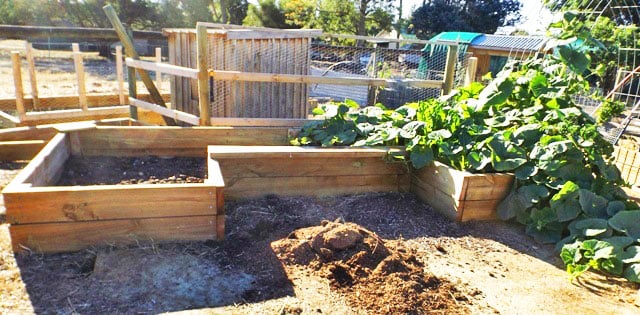

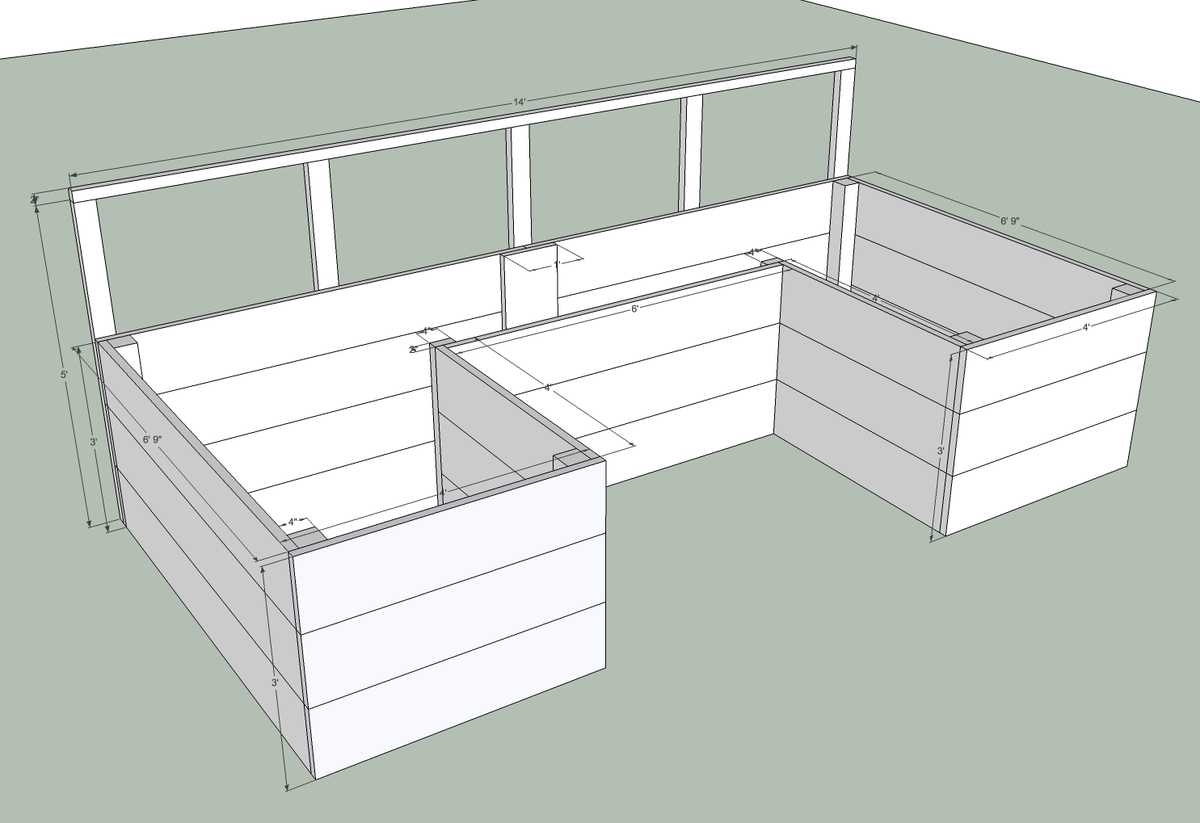
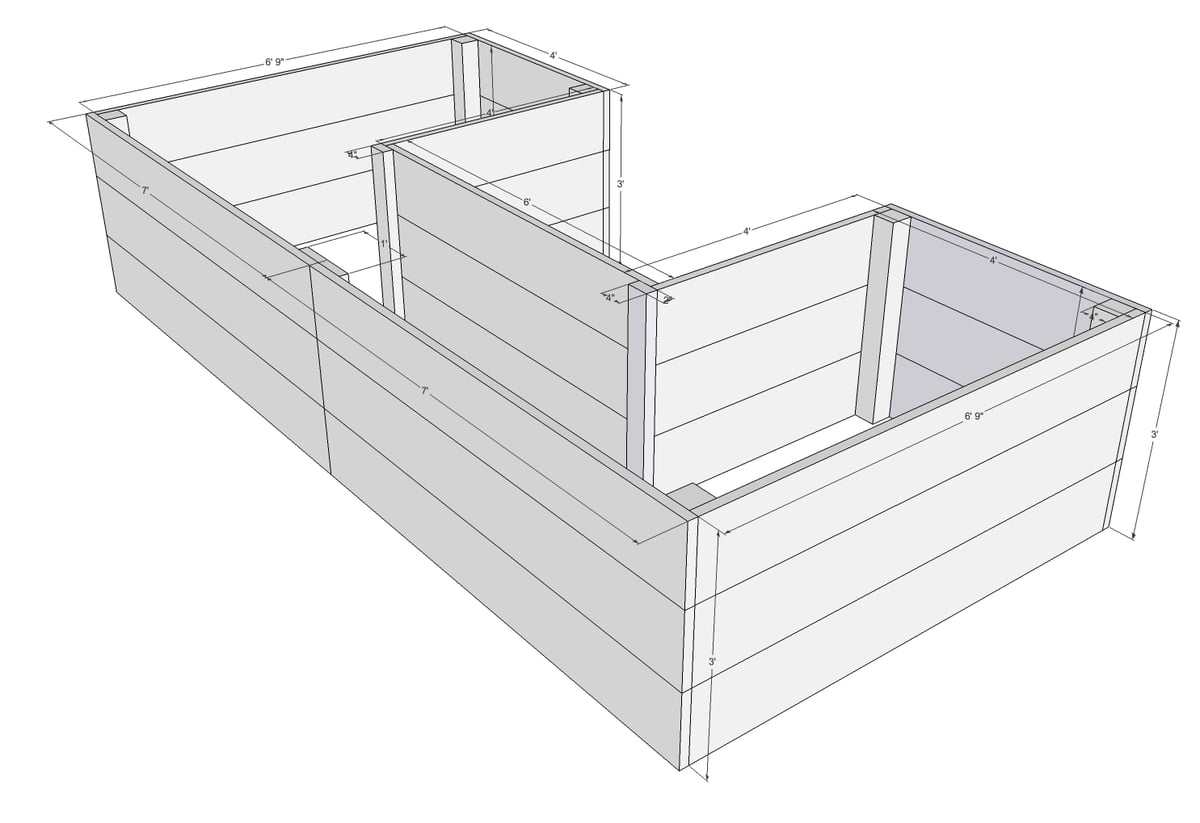
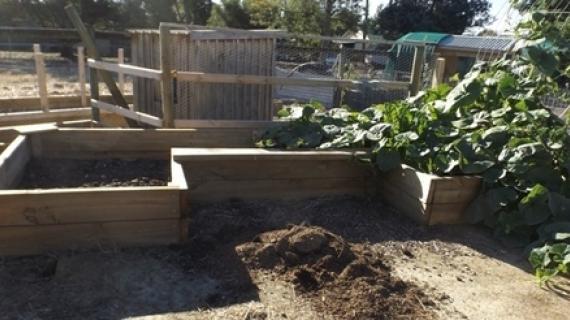
Straightforward plans for “dynamic” raised garden boxes that allow easy reach at convenient height. The beds provide a wooden backdrop that you can line with chicken wire or similar to provide support for tomatoes, vines, and other plants. The garden beds are large - approximately 14’ x 7’ The plans are forgiving, so if you’re hardware store cuts your lumber, their accuracy should be good enough. Finished photo submitted by Doshepherd
Pin For Later!

Preparation
Chicken wire or hardware cloth is optional but not necessary. A box of 3" screws.
Cut list: • 12 – 2x12 at 4’ (front) • 3 – 2x12 at 6’ (front) • 6 – 2x12 at 6’9” (left and right sides) • 6 – 2x12 at 7’ (back) • 1 – 2x12 at 3’ (joint support for back wall) • 6 – 4x4 at 3’ (mounting posts) • 2 – 2x4 at 3’ (joint supports) Optional backdrop: • 5 – 2x4 at 5’ (backdrop posts) • 2 – 2x2 at 7’ (backdrop top)


Please read through the entire plan and all comments before beginning this project. It is also advisable to review the Getting Started Section. Take all necessary precautions to build safely and smartly. Work on a clean level surface, free of imperfections or debris. Always use straight boards. Check for square after each step. Always predrill holes before attaching with screws. Use glue with finish nails for a stronger hold. Wipe excess glue off bare wood for stained projects, as dried glue will not take stain. Be safe, have fun, and ask for help if you need it. Good luck!
Instructions
Step 1
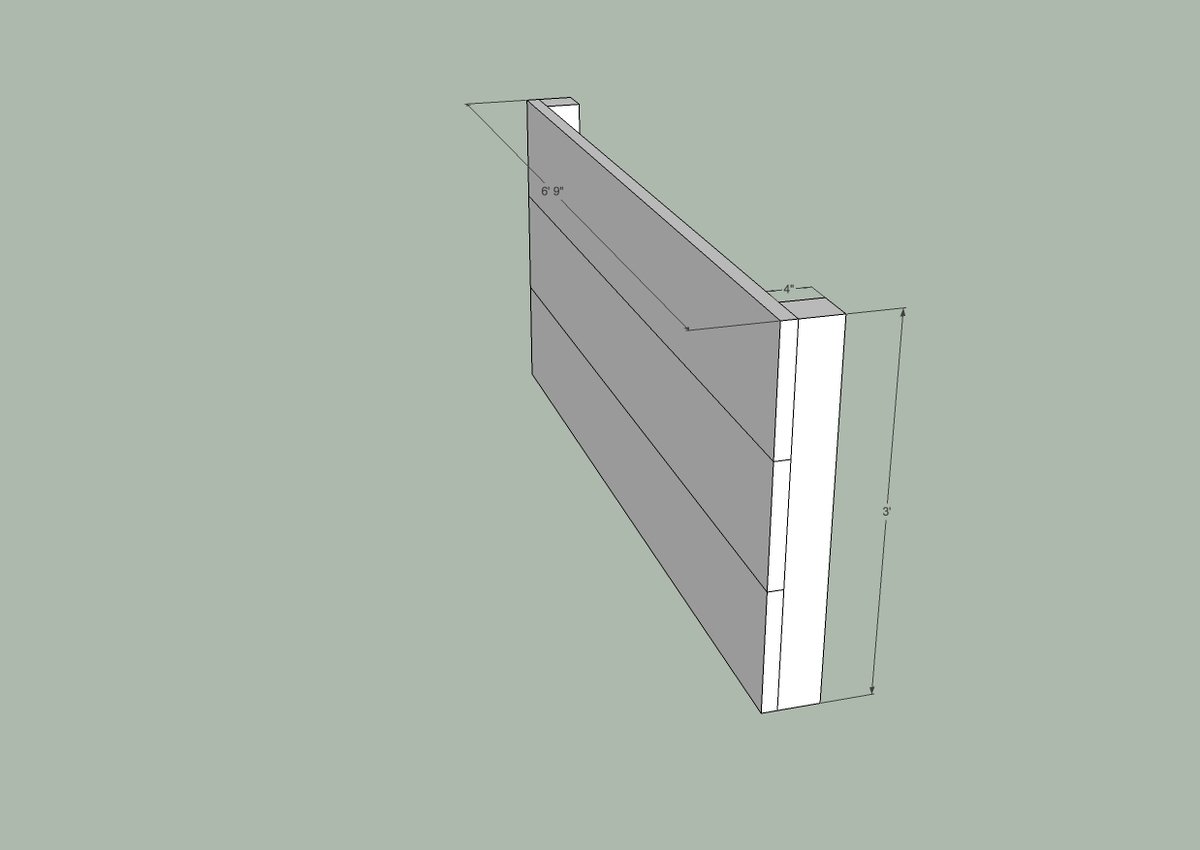
Lay the 4x4’s on the ground and then lay the 6’9” panels on top of them. Align the edges of the panel boards on the 4x4, and carefully attach them into the 4x4 post, using six screws per panel board (three screws for each side). Then repeat for the other side. You should end up with something that looks like this:
Step 2

This is probably the trickiest step. First, you’re going to need to align the panel boards (2x12’s) along the 4x4. Attach the 2x12’s to the 4x4, just like you did the last one.
Here’s where it gets tricky. You’re going to lay the 4x4 on the ground so the panel boards are sticking up in the air. Then you’re going to lay the 2x4 along the top of the panel boards (it will help a lot if you have someone there to hold the boards in place). Make sure that the 2x4 is sticking out in the opposite directio of the 4x4 (see below). Carefully screw the 2x4 to the 2x12’s. This will provide necessary joint support in a few steps.
Step 3
This is probably the trickiest step. First, you’re going to need to align the panel boards (2x12’s) along the 4x4. Attach the 2x12’s to the 4x4, just like you did the last one.
Here’s where it gets tricky. You’re going to lay the 4x4 on the ground so the panel boards are sticking up in the air. Then you’re going to lay the 2x4 along the top of the panel boards (it will help a lot if you have someone there to hold the boards in place). Make sure that the 2x4 is sticking out in the opposite directio of the 4x4 (see below). Carefully screw the 2x4 to the 2x12’s. This will provide necessary joint support in a few steps.
Step 4
Step 5
Step 6
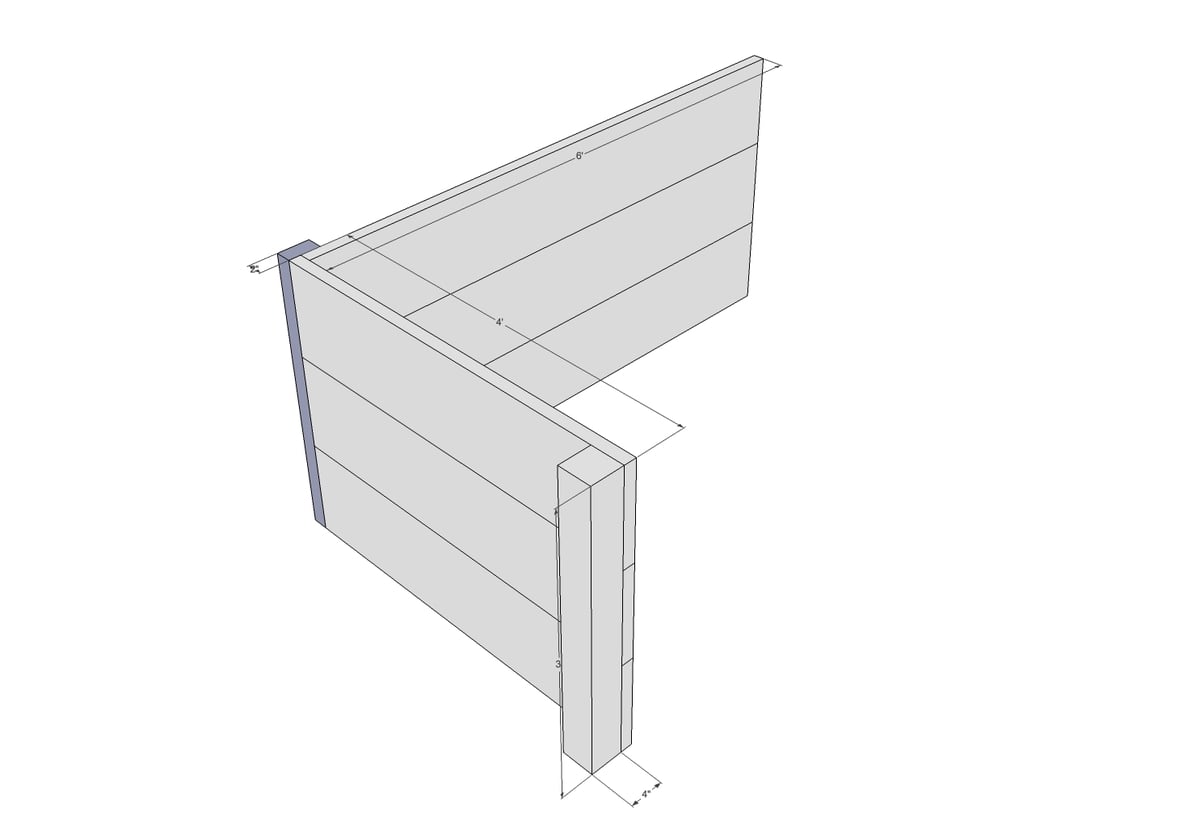
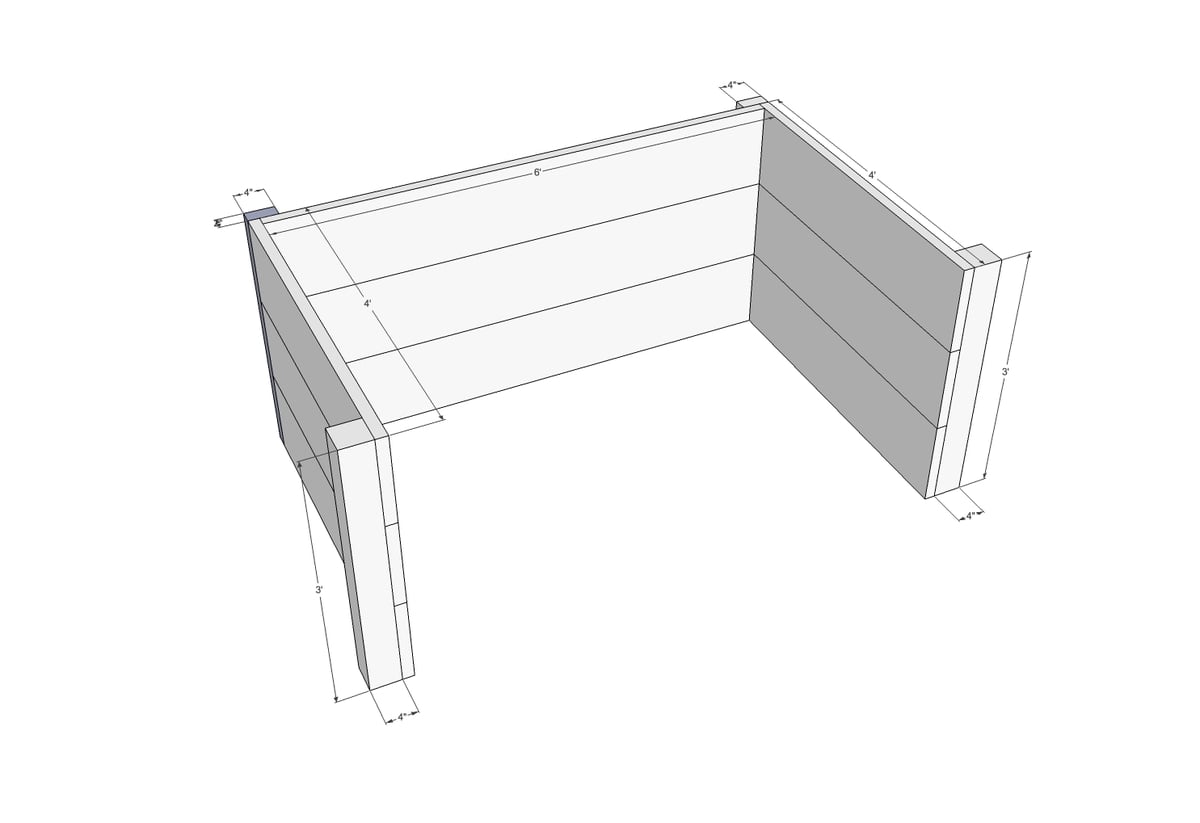
Start by aligning the front panel edge with the side panel as shown below. It will
help if you have a friend hold up the panels as you attach them. You will use 6
screws to attach each front panel board to the side panel. Start with the top panel
board. Drill three screws along the edge of the panel board so that they pierce the
front panel board and the side panel board. Then drill a parallel set of three
screws through the panel board so they pierce the front panel board and the 4x4
post (see arrows). This will make your garden boxes more secure. Repeat for the
other two front panel boards. Then complete the other side in similar fashion.
Step 7
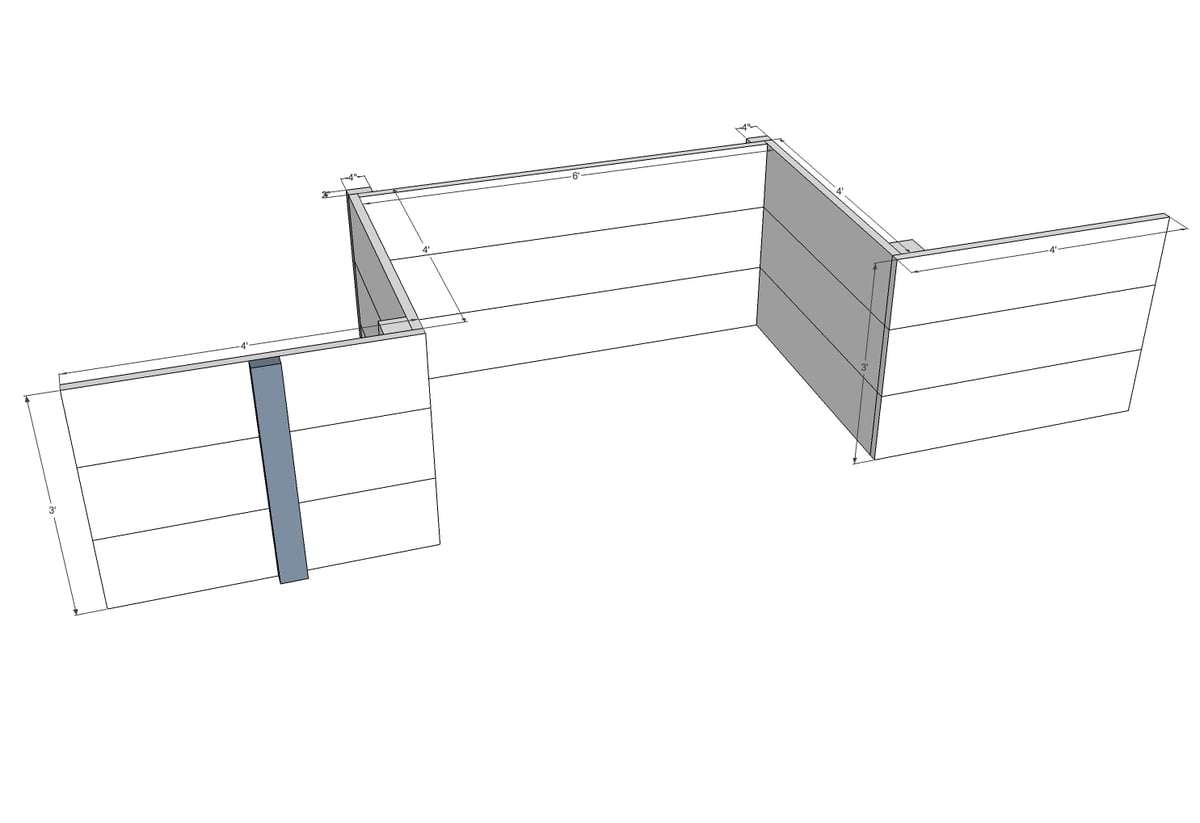
Draw a line down the center of the 3’ 2x12. You will line your panels up along this line as shown below. Keep in mind that, for this step, it is easier if you place your 6 panel boards on the ground, line them up, and then place the 3’ 2x12 joint support on top of them, then drill through the 3’ joint support board and into the panel boards to attach them. Use 3 screws in a zigzag to attach each panel board to the support joint.
Step 8
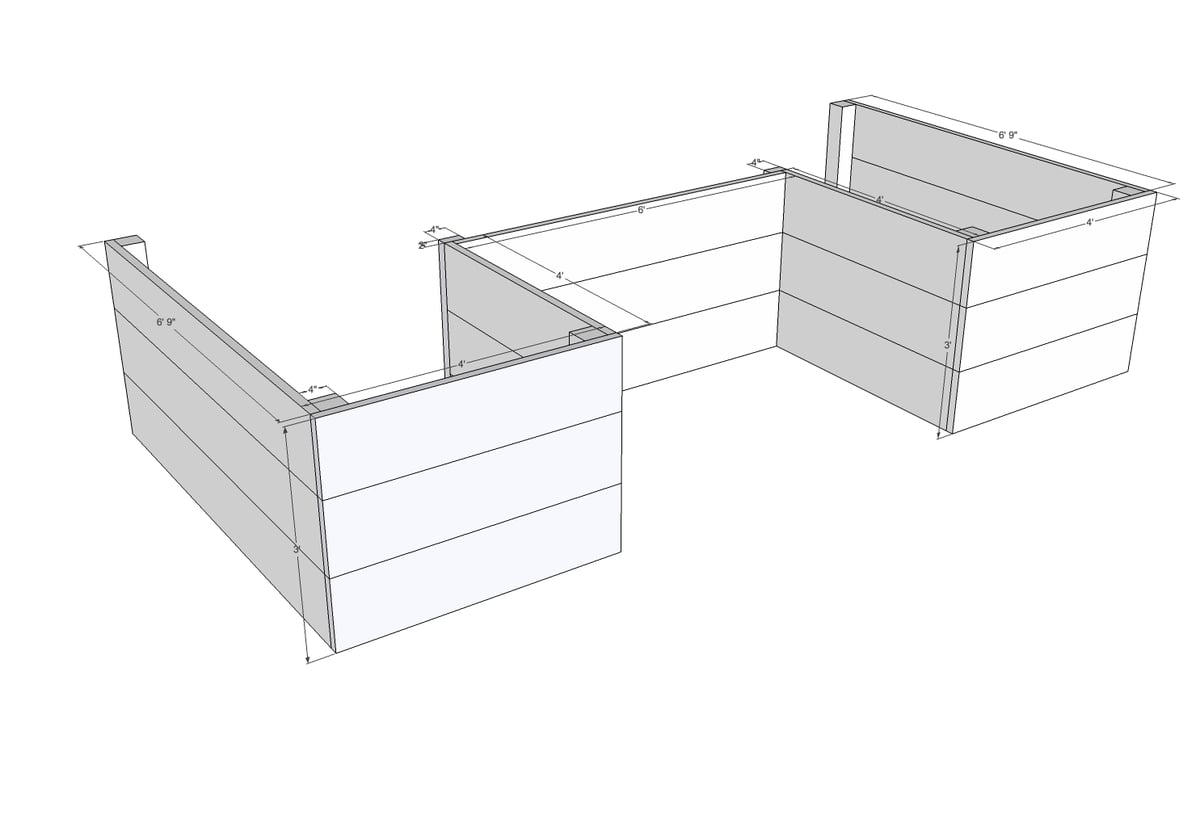
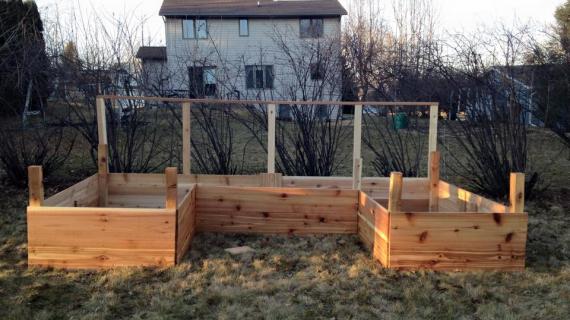
Start by aligning the edge of the back panel along the side of one of the side panels. You will start by attaching the top panel board from the back panel to the side panel. To do this, you will use two rows of screws (similar to Step 5) to attach the back panel to both the side panel boards and the post. Work your way from the top panel board down to the bottom panel board and then repeat for the other side. When you finish, you should have your complete garden boxes!
Step 9

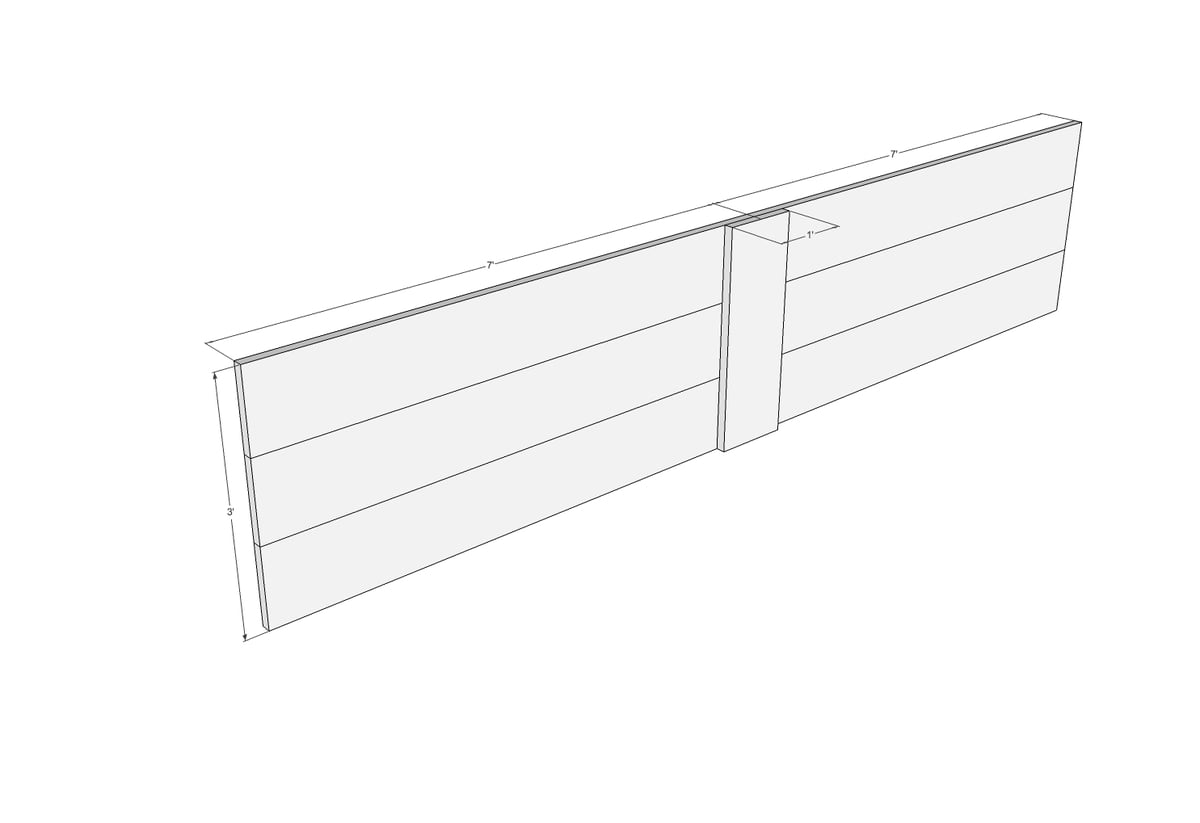
Start by marking each of your 5’ boards. You will measure 2’ from one end, and draw a line. This is the line you will line up with your garden boxes. You can either line it up so that 3’ stick up for the backdrop or so that 2’ stick up for the backdrop. Just make sure you’re consistent and do them all either 2’ or 3’.
For now, we’re going to do the easier one: 2’ sticking up from the back of your box. Start by aligning the 2” edge with the left side edge of your back panel. Align the line you marked with the top of the garden box so that 2’ stick out of the top. Have someone hold this, while you attach it with at least three screws spaced somewhat evenly.
Now go to the other side of your garden box and align the edges similarly. Using your line level, make sure the top of this backdrop post is level with the post you just attached. Once you’ve made sure it’s level, attach the post.
Leaving the line stretched between the two posts, align the third post with the center joint on your back panel and attach. Now, measure 3.5’ from the left side and make a mark. Measure 3.5’ from the right side and make a mark. Align your last two backdrop posts with these marks, check that they’re level, and attach.
Once your five posts are level and attached, you will lay your 2 7’ 2x2 toppers on them. They will butt up against each other on the center of the center 5’ post. Once you have them lined up, attach them by drilling two screws through the 2x2 per post.

Comments
LittleFarmBigCity
Thu, 02/07/2013 - 11:41
First Plans :)
Hope y'all enjoy my first set of "real" plans not drawn on a scrap piece of paper or impromptu. I'm hoping to build these myself sometime soon. Please let me know if you have any questions about the plans. I'd love to see a picture if someone else builds them!
smacneil
Mon, 05/06/2013 - 06:05
Great Garden Idea!
I love this idea for my backyard. It will give me some much needed privacy screening between competing Jack Russels across the fence line.
a few questions: 1- do you need to dig the posts into the ground or do you just sit it on the ground and start filling?
2- that structure is strong enough to handle being filled up with soil?
Thanks for posting this, it's just perfect for my project!!
benjaminrogers
Thu, 09/05/2013 - 07:25
Lumber list
Is there a shopping list for lumber? What type is best?
Thanks,
Ben