


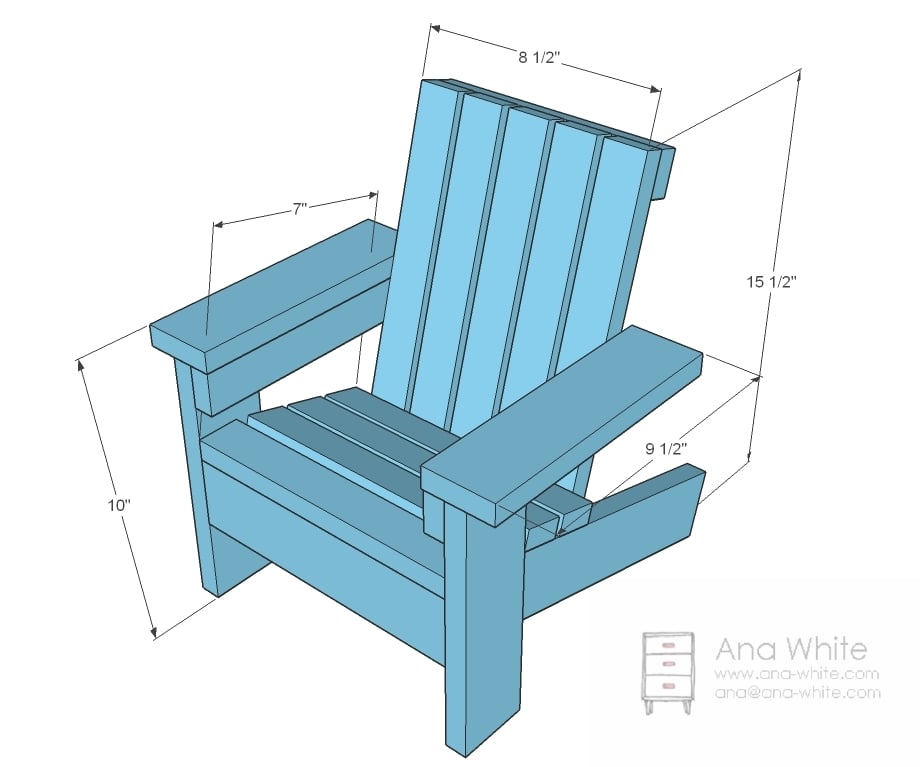
An Adirondack Chair for 18" Dolls.
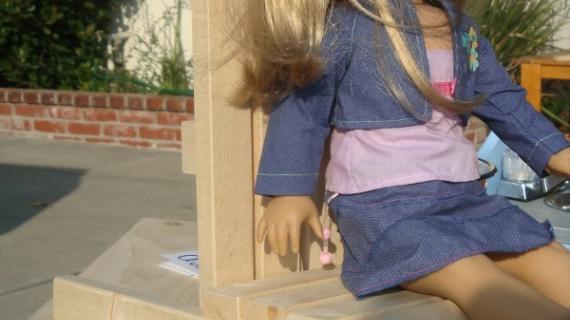
It's been an especially busy time for me of late, as I am sure it is for most of you, with the Holidays in full swing. We also have Grace's birthday right before Christmas. It's always an extra effort to try and not let the Holidays overshadow Grace's special day. So when Fiona emailed me her cut list a few weeks ago for a doll Adirondack chair, I could not have been more thankful that she would give her plans to you - and give me a little bit of a break during these busy weeks before the Holidays. But I wanted to get some of the larger projects blogged to give you time to build before Christmas, so this one's been promised for a few weeks, and I'm so happy to finally be able to blog this plan! I'll be posting lots more smaller projects between now and the Holidays, things you can whip out in no time flat. I'm itching to get back to some media walls and storage beds and bigger plans, and have big big plans for the new year. It's going to be an exciting new year! . . . But let's get back to small things for now.  Isn't Fiona's doll chair just adorable? Building doll furniture is perhaps the most "fun" I've ever had building. You don't have to be perfect, the finished project is so cute, doesn't take long, and it's usually quite inexpensive to build. But the best part is the joy of giving these gifts to children. Last night, I had a conversation with a friend who grew up on a farm with a mom that was like many of us, handy because she had to be. And my friend told me about when she was a little girl, her mother made her doll cradles and a cupboard to use as a kitchen. She's since moved thousands of miles from her mother, but has plans to find those wooden toys her mother built her, and give them to her own children. The story really struck me as special, and I can only imagine what your children are going to think of these pieces you are building for them.
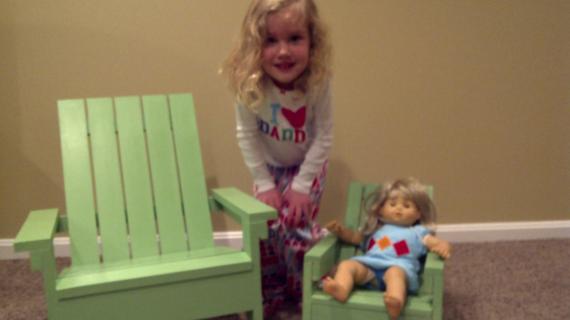
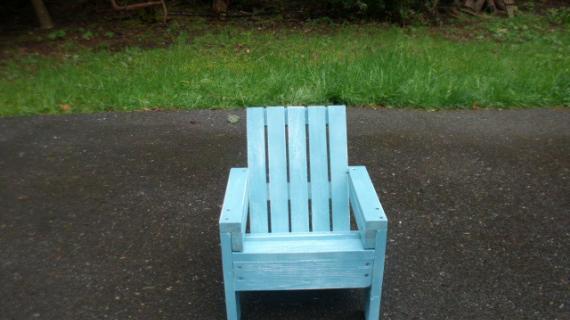
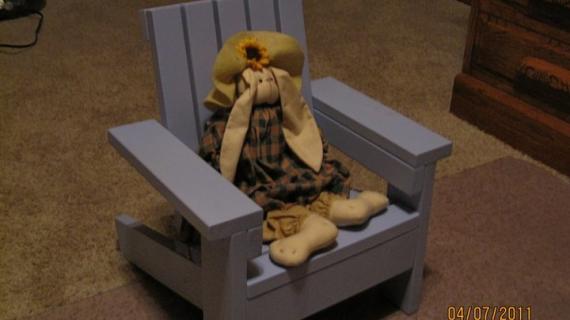
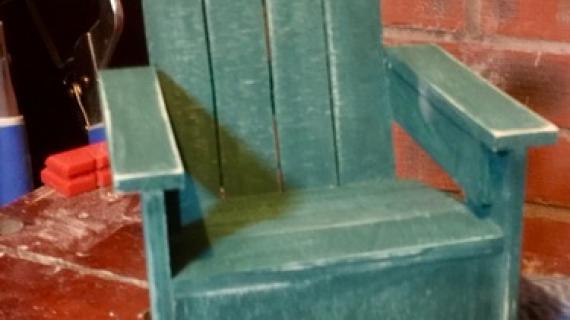
Preparation
1 – 1×3, 8 feet long (whitewood or furring strips should be about $1.50)
2 – 1×2, 8 feet long (whitewood or furring strips should be about $1.00 each)
1 1/4″ screws or nails
wood glue
finishing supplies
2 – 1×3 @ 13 1/2″ (Stringers, one end cut in step 1)
1 – 1×3 @ 10″ (Front Apron)
4 – 1×2 @ 10″ (Seat Slats)
5 – 1×2 @ 14″ (Back Slats)
3 – 1×2 @ 8 1/2″ (Back Supports)
2 – 1×3 @ 9″ (Front Legs)
2 – 1×2 @ 9 1/2″ (Arm Supports)
2 – 1×2 @ 9 1/2″ (Arms)


Instructions
Step 1
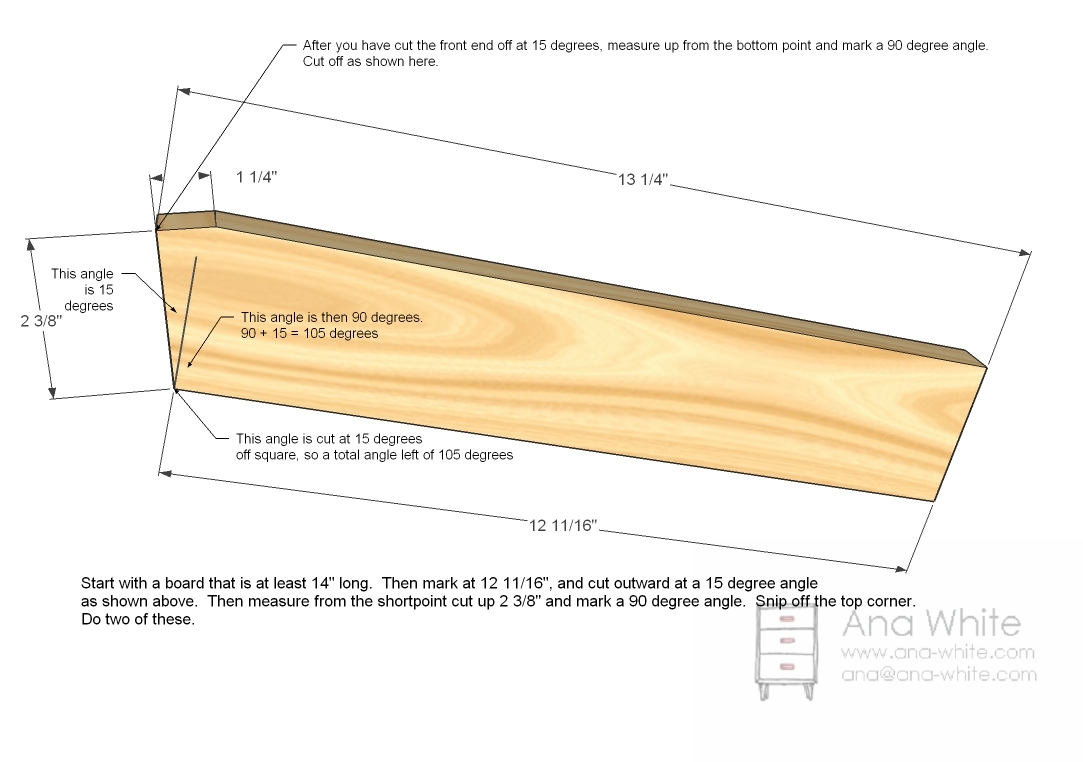
Stringers
This is going to be the most difficult part – getting this cut right. Just follow the directions above, and measure carefully, and you should be able to tackle this one with easy.
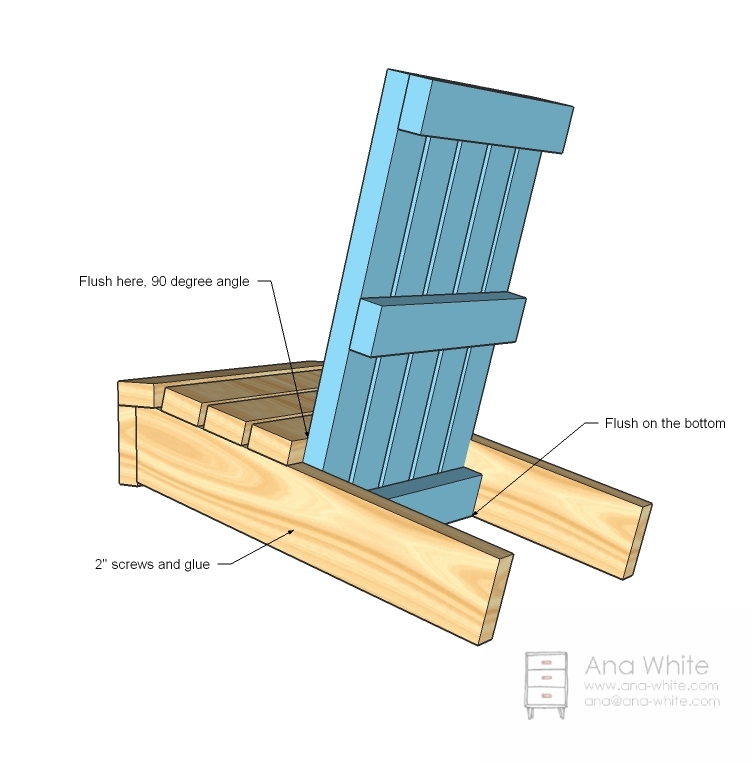
Step 2
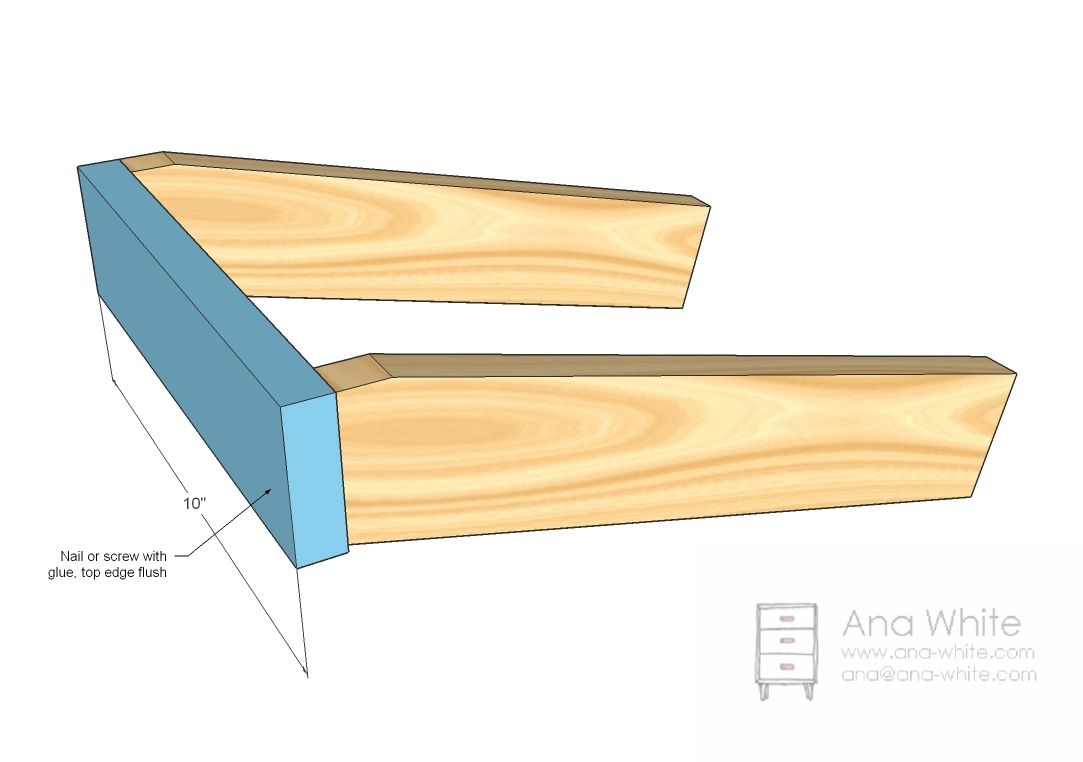
Front Apron
Now this is an easy step. Just screw the front apron to the stringers.
Step 3
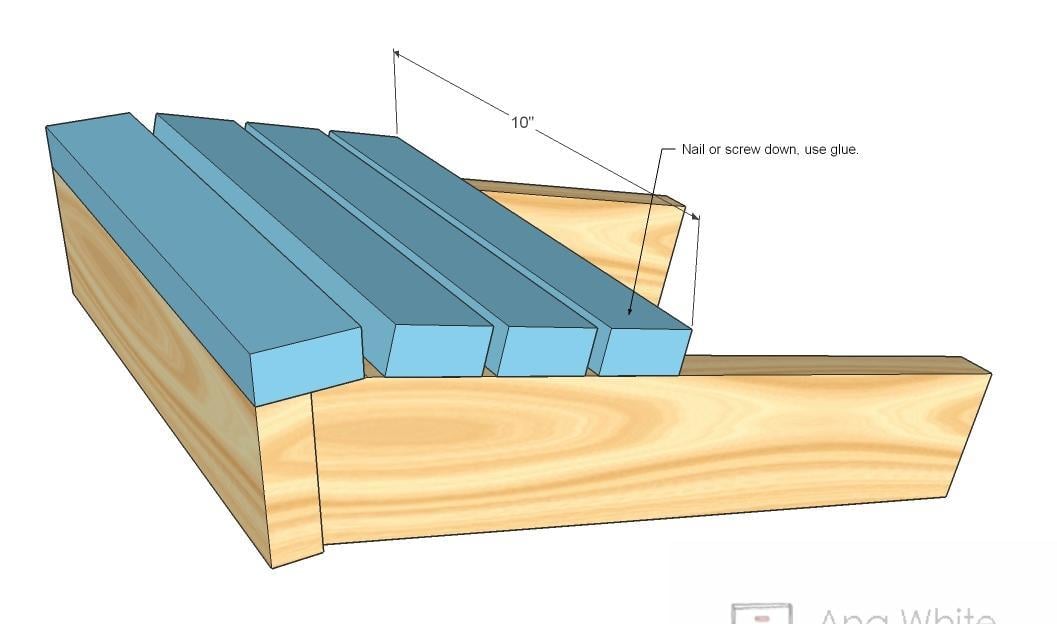
Seat Slats
Now simply screw the seat slats down. You can also use nail and glue – it’s a doll chair
Step 4
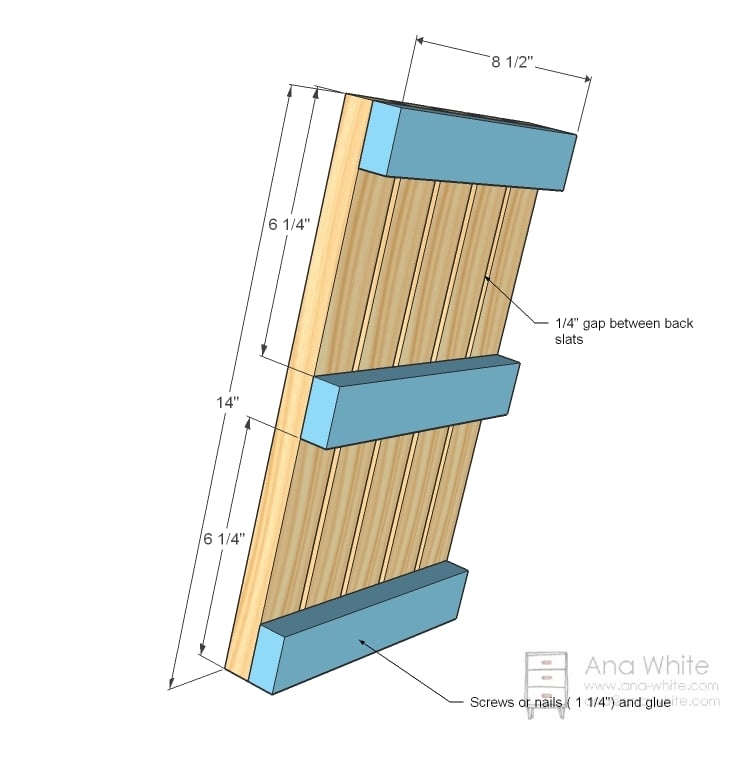
Back
Now build the back as shown above.
Step 5
Step 6
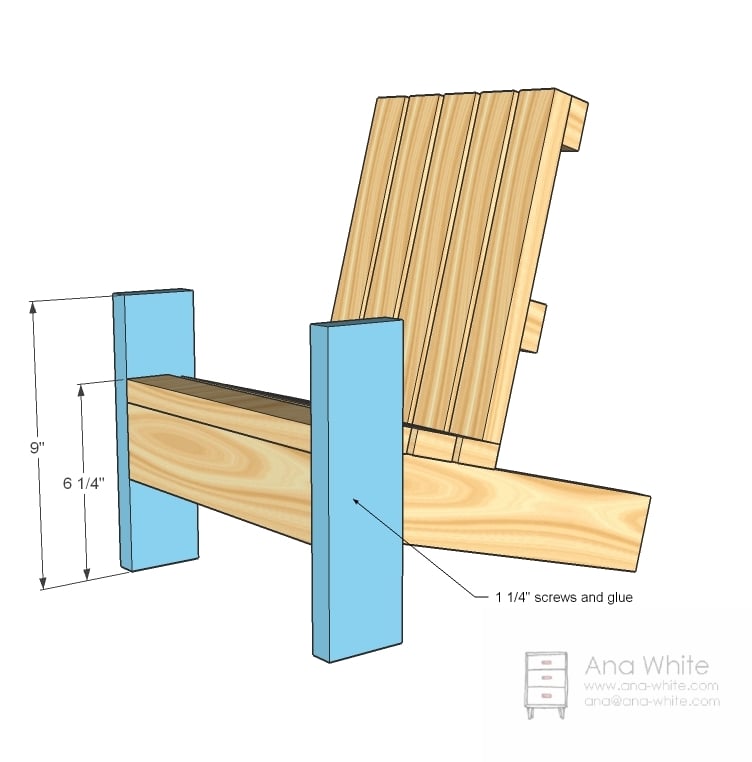
Front Legs
And then mark the front legs and attach to the chair front as shown in the diagram.
Step 7
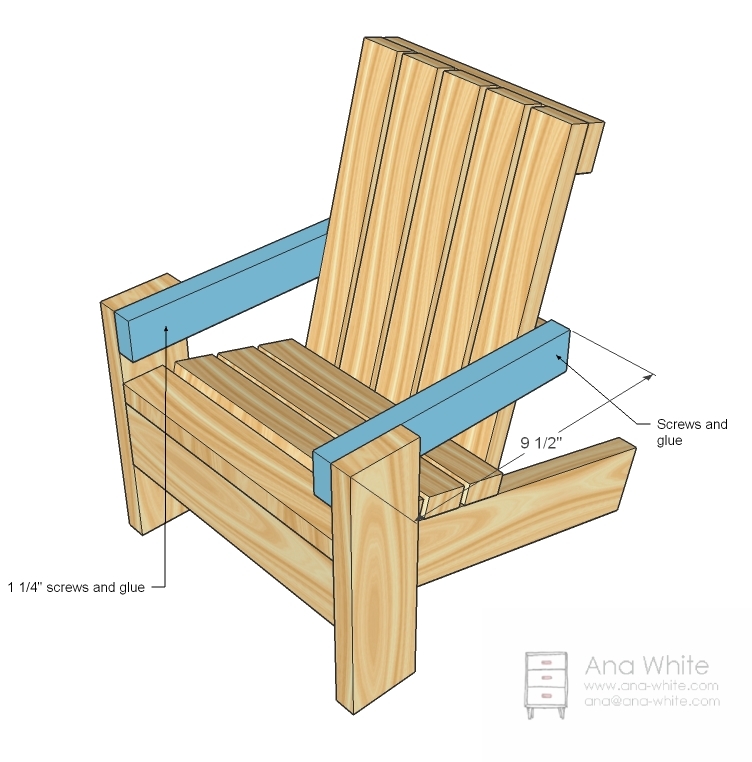
Arm Supports
Now attach the arm supports to the front legs, and then to the seat back.
Step 8
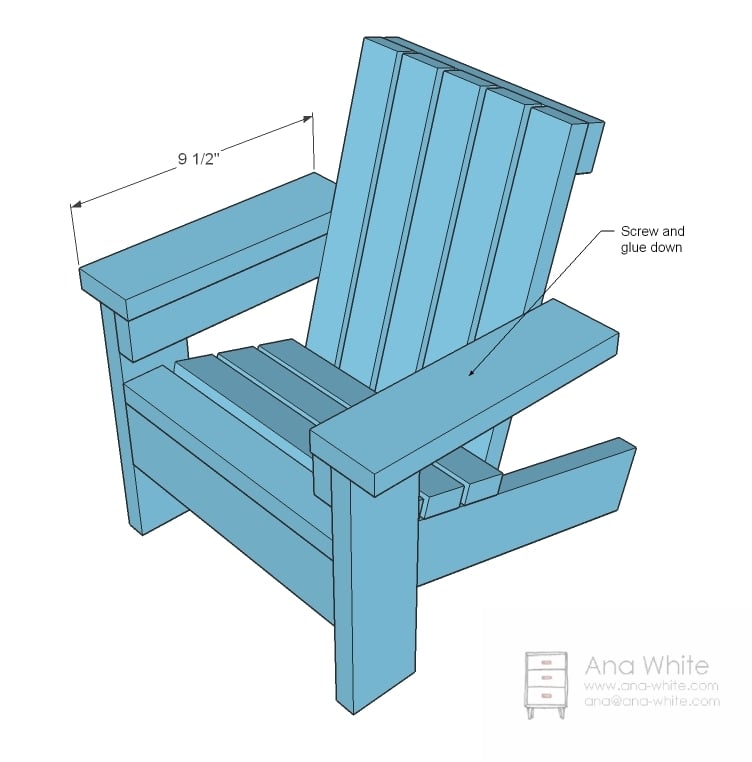
Arms
And then just attach the arms to the arm supports.
If you have any apprehension about building an Adirondack Chair, this would be a fabulous project to start with. And I have to tell you, the Adirondack Chairs are amazing, some of my absolute favorite pieces in my own home.
Thanks again to Fiona for sharing her plans and photos!


Comments
Shawn (not verified)
Mon, 12/13/2010 - 00:39
Absolutely Adorable Ana!!
Absolutely Adorable Ana!!
Jon'el (not verified)
Mon, 12/13/2010 - 04:36
I need to stop coming on this
I need to stop coming on this website for the next couple of days! I am building my 6 year old daughter a kitchen playset and I am half way done in building for Christmas. I also built her a doll bed but now I want to do the picnic table and the adirondack chair =)
Kristi (not verified)
Mon, 12/13/2010 - 05:03
Ana - I featured Fiona's plan
Ana - I featured Fiona's plan on my blog today....hoping to get the "word out" about this much anticipated doll plan!! Thank you for posting, Ana, and thanks to Fiona for the specs!
http://piecesforreese.blogspot.com/2010/12/fionas-doll-adirondack-chair…
Kristi
Tracie (not verified)
Mon, 12/13/2010 - 05:15
So stinkin
So stinkin cute!

Vanessa (not verified)
Mon, 12/13/2010 - 08:04
My husband (Santa) spent the
My husband (Santa) spent the day in the shop yesterday building the doll farmhouse bed and the crib. They're so cute! Thanks for the plans. I'll have to build the chair this spring :)
Tasha (not verified)
Mon, 12/13/2010 - 13:52
I love this... and I love
I love this... and I love your site. THANK YOU ANA!!! We are building a playhouse right now, after that project is done, I'll have a TON of yourminiature furniture to build for it. My girls will love you after that's completed. :)
V (not verified)
Tue, 12/14/2010 - 12:28
How big of a space did you
How big of a space did you leave between the seat slats?
V (not verified)
Tue, 12/14/2010 - 12:29
How big of a gap did you
How big of a gap did you leave between the seat slats? (Sorry, my email was mis-typed on the last question!!)
Ana White (not verified)
Tue, 12/14/2010 - 12:38
1/4" sorry overlooked that!
1/4" sorry overlooked that!
V (not verified)
Tue, 12/14/2010 - 13:28
You're quick, thanks!!
You're quick, thanks!!
V (not verified)
Tue, 12/14/2010 - 13:57
Are the arms by chance
Are the arms by chance suppose to be 1x3s instead of 1x2s?
In reply to Are the arms by chance by V (not verified)
spiceylg
Mon, 04/11/2011 - 04:41
Arms
The pic does show 1x3s but the list shows 1x2s. I built with 1x2s and didn't like the look so I swapped them out for 1x3s. Much better.
dad the builder (not verified)
Tue, 12/14/2010 - 21:17
i miss the old "people also
i miss the old "people also built this" with the 5 or so examples of other ideas
spiceylg
Sun, 04/10/2011 - 05:58
Angles?
Morgane-O (not verified)
Tue, 06/26/2012 - 17:56
beautiful chair
I made the chair and it turned out great. My daughter is very happy with it and so are the girls!
thank you so much for the plan.
here is the link if you would like to check it out (i tried the brag section but no luck!)
http://beardollyandmoi.blogspot.com/2012/06/doll-summer.html
akstover
Sat, 04/17/2021 - 15:46
Back Feet
The original photo shows the back feet with an angled cut to flattened the edge, but this is not captured in the plans. Does anyone know the dimensions of that cut?