


Free plans to make a farmhouse table with just a drill, saw and countersink bit! No pocket holes required! Step by step plans from ana-white.com
Why This Table Was Built
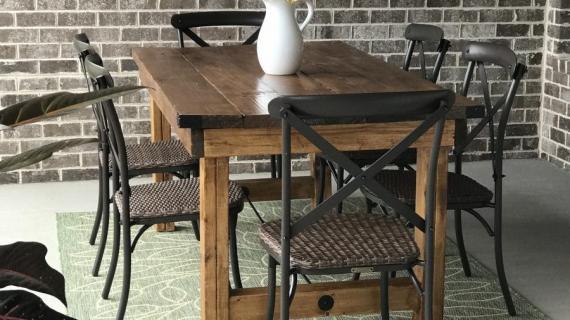
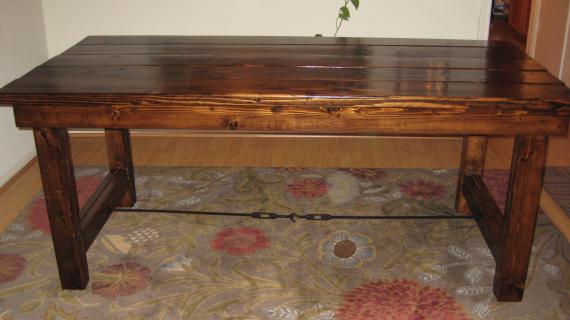
I collaborated with The Happier Homemaker, Melissa and her family use the table for their outdoor space.
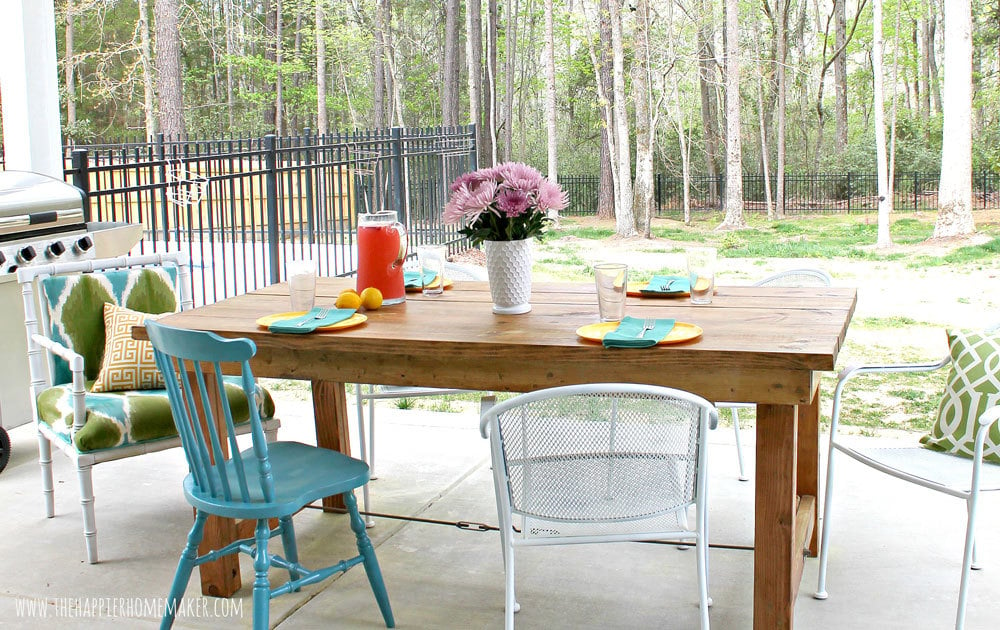
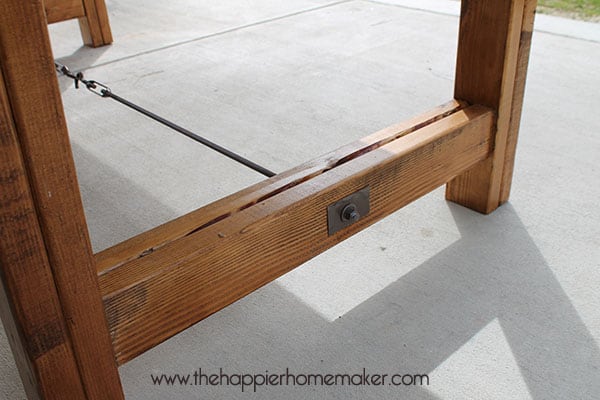
Melissa and her husband were kind enough to let us share plans with you - the plans follow. But please take a second to stop over and read through their building post here for lots more pictures and more details on the hardware.
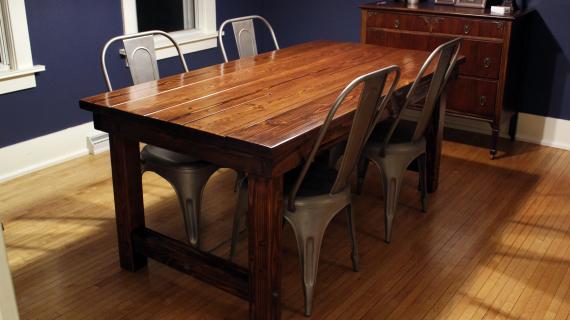
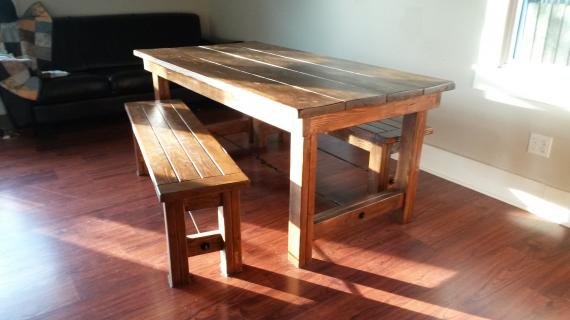
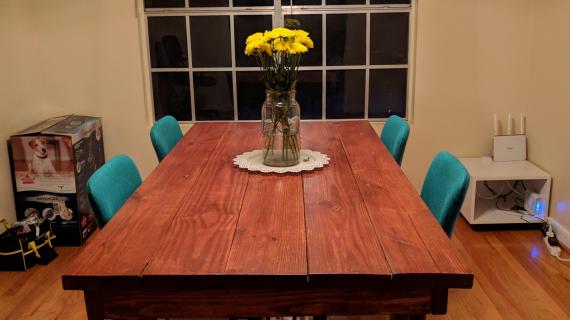
More Photos and Details
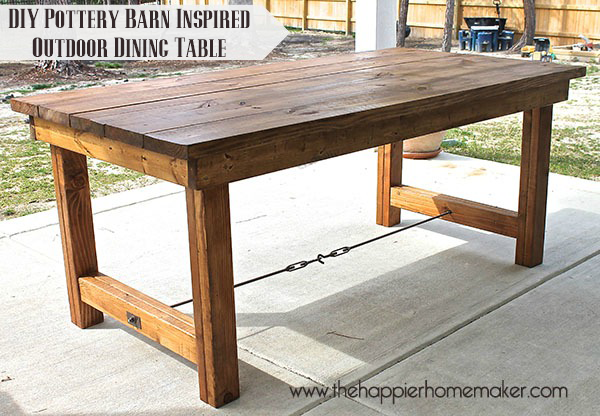
I love how they simplified the table by placing the aprons to the outside, which also removes the need for a pocket hole jig, but made up for the simplicity with the hardware.
Leg Room Concerns
One thing to consider, is with the 2x top and the 2x4 aprons (supports under the tabletop) leg room may be tight for taller guests. Do consider a 1x top or 2x3 aprons if building for taller users.
Preparation
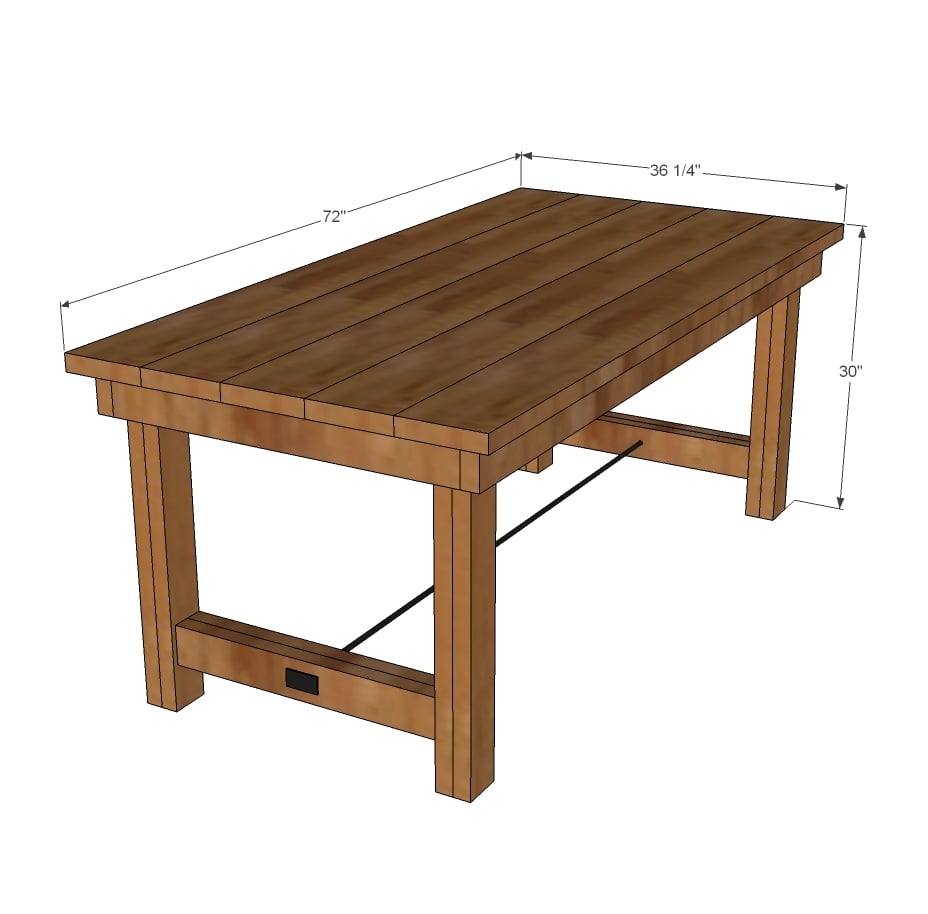
- 6 - 2x4 @ 8 feet long (cut longest boards first to conserve lumber)
- 3 - 2x2 @ 8 feet long
- 5 - 2x8 @ 6 feet long
- 2 1/2" exterior star bit screws (Can use interior screws for interior projects)
- Exterior Wood Glue (again, can use interior wood glue for interior use)
- 2 1/2" pocket hole screws are optional if you have a pocket hole jig
- 2" brad nails (galvanized for exterior)
- 4 - 2x4 @ 24 1/4" (End Stretchers)
- 8 - 2x4 @ 28 1/2" (Legs)
- 2 - 2x4 @ 30 1/4" (End Aprons)
- 2 - 2x4 @ 69" (Side Aprons)
- 7 - 2x2 @ 30 1/4" (Tabletop Supports)
- 5 - 2x8 @ 72" (Tabletop Boards)


Please read through the entire plan and all comments before beginning this project. It is also advisable to review the Getting Started Section. Take all necessary precautions to build safely and smartly. Work on a clean level surface, free of imperfections or debris. Always use straight boards. Check for square after each step. Always predrill holes before attaching with screws. Use glue with finish nails for a stronger hold. Wipe excess glue off bare wood for stained projects, as dried glue will not take stain. Be safe, have fun, and ask for help if you need it. Good luck!
Instructions
Step 1
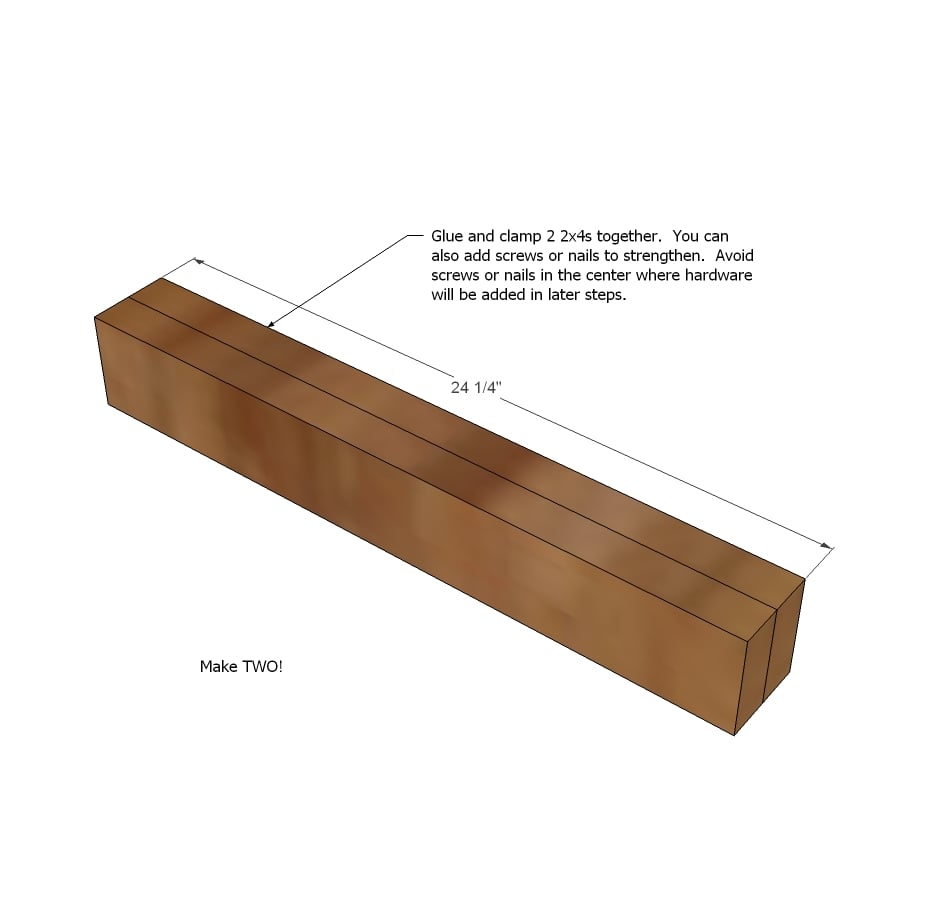
Start by attaching the shortest 2x4s together. This is where the nailer would come in handy because nails are so tiny and difficult to see/easy to hide. But you can use screws to - just hide on the insides.
Step 2
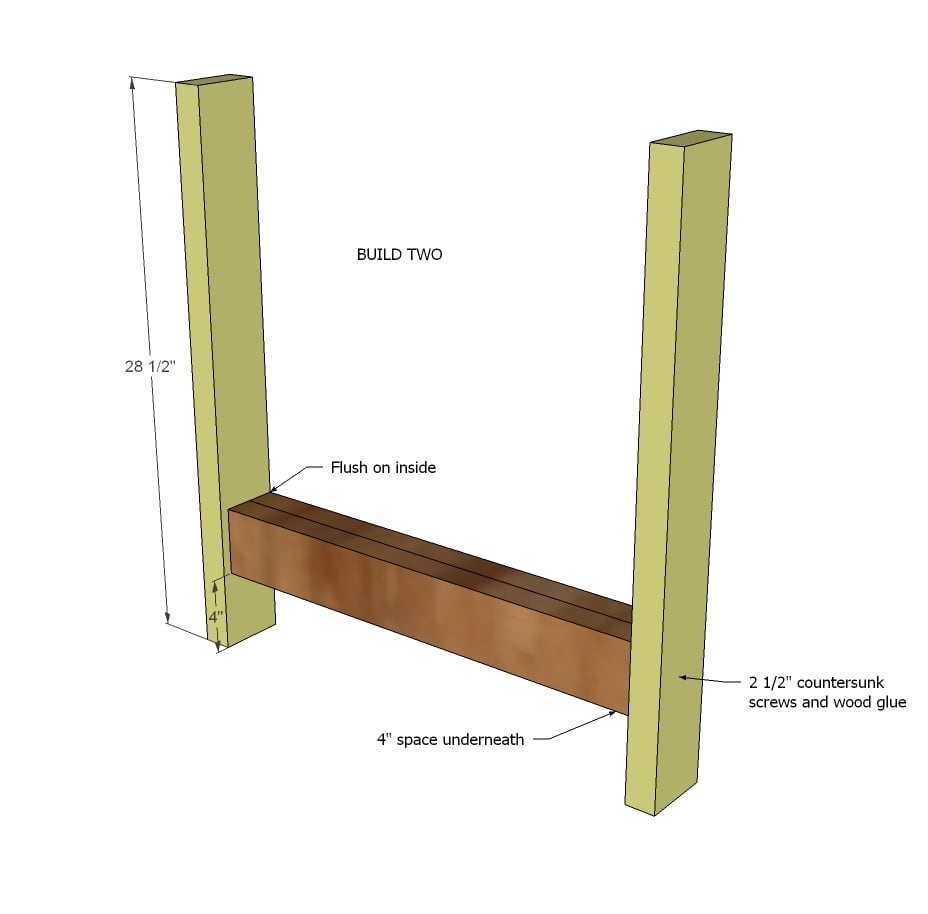
Now attach with screws and glue to the first set of legs.
Step 3
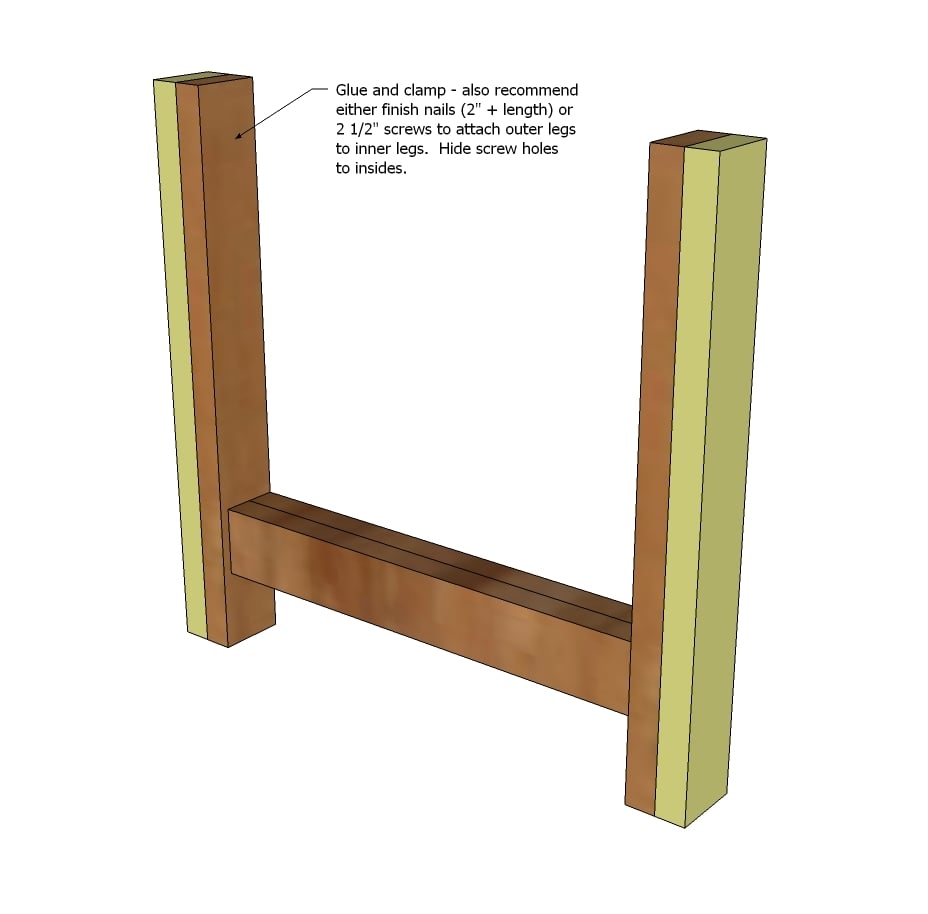
Then attach the second set of legs to the outsides.
Step 4
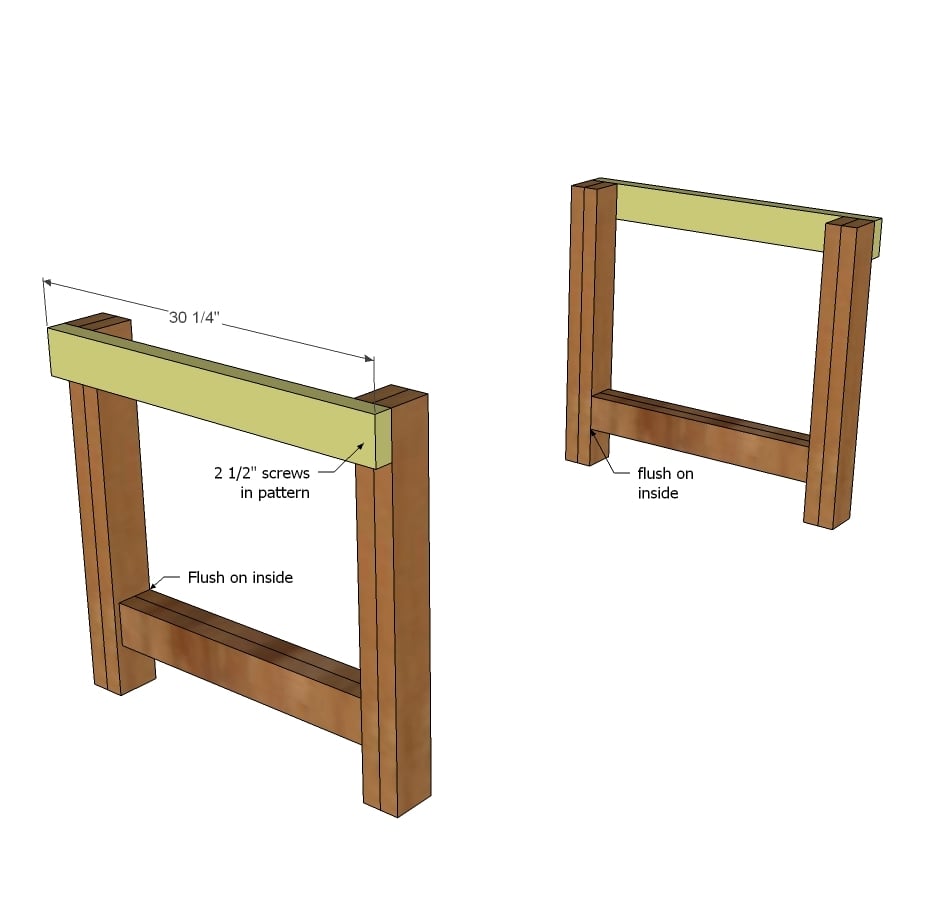
Attach short aprons on top on the outsides of the legs sets.
NOTE: Pocket hole users will want to drill 1 1/2" pocket holes facing upward on insides of aprons to attach tabletop in later steps.
Step 5

Step 6

Next, Add the 2x2 under tabletop supports. These will help you place the tabletop boards really close together.
NOTE: If you have a pocket hole jig, you can just build your tabletop as one piece, and then attach to aprons.
Step 7
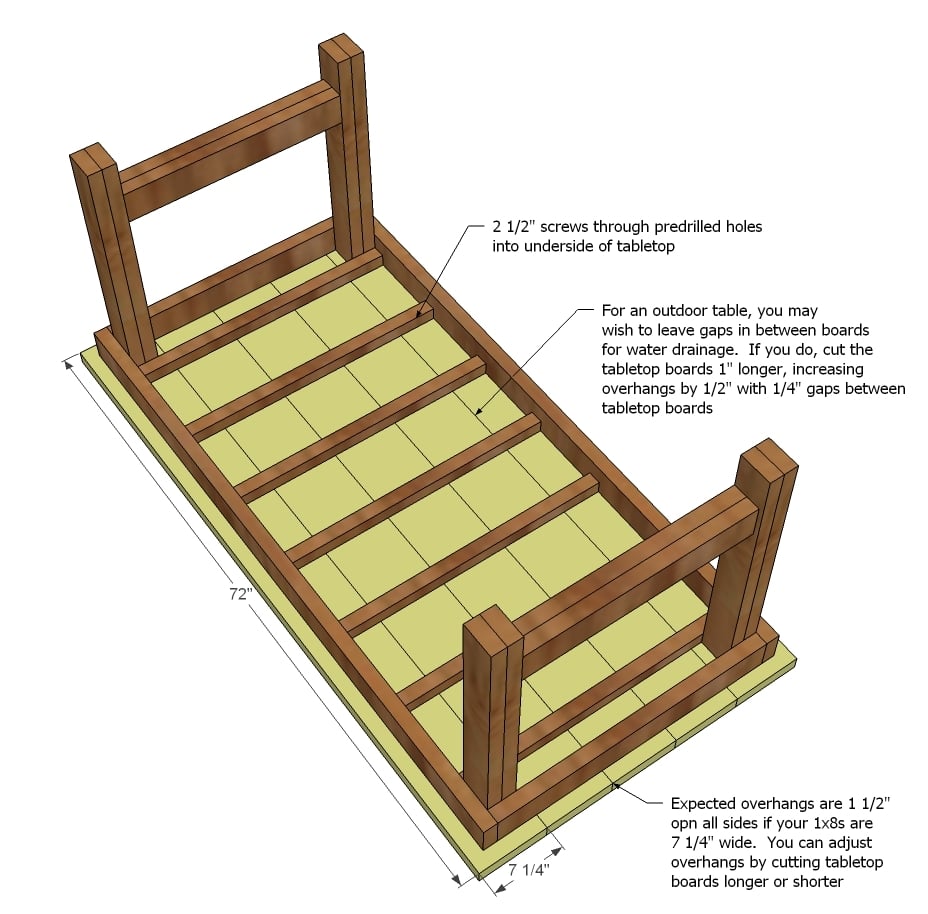
Lay the boards down, and the tabletop on top. Start at the middle and work your way outward, minimizing gaps between the boards as you screw down from underside.
For exterior use, consider a 1/4" gap between boards for water drainage.
You may also wish to attach from top into end aprons in pattern.
Step 8
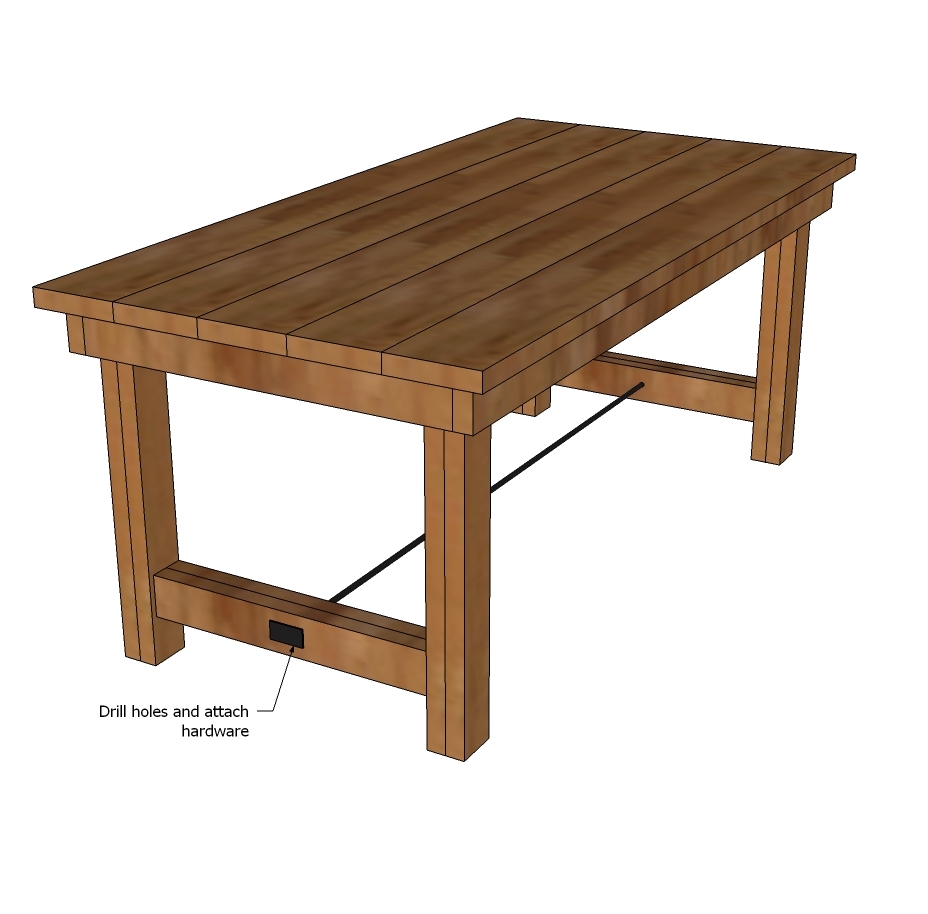
Add hardware to base - check out the Happier Homemaker for more details on how they did that.
It is always recommended to apply a test coat on a hidden area or scrap piece to ensure color evenness and adhesion. Use primer or wood conditioner as needed.

Comments
dmcarwin
Tue, 04/23/2013 - 13:08
Beautifully Done!
Great Plans! I love this table!
babysteps
Tue, 04/23/2013 - 17:02
Better than the inspiration piece!
Beautiful table, much better than the Pottery Barn version.
Chellebebuilding
Tue, 04/23/2013 - 17:36
Gorgeous
Simply gorgeous. The robust look is great for the outdoors. I may have to make one for the summer. Congrats Melissa & Hubby.
jojabis
Thu, 04/25/2013 - 17:53
the hardware
would you have to use a stretcher?? I'm just wondering since the legs seem so beefy.
Crimson0087
Fri, 06/14/2019 - 19:01
How many of your tables have…
How many of your tables have warped or cracked?
email4tina
Sun, 06/14/2020 - 17:21
Ok to make 8 feet long?
Can this table be made 8 feet long? Or would it be too heavy?
RobH2020
Fri, 08/21/2020 - 03:11
Depends what you mean by too…
Depends what you mean by too heavy. It would be pretty heavy, but two average men should be able to move it short distances.
Also depends on the wood you use. If you get mahogany it's going to be different to pine.
RobH2020
Fri, 08/21/2020 - 03:10
Thanks for these plans!!…
Thanks for these plans!! They were so incredibly helpful.
I've just finished making my own version, changing the dimensions slightly. Was 1200mm long in the end (too short in the end, should've been 1.5m but I messed up with the lumber delivery and didn't want to change it) and 820mm wide (4 x 200m boards, with 5mm gap between).
Would post a photo but not sure how!