

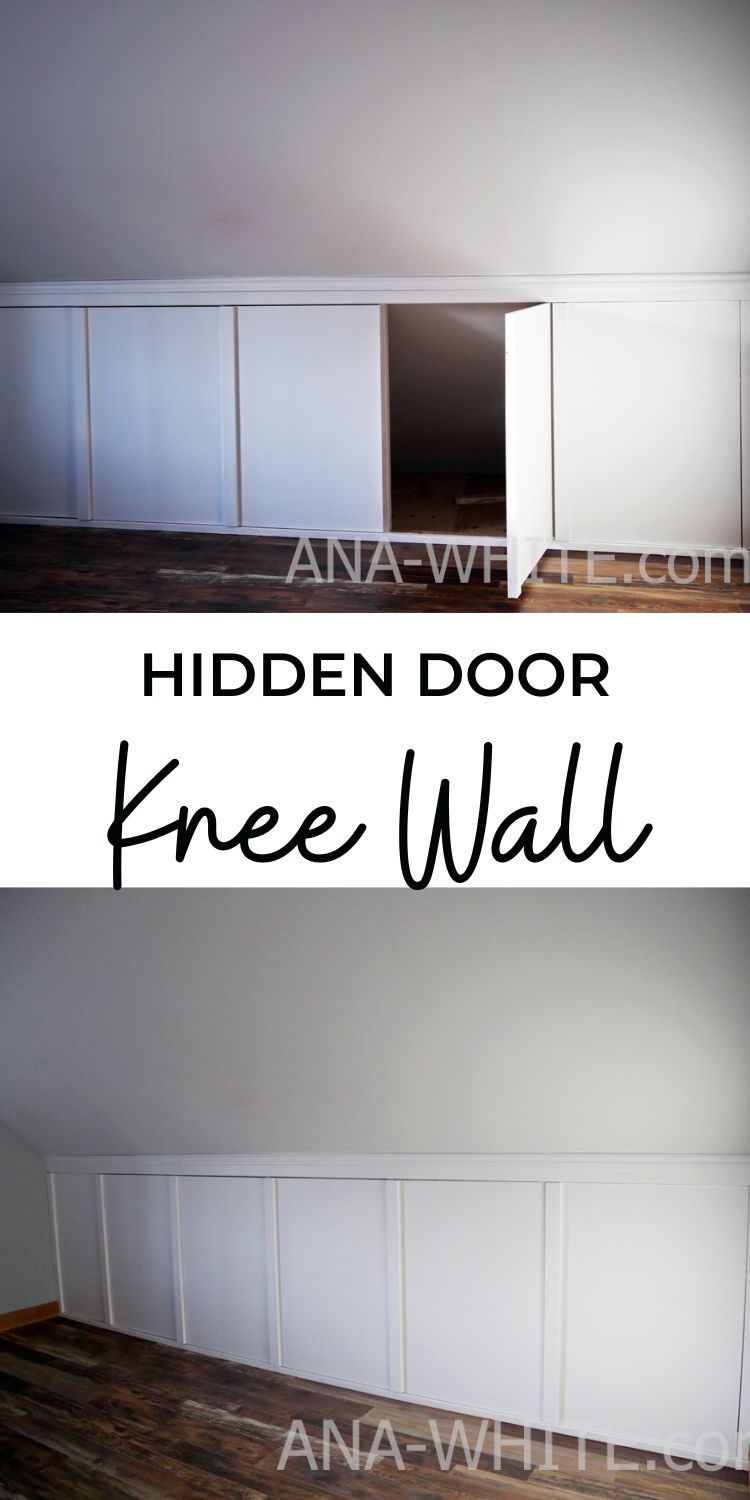
Tutorial for building a sloped ceiling knee wall with hidden access doors. This is an easy and functional way to block off a low sloped ceiling, while still being able to acess the storage area. Very good tutorial with lots of photos, diagrams, videos, and instructions from Ana-White.com
Sloped ceilings add so much charm and character to a home. But they can make a room awkward and challenging to use.
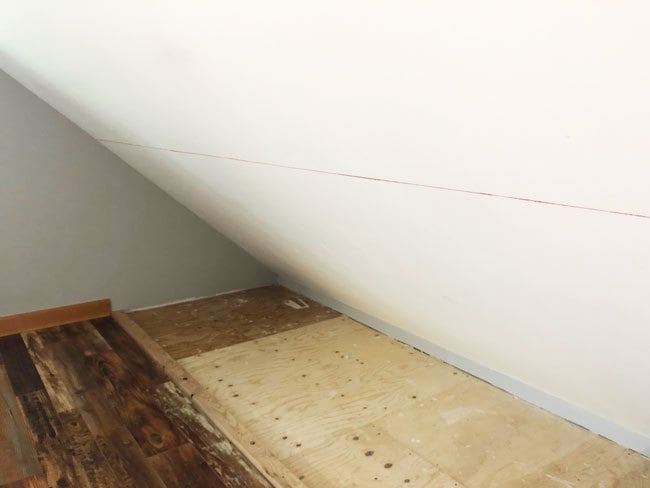
Before - Slope Ceiling Makes Room Awkward to Use
We recently took our attic room sloped ceilings that looked like this -
After - Looks Like a Board and Batten Wall
And built knee walls out of 2x4s and plywood

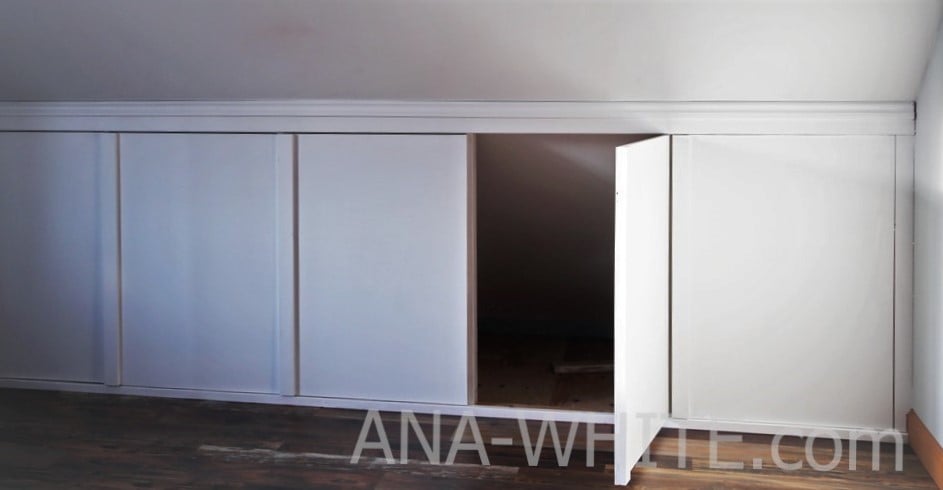
After - Opens for Full Access
But since I wanted the space behind the knee wall to be accessible for storage, we created hidden doors in the knee wall.
The entire knee wall is actually hidden doors - so the area behind is completely accessible.
You could take this project a step further and add closet rods and shelving to create a built in closet. We'll be using the knee wall storage for totes and off season things.
Update: Several Years Later...
It's been a few years since we tackled this project. Here's what it looks like today:
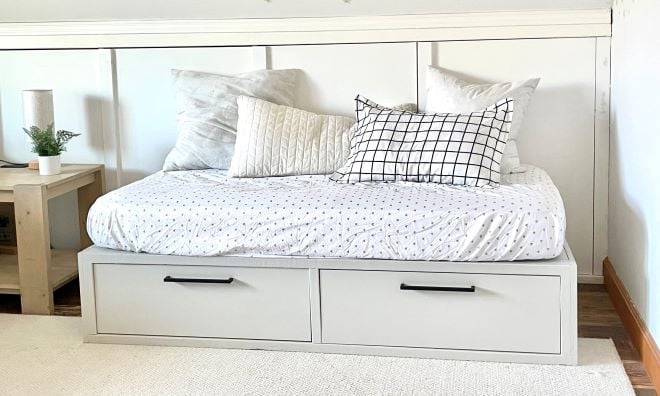
Related: Storage daybed plans here
The all-doors system gives us options for furniture placement - you can place furniture anywhere and there's always a door still available somewhere.
It still looks awesome and none of the doors or hinges have sagged at all.
We use the space for storing Christmas decorations, heirloom gifts that we can't part with but don't necessarily use daily, and of course, the kids use the space for hide and seek. You'd never know this is actually a wall of doors.
How We Built this Sloped Ceiling Storage Wall
This was a fairly easy project - but time consuming since the walls are each sixteen feet long - that my husband and I tackled over the course of a few days, working a few hours each day on it. We are confident that the average homeowner could tackle this project. Here's how we built our knee walls with hidden storage -
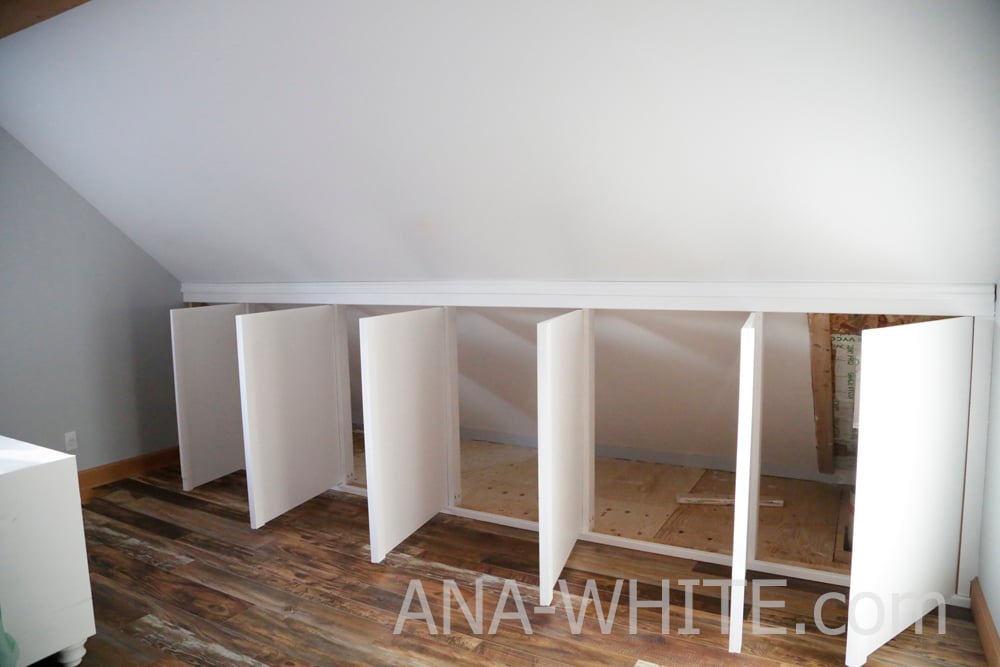
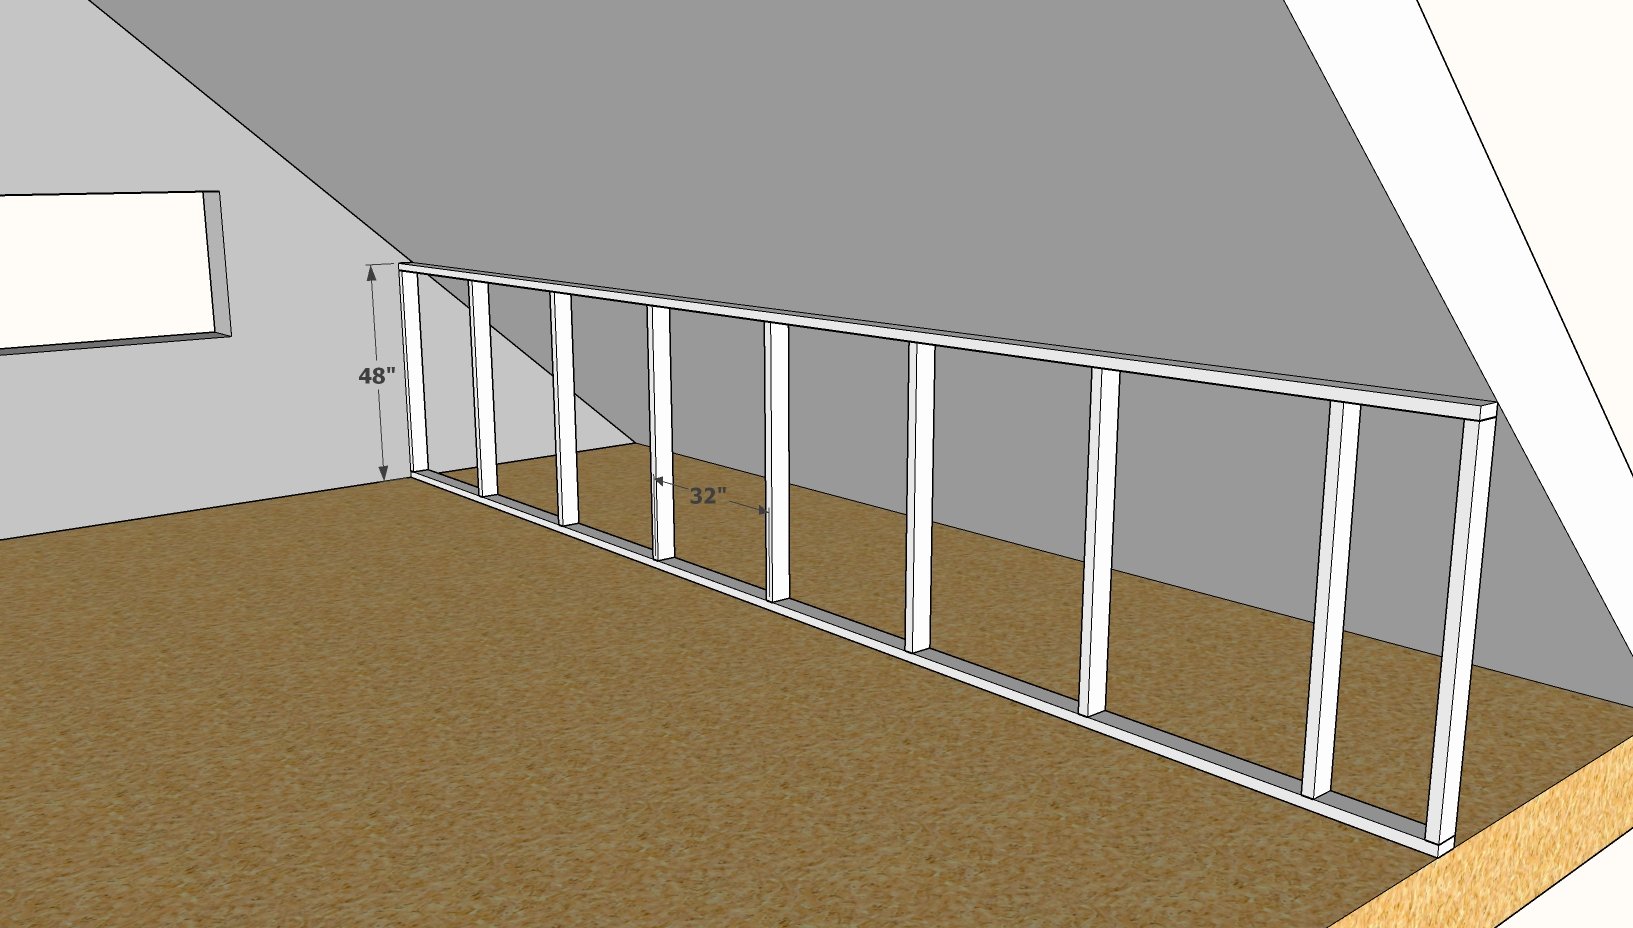
First, alot of planning and measuring.
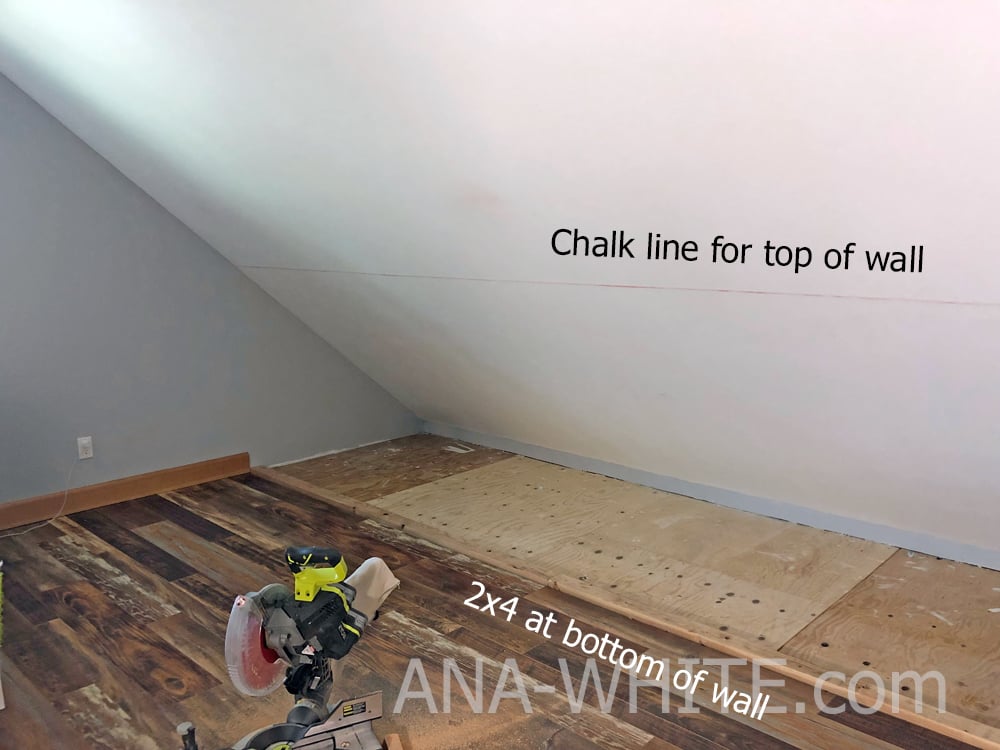
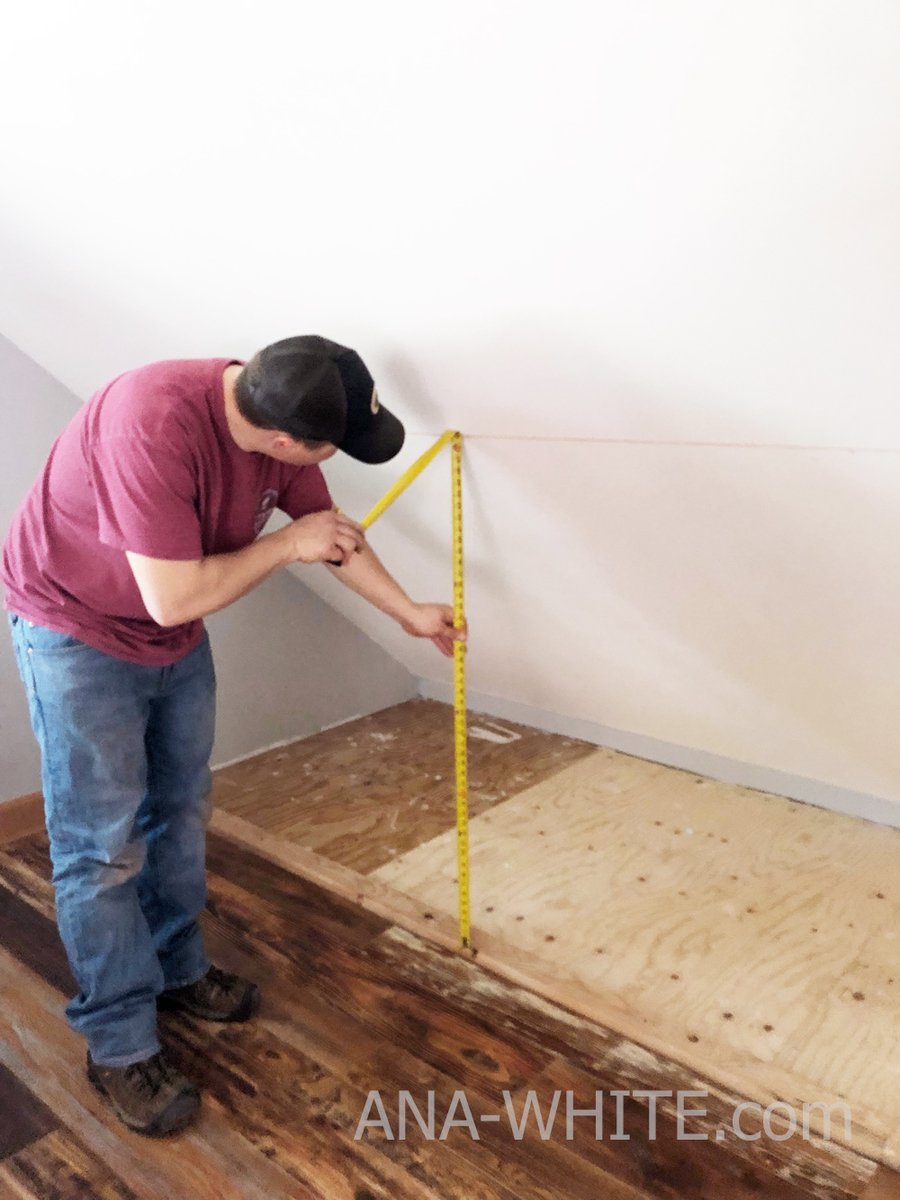
We decided on making the wall 48" tall, because this is where the ceiling height becomes useuable for furniture, and it also helps maximize materials use.
We also decided on making the doors 32" wide, so you can get exactly three 48" tall x 32" wide doors out of a sheet of plywood.
The easier way to do this is to just build a pony wall 48" tall x the length of your room, and install it plumb and level.
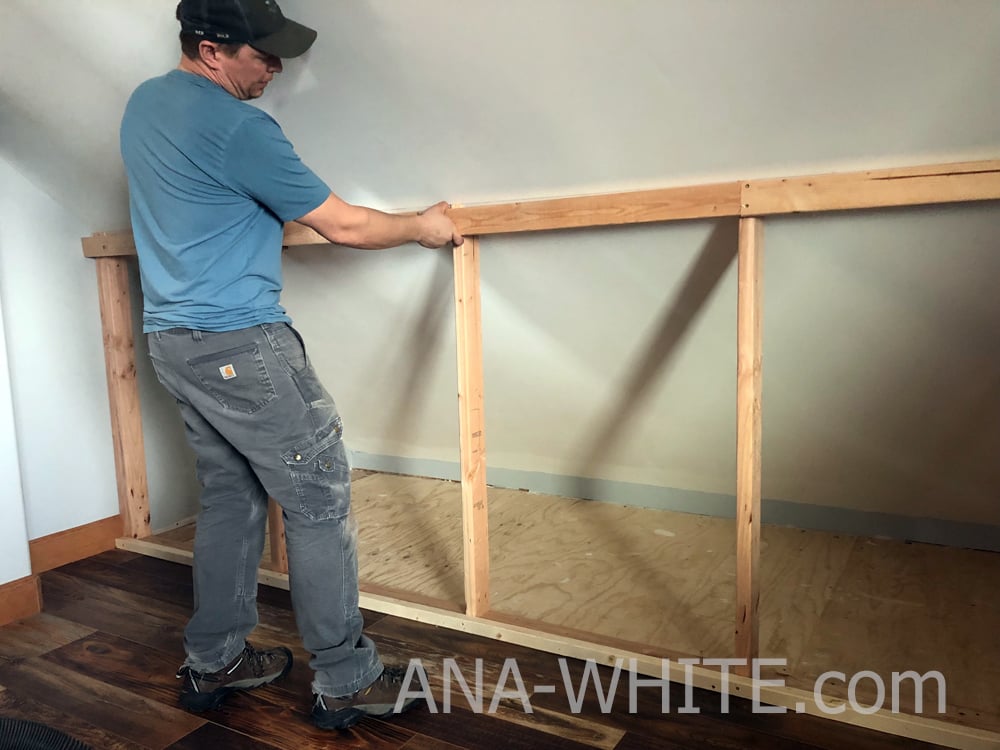
Then trim out the top and bottom to give space for the full overlay doors.
We finished this gap at the top off with a piece of trim.
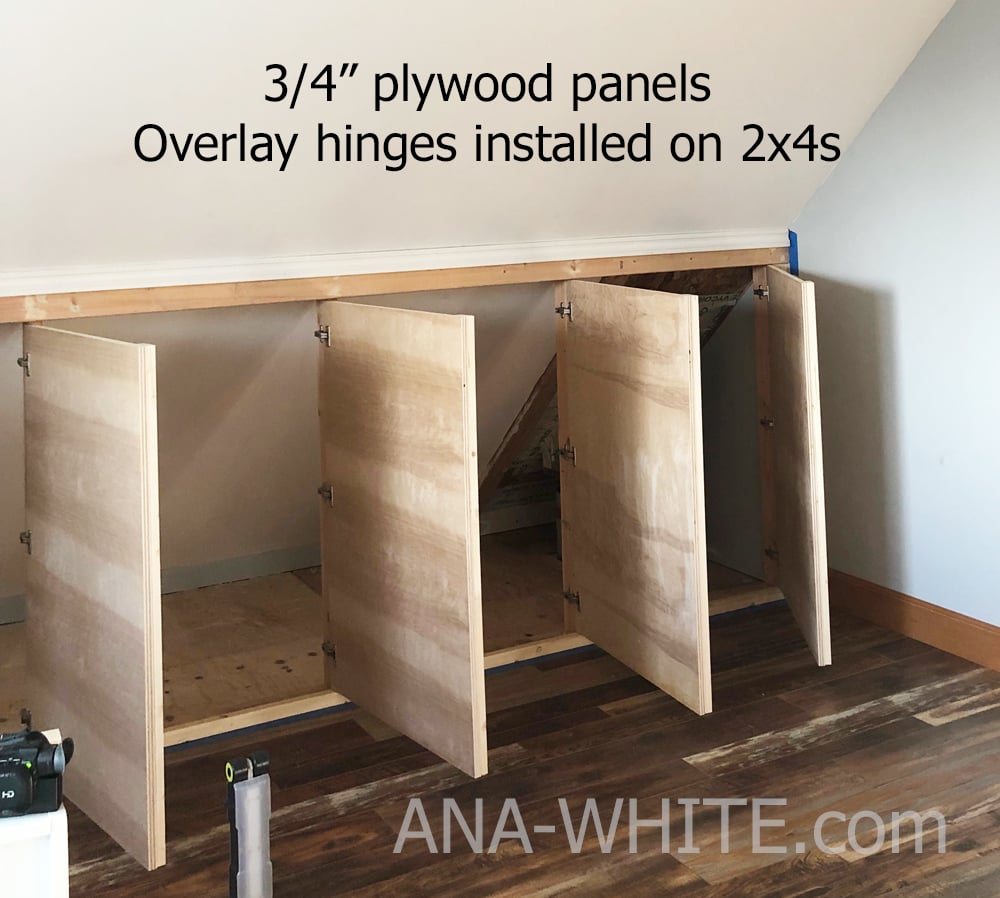
For the doors, we purchased euro style overlay hinges for FRAMELESS cabinets - for a total of 5/8" overlay on each side.
DOOR WIDTH: Inside opening + 1-1/4"
DOOR HEIGHT: Overall opening - 1/2"
We cut our doors on a table saw and installed the hinges and hung the doors in the framing.
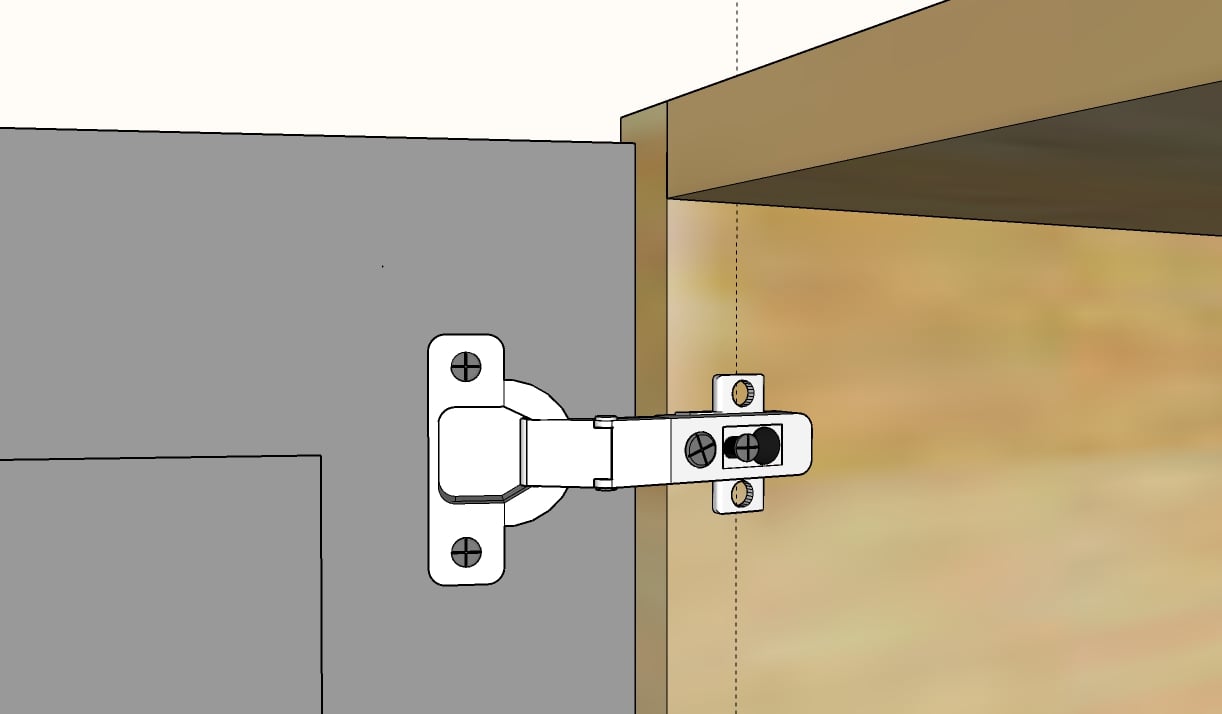
RELATED: How to install concealed hinges
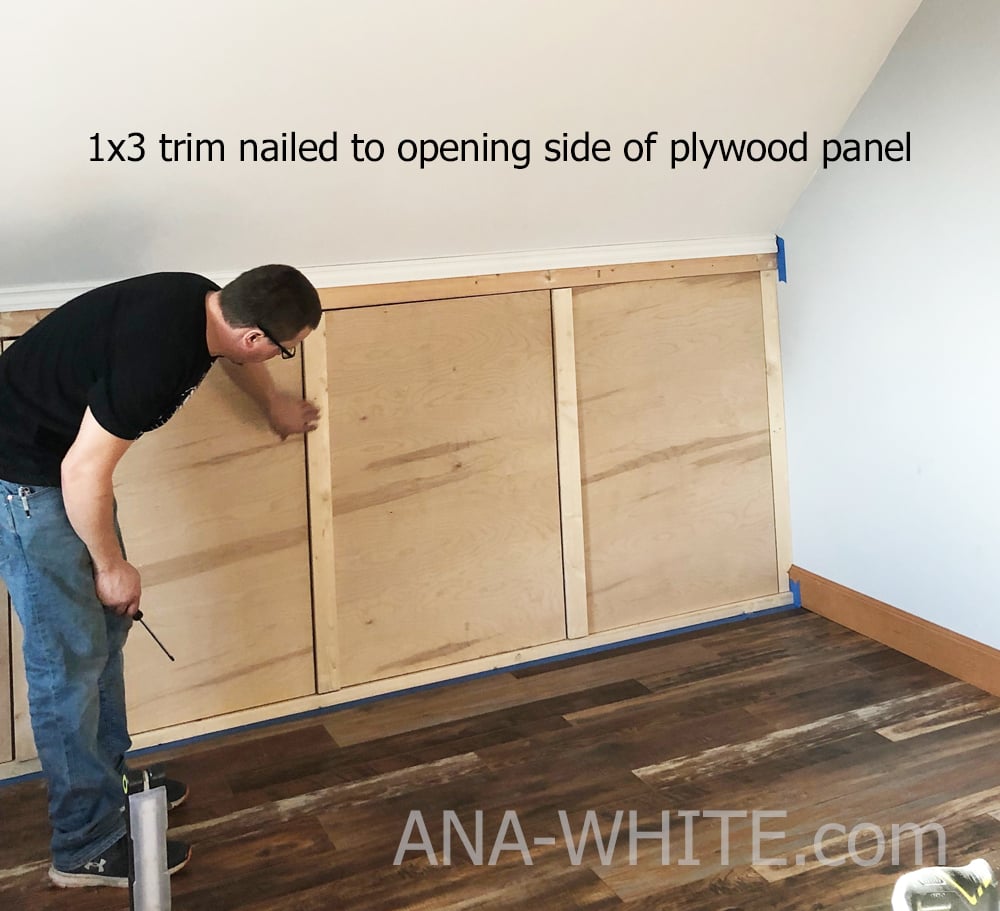
To disguise the door spacing and provide a handle, we nailed 1x3 boads to the opening edge of the plywood door.
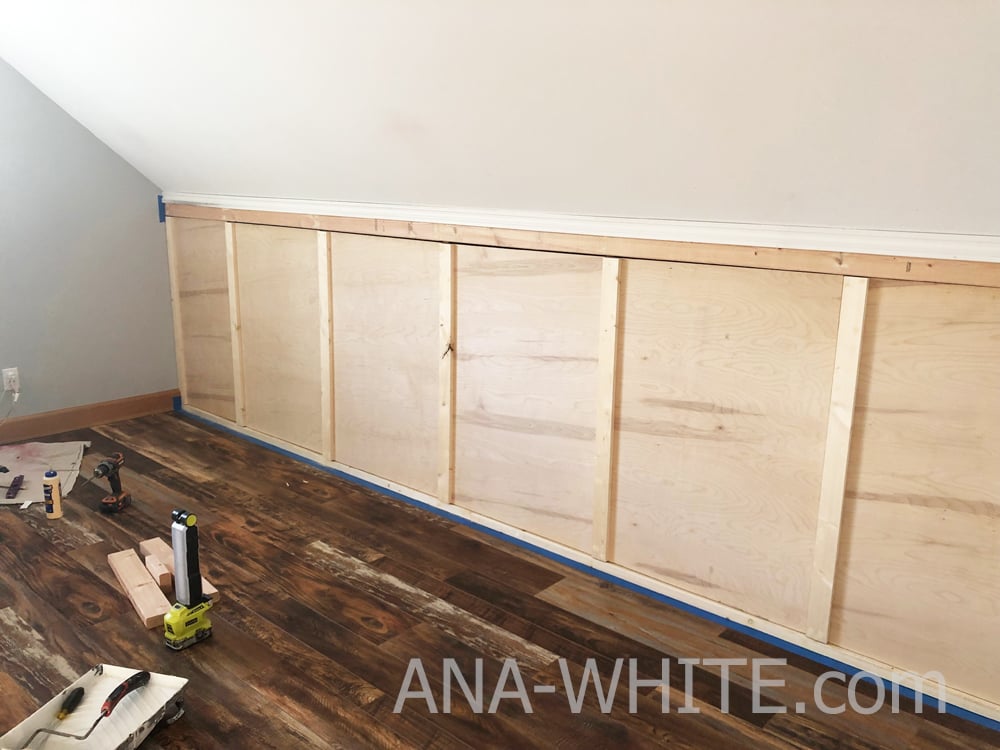
This is what it looks like before paint -
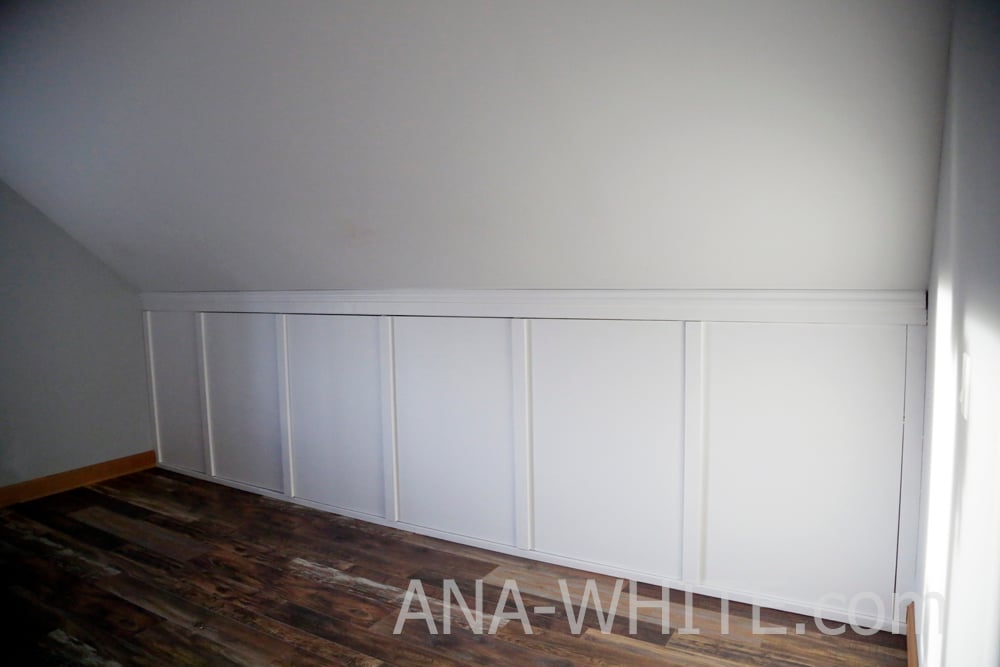
And after paint - We used about a gallon on 32 feet of walls, four feet tall.
We love how this project turned out and know it will greatly improve the function and look of the room.
Video Tutorial of Building this Knee Wall with Doors
We also shared in video format this entire build
If you build, please share a photo - tag me on Instagram #anawhite, share to our Facebook page, or add a brag post. We greatly appreciate the support and thank you for using our free tutorials.
Ana
Pin For Later!
Preparation
- 2x4s for knee wall framing and top trim
- 2x2 for bottom trim
- finished trim for the top gap
- 5/8" overlay concealed hinges (or Frameless Full Overlay Euro/Concealed Hinge)
- 3/4" hardwood plywood (cabinet grade) for doors
- 1x3 trim for "batten" handles
- 2-1/2" long self tapping star bit screws for wall construction
- 1-1/4" brad nails
- 3 - 2x4s @ length of the wall
- 1 - 2x2 @ length of the wall
- 1 - trim piece @ length of wall
- 2x4 studs @ 45" - every 32" and at ends
- 3/4" plywood @ 1-1/4" wider than inside opening and 1/2" shorter than overall height
- 1x3s @ height of doors


Instructions
Step 1
Build the knee wall on the floor with the screws. The wall openings must be square for the doors to open properly.
Position in room and adjust for square/plumb.
Attach to floor, side walls, and ceiling (if possible) with the screws. Blocking can be used to help attach to ceiling. Attach to studs in the walls/ceiling.
Step 2

Trim top and bottom with 2x2 and 2x4 using the screws.
On the top, there will still be a small gap on top - this will be covered with additional trim in later steps.
The 2x boards serve to bring the wall out past the doors to be installed in later steps.
Step 3

Measure and cut the door pieces, cutting the plywood into three pieces crosswise.
Install hinges. Here is a good tutorial for installing concealed hinges.
NOTE: For the end openings, with less overall width in the opening, we just nailed the plywood on, so it's fixed and doesn't open. It was too small to be useable opening.
Step 4
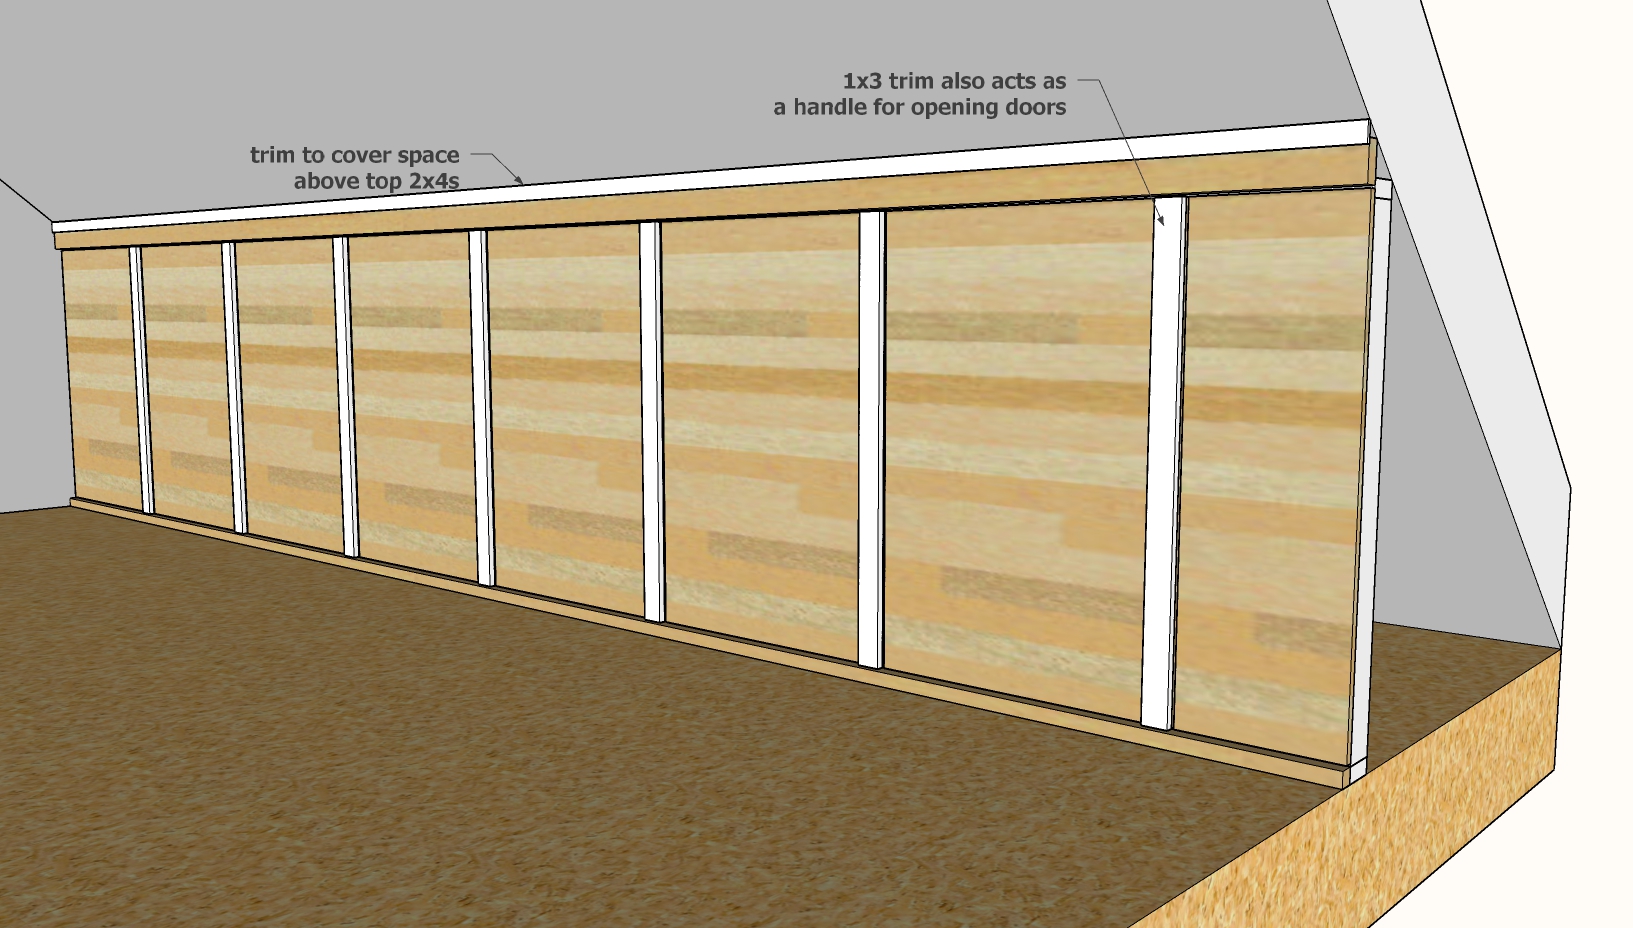
Cut the 1x3s to match the height of the doors.
Use the 1-1/4" brad nails to attach the 1x3s to the door faces on the non hinged side, as the 1x3 acts as a door handle.
The 1x3 can be used to hide the gaps between the door, but be careful to not obstruct the opening of the adjacent door hinge.

Comments
JessD
Sun, 05/10/2020 - 08:04
Question regarding ceiling
Can you screw the 2 x 4's straight into drywall in the ceiling? I am a bit confused about this part.
In reply to Question regarding ceiling by JessD
Ana White
Thu, 09/22/2022 - 12:03
We could because of our SIPS…
We could because of our SIPS construction. It will depend on your ceiling construction.
If you can't another option is to just frame up a pony wall to the short point height, and then trim out the front to cover the long point angle.
jenbrod
Thu, 08/20/2020 - 05:14
Love this. Can’t wait to try…
Love this. Can’t wait to try it. Btw where is your flooring from?
StacyW50
Mon, 01/24/2022 - 12:22
Could you please tell what…
Could you please tell what flooring you used in this room? TIA
Love the hidden storage wall♥