

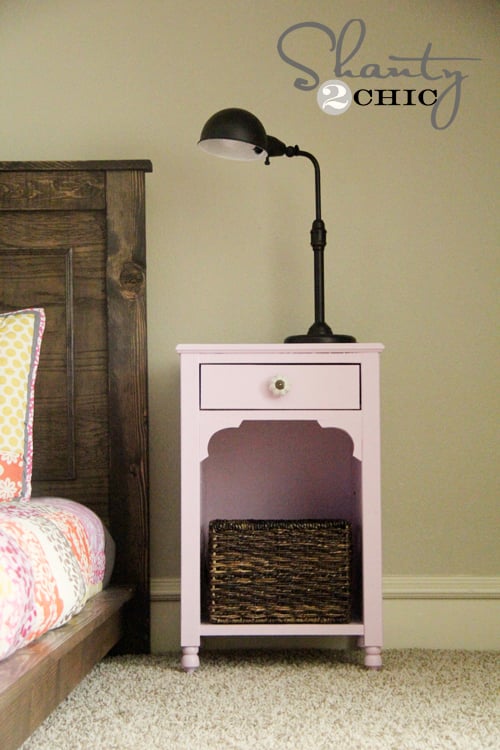
Build a pretty nightstand! Free plans!

We have a really amazing plan today for you! You are going to love it! Especially if you have a little girl that likes pretty things!
But before we get to this amazing plan, something else super amazing is happening today.
___________________________________
Tonight, I am talking to Darren Rowse of Problogger! And I wanted to invite you personally to be part of the conversation. You can submit questions to ask to! I'd love to have questions from you.

The webinar is by reservation only, so please sign up right now - seats are limited and filling up fast. It would mean tons to me if you joined us! Hope to see you then!
________________________________
And I did promise you a super amazing plan today - didn't I?
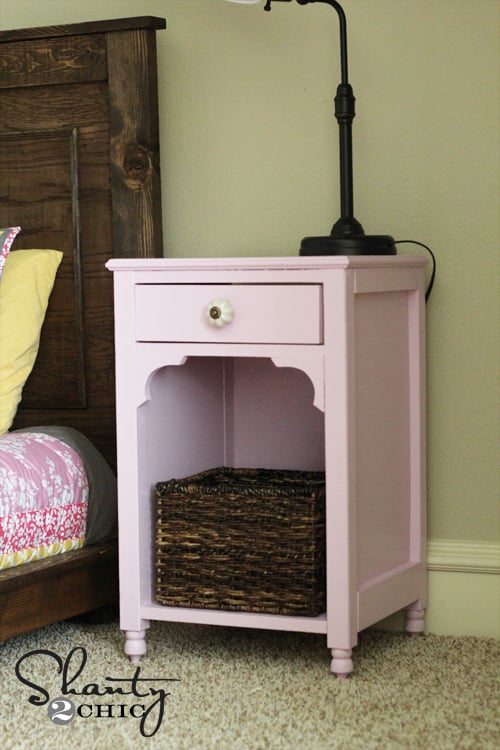
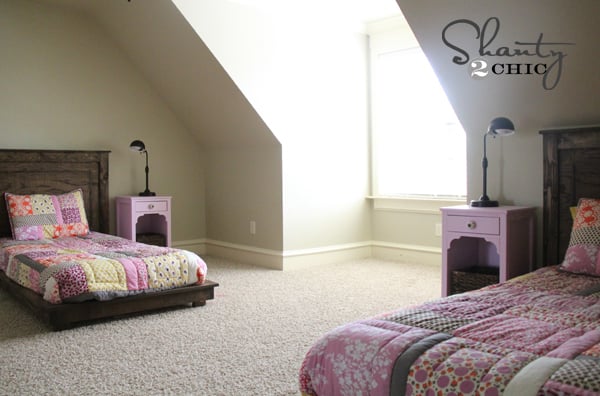
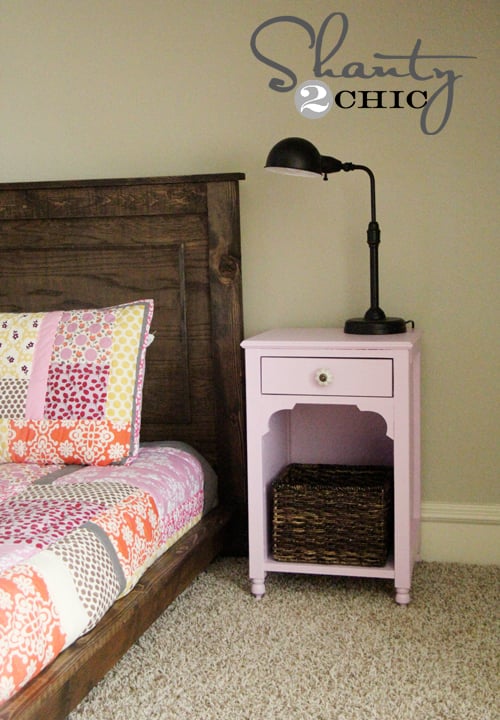
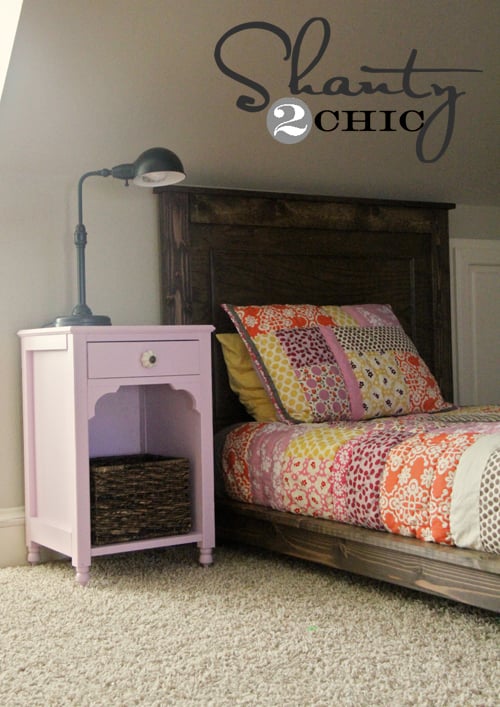
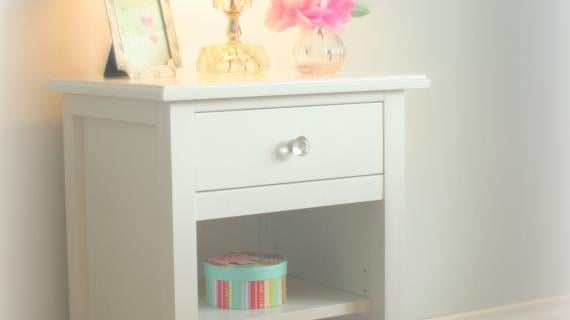
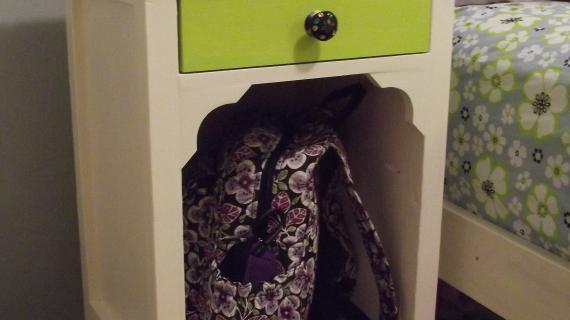
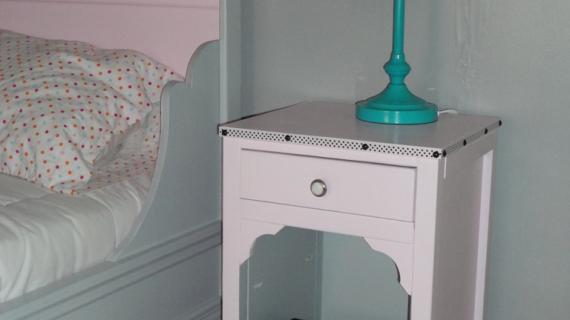
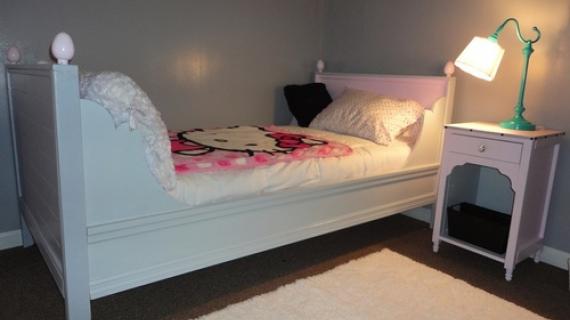
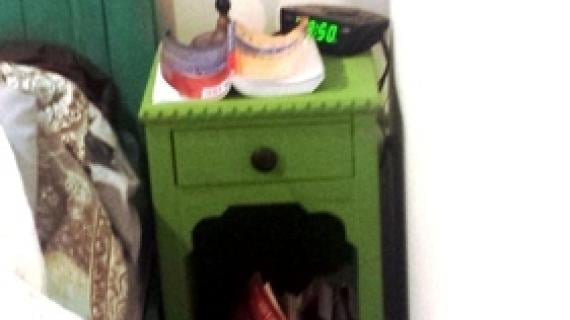
I worked with my friend Whitney who also made the beautiful platform beds and so cute headboards to make this nightstand. It's all in the details and pretty pink paint for this one!
From Whitney:
These were so fun to make! I had both done in just a couple hours. I love how much character they add to the room and the price tag is the best part! My girls love them too... Especially the pink! ;-)
Make sure you stop over and visit Whitney at Shanty2Chic for lots more photos and details!

Preparation
2 – 1x2 @ 8 feet long
1 – 1x12 @ 8 feet long
1 – 1x3 @ 8 feet long
1 – 2x2 @ 8 feet long
1 – 1x4 @ 2 feet long
1 – ¼ sheet ¼” plywood
2 – 1x2 @ 11 ¼”
2 – 1x3 @ 11 ¼”
2 – 1x12 @ 22 ½”
4 – 2x2 @ 23 ¼”
1 – 1x12 @ 13”
5 – 1x2 @ 13”
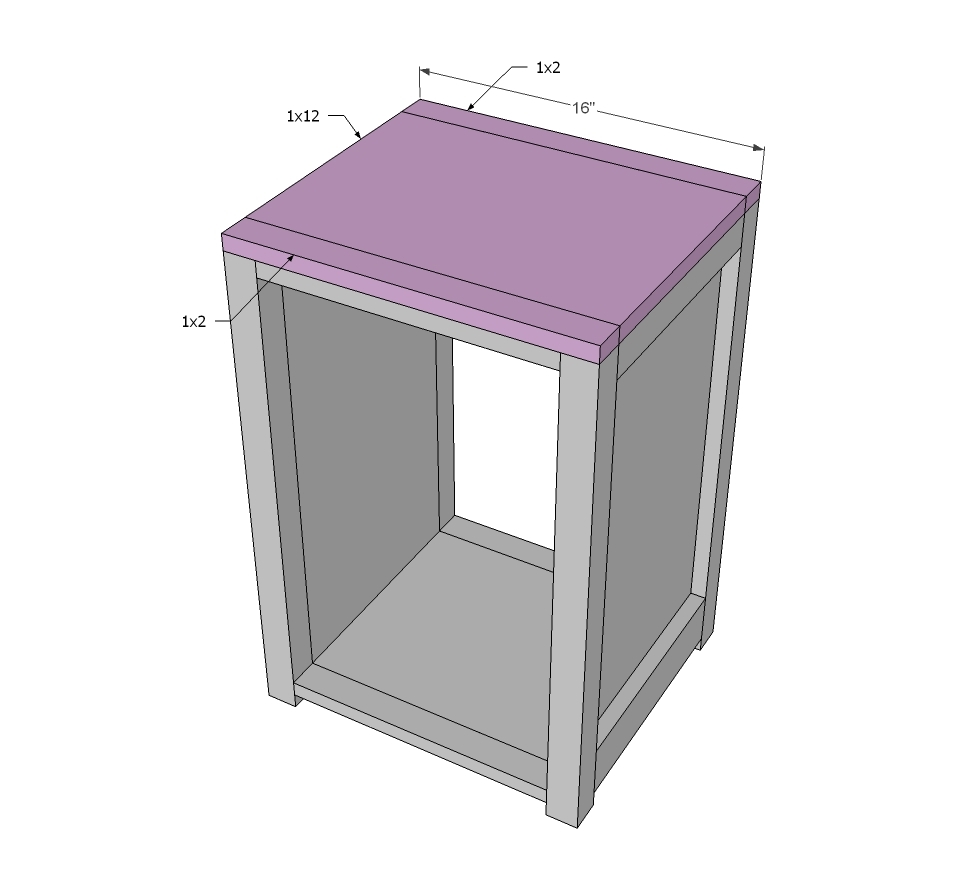
2 – 1x2 @ 16”
1 – 1x12 @ 16”
2 – 1x4 @ 3 ½” (decorative moulding)
Edge Moulding is cut to fit
1 – ¼” plywood@ 16” x 23 ¼”
DRAWER
2 – 1x3 @ 11 ¼”
2 – 1x3 @ 13 ½”
1 – ¼” plywood @ 12 ¾” x 13 ½”
1 – 1x4 @ 12 ¾” (false face)
2 – 1x2 @ 13 ½” (drawer slides)


Please read through the entire plan and all comments before beginning this project. It is also advisable to review the Getting Started Section. Take all necessary precautions to build safely and smartly. Work on a clean level surface, free of imperfections or debris. Always use straight boards. Check for square after each step. Always predrill holes before attaching with screws. Use glue with finish nails for a stronger hold. Wipe excess glue off bare wood for stained projects, as dried glue will not take stain. Be safe, have fun, and ask for help if you need it. Good luck!
Instructions
Step 1
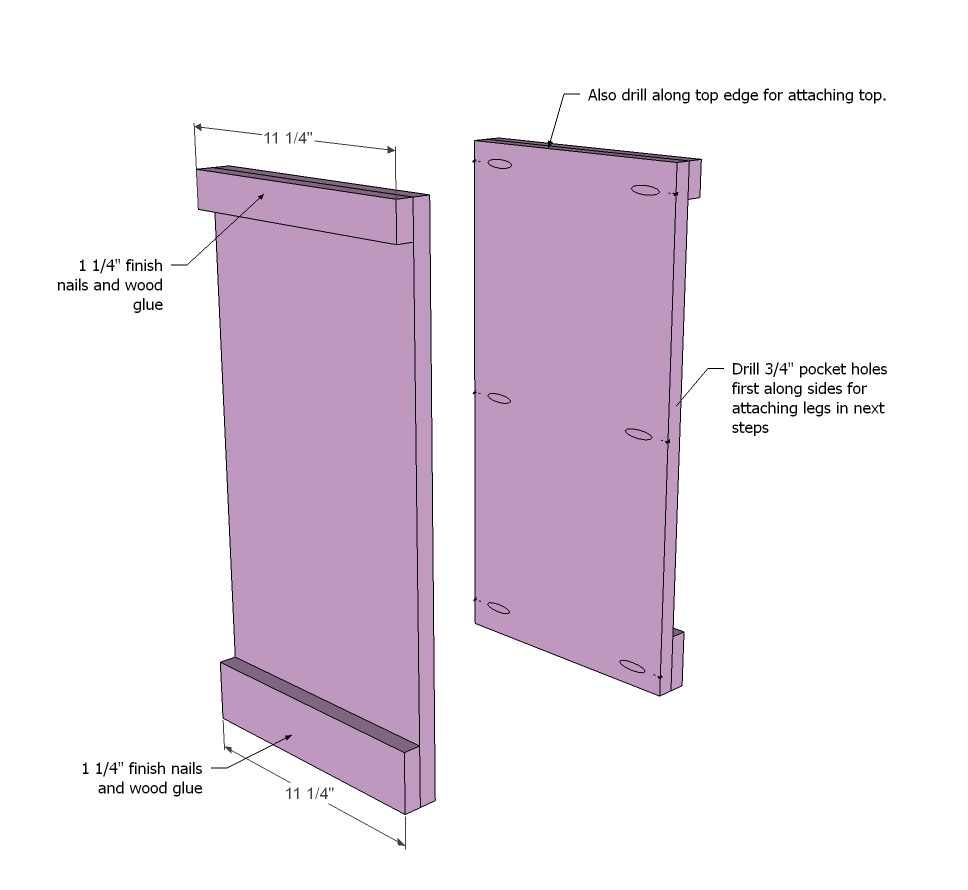
Start by just building the two sides. I recommend PHs for this plan, so drill those first as shown in the diagram above for attaching legs. Use 3/4" PH settings.
Step 2

Then attach legs with 1 1/4" PH screws and glue, flush to top. If you are NOT using the decorative legs, then cut your legs another couple of inches longer instead.
Step 3
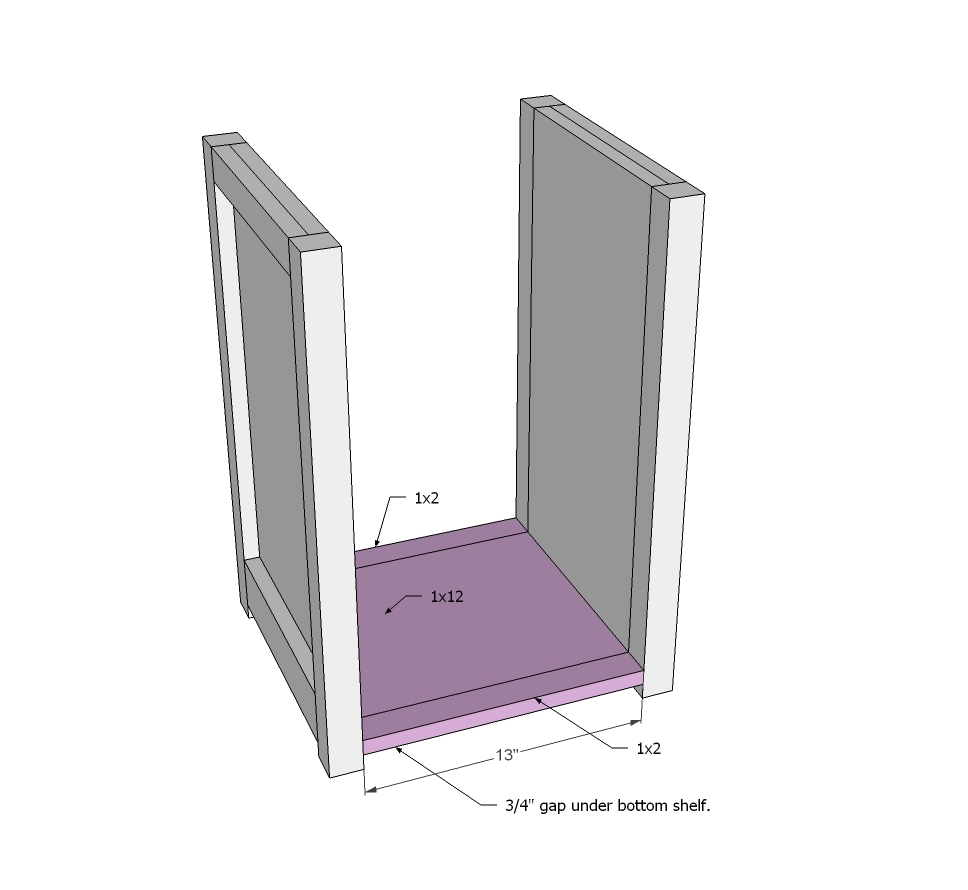
Build your bottom shelf first and then attach to base.
Step 4

And then add top supports.
Step 5
Step 6
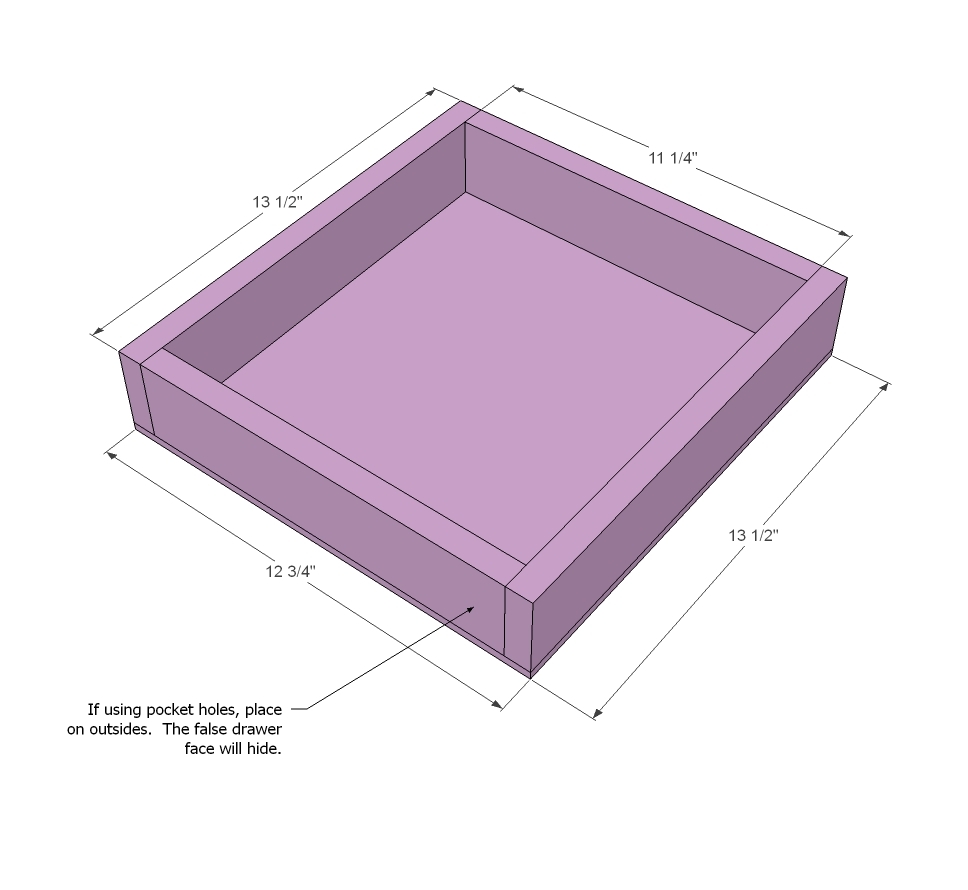
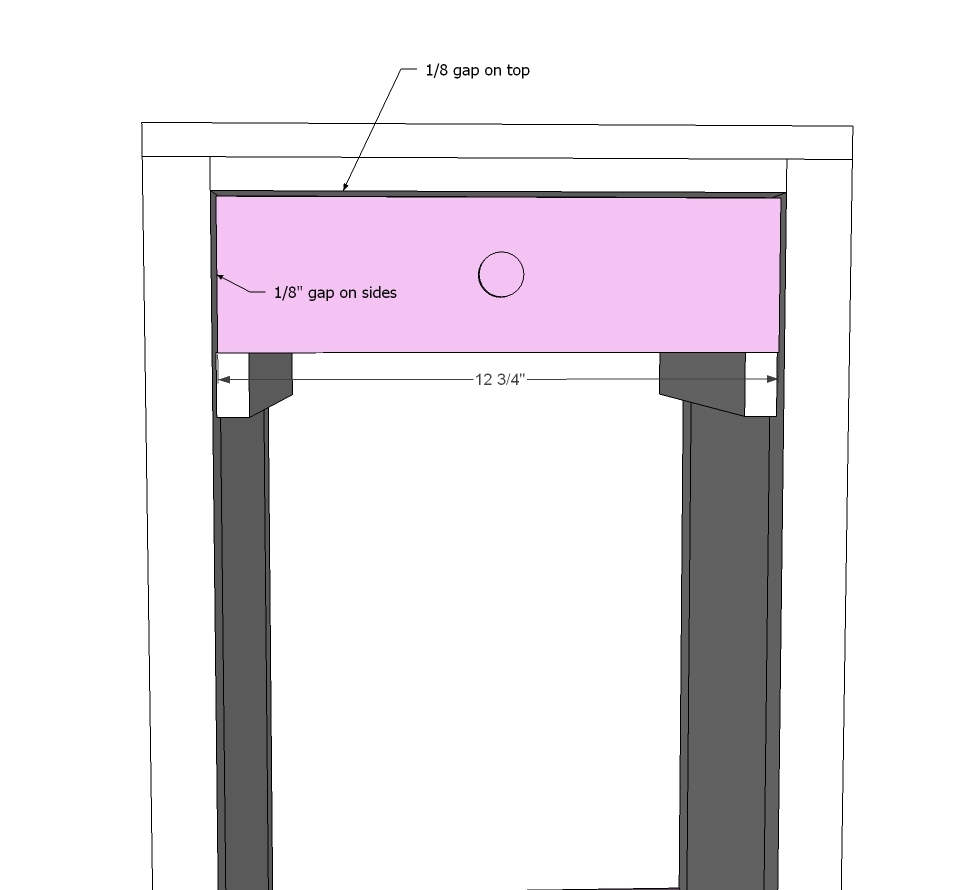
Now your drawer. This drawer just slides on wooden guides, so make 1/8" to 1/4" less in overall width than opening.
Step 7
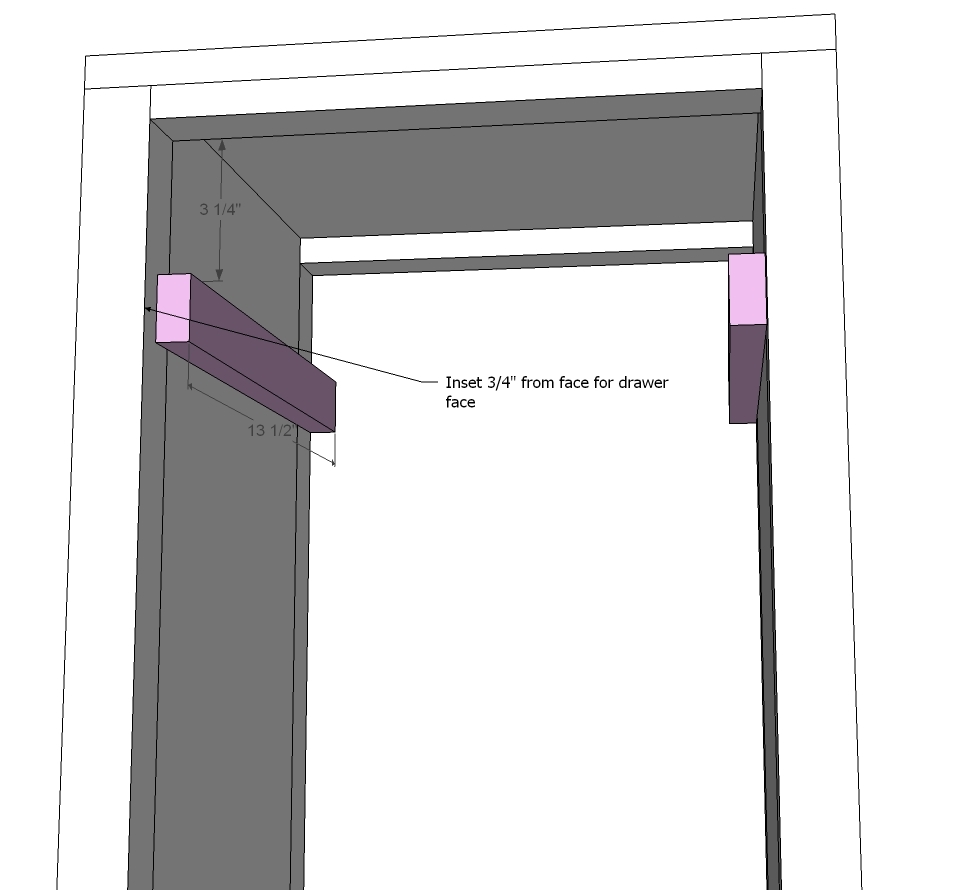
These are those drawer guides I was talking about. Make sure you nail them in level. TIP - Rub candle wax over the tops so the drawer slides smoothly.
Remember to inset drawer guides 3/4".
Step 8
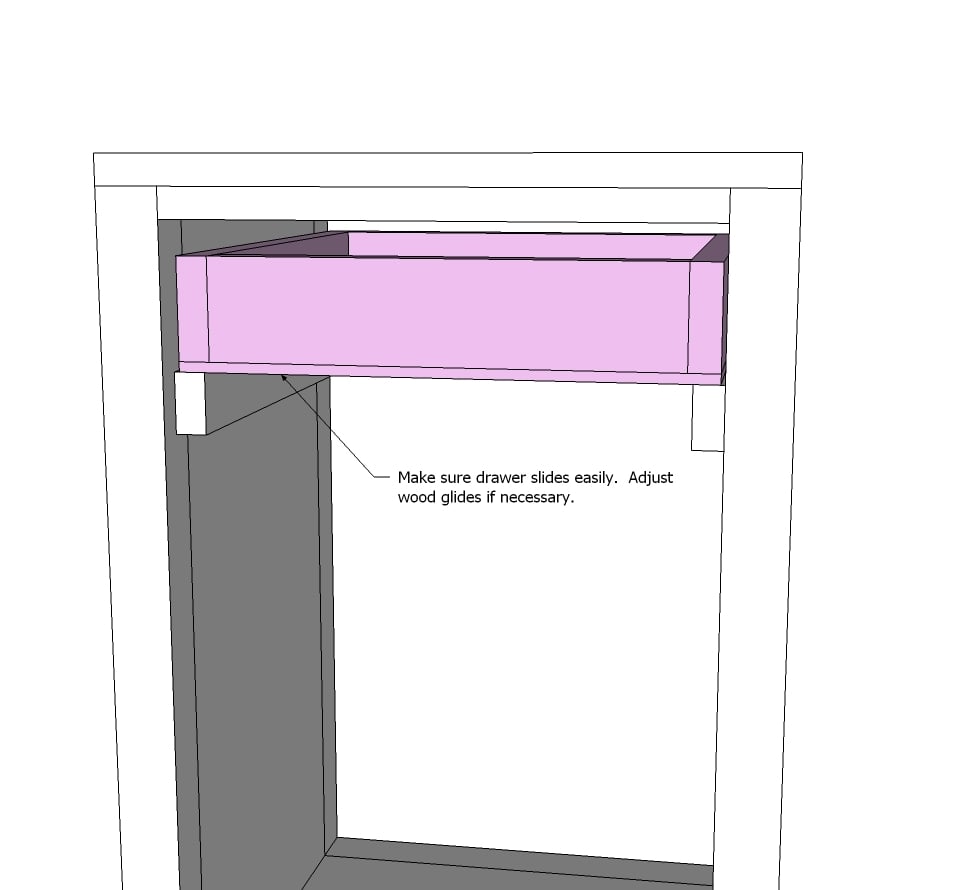
Place drawer in cabinet and check to make sure it slides easily.
Step 9
Now add your drawer face. It will cover up any problems in the drawer :)
Step 10
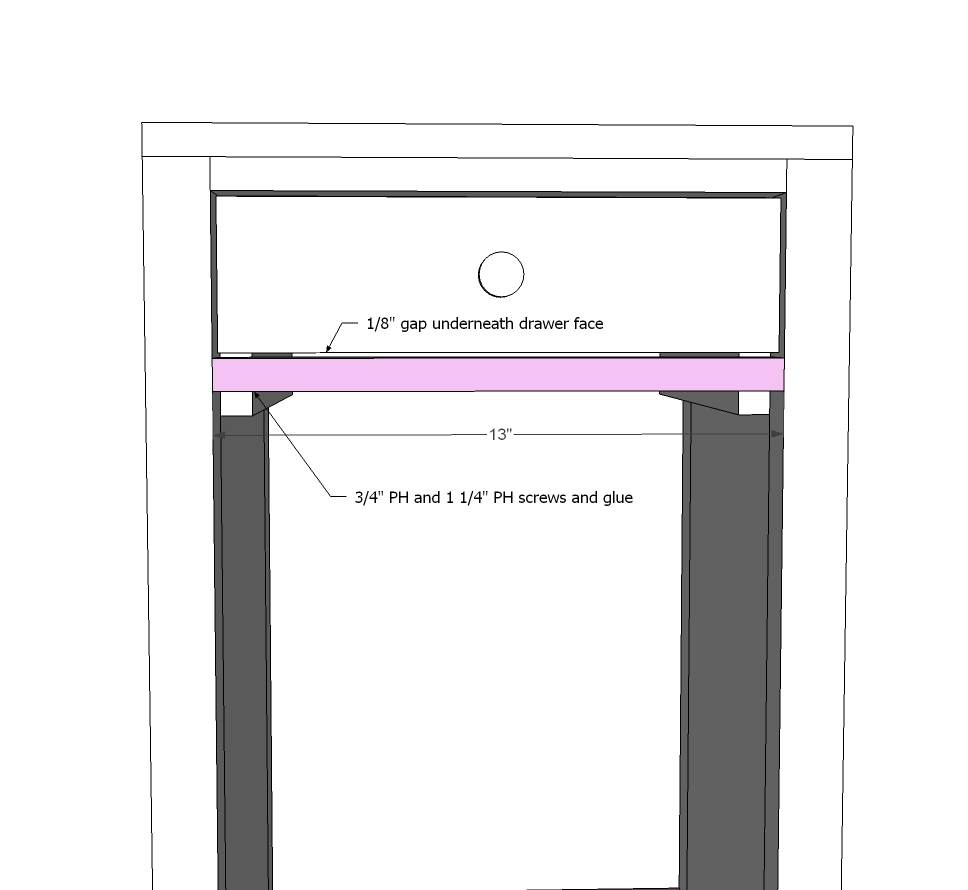
And then the bottom trim ....
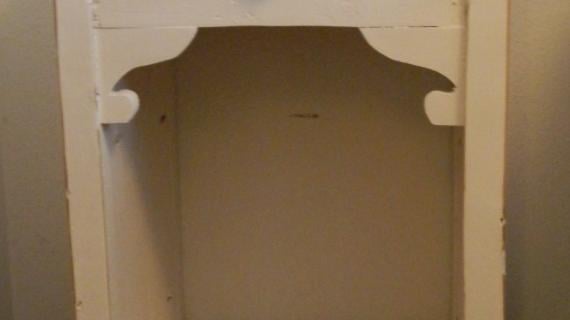
Step 11
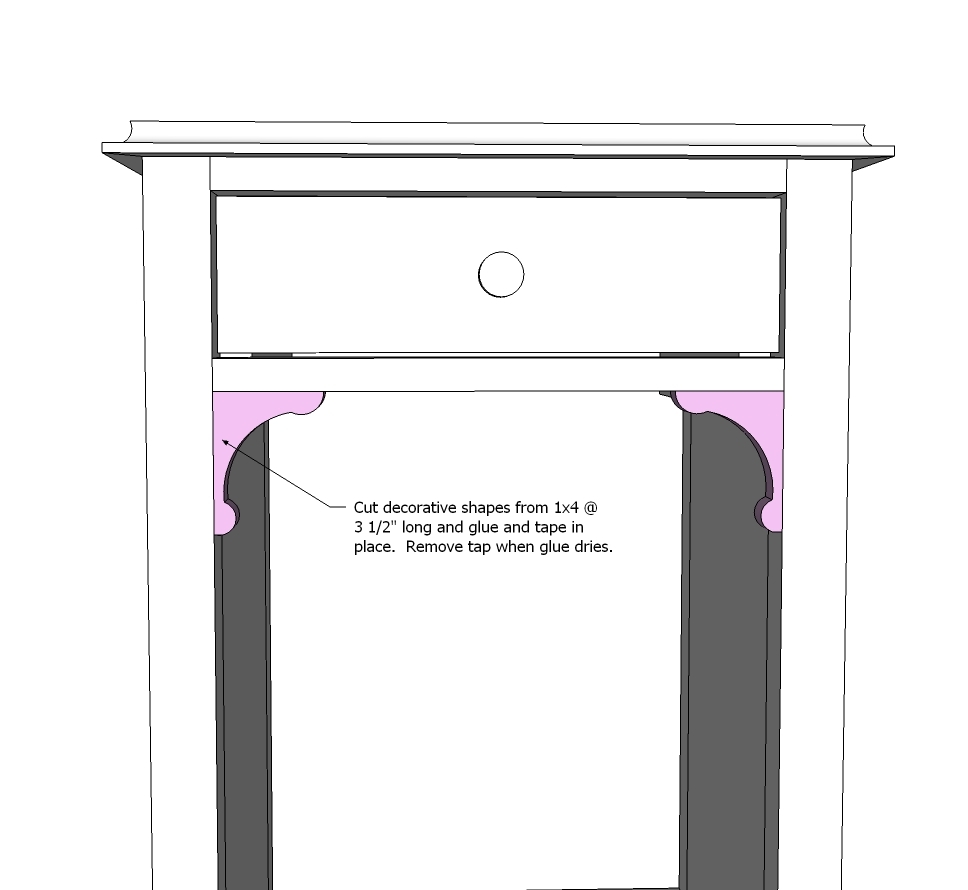
And finally the cute little cutouts that really make this nightstand charming.
Step 12
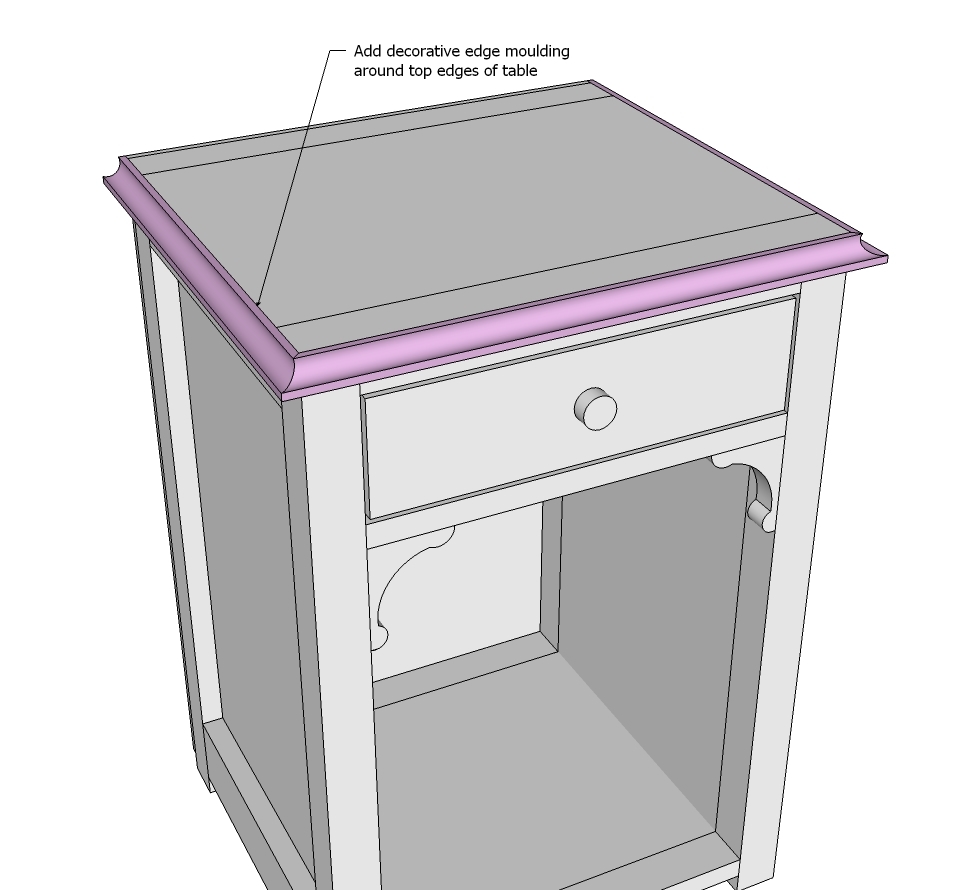
I love adding moulding around the top edges. Really give a finishing touch!
Step 13
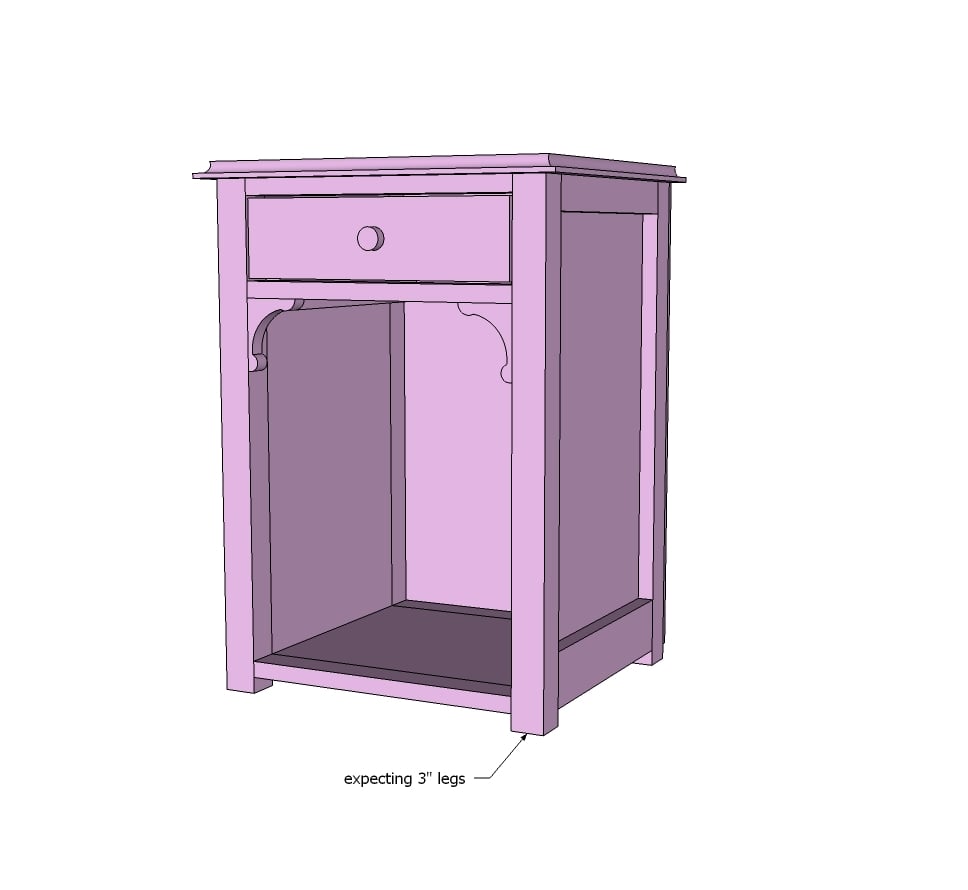
And then add the legs!
Step 14
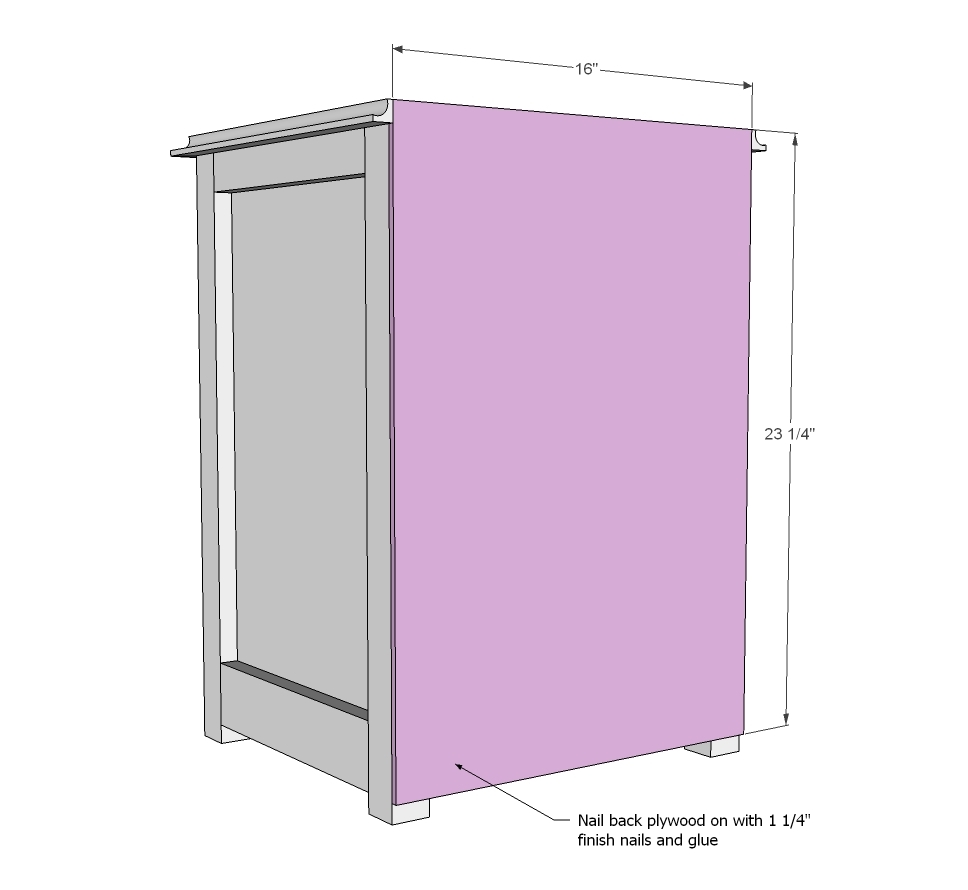
And finally the back!
It is always recommended to apply a test coat on a hidden area or scrap piece to ensure color evenness and adhesion. Use primer or wood conditioner as needed.

Comments
Beth Baker (not verified)
Tue, 05/08/2012 - 22:44
Handmade furniture for shelter makeovers
Hi Ana,
I listened to your webinar tonight, it was very inspiring. Thank you for taking the time to speak about blogging and your furniture projects. My main interest is the furniture plans. I run a nonprofit that furnishes and decorates transitional homeless shelters for woman and children using donated furnishings. I have been thinking, for sometime, about building our own furniture. Your have inspired me to start doing so, and I plan on starting with the Julia night stand. We are always in need on night stands, end tables and coffee tables, among other things.
Thanks for the spark you created in me.
Sincerely,
Beth Baker
[email protected] (not verified)
Wed, 05/09/2012 - 09:51
Error
TCPDF ERROR: [Image] Unable to get image: file:///home/anawhite/public_html/dev/acquia-drupal-1.2.33/sites/default/files/ana-white-darren-rowse-podc.jpg?1336504590
[email protected] (not verified)
Thu, 05/24/2012 - 09:10
PDF
TCPDF ERROR: [Image] Unable to get image: file:///home/anawhite/public_html/dev/acquia-drupal-1.2.33/sites/default/files/ana-white-darren-rowse-podc.jpg?1336504590
mcondon
Sun, 10/02/2016 - 10:39
Nightstand decorative feet
We like the decorative feet you used and would like to incorporate those on the nightstands I am building for our grandaughters. Can you recommend a source. Hopefully on-line as we are a long ways from any big stores.
This is my first pocket hole project.....Love it! And thanks for the great plans.
Michael
In reply to Nightstand decorative feet by mcondon
Ana White
Mon, 10/03/2016 - 06:30
Take a look at this post
Take a look at this post Michael, have fun!
http://www.shanty-2-chic.com/2012/05/diy-julia-nightstand.html