


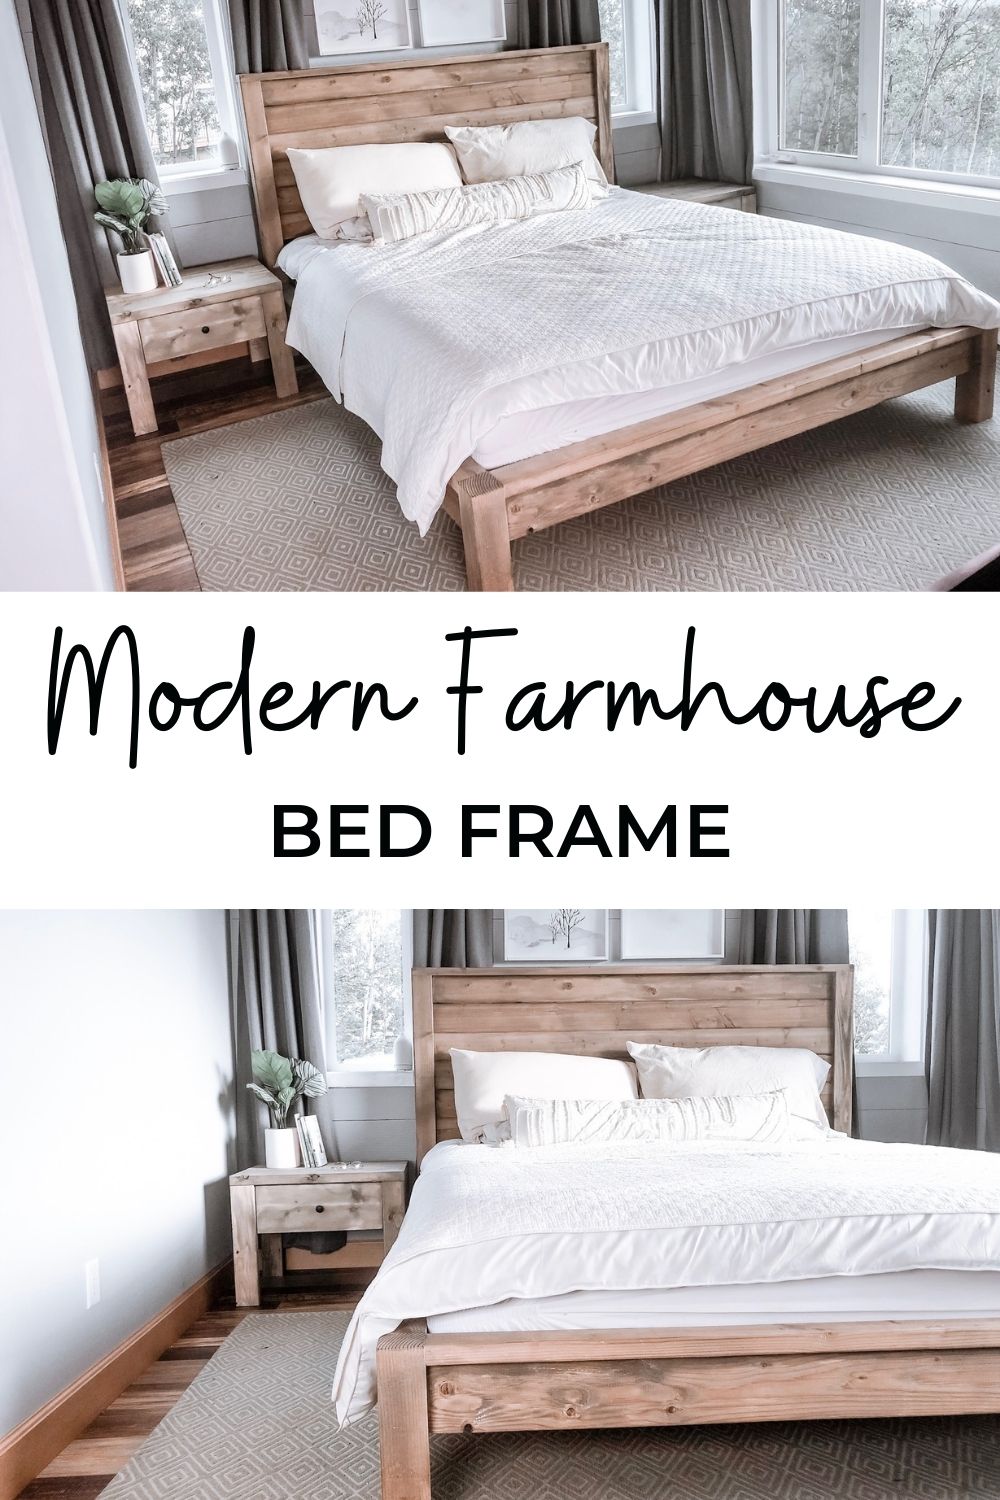
Build your own wood bed frame! This modern farmhouse style bed is easy to build with off the shelf materials and basic tools. You'll love our step by step diagrams, shopping list and cut list for all standard mattress sizes, and lots of reader submitted photos. Designed by Ana White.

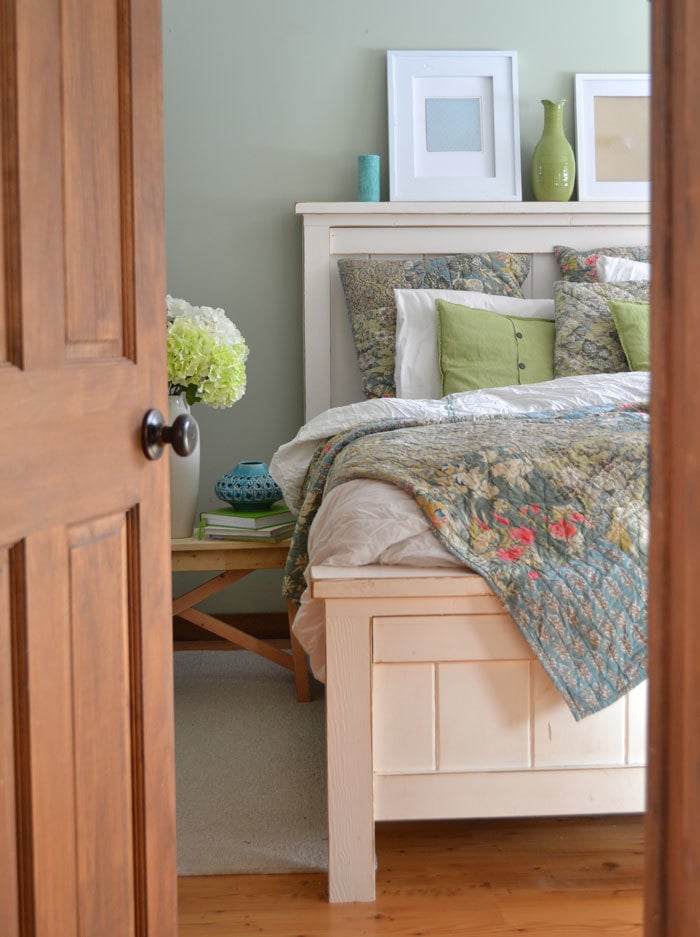
The right bed makes the room. In a bedroom, the bed dominates the room, grounds it, and is the focal point. All the other bedroom furniture simply compliments the bed.
So when it comes to designing a bedroom, I always start with the bed. And it better be grand!
Why Build Your Own Bed?
But the problem is, a beautiful bed can be very expensive - as in thousands of dollars. But the good news is beds are fairly easy to build, and for the size of the bed, astonishingly inexpensive. Most beds we build (including this one) include a platform (so no need for a box spring) - saving you even more money.
You can save upwards of 90 PERCENT OFF when you build your own bed!
If saving money isn't incentive enough, consider being about to choose a custom finish, being able to customize the size, building a sturdier bed - there's lots of reasons to go DIY. And let's not forget - a solid wood bed is so beautiful!
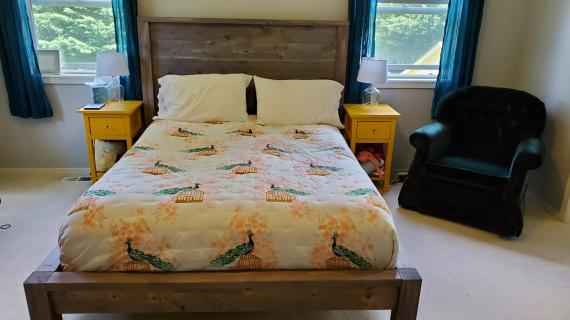
What Happened to the Original Farmhouse Bed?
We just moved into a new home, and our original DIY farmhouse bed wouldn't fit between the windows.
But I still wanted that "farmhouse" look - the square styling, the planked headboard, the beefy legs. But maybe a little more modern.
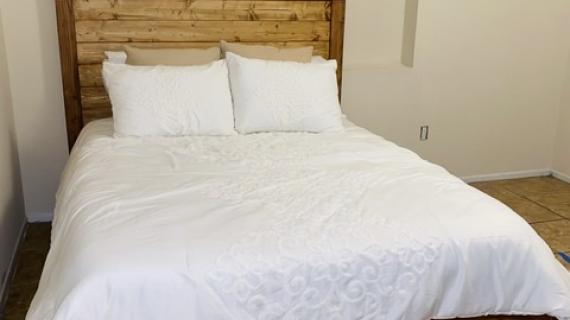
Modern Farmhouse Bed Design
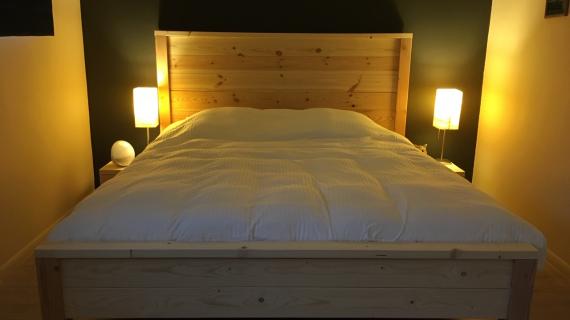
Using off the shelf 2x4s, 2x6s, 4x4s and leftover tongue and groove from our house ceiling (you can also use 1x6s or other materials), we built this new, modern farmhouse bed.
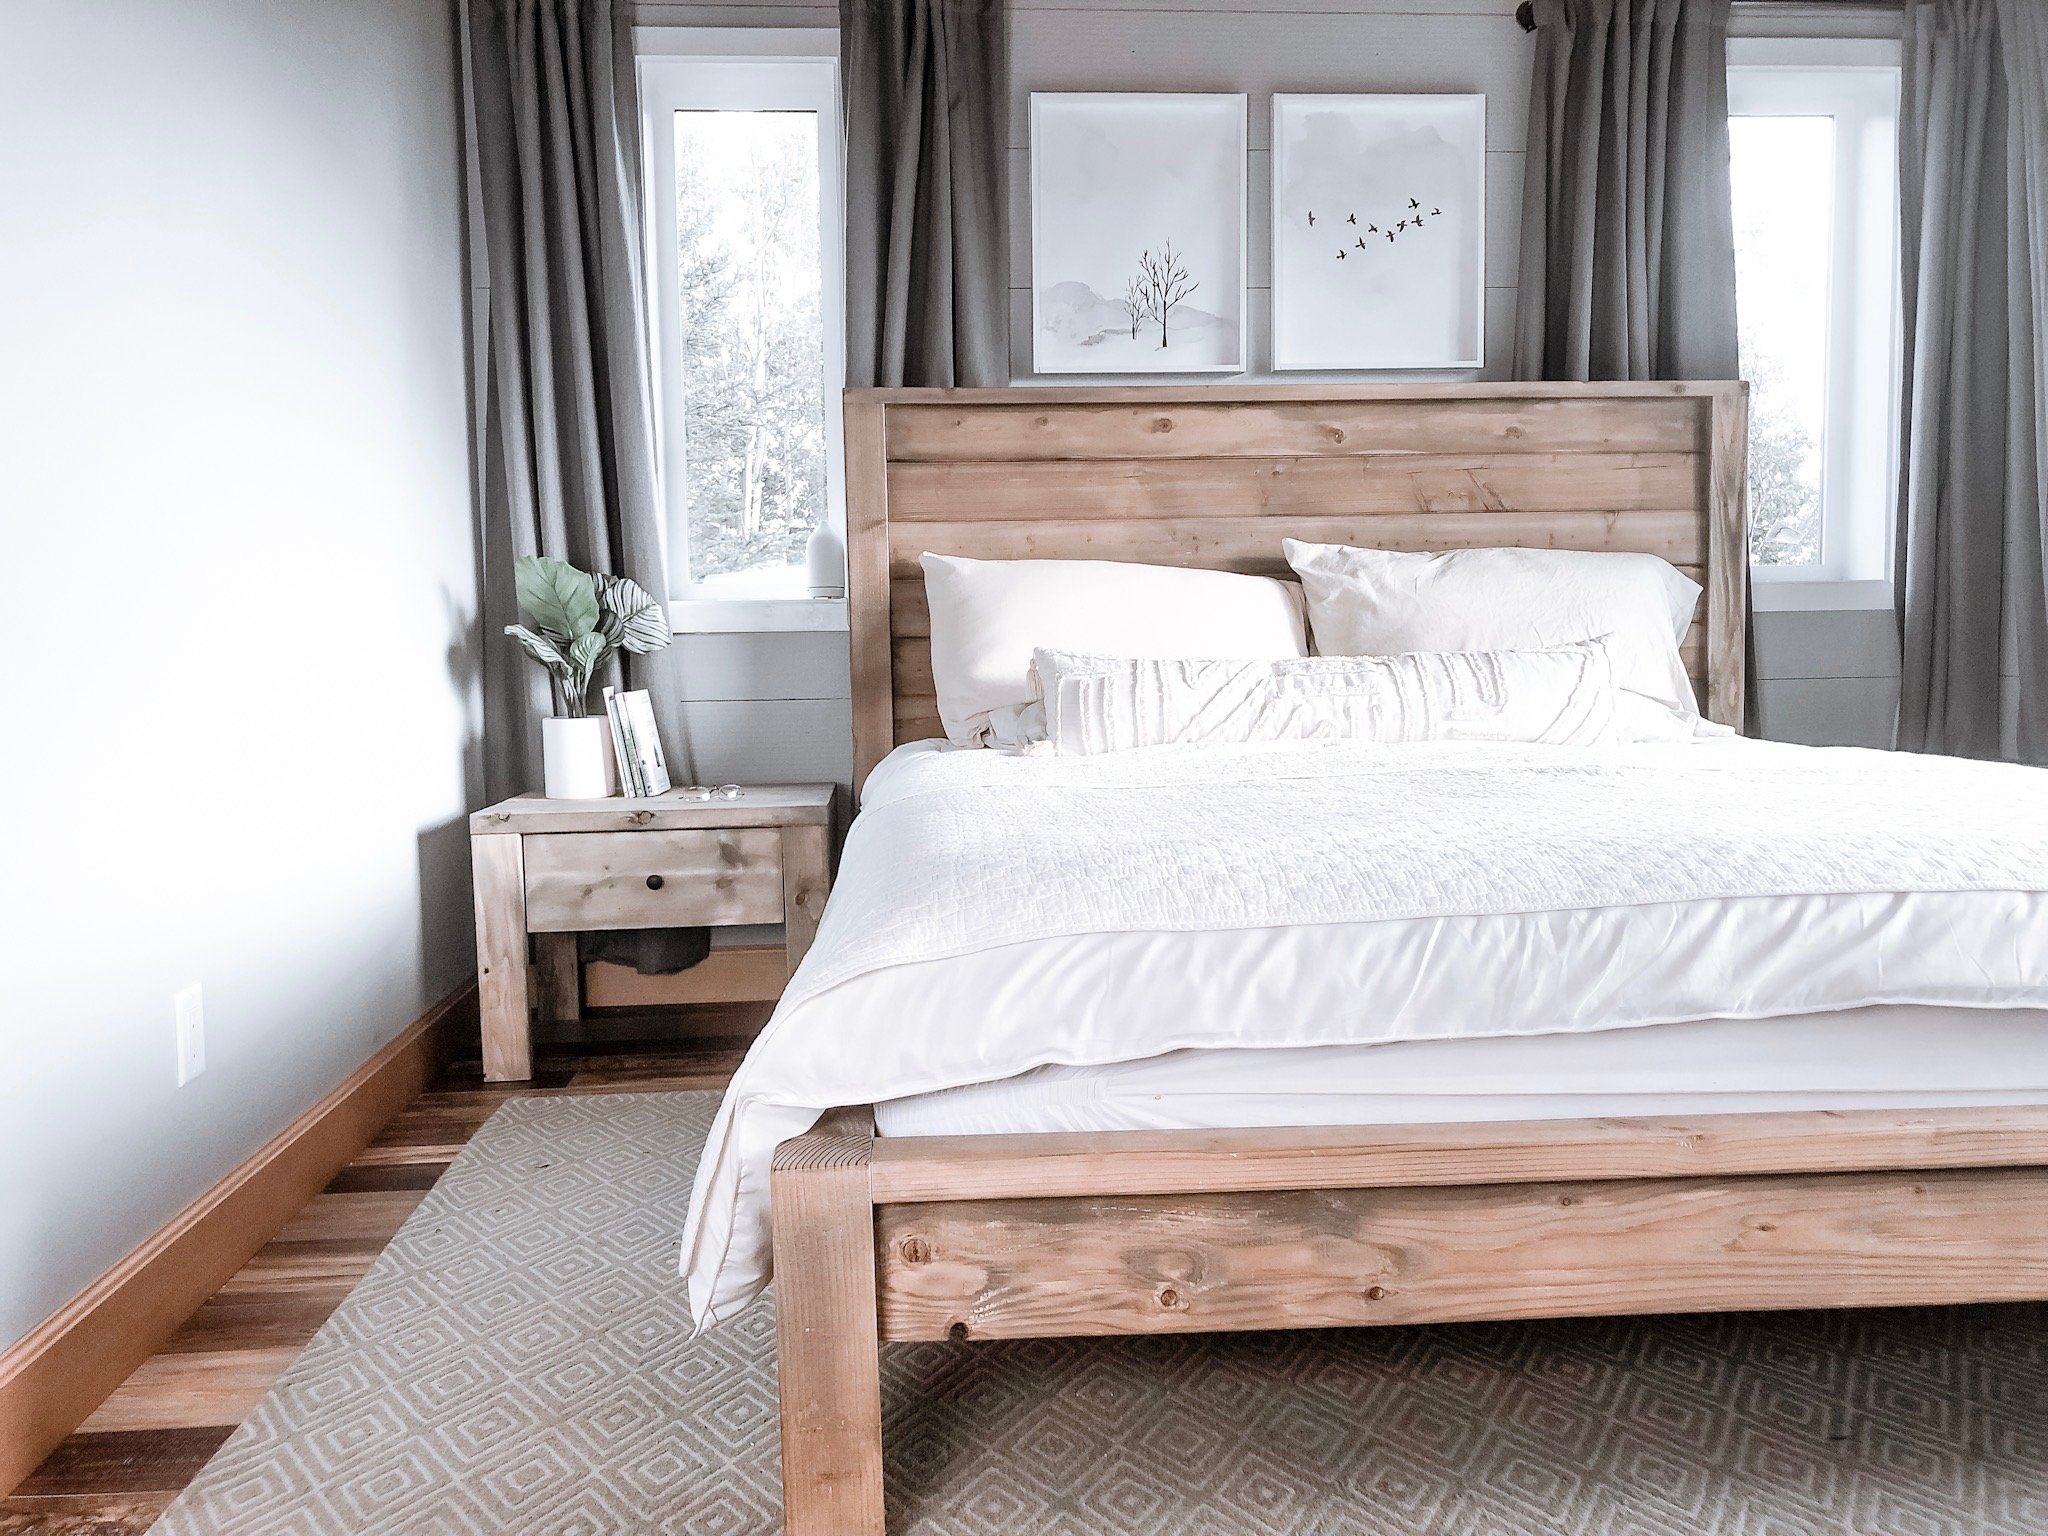
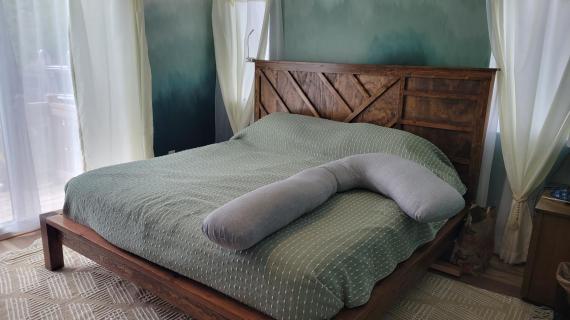
We ran the planking horizontal this time, and traded the footboard and siderails in for a platform base. The results are all that rustic charm, but in a simplified version that is just as sturdy and beautiful as the original.
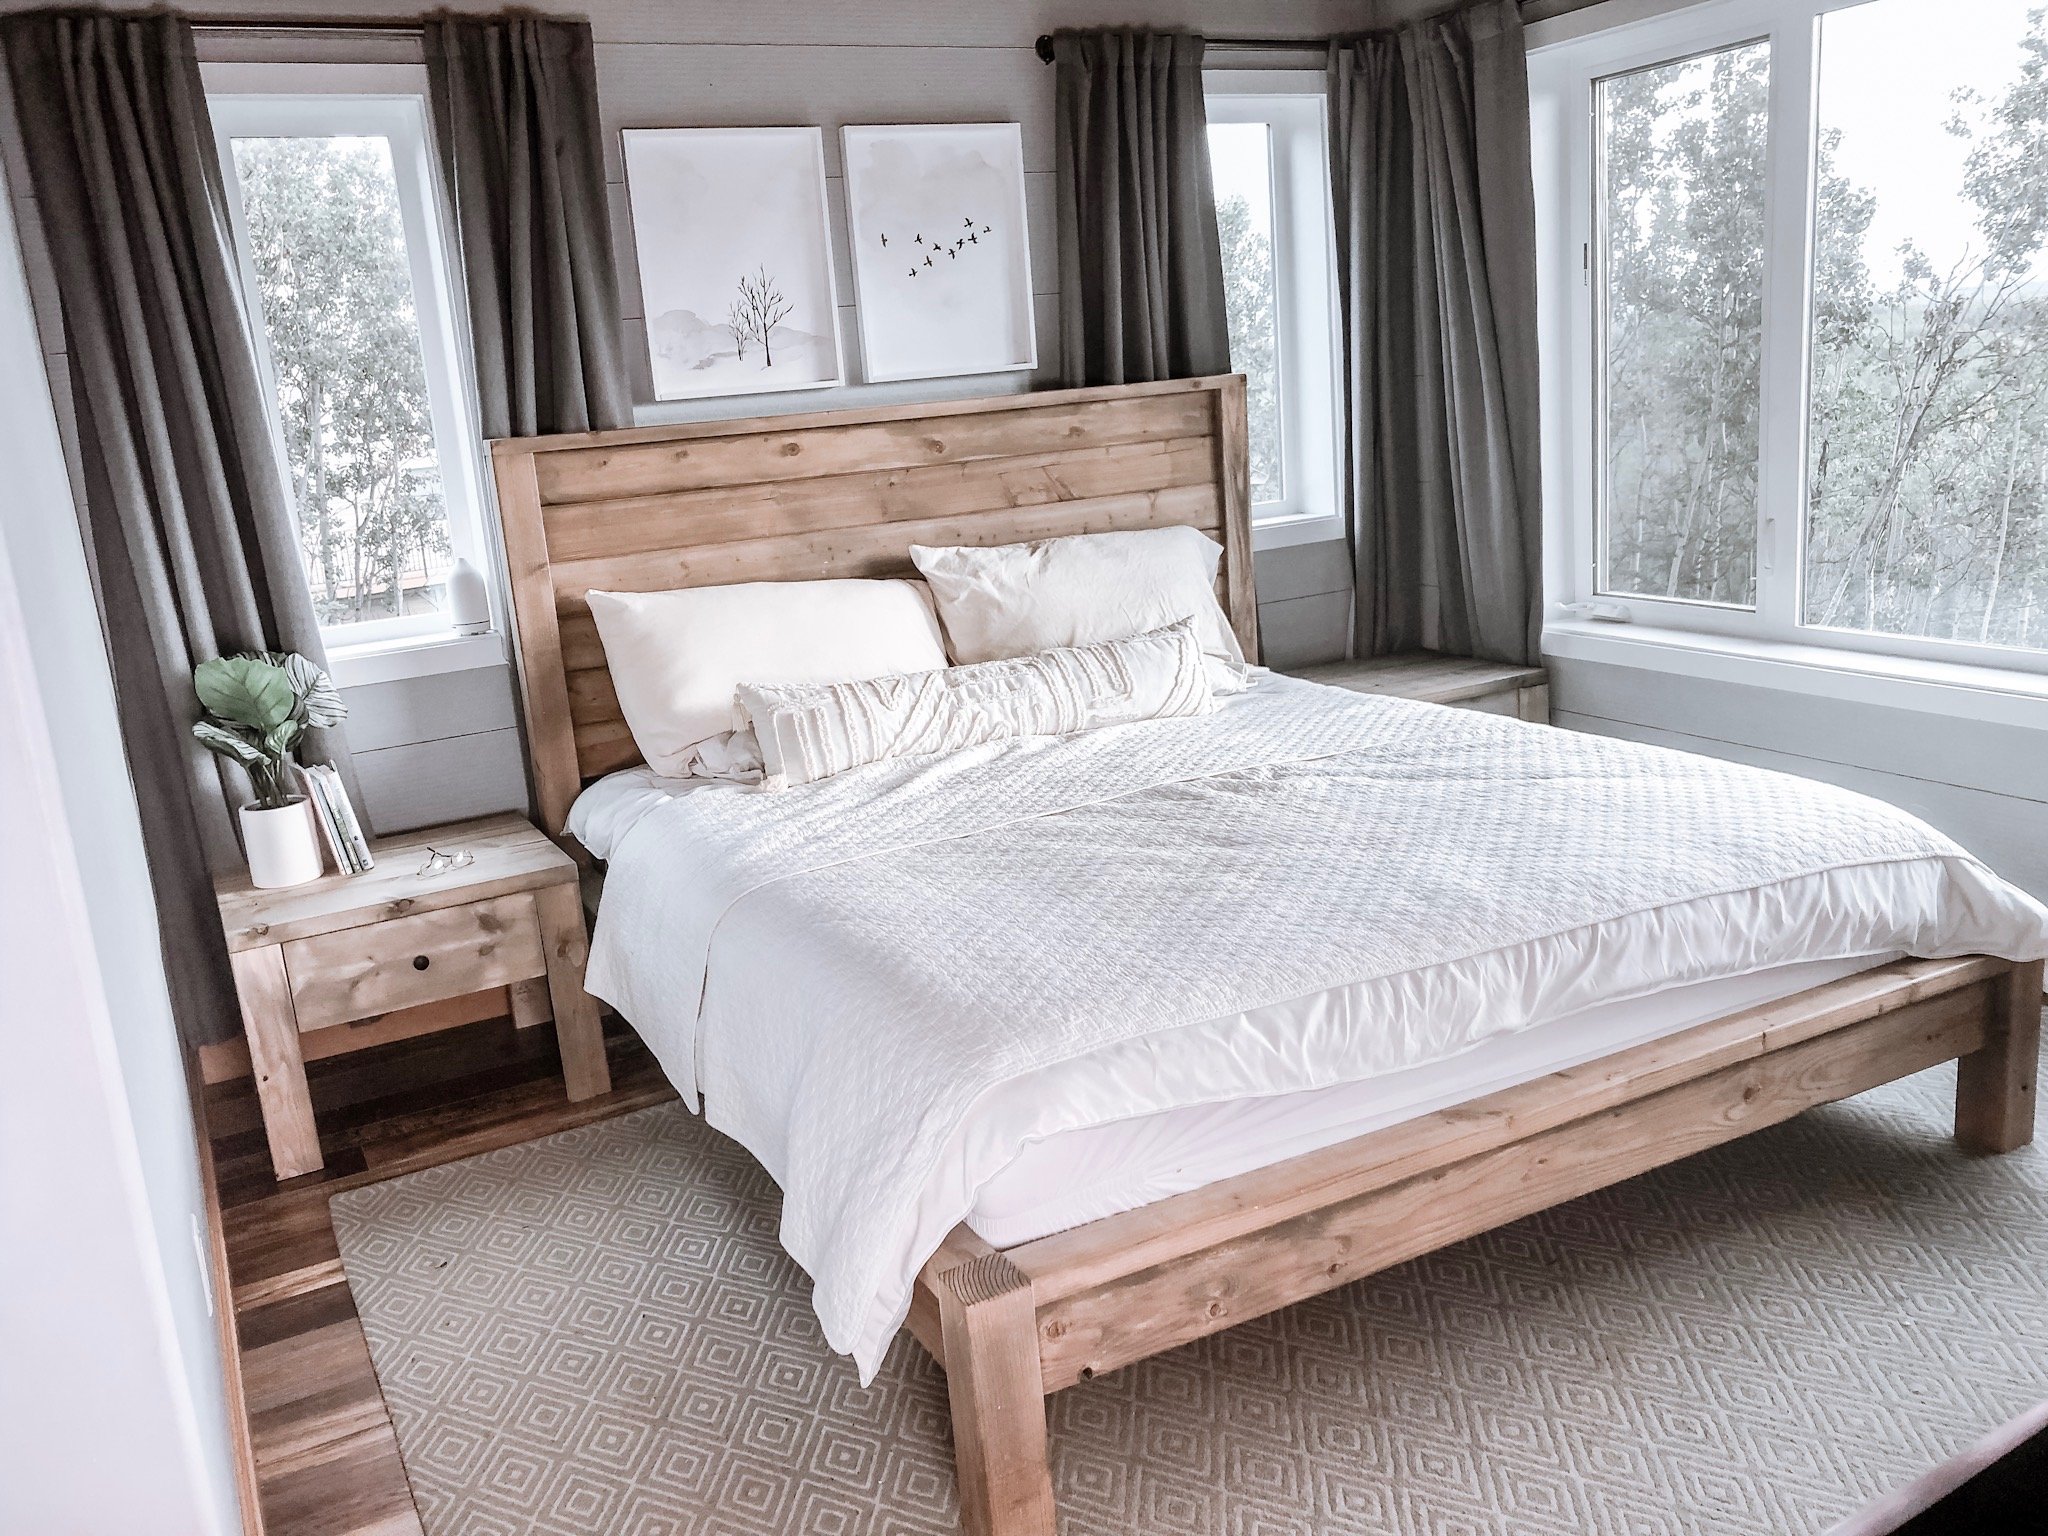
This bed also ended up being easier to build and less expensive than the original farmhouse bed, thanks to the simplified design, less cuts and less joints, and less trim boards.
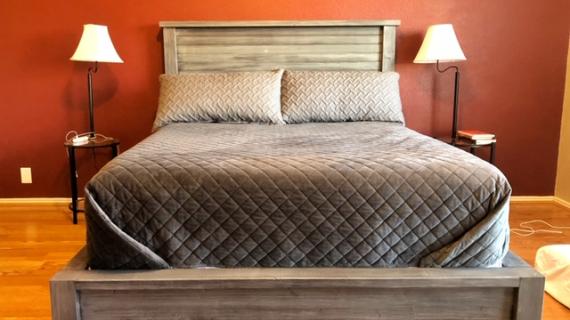
Matching Nightstands
This bed really made our room amazing when paired with our matching Modern Farmhouse Nightstands
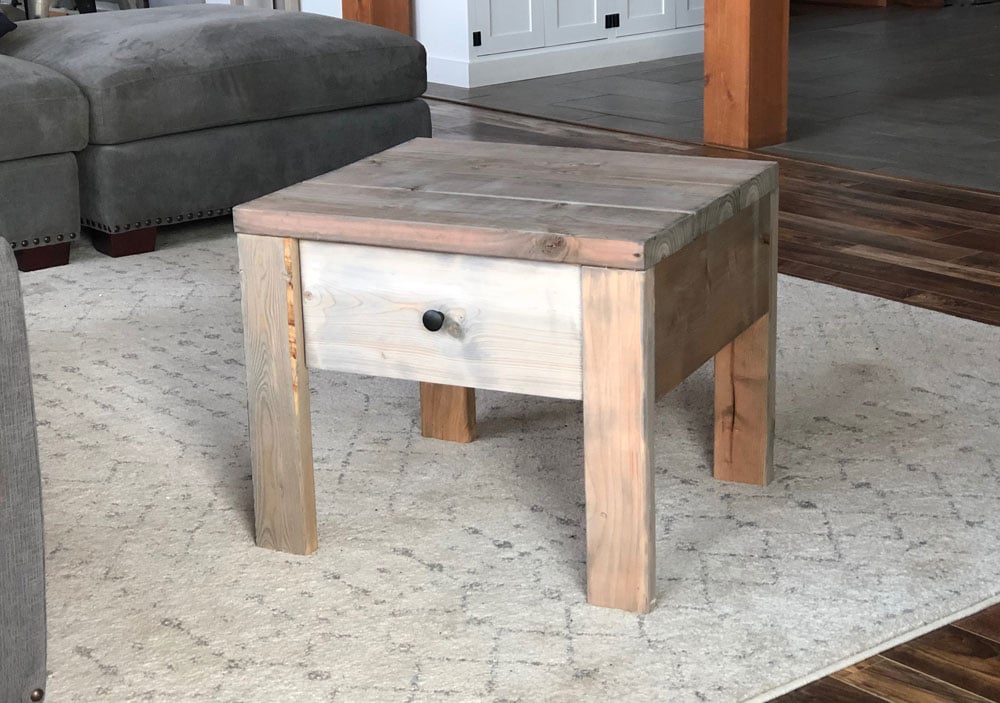
You can find plans for the matching nightstands here.
Weathered Wood Finish
We kept the finish simple with Varathane Weathered Wood Accelerator - it ages the wood in minutes and creates a natural looking grey finish.

Video Tutorial of Modern Farmhouse Bed Build
We did a video on the build of this bed, do watch - lots of little tricks and tips -
Modern Farmhouse Bed Plans
The step by step plan follows, with diagrams and shopping lists and cut list. For your convenience, the plans include everything you need to make this bed in a twin, full, queen or king (both standard and california king). Thank you for using our plans, it is much appreciated.
Pin For Later!
Preparation
TWIN SHOPPING LIST - Mattress Size 39" x 75"
- 2 - 4x4 @ 6 feet long
- 11 - 2x4 @ 8 feet or stud length (includes mattress slats)
- 3 - 2x6 @ 8 feet or stud length
- 5 - 1x6 boards or tongue and groove paneling @ 4 feet long
- 1 - 2x2 @ 6 feet long
- 2-3/4" self tapping screws
- 1-1/4" brad nails
- 2-1/2" pocket hole screws
- 1-1/4" pocket hole screws (optional)
FULL SHOPPING LIST - Mattress Size 54" x 75"
- 2 - 4x4 @ 6 feet long
- 5 - 2x4 @ 8 feet or stud length (cut the 75" boards from these)
- 7 - 2x4 @ 10 feet (cut slats and rest of boards from these)
- 4 - 2x6 @ 8 feet or stud length
- 5 - 1x6 boards or tongue and groove paneling @ 54" long
- 1 - 2x2 @ 6 feet long
- 2-3/4" self tapping screws
- 1-1/4" brad nails
- 2-1/2" pocket hole screws
- 1-1/4" pocket hole screws (optional)
QUEEN SHOPPING LIST - Mattress Size 60" x 80"
- 2 - 4x4 @ 6 feet long
- 6 - 2x4 @ 8 feet or stud length (cut the 75" boards from these)
- 1 - 2x4 @ 10 feet (cut 60" boards from these)
- 5 - 2x4 or 1x4 @ 12 feet long (cut slats from these)
- 4 - 2x6 @ 8 feet or stud length
- 5 - 1x6 boards or tongue and groove paneling @ 60" long
- 1 - 2x2 @ 6 feet long
- 2-3/4" self tapping screws
- 1-1/4" brad nails
- 2-1/2" pocket hole screws
- 1-1/4" pocket hole screws (optional)
STANDARD KING SHOPPING LIST - Mattress Size 76" x 80"
- 2 - 4x4 @ 6 feet long
- 8 - 2x4 @ 8 feet or stud length (cut the 75" boards from these)
- 11 - 2x4 or 1x4 @ 8 feet or stud length (cut slats from these)
- 4 - 2x6 @ 8 feet or stud length
- 5 - 1x6 boards or tongue and groove paneling @ 76" long
- 1 - 2x2 @ 6 feet long
- 2-3/4" self tapping screws
- 1-1/4" brad nails
- 2-1/2" pocket hole screws
- 1-1/4" pocket hole screws (optional)
CALIFORNIA KING SHOPPING LIST - Mattress Size 72" x 84"
- 2 - 4x4 @ 6 feet long
- 8 - 2x4 @ 8 feet or stud length (cut the 75" boards from these)
- 11 - 2x4 or 1x4 @ 8 feet or stud length (cut slats from these)
- 4 - 2x6 @ 8 feet or stud length
- 5 - 1x6 boards or tongue and groove paneling @ 72" long
- 1 - 2x2 @ 6 feet long
- 2-3/4" self tapping screws
- 1-1/4" brad nails
- 2-1/2" pocket hole screws
- 1-1/4" pocket hole screws (optional)
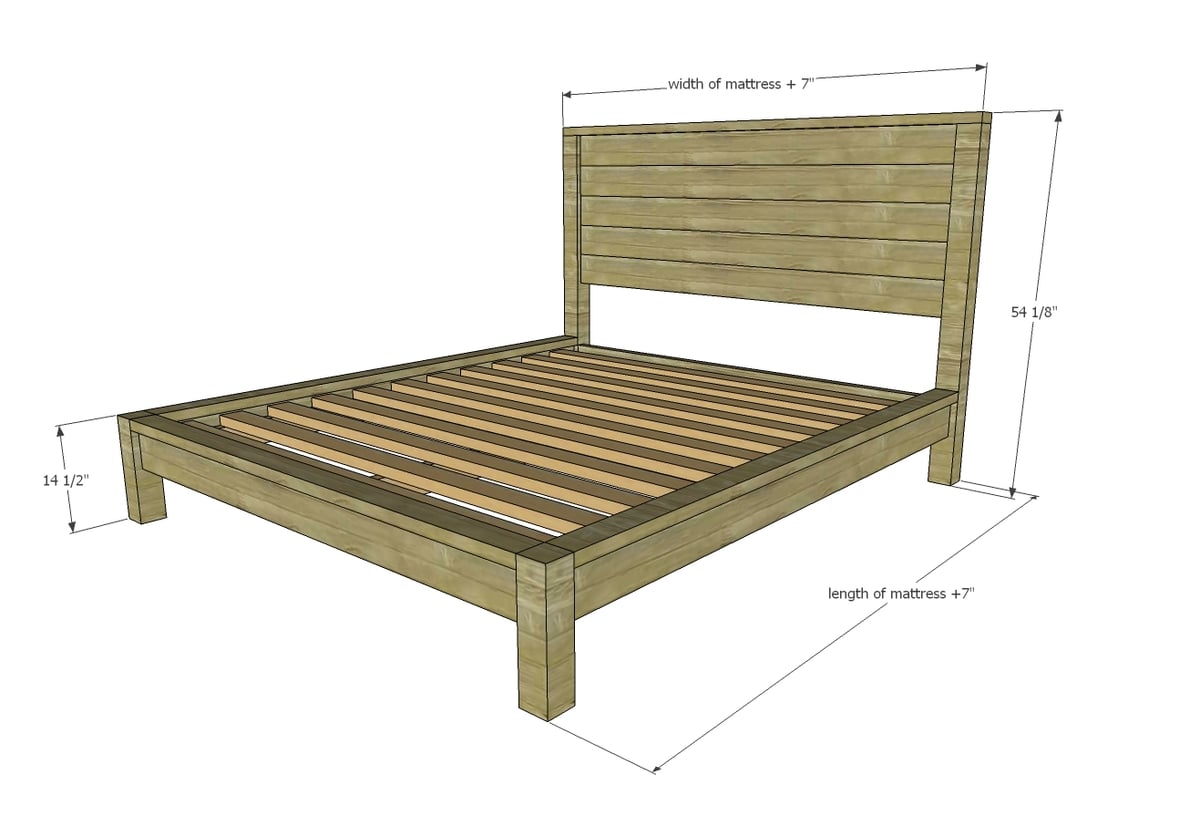
TWIN CUT LIST - Mattress Size 39" x 75"
- 2 - 4x4 @ 52-1/2" - Headboard Legs
- 1 - 2x4 @ 46" - Top of headboard
- 2 - 2x2 @ 27-1/2"
- 5 - 1x6 or 1x6 tongue and groove @ 39" - Headboard planking
- 1 - 2x6 @ 39"
- 2 - 2x4 @ 75" - Siderail Top
- 2 - 2x6 @ 75" - Siderail
- 2 - 4x4 @ 14-1/2" - Footboard Legs
- 1 - 2x4 @ 39" - Footboard Top
- 1 - 2x6 @ 39" - Footboard Base
- 2 - 2x4 @ 75" - Cleats
- 11 - 1x4 or 2x4 @~41" - Slats (cut to fit)
FULL CUT LIST - Mattress Size 54" x 75"
- 2 - 4x4 @ 52-1/2" - Headboard Legs
- 1 - 2x4 @ 61" - Top of headboard
- 2 - 2x2 @ 27-1/2" - headboard cleats
- 5 - 1x6 or 1x6 tongue and groove @ 54" - Headboard planking
- 1 - 2x6 @ 54"
- 2 - 2x4 @ 75" - Siderail Top
- 2 - 2x6 @ 75" - Siderail
- 2 - 4x4 @ 14-1/2" - Footboard Legs
- 1 - 2x4 @ 54" - Footboard Top
- 1 - 2x6 @ 54" - Footboard Base
- 2 - 2x4 @ 75" - Cleats
- 1 - 2x4 @ ~76" - Center Cleat (cut to fit)
- 11 - 1x4 or 2x4 @ ~56" - Slats (measure and cut to fit)
QUEEN CUT LIST - Mattress Size 60" x 80"
- 2 - 4x4 @ 52-1/2" - Headboard Legs
- 1 - 2x4 @ 67" - Top of headboard
- 2 - 2x2 @ 27-1/2"
- 5 - 1x6 or 1x6 tongue and groove @ 60" - Headboard planking
- 1 - 2x6 @ 60"
- 2 - 2x4 @ 80" - Siderail Top
- 2 - 2x6 @ 80" - Siderail
- 2 - 4x4 @ 14-1/2" - Footboard Legs
- 1 - 2x4 @ 60" - Footboard Top
- 1 - 2x6 @ 60" - Footboard Base
- 2 - 2x4 @ 80" - Cleats
- 1 - 2x4 @ ~81" - Center Cleat (cut to fit)
- 10 - 1x4 or 2x4 @ ~62" - Slats (measure and cut to fit)
STANDARD KING CUT LIST - Mattress Size 76" x 80"
- 2 - 4x4 @ 52-1/2" - Headboard Legs
- 1 - 2x4 @ 83" - Top of headboard
- 2 - 2x2 @ 27-1/2"
- 5 - 1x6 or 1x6 tongue and groove @ 76"- Headboard planking
- 1 - 2x6 @ 76"
- 2 - 2x4 @ 80" - Siderail Top
- 2 - 2x6 @ 80" - Siderail
- 2 - 4x4 @ 14-1/2" - Footboard Legs
- 1 - 2x4 @ 76" - Footboard Top
- 1 - 2x6 @ 76" - Footboard Base
- 2 - 2x4 @ 80" - Cleats
- 1 - 2x4 @ ~81" - Center Cleat (cut to fit)
- 11 - 1x4 or 2x4 @ ~82" - Slats (measure and cut to fit)
CALIFORNIA KING CUT LIST - Mattress Size 72" x 84"
- 2 - 4x4 @ 52-1/2" - Headboard Legs
- 1 - 2x4 @ 79" - Top of headboard
- 2 - 2x2 @ 27-1/2"
- 5 - 1x6 or 1x6 tongue and groove @ 72" - Headboard planking
- 1 - 2x6 @ 72"
- 2 - 2x4 @ 84" - Siderail Top
- 2 - 2x6 @ 84" - Siderail
- 2 - 4x4 @ 14-1/2" - Footboard Legs
- 1 - 2x4 @ 72" - Footboard Top
- 1 - 2x6 @ 72" - Footboard Base
- 2 - 2x4 @ 84" - Cleats
- 1 - 2x4 @ ~85" - Center Cleat (cut to fit)
- 11 - 1x4 or 2x4 @ ~86" - Slats (measure and cut to fit)


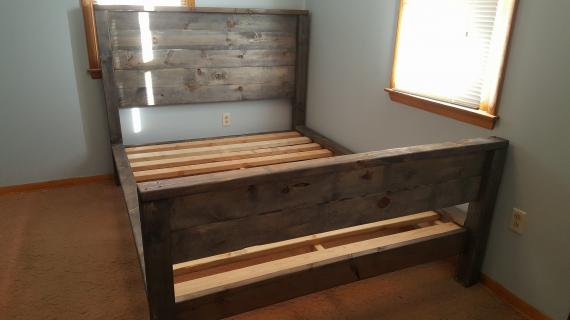
Instructions
Step 1
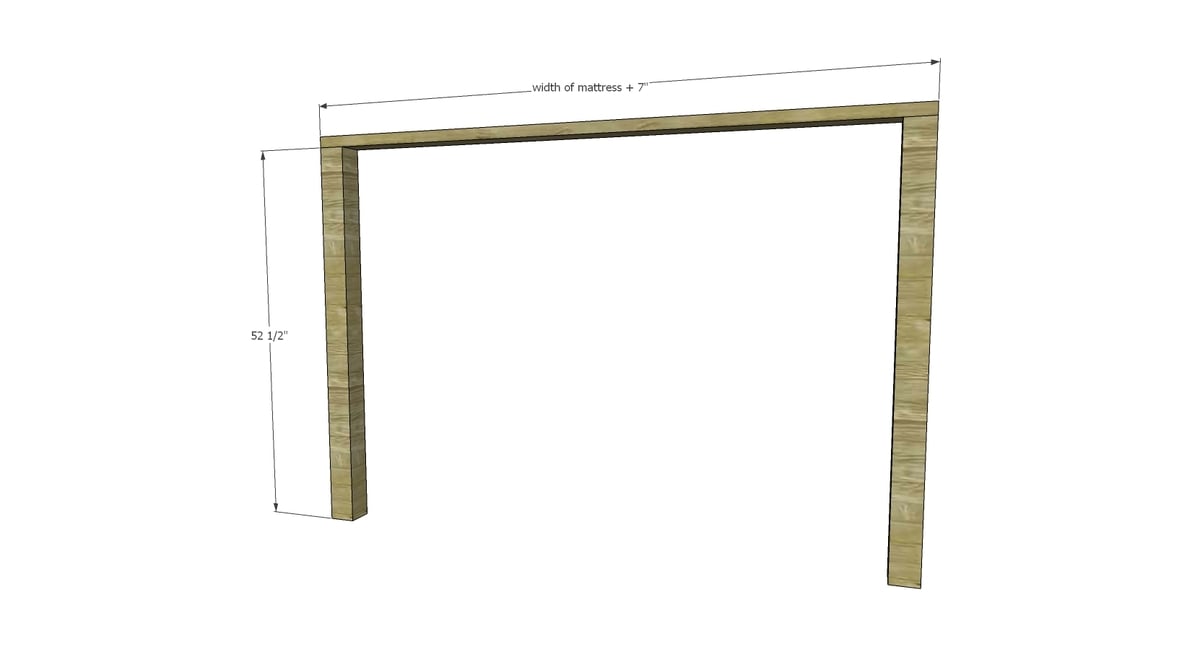
Attach top 2x4 to legs - we just screwed through top with 2-3/4" self tapping screws.
Step 2
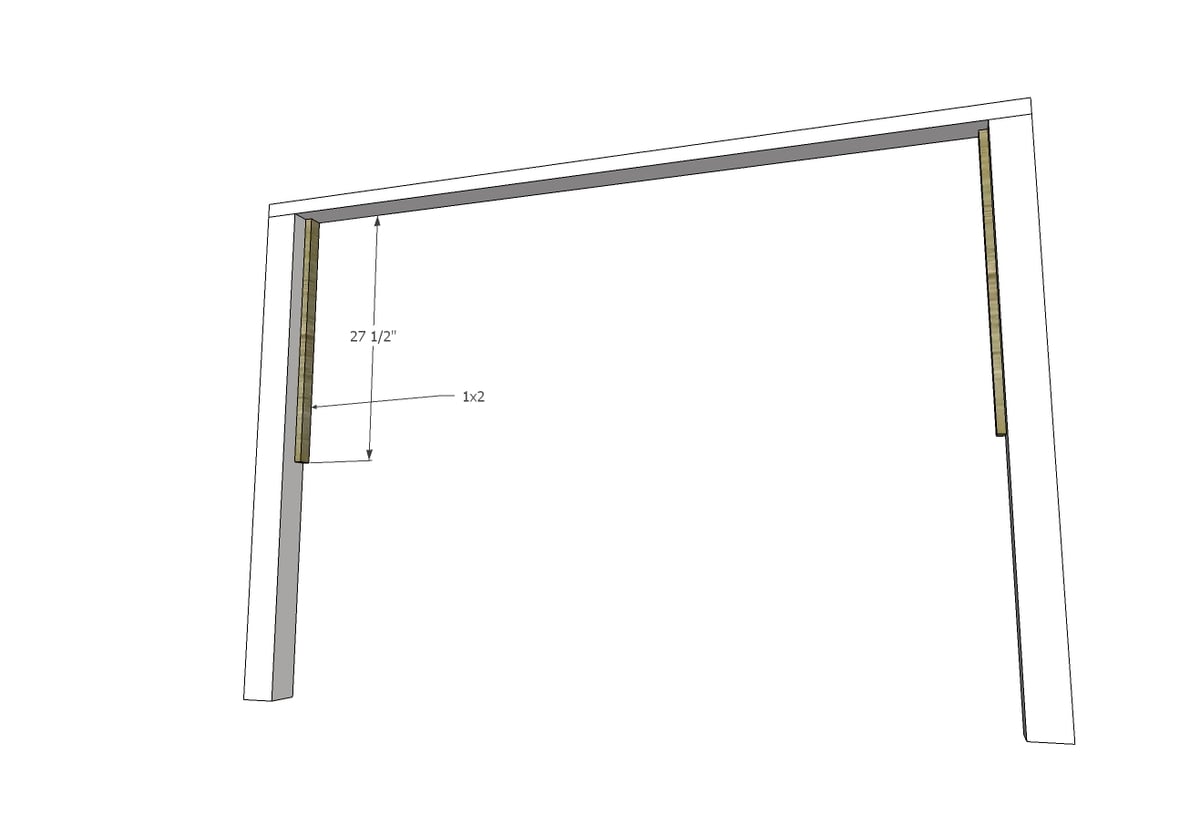
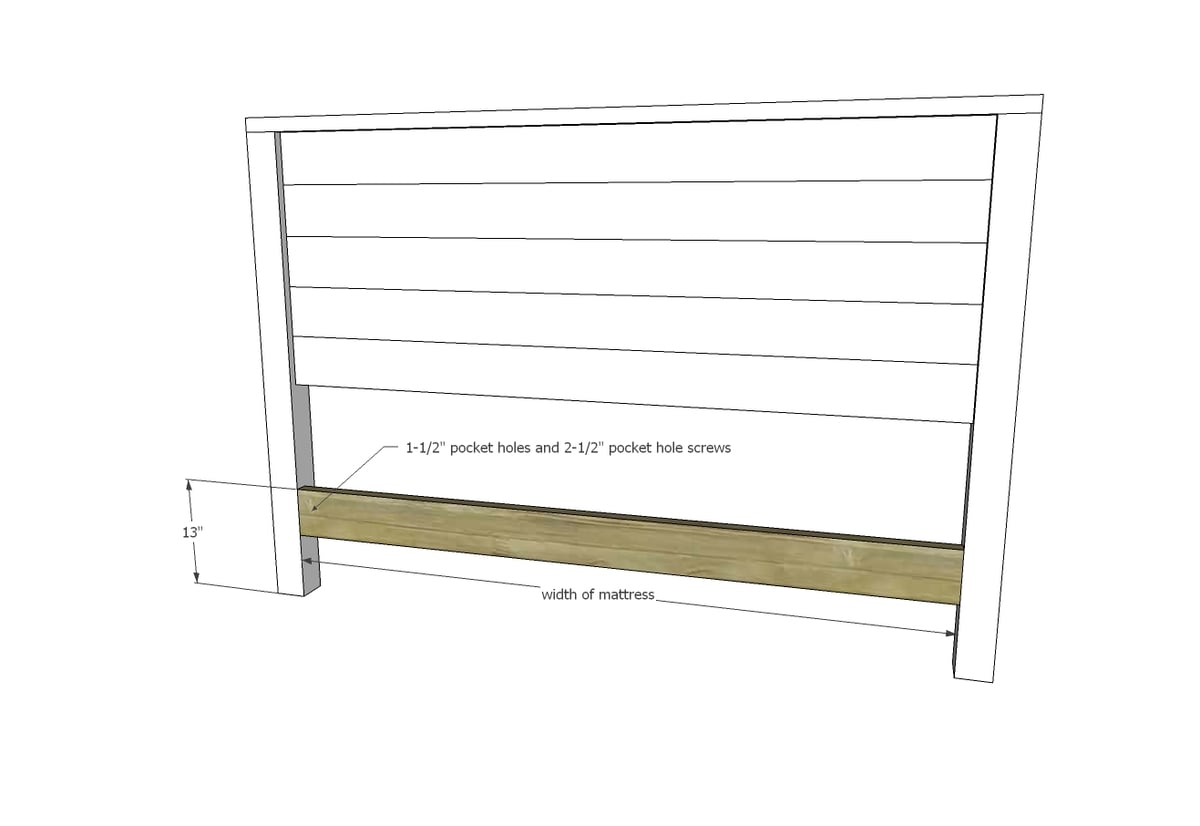
Screw 2x2 cleats to the 4x4 legs with 2-3/4" screws and glue.
NOTE: The diagram shows a 1x2. Either will work but the 2x2 is stronger.
Step 3
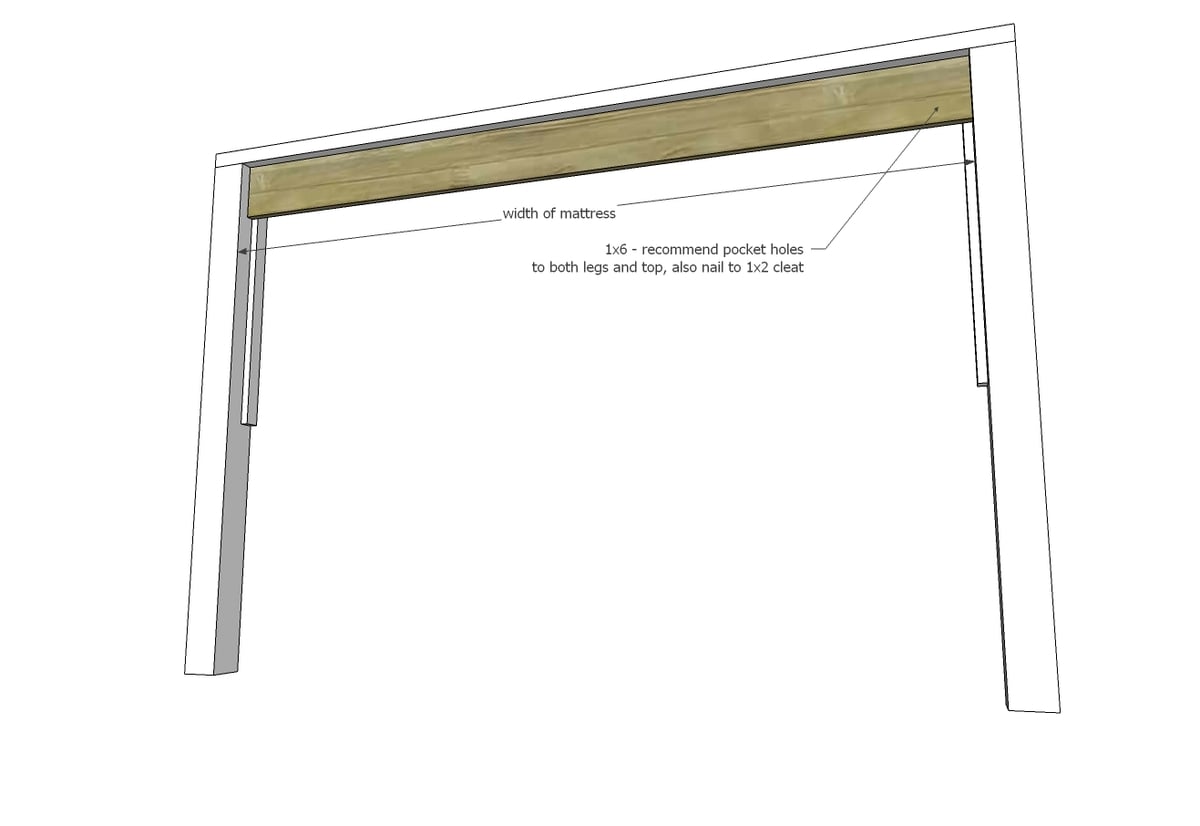
Attach first plank board to cleats, top and legs. If using tongue and groove, place groove side up, tongue side down. Pocket holes (3/4" setting, 1-1/4" screws) recommended for attaching to legs and top.
Step 4
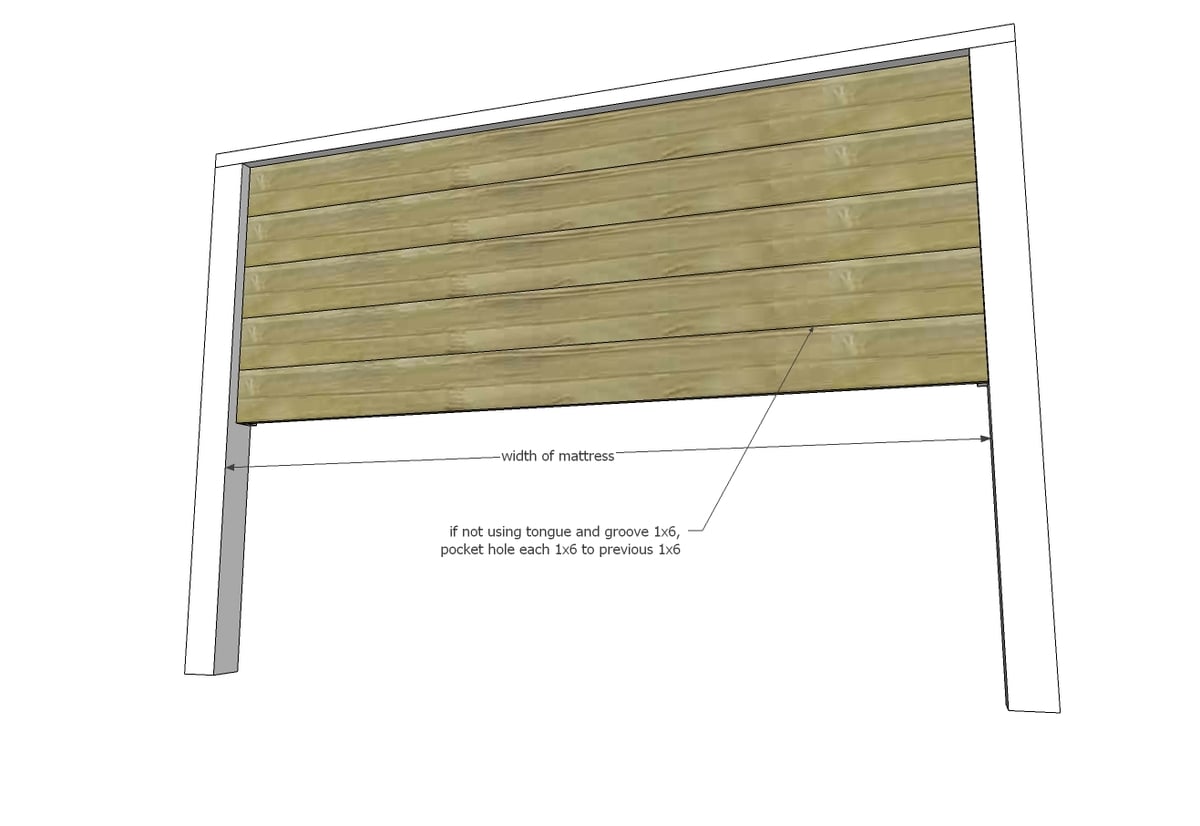
Attach remaining planking boards. If not using tongue and groove, you will need to attach each 1x6 to the 1x6 before it with 3/4" pocket holes and 1-1/4" pocket hole screws.
Step 5
Step 6
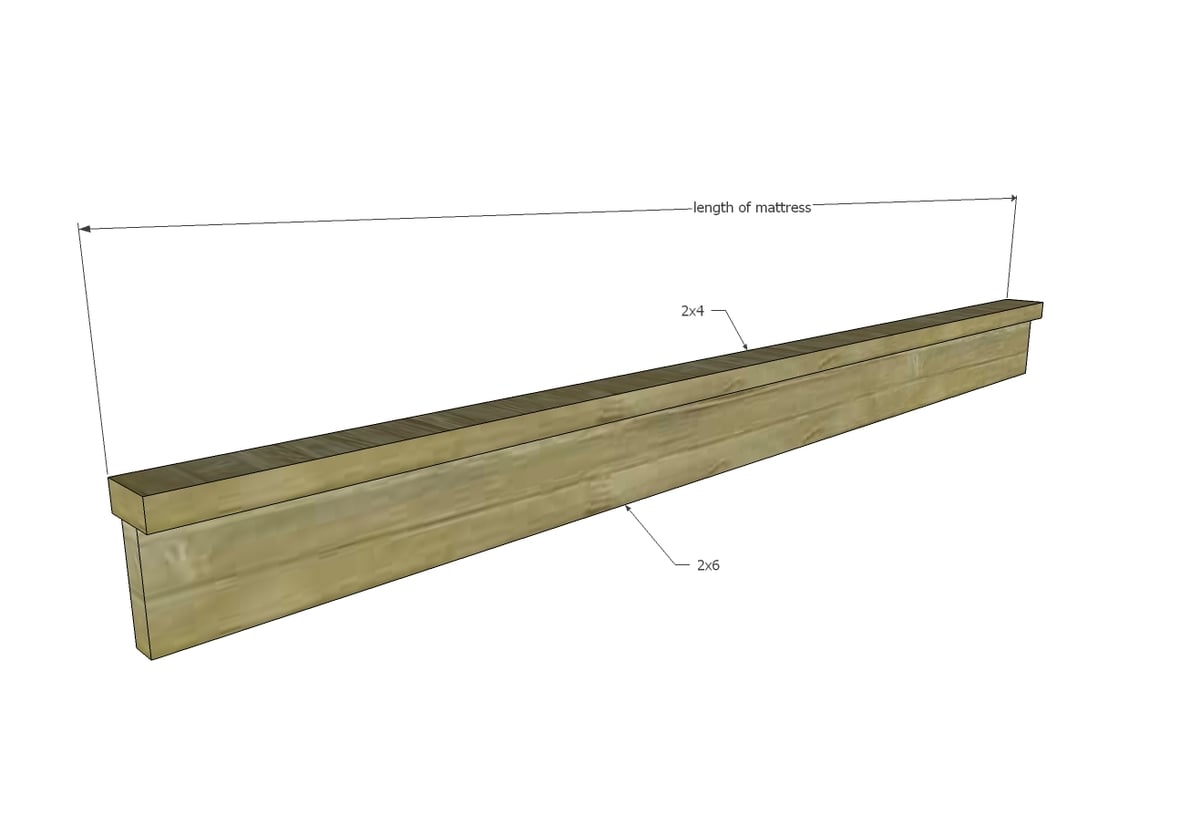
Build two of the siderails by attaching 2x6 to 2x4 with pocket holes. We centered the 2x4 on the 2x6. I also drilled pocket holes to attach the 2x4 (place carefully so won't be covered by 2x6) and 2x6 to the legs in later steps (see step 8).
Step 7
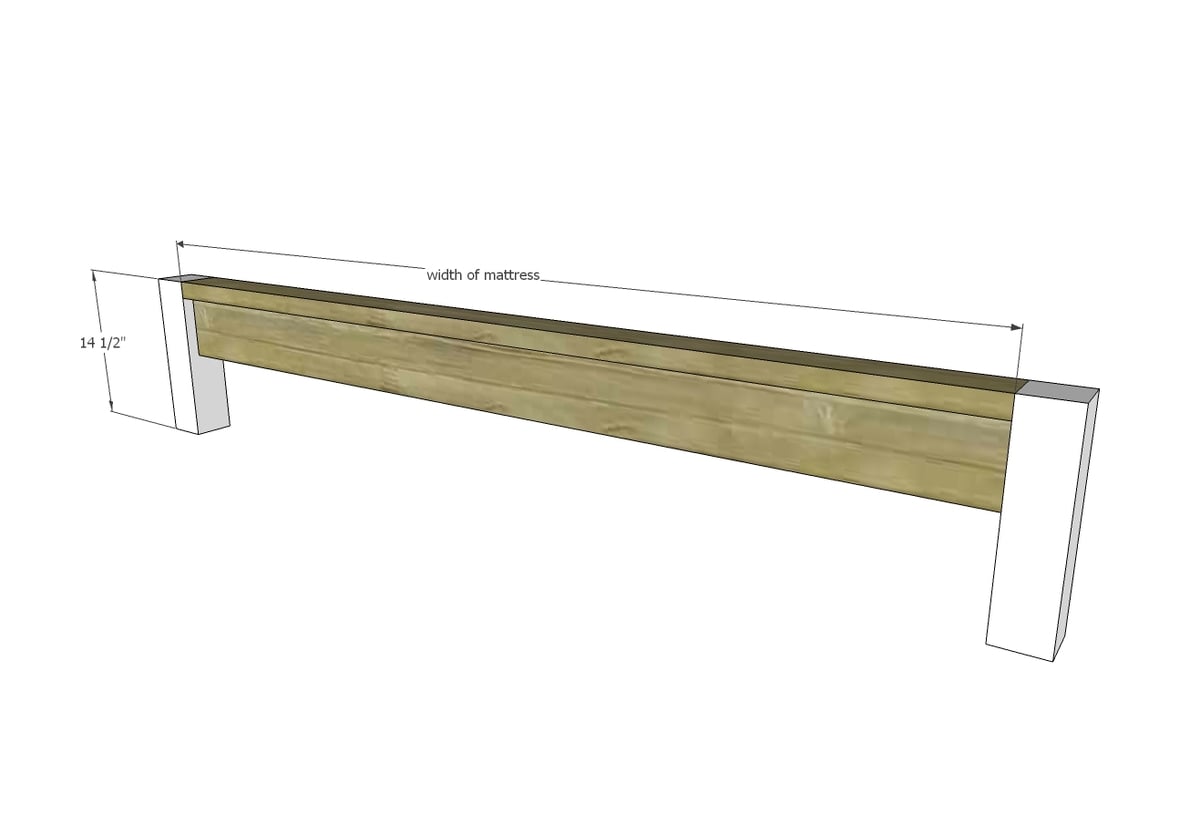
Build the footboard as you did the siderail, then attach to legs.
Step 8

Attach siderails to the legs with 2-1/2" pocket hole screws or metal brackets.
Step 9
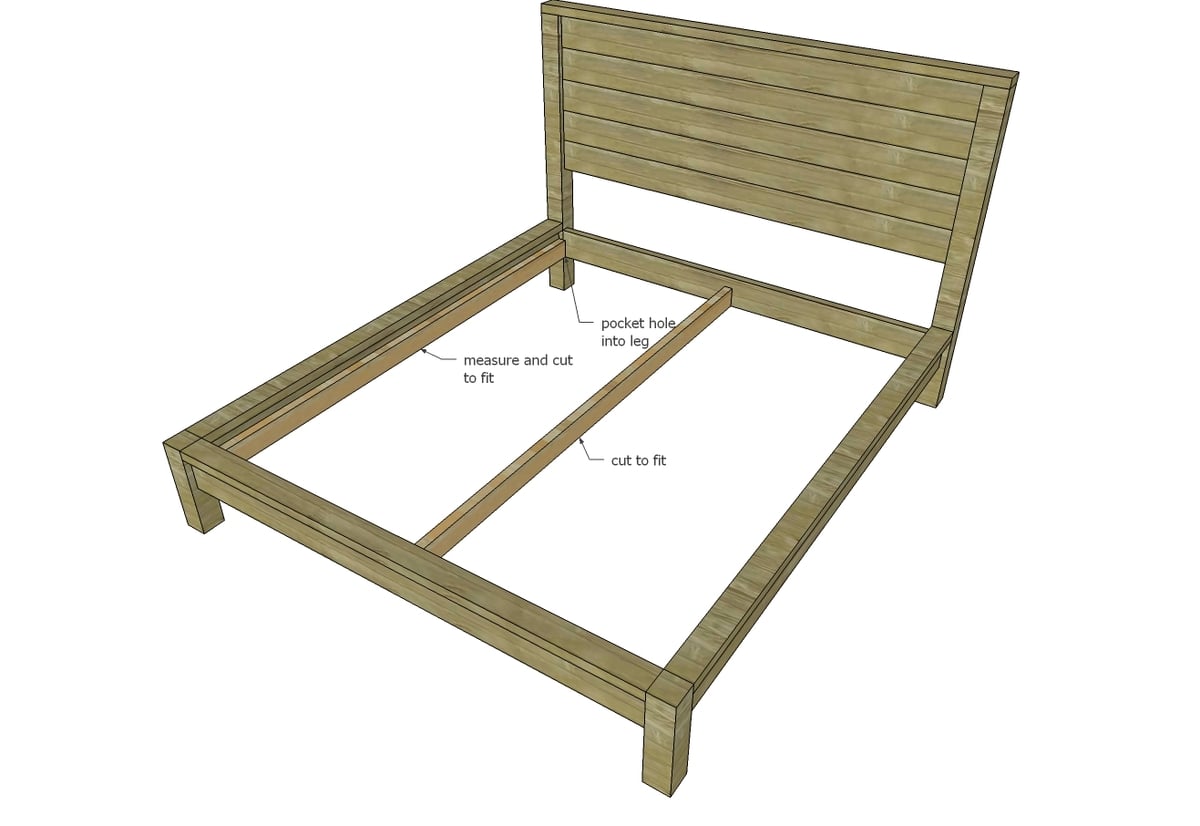
Add cleats with 2-3/4" self tapping wood screws. Center cleat optional for twin bed.
For additional support center legs can be added to the center cleat.
TWIN: No center support is needed
Step 10
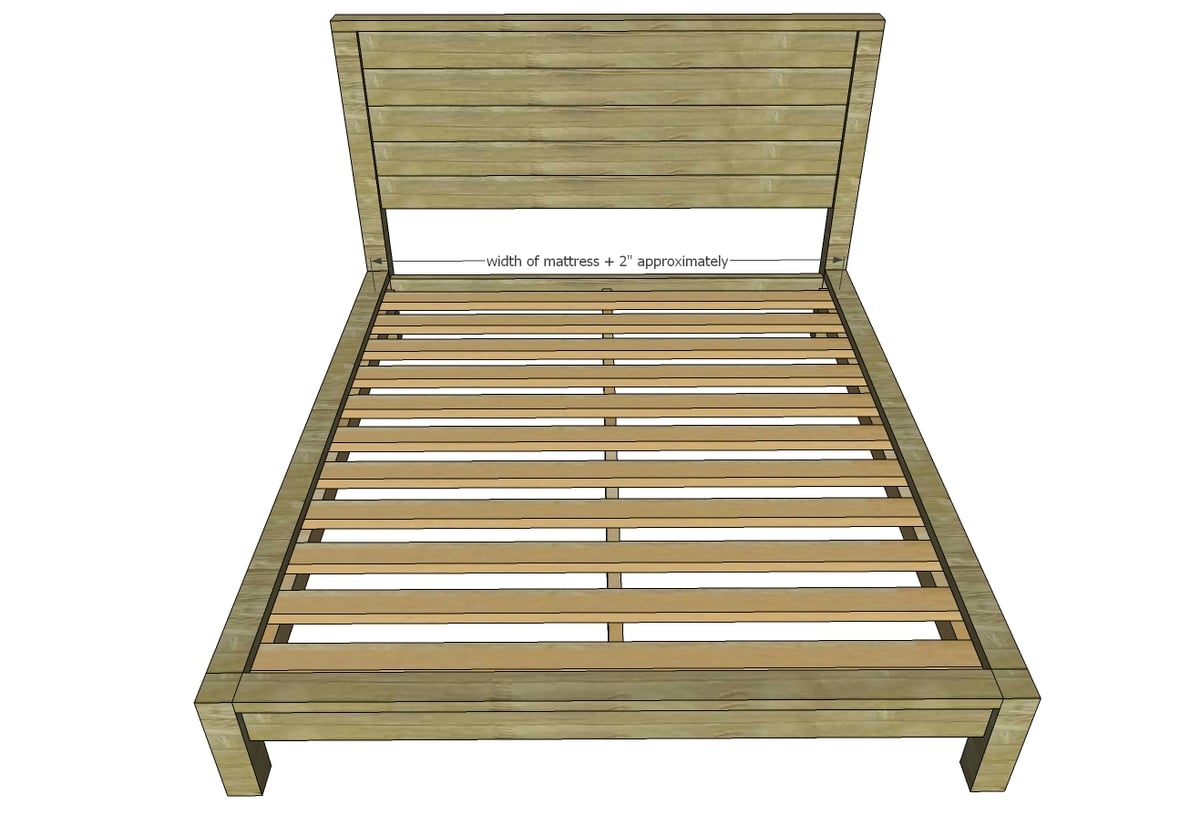
Lay slats over cleats and screw down.


Comments
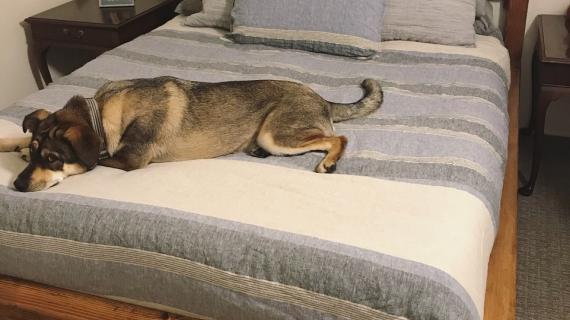
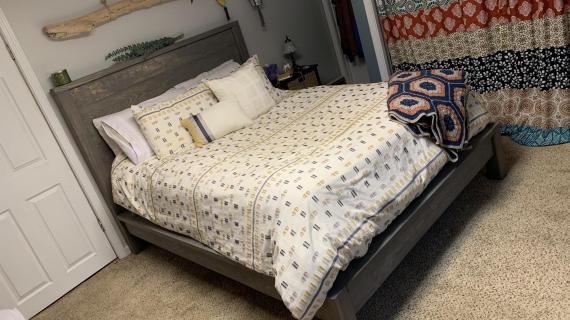
kceglia
Wed, 12/01/2021 - 12:07
Cal King
Thank you for adding in the Cal King dimensions and lumber. This is huge!