
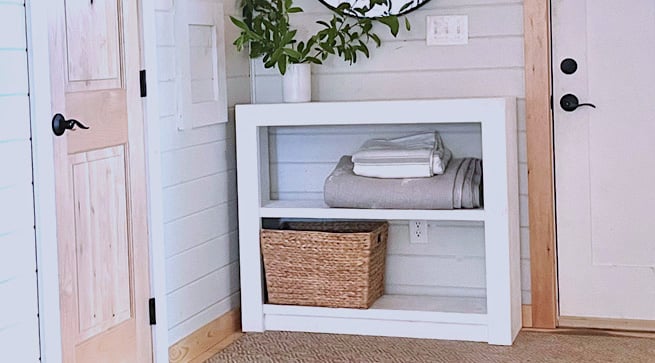

I built this bookshelf with a chunky 2x4 frame on the front - it gives an ordianry bookshelf tons of style and modern vibes!
You can build this bookshelf in just about any size to fit your space. This is a free project plan with step by step diagrams, build tutorial with photos, video and shopping list, created by Ana-White.com
Bookshelves don't have to be boring! By just changing up the front trim (called the "face frame") you can give your storage piece a completely different look!
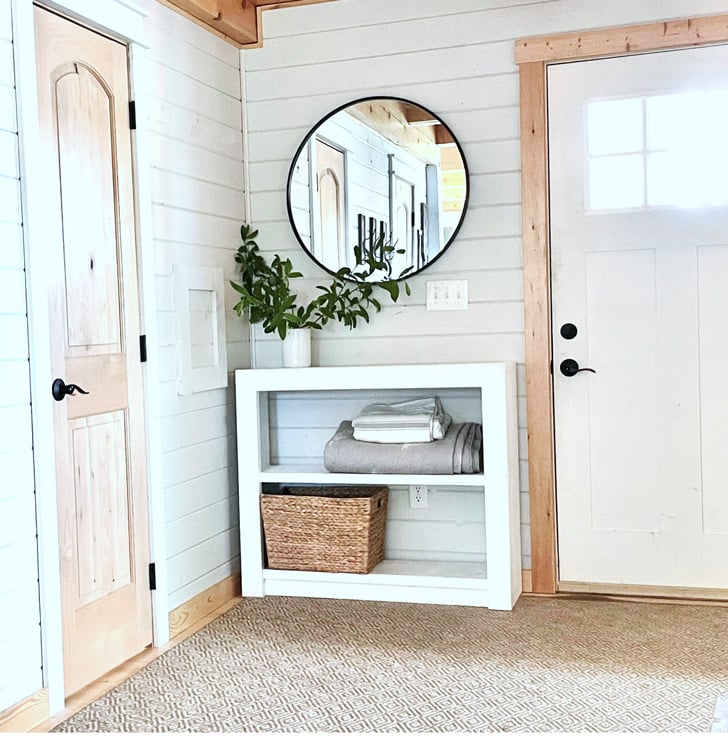
Yes, this is just a simple bookshelf, with a chunkier face frame! It gives this piece a modern but crisp look - so mountain modern!
Why I Built this Bookshelf
I built this piece for our cabin in the mountains, where I'm craving a simplified life, with less things to pick up, less details to dust and wipe down, but still looking to be inspired and encouraged by the surroundings. I needed the storage for shoes, hats, gloves, sunglasses - entryway dropzone stuff - but wanted a piece that could also look good empty. I do love an empty shelf. It's an opportunity to put something away.
Can I Build a Custom Size?
For my bookshelf, I built a custom size to fit in the space perfectly. If you are building it, you might as well get the right size, tailored for your space.
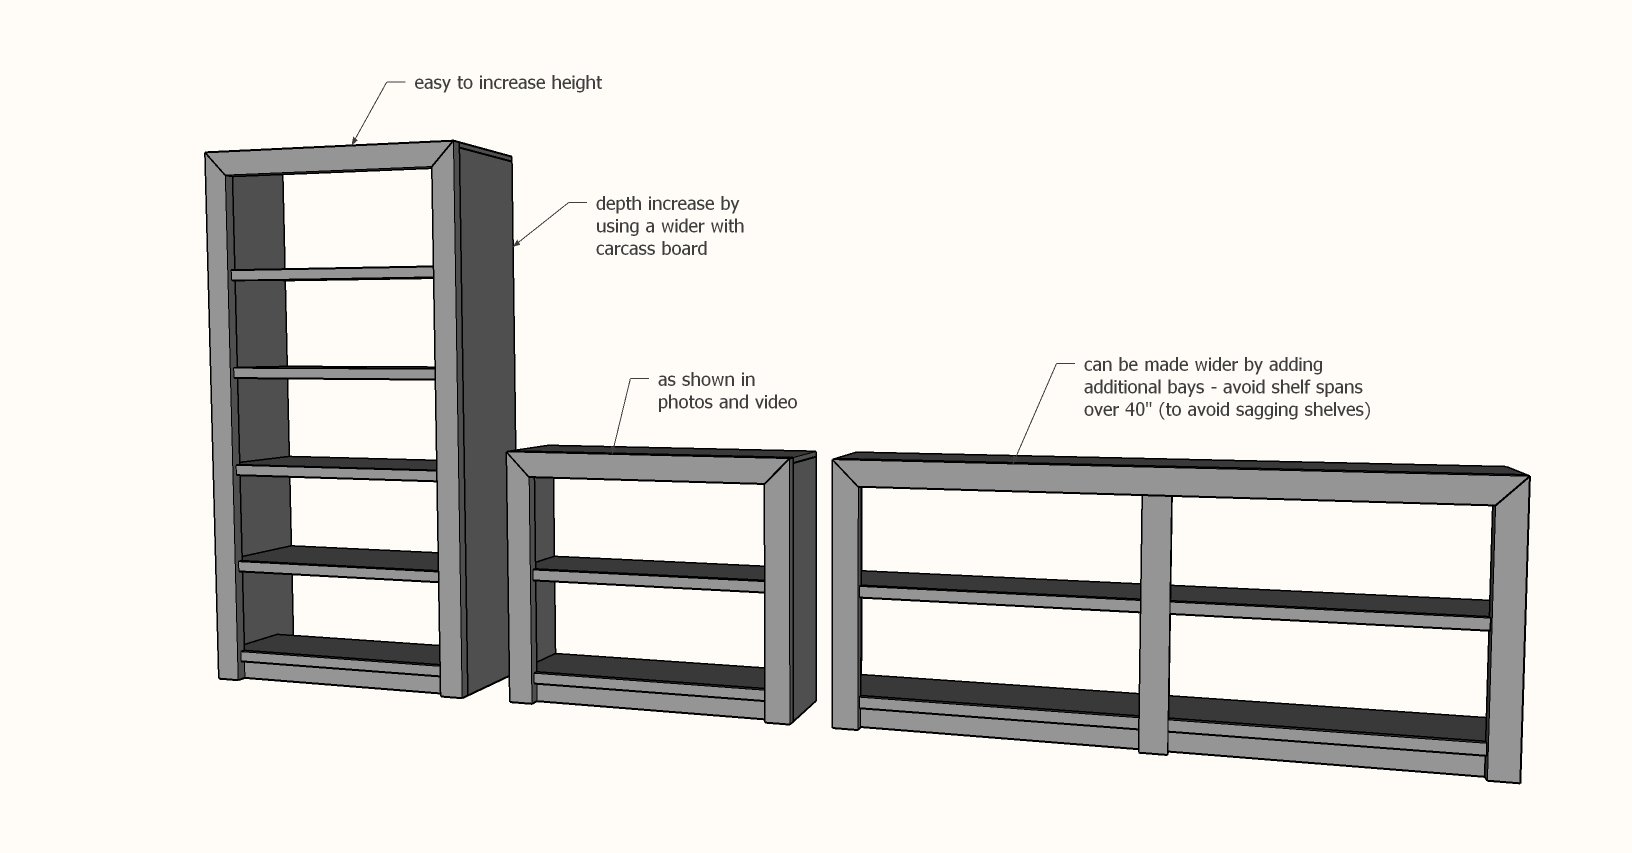
I love this plan because it is very easy to customize the size in both height and width! You can build just about any size you can think up!
The tutorial below will show you how to size yours just right for your space without doing any crazy math or worrying about making mistakes.
Video Tutorial of Building this Bookshelf
I put together a quick video showing the steps to build this bookshelf. Please watch before you build.
Mountain Modern Bookshelf Plans
Here are the plans for this bookshelf. I decided to do this one more as a template (so you can customize the sizes) - since getting the perfect fit is so important. It will be easy to come up with a cut list and shopping list once you have your carcass laid out.
Thank you for using our plans, we appreciate the trust and support.
Pin for Later!

Preparation
- Plywood or 1x12 carcass boards (use the Shelf Help configurator to create this cut list and materials list)
- 2x4 face frame boards (length needed: twice the overall height plus the overall width)
- 1x4 bay support boards (length needed: twice the overall width of your piece)
- 1x2 shelf trim (length needed: number of shelves not including top multiplied by the shelf length)
- 1-1/4" and 2-1/2" pocket hole screws
- 1-1/4" brad nails
- wood glue
- wood filler
- paint or stain
Cut list is generated in Ana's Free Furniture Design App


Instructions
Step 1
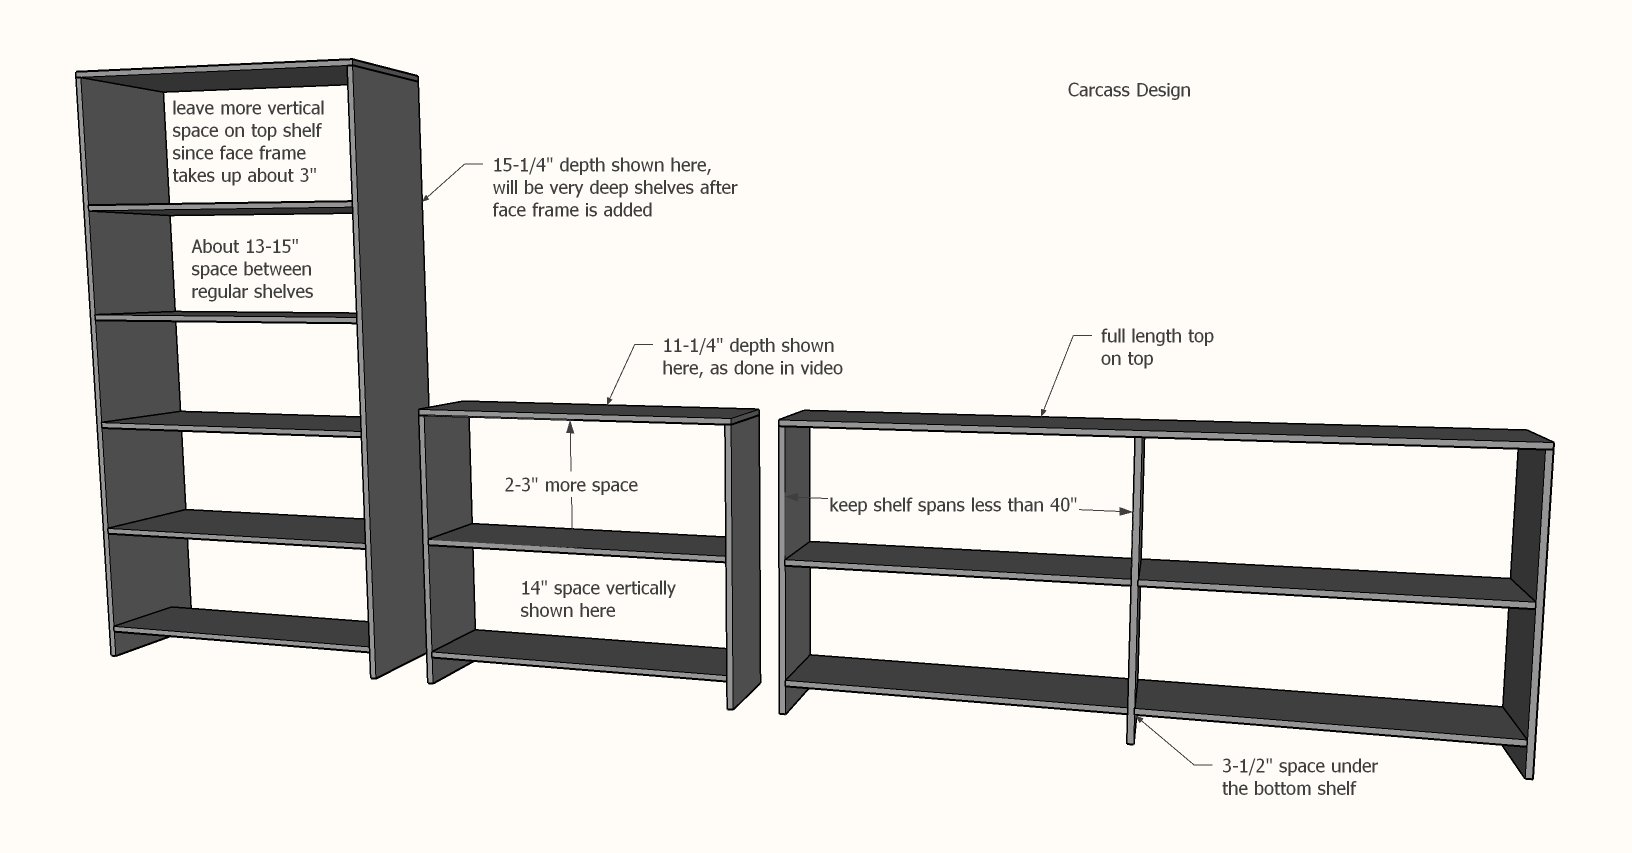
Use my free carcass configurator to create your carcass design.
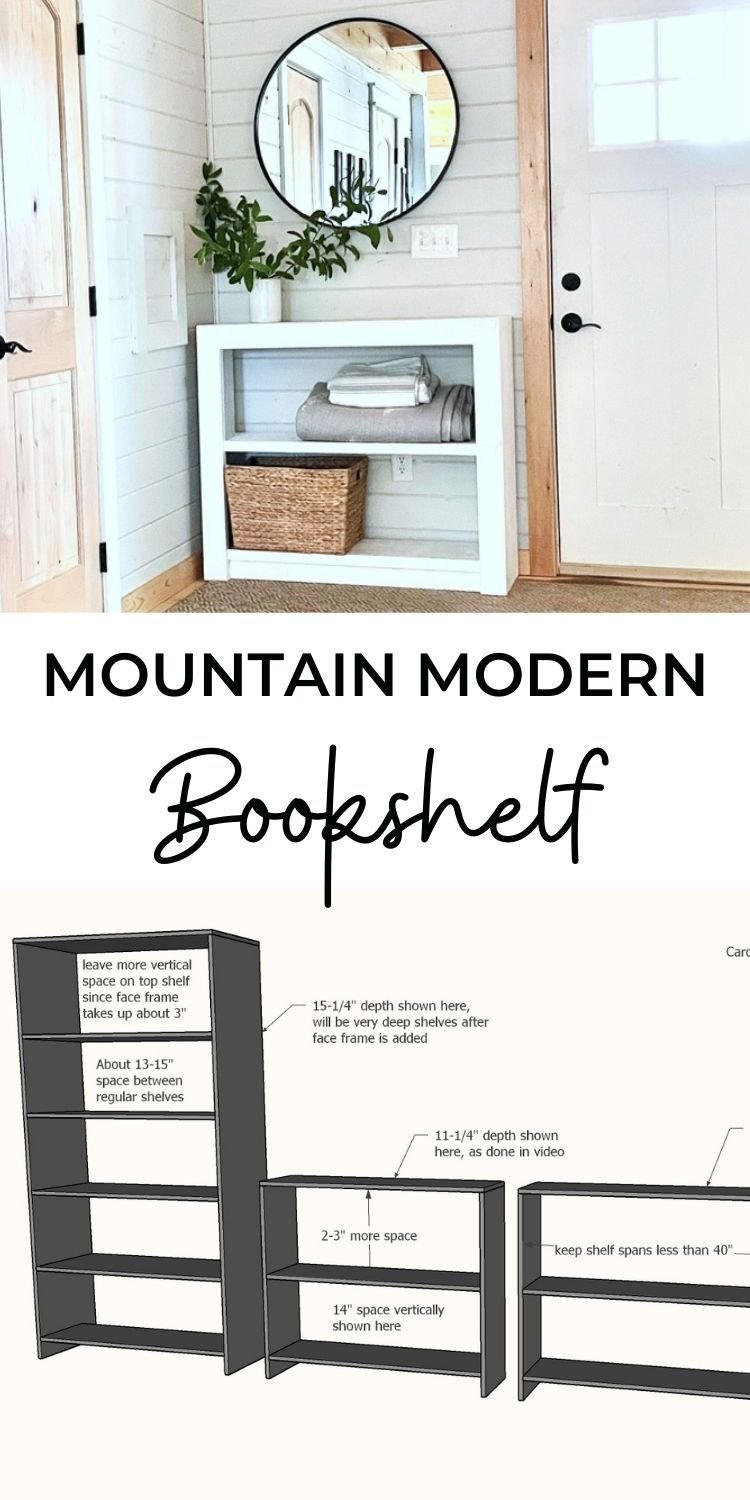
- Avoid shelf spans greater than 36-40" as shelves may start sagging
- Table height is 30" (often used for consoles, especially media consoles)
- Counter height is 36" (often used for taller consoles)
- Bookshelves can be taller, 60", 72" and 80" are pretty common
- Can be used as a bench or coffee table too, go with a 18" height
- For a bath vanity, standard is a 32" height, and the 20-1/4" depth - but you can change this up depending on the sink you are using
- 11-1/4" is the width I used in the video for a bookshelf. If you go up to 15-1/4" remember the face frame adds 1-1/2" to the overall depth
- IMPORTANT: Leave about 3" extra distance at the top shelf because the face frame will take up about 2-3/4" at the top.
Cutting the Plywood Pieces
Rip the plywood first into the desired depth, then cross cut from your ripped pieces to get the lengths. You will not need to finish front edges on the plywood.
You can also use 1x12s - especially awesome if you are staining.
Lay out the pieces and mark pocket hole locations. Drill 3/4" pocket holes (yes, even for attaching the 2x4 face frame in later steps).
Assemble the pieces of the carcass with 1-1/4" pocket hole screws.
Step 2
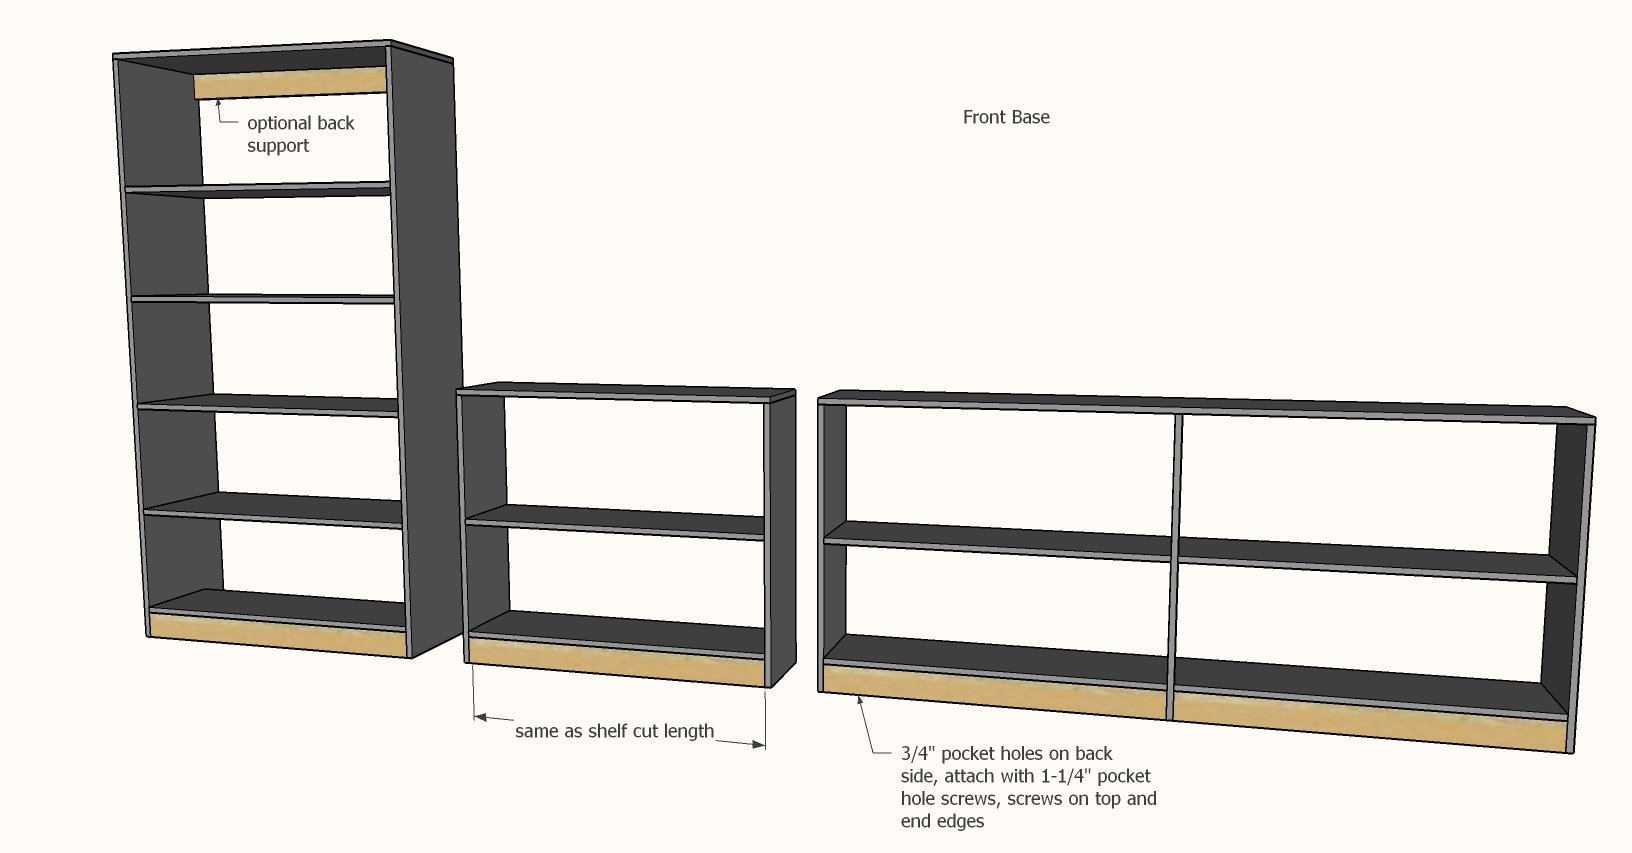
Bay supports add structure to the carcass and help with side to side wobble. The front bottom bay support is required for the look. The top back one is optional.
Drill 3/4" pocket holes on the ends and along the top edges. Attach to the carcass, pocket holes on back, with 1-1/4" pocket hole screws.
Step 3
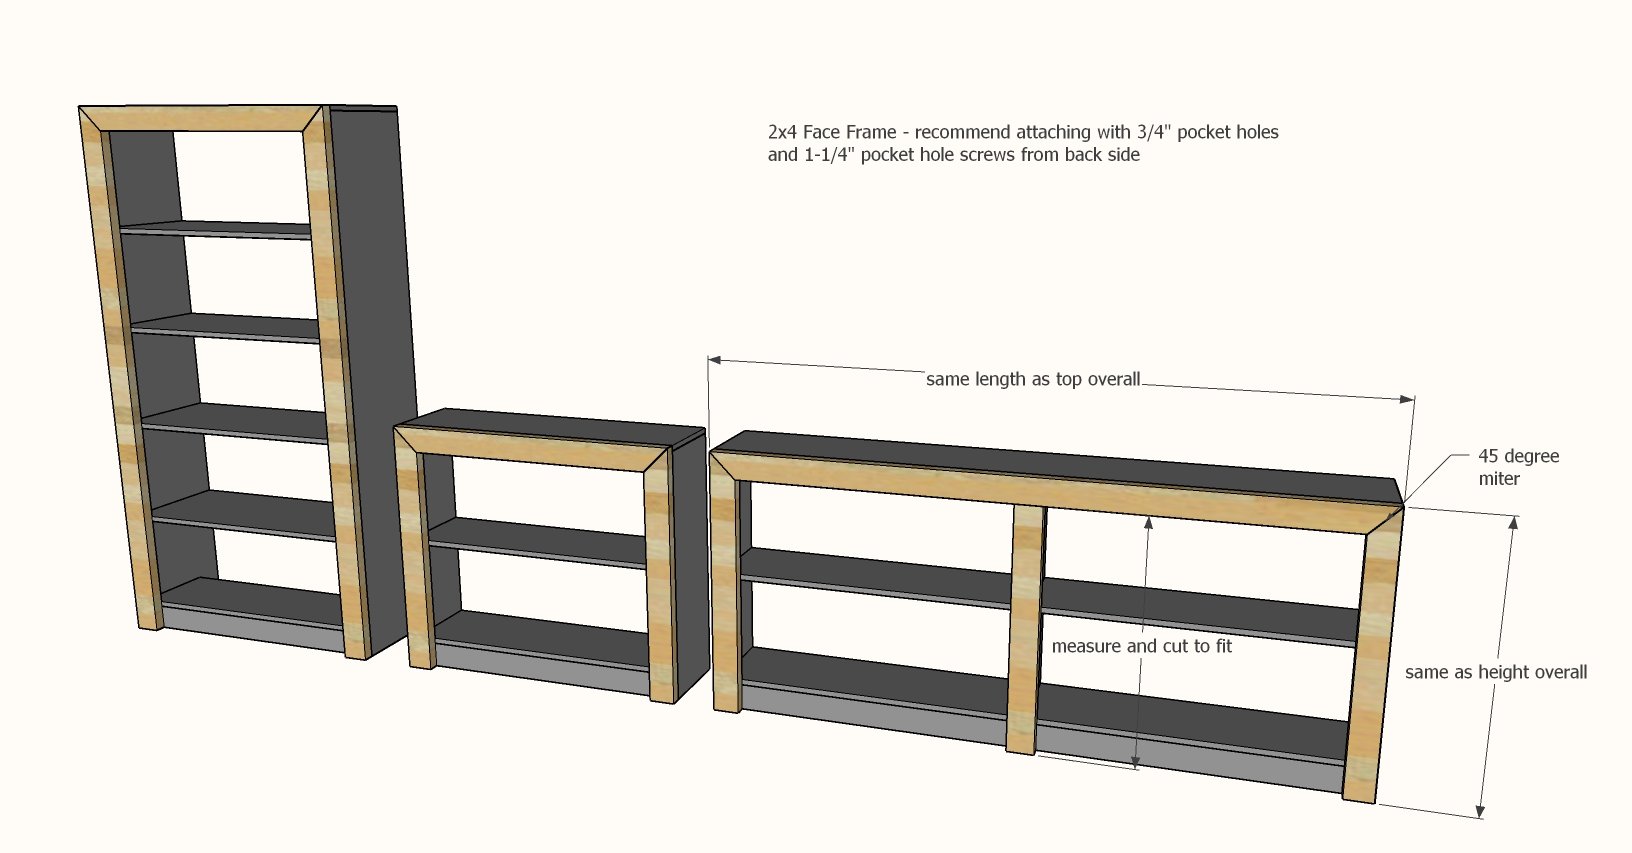
TIP: If you have a table saw, rip the rounded edges off your 2x4s first, making the 2x4s 3-1/4" overall in width.
Measure and cut your 2x4 face frame pieces as shown.
Attach together with 1-1/2" pocket holes and 2-1/2" pocket hole screws, very carefully placing so the pocket hole are never visible on the exposed edges. You only need one pocket hole on the mitered corner - once you secure with the carcass pocket holes, it will hold it all together.
Step 4
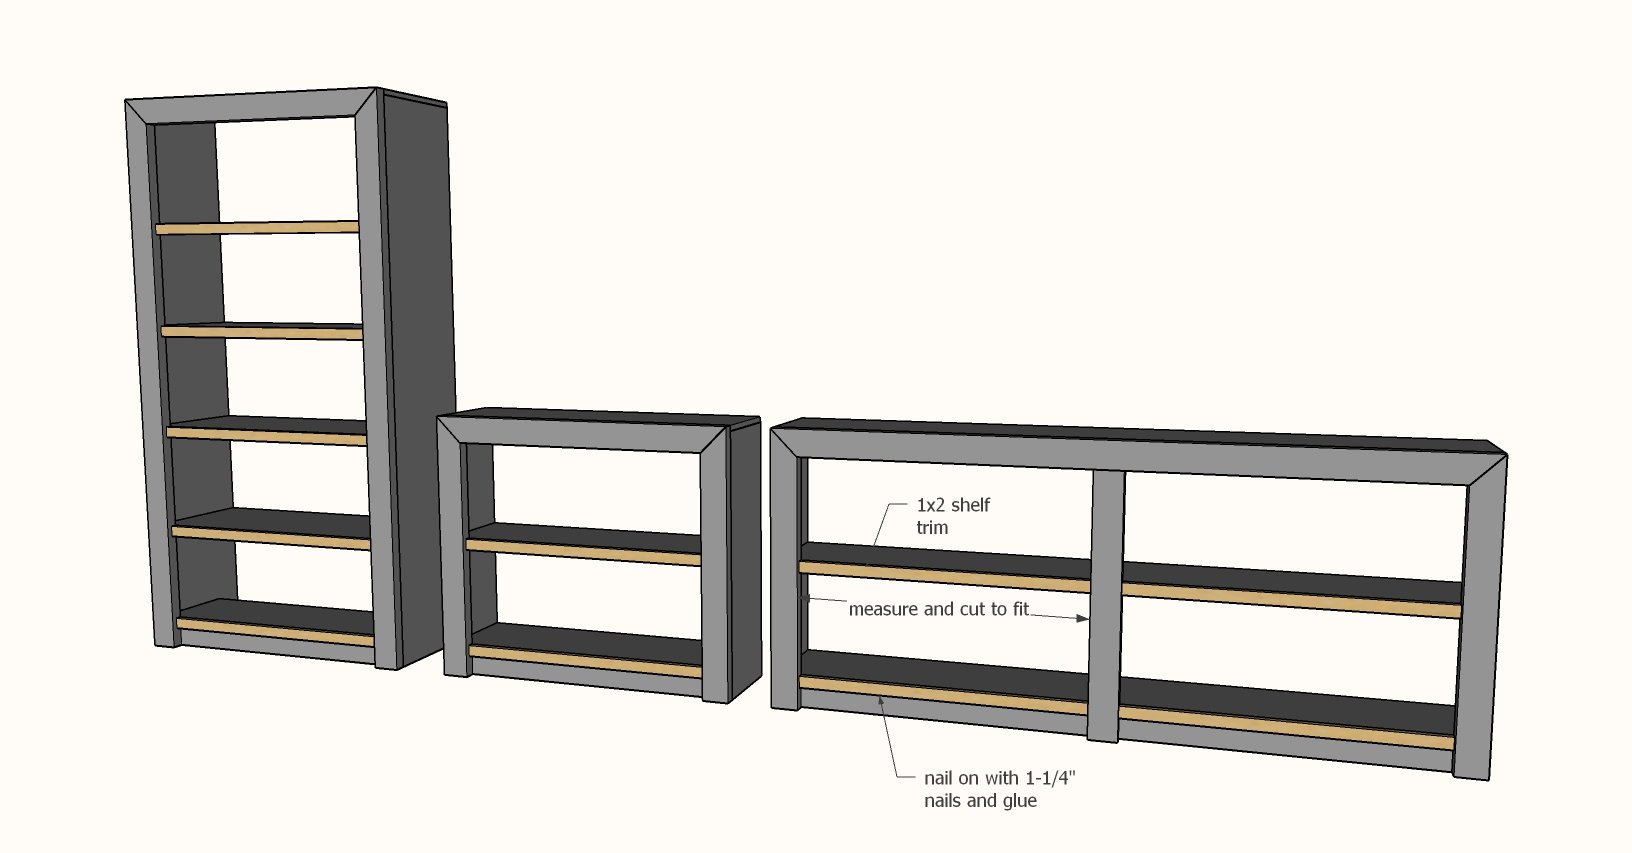
Measure and cut the 1x2 trim for all the shelves.
Attach with glue and 1-1/4" brad nails.
Let dry then sand with 120 grit sandpaper.
For paint finish, sand with 150 grit.
For stain finish, follow with 180 grit.

